Wood-polymer composite (WPC) is a mixture of two main materials - various wood waste and a polymer binder, which also often consists of plastic waste.
Due to the fact that one of the components is wood, and the other is a thick, but still liquid, such mixtures are often called liquid wood.
At enterprises, various finishing and structural materials are made from WPC, which are then used not only in construction, but also in such areas as automotive construction, aircraft construction and many others.
Despite the fact that the process of industrial production of this material requires heat treatment, wood-polymer composite can be made at home , and its characteristics are not much inferior to industrial designs.
Next we will tell you:
- what materials are needed for making liquid wood yourself;
- how to work with polymer mass at home;
- what can be made from it;
- how to change the color of the finished product;
- how to increase the strength and rigidity of the finished product;
- Can it be used as a repair material?
What can WPC be made from?
At home, you have to use materials that you can buy in regular or online stores, or you can also make them yourself.
Any wood waste is well suited as a filler , but the larger its size, the more polymer binder will have to be used.
You will find more detailed information about wood waste in these articles:
- Sawdust;
- Types of chips;
- Woodchips.
In addition, the larger the filler, the more difficult it is to fill the form for filling with liquid wood, therefore, to work with mixtures based on large wood waste (sawdust or shavings), it is necessary to use additional equipment, such as presses or vibrating tables.
On the other hand, a larger filler better reinforces the finished product , making it more rigid and durable.
Various substances and materials with different properties can be used as polymer binders, making each of them better suited for a particular situation.
Here are the most popular polymer fillers :
- PVA glue;
- acrylic adhesives, paints and varnishes;
- epoxy resin;
- polyester resin;
- nitrocellulose adhesives, paints and varnishes;
- homemade adhesives based on various solvents.
PVA
This glue is safe both in liquid and frozen states, because it does not emit toxic substances and does not burn well even in fire conditions.
The glue has high adhesion to any wood waste, and after hardening it turns into a fairly durable monolithic piece.
It can be bought at any construction or hardware store, and it is relatively inexpensive (40–160 rubles per 1 kg).
If the contents of the jar turn out to be too thick, then the PVA can be diluted with ordinary clean water. The disadvantages include poor transparency of the hardened glue, so it is not suitable for all jobs.
Acrylic adhesives, paints and varnishes
These materials are in many ways identical to PVA. They are also safe in a liquid state, but are more flammable when frozen . All acrylic binders easily envelop any wood waste, and thanks to their water base, they penetrate even into the top layer of wood.
The cost of these materials is comparable to the price of PVA glue, so they can be classified as the cheapest binders.
Like the previous glue, these materials have very low transparency after hardening, so they cannot be used for all jobs.
The color of these materials, as well as PVA, can be changed with water-soluble colors , which are sold in any hardware or hardware store.
Epoxy resin
Epoxy resin (epoxy) is a rather difficult material to use, because it consists of the resin itself and a hardener. In addition, the finished resin is a thick gel that is difficult to mix with any filler, and liquefaction by heating sharply reduces the polymerization time.
The main advantage of epoxy resin is its beautiful color and high transparency after hardening.
In addition, the color of the resin can be changed using paste from regular pens or oil/nitrocellulose paints. Its cost is quite high - 1 kg will cost 1.5–3 thousand rubles .
Due to the high toxicity of the resin and hardener, you can only work with them in well-ventilated areas.
There are also water-soluble epoxy resins. They are easier to work with and also noticeably cheaper, but after hardening they turn into an opaque material. In addition, it is easier to make them more liquid and mobile using various plasticizers, which makes it easier to mix the resin with crushed wood waste.
The disadvantage of water-soluble epoxy resins is slightly less adhesion to wood . To harden, they also need a hardener, which activates chemical processes leading to polymerization of the mixture.
Polyester resin
There are 2 main types of polyester resins, distinguished by the original product, that is, obtained from :
- oil;
- vegetable resins.
The former are more liquid , so they are easier to use, but they are extremely toxic , so you can only work with them in well-ventilated areas, wearing protective clothing (goggles, respirator, rubber gloves).
The latter much less toxic (although working with them also requires a ventilated room), and are also thicker, which makes them more difficult to mix with filler and pour into molds.
Both types of resins, after hardening, form a solid polymer, much inferior in transparency to epoxy, but superior in this parameter to most other materials.
A significant disadvantage of both types of this material is
large shrinkage , because first the excess solvent evaporates, then the polymerization reaction begins.
Moreover, the rate of polymerization directly depends not only on temperature, but also on the type/amount of hardener, without which the resin, having lost most of the solvent, will turn into a thick jelly.
The average cost of both types of this material is 200 rubles per 1 liter .
Nitrocellulose adhesives, paints and varnishes
These materials are highly toxic and flammable in both liquid and solid states, so they cannot be used for the manufacture of parts that will be located in high temperature zones.
In addition, all nitrocellulose materials are characterized by the highest shrinkage , because hardening occurs not due to polymerization, but due to evaporation of the solvent.
After hardening, these substances turn into a hard and durable, almost opaque material.
You can make glue, paint or varnish more liquid using a solvent, but you must use exactly the substance indicated on the label. The average cost of such materials is 200 rubles per 1 liter.
Homemade adhesives based on various solvents
In most cases, such adhesives are extremely toxic and very flammable , so you should only use them if you have extensive experience working with such substances. Like nitrocellulose liquids, such adhesives do not polymerize, but dry , turning into a solid monolithic material.
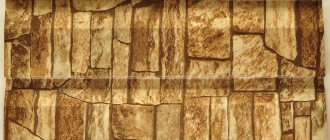
Properties of wood plastic
WPC simultaneously combines the best properties of polymer and wood. It is endowed with the color and smell of natural raw materials. This material has many distinctive characteristics that bring the product to the forefront. The demand for it is only growing, its distinctive features:
similar to natural wood, but the quality is much better; environmentally friendly and safe product without chemical impurities; not afraid of mechanical damage; ideally preserves the structure during temperature fluctuations from -50 to + 180 degrees; is not afraid of insects and is not susceptible to mold and rot; no need for painting or additional care; not afraid of ultraviolet radiation; does not change structure and color when exposed to alkalis and acids; it is permissible to process with construction tools, like ordinary timber; Thanks to the polymer in the composition, the material can be heated and given the desired shape.
The principle of working with a polymer mixture
The principle of working with liquid wood is the same regardless of the type of polymer and consists of the steps described below.
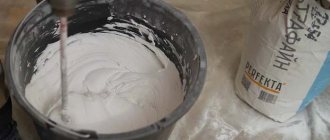
Preparing the mixture
The exact proportions of fillers and other components for each type of wood waste and binders can only be determined experimentally .
After all, everything depends not only on the type of binder and the degree of grinding of wood waste, but also on:
- polymer grades;
- compliance of the hardener (often the polymer and hardener are purchased separately);
- purpose of the finished product;
- mixing method;
- adding plasticizers and other substances.
It is necessary to mix the ingredients of liquid wood in a container made of a material that is chemically neutral with respect to all substances.
The main condition when working with such compositions is to accurately determine the volume of the finished mixture , which you will have time to produce before polymerization begins, because as soon as this process begins, any impact on the mixture will lead to a decrease in its strength after hardening.
First, you need to make small portions (100–200 ml of the finished mixture) in order to work out the sequence of actions and determine the optimal proportions of materials.
For stirring, use a spatula made of a chemically inert material, in most cases it is metal, wood or plastic. It is enough to mix the ingredients for 1–3 minutes to obtain a composition suitable for further use.
An external criterion for the readiness of a composition is its homogeneity - as soon as all the material has become one color, the mixture can be considered ready.
Preparing the form
The choice of form (matrix) depends on what product you want to obtain in the end. This can be either a purchased or homemade matrix of the desired shape, made from various materials. Moreover, the form can even be made from a material that is chemically active in relation to the solvent.
But in this case, it will need to either be covered with a chemically neutral film, or covered with a suitable protective composition, for example, silicone spray or soap solution.
Molds made of silicone and other soft materials can only be used for pouring without compaction.
Therefore, most often they are used to make various small shaped parts that do not require high strength.
If you need to make something durable, for example, a siding board or laminate flooring, then you will need a metal mold that can withstand pressure or vibration.
To make parquet, laminate and other similar parts, it is necessary to use a collapsible mold , because in addition to a pattern or a flat surface on the front side, they also have locks on the ends. After the mixture is poured and hardened, the side walls of the mold are removed, then the casting is disconnected from the front wall.
Pouring and sealing
If possible, fill the entire mold with liquid wood in one pour, paying special attention to corners and uneven areas. Or, if this is not possible, layer by layer, as new batches of the composition are prepared.
The disadvantage of this approach is obvious: the material at the boundaries of the layers will have less strength , because the chemical reactions leading to its polymerization will proceed unevenly. This is especially important when producing parts with high strength values, such as laminate.
In such cases, several compatible batches of solution are prepared and the most transparent is poured first, then paper with a pattern is placed on it, after which the remaining layers are poured.
In the liquid state, the polymer mixture will saturate the paper, due to which the layers will connect and the polymerization process will proceed evenly.
Vibration and pressure are used to compact the material into molds . In the first case, a vibrating table is used, which is used in the production of paving slabs or cinder blocks; in the second, a press and a plate corresponding to the shape are needed.
At home, you can use any screw or hydraulic press, for example, designed to replace silent blocks on cars.
Sometimes it becomes necessary to increase the rigidity of the finished product and its torsional or fracture strength.
In this case, the first part of the finished mass is first poured, then metal, glass or carbon fiber reinforcement is laid and the second layer is poured, after which it is compacted first by vibration, then by pressure. Thanks to this, the polymer mixture completely covers the reinforcement and, after hardening, forms a single whole with it.
When working with epoxy resin, before pouring, the mixture is heated to a temperature of 40–60 degrees to make it more mobile, after which it is poured and compacted by vibration. The lifetime of such a mixture is 10–20 minutes, so you need to work with it quickly, avoiding unnecessary movements and unnecessary downtime.
Drying and polymerization
Each polymer requires special conditions for high-quality polymerization or hardening, so you must read the instructions on the packaging with the polymer component in advance. In addition, it is advisable to collect detailed information from various forums where users discuss working with certain substances.
The most unpretentious in this regard are compositions based on PVA, acrylic and epoxy resin, because they only require positive temperatures (15–25 degrees) for polymerization.
Compositions based on polyester resins, especially those made from petroleum, require, in addition to a positive temperature, good ventilation, otherwise the air in the room will be filled with volatile substances and become not only toxic, but also explosive.
Nitrocellulose liquids , as well as adhesives based on dichloroethane or ether, harden well at temperatures above zero degrees, but during the hardening process they release extremely toxic and flammable substances . Therefore, mixtures based on them should dry in a room with very good ventilation.
Extract from form
If all previous operations, including preparing the mold, are performed correctly, then a small force is enough for the matrix to separate from the frozen or polymerized part.
To remove a frozen casting from a soft or flexible matrix, the mold along the edges is gently bent away from the part to separate them.
This operation is carried out along the entire perimeter, then the back side of the casting is placed on a table or palm and the matrix is removed from it, like a skin or a stocking. If the polymer mixture was poured into a silicone volumetric mold , the depth of which is equal to or greater than half the width, then such a matrix must be turned inside out .
You can not turn it all the way out, but just enough to grab the casting with your fingers, then hold the mold with one hand and pull out the product with the other, slightly rocking it in different directions.
To remove the casting from a rigid flat mold, the matrix must be turned over, holding the casting and placed on the table, then lightly tap the bottom with your fingers so that the vibration causes the finished product to move away from the matrix.
Post-processing
A mixture of wood waste with any of the suitable polymers, after hardening, turns into a solid material suitable for subsequent processing.
Using a file and sandpaper, protruding casting defects are removed from the finished product.
If necessary, finished casting:
- engrave, creating the desired design on it;
- polished to give a mirror or matte shine;
- milled;
- drill;
- cut threads;
- sawed into pieces.
In addition to mechanical processing, finished parts can be glued together, and screws or self-tapping screws can be screwed into them.
What can you make from a wood-polymer composite yourself?
This material combines the best qualities of wood and polymer, and such characteristics as :
- strength, including fracture strength;
- hardness;
- rigidity;
- color;
- transparency;
- smell,
can be adjusted by changing the percentage of the main components and in other ways. All this allows you to create material that is well suited for certain jobs.
In addition, due to the fact that in the initial state the mixture is a thick liquid, it can be used to cast parts that are difficult to make in any other way. For example, you can make a gypsum matrix from some three-dimensional image and make copies of it from WPC.
You can make parts of the box body decorated with unusual three-dimensional patterns, and put a picture on a paper base under the thin outer layer of transparent polymer.
As a result, such a box will combine three-dimensional patterns, including engraving and internal design. This opens up a huge scope for creativity, because from WPC you can make :
- finishing elements for walls and floors, including mosaic paintings;
- caskets;
- frames for postcards or photographs;
- tabletops, including those decorated with patterns;
- cutting boards;
- housings for homemade equipment;
- figurines;
- three-dimensional images, including stylized wood carvings.
Advantages and disadvantages of products made from homemade WPC
The main disadvantage of homemade products made from wood-polymer composite compared to factory products made from WPC or plastic is several times lower compressive and fracture strength .
This is caused by the lower density and homogeneity of the finished material, because at enterprises the components are mixed using special equipment.
In addition, the main ingredients are first mixed in powder form, then heated until the polymer melts and the semi-liquid mass is mixed. Another reason for the difference in strength is extrusion, that is, forcing the molten mixture through a die, which ensures maximum compaction of the material in the finished product.
In addition, compliance with the proportions of the mixture and the order of actions at all stages of production plays an important role .
In production, this is monitored automatically, and anyone who is trying to make something from a wood-polymer composite at home is forced to determine the proportions “by eye”, and also independently monitor compliance with the procedure.
The situation is the same with plastics, because products from them are produced by extrusion. Despite their lower strength, homemade products have significant advantages , the main one of which is low price .
After all, the most popular polymers, that is, PVA or acrylic liquids, are inexpensive, and wood waste is used as a filler, the cost of which you can read here, as well as in this article.
If wood flour is needed to make crafts from WPC, then it can be bought in a store at the same price as sawdust or obtained from small wood waste using a coffee grinder.
However, the maximum advantage if there are no analogues made from other materials .
In this case, even the use of expensive resins and independent grinding of wood into a small fraction is not a significant drawback, because the result of all this will be the appearance of a thing, the analogue of which can only be made by hand.
How to make a craft from this material at home?
In this section we will talk about how to make a beautiful seat for a stool yourself from epoxy resin and scraps of branches or large wood chips. You can also use sawdust, shavings or flour instead of filler, and you can use a printed pattern to create texture.
If you don't have epoxy resin, you can use any other polymer by adjusting the composition of the components and hardening conditions.
Where other materials can be used instead of the specified materials, we will provide brief explanations that will help you better understand the procedure for working with different materials.
Matrix preparation
Buy or make your own matrix of the desired shape and size . It can be round, square, triangular or whatever you like.
The main condition is that the depth of the matrix must exceed 4 cm, thanks to this the seat will be strong enough to support the weight of even a very large person. In addition, with a smaller thickness it will be difficult to attach the stool legs to the lid.
Preparation of wood material
Cut debarked branches 1–6 cm thick into pieces whose length is 1 cm less than the depth of the matrix.
It is advisable to use branches of different varieties , especially those whose wood differs in color.
If you use wood chips, ventilate them well, tossing them in small portions to remove dust.
The main condition when choosing wood materials is a humidity of 5–10%, the lower the better. After all, excess moisture will begin to destroy the wood even without air access and over time the appearance of the cuts will change.
Determining the required volume of resin and hardener
Usually, to do this, it is enough to calculate the volume of the matrix and divide it by 2 or 3 (depending on the amount of wood filler). It is advisable to increase the resulting value by 10–15%; the excess resin will have to be thrown away, but there will definitely not be a shortage of resin, due to which the entire work will have to be redone.
Preparing the mixing container
Its volume should be 3–5 times greater than the volume of all ingredients.
A plastic paint bucket works well as such a container , because it is wide enough and made of a material that is chemically inert to epoxy.
The same container can be used when working with PVA or acrylic compounds, however, when mixing polyester resins or any mixtures based on acetone or toluene, only metal, ceramic or glass containers should be used.
Preparing the mixture
Pour the required amount of resin and solvent into the mixing container, then mix them with smooth movements.
If necessary, divide the mixture into several parts, this will allow you to use both the most transparent solution and compositions with dyes or fillers .
First add dye to the finished resin, then mix, add wood filler to it and mix again.
Preparing the drawing
Print it using a printer on non-waxed paper. You cannot use wax paper, because the resin impregnates it much worse. Trim the drawing so that its dimensions are 1–3 cm smaller than the size of the form. If you do not insert the drawing, then you can skip this point.
Important steps before pouring
Spray a wooden, metal or plaster mold with silicone spray. If the matrix is made of polyethylene, polypropylene or polyvinyl chloride, then it is enough to lubricate it with a thick soap solution, and the thickness of the lubricant should be minimal .
Then install the matrix on a flat horizontal surface (it is advisable to first check it with a level). Also place all containers with ready-made mixtures in a water bath and heat to a temperature of 35–40 degrees, this will make the resin more liquid, but will shorten the time before polymerization begins.
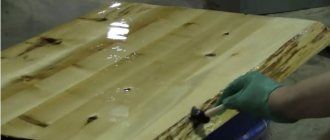
Pouring the mixture into the matrix
Pour the first layer of resin into the mold, its thickness is 5-10 mm, this will be the top part of the seat.
If the matrix design provides for the upper part of the seat on the other side , then this operation will need to be performed in the same way, but after pouring the main layers.
Then place patterned paper on it or install cuttings of branches, pressing them down a little. If you divide the mold into sections using plastic partitions, then each compartment can be filled with resin of its own color and the partitions can be removed immediately after pouring. Some of the resin at the edges of the areas will mix and provide a relatively smooth color change.
In the same way, you can make a not too complex drawing. The main thing is to use the same resin and complete all operations before polymerization begins .
You can also make an inscription, but you will first have to make a partition of a suitable shape. After the resin hardens, this inscription will be an integral part of the seat, so it will not go away even after several polishings.
If you are making the seat only from a mixture of resin and wood filler, then you can skip this point.
When using cuttings of branches, it is necessary to take into account that the density of the resin is noticeably higher, so they will try to float .
To avoid this, you can wait until the bottom layer of resin begins to polymerize, until its state becomes jelly-like, and then pour in the main mass (accordingly, you will need to prepare the main mass of the resin after the start of the polymerization process).
It is also possible, without waiting for the first layer of resin to polymerize, pour the second layer, then cover it with polyethylene and apply it with an even flat weight, the size of which corresponds to the size of the mold, and the weight itself must be placed strictly level.
Pour the bulk of the heated mixture into the mold, then use a plastic spatula to compact the resin over the entire area, paying special attention to the edges. Avoid the appearance of bubbles; if they arise, deflate them immediately.
If you are pouring a mixture of resin and wood filler, then compact it more thoroughly with a spatula, pushing it from top to bottom in increments of 2–4 cm.
Check the top edge of the fill using a level, and if necessary, level it using a spatula .
Product polymerization
Leave the mold filled with the mixture for a day in a room with a temperature of +20 degrees so that most of the polymerization process takes place.
Take out the craft and leave it there for another 72 hours so that the polymerization process is completely completed.
The polymerization time of other compositions must be found on their labels.
Post-processing
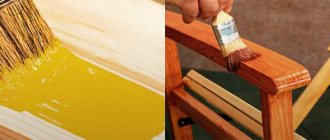
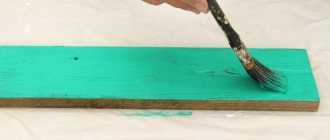
After the resin has completely polymerized, sand the seat to remove any defects in the fill. If the thickness of the layer being removed is thicker than 0.1 mm, then it is better to use a grinder. If desired, the seat can be processed with a hand milling cutter or engraved on it.
Attach the seat to the stool. Ready.
Required Tools
Dyes PVA glue Sawdust Board Abrasive sandpaper
In this article we will tell you how you can make a popular building material called liquid wood with your own hands, and also describe all its advantages.
- 2 Advantages of wood-plastic - natural wood rests!
- 3 Choosing wood-plastic products – make a wise purchase
- 4 Is it possible to make composite material yourself?
Using WPC for repairs
Homemade liquid wood can be used to repair any products from :
- wood of any species;
- chipboard;
- Fiberboard;
- MDF.
These may be small holes or chips, as well as small areas with visible rot or other diseases/pests.
The general principle of action is as follows :
- Select the most suitable binding material for the damaged surface. For wood, these are PVA, acrylic, epoxy and polyester resins; for other materials, PVA and acrylic-based liquids are better suited.
- Choose wood or color scheme that matches the color as much as possible. If the color does not differ, then it will be difficult to notice the repaired area.
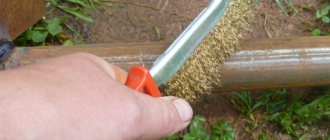
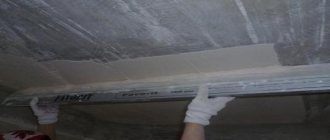
- Clean the damaged area from deformed material, dust and dirt, then clean it with sandpaper and blow it with compressed air.
- When working with acrylic liquids or PVA, prime the damaged surface with an aqueous solution (50–80%) of the binder and leave for 1–2 hours for partial polymerization.
- Prepare wood pulp with the following ratio of ingredients: wood filler 70–80%, polymer 20–30%, color as necessary to obtain the desired color.
- Using a spatula, fill the damaged area with the prepared mixture, ensuring that it rises tenths of a mm above the surface.
- Remove all traces of the mixture, then wipe the surface with a damp cloth.
- After 24 hours, carefully sand the repaired area, first with fine, then very fine sandpaper.
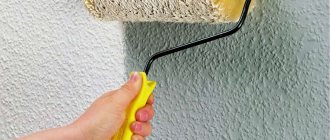
- Sand the repaired and adjacent areas of the surface with zero-grade and velvet sandpaper, then (if necessary) coat with a varnish compatible with the existing varnish coating.
Where is liquid wood used?
High performance characteristics make it possible to use liquid wood in the construction and decoration of buildings, when the use of conventional wood is quite difficult, since it either cannot last long without protective treatment or the treatment itself is quite labor-intensive. That is, we are talking about bathhouses, swimming pools and even piers.
There is a place for liquid wood in the construction of small buildings such as gazebos and terraces. Since this material is resistant to any weather conditions, it can be used to make decking boards and more.
The temperature range of liquid wood allows it to be used outdoors in all weather conditions, which makes it a truly unique novelty.