11643 0 0
Che Guevara December 10, 2016
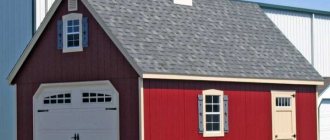
You can line the well with wood yourself.
A beautiful well on the site is always pleasing to the eye. Today, it has become fashionable to decorate a well with wood, decorate it with stone, and also build heads in different styles. I will tell you about the simplest and most affordable ways to equip your own source of drinking water.
Purpose of the houses
The well house decorates the structure, performing essential useful functions. The water source is protected from precipitation, debris, dust, and when securely closed it becomes safe for children present on the site.
An open well will very quickly become unnecessary, because water with the remains of leaves and dust, especially after heavy rains and strong winds in bad weather, will become unsuitable for drinking. It will be possible to water the garden and use it for technical purposes, but the construction of a well is not intended only for this.
If you build a good-quality house over a well, the source will be useful and supply clean water for a long time, especially in cases where everything is done correctly.
Cladding of the above-ground part of the log house
What we habitually call a well frame has, in fact, been made of concrete rings for a long time. The top ring protrudes from the ground and looks unpresentable
It is especially important to line it when an open type well is being built, since in closed ones the ring is hidden behind the walls of the house. But even in closed structures, successful design of the log house can give completeness to the entire structure
Wooden traditions
To give the house above the well a purely rustic look, a frame is laid around a concrete ring. It is not necessary to adhere to the traditional square shape - the log house is made both hexagonal and octagonal. It is brought above the level of the rings and covered with a wooden flooring, in which a hole is cut with a door for a bucket.
House for a well in the form of a log house
For a Russian-style estate, a log house made of round logs is the most suitable option. If the buildings follow the traditions of Scandinavia, then rectangular timber or clapboard cladding would be acceptable.
Lining the well with clapboard
Stonework - a journey to the land of the elves
The well with stonework carries a European flavor. It will look fabulous on a site with a small wooden house and a garden in the spirit of Provence or next to a brick cottage in the English style.
Covering a concrete ring with stones is not difficult; it requires diligence, cement mortar and the stone itself. You can use large cobblestones, pebbles, flagstone, and flagstone looks especially picturesque if it is laid flat. Along with stone, facing bricks and tiles imitating natural masonry are used.
Stonework in the design of a well
In open wells, it is necessary to line the upper edge of the ring and secure a wooden or metal lid (door) to it.
Metal, but not plastic
There is nothing that prevents the use of non-traditional materials in the design of the upper part of the log house, from metal profiles to plastic. And if plastic could be immediately rejected as a short-lived material that cannot withstand low temperatures, then metal sheets can lead to interesting ideas. Of course, it will be necessary to build a wooden frame under such cladding.
Lining the well with metal
Closed and open type
Over the centuries-old history of the existence of wells, different technologies for constructing structures in general, and the upper part in particular, have evolved.
Essentially, the top comes in one of two forms:
Open buildings are often built on the streets, in public areas. They consist of a ground part of a log house with a door, a lift on a rack and a roof on supports.
The completely closed top is made in the form of a house, the design of which depends on the traditions formed in the area and the taste preferences of the owners. In order to make such a structure, you need skill and a lot of time. The result is a well that is reliably and completely protected from external factors and is absolutely safe for others.
Required Tools
To arrange a wooden frame over a well shaft, you need to prepare the following tools:
- hammer;
- hacksaw;
- axe;
- Bulgarian;
- plane;
- jigsaw;
- vice;
- sharp technical knife.
To make a ring of concrete around a well, you will need the following equipment:
- tank for mixing the solution;
- measuring container;
- electric drill with whisk attachment;
- work clothes, rags.
To pre-build the formwork you will need simple woodworking tools.
When the concrete has hardened, you can begin finishing work. They are carried out using such tools and materials as:
- cement;
- plaster mesh;
- graters of different sizes;
- spatulas.
What to make a house from
The choice of material is determined by the specifics of the structure, depending on which you can use:
- brick;
- a natural stone;
- concrete blocks;
- metal constructions;
- tree.
The ground part made of brick, stone, concrete can be used for a long time without repair, but does not have a very aesthetic appearance, so it needs additional finishing. There are many materials for decoration, ranging from plaster mixtures, paints, ending with siding panels, but any finishing requires the investment of additional funds.
Metal on the street, especially near a water source, will suffer from corrosion, so it will have to be regularly treated with antioxidant compounds and painted, which is not very desirable due to the risk of coloring agents getting into the well.
The most reliable, environmentally friendly, durable material is timber, the structures of which remain almost unchanged even in long-abandoned villages.
You can make a well house with your own hands either using ready-made drawings, step-by-step detailed instructions, or using homemade calculations and drawings.
To work with wood you will need standard tools:
The work is much faster with electric mechanisms: a hand router, a modern jigsaw, a circular saw, in which the angle of the teeth can be adjusted.
There are various designs of houses built as the ground part of wells, among which several are the most popular. They have a pleasant appearance, reliably cover the water source, are manufactured relatively quickly and do not require large financial outlays.
Types of finishing of a well in the country
Since the requirements for the material are minimal, you can use what is most available. However, each finishing option has its own characteristics that are worth considering. What a well looks like in a dacha and its finishing is clearly visible in the photo.
The designers' recommendations will help you decorate the well beautifully and harmoniously fit it into the style of the site.
Made of brick
Brick is one of the most popular materials for finishing, due to the relative ease of its use. Moreover, if you use ceramic bricks, you can completely build the shaft head out of it, which is not only beautiful, but also practical. Among the advantages of this type of brick are the following:
- good strength;
- structure density;
- resistance to various types of mechanical stress;
- pleasant appearance;
- wear resistance and durability;
- the ability to create a unique design thanks to a wide palette of colors.
Brick finishing is similar to stone, although it is easier to do.
Note! Ceramic brick absorbs moisture, so after laying it must be treated with a hydrophobic varnish.
An alternative to ceramic is sand-lime brick, which is available in different colors and has a lower price.
Any brick can be used. A simple silicate with a red color is perfect.
When choosing this material, you should consider the following:
- a brick with a solid structure is required;
- can be placed lying down or on the edge;
- the optimal masonry option has a round shape, which saves material;
- wall thickness should not exceed 25 cm;
- the surface needs to be plastered;
- It is recommended to “ironize” the cladding, that is, rub cement into the wet plaster. This allows you to increase service life.
The red brick cladding gives these products an unusual look.
Made of wood
Wood can be considered a traditional material for finishing well shafts. It is convenient to work with, and can also be decorated in various ways, the main of which is carving. At the same time, the finished structures have a pleasant and presentable appearance that looks good in combination with a country house.
Wood is a traditional material used for finishing.
Important! Most types of wood are quite susceptible to moisture, and therefore it is better to choose larch or aspen, which should be coated with a protective agent with antibacterial components before finishing.
It makes sense to build a house with a full roof over the mine, which will protect the water from pollution and also serve as an interesting decorative element.
This is a rustic style, it is ideal for a site with a log house.
Stone or cobblestone
A fairly common option is stone masonry. It is more versatile than wood and can fit well into almost any area. You can use both natural and decorative stone, because both of them have properties such as:
- high strength;
- durability;
- moisture resistance;
- resistance to weather and climatic conditions;
- variability in sizes and colors.
Stone is a beautiful, versatile and durable finish.
The stone is easy to install, but this can only be done on a flat surface. It is recommended to plaster the well shaft, cover it with a layer of concrete contact and cover it with a plaster mesh on top. The best option would be to simply cover the surface with stones in a circle, starting from bottom to top. It is better to fasten them with tile adhesive or cement.
If the masonry is done correctly, it will last for decades.
The advantages of decorative stone are both the variability of colors and shades, and a more affordable cost. If it imitates natural stone and differs noticeably in color, then you can lay out a pattern or ornament.
After finishing the well with stone is completed, it can be treated with a special varnish, thus giving it shine and the effect of wet stone.
Pebbles and cobblestones are also used in decoration. They can be used as an addition to masonry or serve as the main material. There is another option: use them to build a path leading to the well.
Flowers
In addition to the basic finishing with stone, wood, brick or cement, you can also use decorative elements such as flowers. They can be used to decorate the roof of the mine, the base and the surrounding area, hang it in flower pots, place it in pots or build an alpine slide. Another option is weaving species that will gradually entwine the entire well.
As a budget option, frame the well with flowers.
Note! An interesting solution is to plant varieties that bloom one after another, which will allow you not only to observe constant changes in design, but also to do this throughout the entire season.
If the shaft is buried in bright plants, the well looks especially beautiful.
Plastering and painting
Plastering and painting is the final stage of finishing, used more often for brickwork. Cement mortar is used as plaster, to which it makes sense to add a little glue. When carrying out work, you can use the following recommendations:
- start work in clear, dry weather, and the temperature should be at least 5°C higher;
- before starting, rinse the surface of the well and wait until it dries completely;
- prepare the solution in small portions to prevent it from drying out;
- apply the plaster from top to bottom, leveling with a trowel and smoothing with a trowel;
- install beacons made of wooden slats 50-60 mm thick on the sides, which will ensure a smooth surface;
- It is worth plastering in separate strips, rearranging the slats.
This option will not last as long as stone or brick. Over time, the finish will have to be updated.
For wooden cladding, painting is usually used rather than plastering. In this case, it can be either a monocolor or a pattern. Additionally, varnish coating is possible.
Important! You can also paint stone trim, but you must use special paint mixtures.
The design of the structures excludes the presence of a pronounced style.
House made of timber and boards
A do-it-yourself roof on a well can be made in the form of a gable structure, for the construction of which you will need the most affordable material: logs, boards, fasteners. The optimal dimensions of raw materials to ensure the necessary strength have been tested over time.
Note! The recommended thickness of the board is 4 cm, the dimensions of the timber are 10 × 10. Thinner wood can be easily damaged by gusts of wind, and large materials will make the structure heavier and cumbersome.
The main racks are made from timber, and the ground frame is tied with boards, with the optimal width of the boards being 150 mm. The entire structure is fastened with nails with a length of at least 10 cm. First, the frame is assembled on the ground near the well, and then transferred to a permanent place.
After that, rafter elements from boards with a thickness of 3 cm are attached to the future house at an angle, and they are additionally fixed with crossbars, placing them below the top of the rafters at a distance of 30 cm. The structure is nailed down with nails with a length of at least 12 cm.
Cutouts are made where the rafters meet the boards of the upper ground part. The rafter elements are additionally reinforced with jibs, and a ridge of two boards is placed on top. All walls of the building must be protected by projections with a length reaching at least 10 cm. Places in the corners are covered with wind boards, and the structure as a whole is covered with roofing felt, on top of which decorative material can be laid out.
The opening in the house is closed with doors that look like a shield made of boards fastened with bars. The doors will have to be used many times every day, so you can additionally strengthen them with a board diagonally, which will increase the rigidity of the shield. All that remains is to make a latch and nail the hinges onto the doors.
The outside of the house structure can be carefully coated with an antiseptic, making sure that the product does not get into the well. The top of the wood is varnished, which will decorate the well and increase its durability.
Design options
Once the base of the structure is made, it can be designed in various ways. As a result of the correct choice of the way in which this should be done, the well will acquire not only practical significance, but also aesthetic and design value.
Roof finishing
The roof can not only be made from neat, beautiful boards, but also decorated with carved wooden parts.
Unusual options for this part of the structure may also be used. One of these options involves a folding design made of thick glass. It is structurally made in the form of a cover over the well, which opens on door hinges mounted on the well frame.
You can provide a semicircular metal roof, decorated with curlicues made of metal.
Decorative finishing of a well with forged elementsSource dozor.spb.ru
It is possible to design this part of the well in the form of a hexagonal pointed structure.
Sometimes when choosing what to cover a well with, a soft roof can be a good choice.
Concrete ring frame
Using a stone around the concrete ring, create a beautiful stone wall that completely hides it. This can be done in various ways. For example, an imitation of a small door made of wood in a stone fence may look beautiful.
It is possible to use logs in the form of a log house in a folk style. Sometimes such a frame is made not quadrangular, but hexagonal.
An option can also be used when, using wooden planks coated with varnish, a design is made that resembles a wicker basket. To do this, they are laid out horizontally at each level so that they look like a polygon. In this case, at each next level above the corner there is a flat part of the board.
Decorative finishing - a well in the form of a basketSource stroim-dom.radiomoon.ru
Using an unusual gate shape
This part can be made, for example, in the form of a steering wheel of a sailing ship, or simply in the form of a wheel with spokes installed perpendicular to each other.
Log house
In suburban areas, wells with a ground part made of logs look organically - an accessible, very durable and inexpensive material in many areas. Logs are used to assemble the posts, the frame itself and the gates, as a result of which the house looks like a single whole. In such a structure, a traditional lifting gate made of a log with a chain for a bucket looks harmonious.
First, the rounded beams and logs are sawn to the required sizes, then treated with an antiseptic and waited for complete drying. After this, the log house is laid on the ground in the shape of a well, while the ends of the logs are either trimmed or left protruding beyond the edges, if this is what the master intended.
Then, racks for support are made from rounded timber and logs, further strengthening them with supports. The roof on top is assembled in the same way as in a gable house for wells. The edges should protrude beyond the main part of the frame; for beauty, they can be beautifully trimmed in accordance with the wishes of the craftsman.
The shape of a house made of rounded timber or logs can be square or hexagonal, the latter is especially convenient for use on small plots of land. Edges save unused space, take up little space, are original and functional. If desired, the roof can be decorated with edged boards, which will additionally add originality to the structure.
Using a similar principle, you can assemble a house for a well not only from logs, rounded beams, but also ordinary beams with a smooth surface on the sides.
Materials for lining a well
Popular finishing materials
Lining wells is quite simple. For this you can use any modern finishing materials.
Advice. For the exterior finishing of wells, you need to use materials that can withstand temperature changes and weather conditions.
Characteristics and properties of natural and artificial stone
Both artificial and natural stone have almost similar properties. Just keep in mind that there are differences in the mass of materials.
The heaviest will be natural agglomerate. Also, its price is much higher than decorative stone.
Advice. In its external design, artificial stone very much resembles natural stone and it is most economical to use it in finishing.
Stones:
- They are durable and capable of supporting moderate weight of any decorative element on their surface (there are designs for houses for wells that have decorative forged elements on the sides).
- Durable. Artificial stone has a service life of at least 10 years. Natural agglomerate has practically no shelf life. Proper operation and installation of the material plays an important role.
- Moisture resistant. The surface of natural stone is not able to change its design and absorb moisture. As soon as liquid gets on it, the shade of the material may darken a little, but after the liquid has completely dried, it regains its original appearance. Decorative stone is reliably protected by a layer of a special agent, which is applied during the manufacturing process.
Advice. In rare cases, gypsum stone can absorb moisture and to ensure its moisture resistance it must be varnished. It will reliably protect the surface of the material and give it shine.
- Practical. The surface of natural and artificial stone does not require additional care.
Advice. It is not recommended to use chemicals to clean the surface of natural agglomerate, as they can damage not only the external appearance of the material, but also its structure.
- Wear-resistant. Throughout the entire period of using natural or artificial stone in exterior finishing works, they do not change their surface design and structure.
- Fire resistant. They do not burn and are not able to react to high temperatures.
- Frost-resistant. The surface and the structure itself are not able to freeze under the influence of cold weather conditions in winter. It is for this reason that this type of material is most often used for exterior finishing work.
- Stones can be mounted on any surface. Only it should be smooth.
Advice. Artificial stone can only have a tiled form and for this reason you should not build the walls of a house structure from it, as it will be very fragile.
Thanks to the external decoration of the well house, it is possible to insulate the structure, which will protect it from freezing.
Decoration
The structure above the water source should be in harmony with the house and other buildings located around. It would be good if the site was arranged with the participation of landscape designers or owners who have experience in designing work and recreation areas.
The covering of the well will harmoniously complement the site if it matches the roof of the main house in tone and texture.
Surrounded by buildings made in folk style, the well house can be decorated with carvings, which are done separately and then fixed in the form of an ornament or figurines on a tree. Some craftsmen carve the protruding parts of the log house, give them originality, and create a special atmosphere around the well.
Hanging flowerpots with flowers are sometimes attached to the upper ledges of the ridges so that they do not fall into the opening of the open door and do not serve as a source of debris.
Peculiarities
The design of the well must meet certain requirements. Firstly, it must be in harmony with the surrounding landscape and the exterior style of a residential building, and secondly, if it is used for its intended purpose, as a source of water, it must be protected from possible ingress of sewage, sediment and other contaminants. Finishing can be done using stone, wood, brick, flowers. In the end, the well can simply be plastered or painted.
If the well is planned to be decorated with wood, then it is better to choose hard species that are not afraid of the negative influences of the environment. In any case, the selected material must be wear-resistant, insensitive to temperature changes and precipitation. If, upon completion of finishing, it is plastered or painted, its service life will increase and it will retain its attractive appearance longer. You can build a house over the well itself - this will further decorate it and protect it from precipitation.
House for a well + drawings, dimensions
The only source of drinking water in a country house is often a well. A well house helps preserve the purity of life-giving moisture and give the structure an attractive appearance. A template copy can be purchased ready-made, but it is much cheaper and more interesting to build a house for a well with your own hands. The design differs in size, configuration and finishing material. The proposed drawings will help you choose the appropriate option for making it yourself.
Decorative stone for facing a well
An example of decorative stone finishing
This material is very similar in appearance to natural stone. It has various shapes and sizes. It is much easier to install it on the surface than natural agglomerate, since it does not have much weight.
So:
- The stone is fastened on any surface that is flat and also well prepared.
- To do this, there are certain instructions according to which a number of works are performed.
Artificial stone can be from:
- Plaster.
- Acrylic.
- Concrete and sand.
- Sand.
- Synthetic substances.
Advice. For exterior work, it is not recommended to use gypsum stone, which in most cases does not have a protective layer on its surface and is capable of absorbing moisture very well and at the same time being deformed.
Preparing the surface of the well house for the installation of decorative stone
Preparatory work
To level the surface for exterior finishing, you can only use concrete mortar or moisture-resistant drywall. Everything is clear with concrete mortar and its application to the surface.
Work order:
- Installation of drywall can be done either on a frame or without it. It is best to use a frame installation method to additionally insulate the well. Foam plastic or any other sheet insulating material is used for this.
- It is imperative to prime the surface before installing the material. This lasts the ability to ensure a reliable bond between the surface itself and the adhesive solution for installing the material.
The process of installing decorative stone
All work on attaching decorative stone to any surface can be easily and quickly done with your own hands and for this you will need:
- Adhesive solution for ceramic tiles, which is used for exterior finishing.
- Construction level to ensure smooth installation of each decorative element.
- A tile cutter that can be used to cut artificial stone very quickly and easily.
- Spatula for applying the solution.
The principle of installation of the material is very similar to the installation of natural agglomerate.
Purpose of the house
The main function of a well house is practical. The quality of well water is negatively affected by many factors:
- direct rays of the sun;
- precipitation;
- excess heat;
- animals and insects;
- wind blown debris;
- chemicals sprayed on nearby plants.
A properly equipped house prevents foreign substances from getting inside. In addition, a competent design will prevent water from freezing during severe frosts. Throughout the year, the structure creates protection from curious children, preserving their life and health. In addition to its practical purpose, a well house made with soul and soul will be an excellent decorative decoration for the site.
Water is supplied from the well in two ways - using a gate and a bucket attached to it or a pump. When choosing a house design, this factor must be taken into account.
One of the options for a professional drawing with dimensions is presented below:
Tips and tricks
Nowadays, wells rarely fulfill their original function - water supply. Most often they serve simply as a decorative element of the site. In this case, their design depends only on the taste of the owners. An experienced designer, of course, will help create a unique object that will please the eye, but this may require considerable funds. Homemade wells are in no way inferior to the work of experienced professionals.
First of all, you need to decide on the style of the future structure, because the choice of material will depend on this.
Rustic style is, of course, wood. In this case, any natural available materials are well suited - straw, dry grass, living plants, wood. Carvings, cornices on the roof above the well, clay pots and a bucket as an alternative to an iron bucket will look harmonious.
A concrete well can be plastered, painted and painted. Plant motifs, images of flowers and animals are well suited.
In addition, do not forget about the maintenance of the well.
To ensure that the water in it is always suitable for drinking, you need to follow some rules.
- As mentioned earlier, any sources of possible water pollution should be located at a distance of at least 30 m from the source.
- If the well is open (without a house), then it must be equipped with a lid.
- It doesn't hurt to install a fence, especially if there are small children in the house.
- In winter, the well must be insulated so that the water in it does not freeze. For this purpose, straw, hay, and sawdust are used. Any synthetic materials are unacceptable.
- The well must be cleaned as necessary.
- After the well is cleaned, it must be disinfected.
- As old equipment wears out, it must be replaced with new one.
Variations of the structure
The protective structure can be open or closed. In the first case, the likelihood of water freezing in severe frosts increases significantly. Insulating the well ring with an expanded polystyrene foam coat followed by decorative finishing will help save the situation. A closed type design is more practical from the point of view of frost protection. The air layer itself retains heat, and in combination with thermal insulation material it copes perfectly with the functions assigned to it.
The choice of materials when making a house for a well is based on the general architectural concept of the suburban area. If the main structure is a wooden frame, it would be logical to use logs to finish the well ring and boards for the roof. If the exterior of the house contains elements of brick or stone, the corresponding material is used when assembling the structure for the well with your own hands. The top is sheathed with material identical to the roofing of the main building. The proposed design is not an unshakable postulate and is relevant if the house is located within sight of the main building. A well located further away allows you to expand the boundaries of the choice of finishing for the house.
Another example of a drawing with dimensions will help you navigate the choice of configuration:
Integrated sink
Design features
Stone sink – built into the kitchen countertop.
Most kitchen sets made in a modern style require a single countertop that unites the entire working surface of the kitchen, including the sink, cutting room and other functional areas. The dishwasher and washing machine are usually hidden under the countertop, which can run along one or two walls.
This solution makes the interior logical and complete, it has integrity, and the kitchen looks neat. But the main advantage of this approach is convenience. The housewife no longer needs to run from the table to the sink, from the sink to the dryer and back: everything is at hand in the most convenient location.
Double sink – built into the countertop.
Of course, such changes could not but affect the design features of plumbing fixtures, and the built-in under-counter sink for the kitchen is good proof of this. What are its main differences from the usual traditional sinks?
Let's figure it out:
- As the name suggests, the product is integral with the countertop and is built into it;
- Unlike traditional countertop sinks, which were installed on cabinets, these sinks require the countertop to be adjusted to their dimensions;
- The design involves hidden fastening to the tabletop;
- If the sink has sides, then their dimensions in width and height are minimal and do not interfere with cleaning the surface;
- The product does not stand out from the overall interior ensemble and does not rise above the kitchen work surface.
The sink forms a single whole with a common surface.
If we summarize the design features of built-in sinks, they all boil down to maximum convenience, functionality and ergonomics.
Varieties
Built-in kitchen sinks are stylish and original.
The types of integrated sinks should begin to be discussed with the method of installing them into the countertop.
There are three main methods:
- Installation from above. The model has small sides around the bowl, which allow it to rest on the surface of the tabletop, and from below the device is fixed with special clamps, which are tightened with the required force using screws. This is the simplest method and is best suited for DIY installation;
- Flush installation. With this method, the bowl does not protrude above the tabletop, but is integral with it, that is, it is mounted flush. Here the installation is more complicated and requires cutting not only the most even, but also a shaped hole with a choice of quarters (steps), and for this you need a milling machine or lathe;
- Underbench installation. When installed at the bottom, the walls of the bowl are located under the countertop, which covers the mounting sides. Here it is necessary to use only a waterproof board made of stone or a polymer composition, and the hole should be cut on a coordinate machine according to a special template.
The top installation assumes the presence of small sides, which can be seen in the photo.
In addition to the installation method, sinks may differ in shape, size, functionality and additional features. Today you can easily find products of almost any configuration: rectangular, round, oval, square, corner and models of indefinite complex shape.
Model with two bowls and a drainer for drying dishes.
Two- and three-bowl sinks are becoming increasingly popular. They allow you to defrost meat, wash vegetables and put away dirty dishes at the same time. Modern sinks are also equipped with additional wings for drying dishes, cutting semi-finished products, baskets for vegetables, colanders, etc.
Multifunctionality is a hallmark of modern plumbing.
Simple open house design
It’s quite simple to design a structure for an open well with your own hands. Main design elements:
Below, for clarity, a general drawing with dimensions is presented:
Since the racks are dug into the ground next to the well, the installation of supports for the canopy is carried out after the decorative design of the well ring.
Basic steps for making a well canopy:
- Two side triangles are assembled. The dimensions in the drawing are indicative only and can be adjusted if necessary.
- The length of the canopy is selected taking into account the diameter of the well and where the supports will be located: behind the casing or close to the ring. A detailed drawing of the canopy with dimensions for a well with a diameter of 1 m is given below:
- For reliable protection from rainfall, the spread of the slopes of the open house is recommended to make the diameter of the well 40 cm larger.
- The material for the frame of an open house can be a wooden beam, a profile pipe or a galvanized profile.
- When the frame is assembled, the rafter system is attached to it.
- Boards, siding or metal tiles are used as roofing for a well canopy. Boards are a rather capricious material when decorating an open-type house. The wet ones will dry out over time, and the roof of the house will begin to leak, the dry ones will swell from precipitation, and the structure above the well will begin to wave.
The order of work may vary. In some cases, the supports are first dug in, then the rafter system is attached, after which the roof is installed. It is more difficult to assemble the rafter system of an open house directly on fixed supports. Sometimes the entire structure is first assembled together and then dug over the well. The weight of the structure and personal experience will tell you how to make it more convenient with your own hands.
Open well with lid
Many owners of suburban areas want to have their own beautifully decorated well. The most common is a well made of concrete rings with a diameter of up to 100-130 cm. The height of the upper edge of the ring usually does not exceed 0.6 m above the ground surface. Wall thickness 7-12 cm.
In order for such a structure to be safe and easy to use, it must be equipped with a canopy or gable roof mounted on wooden or metal racks. A well gate is attached to the same posts, onto which a chain or cable with a bucket is wound to extract water. In addition, it is necessary to provide a durable and airtight lid that protects it from dust and precipitation.
Self-finishing a well begins with measuring the dimensions of the pipe, in particular its diameter and height above the ground surface. If the height of the upper edge of the pipe is small, i.e. less than 40-50 cm, then when finishing it must be increased to 60-70 cm. The simplest option for finishing a well in the country is to install two racks (with a single-pitch or gable canopy), a gate and a cover.
The size of the canopy should be slightly larger than the diameter of the pipe. This will reliably protect the well from precipitation .
The roof is installed at a height of 1.6-1.8 m above ground level and has a width of at least 1.5 m. The length of the racks is calculated taking into account the fact that the racks are buried in the ground to a depth of at least 0.5 m. The gate is usually located on main posts at a height of 1.3 m from the ground level and at least 0.7 m from the edge of the well.
The procedure for making a closed house
An open house does not provide the well with 100% protection from adverse factors. It is much more efficient to assemble a closed type structure with your own hands. A detailed drawing indicating dimensions and a diagram of the assembled version is shown in the photo:
Frame design
To make the frame you will need timber and boards. As in the case of an open canopy, it is important for the structure to correctly select the dimensions of the main elements. Excessively thin parts will lead to deformation or breakage of the structure above the well as a result of wind loads. A large margin of safety will also be unnecessary, as the structure above the well will turn out to be bulky.
The photo shows a detailed drawing of the roof of the house:
It is optimal to select the following material sizes for work:
- The thickness of the board is 4 cm, the width varies from 120 to 150 mm.
- The section of the beam is 80x100 mm; for heavy roofing, it is better to take 100x100 mm.
- To work, you will need 4 timber supports and 4 boards for the lower and upper trim.
The boards are cut in advance, taking into account the dimensions of the well, and then nailed to the support posts. 100 mm nails are used as fastening elements. The algorithm for making a frame for a well house includes the following steps:
- the first pair of supports is fastened with boards at the top and bottom;
- the second pair of risers are connected in a similar way;
- the blanks are placed around the well;
- The elements of the house frame are connected by strapping.
The photo shows an example of a finished house over a well:
Roof installation
The design of the roof of the house over the well begins with the assembly of roof trusses. They represent a rigid structure onto which the sheathing is subsequently attached. For the rafter legs of the house, boards are taken, the thickness of which is at least 3 cm. The length is selected individually, depending on how high the house above the well you want to get. The next elements of the rafter system are crossbars and jibs; a board thickness of 2.5 to 3.0 cm will be sufficient. The set of elements for the rafter system of the house above the well includes:
- jib - 8 pcs.;
- crossbars – 3 pcs.;
- rafter legs – 6 pcs.
The parts are cut at an angle, the upper ends are connected to each other using self-tapping screws. The crossbars perform the function of additional fixation; they are installed 0.3 m below the point of the upper connection of the rafter legs. The rafters are fastened to the frame using nails 120 mm long.
In order for the well house to have sufficient strength, the rafter system is strengthened with jibs. When the structure is assembled, lathing is carried out. The fastening step of the boards is 15 cm. First, the sheathing is covered with roofing felt, then the finishing roofing is installed. Corner joints are usually covered with boards.
Gate installation
Decorating a house with your own hands above a well necessarily touches on the issue of installing a gate. To make it you will need a round log with a diameter of more than 200 mm.
The size of the gate depends on the distance between the two supports on which it is attached. It is optimal to choose a length that is 4-5 cm shorter. The approximate dimensions of the gate for the house above the well are shown in the drawing:
The main stages of making a gate for a house over a well:
- The required length of the collar is cut.
- After removing the bark from the log, it is carefully cleaned and sanded.
- The edges are covered with steel wire; this measure will preserve the geometry of the log.
- Holes are drilled in the center of the ends to a depth of 50 mm. The diameter is 20 mm.
- On top of the holes, metal plates are installed, on which the corresponding holes have already been prepared. This element will protect the wood from destruction.
- Similar holes are prepared in the supports, at the points where it is planned to fix the gate.
- The areas are covered with metal plates with holes.
- Metal bushings are inserted into the holes on the supports.
- The ends of the logs are equipped with metal rods. For the left part, a length of 200 mm is sufficient, the right element is represented by the letter “G”.
- Finally, the gate is hung on the posts.
House with a gable roof
The simplest and most popular design option. Such a well house can be easily built from available equipment, because... almost everything necessary (timber, boards, fasteners) remains after the completion of larger construction activities.
Frame
To create the base of such a house, boards and wooden beams are used.
First of all, it is necessary to select the optimal dimensions of the main structural elements. If the parts are too thin, the well house may not withstand wind and other loads. Elements that are too voluminous will make the house bulky.
House diagram. 1 – base frame, 2 – gables, 3 – pillar, 4 – roof ridge, 5 – gate, 6 – gable cladding, 7, 8 – roof slopes Therefore, adhere to the recommended and time-tested parameters. Thus, the optimal thickness of the board is 4 cm, the cross-section of the timber is 8x10 or 10x10 cm. The design of such a house consists of four posts made of timber and the same number of boards, suitable for making the upper and lower trim. The recommended width of the boards is 120-150 mm.
Saw off the boards in advance in accordance with the dimensions of your well, and then nail all the elements one by one to the support posts. As a result, you will get a reliable and even frame. To fasten elements of the mentioned dimensions, use nails approximately 100 mm long.
At this stage, it is best to adhere to the following algorithm:
Roof and upholstery
Start arranging the roof of the well house.
Start by installing trusses - this is a rigid structure designed to attach the sheathing. Make trusses from durable boards with a thickness of at least 30 mm. Select the length individually - the final height of the well house directly depends on this indicator. Prepare boards for jibs and crossbars. Material 2.5-3 cm thick will be enough. In general, you need to prepare 6 rafter legs, 3 crossbars and 8 jibs. Cut the rafters at an angle, and then connect the upper ends of the products to each other. Fasten with self-tapping screws.
For additional fixation of the rafters, use crossbars. They should be placed 30 cm below the point of the upper rafter fastening. Create cutouts at the junctions of the rafter elements with the top trim boards. Use 12 cm nails to connect the rafters and frame.
Strengthen the fixation of the rafter elements with jibs. To connect the trusses, use a kind of ridge - a structure made of two boards. Attach the sheathing boards in increments of about 15 cm. Provide 10 cm protrusions above the walls of the building. Cover the finished roof frame with roofing felt, and on top of it, if desired, attach the finishing roofing material at your discretion. Finally, all you have to do is cover the corner joints with wind boards.
It is most convenient to assemble the roof structure frame on the ground.
Door
The door of such a well house looks like a kind of plank shield.
The door is made according to an extremely simple principle. Cut boards about 150-200 mm wide. The length will be enough 85 mm. Place the boards one next to the other and fasten them with 30x25 mm bars. Two bars will be quite enough - you fix one on top, and nail the second from below. To fasten the elements of the product, use self-tapping screws. Four self-tapping screws for each board will be enough. Nail an additional diagonal block. It will help increase the rigidity of the product. Frame the gables, attach the latch and handle, and then hang the finished door on its hinges.
Don’t forget to treat the outside of the product with an antiseptic and varnish it. Before applying varnish, you can paint the door with waterproof paint.
Prices for various types of lumber
Such a well house will have an original and very interesting design. To build such a structure you will need the following:
- rounded logs;
- boards for roofing and supports;
- finishing coating for roofing;
- material for arranging a gate with a comfortable handle.
Similar well houses are often found in villages. The pillars of the structure, gates and the log house itself are made from rounded timber.
Manufacturing technology
Fold the rounded timber into the log house according to the dimensions of the well.
Connect the timber using any suitable and convenient method. Install two massive wooden beam supports. For additional rigidity, equip the house posts with supports. Place a wide roof structure on top of the support posts. The instructions for constructing the roof were given in the previous section of the instructions - do everything in the same order. The edges of the roof should extend beyond the base of the well house. This will prevent precipitation from entering the well shaft. Securely fix the gate. You can decorate the protruding ends of the beam with a variety of curly cutouts.
Modification of a previous design. The only difference is the shape - it is hexagonal and allows you to save additional space, which is important for owners of compact wells and small plots of land.
In general, the sequence of construction of this house remains the same as in the case of the construction of an ordinary quadrangular building made of timber. The house is well suited for framing a shaft with pumping equipment.
Prices for popular types of antiseptics
Several methods can be used to decorate a house.
A popular decoration option is carving. A neat carved house will fit into any landscape, the design of which is made using wood. Another simple and popular option for decorating such structures is painting. Varnishes and impregnations allow you to radically change the texture and color of the material. In some situations, it will be appropriate to decorate a house using a ceramic or wooden figurine of an animal.
Otherwise, each owner must independently think through the finishing design of the well house so that the finished structure fits well into the environment and fully demonstrates the individuality and taste of the owner. Happy work!
Video - DIY well house
If you have already decided to install a well house on your property, here are the main points you should keep in mind:
We build a house for a well with our own hands - step-by-step instructions
Probably, each of us associates a well with a wooden frame, a gate and a bucket on an iron chain, a neatly folded gable roof and a peasant woman standing next to her with a rocker resting on her shoulders. It is unlikely that you will find something like this as soon as you dig a well in your dacha. No log house, no roof, just bare concrete rings. But everything is in your hands, since they are exactly what you will need when you start making your own house for a well. Don’t be alarmed, there is nothing complicated in this, you just need common sense and a powerful desire, coupled with knowledge of some of the features of the work, and now you are building your own little architectural miracle.
Interesting finishing ideas
If you still haven’t decided how to finish the well, then perhaps some design ideas will help you in your choice.
Chalet style
If a house on a summer cottage resembles a chalet house, which are usually located in Switzerland, then a mine in the same style will look beautiful. Usually stone is used for its finishing. You can use artificial or natural stone. In addition to it, you can also make a path from a stone base. What does a chalet style well look like? Look at the photos, you can see design options in this style.
Country style
Everyone has probably seen the Russian well. It is made of a wooden frame, it also has a swing, a canopy or a so-called crane.
Characteristics of rustic wells:
- The log house has a log structure. Its shape is quadrangular; the corners can be joined without or with a remainder;
- sometimes, to give an unusual look, it is cut into five, six or eight corners. For the construction of these structures, a rounded log is used, with the help of which you can build a neat structure;
- The frame can be installed around a concrete ring. The space between the log house and the wooden caftan can be filled with small pebbles or expanded clay.
In order to create a real rustic style, you can additionally install various ethnic components:
- carved posts to support the roof;
- openwork cornice;
- roofing made of shingles or straw;
- cart wheel as a handle for the lifting drum;
- wooden tub instead of a bucket.
Oriental style
If your garden or summer cottage is decorated in an oriental style, then the well should also be decorated in an oriental style. Therefore, when creating the design of the entire structure, you should give preference to elements of the oriental type. The eastern well must have a canopy. Often the canopy is decorated with various oriental amulets - figurines, mythical creatures. The head should be made of large stone or wood.
The roof must be covered with metal tiles with a soft base, it must have raised corners - a pagoda. The design must have a wooden bucket.
Why do you need a well house?
The main purpose of the design is to protect water from dirt, insects, branches, etc. You can, of course, simply cover the top of the well with some kind of lid, but bare concrete rings are unlikely to delight anyone (and it’s more difficult to collect water ), so the second function of the house is purely aesthetic. Moreover, such a house can be a whole work of architectural art and be the envy of your neighbors.
To install a log house, you can seek the help of professionals, but we know very well that things made with your own hands always bring more pleasure, and they also save a lot of money.
Let's look at different house designs, study their pros and cons, and also learn how to make a house for a well yourself.
How to make an Abyssinian well with your own hands - detailed instructions.
Water supply diagram from a well - details here.
How to make a water supply mechanism
There are 2 types of structures that can be used to manually raise water. It is worth highlighting the following:
- "crane";
- "gate".
You can make a “crane” for your own well, but it will require a lot of space. It is quite difficult to install, so it is rarely used. But to install the “gate” you will need 2 pillars; they need to be dug into the ground immediately after the well is brought to the surface. In order to prevent rotting, it is useful to coat a wooden post with a special compound. It can be replaced with resin.
First, the pillars are coated 2 times with a liquid composition, and then 1 layer of thick resin is applied. The pillars should be made of coniferous trees, then they will not require repairs for a long time. This material is less susceptible to rotting.
It is quite easy to make a concrete head with your own hands and equip it with a wooden roof. If the well shaft is made of brick or monolithic structures were used in construction, then they may contain embedded parts. For example, a sewer can be made of concrete rings with factory-installed embedded parts. They can be used to securely fix supports. The step-by-step instructions are as follows:
- It is necessary to measure the stand welded to the embedded reinforcement. The plate must be bent to its size.
- Using long self-tapping screws, the timber must be attached to the plate. Self-tapping screws can be replaced with nails. If there is no plate, then instead you should put a piece of pipe with a square cross-section. It is selected taking into account the size of the timber.
- In order to install pillars for a well with your own hands, you need to dig holes. Their diameter depends on the diameter of the pillar. The depth of the pit is 1.3 m. Before installing the pillars, you need to prepare the bottom of the pit. First you should pour sand, forming a pillow. It is enough to make a layer 20 cm thick; it needs to be compacted well. Then the bottom must be covered with a piece of roofing material, overlapping the walls. It is necessary to pour a 30 cm layer of concrete at the bottom of the hole. Ruberoid is required so that water does not escape from the concrete into the sand.
- The pillars must be completely covered with antiseptic impregnation. When it dries, the end is wrapped with waterproofing material. You can replace it with roofing felt. The pole is placed in the hole, and the vertical installation is adjusted using a plumb line. Then it is fixed with spacers and the hole is filled with concrete mortar. Allow 2 days for the foundation to dry, then proceed to further work.
The well gate is made of smooth logs and is a rotating drum. It is best made from hard wood. Ash is perfect, but you can use beech or more expensive oak. To remove friction, the drum needs to be made 40 mm less than the distance between the supports.
Making a gate for a well with your own hands is quite simple. You need to find a central point at the end of the drum and make a hole 50 mm deep. The hole must be drilled on the other side as well. Through holes of the same diameter should be made in the gate posts. They need to be strengthened; for this you can use steel bushings. After this, a handle is attached to the collar. Since high-quality drilling is quite difficult to do, it is easier to order the gate from a workshop.
At the last stage of arranging the head, it is sheathed. If the log house is made of calibrated logs, then it already has an excellent appearance. It is enough to make a roof, equip the source with a mechanism for raising water, and hang a door. If desired, the structure can be decorated with carvings.
The head of the manhole does not require decoration; the space around the shaft can be filled with concrete mortar.
Drinking water well heads made of other materials require additional finishing. The easiest way is to sheathe the surface with a board; you can use clapboard or material that imitates timber.
First you need to make a frame by purchasing a beam with a section of 50x100 mm. The structure, made for the well with your own hands, should be attached to the gate posts; it can be fixed to the concrete wall of the shaft. Next, the frame needs to be sheathed and the missing elements attached to the gate posts. The casing can completely cover the head, imitating a well house. The door will be on the roof.
https://youtube.com/watch?v=e7-qcjc0ZiA
If you wish and have free time, you can cover the head with a well house in the form of a mill. There are a lot of design options, so it’s worth choosing a drawing in advance
It is important to take into account the landscape design of the site and the style of other buildings
The head of a concrete well can be lined with ceramic mosaic. A house made of natural stone looks impressive.
Designs, diagrams and drawings
First, let's decide how many walls our house will have. You can choose a rectangular or hexagonal frame.
The tetrahedral version looks more traditional, but the hexagonal version also has its advantages. The design of such a log house will allow you to save space; it takes up less space and is well suited for small areas. Otherwise, it’s more a matter of taste; each option can be played up, decorated, decorated in its own way.
There are more simplified open-plan designs without walls. They perform their function just as well, but are easier to manufacture. There are also closed and open designs. The closed structure differs in that it completely hides the well, while the open one consists of walls along the height of a concrete ring and a roof.
Summarizing
Owners of cottages and private houses often have heated discussions about the advantages and disadvantages of wells. As an alternative, it is proposed to use a well. Each option has its fans. However, wells are a brilliant invention of mankind that has served it for many centuries.
A properly dug well can serve people for more than fifty years. The beautiful design of the water intake shaft can be used as an additional design element. Therefore, it is important that it does not stand out from the general style of the site.
Self-installation
Typically, wood is used as the material for building a house. It is easy to process, durable and looks good. Both timber and logs are used to make sheathing. Bricks or cobblestones can be used to cover the above-ground part. This material goes well with wood.
List of building materials for all work:
- A wooden beam, the cross-section of which is 5 x 5 cm, or logs for a log house (depending on the design).
- Roofing material. It must be light, otherwise the supports may break.
- Log for making a lifting mechanism.
- Protective impregnation for wood, paint, varnish.
- Metal hinges, handle, latch or other latch.
- Nails, screws.
- Metal corners and bushings.
- Bucket, chain.
- Door materials.
A general set of tools that you will need in any case:
- To process logs we will need an electric planer, and for timber and boards - a jigsaw.
- You also need to have a grinder.
- Building level.
- Roulette.
- A hammer and preferably a nail puller.
- Hacksaw.
- Screwdriver Set.
As the foundation itself, concrete formwork or a tile base is usually used. You can use the well blind area, modifying it a little. Do not forget to take care of the drainage of rainwater in advance by using special gutters in the formwork for this purpose. It is also recommended to add a little liquid glass to the formwork solution to protect it from moisture and dampness, but this is not a necessary condition. Consider the size of the base so that when the house is ready, it will be convenient for you to collect water; the design should, first of all, be comfortable and practical.
Next, we will study the process of assembling the frame, first we will consider the option of a log house:
- Logs cut to the required length must be treated with a plane and then with an antiseptic for protection. Since the log house is traditionally not held together by anything, it is necessary to make grooves in the logs. An insulation underlay is required under the first layer.
- Then the log house is assembled layer by layer; the protruding parts of the logs can be made of different lengths. The last crown should be flush with the frame under the gate and roof.
- The racks are made of two logs, between them a gate made of a single log with a diameter of twenty centimeters is attached. Such a log should be processed and made smooth. Metal holders are installed at the ends; for them you need to drill holes five centimeters deep and two in diameter. Washers are mounted in them, and metal bushings are placed in the slots in the frame, so the wood will not crack and the gate will rotate easily. If the roof is supposed to be closed, the frame should be inside it, and vice versa if a hinged roof is used.
- A closed type roof is usually made of a gable roof; for this, a base is made from timber, which is then fixed to the upper crown, and a ridge is installed. The racks serve as a frame for sheathing. Open roofs are also common. The base is mounted on racks; the material used is strong timber.
Deepening a well by digging
This method differs from the one described above in that the well is built up with repair rings from above. Moreover, their diameter does not differ from those that are already installed.
This is essentially a continuation of the work that began many years ago when the well was originally dug. The main danger in using this method is the possibility of the old column getting stuck in the ground, especially if the well is located on clay rocks.
Carrying out preparatory work
We start by securing the rings. We fix at least 4 staples at each joint. We drill holes for them, install metal plates 0.4x4x30 cm and secure them with 12 mm anchor bolts.
In this way, the casing will be able to withstand possible soil movements. We pump out the water from the well and completely remove the bottom filter, if it was present in the structure.
Carrying out deepening work
A worker lowers himself down on a safety net and begins to dig. First, he selects soil from the middle of the bottom of the structure, then from the periphery. After which he begins to dig under two opposite points from the edges of the lower ring with a depth of 20-25 cm.
No longer necessary, otherwise there is a danger of uncontrolled descent of the element. The tunnel then gradually expands to a circular area.
During operation, the column must settle under its own weight. New rings are placed in the space vacated on top. Digging is carried out until the water begins to flow very quickly.
It should be noted that subsidence of the column does not always occur, especially if the well is “older” than 1-2 years. In difficult cases, you can use the side digging method as a way to lower the stuck ring.
This is what a spatula looks like, which is used for digging up rings from the side. The handle, more than 40 cm long, should be curved for convenience and precision of work
Let's look at it using the example of the lower ring. We carry out the digging as already described. Then we take three stumps or strong stands made of timber and place them under the ring so that there is a distance of about 5 cm between them and the bottom edge.
These supports will subsequently take on the full weight of the settled structure. Then, in two opposite areas, remove the sealing solution from the inter-ring gap.
We insert nail pullers into the resulting gaps, and two people, simultaneously acting as a lever, can try to lower the ring. If all else fails, take a special shovel to dig up the side walls.
For its handle, reinforcement 10 cm long and 14 mm in diameter is used. The cutting part measuring 60x100 mm is made of 2 mm sheet iron. We insert the spatula 2-3 cm from the outer wall of the ring and begin hollowing out the clay.
To do this, hit the handle with a sledgehammer from bottom to top. In this way we go through the entire ring except for the areas under which there are supports. We managed to remove the clay to a height of 10-15 cm from the lower edge of the ring.
Now you can try the lowering attempt again with nail pullers or any other levers. If it doesn’t work, take the next shovel. The length of its handle should be 10 cm longer. We perform similar actions.
Upon completion of the repair work, you should once again inspect all the seams and carefully seal them, and then cover them with sealant
A small note: when the length of the shovel handle reaches 40 cm or more, it will need to be slightly bent. It will be more convenient to work this way. With proper lateral digging, the outer wall of the ring is gradually released, and it settles down. Similar work is carried out on other rings.
Final work in the well
Upon completion of the deepening work, all contaminated water is removed from the structure. All seams between the rings are securely sealed and sealed. If damage to old seams is noticed, they are also repaired.
We place a new bottom filter of the desired design at the bottom of the structure. Then we disinfect the walls of the shaft with a solution of chlorine or manganese. The well is ready for use.
Do not forget that the normal operation of a water intake mine opening and the preservation of its water abundance is directly related to proper arrangement, the rules for which will be introduced in the article we have proposed.
Cost of materials and work
You can buy a ready-made house at completely different prices. A simple structure made of boards and a gable roof costs from 7 thousand rubles. The options are more interesting, but with walls they will cost you more. Such houses are sold at a price of 15 thousand rubles.
If you do all the work yourself, then the prices for materials will depend on what type of house you have chosen, as well as your design decision and preferences in the choice of material. On average from three to seven thousand rubles. However, one thing is for sure, the final price will be cheaper than ready-made models on the market.
If you have already decided to install a well house on your property, here are the main points you should keep in mind:
- The cheapest and easiest to make design is an open house without walls. The most expensive and difficult to install is the closed hex version.
- It is very important to treat all parts with impregnations and varnishes before installing the structure directly above the well. Doing this after installation can contaminate your well water with chemicals.
- A wooden block nailed to the door diagonally will prevent it from skewing.
- If your site does not have suitable conditions for a well, you can always install a decorative log house.
Finally, do not forget to properly care for the well, and it will always delight you with clean and tasty water.
Wooden log house
The log house can be made from logs or timber. The protective roof is hipped, single- or gable, and is installed on top of the entire structure. Instead of a log house, you can arrange a box of boards around the well shaft. True, its long term will be much lower. The photo shows what it looks like.
Wood should be chosen that is most resistant to constant exposure to moisture. Before starting work, the prepared material must be treated with an antiseptic solution and a water-repellent agent.
The main stages of building a house
Having considered the design options, have you decided on the appropriate type of house and want to try your hand at building it? Using the example of a simple closed house with a door, let's take a look at the main stages of construction and the procedure for doing so.
Stage #1 - creating a drawing and selecting materials
You should start by creating a drawing on which you will indicate the dimensions of each structural element. Next, we give as an example a drawing of a gable roof made of beams and boards (lining).
When creating a drawing, you need to calculate what materials and in what quantities will be needed.
For such a small house you will need approximately the following set of materials:
wooden beam - for the manufacture of rafters, ridge, base and their fastening, as well as timber for support;
Currently reading
log - for making a gate (drum);
boards - for gables and roof slopes, and as a stand for placing a bucket;
metal rods - for making handles and securing the gate;
small consumables - metal bushings, washers, door hinges, handle; nails or screws;
bucket and rope or chain.
As for the amount of materials, in each specific case the consumption will depend on the size of the product and its shape.
Stage #2 - preparing tools and wood
Having collected the necessary materials and purchased the missing ones, it’s time to prepare the following tools:
chainsaw, jigsaw, circular saw or grinder + wood disc; drill or hammer drill; hammer, screwdriver; level, tape measure, pencil.
Also at this stage, you can prepare the wood - level, trim, treat with antiseptic and antifungal protective agents.
If you have never worked with a power tool and are going to cut wood with an angle grinder, in such a situation we recommend that you familiarize yourself with the rules for using an angle grinder.
Stage #3 - making the frame
First you need to measure the head of the well and, based on these measurements, create a drawing of the basic structure.
Next, mark the beams and boards into the required sections and cut them. Then assemble the frame of the future house and its base.
Stage #4 - fastening the gate
At this stage, a gate is made by processing the log and driving a metal rod into it on one side and a metal handle on the other. They attach it to the vertical posts with metal plates.
Stage #5 - cladding and decor
Now you need to assemble the doors from the boards and attach them. Then nail the boards/lining to the frame and cover it with a waterproofing layer.
How to do all this is clearly demonstrated in the following photo collection.
from The bars will need to be attached to the frame with self-tapping screws, onto which the doors will be nailed
Why is it important to determine the dimensions of the door and make the necessary markings with a pencil and ruler? Boards for door assembly are marked and sawn. Then a door is assembled from them using nails and beams. Fastening to the frame is carried out using metal loops
You also need to screw a handle onto the door. The slopes and gables of the future roof are lined with boards or clapboard. And a waterproofing layer is applied on top, for example, the now popular flexible tile - it is easily attached and can withstand natural disasters. The head of the well itself can also be lined with clapboard. Or use decorative brick, artificial stone, tile fragments, etc. The area next to the well can also be decorated - install a bench, plant flowers, place sculptures. Attaching bars for mounting the door. Assembling and fastening the door. Cladding with flexible tiles. Decorating the well.
Fastening to the frame is carried out using metal loops. You also need to screw a handle onto the door. The slopes and gables of the future roof are lined with boards or clapboard. And a waterproofing layer is applied on top, for example, the now popular flexible tile - it is easily attached and can withstand natural disasters. The head of the well itself can also be lined with clapboard. Or use decorative brick, artificial stone, tile fragments, etc. The area next to the well can also be decorated - install a bench, plant flowers, place sculptures. Attaching bars for mounting the door. Assembling and fastening the door. Cladding with flexible tiles. Decorating the well.
This completes the assembly of the simple house. Did this process seem complicated to you and you don’t know how to process wood at all? You can try to assemble a house from other materials - stainless steel or galvanized steel.
It is also important to take into account the climate characteristics of your region - if you have frosty winters, then when choosing a material for lining the head, you should immediately take care of insulating the well for the winter
What role does the soil play on the site?
- Wells dug in clay soil are considered the cleanest. They contain tasty, clear and clean water, “alive”, as they say. This happens due to long-term filtration. However, filling such a well is slow, especially in the first year. Later, after floods, filtration occurs faster.
- A well that is dug in sandy soil must be quite deep (3-4 rings are too few), otherwise the water is suitable only for technical purposes. It is long and difficult to build - you have to fight the float and pump out water all the time.
- If there is peat on the site, then you can dig a well, but the rather dark water will have to be settled. It won't smell very good when it's fresh. After boiling, it is used for drinking.
It has long been our custom to treat a well log not only as a source of water. It was always decorated with skillful carvings, patterns, figurines of fabulous animals and birds.
A beautiful well commands respect from neighbors, guests and passers-by. This tradition still exists today. Only much more materials for decoration and paints appeared. You can build a real work of art on your site.