Beginners are perplexed by drywall plastering. This is one of the popular materials for making partitions and leveling walls. We answer numerous questions that beginners have: is it necessary and how to plaster drywall under wallpaper, what mixture is best suited, what are the features of plastering for painting? Let us immediately consider the main features of the material itself.
Peculiarities
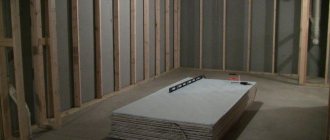
Many of the building materials on the market are designated by abbreviations. One of them - gypsum board - refers to the well-known drywall. The sheet material consists of paper (cardboard) facings glued to a gypsum core. Plasterboard sheets are used to cover walls and ceilings, cover niches, and make partitions from it. The material creates smooth surfaces and serves to level walls.
Plasterboard material is inferior in strength to brick, ordinary concrete, and wood. Needs protection. The gypsum board is attached directly to the wall (with a sticker) or to the frame (with self-tapping screws).
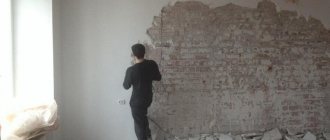
Seams, broken corners, screw heads are not the best sight. The first thing you want in such cases is to cover everything with plaster mortar.
However, heavy plaster coating can deform it. Moisture from the solution will warp and reduce strength. Therefore, questions arise about the possibility and necessity of plastering gypsum boards.
Application rules
When applying plaster solutions to drywall, you need to consider:
- Plaster can only be applied to drywall that is resistant to moisture. It is painted green, marked in blue - GKLV. The gypsum layer of such sheets is impregnated with special compounds with water-repellent properties.
- Several thin layers of solution are applied to problem areas (dents, depressions). The next one is applied only after the previous one has dried.
- Before applying the plaster solution, you need to treat the material with a deep penetration primer. It will serve as a barrier to the penetration of moisture from the plaster mortar into the gypsum layer of the walls. Apply the primer in a thin layer, making sure that the entire surface is saturated. After the composition has dried, apply the primer again.
- When using decorative plasters, you must strictly follow the application instructions.
Plasterboard walls only at first glance seem perfectly smooth. Even such a surface requires preparation before performing the final stage of finishing work.
Why do this?
The cardboard wrapping of the drywall is unpresentable, so a finishing coat is supposed to be placed on top of it. Most often this is a “shirt” made of wallpaper or painting. Both of these types of finishing are thin-layer, do not hide joints and fastenings, and require a particularly flat, smooth surface. For this reason, before gluing wallpaper or applying paint, drywall needs additional leveling using putty or plaster.
In addition, drywall plaster serves as a protective layer for the easily vulnerable external “misfortunes” of a fragile material.
A separate type of finishing coating for gypsum boards is decorative plaster. This is a recognized leader among means of interior transformation and ways of self-expression for homeowners.
Modern plastering materials allow you to create a unique design without overloading load-bearing structures with their weight, protect plasterboard walls from moisture, fungus, mold and rodents, and allow the walls to breathe. Making plasterboard partitions with the effect of malachite, marble or onyx, for example, decorating a ceiling in the Venetian style with any wallpaper will not work - only with decorative plastering.
However, it is recommended to plaster drywall only for leveling littered or bent walls, when it is not possible to remove the sheets and replace them with new ones. During dismantling, the sheets break; fasteners must be installed in new places. In all other circumstances, the plasterboard lining is puttied.
To plaster or not
Drywall is a material often referred to as “dry plaster.” There are no clear instructions regarding the fact that it must be plastered under the wallpaper. This is done only at the request of the users, based on the quality characteristics of the product. It is not recommended to further process a product that is classified as non-moisture resistant. This is justified by the fact that drywall can become saturated with moisture from the plaster mass, which will ultimately lead to its deformation. If the sheets are of higher quality, then plastering them is not a problem. The main thing is that the surface is smooth and has no flaws.
When the base needs to be leveled a little before wallpapering, you can’t do without plaster. You can also eliminate existing defects at the corners, hide the joints of drywall sheets, and also prepare the walls for wallpaper. If the surface is planned to be covered with wallpaper in light shades, then the base should be the same color. That is, separately plastered areas will stand out under the pasted wallpaper. This will ultimately affect the appearance of the walls. They will become unattractive.
Types of drywall
Five types of gypsum plasterboard are produced, the difference between which is in the composition of the core and its properties:
- In addition to the usual wall gypsum plasterboard, they produce plasterboard ceiling sheet material, which differs from the wall one only in its smaller thickness. The core contains the same building gypsum.
- Moisture-resistant plasterboard lined with green cardboard (GKLV) is used in the interior of bathrooms (they even cover walls in swimming pools). GKLV treated with antifungal impregnation and other compounds is not afraid of moisture.
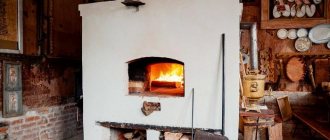
- GKLO - fire-resistant gypsum board with reinforcing and fiber additives is suitable for lining fireplaces and chimneys. In a fire, the cardboard becomes charred, but the plasterboard sheet retains its shape.
- The core of a flexible arched gypsum board is reinforced with fiberglass threads, which allows the sheet to be bent in different directions with a possible minimum radius of up to 300 mm. It is thinner and more expensive. If you consider that to ensure the strength of the arches that are made from it, gypsum boards are used, folding two sheets at a time, the cost of plasterboard structures is decent.
- Moisture-resistant combines the qualities of fire-resistant and moisture-resistant.
- Combined, used for wall insulation, has a special composition with the addition of expanded polystyrene.
This information will be needed when choosing the type of plaster composition. The shape of the edge is important for sealing seams.
The ends of the sheets are rectangular; when joining the gypsum boards at the ends, a chamfer is first cut off on them.
Material selection
The characteristics of plasterboard walls determine the choice of primer and plaster compositions. For ordinary, ceiling and arched types, solutions are suitable that do not transfer moisture to the base, do not contain a lot of water or do not contain it at all. It is better to leave ordinary mineral mixtures for gypsum boards, and polymer solutions for plasterboard walls of any type.
Plaster
Gypsum-based plasterboard plaster, popular for finishing dry rooms, is ideal for leveling and decorative finishing. Does not “share” water with the base, quickly sets and hardens.
Pros:
- vapor permeability;
- easy restoration (repaired without visible trace of repair);
- low weight of the coating;
- environmental friendliness;
- versatility (combinable with any base);
- perfectly sculpted and polished;
- does not form shrinkage cracks when hardening;
- fire safety;
- low thermal conductivity;
- easy to mix;
- compared to cement mixture, consumption is lower;
- An excellent base for paints, varnishes and wallpaper.
Minuses:
- low frost resistance;
- rabies;
- fast setting.
As already mentioned, gypsum plaster can be used to plaster plasterboard walls in dry rooms.
Cement
The binding component of the cement mixture is Portland cement. A simple composition with sand as a filler is complemented by additives that provide the necessary properties. It is characterized by frost resistance and durability of the coating. Cement plaster for drywall can be made independently or purchased in the form of a dry mixture.
Pros:
- good adhesion;
- availability (large selection, low price);
- easy application;
- maintainability;
- fire safety;
- resistance to water;
- strength;
- versatility;
- frost resistance;
- durability.
Minuses:
- refers to heavy (not for weak plasterboard walls);
- long-term strength gain (at least 3 weeks);
- does not withstand precipitation and vibration.
Suitable for plastering plasterboard in damp areas. Complex compositions are also used, for example, cement-lime
Modern polymer compositions
The versatility of polymer compositions is especially appreciated by specialists. Polymer mixtures are easy to install, dry quickly, adhere firmly to drywall, and do not weigh down the wall.
These include:
- acrylic,
- silicone,
- polymer cement,
- siloxane, etc.
Pros:
- elasticity;
- strength, as well as its rapid gain;
- water resistance (water repellent and waterproof);
- 25 or more years of service;
- environmental friendliness;
- non-shrinkability;
- richness of the palette;
- increased mechanical resistance;
- workability;
- increased adhesion.
Minuses:
- high price;
- not suitable for leveling;
- are purchased only in finished form.
The best choice for plastering drywall, as it does not “supply” it with water, does not weigh it down, and protects it from water ingress.
Tools
To plaster walls with your own hands, you will need the usual tools and equipment for plastering work:
- spatulas - for applying the solution;
- for priming - rollers, brushes;
- grater;
- mixer;
- rule;
- construction knife;
- masking tape;
- containers;
- rags.
Let's sum it up
Now you know how to level a plasterboard wall or ceiling with your own hands for wallpapering, painting or decorative plastering. If plastering drywall seems difficult, ask your questions in the comments, and don't forget to watch the video in this article.
Did you like the article? Subscribe to our Yandex.Zen channel
June 14, 2021
Plasterboard systems, Plaster and wall putty
If you want to express gratitude, add a clarification or objection, or ask the author something, add a comment or say thank you!
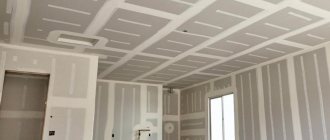
Features of preparatory work
Before applying the solution, the surface of the plasterboard coatings must be cleaned of dust and repaired. During installation of gypsum boards, corners often break off and dents form. It is necessary to cover with mortar and level with the surface all the places where the screws are installed.
The seams are also sealed. Where chamfers have not been removed, they are removed with a sharp knife at an angle of 45°, otherwise the monolithic work will be of poor quality. Serpyanka mesh is often used to reinforce seams. However, there are more worthy substitutes - special paper, fiberglass tape.
First repair the drywall joints:
- A bevel is cut with a knife.
- Clean the joint from dust with a brush or broom.
- Apply primer and dry.
- Spread the putty.
- Apply the composition with a narrow spatula and level.
- Apply a reinforcing mesh (pre-wetted paper tape), press and smooth with a narrow spatula (from the middle to the ends).
- Apply a covering layer of putty and level with a wide spatula.
Chamfering
Padding
Fastening the reinforcing mesh
Application of the composition
Applying a covering layer
Repairs dents in fasteners. The caps must be recessed into the thickness of the sheet. All attachment points are covered with the solution crosswise with a narrow spatula. In this case, the grooves (slots) on the heads of the screws are guaranteed to be filled with solution.
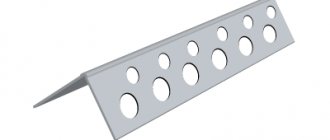
The corners of plasterboard walls and partitions are reinforced using perforated corners, mesh or paper. The first ones are preferable.
The work should be performed sequentially:
- The edges of the sheets are processed by chamfering.
- Remove any accumulated dust.
- Primed.
- Apply the first layer of putty.
- Apply a corner and sink it into the solution (at the level).
- Apply the solution on top and level it with a spatula.
- After drying, the unevenness of the mortar in the corner area is rubbed with a trowel.
After repair, the surface is completely primed with concrete contact before plastering. If the putty in the joints has settled, then additional putty is necessary.
Before performing plastering operations, the primer and putty applied to the plasterboard must be dried.
If, after completing the preparatory work, the walls are smooth, then the question “is it necessary to plaster sheet plasterboard under the wallpaper?” – you can answer negatively. A smooth, primed wall will be suitable for wallpapering (without additional putty or plastering). Wallpaper will hide roughness.
If the plasterboard sheets are too curved, it is better to replace or straighten them, as a thick layer of plaster can complicate the situation.
How to plaster drywall - technology
Let's turn to how to properly plaster plasterboard walls. If the unevenness on the surface of the gypsum board is small, it is better to plaster by stripping:
- apply the solution into the recesses with a spatula;
- The mixture is leveled using the rule, resting the tool on the surface of the sheets.
Stripping plaster technology
In case of unevenness with differences of up to 10-15 mm, plaster with a wide spatula. It is possible to apply two layers sequentially with the obligatory drying of each.
How to plaster drywall under wallpaper with large curvature of the walls? If the curvature or unevenness of the surface is too great, plaster along the beacons, applying two layers in succession. Each layer is dried and only then the next one is applied. After the solution has dried, the unevenness is rubbed down with fine sandpaper or an abrasive mesh.
For painting
Since a layer of paint can make even small flaws visible and emphasize, the surface of the plaster coating of drywall before painting is treated especially carefully. The plaster layer applied and leveled with a wide spatula (except for the gypsum layer, which is sanded to the desired smoothness) is rubbed using a trowel.
They begin this from the moment when the solution stops sticking and does not press through with a slight finger pressure. The surface of the solution is moistened. The grater is applied flat and rubbed in a circle with slight pressure. On convex places the pressure is increased, on depressions it is reduced. The dried drywall plaster, intended for painting, is sanded. After this, a primer is applied.
How to plaster drywall under wallpaper with your own hands
If you are not confident enough about the need to plaster drywall under wallpaper, the following information is for you.
If drywall is being prepared for wallpaper, a layer of primer and putty/plaster is also necessary to ensure that the wallpaper does not stick tightly to the gypsum board cardboard. Otherwise, it will not be possible to remove outdated wallpaper without damaging the plasterboard base.
Wallpaper, unlike painting, can hide small, minor flaws and errors - small pores, microcracks. Therefore, it is quite possible to apply only the starting putty under the wallpaper, ensuring the absence of protrusions, dents, and large pores. The same applies to plaster. When applying leveling plaster on beacons, the top layer - the covering - is made with a fine-grained composition. The surface is rubbed and, after drying, sanded.
You can also learn from the video how to properly plaster drywall under wallpaper.
Is it possible to apply decorative plaster to drywall?
Of course you can. Decorative plasterboard plaster is one of the types of finishing. The application of decorative plaster to drywall must be preceded by preparatory work, culminating in the application of a primer. For thin-layer coatings, for example, Venetian, the surface is additionally puttied to achieve smoothness. A smooth base is not necessary for structural plasters.
Decorative plaster is applied to drywall with a spatula, roller or trowel in the manner prescribed for the selected effect. Layers of textured plaster are applied sequentially, and each one is dried. The decorative layer should not be thick.
After drying, the decorative plaster is coated with paint or varnish.
Is it possible to plaster drywall with rotband?
Among the best plasters for gypsum boards is the gypsum composition - Rotband (Knauf). This is not only a leveling plaster for drywall. It can be used to form a decorative coating. It contains gypsum, polymer additives and light aggregate. The use of rotband for plastering allows you to create a smooth surface that does not require any other additional processing.
Rotband is used not only for plastering dry rooms. It is also suitable for bathrooms and kitchens (except for very wet rooms). The lightness of the composition allows the use of rotband for plastering ceilings. The plaster mixture dries quickly. The disadvantages include the ability of the solution to corrode metal objects. Therefore, they are isolated before plastering.
Applying bark beetle to drywall. How to apply decorative plaster on drywall
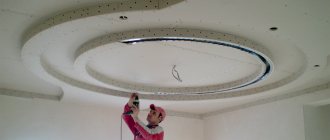
Drywall (photo) is gaining popularity. This material is simply irreplaceable when you need to level the surface. Easy to install, it is suitable for all types of decoration. The surface of such sheets can be painted or covered with wallpaper. You can install a finishing film or facing tiles on the GC, or you can decorate its surface with a decorative mixture
After you have covered the surface of the walls with plasterboard sheets, it is time to think about finishing.
Further work on finishing the walls will depend on what you plan to see in the end. In the case when wallpapering is chosen, you will need a simple putty that will seal all the joints and remove unevenness. If you plan to paint the walls, then it is easier and more interesting to decide to finish the surface with a decorative mixture.
Whatever finishing material is chosen for finishing drywall, there are certain requirements for rough finishing of walls with drywall material.
Elimination of irregularities, preparation for finishing
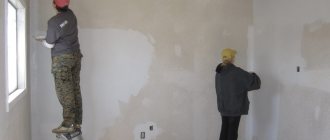
Before proceeding with any finishing option, we eliminate all irregularities, seal all seams, screw heads, potholes and roughness.
- Surface preparation is primarily cleaning, so we get rid of dust that appeared during installation of drywall. A vacuum cleaner, of course, a construction vacuum cleaner, can do this job just fine; if you don’t have one, we remove the dust with a wet rag. After this, we proceed to treat the walls with a primer, which is applied with a wide brush.
- Preparing a solution for plaster (photo), it’s easier to buy a ready-made mixture, but you can choose the dry version, then dilute it before work. If you follow the rule, then different mixtures are used for the seams and for the surface.
- To make it easier to seal the joints, they are glued with a special mesh with a sticky edge. This procedure should be carried out with caution in corners. For leveling, you can run it along the mesh with a spatula.
- We begin the process of plastering the walls. First, apply a layer of the mixture to all joints and irregularities, trying to fill the space between the sheets. We seal all protruding elements, screw heads, potholes, and bumps.
- After the first plastered layer has dried, we apply the mixture to difficult areas where there is a possibility that the plaster has not completely filled the voids. Our walls are ready for finishing.
Drywall plaster or putty - what's the difference?
It is no coincidence that the two building materials have different names. There are significant differences between them:
- Purpose. Plastering is used to level out large deviations and uneven surfaces of the base. Putty – for leveling minor unevenness.
- The size of the filler varies. Coarse-grained components are possible in the composition of the plaster mixture; the grain size can reach 5 mm. In the starting putty, the filler grain has dimensions of 80-200 microns (0.08-0.2 mm), in the finishing putty - 20-80 microns, in thin putty - up to 20 microns. The grain size affects the minimum thickness of the created layer. The putty paste intended for finishing is applied with a thickness of 0.1-0.4 cm.
- Shrinkage of putties is less.
- Plasters have higher strength.
- The cost of plaster compositions is lower.
- Application technology also varies. You can apply plaster manually and mechanically, throw it on, apply it in a thick layer. The putty composition is applied in small portions and leveled.
You can also decorate walls with putty, just like with plaster.
Tips and tricks
Needless to say, every case has nuances. Plastering drywall is no exception.
- When purchasing gypsum boards, it is better to immediately purchase moisture-resistant ones. After all, even in a dry room, water can appear, for example, the neighbors from above will flood it. Moisture-resistant cardboard will help out in such cases. You only need to remove the coating that has become unusable (wallpaper, whitewash, paint) and apply a new one.
- Plaster work starts from the ceiling.
- When preparing gypsum boards for plastering or applying putty, you need to pay attention to the joints. If cardboard comes away from the core, it is cut off; the peeled cardboard remaining at the cut line is sanded with sandpaper.
- When performing plastering work, the same conditions are observed as for ordinary plaster: temperature not higher than +30°C not lower than +5°C. Humidity up to 60%. No drafts or heaters. The electrical wiring is disconnected from the network.
- Nearby surfaces (for example, platbands) are covered to prevent splashes of the solution. Platbands, switches, sockets are covered with masking tape.
- If the choice is made between ready-made and dry mixtures, choose dry ones. They can be diluted in the required doses. Ready-made formulations must be completely developed, since they are not stored after use.
- Dilute gypsum mixtures correctly by pouring them into a container with water, scattering them over the surface of the liquid. After filling, you can mix by hand or with a mixer at low speed. Otherwise, thick lumps will form.
- If there are large chips at the joints of the sheets, these places are primed. After drying, the primer is sealed with a special adhesive composition. Subsequent work is carried out no earlier than the composition has dried.
- It is advisable to purchase dry mixtures closer to the beginning of the shelf life. It is not recommended to use expired compounds (it is fraught with serious consequences).
- The reinforcing tape is laid strictly in the middle of the seam.
- Do not add water to drying plaster or putty mixture. After this operation, the solution sets faster.
- Excess plaster gypsum mortar must not be thrown into a container with the working composition.
- Gypsum mixtures are diluted with cold water.
- To reliably plaster the joint, fill the seam with mortar, moving the spatula along the seam and making sure that there are no voids in the filling. Drips and splashes are removed immediately, since once they set, removing them will be problematic.
It is useful to support information on how to plaster drywall with a visual demonstration. Videos will help with this.
It is not difficult to do leveling plasterboard on drywall with your own hands. Many types of decorative plaster can also be done by beginners. You can learn anything if you want.
When is plastering necessary?
In addition to the fact that plastering plasterboard sheets is a labor-intensive task, it can also give unexpected results. The product may warp under a thick layer of mortar, but may last for many years.
If after covering the walls with sheets you notice serious distortions, plaster on drywall will not solve this problem at all. On the contrary, over time the condition of this surface can only worsen. Therefore, there is no need to try to correct this situation; it is better to immediately eliminate the cause.
Important! Serious coating defects must be eliminated only by dismantling and reinstalling the plasterboard material. At the same time, moisture-resistant sheets will be the best replacement.
Plastering moisture-resistant drywall is much easier. If there are minor deviations in the plasterboard sheathing, you can safely proceed to plastering. You can use plaster if there are dents and putty joints.
An exception would be the application of decorative plaster to drywall. In this case, there are no restrictions, since it is applied to the sheets in a thin layer. Also, thanks to the composition of this mixture, it sets and dries quickly.
So, we found out that in order to finish the plasterboard base without any consequences, you need to pay attention to the technology, as well as properly prepare the surface.