Home renovation is a desire for beauty and comfort. And it’s not scary if the walls are not level or there are differences in plane. The main thing is that it is visually smooth and beautiful. How to achieve this?
Few people know that the secret to the visual beauty of walls lies in a straight, clear edging. This concept refers to the following areas of application of plasters and putties:
- external and internal angles;
- junctions of walls at ceilings and floors;
- protruding parts of any structures (arches, boxes, other structures).
All these places (edges) must correspond to the intended design. Straight should be straight, oval should be oval. The former plasterer-painter achieved acceptable quality with almost his bare hands. But modern accessories simplify and speed up the process.
In fact, all of them are perforated corners for plaster. There are only two varieties of it - straight and arched, and there are many more subspecies. They are used almost everywhere where plaster mixtures with putty are used.
Right angle.
A right perforated angle can be used for internal and external corners. It can be of different widths, as well as aluminum, galvanized or plastic (polyvinyl chloride). In general, there is no difference. You can’t say that one is better or worse. But galvanized corner is more rigid than others. Especially the wider one. Therefore, it is convenient to use it as a plaster beacon.
Tip: Use good, sharp tin snips to cut the corner, as the bent edges will get in the way. On the other hand, plastic products can be cut perfectly with a regular stationery knife. If you don’t have a knife, scissors, or grinder at hand, then you can simply break the perforated angle. Uneven edges can be easily straightened with pliers, a hammer or just your fingers.
Any straight corner for plastering corners is a V-shaped profile. Its sides (shelves) have many holes throughout their entire plane - perforation. The top of the corner stands out, that is, it sticks out relative to the shelves by approximately 1 mm. Moreover, at the inner corners it sticks out inward, and at the outer corners it sticks out. Perforation is needed for reliable fastening, the top is like a guide for a spatula.
Tip: In order to cut a dozen perforated corners of the same length, you can fold them one into one, then, after measuring with a tape measure, cut off the entire pack, say, with a grinder. And 2-3 pieces will be cut through by metal scissors.
The purpose of the perforated corner and how to install it
Depending on the task at hand, this finishing accessory can be installed in two ways: on a curved corner and on a leveled one.
Finishing external corners
Processing external corners during new construction or renovation of premises can also be done in 2 ways. The first of them involves the introduction of a corner profile made of metal. This method makes it possible to plaster both combined walls at once and ultimately obtain a strong corner.
The second method is to first plaster one side of the corner using a beacon strip, and then the other.
The iron corner profile allows you to form an even and reliable outer edge of the walls without any special problems. Mesh shelves are adjacent to the central part of the profile on both sides. Their thickness can be different, depending on the model of the slats. Before you apply a continuous layer of primer, the solution that secures the profile must be allowed to dry properly.
The corner lath can also be placed on a narrow layer of plaster consistency, spread in a continuous strip from the ceiling to the floors. Then setting the profile by level is even easier. All metal corner profiles can be shortened if necessary.
The side shelves are cut with metal scissors, and the central part with a metal saw. A fixed strip can also be used as a beacon when smoothing a layer of plaster primer.
Once the mixture has set, it needs to be cut using a metal trowel, thus freeing up space for covering. It is spread as usual; the thickness is determined by the angular profile. To round the resulting plastered corner, lightly sand it with small sandpaper.
The corner is a beacon.
In the first case, the product will serve as a plaster beacon. To install it, a plaster mixture is applied to the base corner. By the way, it is more convenient to work with gypsum plaster than with cement plaster. It should not be applied along the entire length of the edging, but in such flat cakes - for the convenience of adjusting the angle along the plane and level. This adjustment is made using a building level and a plaster rule.
Tip: If you add a handful of cement or any cement mixture to gypsum plaster, the plaster beacon will set in a matter of minutes. You can continue working immediately. Where perpendicular planes intersect, it is advisable to cut the overlapping corners at 45 degrees to avoid overlap.
It should be noted that the internal perforation angle is extremely inconvenient to use as a beacon for plaster. It is only suitable to emphasize the straightness of the edging.
In walk-through areas where external corners may be subject to more intense mechanical loads, it is recommended to install a corner with a mesh under the plaster. Fiberglass plaster mesh, firmly connected to a plastic or metal corner, serves as a means of reinforcing the corner.
This type of perforated corner is used precisely as a beacon. After all, it is almost impossible to hide the mesh under a layer of finishing putty, since about 5 mm of plaster must be applied on top of it
Advice: If you want to reinforce a regular perforated corner, you can cover its shelves with a sickle mesh, covering the wall. Strips of non-woven fabric or fiberglass are also perfect for this purpose. The same putty can be used as glue.
Corner - protective cover.
If the wall, along with all its corners, is already well-plastered, then the purpose of the perforated corner will be to protect the corner from mechanical damage and emphasize a straight line.
The technology for its installation is basically the same as the first option. Only the layer of the solution used should be minimal, the consistency of the mixture should be more liquid.
To achieve this goal, a plastic or aluminum corner for plaster is ideal. In addition, it is not at all necessary to fix it with a plaster mixture or putty. After all, the base is already straight, which means that the corner should be pressed tightly against the base, hugging it.
Such installation is possible using small screws, nails or staples. You just need to make sure that the corner itself and its shelves are not deformed in the process.
Tip: Often, protruding screws and nails interfere with puttying with their heads. To avoid this, they can be removed after the corner has set.
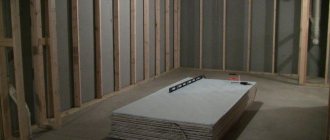
In addition, installation of a perforated corner with a minimum layer of mortar is necessary, as a rule, when finishing gypsum plasterboard structures. Of course, provided that they are assembled with more or less high quality.
In this case, a self-adhesive perforated corner is perfect - it has strips of glue on the inner sides of the shelves, which are activated by ordinary water. If there is a need to join corners, it must be done using the same materials: plastic ones are connected to plastic ones, etc.
The fact is that different corners for plaster may differ in size, which will affect during finishing.
Grouting the joint of planes and leveling
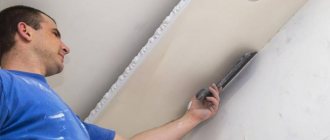
After the mortar to which the overlay is attached has completely dried, plastering work begins.
They start by leveling the entire wall, without reaching the rumbles of about 4 centimeters. Next, a solution is applied next to the corner overlay and, working as a rule, it is smoothed, getting rid of excess. The same actions are done after using a grater. Align the connecting surfaces, making sure that the corners do not begin to show through.
For internal corners there is a special spatula, with a special shape for high-quality leveling of this surface. After the wall has dried, polymerization is carried out and proceed to grouting.
The corners should be rubbed one at a time. It is necessary to ensure that the grater does not touch the material along the edges when removing it so as not to cause chips. Rub the inner corner with a sponge grater.
They start by leveling the entire wall, without reaching the rumbles of about 4 centimeters.
Plastering slopes.
Slopes on windows, doors and other openings are especially important places, since a person looking there automatically compares them with a window or door. That is, with straight lines. This means that no deviations are allowed - deviations from the lines of the window or door. As for matching the level, the windows can easily be slightly blocked.
Therefore, slopes are plastered mainly according to level. It is recommended to use a corner for plastering slopes. And, again, as a plaster beacon. If the slopes were mounted from gypsum fiber board or gypsum board, and not of very high quality, then a perforated corner will help eliminate all the shortcomings.
By the way, before installing gypsum plasterboard or sandwich panels on slopes, the basic brick slope, according to technology, must be covered with plaster. The perforated corner installed at the same time will help to correctly align the sheet of drywall.
Perforated corner for putty: which one to choose and how to attach it
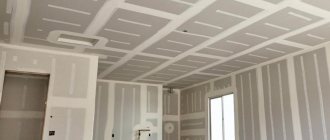
Puttying the corners of a two-level ceiling begins with the installation of perforated corners
If you do not live in a round tower without windows and doors, then your home must have corners - internal and external. And during repairs, you have to decide how to finish them so that they turn out perfectly smooth and protected from mechanical influences. If the joint between the walls and the ceiling or floor is easy to hide with a plinth/cornice, then the filling of the internal corners between the walls and the external ones formed by window and door slopes, niches and protrusions must be done efficiently. To simplify this task, special perforated corners are used, the purpose and types of which you will learn from this article.
Arched corner.
Everything is clear with the finishing of right angles. How are various arches, multi-level ceilings and other figured structures brought to perfection? After all, neither the plaster rule, nor the building level, nor even a straight perforated angle will help here.
For this purpose, a slightly modified perforated corner for plaster is used - arched. Firstly, such a corner is always plastic. Secondly, one of its shelves is cut crosswise into petals. This solution allows this accessory to be so flexible that it can follow the shape of almost any smooth curves.
Tip: When installing arched corners under plaster, you need to remember that you cannot adjust them with a level or rule. This is done exclusively visually, by eye. Help from another person and good lighting will be a good help. Before installing the corner, you need to compress it a little so that the petals do not stick out from the plaster.
The arched corner, depending on the manufacturer, can be hard or soft.
Hard is usually more expensive. But, when finishing large-scale structures with smooth shapes, it is indispensable. The fact is that his desire to straighten ensures the ideal roundness of the lines and the absence of “angularities”. But attempts to use such a corner on small decorative elements with sharp bends will lead to its fractures, which cannot be corrected.
A soft arched perforated corner for plaster allows you to finish sharper turns, for example, arches with a small radius of a circle and other curves. However, the lack of rigidity in the profile of such a corner threatens the appearance of bumps and depressions on the lines being processed. To avoid this problem, it is recommended to install soft arched corners using a plaster mixture.
With this method of fastening, firstly, there remains a chance to correct visual defects during plastering. Secondly, screws and other fasteners will not pull the bend lines towards themselves. To make the arched corners look smoother, they should be mounted slightly under tension.
Corners - savings or waste?
An accessory such as a corner for plastering slopes or any other perforation angle has a low cost: the price of a regular aluminum perforation angle is only about 40 rubles. The plastic one costs about the same. Galvanized - a little more expensive, 60 rubles. But you can buy rigid arched or straight reinforced corners for about 150-200 rubles.
And if, initially, we are talking about decorating an entire house, then you will have to order more than a dozen of these corners. Docking them is not always appropriate, so quite a lot can go into waste. Accordingly, the costs will be considerable.
But the protection for the corner that the described device provides also costs a lot. Not to mention speeding up the process of applying plaster or the visual effect. In addition, by replacing plaster beacons with corners, you can really save money on this.
Tip: Many people, far from finishing work, confuse a perforated corner with a regular finishing corner. Their main difference is that the second option is exclusively a finishing element. If the question arises of how to attach a plastic corner to decorative plaster, it can be solved with the help of liquid nails. By the way, finishing angles are also different.
When undertaking a large-scale renovation, you must definitely consider purchasing perforated corners.
Trying to do without them will definitely backfire. It is better for the master to decide which corners to purchase, because he guarantees the quality. data-matched-content-ui-type=”image_stacked” data-matched-content-rows-num=”2″ data-matched-content-columns-num=”3″ data-ad-format=”autorelaxed”>
Where and how are profiles used to protect wall corners?
You have to get acquainted with the first version of the profile corner at the stage of plastering or leveling the surface of the walls using plasterboard. Installing a plastic corner under the wallpaper makes it possible to solve two problems at once:
- Strengthen the finishing layer of putty;
- Give the outer corner an ideal geometry, at least visually the line of junction of the two planes looks quite even.
Anyone who has at least once had to glue wallpaper on walls with crooked corners will appreciate all the benefits and practicality of a simple plastic profile.
The main difference between corner profiles and decorative plastic corners is that the installation option always has perforation along its entire length. The corner does not need to be glued; it is simply imprinted into a layer of putty or plaster. Even professional plasterers always use a plastic corner in their work.
But the use of mounting profiles for leveling walls does not solve the problems of the appearance of corner edges, both internal and external, especially if the walls are decorated with light-colored trellises. Therefore, plastic corners are often installed in addition to the perforated profile.
What does it give:
- Complete corner protection. No matter how carefully the owners handle the decorative finishes at the corner joints of the walls, after a few months, or at most a year, marks, scratches and chips of the cladding will appear;
- Eliminate cracks and gaps between wall panels, especially at wall corners and baseboards, on curved surfaces;
- Dramatic improvement in appearance. Colored plastic wall corners will help you transform and significantly refresh your wall decor at minimal cost.
At the same time, it is not necessary to limit yourself to the outer corners of the walls, although they are, as they say, in plain sight and require protection in the first place. Often, a plastic corner on the corner of a wall has to be installed after the fact; it is worth rearranging the furniture once and moving the largest interior items. Scuffs and dirt can still be removed or washed, but chips and deep scratches on the walls have to be hidden.
Internal corners also have to be covered in order to disguise the transition from one type of finishing to another, for example, when simultaneously covering the corridor walls with plasterboard, MDF or DFP panels, and living rooms with wallpaper and wall boards.