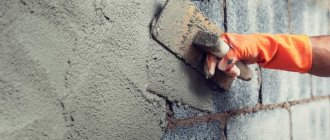
Plastering a large area by hand takes a long time and is not always advisable. Enterprising finishers have come up with a device that makes life easier: a pneumatic plaster bucket, also known as a hopper bucket. This tool will help you plaster the exterior walls of your home with minimal time.
A big plus of a pneumatic bucket is that the plaster is applied very efficiently, and you don’t need to be a professional builder to handle the tool. In addition, it is easy to make a pneumatic bucket for plaster with your own hands.
Positive properties of a pneumatic bucket.
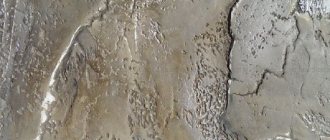
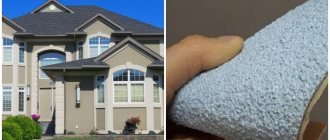
The plaster drops are smaller, they stick better to the base, filling all uneven areas. Spraying of plaster occurs at high speed: in 1 minute a master can plaster 1 square meter. m and more. The resulting pattern (“pimples”) can be left in its original form (in fact, the external appearance is the full-fledged effect of “Shuba” plaster) or an imitation of brick, stone, or block masonry can be reproduced using the embossing method. If you want another drawing, please! Until the plaster has set, you can depict anything.
Tip: the combination of a “fur coat” and a smooth surface looks especially original and impressive when different areas are painted in different colors. Use no more than 3 shades!
Other advantages of the pneumatic bucket:
convenience and ease of use;- the tool is suitable for using any plaster solutions;
- finishing speed increases 2-3 times;
- plaster consumption is reduced;
- you can plaster both horizontal and vertical bases;
- the solution adheres well to the surface and fills all defects without leaving voids;
- Various components can be added to the plaster to impart the desired properties;
- the resulting texture looks impressive, and if desired, the surface can be completely or partially smoothed before the mixture hardens.
Factory bucket: features, application.
The ladle for applying plaster can be homemade or factory-made. The latter are available in two versions: wall and ceiling. The difference is in the design of the handle: for a ceiling bucket it is bent at a right angle, for a wall bucket it is bent at an angle of 45 degrees.
These are universal tools suitable for different types of work, including:
- Application of liquid wallpaper;
- Painting with textured dyes;
- Plastering with cork, cement-sand compositions;
- Application of concrete solutions.
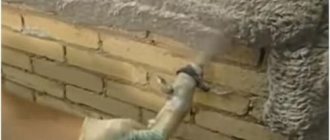
The use of a hopper (pneumatic bucket for plaster) guarantees excellent adhesion and ensures high-quality and quick application of the plaster mixture on horizontal and vertical surfaces. The solution is supplied under high pressure, due to this it sticks well to the wall or ceiling. A full ladle of plaster is produced in 4-5 seconds. This performance is achieved thanks to nozzles located at the base of the tool, where compressed air is supplied.
Plaster application technology
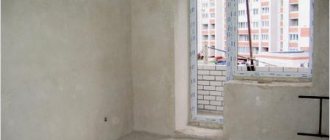
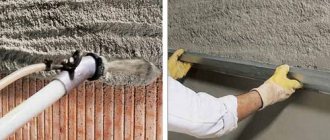
Before starting work, beacons are placed, the walls or ceiling are moistened with water. If shotcrete is planned, a reinforced mesh is installed. Since the plastering process using a hopper occurs at high speed, and in 3-4 minutes of operation of the device, about 50-60 kilograms of the finished mixture are consumed, it is necessary to make a large supply of solution in advance. It is recommended to automate this process using a concrete mixer or mortar mixer. Compositions for application, plaster proportions.
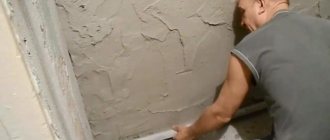
You should start spraying the mixture immediately after preparing it. The throwing distance is chosen depending on the desired result; usually a factory or homemade plaster hopper is kept at a distance of 4-5 centimeters from the surface being treated. When the process is completed, the plaster is leveled using a rule, and after drying it is rubbed down.
The bucket must be washed after use
This is done simply: its upper part is dipped in a container of water, and then the compressor is turned on to blow out the nozzles. The remaining solution is removed from the working area of the instrument manually using a rag. If you need to take a break while applying the plaster, do the same: the hopper is dipped in water and washed, but left in the container until work resumes.
How to make a pneumatic bucket yourself?
The advantage of a homemade ladle for applying plaster to a wall over a factory one is obvious: making it yourself is cheaper than buying it. Compared to the manual method of applying plaster, the mechanized method provides greater productivity.
A bucket is a container with four walls, a bottom and a partially closed top. You can make a pneumatic bucket for plaster with your own hands from a sheet of iron (stainless steel is suitable) or from an old 5-liter canister, cutting off the top from it. The front wall is necessarily metal, it is located obliquely. The sloped wall and partially closed top allow the mixture to be applied to walls and ceilings with equal efficiency.
Important! For a reverse horizontal surface (ceiling), it is better to use not cement plaster, but gypsum plaster, for example, “Rotband”, since it is lighter.
Observe the proportions: nozzle diameter – 5 mm, distance from it to the front wall of the bucket – 16-20 mm.
Make the front hole with a diameter of 10-12 mm. For connections, use steel or aluminum blind rivets. Additionally, the gun is attached to the rear wall with two pieces of duralumin. This must be done because the solution is heavy and the sprayer is usually made of aluminum. On the left (for left-handers - on the right) a handle is attached to the pneumatic bucket at an angle of 45 degrees. The handle is a ready-made gun designed for various pneumatic tools. It can be purchased at a specialty store. The same gun acts as a valve that regulates the air supply when pneumatically applying plaster to the wall. The front part of the gun is attached to a hole made in the bucket.
Device and principle of operation
The texture gun is used for applying various building mixtures to walls: primer, putty, textured paint, decorative plaster. Its other name is crumb thrower, which reflects the resulting texture. The plaster, flying out of the pneumatic gun, falls on the walls in splashes or crumbs (granules).
The diagram shows what a pneumatic plaster sprayer consists of:
The device of a cartouche gun with a tap
- A valve that shuts off the air from the compressor;
- Lever;
- Needle for regulating the supply of solution;
- Spring;
- The sleeve, turning counterclockwise, moves the needle, increasing the supply of solution;
- Pin;
- Air supply trigger;
- Washer;
- Container for plaster mortar;
- Clamp for fixing the container;
- Washer;
- Diffuser to expand the air flow and spray the mixture;
- Fixing nut;
- screw
The principle of operation of this tool is quite simple: using a stream of air, the solution is captured from the container, and then sprayed onto the wall under pressure, forming a uniform layer of plaster on the surface.
Important! The structural pattern on the wall will depend on the type of plaster, the diameter of the gun nozzle, and the pressure on the compressor.
There are several features:
- Since the tank with the solution must be held in your hands, it is made in a small volume (usually up to 5 liters).
- The air stream is supplied under a pressure of 2-6 atm. The optimal pressure is 3 atm. The air flow rate at the compressor must be at least 120 l/m.
- The kit may include several nozzles (diffusers) of different diameters. The choice depends on the consistency of the solution: the thinner, the smaller the diameter you can use.
Pneumatic application of plaster on the wall.
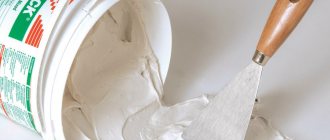
Pre-fix the beacons and, if necessary, prime the base. Dilute the ready-made plaster mixture or prepare it yourself, using cement, lime and sand in the required proportions.
Important: watch the consistency: it should be such that when you squeeze it in your hand, no moisture comes out of the mixture.
It is optimal when the composition is more rigid than for manual application. If the plaster is soft, it can also be used, but it will inevitably leak out of the ladle, have difficulty leveling, and subsequently cracking will begin.
Connect the gun and the compressor using a hose. Adjust the air supply to 2-3 atm. With your right hand, grab the handle of the tool, with your left hand, grab the handle on the container (for left-handed people, vice versa). Scoop up the mortar using a plaster ladle as a scoop. Hold the compressor at a distance of 15-20 cm from the wall, pull the trigger and fill the space between the beacons, moving the gun from top to bottom until the entire gap is plastered. Take a long board or rule and remove the excess. It is enough to plaster in one layer.
To achieve the desired size of the “pimples,” you can change the diameter of the nozzle, the thickness of the mixture, the diameter of the hole in the front wall of the pneumatic bucket, and the distance to the surface on which the plaster is applied. After experimenting for a while, you will master the plaster ladle.
Note: recommendations for working with the bucket.
- It is easiest to apply plaster on leveled bases: brick, block masonry, thermal insulation slabs, monolithic concrete walls.
Do not allow the pressure to exceed 6 atmospheres. 2-4 atm is enough, and if you need to compensate for the air supply as it passes through the hose, you can increase it to 6.- The optimal distance between the wall and the nozzles is 6-10 cm, and if you need to apply the plaster in a thick layer, keep the device at a distance of 2 cm.
- When applying plaster as a base coat for subsequent finishing, keep the bucket away from the wall and spray at maximum pressure.
Tip: use special nozzles to apply plaster mortar to hard-to-reach areas.
What is a cartouche pistol - application features
Finishing work includes gluing wallpaper, painting walls, and applying plaster. This last job requires some care. A plastering gun uses high pressure to spray the compound evenly. Drawing patterns is sometimes possible only with this tool.
This tool is useful for the following reasons:
- Labor productivity increases significantly.
- Reduced physical effort during work.
- Designed for applying various materials.
The weight of the tool without solution is 1-3 kg. The use of tanks designed for different volumes of solution is provided. The maximum value is 8 liters.
What is the difference from a hopper bucket
To apply the plaster, use a cartouche gun or a hopper bucket. The differences between these tools are as follows:
- In a pneumatic bucket, work is carried out through several nozzles. This increases the consumption of the solution when applying the solution. At the same time, the application area increases, which makes the work more productive.
- To spray evenly, you need to ensure a relatively high operating pressure in the sprayer. A more powerful compressor is required for operation.
- In a cartouche instrument, when the composition is supplied, the solution is absorbed. The hopper bucket uses the action of gravity.
- These devices differ in their primary use. A cartouche gun for applying plaster is more often used for putty, and a hopper-bucket is most effective when throwing mortar to level walls.
Note! The speed of applying plaster with a hopper bucket is higher, and work with a cartouche gun is performed more accurately and accurately.
Cleaning the pneumatic bucket from plaster.
When you have covered everything you planned with plaster, immediately clean the pneumatic bucket from any remaining mixture. If the lumps have time to dry out, they will be difficult to remove. As a last resort, immerse the tool in a container of water. The plaster will get wet and then pull away from the walls of the ladle.
Untimely cleaning leads to the nozzles becoming clogged, and the next time you turn on the device, it breaks down, regardless of whether you use a purchased tool or a home-made pneumatic plaster ladle.
How much will it cost to use a pneumatic bucket?
A pneumatic bucket made independently allows you to save money: the costs will only be on components and materials. The purchased tool costs differently, depending on the manufacturer:
- “Plaster’s Dream 1” : the cost of a ladle is from 6,000 rubles, the price of a compressor with a receiver is from 5,000 rubles.
- “Plaster’s Dream 2” : a pneumatic bucket costs from 11,000 rubles, a compressor of the required performance – from 15,000.
- “PK-1.1” : the price of the bucket is from 5,000 rubles, the cost of the compressor is similar to the previous point.
- Pistols Matrix, WESTER KP-10, “Hopper” RK-1 : can be purchased from 2000 rubles.
The consumption of plaster depends on its type. To order the required quantity, be guided by the norms:
- gypsum mixture applied in a layer of 10 mm will disperse in an amount of 9 kg/sq. m;
- cement plaster is heavier, its consumption will be 16-17 kg/m2.
To the estimated costs you need to add the cost of a hired plasterer (if you are not going to do this work yourself).
Masters, depending on experience, the market situation in your region and their own “appetites,” charge from 200 to 800 rubles. per square meter. It’s possible to find a plasterer who charges 400-500 per sq. m. m. But if you have at least minimal construction skills, you can handle plastering yourself. data-matched-content-ui-type=”image_stacked” data-matched-content-rows-num=”2″ data-matched-content-columns-num=”3″ data-ad-format=”autorelaxed”>
The subtleties of working with a cartouche pistol
When carrying out decorative plastering of walls, the mixture is sprayed in a thin layer. To create a beautiful coating, experience is important. In practice, the following parameters are usually optimal for applying a decorative layer:
- The maximum thickness of the applied layer should not exceed 12 mm. It is better if it is 10 mm or a little less.
- It is enough to use a compressor pressure of 2.5-4 atmospheres.
- The distance to the wall depends on the density of the solution used. The thicker it is, the closer the nozzle should be located to the surface. The liquid composition is sprayed from a distance not exceeding 200-250 mm.
It is recommended to plaster in two steps. The first layer is made thinner. And the second allows you to make the coating more even, hiding previously formed unevenness. Applying plaster requires significant effort from the worker. In order for the work to be of high quality, you need to avoid processing too large areas at a time.
During the application of plaster, personal protective equipment must be used. If splashing occurs not only on the wall, then a respirator and goggles will create reliable protection for the master.
The application of the layer is carried out using careful horizontal movements. During operation, pressing the lever should be uniform. The nozzle of the air plastering gun is directed strictly perpendicular to the wall surface.