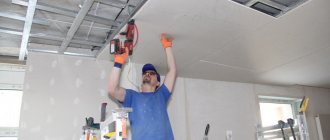
Installation of plasterboard sheets is carried out in two main ways: on the frame
or directly on the wall surface. In most cases, plasterboard is attached to walls without a frame in rooms with a small area, since the lathing takes up a lot of space and narrows the space. How and in what way frameless installation is carried out will be discussed in this article.The frameless method of installing drywall is most often used in rooms with small areas.
Advantages and disadvantages of frameless drywall installation
The frameless fastening method has the following advantages:
- Saving money spent on installation of sheathing.
- Quick installation. Basically, the duration of installation work is caused by the construction of the frame, and in its absence the process accelerates.
- This method allows you to save more free space, since the lathing takes up at least 5 cm of the usable area of each wall.
Flaws:
- If the humidity of the walls is high, drywall will quickly become unusable, even taking into account the use of moisture-resistant material.
- Finishing walls with plasterboard without a frame and profile is possible only with minor surface unevenness.
- The maximum permissible difference is 2 cm, but no more. For more significant differences, it is necessary to level the surface or use another method of attaching the finishing material.
- When using the frameless method, there is no way to hide communications.
How to properly lay drywall on walls without using a frame
Plasterboards have become a favorite material for many who decide to carry out renovations in their home. The fact is that working with them does not require special skills. The understanding of what to do with them comes literally immediately. But still, there are certain nuances that you need to know.
Thus, this material is often installed exclusively on various types of sheathing (wooden or metal). Few people know that drywall can be laid on walls without using a frame. This method allows you to save room space and carry out work much faster. And also save money, because you don’t have to purchase a profile.
What is the technology
First of all, you need to make a reservation - you cannot immediately attach sheets of drywall to the wall. In any case, preliminary preparation is required before installation. Another important condition is that leveling walls with plasterboard without a frame is possible for walls up to three meters high. This requirement applies to adhesive fastening. But, besides this, there is another method - using self-tapping screws and polyurethane foam.
Preparation
No matter how much you would like to make repairs quickly, the preparation stage is present in any work. This is a very important process that affects the final result more than even the finishing.
It all starts with choosing the necessary tools and purchasing materials. You will need:
- Various measuring instruments - ruler, tape measure, level.
- A construction knife that can be replaced with a stationery knife - for working with plasterboard.
- Hammer, usually spatulas, slats.
- A container (preferably several) is for mixing solutions.
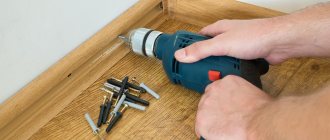
- Drill with mixer attachment. You can also use a screwdriver, but you must understand that then its service life will be noticeably reduced.
- Putty mixtures.
- Drywall sheets. Naturally, the set listed above is not universal. In each specific situation you have to add something different.
Much depends on the surface:
A brick wall requires the least amount of preliminary finishing. You just need to remove the protruding elements and cover it with a primer. Working with plaster is more difficult. In most cases it needs to be removed. Especially if there are damaged and crumbling areas. After all, by attaching a sheet of drywall to it, you can get unpleasant consequences - falling off the base, the plaster will drag the finishing material with it
Although, sometimes you can do it differently, namely, use anchors that will reach the main coating. It is important to remember that the presence of fungus is a great danger for all residents. If it is found, you will have to remove the entire coating to find and destroy the mycelium
Therefore, it would be useful to cover the surface with antiseptic preparations before starting the installation of gypsum boards. Or use a primer with special additives.
- pour the dry mixture into the container;
- pour water;
- stir with a drill with a mixer attachment;
- add either water or mixture as necessary until a creamy composition is formed (completely homogeneous).
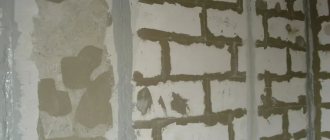
- For minor defects, up to five millimeters, a small thickness of adhesive layer is applied to the plasterboard slab (from the wall side).
- When the unevenness reaches two to three centimeters, the binder is applied at intervals - steps of 35-40 cm.
- Significant differences require the installation of mortgages. To do this, use drywall scraps. They are screwed to the walls.
- An adhesive mixture is applied to the back side. As described above, this is done depending on the surface.
- The sheet is applied to the wall. Immediately level it. They press and support with slats.
- The second slab is laid in the same sequence.
Preparing everything you need
To attach drywall without a frame, you need to plan the work and prepare everything you need:
Tools and material:
- Jigsaw.
- Drywall (the quantity is calculated taking into account the area of the walls of the room).
- Gypsum mixture.
- Level.
- Roulette.
- Container for diluting adhesive solution.
- Knife.
- Metal brush.
- Plaster mortar.
- Putty knife.
- Primer.
- Hammer.
Take measurements of the room and, based on the results obtained, cut the material. Measurements are also necessary to select the most appropriate option for the location of the material. If the standard height of the room is exceeded (2.5 m), it is necessary to prepare special inserts that will close the resulting gaps.
When calculating and cutting the material, you need to take into account that the arrangement of the sheets should be offset - to prevent the appearance of cross-shaped joints.
Before installing drywall, you need to prepare the wall: clean it of whitewash, wallpaper and paint. Existing holes must be plastered.
Alignment of walls
Preparation and leveling of walls plays an important role in the long-term operation of plasterboard coating. The complexity of their preparation lies in the material from which they are made.
The most suitable and convenient option are brick walls, which will only need to be coated with a primer.
If the walls are plastered, it is necessary to remove this coating, as it may fall off over time and deform the slab from the inside.
All other coatings, such as whitewash, old wallpaper, paint, also need to be removed.
The surface preparation process should be carried out in the following sequence:
- Tapping walls to identify weak spots and remove them.
- Removing the old coating.
- Plastering the resulting pits during the tapping process.
- Cleaning the surface from dust.
- Prime the walls with a deeply penetrating compound.
- Plasterboard sheets should also be primed.
A primer is necessary in order to preserve the finishing material from the appearance of mold, since primers have antibacterial properties that prevent the growth of fungus.
How can you cover plasterboard sheathing?
After sealing the seams and holes from the fasteners, a gypsum board wall can be painted or covered with wallpaper, covered with decorative plaster, or covered with textile wallpaper. It is recommended to cover surfaces made of moisture-resistant plasterboard with a continuous layer of putty, otherwise the green color may be visible through the finishing coat.
Also, walls can be covered with tiles, decorative stone or brick, stucco molding, and panels. It is not necessary to treat seams and marks from self-tapping screws before cladding.
Drywall is a modern finishing material that allows finishing work to be carried out with minimal labor and time costs.
Solution and methods of its use
Gypsum is used as a fixing solution. As an option, you can use starting putty or alabaster, but to increase adhesion you need to add wallpaper glue or PVA to the solution.
Frame and frameless gypsum board wall cladding
How to apply the solution for different unevenness:
- If the difference in unevenness is 5 mm, the solution is applied to a sheet of drywall in a thin layer along the edges and in the center.
- For differences from 5 to 20 mm, a special adhesive composition is applied pointwise, in increments of 25 - 30 cm.
- If the differences reach 40 mm, then you first need to attach small pieces of plasterboard to the wall using glue, onto which, after the glue has dried, the main slabs will be attached.
- If it exceeds 40 mm, the method of frameless installation of finishing material is unacceptable.
Existing installation techniques
To fix gypsum boards without lathing, you can use the following methods:
- Gluing the material to the rough base using mastic or glue. To do this, a solution is applied at the place of curvature, and it is also applied in a checkerboard pattern to the sheet. The plasterboard is applied to the wall, aligned and pressed, additionally installing a holder. There should be 10-12 mm from the floor to the gypsum board. To do this, you can put a small piece of sheathing material.
- The use of self-tapping screws and foam rubber. This method is used for large curvatures. Fixation is carried out as follows:
- make markings for the material;
- 9-12 holes are drilled on the gypsum board. Their location is transferred to the rough base;
- pieces of foam rubber are glued near these holes on the back side;
- The sleeve from the dowel-nail (plastic part) is inserted into the base according to the marks;
- The sheet is screwed to the wall with self-tapping screws.
- Combined method. Beacons are installed from below and above. The middle is filled with glue.
All methods of fixing a sheet to a rough base are applicable for various surface unevennesses.
Gluing plasterboard sheets to the base of the walls
This is the easiest way to finish interior surfaces.
Gluing technology:
- First of all, you need to prepare wooden pegs for placing them under the sheets of drywall. They are necessary to obtain small gaps between the sheet and the floor (1 cm). Gaps must also be made between the sheets - no more than 0.5 cm.
- The adhesive is applied to the sheet in the manner that is most suitable.
- As quickly as possible, but very carefully, the material is glued to the wall.
- Using a level, the unevenness of the coating is adjusted by tapping problem areas with a rubber hammer.
- After tapping, you should again carefully check the entire surface for evenness before the solution hardens.
- After leveling the surface, the plasterboard board is supported with a wooden plank.
The alignment of the sheets must be done very carefully, since drywall is very fragile and can easily become deformed.
Once the finishing material is attached, the joints are covered with fiberglass mesh and puttied. The roughness resulting from the work is smoothed out with sandpaper. After cleaning the surface from dust, it is primed and covered with the chosen method.
Installation of drywall with self-tapping screws
This method is more practical than the previous one, but the installation technology is also a little more difficult. When applying this method, you need to add polyurethane foam and thick foam rubber to the base materials.
Fastening technology:
- Having attached the cut plasterboard sheets to the wall, drill holes in 10 places that will serve as a marker.
- After removing the slab, anchors are driven in at the marks.
- Pieces of foam rubber (10 cm from the holes) are glued to the plate, which will serve as a shock absorber.
- If there are sockets and switches on the wall, holes are immediately cut in the drywall for them.
- Leaning the sheet against the wall, fasten it using self-tapping screws.
- Leveling the surface is done by unscrewing or tightening the screws.
- For high-quality fixation, holes with a diameter of 5 mm are made next to the screws, through which the mounting foam will be poured.
- After the sealant has hardened, the self-tapping screws are removed, and the holes after them are filled with putty.
- The final stage is gluing the seams and puttingty them, followed by sanding the surface.
Before pouring polyurethane foam, you need to first practice with the dosage. After the sealant comes out, you should get a spot no larger than 15 cm in diameter.
To summarize, we can say that installing drywall without a frame is a fairly acceptable way to level walls, which can be done by almost anyone without any special skills. To do this, it is necessary to correctly calculate and cut the material, as well as decide on the method of frameless fastening of drywall. If all requirements for the wall surface are met, the material will last a long time.
source: //mrgipsokarton.ru/steny/bez-karkasa
In most cases, to finish/cover walls with plasterboard, a frame is made/assembled (for this, profiles made of metal are used). Finishing using this method is suitable for large rooms. This is explained by the fact that the frame “eats up” the usable area, so this method is not relevant for small rooms.
For finishing walls in a small room, another method is suitable - frameless. In this case, there is no need to assemble a structure from metal profiles.
As for the complexity of the work, you can install drywall yourself, without a team of builders.
You can achieve this effect without using a frame.
The simplest set of tools for frameless fastening of drywall to the wall
- A plumb line, a building level and a rule, preferably 1500 mm long, to control the evenness of the original wall and the created vertical plane.
- Electric jigsaw or sharp utility knife - for cutting drywall.
- Rulers of different lengths, a square, a tape measure and a simple pencil - for marking.
- Wide, medium and narrow spatula, as well as possibly a trowel (trowel) - for applying and distributing the solution.
- Construction float – for processing putty surfaces.
- Roller and brush - for treating walls with primer.
- Rubber hammer - for adjusting plasterboard sheets glued to the wall.
- Electric drill and mixer attachment - for mixing the solution.
- In some cases, a screwdriver will be required for additional fixation with self-tapping screws.
Necessary materials
Now it is necessary to consider the materials that will be required to prepare the surface of the walls and for high-quality installation of drywall:
- Primer solution with antiseptic additives.
- Gypsum-based putty mixture, base and finishing.
- Dry construction mixture - drywall adhesive, or polyurethane foam.
- Serpyanka mesh tape - for sealing joints between sheets.
- Long self-tapping screws may be required to level the wall by adjusting the plasterboard sheets. The size of the fastening elements will depend on the flatness of the surface, taking into account the fact that they must be recessed into the wall by 50÷60 mm.
- One of the leveling technologies will require pieces of foam rubber - this will be discussed in due course.
About some materials - a little more detail.
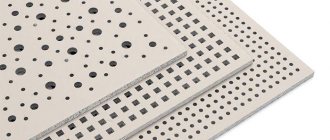
Drywall
produces not only a variety of building and finishing mixtures, but also plasterboard sheets for various purposes - this is a simple, moisture-resistant, fire-resistant and moisture-fire-resistant finishing material:
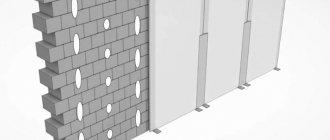
Frameless fastening methods and base preparation
Installation of gypsum boards on a wall without assembling a frame, for which profiles are used, is carried out in two ways:
- on the adhesive composition;
- on self-tapping screws.
But even before attaching the sheets to the wall (without creating a frame), it is necessary to prepare the base coating - remove the old cladding, dirt and dust.
While working, take into account some nuances - they will help you cope with the old finish:
- It is convenient to remove old paint from the walls with a spatula ten centimeters wide, cut to length (so that it does not sag during the cleaning process).
- If you need to remove wallpaper, moisten it with water. After a quarter of an hour they will easily come off.
- To remove plaster from walls, use an axe, hammer or hammer drill (putting the tool in the impact position without drilling). When removing the plaster, make sure that no areas are left that have not been cleaned.
The surface is prepared for further work
When cleaning walls (not including wallpaper), spray water periodically to prevent dust from being raised.
What can be mounted on a plasterboard wall?
With appropriate preparation, almost any objects can be mounted on gypsum board walls, including cabinets and storage water heaters. To do this, during the manufacture of the frame, so-called embedded parts are made of plywood or boards. Lumber is sewn onto the rough wall so that the front surface of the embed is in the same plane as the frame. If the mortgage is deeper than the frame, the wall will push through when attaching hanging objects.
Where to begin
To sheathe a wall with plasterboard, collect and prepare tools and materials:
List of what you will need for finishing:
- jigsaw;
- adhesive composition (gypsum dry mixture);
- level and rule;
- painting knife and lace;
- paint roller, brush, spatula and rubber hammer.
If you mount the sheets with self-tapping screws, then you will additionally need:
- screwdriver;
- foam;
- polyurethane foam and glue;
- self-tapping screws and screws with washers.
Self-tapping mounting
Brick wall cladding: features
Brickwork has a number of features that must be taken into account when fixing gypsum boards.
- When attaching a sheet with self-tapping screws without glue, they will not last long if they get into the solution. The building has its own movements, the fasteners will be unreliable.
- When applied to cement mortar, gypsum adhesive will not have good adhesion due to the difference in composition. Eventually the glue will peel off.
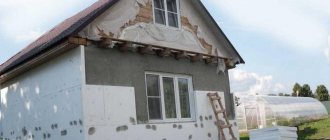
- A brick wall can collect condensation if it is thin and is affected by street temperature changes. Moisture has a negative effect on gypsum boards. In this case, you need to use polyurethane foam and self-tapping screws.
There are two ways to solve the problem of installing gypsum on brick:
- In the first case, polyurethane foam is poured into the small space between the gypsum board and the base.
- In the second, foam is applied to the surface of the sheet, and then it is fixed to the surface. This case is more acceptable, since it is possible to control the amount of foam applied to the surface of the facing material.
Use foam that has the lowest expansion coefficient - for expanded polystyrene.
Installation of facing material with screws and foam:
- One sheet is drilled in 9-12 places.
- These points are transferred to the surface.
- Pieces of foam rubber are fixed with glue near the drilled holes. It serves as shock absorbers during fastening.
- Dowels are driven into the wall at the marked places.
- The sheet is fixed with screws with wide heads, and washers are placed under them. During installation, the evenness must be measured using a level and a rule.
- Stepping 1-2 cm to the side from the fasteners, holes are drilled into the gypsum board for foam insertion.
- Foam is injected into the hole in small doses. Don't forget - foam expands.
After the foam has dried (about a day), the screws are removed along with the washers. Instead, screw in regular self-tapping screws, “drowning” the caps a little.
The first method of frameless fastening is installation with glue.
Wall finishing with gypsum plasterboard sheets without the use of frames and planks is carried out in the following order:
- The process of installing a coating without a frame begins with preparing the surface. The old finish is removed, dirt and dust are cleaned off.
Porous surfaces are primed. To reliably cover the recesses and pores, use a paintbrush.
- Next, they move on to the most labor-intensive stage - cutting out the facing material:
- draw a line along which you want to cut the sheet;
- a shallow cut is made on one side of the material;
- then a painting knife is drawn along the entire length of the drawn line;
- a break is made, then the sheet is bent inward;
- cut the material on the other side;
- cut.
- At the third stage, glue is prepared and applied. Instead of glue, building plaster is suitable. Often builders use starting putty instead of glue. But in this case, add PVA glue to the water (wallpaper will do). After the mixture is ready, it is applied to the back side of the sheet using a spatula.
Glue drywall
and using polyurethane foam (with a low expansion rate).
If drywall is installed without a frame on the surface using polyurethane foam, the sheets must be securely fixed before the composition hardens, otherwise lumps will form that cannot be removed.
Installation on polyurethane foam
- Next they move on to attaching the gypsum board sheets. It is important to take into account the degree of curvature of the base. Drywall can be glued directly to a flat wall. If the surface has crooked places (height difference no more than 40 mm), then they are eliminated by first gluing narrow strips of drywall (10 cm wide).
If the height difference is less than four millimeters, then the panels are fixed with Fugenfüller putty. With a difference of 2 mm, fastening is carried out using “Perlfix” (the mass is applied to individual areas in increments of up to 0.35 m).
The cut parts are glued vertically, in half-meter increments. Using a plumb line, attach the outermost parts, then the remaining elements. Then the sheets are pressed against the wall as a rule.
Using a rubber hammer, periodically tap the material, thereby removing bulging areas. It should be noted that hitting the tool with a hammer is not recommended.
After leveling, the sheet is supported with a board.
- The seams are puttied. Seal the resulting gap near the floor. The gap at the top (near the ceiling) is filled with putty.
Grouting the remaining seams
Frame or frameless plasterboard
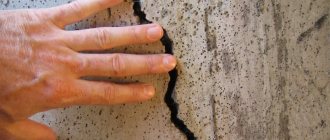
Many people, when decorating walls, are faced with the problem of uneven walls, which are found in both apartment buildings and private houses. As a rule, the structure of a building after commissioning can take almost five years to settle. It is because of this that curvature of walls and partitions occurs. In addition, the structural integrity of a building can also be affected by tremors, which are common in certain regions of the country.
Changing the current situation is actually not difficult. Today, when making repairs, many people give preference to materials that can be easily finished, and one of them is drywall. The sheets of material are not heavy, which means the structure of the structure is not overloaded. By highlighting the positive qualities, we can emphasize the environmental and engineering performance of the material, which fully meets all necessary standards.
The second method of fastening without a frame is using self-tapping screws
This type of wall cladding (without creating a frame) is more difficult to complete than the first option. However, it is considered more reliable. This method is used when finishing surfaces with large curvature.
Sheathing without creating a frame is possible if the height of the walls does not exceed 3 meters.
The finishing process using self-tapping screws without assembling the frame:
- The sheet is applied to the surface. Make small holes for fasteners. They should be spaced evenly. There should be a total of ten (eight allowed) holes per sheet.
- Then the plasterboard is removed. Dowels are inserted into the holes made.
- On the next stage, thick foam rubber is glued to the drywall, ten centimeters away from the drilled hole.
- Then the sheet is attached to the wall with screws and washers.
- Drywall
is installed in a vertical position, which is checked using a level. Then screw in/unscrew the fasteners - self-tapping screws. - Work similarly with all subsequent sheets.
- Next, a hole is made near each screw (about seven millimeters in diameter). Polyurethane foam is pumped there.
- Fix all sheets.
- After the foam has hardened, the screws are removed. The resulting holes are puttied.
- The seams are puttied and then sanded.
Sheathing walls with plasterboard without installing a frame is carried out before laying the floor covering. Please note that finishing work is carried out at a temperature not lower than +10 degrees and normal humidity.
Keep in mind that before installation, drywall must rest for two days in the room in which it will be installed.
source: //gipsohouse.ru/walls/631-otdelka-sten-gipsokartonom-bez-karkasa-i-profilya.html
One of the most convenient options for wall repair is covering the floors (reinforced concrete and wood) with plasterboard. The material has a number of advantages and allows you to carry out work with a minimum amount of dirt and dust. In addition, with the help of gypsum boards you can not only level walls and ceilings, but also install partitions. This will allow you to make any layout in the room or divide the room into zones. How to properly install drywall on walls and what methods can be used? The next article is about this.
What you definitely shouldn't do
Recently, while browsing information on the Internet, I came across another “interesting” method of installing drywall using self-tapping screws without a frame. Some unfortunate master was describing a supposedly working technology.
Maintain the bottom clearance.
It all sounded something like this: first, as in the method described above, a sheet of drywall was tried on the wall. A series of holes were drilled in it, and then in the wall itself, into which plastic “quick installation” dowels were inserted.
After this, several foam rollers were glued to the inside of the sheet. According to the plan, they should act as shock absorbers when the sheet is leveled. Then, without any glue, the sheet was aligned vertically using self-tapping screws.
At the last stage, the most interesting thing happens: the author recommends drilling another hole with a diameter of about 10 - 15 mm next to the screws. And virtually blindly inject polyurethane foam into these holes. It is assumed that the foam should fill the voids and at the same time firmly glue the drywall to the wall.
I very much doubt that the person who recommended this method has ever used it himself. It's no secret that polyurethane foam expands very strongly. And during expansion, it can create quite a lot of pressure.
Determining the depth of curvature of walls using a plumb line.
I had a case when, while insulating a wooden door opening, I poured a little more polyurethane foam than necessary. So, during expansion, the foam moved a powerful wooden beam.
In our situation, I can say with full responsibility that if you pour polyurethane foam between the drywall and the wall, it will simply warp. As a result of pressure, the sheet will at least go in waves.
And if you make a mistake with the dosage and pour in too much foam, the sheet may even break or be torn off the screws, because they stand firmly. So keep in mind, polyurethane foam is a good thing, but you don’t need to pour it anywhere.
Scheme for attaching sheets to a brick wall.
Options for covering walls with plasterboard
There are two main ways to finish gypsum board walls: framed and frameless. In addition, you can use several options for installing the frame using different profiles. Each option has a number of advantages and limitations in application. Therefore, to begin with, it is worthwhile to analyze the features of each design and choose the most suitable option for a particular room.
There are three main ways to install drywall on a wall:
- on metal profiles;
- on a wooden frame;
- using glue.
Metal is most often chosen as the frame material. Wood is less durable, “afraid” of moisture and is better suited for cladding wooden walls. For example, in country houses. Therefore, for standard city apartments it is recommended to use either a metal frame or glue.
A comparative description of cladding methods in terms of basic consumer characteristics is given in Table 1.
Table 1 - Advantages and disadvantages of various wall covering options.
| Characteristic | Frame method | Glue mounting |
| Labor intensity of work | – | + |
| Possibility of installation on uneven surfaces | + | – |
| Price | – | + |
| Possibility of installing sound insulation | + | – |
| Space Occupied | – | + |
| Reliability and durability | + | – |
Based on the table, it can be seen that installing drywall on walls with your own hands is easier and cheaper to do without a frame. But if there is significant curvature of the floor or a large number of defects, this method will not work. In addition, glued sheets cannot be decorated with tiles and sound insulation cannot be installed under them.
As a result, we can draw the following conclusion: it is difficult to say which method
better. The choice will depend on the area of the room and the operating conditions of the future structure. In any case, to create high-quality wall decoration you will have to work hard and spend a lot of time.
Selection of tools and components
To install plasterboard sheets on walls without a frame, you will need the following list of materials and tools:
- drywall;
- start profile;
- guide profile;
- straight suspension;
- profile extension;
- dowels;
- self-tapping screws;
- connectors;
- materials for finishing (tape, primer, putty);
- knife (for cutting gypsum board);
- metal scissors;
- perforator;
- tape measure and pencil;
- screwdriver (preferably);
- laser level.
For the frameless method, the list will be an order of magnitude shorter:
- gkl;
- seam tape;
- putty;
- finishing putty;
- primer;
- Perlfix glue;
- tool for cutting sheets and taking measurements.
Once all the necessary components have been purchased, you can begin installation. The following are instructions for installing drywall on walls in various ways.
Materials and tools
When planning to build a plasterboard wall, you need to choose the right materials and have all the necessary tools with you so that the work process takes as little time as possible and does not take a lot of effort and energy. In order for the wall to be strong enough, a frame made of a metal profile is erected for it. There are different profiles for different purposes.
Most often, two options are used for such structures:
- A profile, but which will be attached directly to the drywall itself. It is smaller and conventionally designated as “D”.
- The profile with which the main frame of the wall will be erected. It should be more powerful and larger, conventionally designated as “W”.
For each of the above profiles there are two more options, one of which is a support one and is designated “C”, and the second is a guide and is designated “U”. The guide profile is simpler; it has a U-shaped structure and smooth walls. The support profile is inserted into it end-to-end. It also has an additional difference from the guide in the form of ribbing, which gives greater strength to the material and does not allow it to bend spontaneously.
As the main load-bearing element of the frame, you need to use a supporting and smaller profile, to which the sheet of drywall will be attached. Its size is 60 by 27 millimeters. As guides to secure such a structure, you need to use a narrow guide profile with dimensions of 28 by 27 millimeters. In order to form a wall frame, you need to take a supporting and large profile with dimensions of 50 by 50, 50 by 75 or 50 by 100 millimeters. A large guide profile with dimensions 50 by 40, 75 by 40, 100 by 40 is used as a guide for this design.
There is another profile option, which is a thicker and reinforced version of the large support profile. To build simple walls, only wide profiles are used, but for more complex structures in which it is planned to lay any communications, it is necessary to use thin profile options.
In order for the profile to be connected into a frame, you need to have a direct suspension or use a universal connector. The twisting process is carried out using small flea screws, which have a drill at the end. In addition, special metal screws are used that have a countersunk head. To secure the frame to the wall, you cannot do without plastic dowels and impact screws.
The optimal thickness of plasterboard sheets for a wall is considered to be 12.5 millimeters. A mandatory element must be a wide chamfer on the side of the sheet. Depending on the room, you need to choose the appropriate material - for the kitchen and bathroom you need a moisture-resistant sheet, and for an ordinary room, an ordinary one will do. A distinctive feature will be the color - for moisture-resistant sheets it is green, for ordinary sheets it is gray.
Thus, the sheathing of a plasterboard structure is most often made from a metal profile, but in some cases wood can also be used. Depending on the type of structure, you can choose one or another material and select its thickness.
Tools that will be needed during the construction of walls made of plasterboard sheets:
- tape measure at least 3 meters long;
- level at 80 or 120 centimeters;
- plumb lines;
- fishing line with rope;
- corded or cordless screwdriver, impact drill with attachments for self-tapping screws;
- perforator;
- scissors that can be used to cut metal;
- construction knife for cutting drywall sheets;
- plasterboard float.
Installation of drywall without frame (with glue)
Installation with glue has some features depending on the level of wall deformation. For example, for surfaces with defects of no more than 4 mm, the method of fixing gypsum boards using Fugenfüller type putty is suitable. If the size of the irregularities is up to 20 mm, then Perlfix glue is used for cladding. For defects up to 40mm, first you need to stick gypsum board strips onto the surface, and then install sheets of material using putty.
Before you start installing drywall on the walls with your own hands, you should pay attention to some nuances:
- room temperature (it should not be below 10 degrees);
- drywall should “lie” for a couple of days in the place where it will be installed;
- in rooms with high humidity, only moisture-resistant material can be installed;
- the walls must be cleaned of layers of old plaster, wallpaper and other elements of previous repairs;
- The finished glue hardens quite quickly, so you need to dilute the powder with water immediately before starting work.
The process of installing drywall begins with marking and cutting the material. At this stage, you should prepare the holes in which the sockets and switches will be located. After this, the surface is treated with a primer and left until completely dry.
When cutting sheets, we must not forget about the gap that should be between the sheets and the floor. It is subsequently closed using pads, which are removed at the end of the repair, and the gap is completely sealed.
The glue is applied to the back side of the sheet in the form of piles every 300 mm. Next, the gypsum board is pressed against the wall and leveled until the glue has completely hardened. The sheets are installed very tightly to minimize joints and prevent the formation of gaps. The installation is coming to an end. All that remains is to seal the joints, carry out the finishing touches and seal the gaps between the walls and the floor.
How to level walls with plasterboard without a frame using glue
Before attaching drywall to the wall, it is important to prepare the surface. To do this, use a metal brush to remove dust and loose plaster from the wall.
If the wall surface is porous, it will need to be treated with a primer.
Further actions:
- Cut out the sheets. Before attaching to the walls, you need to think about the placement of the sheets. The main condition here is to avoid cross-shaped joints.
- Preparation of the adhesive mass. Depending on the unevenness of the wall, the composition of the solution may differ. If the difference is up to 4 mm, “Funenfüller” putty is selected; if the difference is up to 20 mm, “Perflix” is used. The putty is mixed with water until it reaches the consistency of sour cream.
- Applying glue to drywall. Again, depending on how crooked the walls are, the glue is applied in different ways. When the discrepancy is up to 4 mm, the mixture is applied to the entire surface of the sheet in a small layer. Up to 20 mm, the glue is applied in separate dots with an interval of no more than 35 cm. If the discrepancy is even greater, ten-centimeter gypsum board strips are used, they are attached to the wall and the sheets are mounted directly to them.
- Gluing the sheet. Drywall is pinned to the wall neatly and quickly. After aligning the slab along the bottom edge, the sheet is pressed tightly against the wall.
- Adjustment. Convexities are corrected using a long building level or rule. The protruding places are tapped with a mallet.
After all the bulges have been eliminated, for reliable fixation, the sheet is supported for several hours with a wooden board.
If the curvature of the walls exceeds 40 mm, guides are attached to the walls in places of strong deviation. Also, in areas of strong depressions, you need to apply more glue. The joints are processed longer and the rough finishing of the walls is carried out.
Installing plasterboard on a metal frame
This method is more labor-intensive and expensive than the previous one. But such a design is not only more durable and reliable, but also allows you to maximally level any surface. It is better to first watch the entire procedure for installing plasterboard sheets on the walls in a video, and only then implement it.
The order of operations will look like this:
- marking based on the most protruding point of the wall using a level;
- fastening the starting profile to the ceiling using dowels;
- installation of hangers on the wall surface;
- installation of guide profiles and connecting it with hangers and starting profile;
- installation of sound insulation and wiring;
- fastening gypsum board sheets with self-tapping screws;
- seal the seams and apply a decorative coating.
The final finishing can be done in several ways: laying tiles, wallpapering or simply painting. Important: tiles can only be laid on a wall made of two layers of gypsum board! In any case, the strength of a double wall will be higher than a single one. But this will also affect the price.
There are many different instructions online for how to properly install drywall on a wall. Is there detailed information on how to properly hang heavy objects (for example, a TV) on the gypsum board? What tool will you need for this? The answers to these questions will be useful to every novice repairman.
source: //ogipse.ru/74-professionalnye-tonkosti-montazha-gipsokartona-na-steny/
Sheathing methods
GCR surfaces are decorated in 2 ways:
- According to the frame.
- Directly on the wall or ceiling.
The frame is usually made of galvanized metal thin-walled profile, but it can also be made of wood. When fastening sheets without a profile, special glue and dowels with self-tapping screws are used.
GKL sheathing on a frame: technology
When attaching material using a frame, it is very important to mount it correctly.
- The guides attached to the walls must be strictly vertical, as well as the intermediate racks.
- The distance between the centers of the posts should be 600 mm, i.e. such that the joint of the sheets falls on the profile.
- To strengthen the structure, you can reduce the size to 400 mm.
- If it is necessary to join sheets vertically, install a horizontal profile to tie 2 sheets together.
- Drywall is attached to a metal frame with black metal screws, 25-32 mm long, and to a wooden frame - with wood screws of the same length.
- To improve the strength and insulating properties, lining with sheets in 2 layers is possible. In this case, the sheets are sewn in a checkerboard pattern.
How to sew drywall without frame
GCR without using a frame can be fixed with special glue or mechanically, using dowels and self-tapping screws. It is possible to combine these 2 methods, first securing the sheets with an adhesive composition, and after it has dried, with self-tapping screws. At the same time, it is important to fasten the drywall with hardware in those places where the glue is applied, and not between them, because the coating can be deformed and even broken.
GCR decor
Walls and ceilings made of plasterboard are painted, covered with wallpaper, plain or for painting, and finished with decorative plaster compounds. The walls are lined with tiles, decorative bricks, stone, etc.
Suspension
Only light objects, such as photographs, decorative shelves, and lightweight mirrors, can be hung on plasterboard walls. To screw self-tapping screws into gypsum boards, special dowels are used: driva, molly or “butterflies”. Provided that the location of the profile is known exactly, you can tighten metal screws to hang various objects directly into the frame elements. To fasten heavier objects (cabinets or bookshelves), it is necessary to arrange special mortgages.
GVL classification and labeling
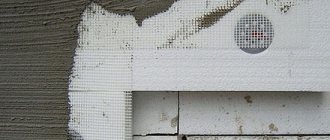
The gypsum fiber sheet used today varies, it all depends on its application. There are those that can only be used for dry rooms, and there are those that are suitable for conditions of high humidity. Manufacturers offer regular and moisture-resistant gypsum plasterboard, which can perfectly replace even tiles in industrial premises characterized by high constant humidity (the walls must be puttied before installation!).
Characteristics of gypsum fiber.
In addition, GVL sheets are divided into standard and small-format. The dimensions of standard slabs are: 2500 mm – length, 1200 mm – width, 10/12 mm – thickness. Small-format sheets have dimensions: 1500 mm – length, 1000 mm – width, 10/12 millimeters – thickness. Such small sheets are very convenient to install on walls in bathrooms and toilets using the frameless method (the walls must then be puttied with special moisture-resistant compounds).
All sheets that are used for installation on walls have a marking on the back side containing the characteristics of the sheet, its date of manufacture, and the name of the company that produced the material. The marking must necessarily contain information on the type of longitudinal edge of the slab, the exact name of the material (regular or waterproof), and the dimensions of one sheet in millimeters; designation of the group to which the material belongs.
Installation
Wall priming scheme.
Installation of GVL can be carried out on cleaned walls or after they have been putty (this depends on the condition of the wall). For this, the adhesive method is used, when the slabs are glued to the surface using gypsum putty or special glue. This can be done in several ways depending on the curvature of the wall; in some cases it is necessary to putty them first.
For the frame method, a special galvanized metal profile or wooden slats are used, to which the sheet is screwed.
DIY frameless installation
Stages of laying gypsum boards on the floor
For gypsum fiber sheets, the frameless method is rarely used, but for the walls of residential premises, gypsum fiber boards are the most preferable option. Installation using this method is carried out in the following sequence:
- If the walls are uneven up to 4 mm, the sheets must be glued directly to the surface of the walls using gypsum putty, which is applied in longitudinal ridges in a fairly thin layer along the perimeter of the gypsum fiber board, after which the sheet is glued to the wall.
- If the unevenness is 4-20 mm, the sheets are laid using a special glue, for example, Perflix. The composition is applied to the surface of the gypsum fiber board in the middle and along the perimeter of the slab in increments of 30-35 centimeters.
- If the unevenness is very large, from 20 to 40 mm, then installation is more difficult. First, with your own hands, using special glue, strips of gypsum fiber board with a width of 100 mm are glued to the surface of the walls, and only then the slabs themselves are glued to them using gypsum putty.
Installation using the frameless method is carried out as follows:
Scheme for attaching drywall with glue.
- Installation must be carried out before the final floor covering is laid. The room temperature should be between + 10°C. The sheets themselves should be kept in the room where the installation will take place for two to three days before work. Humidity and temperature conditions must be maintained for the entire installation period; For very wet rooms, such as bathrooms, it is better to use plasterboard moisture-resistant boards.
- If necessary, the walls must be prepared and cleaned of remnants of the old coating. If the surface delaminates, then strengthening measures should be taken. The wall is puttied, it must dry, after which installation can begin.
- After the puttying is completed, you should use a building level to correct the verticality of the walls and the presence of unevenness (the choice of installation method depends on this). The location of the slabs is marked on the surface. If necessary, the walls are treated with a primer.
- GVL slabs are cut out, holes are cut in them for switches and sockets. The height of each piece should be such that there is a gap of 8-12 mm at the bottom. After installing large slabs, small sections are installed below to bridge the gaps. To be on the safe side, the sheets can be screwed to the wall surface with self-tapping screws.
- The GVL boards themselves are glued to the wall using special compounds according to the chosen method. This is done with a calibrating notched trowel; after applying the mixture, the sheet is leveled using a mallet. If you plan to mount any furniture on the wall surface, then glue must be applied to the entire surface of the gypsum plasterboard.
- Apply the adhesive in an even layer and constantly ensure that the installation level is maintained at the same level. This is usually done using a stretched thread. The DIY installation itself starts from the corner. Gradually, the entire room is covered around the perimeter. To cover a wall made of wood, all sheets are additionally fastened with self-tapping screws or tar nails with very wide heads.
After laying gypsum fiber sheets on the walls of the room with your own hands, it is necessary to putty all joints and fastenings with nails so that the surface becomes perfectly flat. When the mixture has dried, you can begin further finishing.