Advantages of extruded polystyrene foam
Expanded polystyrene (EPS) is a heat-insulating material consisting of 98% air.
Outwardly, it resembles polystyrene foam, but other characteristics of these insulation materials differ. Expanded polystyrene boards are used for insulation and partial sound insulation of walls. Advantages of expanded polystyrene:
- high degree of thermal insulation;
- vapor permeability;
- moisture resistance;
- strength;
- does not react with cement, which makes it possible to plaster PPS boards;
- does not support the development of mold and fungi;
- If the installation technology and operating rules are followed, the service life of the material is up to 30 years.
Features of working with extruded polystyrene foam
Plastering extruded polystyrene foam has a number of differences due to its physical characteristics.
The most characteristic properties that show the nuances of working with this material are:
- moisture is not absorbed into the insulation boards, so all the water from the facade remains inside the finishing layer;
- the coefficient of expansion (temperature) of polystyrene foam does not correspond to this indicator for plaster mixtures, therefore, due to temperature changes, the coating applied to the slabs may crack and fall off;
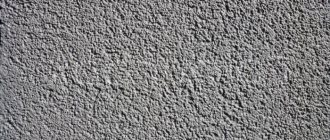
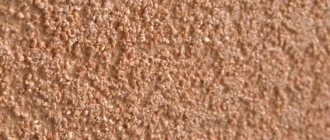
- The surface of the insulation is smooth, dense, irregularities and micropores are virtually absent, which makes it difficult for the solution to adhere to it.
If the material is too smooth, it is roughened
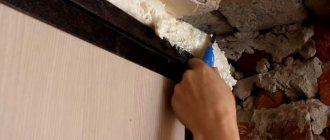
Before starting work, you need to apply a small amount of plaster mortar to the slab and wait a day. If the coating was difficult to apply, cracked or fell off after drying, then additional treatment of the contact layer should be carried out.
It consists of increasing the roughness of the interacting part of the slab using a needle roller or small plastic brushes. Afterwards, a special primer and reinforcing mesh should be applied. The latter is fastened either with a special adhesive composition or with the residue left over from working with insulation.
Due to the low adhesion ability and weak adhesion, the thickness of the applied layers of the solution should not exceed 3 mm.
Extruded polystyrene foam requires a plastering technology that differs from the standard process.
DIY plastering technology with mesh
It is possible to carry out finishing work on your own. To obtain a flat surface, it is necessary to follow the rules for preparing the working surface.
Using polyurethane foam, seal the joints between the insulation sheets and remove any excess. Check that all fastener caps are recessed into the foam. Secure the reinforcing mesh over the entire area of the working surface.
The technology for insulating a facade with polystyrene foam under plaster is as follows:
- Gluing the mesh begins from the corners of the building; for this it is necessary to cut a strip of mesh 30 cm wide, the length of the strip depends on the length of the area on which the façade mesh is applied. The plaster is applied using a spatula to the required areas, and a mesh is placed on top. Using a spatula, gently press down and smooth out the mesh. Cover all corners of the building and hard-to-reach places in this way.
- The next step is to glue the mesh onto flat areas of the walls. Apply a 3mm layer of plaster. and spread the mesh on the surface using a spatula. For uniform application, it is advisable to use small pieces of mesh of 1 m. Pasting the insulation with mesh is done by applying the edge of one sheet of mesh to another. Using this method, cover the entire work surface.
- After the reinforcing layer has completely dried, the surface of the walls is rubbed using an emery sheet.
- The leveling layer of plaster mixture is applied evenly over the entire area of the surface to be treated.
- The most important step will be rubbing the leveling layer of plaster. The quality of the work performed will determine how equal the surface of the façade walls will be.
- Priming the resulting surface will help remove dust and enhance the adhesive properties of the finish.
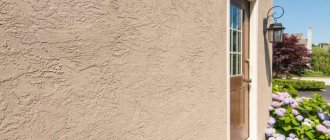
The application of decorative plaster intended for the design of facades will be the final stage in the finishing work. Subsequent painting of the walls will give an aesthetically attractive appearance to the facade of the building. A high-quality and durable result can only be obtained by strictly following all stages of applying plaster to polystyrene foam.
Why is it necessary to plaster a facade insulated with polystyrene foam?
The popularity of extruded polystyrene boards for external insulation of facades is associated with its properties:
- low cost;
- high heat and sound insulation properties;
- a simple installation technology that allows you to cover the façade of your home with them yourself.
But with all the advantages, this material has several disadvantages:
- the slabs are extremely unstable to ultraviolet radiation, wind, precipitation and may lose their properties over time;
- a house insulated with extruded polystyrene foam does not look aesthetically pleasing.
To compensate for these disadvantages, the foam is covered with a finishing material.
Preparing the penoplex surface
Penoplex (more accurately called extruded polystyrene foam), which was installed on the external wall of the house for insulation, can and should be further processed. In order for the plaster to protect this insulation, guarantee fire safety, create aesthetic appeal, and evenly smooth out unevenness, you need to properly prepare the surface, choose the right putty material and apply it correctly.
Tools and materials that will be needed for proper plastering of penoplex on the exterior walls of a residential building:
- wide spatula or American;
- polyurethane foam;
- scissors for cutting the reinforcing mesh;
- narrow spatula (10-12 cm);
- primer;
- grater (to remove excess foam);
- building level;
- fry;
- notched spatula (for the so-called pulling of the surface of the adhesive composition for the reinforcing mesh);
- rule;
- stationery knife;
- umbrella dowels, a hammer drill for making a hole for the umbrella and a hammer (if necessary);
- metal construction corners;
- construction mixer (for mixing);
Tools for plastering penoplex outside the houseSource kraski-net.ru
- primer (deeply penetrating);
- a brush with an emery base or sandpaper;
- container for stirring construction and finishing mixtures;
- a rag or rags (to remove dust from the surface before starting work);
- reinforcing mesh (the smaller the cell, the better the reinforcing properties of this material);
- flat containers for diluted building mixtures;
- roller for applying primer;
- plaster.
To ensure that the insulating polystyrene foam surface is ideal for plastering, you will need to check the following points:
if there are gaps between the plates of material, it is necessary to fill them with polyurethane foam intended for heating installation work, and cut off the excess with a knife and rub it with a float;
How to seal gaps between foam boards using polyurethane foamSource vdome.club
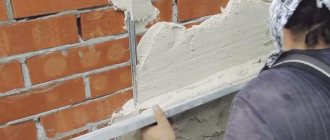
If one or more “umbrellas” have been cut off, it is necessary to install new ones next to them so that the strength of the structure is not affected. To do this, you will need to select a suitable place near the cut umbrella dowel, make a hole there using a hammer drill, install the “umbrella” and carefully drive it in with a hammer. In this case, the head of the fastener should sink slightly into the foam insulation material.
All umbrella dowel caps must be recessedSource stroi-baza.ruAfter eliminating the flaws in the installation of penoplex, be sure to remove dust from the surface with a rag and only then prime it. To do this, you will need to purchase a deep penetration primer and dilute the dry material as indicated on the manufacturer’s packaging. To conveniently apply the prepared mixture, you need to take a flat container and a construction roller. Before applying the mixture, you need to squeeze it out a little. After evenly distributing the primer over the surface of the penoplex, you must wait until the finishing material has completely dried.
When the surface has become smooth and primed, you can begin reinforcing. To do this, you will need directly alkali-resistant mesh with a density of 140-160 g/m2 made of fiberglass material, perforated aluminum corners and special glue.
Installing mesh on penoplexSource baumitpro.com.ua
To reinforce penoplex, you need:
- make the glue so that it is a little thinner than the manufacturer advises on the factory packaging;
- cut the mesh so that their length matches the height of the walls, and the width ranges from 60 cm to 100 cm (allowances must also be taken into account);
- apply an adhesive composition approximately 3 mm thick to the penoplex;
- walk with a notched trowel over the entire treated surface to level the layer of mesh adhesive;
- quickly apply the mesh to the pre-designated gluing area using a small trowel or a wide spatula, using the technique of circular or vertical movements (each subsequent piece of the surface for gluing the mesh must be processed gradually from top to bottom or bottom to top, but without changing direction);
- the corners need to be secured using special metal corners (if there are none, you can use a bent mesh);
- After installing the next part of the mesh, it is best to apply another layer of glue on top so that the mesh is completely immersed in the adhesive composition.
Corner reinforcementSource sense-life.com
Types of finishing mixtures
Plastering work involves leveling and protecting the surface with a small layer of a special mixture. The difference between mixtures for expanded polystyrene is that they contain substances that penetrate well into the porous structure of the foam. Such mixtures can be used for interior work and exterior facade finishing.
There are two main types of plaster mixture for polystyrene foam: mineral and acrylic.
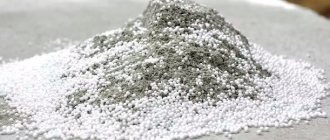
Mineral plaster mixture:
- consists of a mixture of cement, lime and mineral aggregates;
- resistant to precipitation and temperature changes;
- has a high level of adhesion;
- service life is about 10 years.
The main disadvantage of this type is that it is not very elastic and over time the façade may become covered with cracks.
Acrylic mixture:
- consists of a mixture of acrylic resins and minerals;
- elastic;
- resistant to atmospheric conditions and temperature fluctuations;
- has a high degree of adhesion;
- service life up to 25 years.
The main disadvantages of this type of mixture: high price and ability to absorb dirt.
Which plaster should you choose to use:
When you begin work, you need to figure out what types of plaster you will use to complete the foam plaster work.
In construction practice, these types of solutions differ:
- Mineral plaster.
It is made of cement and various polymer additives. It practically does not absorb moisture, resists fungi and mold, is easy to work with new craftsmen, the price is low, which makes it an ideal finishing material. - Acrylic plaster - with a high degree of elasticity, excellent resistance to unpleasant environmental factors and ultraviolet radiation.
It is recommended that this mixture be used in areas with high humidity because cement does not withstand moisture.The price of acrylic is higher than cement.
- Silicate mixtures are effective, elastic, have good antistatic properties, vapor permeability, and resistance to precipitation.
It can be used for interior and exterior decoration.
Pay attention to the choice of gypsum, which is the best quality in acrylic compounds. The latter are resistant to silicate mixtures, even less resistant mineral ones. You should know that texture affects texture - more textured plasters that are environmentally resistant
You should know that texture affects texture - more textured plasters that are environmentally resistant.
alabaster
Popular plaster manufacturers:
The construction market offers a wide range of mixtures suitable only for penoplex.
In addition, one manufacturer may offer several items. Some of them serve to connect panels, while others perform protective functions
Your attention is drawn to the characteristics of the most famous manufacturers:
- The Ceresit mixture must be additionally colored.
The acrylic mixture is UV resistant and silicone durable. All products are of high quality and reliability. - Ecomics mixtures are designed for use indoors and outdoors. Resistant to high humidity, environmentally friendly. But the end cannot be completed during the cold period when the temperature indicator drops below 7 degrees. With their help you can eliminate cracks, marks and deformations.
- Stolit mixtures.
The products use the highest quality cement with the addition of stabilizers and modifiers, which allows the material to be used at low temperatures.
Blend selection
Many developers do not know how to plaster polystyrene foam outside the house, and are constantly wondering whether it is possible to plaster polystyrene foam with cement mortar.
Plastering a polystyrene foam surface with a solution based on sand and cement is not allowed, as it begins to quickly peel off from the slab surface
In this regard, the first layer is made with a plaster composition specially designed for this purpose. In addition to cement material and sand, it contains an adhesive composition and other additives that ensure reliable adhesion to the surface. By applying such a mixture to the insulation, it is possible to create a base coating from a traditional solution.
Sable fur coat for the home: characteristics of penoplex and its advantages
Penoplex is an insulation material produced in a special extrusion plant that appeared in America more than 50 years ago. The material is produced in slabs of different thicknesses, which look like polystyrene foam. It is ideal for insulating buildings, both outside and inside, as it has a number of advantages. It demonstrates excellent technical characteristics, for example the following:
- Durability;
- wear resistance;
- environmental friendliness;
- safety;
- density;
- compressive strength;
- moisture resistance;
- frost resistance;
- resistance to rotting;
- biological passivity;
- ease of installation (here is the article);
- soundproofing;
- low thermal conductivity;
- resistance to the harmful effects of chemical factors;
- possibility of plastering, painting, gluing;
- unattractiveness to rodents (they cannot stand this material, although there are exceptions).
Penoplex is ideal for insulating indoor and outdoor walls, foundations, floors, ceilings, and roofs. For such a luxurious fur coat, your home will say: “Thank you”!
Basic materials and accessories
Work related to construction and finishing is constantly accompanied by quite serious financial costs. It is quite difficult to calculate and purchase exactly according to the estimate several types of plaster mixtures and adhesive compositions at the same time, as is done by professional builders. This gives rise to an irresistible desire to simplify the process by laying façade plaster over foam plastic.
The building materials market today offers consumers a huge number of adhesive mixtures. Well-known manufacturers produce not only universal compositions, but also special mixtures based on acrylic and cement. The first option is cheaper, but it is not recommended to use it. As a rule, the following building materials are purchased as plaster for exterior use for finishing polystyrene foam:
- glue for constructing a reinforcing base on polystyrene foam. The material is special and is not suitable for fixing ceramics or foam;
- a mesh made of fiberglass material, the density of which is 150 - 160 g per square meter, used in an alkaline environment. It has a special coating that improves the adhesion of glue and fibers.
The adhesive composition used to create the reinforcement contains additives that take part in an alkaline reaction, which allows the mixture to reliably adhere to walls lined with polystyrene foam boards.
Decorating the coating
Before plastering the penoplex with decorative material, you need to apply a primer using a roller or paint brush.
This composition provides a sufficient level of adhesion, which significantly increases the service life of the finished coating. In addition, primers provide protection against fungi and mold. Most often, structural or textured plasters are used to decorate facades. In the first case, the application process is as follows:
- First, apply the solution with a spatula and level it. The thickness of the layer should be equal to the grain size of the material.
- After several hours, when the plaster has set, you need to rub it again. Only now they use not sandpaper, but a trowel or grater. The tool is pressed against the wall and processed with vertical movements.
- The wall is then left to dry, after which paint is applied in two layers. The first coat of paint should be slightly darker than the second.
- After the paint has dried, the surface is treated with varnish.
Textured surfaces are designed in the same way as structural ones, but instead of grouting, a different technique is used. It involves applying relief designs with a roller or brush. It is also permissible to use special stamps or a regular sponge, which are simply touched to different parts of the surface, leaving marks. After drying, textured plasters are painted and varnished.
After grouting, plastering of penoplex is easy and relatively quick. To decorate the coating, you can use a sponge with large pores or a special grater.
There are ready-made decorative plaster compositions that create an unusual texture on the outer surface.
Bark beetle plaster, in addition to the usual basic components, contains white powder and small pebbles with a diameter of up to 2.5 mm. With certain skills, the master can make different designs from the same mixture by directing the movements of the spatula in a certain way. The work of a plasterer thus turns into the work of a decorator.
If the mixture contains larger stones, up to 4 mm in size, the relief will be completely different. Granules are crumbs made from natural raw materials: granite, marble. Pebble plaster gives the facade an unusual, beautiful look and provides shine in the rays of sunlight. White cement plaster mixtures with the addition of large granules of quartz, dolomite, and marble are available for sale. For some unknown reason, it was called the lamb. Perhaps the appearance of the facade reminded someone of the wool of sheep.
An interesting decorative option is created by mosaic plaster based on polymer acrylic interspersed with natural colored chips.
Insulation process
Following a certain order will help you understand exactly how to insulate external walls with polystyrene foam. That is why the first stage should be the installation of panels on an already cleaned and carefully prepared, primed wall.
The correctness of fastening can be checked using a special level. And only after this can the structure be hammered with dowels.
A special adhesive developed for slabs will help guide you on the question of how to glue polystyrene foam to the wall. It is applied with a notched trowel evenly over the entire working area. Do not forget that the insulation thickness is selected depending on the purpose:
- Indicators from 30 to 50 millimeters for residential premises;
- Indicators of 60 millimeters for walls of other industrial structures.
Disc-shaped dowels will be an excellent assistant in all work, since it is necessary to attach polystyrene to the wall as securely as possible.
Plastering walls made of polystyrene foam helps to level and decorate the formed surface.
By following all technologies when carrying out insulation work, you can achieve the highest quality result, as well as avoid possible heat loss. Do not expose the surface to sunlight or high temperatures.
Choosing façade plaster over polystyrene foam
If the “umbrella” is stuck in the wall and does not go deep to the required level, it should be cut off using a utility knife and the dowel hammered in another place.
While installing polystyrene foam on solid walls is not difficult, finishing windows with polystyrene foam is a more complex process. In this case, it is necessary to cover the opening around the perimeter with polystyrene foam, after which a slope should be made.
For these purposes, you can use thinner sheets of foam, for example, a thickness of 3-4 cm will be enough.
In the photo - reinforced polystyrene foam
Finishing insulation with plaster
So, the finishing of the walls with polystyrene foam is completed, but, of course, it is impossible to leave the facade in this form. Therefore, it should be covered with plaster (also find out how to properly carry out waterproofing and finishing work).
Types of plastering materials
This material requires the selection of a special plaster composition. Not all plasters are suitable for polystyrene foam. Some options contain components that destroy the foam immediately. Therefore, in the store, be sure to check with the consultant whether the composition will be suitable for work on this insulation or not.
Facade
For exterior plastering of polystyrene foam, special compositions are used, which include various frost-resistant and moisture-proof additives. Foam plaster for facades is divided into two types:
- mineral;
- acrylic.
Mineral
The most affordable option. It consists of cement, sand and mineral fillers that improve the properties of the layer after hardening. It is sold in the form of dry mixtures, which must be diluted with water in a certain ratio before starting work. The manufacturer must indicate the proportions on the packaging.
It is quite possible to make such a solution yourself. In this case, sand and cement are purchased separately and during the preparation process the required volumes of each component are measured separately. So, it’s more difficult to work, especially if you need to prepare half a portion to finish a small area.
Mineral plaster is of lower quality. Difficulties arise during application, since it has poor adhesion with polystyrene foam. To increase adhesion, the insulation is treated with a special primer and small cuts are made across the entire surface.
Acrylic
A more expensive option for plaster mixtures, but at the same time higher quality. This type of plaster on polystyrene foam does not require special preparatory work, since it has high adhesion rates to any materials.
The main components are acrylic resins along with chemical additives. Such mixtures were created exclusively for finishing facades after insulation. Therefore, it can withstand various loads well. The treated surface remains attractive for a long time and is easy to clean.
Using acrylic plaster, you can create textures or immediately use decorative compositions. For example, the “bark beetle” has inclusions that, after rubbing, form grooves. Using different grouting techniques you can create an original design.
Plaster for interior decoration
The coating for interior work does not require the addition of frost-resistant and especially moisture-resistant ingredients, so the mixture is much cheaper than the façade coating.
Just like facade finishing, interior plaster has a mineral and acrylic base.
If suddenly plastering of polystyrene foam inside the room was done with a facade composition, then this will not cause harm. Otherwise, when the plastered walls are coated with a product for interior work, the finishing layer will quickly collapse.
How to plaster polystyrene foam
Based on the tasks solved by plastering, the choice of plaster is made in favor of the following compositions:
- durable;
- tenacious (highly adhesive);
- durable;
- for external work or universal, if exterior finishing is being done (if insulation is carried out indoors, any types are suitable, primarily for interior work).
Gypsum compositions for plastering foam plastic on the outside (for facade work) are not suitable.
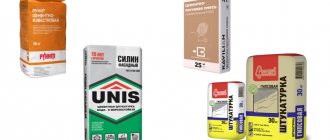
Plaster for polystyrene foam - specially developed compositions for coating polystyrene foam materials, for example, Ceresit, Ekomix, Stolit, contain additives that increase adhesion to EPS. There are certain types of mixtures designed to perform specific work:
- for gluing foam sheets to the base;
- for protective plastering of PPS sheets;
- universal.
When purchasing, it is better to purchase mixtures from one manufacturer. It is preferable to opt for universal ones, which are used at any stage of finishing work.
Simple plaster compositions on a regular cement base, although cheaper, are not elastic and can easily become cracked. If we are insulating a house, we need durable monolithic coatings. In addition to special formulations, conventional ones on a mineral or synthetic basis are also used.
Plaster mixtures based on the following are:
- mineral (quite durable, non-flammable, resistant to UV rays, vapor permeable, environmentally friendly and cheap compositions based on gypsum, clay, lime, cement);
- acrylic (durable compositions based on acrylic resins, more expensive, less resistant to fire, water-repellent, rich in color, easily fade in the sun, do not develop shrinkage cracks);
- silicone (the most expensive, durable, very elastic, vapor permeable, UV resistant, most durable).
Plastering technology
The difficulty of plastering foam boards is due to the fact that a wall covered with this material has a number of features:
- smooth and dense texture of the surface of the slabs with a small number of irregularities and micropores;
- low permeability to liquids;
- the difference in the coefficient of thermal expansion of the foam, the plaster layer and the material from which the wall is made. This may result in cracking of the finish;
- low absorbency.
All these features complicate the finishing of a façade insulated with polystyrene foam.
The work of plastering an insulated facade can be done with your own hands at ambient temperatures from +5°C to +35°C. The lower temperature limit is understandable: a wet facade at a lower temperature will not dry out, and the upper limit is due to the fact that at a higher air temperature, moisture quickly evaporates from the plaster mixture and it will be impossible to work with it. After installing polystyrene foam slabs on the facade with your own hands, finishing should be done as early as possible so that the polystyrene foam is not exposed to atmospheric factors.
Calculation of plaster mixture
There are special mixtures designed for pre-gluing reinforcing mesh and applying plaster for polystyrene foam.
They perform a number of functions:
- protect foam boards from ultraviolet radiation;
- smooth out temperature differences and compensate for differences in thermal expansion coefficients;
- protect fragile insulation from mechanical damage.
Glue consumption is usually 4 - 6 kilograms of dry mixture per 1 square meter. m. facade. For those who perform such work for the first time, it is better to buy the mixture with a reserve . Whole packs of dry glue can be returned to the store if you have a receipt. Mixtures from different manufacturers cannot be used on the same façade. The result may be unpredictable.
Preparation of glue
The dry mixture must be diluted according to the instructions on the package. It is better to cook in small portions so that it does not have time to dry out.
For the first stage of work (gluing the reinforcing mesh), it is better to dilute the mixture somewhat thinner than indicated in the instructions . It is better to mix the glue in two stages: mix, let stand for 5 - 10 minutes, and mix again.
Preparing an insulated facade for plastering work
After diluting the plaster mixture (or before this), the facade must be prepared for plastering:
- Make sure that the caps of all the “mushrooms” that were used to secure the foam to the wall are evenly recessed into the material. Protruding dowels must be driven deeper. If you cannot hammer in a dowel, it is better to replace it.
- Fill the gaps between the foam plates with special foam for insulation.
- Treat the uneven surfaces of the slabs that protrude above the general surface with a special grater.
- Cover the slopes and corners first with reinforcing mesh, then with a perforated metal corner.
After preliminary preparation, you can begin gluing the mesh.
Pasting with reinforcing mesh
The technology of plastering work using extruded polystyrene foam is very different from conventional plastering of a stone surface. Firstly, a glass reinforcing mesh must be secured to the foam boards to ensure reliable adhesion of the plaster layer to the insulation. Secondly, the slabs must be processed to ensure reliable adhesion of the mesh to them, so that later the mesh along with the plaster does not fall off the facade.
The procedure for gluing fiberglass mesh:
- For reliable adhesion of the mesh to the insulation, before gluing the mesh, the foam must be scratched with a sharp tool (you can use an ordinary nail), making dash-shaped vertical stripes every 8 - 10 centimeters and forming small indentations.
- Cut the mesh into strips of a size convenient to use.
- Apply a 3-5 mm layer of adhesive mixture on top of the slabs, then carefully straighten the mesh strips over the glue with your hands, lightly pressing it into the mixture. Glue the mesh with an overlap of 10 - 15 cm.
- Go over the entire surface covered with the mesh with a trowel, evenly pressing the mesh cells into the adhesive composition.
To secure the plaster mixture on the facade, the size of the mesh cell is important: a cell that is too large holds the mixture worse, and a cell that is too small is difficult to glue . The best option is a mesh with a medium cell size. When gluing the mesh, you need to do it as carefully as possible, so that later you have to level the facade as little as possible.
After gluing the mesh is completed, the mixture must be dried for at least 24 hours. When it dries over the entire surface, you need to go over it with a plastic float covered with sandpaper. This is the first stage of grouting.
Leveling the surface
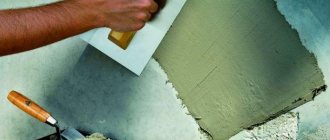
After pasting the facade with mesh and drying the mixture, it is necessary to level the surface before applying the final layer of plaster on polystyrene foam. To do this, the adhesive composition that fixed the mesh is applied with a spatula over the entire facade in another layer about 3 mm thick. When applying this layer, you should try to level out the remaining unevenness before finishing the plaster. Then, the facade is left to dry for at least a day.
Final alignment
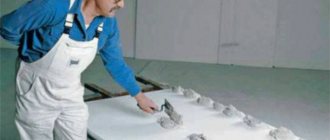
We understand how and how to plaster polystyrene foam on the façade. Let's proceed to its final alignment. For this work, we prepare a solution of liquid consistency so that it flows freely from the spatula blade, leaving a solid translucent mark on it.
The mixture is collected with a tool and carefully applied to the surface in a layer of one to three millimeters. For convenience, it is recommended to divide the entire area into square sections and prepare the mortar mixture in small portions, preventing it from hardening. Having completed the process, you should wait for the plaster to dry and re-grout.
The prepared façade is cleaned of dust and covered with a primer mixture, which is applied with rollers or wide brushes. Priming is carried out in one or two layers.
Finishing plaster on polystyrene foam
Work on applying the finishing layer of plaster to polystyrene foam slabs is carried out in several stages:
- First, the facade prepared for finishing is covered with a layer of primer. The primer is selected depending on the properties of the finishing layer of plaster and applied with a short-pile roller.
- The solution for the finishing layer must be prepared without lumps, with the consistency of sour cream.
- Using a wide spatula, apply the solution on top of the soil and carefully level it. If necessary, the procedure can be repeated twice, allowing time for the first layer to dry.
When the last layer of finishing plaster has dried, the facade can be painted.
Insulating the facade using extruded polystyrene slabs, followed by plastering, of course, is a labor-intensive process. It is necessary to strictly adhere to all technological stages of the process, observe the temperature conditions for the work, and use high-quality materials. But the achieved result is worth the time and effort spent.
Is it possible to plaster polystyrene foam and why is it done?
Polystyrene foam is popular as an insulation material. However, due to constant changes in temperature, environmental humidity, and under the influence of UV rays, the structure begins to collapse over time. Protection from these factors is easily provided by a plaster layer. Finishing the facade with foam plastic and plaster, which protects the fragile material, is considered the most successful solution for insulating the walls of a building from the outside.
Advantages of the solution:
- the reinforced plaster layer protects the fragile material from mechanical stress;
- access to sunlight is blocked;
- access to moisture is blocked;
- fire safety increases, since the plaster coating does not ignite;
- a barrier is formed for insects and rodents;
- the emerging layering better absorbs noise and prevents heat evaporation.
Of course, plaster mixtures based on different bases cope with this task in different ways. You need to choose the optimal mixture.
Recommendations for finishing
It is advisable to perform plastering on foam plastic immediately after the seams have dried. The longer the insulation is exposed to atmospheric influences, the lower its thermal insulation properties. Moreover, such a house cannot be left unfinished for the entire winter.
Plastering should be done in dry, warm weather and on a dry surface. The presence of moisture, dust, and greasy stains on the foam negatively affects the adhesion of the plaster to the base, as a result of which the coating very soon falls off in pieces.
When mixing the solution, strictly follow the proportions and do not add anything other than water. Factory mixtures already contain all the necessary components, and the presence of foreign impurities will only worsen the quality of the plaster. Also follow the specified application thickness - it is better to do 2 thin layers than one thick one.
Plastered surface
Decorative plaster can give a house a unique exterior
Plastering doorways and slopes
After replacing window or door frames, the best insulation of the openings formed between the frames and the facade will be to make slopes made of foam plastic with plastering. You can make slopes as soon as the polyurethane foam has dried.
The simplicity of the work is similar to installing drywall. Blanks are cut out of PPS sheets and glued to the wall along the perimeter of the frame (foam plastic also needs to be mounted under the window sill. When the glue dries, dowels with fungus are installed. Plastering the foam is done in the same way as described above (corners are placed on the mortar, strips of reinforcing mesh are attached, etc. .d.).
In order not to stain the frames, they are covered with masking tape before starting foam plastic work.
Decorative plaster
The soil has dried, we proceed to applying a decorative plaster layer. The solution is prepared in accordance with the instructions, the dry mixture is combined with water and mixed. It is recommended to apply the solution with a tool with a wide blade, moving from bottom to top and ensuring uniform distribution of the material.
The thickness of the applied solution in most cases is determined by its grain size, and the manufacturer indicates such information on the packaging material.
To ensure that the surface looks uniform and has no stains, plastering is done at one time, breaks are taken only for mixing the next portion of the mortar mixture.
Having distributed the plaster, we begin to form a relief surface. This is done with special graters, brushes, sponges and even a spatula. The main thing is to achieve a uniform texture throughout the entire area, avoiding noticeable transitions. If the shade of the plaster can be covered with paint, then the relief of the surface remains always visible.
Plastering on polystyrene foam: step-by-step instructions
To do this, use techniques for applying decorative plaster. For example, after installing the facing layer, the surface of the wall can be “rolled” with a relief roller. This will make the appearance of the facade unusual and very attractive.
08/23/2013 at 03:08
Expanded polystyrene is often used for finishing facades due to its high thermal insulation characteristics. Most often, brick foam concrete or cinder block buildings are insulated with it. Next, we will look at how buildings are sheathed with polystyrene foam and its subsequent finishing with plaster.
Finishing the facade with polystyrene foam and plastering it