Why insulate the facade?
Insulation of external walls is necessary for buildings located in cold climates. Favorable living conditions will be created if the building is lined with insulation on the outside and plastered. In winter, heating costs will be reduced, and in summer, cooling costs will be reduced.
Insulation of the facade is necessary to maintain a comfortable microclimate in the room
The risk of cracks on the load-bearing wall is minimized, visual defects are hidden, and the exterior is improved. A decorative finishing layer will make the facade attractive. More often, this method of insulation is used for country houses and country houses.
This method is prohibited from being applied only to architectural monuments, since the preservation of their external appearance is prescribed by law.
Installation of an insulation system in the basement of the house
If the facade plaster system is installed in the basement of the building, it is necessary to take into account some features:
- Before carrying out work, thoroughly waterproof the basement of the walls and the blind area;
- the insulation must have a low level of moisture permeability;
- Reinforcement should be done in two layers;
- For façade cladding, you can use mosaic plaster, ceramic tiles, artificial or natural stone.
Features of plaster technology for insulation
Facade plaster on top of insulation is distinguished by its simplicity of technology, and the material itself is lightweight and does not require reinforcement of structures. If reconstruction is necessary, such insulation can be easily dismantled, unlike the second method, which is called ventilated and is performed during the construction or reconstruction of a house.
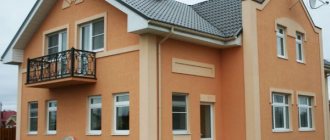
Facade plaster improves the performance characteristics of the building and gives it a finished look
In the ventilated version, a strong frame is initially installed around the building at some distance from the load-bearing wall for air circulation. Then it is lined with porcelain stoneware or composite panels.
Advantages and disadvantages
The wet finishing technology has advantages and disadvantages. The advantages of facade plaster include:
- protection of insulation from UV radiation, temperature changes, natural precipitation and other external factors;
- there is no need to use insulation indoors;
- reducing costs for building materials;
- the technology is applicable regardless of what finishing material the main wall is built from;
- increased sound insulation;
- the coating is continuous, without seams;
- lack of fasteners.
Plaster protects thermal insulation materials on walls from temperature changes, precipitation and mechanical damage
There are also disadvantages:
- work is carried out at a temperature not lower than –5 ºС;
- the technology involves stage-by-stage insulation and plastering, which takes a lot of time;
- During rainfall, work is postponed until better weather conditions.
In places where it is planned to create an opening, a metal frame is installed.
The process of insulation and plastering is gradual, so it takes a lot of time
Finishing the facade with decorative plaster
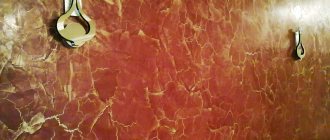
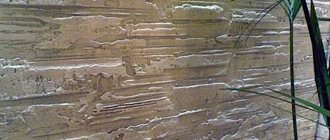
Facade decorative plaster is the final finishing of the walls of a house, which creates a seamless coating and protects the building from the negative effects of atmospheric phenomena. The finishing technology is simple: the surface is cleaned of dirt, leveled with base plaster, and then covered with a decorative layer. This type of cladding can be used on any type of wall.
Advantages and disadvantages for outdoor work
A facade finished with a decorative coating helps reduce heat loss and extends the life of the building. Plaster mixtures are made with the addition of various components that give them strength and durability, and special modifiers increase resistance to frost and humidity.
The façade covering is characterized by:
- Good adhesive properties, suitable for application to various surfaces.
- Low maintenance requirements. You can clean the walls with a stream of water from a hose. Some types have the property of self-cleaning.
- Resistant to abrasion and mechanical stress.
- Safety and hydrophobicity (moisture resistance).
- Good vapor permeability, which creates a comfortable microclimate for the building.
- Excellent performance in different temperature conditions.
- Environmentally friendly, safe, there is no presence of toxic chemical elements in the composition.
- Ease of application.
Facade plaster protects buildings from adverse weather conditions. The coating breathes, which prevents the formation of efflorescence on the walls and the development of fungi.
The disadvantage of decorative coating is labor intensity, high cost of work and building materials used.
Choosing the type of insulation for plaster
Before plastering, a material for insulation is selected, focusing on its thermal insulation, service life and cost.
Expanded polystyrene (EPS) or polystyrene foam
This material is obtained by foaming a polymer liquid. As a result, granules with micropores inside are formed. They are filled with gas and tightly connected to each other.
In appearance, steroid foam slabs are dense, but at the same time they are very light - when there are gusts of wind, installation becomes problematic.
PPS is not exposed to microorganisms, including mold. It has high thermal insulation, soundproof and moisture resistant properties. Does not absorb moisture from the air.
Foam plastic - easy to install, retains heat well, but has increased fragility
Along with the advantages, foam boards also have disadvantages:
- cannot tolerate high temperatures;
- react to many chemicals;
- When ignited, they release toxins that are hazardous to health.
Expanded polystyrene contains fire retardants, which contribute to the self-extinguishing of the material.
Mineral wool
Insulating wool is environmentally friendly and is divided into the following types:
- glass wool made from molten glass;
- stone wool obtained from melting rocks;
- slag wool produced by melting blast furnace slag.
Glass wool from glass melt
Stone wool
Mineral wool from slag
All these varieties have different fibrous structures:
- horizontal;
- vertical;
- corrugated;
- formless.
This material is resistant to high temperatures and chemical attack. It has heat and sound insulation.
The service life of mineral wool is longer than that of foam plastic insulation, but this material is much heavier in weight, so it is recommended to make a supporting metal frame during installation.
Penoplex EPPS
Otherwise, this material is called extruded polystyrene foam. Extrusion is the forcing of a viscous composition through a molding hole. This technology is used not only to create insulation materials in the construction industry, but also in other industries. Penoplex EPPS differs from ordinary polystyrene in its greater moisture resistance and thermal insulation. All other characteristics are identical.
The advantage of material made from extruded polystyrene foam is its moisture resistance
Walls made of material with low thermal conductivity (gas silicate blocks, aerated concrete) are insulated with mineral wool. Porous surfaces (wood, expanded clay, cinder block) are covered with fiberglass mineral wool with hydrophobic impregnation. Brick and concrete buildings are insulated with foam material.
Polystyrene foam and its derivatives do not tolerate direct sunlight, under the influence of which they are destroyed.
How to calculate the thickness of insulation
The thickness of the insulation is not a constant value, but purely individual.
And all calculations will be only approximate. But it is necessary to do them, since if the walls are not thick enough, the walls inside the room will freeze, and fungus and other microorganisms will develop. If there is an excess of insulation, the budget will be spent on useless additional material. You can calculate the depth of the masonry yourself, without turning to specialists. To do this, a number of parameters are taken from building codes and regulations: “Thermal protection of buildings” dated February 23, 2003. In the section, find the heat transfer resistance coefficient R m²*ºС/W for enclosing structures (RO).
Recommended calculation methods are set out in the code of practice “Design of thermal protection of buildings”
Also find the thermal conductivity coefficient of insulation and other building materials from which the wall is made. Each building material has its own.
Knowing the standards for thermal resistance for different climatic zones of Russia and the thermal conductivity coefficient of the material used to build walls, you can calculate the required thickness of the insulation.
For example, let’s imagine a wall built from solid brick, one and a half stones (38 cm). From here, using the formula, we find the actual heat transfer resistance of the brickwork - R = d/y, where:
- R—heat transfer resistance;
- d – material depth;
- y is the thermal conductivity coefficient of the material.
Rф = 0.38: 0.81 = 0.47 (m²*ºС)/W
Based on this formula, we find the difference between the standard and actual heat transfer resistance:
Rt = Rn - Rph = 3.065 - 0.47 = 2.59 (m²*ºС)/W
(3.065 is the standard thermal resistance coefficient for residential buildings in Moscow).
Map of thermal conductivity resistance by regions of Russia
Now we find the required thickness of insulation that will make up for this difference. The calculated thermal conductivity coefficient (ECC) is 0.03 W/(m²*ºС). Let's insert it into the following formula:
d = Rt*y, where:
- d – depth of insulation;
- Rt—heat transfer resistance;
- y is the thermal conductivity resistance of the insulation.
d = Rt*y = 2.59*0.03 = 0.08 m
Convert the result into centimeters and round up.
0.08 m = 8 cm = 80 mm
To bring the thermal resistance of a brick wall to normal, it is necessary to install an 80 mm thick layer of EPS on the outside. Using this simplified calculation method, you can independently calculate the required depth of insulation.
Installing EPS on a brick wall will bring the thermal resistance of the surface to normal
If the wall is multi-layered and made of plaster, thermal insulation, cladding, then to obtain the overall thermal resistance of the wall, you need to sum up the values of each layer.
Consumption of working mixture for facades, how to estimate
Before starting external work, it is necessary to determine how the working mixture will be consumed. On average, plastering one square meter will require 2-4 kilograms of mixture. To more accurately determine the solution consumption, two factors are taken into account:
- Type of solution used. For plastering facades, silicone, mineral and acrylic mixtures with different consumption rates are used. Manufacturers of such formulations indicate on the packaging information about the costs of each of them.
- The material from which the wall is made. Most of the mortar is consumed when working with brick walls. This surface is the most prominent due to the gaps between the bricks and therefore more working mixture will be needed to plaster it.
Tools and materials for work
Construction tools and materials are prepared in advance so that everything is at hand during work:
| Insulation. | |
| Finished plaster, or dry mixture, mixing container and water. | |
| Primer. | |
| Glue. | |
| Reinforcing mesh. | |
| Set of spatulas and trowels. | |
| Graters. | |
| A wide brush or roller with 1 cm bristles. | |
| Bubble or laser level. | |
| Overalls and closed shoes. | |
| Headdress. | |
| Rubber gloves on a knitted base. | |
| Drill with whisk attachment. | |
| Goat, stepladder, scaffolding, work table. |
Once everything necessary is prepared, work can begin.
Types of plaster for external walls
Modern types of plasters are varied and you can choose them based on characteristics, cost and manufacturer.
Mineral
The composition is made on the basis of granite and marble chips, hydrated lime, anthracite, quartz sand, white mica, glass, ceramics, colored clay, Portland cement and fillers. Available in dry form in bags of 15-20 kg. The composition consists of several color shades.
According to texture, it is divided into bark beetle, lamb beetle, mosaic, and pebble mixture.
Plaster Bark beetle
Plaster Lamb
Plaster Mosaic
Pebble plaster
Acrylic
The mixture consists of acrylic resins, modifiers, dyes, antiseptics and fillers, giving the wall a different structure. This type of plaster goes on sale ready-made in different color shades. It has an affordable price, unlike other mixtures. Due to the increased flammability, you must be careful when handling fire and do not light it near the work site.
Acrylic plaster is made on the basis of acrylic resins, which allows you to obtain a strong and durable coating
Silicate
This finishing mixture is made of liquid glass, mineral fillers, pigments, resins, and modifiers. Unlike acrylic plaster, it is fire resistant.
Silicate plaster has excellent resistance to various types of temperatures
Silicone
This type of plaster consists of silicone resins, fabric fibers and other components that improve the structure of the mixture. Sold in containers in liquid form. It is characterized by high cost.
Silicone plaster has good technical characteristics and excellent ability to cope with facade leveling
Manufacturers' choice
The ranking of the best manufacturers of facade plaster includes:
- “Osnovit” (“Startwell”, “Bigwell”, “Slimwell”, “Exterwell)”;
- Weber-Vetonit;
- Glims (Tweed, Velur, CS-50, Bark beetle 2.0);
- Kiilto (TF, TR, TT);
- “Stroybrig” (PC 7.5, PC 10, PG 26/1mm);
- “Bolars” (facade, “Bark beetle”, EasyWall);
- Bolix;
- Unis;
- Caparol.
“Startvel”
"Bigwell"
"Slimwell"
"Exterwell"
Plaster Weber-Vetonit
Glims plasters
Kiilto plasters
Plasters "Stroybrig"
Plasters "Bolars"
Bolix plaster
Plaster Unis
Caparol plaster
All plaster compositions are characterized by vapor permeability, water-repellent properties, strength, immunity to contamination, absence of microbiological contamination, tolerance to UV radiation and temperature changes, and are easy to apply.
Varieties of mixture
Let's consider the main types of plaster for facades, differing in composition and characteristics.
Acrylic
The function of the binding component in such a material is performed by acrylic resin, which allows the mixture to be sold in a state prepared for application. The applied plastic layer begins to set after a couple of hours, the surface becomes impact-resistant, vapor-permeable, and resistant to negative influences.
This plastering material for facades contains components that prevent the development of bacteria.
Silicate
The binder in this composition is liquid potassium glass. It is distinguished by a neutral indicator of electrostaticity, which provides protection against the accumulation of contaminants on the surface. Silicate material has good vapor permeability and creates an excellent alternative to acrylic compositions when their use is impossible.
Silicone
This material for exterior decoration is considered expensive, but has undeniable advantages - a rich color palette, elasticity, and is easy to wet clean.
A façade plastered with this composition easily allows steam to pass through, allowing the walls to “breathe.”
Mineral
The main component is a cement material, which creates an unprecedented strength indicator. On the building materials market, such plaster for external use is sold in the form of a dry mixture, which remains to be mixed with water, observing the ratios. The operational period of the finishing exceeds ten years, the material practically does not absorb water and resists the development of microbes.
If you use this option, you will have to paint it with facade paint that is resistant to low temperatures. Paintwork materials are used only on a silicate basis so that the plaster layer can breathe.
Terrasite
A type of decorative material for plastering facades, made on a cement-sand base with the addition of lime, mica and fine marble. The coating is durable and moisture-resistant, looks interesting, and lasts a long time. There is a labor-intensive process of applying the material and a long hardening period.
Cork
This type of plaster is gaining popularity among fans of eco-style. The composition contains natural oak bark, mixed with modifiers and binding components and creating the characteristics of a cork of natural origin. The coating is distinguished by its unique appearance, softness, antistatic characteristics, elasticity and environmental safety. Applied to walls made of aerated concrete, expanded clay, wood, and plastic.
Thermal insulating
It is used for external walls, the insulating material of which cannot cope with the functions assigned to it, and the frame base of the structure will not withstand additional protection from heat loss.
The composition of such facade plaster includes sawdust, polystyrene foam balls, verculite and other materials.
Soundproof
This plaster is used instead of auxiliary materials, combining it with mineralized wool or polystyrene foam. In combination with such insulation, the plaster layer protects against extraneous noise.
A cement-based plaster mortar; slag, pumice or magnesite are used as additional components to create a porous surface texture and sound absorption.
Stages of plastering a facade with your own hands
Plastering of the facade is carried out in stages. Favorable temperature conditions for work are from +15 to +30 ºС. In cool weather, scaffolding is constructed and covered with windproof film.
It is allowed to carry out plastering work at temperatures from +15 to +30 ºС
Preparatory work
First, the house is checked for cracks, and if any are found, a restoration screed is made. The outer part of the wall begins at a distance of 60-70 cm from the ground. The base is treated with waterproofing bitumen material. Old walls are cleaned of dyes and other decorative layers mechanically, by firing or chemical sandblasting.
Before starting work, the surface is cleaned of old coating
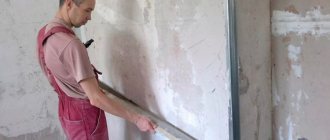
New ones are checked with a two-meter even strip for the presence of protrusions and irregularities. The excess is cut off with a spatula and smoothed with a grater. Using washing equipment, the wall is washed and dried. Then prime with a wide brush, penetrating deeply into every crevice. Cracks, chips and other defects are repaired with starting putty, and then the surface is leveled with the same mixture. After drying, sand with a coarse grater and prime the entire wall.
Installation of insulation
Before installing the slabs, a special profile is installed that will ensure their horizontal position. Insulation is glued to the prepared surface in rows horizontally. The glue is applied dotted at 8-10 dots for one slab or continuously applied in the middle with a grooved spatula, 3 cm away from the edge of the slab. The stripes along the contours are applied in a dotted line so that there is no air cushion left inside.
Insulation boards are glued in rows horizontally
Gluing begins from the base, the second and subsequent rows are laid, observing the ligation of the slabs, as when laying bricks. The second layer of insulation is glued at a distance of at least 20 cm from the seam of the first row. The distance between the tile seams should not exceed 6 mm, and differences in plane should not exceed 3 mm.
In places where window openings, columns, and corners adjoin, unclosed joints of 1.5 cm are left, which are subsequently filled with waterproof mastic.
Press down the insulation with a wooden trowel. A day after the glue has dried, fasteners with dowels with an umbrella-shaped cap are used in the center and at the joints. Wide cracks are filled with mastic.
Facade reinforcement
The reinforcement is made with a special mesh of glass fibers. Installation of the reinforcing mesh begins with cutting. The calculation is made in such a way that the segments overlap each other by 10 cm (overlapping). Start installation from the corners, moving towards the center. The slopes of all openings are leveled with perforated aluminum corners.
To strengthen the base, the façade is reinforced
The mesh is applied to the insulation using glue. It is completely immersed in the composition. After the first layer has dried, applying a second one will not hurt, since the mesh will be more firmly glued to the insulation.
Base plaster layer
The initial plaster layer is applied 3 days after gluing the reinforcing mesh. The technology for plastering walls outside and inside is no different. Aluminum beacons are also glued on, and perforated profiles are installed at the corners.
The plaster is applied using a trowel and spread along the guides using a rule. For the construction of large buildings, a plastering station is used, where the solution is supplied through pipes and hoses, spraying the mixture mechanically onto the walls.
Plastering technology
After applying the plaster to the surface, rubbing begins. Movements with a spatula are made using different technologies:
- horizontally;
- vertically;
- cross;
- all around.
Trajectory of the spatula
Base layers are applied 2-3 times depending on their thickness, which in general should not exceed 5-6 mm. Then the plane is primed with a wide brush.
Leveling layer
After removing the beacons, depressions remain. They are first primed and then plastered, starting from the bottom with horizontal movements to the right and left. The seams are sealed so that the plane appears as one whole. A finishing layer of plaster is applied on top, either for painting, or a mixture is taken with pigment.
The final layer of plaster makes the surface ideal for subsequent finishing.
Grinding and expansion joints
After the plaster has dried, it is sanded with a construction polyurethane float.
To reduce the load on the structure, the surface is cut with a special construction disk into longitudinal and transverse seams in places of possible deformation. The depth of the seam should reach the main wall. That is, all layers are cut through: plaster, reinforced mesh and insulation. This type of seam is called an expansion seam. It is needed to prevent cracks from occurring in the structure during shrinkage, earthquakes or other natural phenomena.
After applying the last layer of plaster, the coating is sanded with a construction trowel.
Subsequently, the seams are filled with mastic or other insulating material. Cuts at the corners are made at a distance of 15 cm from the edge. The distance between the seams depends on the structure of the soil and the material from which the house is built. This data can be found in the construction manual. The shortest distance is 15 meters.
How to check the quality of work
To get the job done efficiently, follow these tips:
| At the preparatory stage of work, the main wall is checked for dirt, unevenness and decorative applications. | |
| Dry plaster is not diluted “by eye”, but according to the proportions indicated on the packaging. | |
| The insulation is fixed evenly using a level. | |
| The dowel caps must fit snugly against the insulation boards. | |
| The reinforcing mesh is embedded under the base layer of plaster so that the ends fit tightly to the insulation and do not stick out. | |
| A canopy is installed above the facade, since water flowing down the wall will eventually erode the structure and penetrate into microcracks. | |
| At the end of the work, check how smooth the wall is (are there any drops, bumps or holes). | |
| Inspect the corners of door and window openings for cracks and chips. | |
| They walk around the perimeter of the house and carefully inspect the walls for defects. |
If no defects are found, then the work was done efficiently and you can be proud of yourself. After all, living in an insulated house is more comfortable. Now you don’t have to worry about frost in winter or heat in summer.
Have you plastered the façade using insulation yourself? Share your life hacks in the comments.
Mesh for plaster
To improve the adhesion of the plaster layer to the surface of the walls, especially when plastering the facade of a building, additional reinforcing mesh is used, which can be metal - wicker or expanded metal, as well as polymer or made of fiberglass. In individual construction, if you need to plaster external walls with your own hands, it is best to use fiberglass mesh for reinforcement. This mesh is resistant to aggressive influences of the external atmosphere, is not subject to corrosion, practically does not deform during tensile deformations and has high tensile strength.
To strengthen the external corners of the facade - the junction of walls, external slopes of window openings, cornices, it is recommended to use a facade corner - this is a metal corner with a groove for better adhesion to the plaster. Sometimes, for even greater traction, a corner with a mesh attached on each side in the form of an apron tape, up to 150 mm wide, is used.
