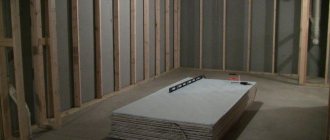
Plaster is a very important element when building a house or renovating. This mixture performs many important functions, for example:
- Thermal insulation. It closes microcracks through which cold air from the street passes.
- Improving the appearance of the wall. After plastering, the walls look smoother.
In general, this mixture has many more functions that can be listed for a very long time.
However, sometimes it happens that the plaster begins to collapse. This is a rather annoying problem. Fortunately, there are several methods to harden the surface.
Repair of plaster in separate places
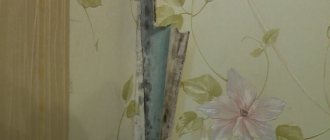
Plaster is not an eternal thing. Owners of houses and apartments are faced with a problem when it begins to crack or fall off in places. What to do? We will look at the reasons for this phenomenon, as well as how to repair plaster walls in individual places and surface restoration technology.
Defects on the surface, causes and method of restoration There are a number of defects that are formed when the proportions of the components of the composition or the technology of its application are violated. The list is as follows:
- Formation of tubercles on the surface and swelling.
- Sedimentary cracks.
- Fresh plaster is peeling off the wall.
- Formation of cracks throughout the entire depth of the solution.
- Efflorescence, spots and stripes appear on the wall after the plaster layer has dried.
What is the reason for such defects? Bulges and bumps may appear if the limestone composition is unseasoned and has unslaked particles. How to repair lime plaster in this case? It is necessary to withstand the plaster until the lime is completely extinguished. The defects are exposed, abundantly moistened with water and filled with plaster mortar. All that remains is to wipe the surface.
Sedimentary cracks are formed when the composition is poorly mixed and when there is an excess of binder. Precise adherence to proportions and dosage in accordance with the packaging will help solve the problem. All that remains is to thoroughly mix the plaster and level the surface.
When the base has not been prepared, cleaned, rough, too dry and dusty, fresh plaster may flake off when applied. To solve this, you will need to pause work and start preparing the surface. The application technology is as follows: notches are made on the surface for better adhesion (or shingles are made), the wall is cleaned of dust and dirt. In addition, it is moistened with water. Then the mixture will not peel off, and repairs to the plaster and surfaces inside the building will not be needed for a long time.
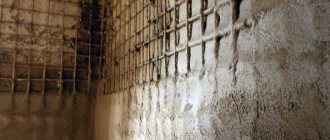
If the problem is cracks throughout the entire thickness of the plaster layer, then there is exactly one reason - there is no reinforcing mesh between the wall and the plaster. The base material is not rigid and is not reinforced in any way. The technology for applying the mixture is that the subsequent finishing layer should be less durable than the previous one, that is, it contains less binder. To prevent the intermediate layers from drying out, they must be moistened with water and reinforced with mesh.
The last defect is spots and stripes. They most often appear on walls from the outside. The cause may be a very damp or wet surface. Especially when the plaster is applied after rain. The solution is to treat the dried walls and waterproof them to prevent moisture from being drawn up from the ground. Local repairs of plastered walls are performed differently. The technology is simple, but requires careful consideration.
- Step-by-step instructions for eliminating defects
- Restoration work
- Removing cracks
- Conclusion
Step-by-step instructions for eliminating defects
You can repair a wall with fallen pieces of plaster yourself. The work is not difficult. You just need to follow the instructions. Alternatively, you can completely remove the layer and apply a new one. But it is more profitable to plaster the damaged areas. It all starts with an inspection. It is important to identify areas that need repair. You will need a wooden mallet. You will have to lightly tap the wall. If a dull sound is heard, then the train has moved away.
Then the sequence is as follows:
- After the inspection, you need to remove the old plaster. We do not touch the places where it holds well.
- Next, the seams are cleaned if it is brickwork. The surface is cleaned of debris and dust.
- A primer is applied to the wall. It is needed for better grip.
- After the surface has dried, the wall is slightly moistened and the solution is applied. If a large part of the wall has peeled off, you will have to use beacons and a rule. This is the only way the surface of the wall will be perfectly flat.
- For minor damage, the plaster is removed in the shape of a square or rectangle. The area is processed according to the previously described method, and the recess is filled with the prepared composition. It is important to adhere to the proportions so that the mixture has the correct consistency.
- Another restoration option is restoration with corks. In the right places, a hole is drilled to the base, primed, filled with mortar and plastered.
Note! For wooden walls, use limestone mortar. However, it is not suitable for wet surfaces. It is better to resort to a cement mixture. It is recommended to treat corners with gypsum plaster, as it sets faster.
Causes
First, you need to figure out the reasons why it crumbles. The reasons are errors when plastering the walls. Here are the most common ones:
- No primer. The presence of a primer is a prerequisite for plaster. Most people don't use primer because it prevents the wall from absorbing moisture. However, for such cases there is a special primer that improves adhesion and holds back salts. These salts come out of fresh concrete and over time reach the plaster, almost completely tearing it off.
- Violation of drying time. The plaster mixture dries from 7 to 28 days. Most people decide not to wait, but to apply the next coat ahead of time. Consequently, after some time it begins to fall off and crumble. The room where the mixture is drying should be well ventilated, this will speed up drying.
- Adding water to the mixture rather than slowly pouring the mixture into the water. Because of this, all sorts of lumps appear, which will greatly interfere with further work, since they are difficult to break. Consequently, the surface will be processed poorly, and this will provoke further destruction.
Final primer treatment
If for the first time we used a primer rather to treat the base base and protect it from mold, mildew and other “evil spirits,” then the final treatment has slightly different goals:
- improving the adhesion of the surface to the finishing material;
- formation of a perfectly smooth surface without any roughness.
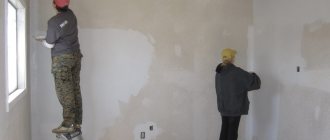
How to repair plaster
Advice: If you are not confident in your own abilities or have never had to plaster walls before, you should trust the professionals. They will complete the entire process faster and better than a self-taught amateur.
Plaster repair is carried out in several stages. To isolate the wall surface from moisture, you will need to apply a protective compound, and then proceed to further operations.
The repair procedure is as follows:
- The wall is carefully and carefully scraped with a metal brush to remove all remnants of the old plaster.
- A special primer mixture is applied in two layers.
- Any stains remaining after the primer has dried are lightly washed off with a stream of water.
- The wall dries for about three hours.
Advice: If the coating defects are very serious, the damaged areas should be re-applied with a putty mixture or plastered.
- The applied coating should be about three centimeters thick.
- When plastering a wall, the powder is dissolved in water and applied in a small layer.
- The first layer is performed to level the wall (see Leveling walls with plaster according to all the rules).
- After one hour, a second layer is applied superficially.
Useful tips from the experts
The production experience of master finishers allows us to give beginners some advice on how to properly organize the work process.
Tip 1
A drill is the first tool when carrying out repairs. Therefore, if you decide to do something yourself, take care of purchasing it. Choose a tool with a power of 700-900 W. With its small dimensions and weight, such a drill is sufficient to perform most of the work encountered in the “do-it-yourself” practice.
Tip 4
The results of plastering and puttying work will be better if you use materials from one manufacturer with a decent reputation.
How and with what to remove cement based?
It is better to remove old cement-based plaster in a completely empty room and it is advisable for the residents to move out for the time being when the renovation reaches this phase.
To work you will need:
- — face protection (mask, scarf or respirator),
- -perforator,
- - gloves,
- - putty knife,
- - heavy hammer or sledgehammer,
- - chisel,
- - hot water.
It will not be possible to remove all the plaster cleanly and without dust. Therefore, it is probably worth covering the floor with something. And, of course, you need to remove all the old coating before finishing work. You need to start dismantling by removing the wallpaper. Then:
- Wet every section of the walls and ceiling with hot water. Moreover, wetting of old, outdated plaster, when there is a need to remove it, must be carried out constantly.
- Tap with a hammer along the entire perimeter of the walls. This will make it easier to remove any unnecessary coating.
- Further dismantling involves working with a spatula, if the plaster easily comes off the walls, or with a chisel. The tool must be held at an angle to the wall, trying to pry off as large areas of plaster as possible.
- If you cannot immediately remove the entire layer of plaster, you will have to again wet the wall generously with water, and then again pry up the old coating with a spatula or break it with a chisel, or use a hammer drill with a chipper.
- The older the house, the more layers of plaster there may be on the wall. It is possible that its remains will have to be removed with a grinder or at least coarse sandpaper.
- After you have managed to remove all the plaster, the surface must be cleaned with a wire brush. To do this, it is better to put a special attachment on the drill and run it along each section of all walls freed from plaster.
Six steps to the finish
Removal of plaster from the walls is carried out until the old finish leaves a layer that is firmly adhered to the masonry. All loose parts are removed. The work is painstaking and time-consuming, so we recommend being patient.
Below is a step-by-step instruction, following which a beginner can clean the walls of dilapidated finishes, and the video in the article will help you understand the work in more detail:
Before removing the old plaster, it is necessary to clean the surface of the old finishing coating. You can remove the paint using a wide spatula, after moistening the old composition with water. Since water is quickly absorbed and dries, the surface is constantly sprayed from a spray bottle. Readers ask how to remove plaster from a wall without dust or dirt. Use more water, so there will be less dust inside the room during work.
We take tools for removing plaster and walk along the masonry. Tap the brick surface with a hammer. In loose places, the plaster crumbles on its own; scrape off the remains with a spatula, after soaking them with water. In places where cracks form, tap more carefully. If the old layer is cracked, but the adhesion to the brick is tight, then widen the gap. To do this, tap its edges with a hammer and expand the hole with an ax.
If there are no cracks, but the layer of old finishing is too thick, then it is also better to remove it. A thick layer of old mortar will fall off due to moisture after you apply the new one.
Coat the cracks with two layers of primer and let them dry. We put new mortar inside and level it to the level of the wall. The remaining surfaces of the masonry are primed and covered with a thin layer of plaster.
Types of cracks and reasons for their formation
If the damage in cross section is 1-2 mm wide, then this is considered an acceptable and safe phenomenon. When the parameter exceeds 5 mm, then it is worth contacting specialists for an examination. It includes analyzing the current state of the structure, identifying threats and issuing recommendations on how to repair a crack in a brick wall of a house, outside, inside, in winter or summer.
Vertical
The appearance of such cracks is preceded by miscalculations by designers and mistakes by builders. Reasons include non-compliance with expansion joints, excess load on lintels and partitions, poor quality of concrete and masonry mixture. Manifestations of violations occur more often in winter.
Horizontal
Cracks of this kind appear more often in masonry mortar. The reason for this is shrinkage. This may concern the foundation due to pressure from the building or groundwater, loaded structures. Often in this situation, the house is tightened around the perimeter. If the width of the split is less than 5 mm, then such a decision is erroneous.
End-to-end
Such defects are considered the most dangerous, so in this case the building is often transferred to emergency status. Through holes appear due to deformation of the foundation. In this case, it is not shrinkage that becomes the cause, but a natural disaster or the fall of a tree, an explosion.
Shrinkage
This type of damage is otherwise called hair damage. Here, deformation of the foundation and main part of the building, including the roof, occurs. Prevention of crack formation is a competent approach to the choice of concrete solution and compliance with construction technologies.
Damage to the leveling layer
Residents often encounter damage to leveled structures. In this case, also, before repairing cracks in the plaster on the wall, you need to determine the reasons for their appearance. They come down to a violation of the plastering process. In particular: heterogeneous composition, exceeding the thickness of a single-layer application, lack of reinforcement.
Read more about the main reasons
A number of reasons that lead to destruction are identical for walls made of brick, foam blocks, panels, concrete and plastered structures. In new buildings, problems appear relatively faster than in old buildings due to failure to meet construction deadlines. Today, it is rare that a customer or developer will suspend work for an entire season to shrink the frame. As a result, window installation and finishing work are carried out while the building is still moving.
The second common reason is the quality of geodetic research. The choice of design solutions, building materials, and additional measures to ensure the durability of the planned facility depends on the results of research and examinations. More often, problems arise due to neglect of unstable soil and groundwater.
The list of common reasons also includes an incorrect approach to plastering walls. To save time, work is often carried out on a damp base, when the floors and ceilings have not yet dried. To reduce cost estimates, low-quality reinforcing materials, primers, and leveling mixtures are used. In order not to wait a long time for the applied layer to completely dry, additional ventilation with heating is created, the coating is formed in one go, exceeding the recommended limits.
Liquid wallpaper
Liquid wallpaper is one of the types of modern decorative wall decoration, although they are the ancestors of many modern wallpapers, having been invented 300 years ago. Be that as it may, nowadays everyone is able to appreciate the simplicity and convenience of working with them. When purchasing a package of liquid wallpaper, inside you will find a dry mixture that already contains an adhesive element. Before diluting them in water, it is necessary to prime, paint and dry the wall.
In order to start working with liquid wallpaper, you need to dilute the mixture with water and mix well until it forms a dough (1 bag of wallpaper requires 6 liters of water). Experts recommend doing this only manually, since mechanical stress can damage the fiber structure. Next, the mass is applied to the wall with plastic grout or a trowel.
How to strengthen plaster
Strengthening crumbling plaster
To work you will need:
- Primer.
- PVA glue.
- Wallpaper glue.
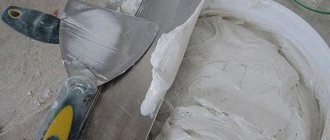
Instructions for strengthening cracked, peeling or crumbling plaster:
- To avoid such defects, the plastered surface must be strengthened with a primer. Such a coating is an important condition for performing finishing and repair work of good quality. It is used to finish the surface of walls and ceilings before applying paint, wallpapering and tiling. A primer is a mixture of a solvent, a binder component and various additives that determine its properties. The dried material creates an opaque film of one thickness, increasing the adhesion or adhesion of subsequent layers of coating.
- According to their purpose, primers are divided into:
- metal surfaces;
- wooden surfaces;
- universal, having an acrylic base. Acrylics are used for concrete, cement and gypsum plaster, wood and fiberglass wallpaper. Such compositions dry quickly and do not have a pungent odor.
- The impregnating composition is applied with a roller, in one layer or with a wide paint brush.
- When finishing rooms with high humidity: bathrooms, showers, special compounds are used, they create a layer of waterproofing. For example, Aura Primer is suitable for dry rooms and high humidity. The mixture is diluted with water immediately before use in a ratio of 1:4. The degree of dilution can be reduced to 1:6, this will increase protection against moisture.
- Cheaper strengthening of plaster can be done with wallpaper glue. This method is often used before wallpapering. With high-quality glue, the adhesion is strong, and the wallpaper and putty will not come off. But this option does not apply to heavy vinyl wallpaper.
- An unjustified savings is the use of PVA glue for primer, especially in rooms with high humidity. The adhesive contains dry components; they are capable of absorbing moisture, which after painting can contribute to the appearance of matte spots due to uneven paint absorption.
If problems arise with the plaster, you will have to abandon the wallpaper.
There are several options for resolving such problems. You will have to use a hair dryer to dry the walls if the problem is high humidity. This level can be measured using a special device. To prevent the plaster from falling off, you can cover the walls with plasterboard. Often similar problems arise precisely with lime plaster, which was previously used during the construction of houses. At that time, gypsum solutions were not used. During times of high humidity, the structure of the material is disrupted. After drying, it begins to crumble, and this happens cycle after cycle. You can even hear the sand rustling behind the wallpaper.
Composition of impregnations
They consist of the following components:
- Water is the basis of any impregnation;
- Polymer additives – promote better penetration of the composition into the treated surface, improve and facilitate the processing process;
- Acrylic resins are the connecting link between the components.
In addition to the main components listed above, impregnations may contain additional substances.
- Fungicides - these substances impart antiseptic properties to the soil, eliminating the further spread of fungus and mold;
- Silicone – gives the primer water-repellent properties;
- Latex - promotes better adhesion to the surface with minimal pores.
The properties of the material will depend on their presence.
Qualities of liquid wallpaper
Liquid wallpaper is considered a very good heat insulator, and it also has the property of absorbing noise. They have no seams, do not absorb odors and do not fade. In addition, they can have any shade of the palette. For example, it is quite easy to create a gradient transition on the wall on your own. The choice of colors is so wide that some are supposed to be mixed with the sparkles included in some cases (they are diluted in water before the dry mixture of wallpaper is placed in it). Another advantage of seamless wallpaper is its reusability. In order to remove them, it is enough to soak the coating thoroughly, remove it with a spatula and transfer it to the wall, for example, of another room or cottage. And so on up to three times. Despite the fact that they will take about 12 hours to soak, removing them from the wall does not cause any difficulties. Liquid wallpaper is perfect for rooms with many corners and in children's rooms. They hide irregularities and cracks. If any part of the wall is dirty or damaged, then the “wound” can be covered again with wallpaper of the same color.
Plaster fell off the ceiling - why does this happen and what to do?
Often, after carrying out thorough repair work, you can find that in some places on the ceiling, the plaster has fallen off. This happens much more often than you might think. Naturally, you shouldn’t leave everything in the same form that the ceiling acquired after this.
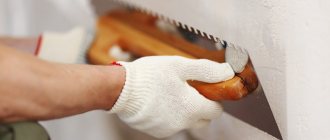
Leveling a plaster wall with your own hands: how to carry out the work correctly
When applying two or more layers, do not forget to moisten the previous layers with water after they have dried. The first two layers, if three-layer plastering is intended, are usually not leveled, leaving them rough. And the third layer is brought to perfection.
Is it possible to level plastered walls with plaster?
Yes, if the walls are uneven. It is better to level a plaster wall using gypsum-based plaster.
What to do
If the unevenness is more than 3 cm, then you can cut off the bumps with an angle grinder. It is recommended to cover the depressions with putty.
What materials are best for leveling?
Plaster with gypsum can be applied in a fairly thick layer, but it will still be durable. Because of this, using a similar composition, it is possible to make walls with large defects smooth.
Radical method
If the walls or ceiling in your apartment were once plastered, then, probably, after a while you encountered a problem - the plaster is crumbling. Most often, plaster crumbles due to non-compliance with technical conditions during its application, as well as due to incorrect temperature conditions, when the temperature in the apartment is extremely low.
So, what to do when the plaster crumbles? Many experts advise a radical method, which may ultimately save your nerves and money. Throw everything away, rip off all the plaster, treat the walls with primer and putty everything again. Then you can start painting or wallpapering. But you will already have normal walls, for which you do not need to worry that they will begin to crumble again and the layer of putty will fall off along with the plaster!
Specifics of wall preparation depending on the base material
The preparation of walls made from different materials will differ, since each of them has its own properties.
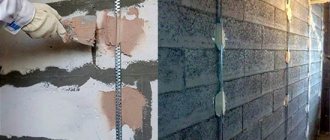
- One of the most problematic walls are walls made of concrete slabs: due to their smoothness, they cannot provide good adhesion to the plaster mixture, which complicates preparation. To ensure that the plaster adheres firmly to the surface, notches are made on the wall with a grinder or an ax. You can also apply a thin layer of tile adhesive or install a plaster mesh.
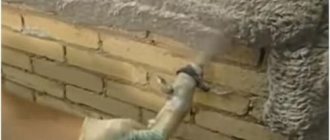
- Preparing brick walls is quite simple. You just need to clean the mortar between the bricks and pour water on the wall.
- To plaster wooden walls, it is necessary to cover them with shingles or wire mesh, because the plaster does not adhere to smooth wood.
- A structure made of cinder blocks or sawn shell rock only needs to be moistened generously with water.
- Before plastering, a plasterboard wall can simply be coated with a primer.
You also need to pay attention to some points:
- Places where surfaces of different textures connect must be reinforced with a mesh of at least 20 mm in width to prevent cracks from appearing and the plaster falling off.
- Reinforcing mesh is absolutely necessary if the plaster layer is thick enough.
- A layer of insulation is placed under shingles or mesh.
If the technology of all stages of work is followed - preparing the walls, mixing and applying the mortar, drying the plastered wall - the new plaster will not crack or crumble, allowing you to forget about labor-intensive repairs for many years.
Trust the professionals?
If you decide to clean off the crumbling plaster and cover the walls with a new layer, be sure to ensure that all conditions are met and that the consistency of the solution meets the necessary requirements. If you are not sure, it is better to entrust the application of plaster to the walls to professionals. After all, a competent approach guarantees you a high-quality result at minimal cost, if you have never held anything heavier than a pen in your hands. Its quality and, as a consequence, its service life depend on the composition of the plaster. To begin with, let’s determine that the main components of such a solution should be water, binders and fillers. In the absence of the latter, binder components, be it cement or clay, are not able to provide the necessary strength. The constituent elements must be selected in accordance with the surface where this solution will subsequently be applied. It is very important that all ingredients undergo the necessary preparation and are sifted. For example, clay and lime should be brought to a viscous state to ensure the plasticity of the solution and ease of application.