Why does Rotband plaster harden immediately after mixing?
The store advised me to buy the famous Rotband plaster, but it immediately hardens after mixing.
Why is this happening? Plaster, or rather plaster prepared from a ready-made gypsum mixture (as people say, just add water) and it doesn’t matter whether it’s “Rotband” or some other brand of plaster can immediately harden after mixing! - in only one case this is:
Expired/Expired expiration date/freshness of the mixture - and nothing more, you can’t add here, they just slipped you an expired product, or you already had it lying around for quite some time before you started using it!
I can suggest two reasons for the rapid hardening of Rotband gypsum plaster, from my own experience.
1 reason - small amount of water. It seems that there is enough water, but the plaster absorbs it so quickly that it begins to harden before our eyes, even before it has been completely used.
This happens for the reason that it is not always possible to mix different batches with the same proportions, you always look at it by eye, sometimes you add more than in the instructions, and sometimes less.
This can happen either due to non-compliance with the technology during production (they also added more of something and less of something), or because the plaster has been lying around in warehouses for a long time and has already caked, i.e. lost its initial characteristics.
Reason 2 - before using plaster, always pay attention to the date of manufacture and expiration date, since it is possible that if the plaster is old, it no longer has the properties that are included in the specifications.
What happens is that the gypsum plaster itself is a mixture of natural gypsum material, well crushed and roasted in ovens, with certain additives that regulate the rate of hardening, and also contains anti-caking additives and many others.
When the plaster sits for a long time, the mixture can separate or become compacted and before use it must be sifted so that it at least takes in air (it’s like flour before kneading dough).
If the impurities are compacted, then the water will combine only that mass that is in a crumbly state (visually this may not be noticeable).
So it turns out that the ingredient that is responsible for the rate of hardening does not work.
Useful tips for removing putty
On a note:
- When you are ready to dilute the putty, study the proportions indicated in the instructions on the package;
- You should not mix a lot of mixture in one go, as you may not have time to use it completely before it begins to dry out;
- Once the mixture has set, you cannot add water and mix it again;
- Clean the bucket after each batch of putty; if you do not thoroughly clean the bucket earlier, already dried pieces of putty may get into the next batch and make the next batch useless to use.
You can mix mixtures from different manufacturers. If you do not have the opportunity to purchase putty from expensive brands, in order to decorate the entire apartment, you can add a small amount of it to a cheap base. For example, Knauf Rotband Isogypsum, which contains polymer additives that make the mixture more sticky, can be mixed with Satengypsum in a ratio of 1:3, after which we get an improved putty composition for finishing walls.
Be sure to pay attention to the manufacture and expiration date of the putty you want to buy. If the mixture is of stale quality, then they will most often set quickly, and this will bring you some inconvenience in your work, and nothing is known about the durability of such putties. It is best to buy putty mixtures in specialized construction stores, and it is better to avoid markets.
If you want to achieve an excellent result, following only the instructions will not be enough, you need high-quality material, and then the end result will be pleasing to the eye. Tips from professionals on the topic: how to dilute putty.
To carry out finishing work indoors or on external (street) surfaces, special construction crumbly mixtures are used. Dry compositions are presented in two versions: cement-based and gypsum-based.
The latter is more preferable due to its environmental friendliness and ability to form a high-quality finishing surface.
Top 5 ways to prevent plaster from drying quickly
Gypsum, used in construction and finishing works, is also called alabaster. In total, there are 3 main types of gypsum grinding, which affect its hardening time. The finest grind of gypsum in the solution will harden in just 2 minutes, and the coarsest grind in 20. But even this time is not enough to complete a large amount of work. Therefore, they use some tricks - add ordinary components to the solution that can be found in any home:
- PVA glue. This component can be added in a ratio of 1 to 4, relative to water in solution.
- High fat milk. You cannot use milk whose fat content is below 3.2%. To dilute the mixture, you need to add a volume of milk that is 10-20% of the volume of water. If you increase the amount of milk, you can further increase the hardening time of the solution.
- Wallpaper glue. In this case, the glue will be the basis for the solution, instead of water. By dissolving alabaster in wallpaper glue, the hardening time can be “stretched” by another 20 minutes.
- Table vinegar. Thanks to vinegar, the hardening of the mixture can be increased by 50 minutes. It is enough to add vinegar to the solution in a ratio of 2 tbsp. spoons per half liter of water.
- Laundry or liquid soap. This additive will also increase the “lifetime” of the solution by only 20-30 minutes, but it is accessible and on hand. Laundry soap is dissolved at the rate of 100g per 1 liter of water, and liquid soap should be 20% of the volume of water.
Preparing the base for work
Leveling walls with any plaster begins with preparing the base. Rothband in this case is no exception. Therefore, let’s work with our own hands, everyone can do it.
- Let's remove the old wallpaper and strip off the weathered paint.
- Let's tap the walls with a small hammer. We will look for places where the old plaster is ringing. This means that there is emptiness underneath. It is not advisable to apply a new one to a layer that barely adheres.
- We will level the walls according to the beacons (the difference in height is from 2 to 4 centimeters). Therefore, the foundation must be well prepared.
- If such “pockets” are found, they need to be recaptured.
- Now let's clean the walls from dust and walk along them with a level, determine the difference between the highest bulge and the deepest depression.
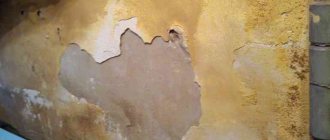
- If the height difference is large, then the best solution would be to completely strip the base from the old plaster - to concrete or to brick. Next, it will be necessary to wash off the form lubricant from the concrete, and clean the brick from possible grease stains.
- Leveling is not complete without priming. Now let's prime the finished surface. We will use materials from Knauf, as they are adapted to work with each other. Let's choose the Grundirmittel primer. This will help the layer of plaster dry evenly.
- For weakly absorbent surfaces it is better to use Betokontakt. This will further increase the adhesion of Rotband.
- After the primer has dried, you can directly level it with plaster.
Gypsum set retarders - from milk to plasticizer - Blog Stroyremontiruy
Gypsum is used in many construction works, where it acts as an additive to accelerate the hardening of various mixtures and solutions. Sometimes alabaster is used in its pure form, helping to quickly secure a wire in a groove, secure a socket, or perform other work.
The main advantage of the material is the speed of setting, but often this advantage becomes a disadvantage and it is necessary to slow down the setting of the gypsum. For this, organic or inorganic retardants are used, which are bought at a hardware store or found in the kitchen.
The putty hardens quickly - is it possible to slow down the setting?
Over the weekend I bought putty from our local manufacturer (Piton – ” > )). Compared to other putty previously used, the above one hardens very quickly and, as an amateur, it is very difficult for me to work with it.
It is clear that these are problems of my inability, etc. but can anyone tell me what can be added to it so that it does not harden so quickly?
In other respects, I am completely satisfied with it. Thank you in advance.
In the characteristics (“Use the prepared mixture within 60 minutes.”).
Isn't that fast? If it hardens (unused) faster, it means either you did the mixing incorrectly (let it sit and mix) or the surface was poorly primed or the manufacturer did something wrong. Use polymer, although it is more expensive, but its consumption is less.
sergeylx wrote: Use polymer
Sergey, thanks for the answer. I will use it, I need to use this one to the end
sergeylx wrote: let it sit and mix) or the surface was poorly primed
I primed it well, but it didn’t seem to let it dry out. I let it sit for about 2 minutes, I stirred it and put it to use.
Apparently this is the problem.
And one more question, Sergey. How do you personally solve the problem with frozen small pieces remaining in the bucket (
1-2 mm) from the previous batch? When they fall on fresh putty, they leave unpleasant, unsightly furrows.
After using a batch of putty, the container must be cleaned. If not cleaned after use, remove residues mechanically and rinse.
OK thanks! In principle, that’s what I did, I just need to get more practical experience.
Ara wrote: the above hardens very quickly and for me, as an amateur, it is very difficult to work with it.
The mixture is gypsum, alas, 60 working minutes is almost the limit for it. Each time for a new batch, clean, wash the container and use clean water (remains of the old, set mixture will significantly reduce the “lifetime”)
yes. it is a fact. the first time, without taking this into account, he killed half a bag of fugenfüller.
Ara wrote: How do you personally solve the problem with frozen small pieces remaining in the bucket (
1-2 mm) from the previous batch? When they fall on fresh putty, they leave unpleasant, unsightly furrows.
An old batch in the same container can also cause a new batch to harden quickly. She plays the role of a catalyst. (I know that in chemistry this process is called something else - not catalysis, but I can’t remember).
In general, citric acid slows down the setting time of gypsum. The dose is based on experience, but if you mix small portions, then the count comes down to several grains.
You can slow down the setting of plaster by adding milk to the water. This is specifically for gypsum; for ready-made mixtures it may not work or it may work, but not as dreamed.
solo wrote: In general, citric acid slows down the setting time of gypsum. The dose is based on experience, but if you mix small portions, then the count comes down to several grains.
The author uses SSS, gypsum putty “>, with a working time of up to 60 minutes, which indicates the presence of retarding additives in the mixture.
iale wrote: with an operating time of up to 60 minutes, which indicates the presence of retarding additives in the mixture.
No, colleagues. I got the worst option, after 60 minutes the wall can already be sanded
solo wrote: In general, citric acid slows down the setting time of gypsum
Natalia N. wrote: You can slow down the setting of gypsum by adding milk to the water.
And thanks for the milk and acid, I’ll try it.
iale wrote: The author has SSS, gypsum putty “>, with a working time of up to 60 minutes, which indicates the presence of retarding additives in the mixture.
Yes, I understand, but in addition to this link, there are also words from the author that the operating time is unacceptably short. So I suggest you try it. This is suitable for pure plaster, why not try it in a small portion for putty?
Ara wrote: No, colleagues. I got the worst option, after 60 minutes the wall can already be sanded
Not the worst
If there was pure plaster without additives, then it would be possible to “sand” it in 10 minutes. In addition, the manufacturer usually indicates a slightly longer working time (for example, for +15 C). In real conditions (for example, at home +25 C) it can set in 30-40 minutes. And the presence of remnants of the old mixture in the container is additionally cut down for half an hour.
When to slow down the setting
Slowing down the setting of alabaster is important when a large amount of work is being performed and there is no desire to dilute the plaster a hundred times in small portions. For example, you need to seal the grooves throughout the room, but Rotband (a gypsum mixture with polymer additives) is not at hand. You can dilute 100 grams of alabaster, but this volume will be enough for 5 minutes of work. If you use a retarder, then dilute 1-2 kg of material at once and perform a multiple greater amount of work in one approach.
So, the main task of slowing down the setting is to increase the volume of mixing the gypsum mixture and to complete a larger piece of work from one batch .
Volma-layer starting plaster
I had the opportunity to plaster a window slope. The choice fell on Volma-layer gypsum plaster.
It's a pleasure to work with, it applies easily, the consistency is perfect, it holds tightly. Lay it on a concrete surface, having previously moistened it with water. The manufacturer states that the plaster does not require puttying. If everything is followed according to the instructions, the surface will be quite smooth and does not require additional plaster. Although, perhaps you need to have some experience for this. I didn’t succeed very well, because the finished solution hardens quite quickly, and I decided to plaster several surfaces at once from one batch, without having any experience in doing so. Although in those places where I took extra care, the surface turned out to be very smooth, and if it weren’t for the rush, it would have been possible to refuse additional finishing plasters. So, I liked Volma products (especially since they are not expensive) and for finishing, I’m thinking of buying Volma-finish.
General rules
Before using retarders, we recommend that you follow the general rules for mixing alabaster, otherwise no additives will help. Here are tips that will come in handy when working with plaster:
- Knead only in clean plastic containers,
- Use a clean mixing tool
- First, water is poured into the container, then alabaster is poured.
If there are remnants of old mortar on the tool or in the mixing container, the plaster will set 2-3 times faster. If you first pour gypsum into the container and then pour water, the hardening will also go faster.
Use of retarders
Set retarders are additives that increase the hardening time of alabaster . They are divided into organic and inorganic. Here is a complete list of moderators, the use of which has been confirmed in practice:
- PVA,
- Wallpaper glue,
- Dishwashing liquid (Ferry),
- Liquid soap,
- Boric and citric acid,
- Washing powder,
- Putty Vetonit,
- Milk 3.2 fat content,
- Concrete plasticizer.
In some cases, additional sand is added to the gypsum; this increases the hardening time of the mixture and makes it more durable.
There is no point in describing the proportions of each moderator; we will talk about the use of some of the additives.
There is always milk on hand during repairs. This useful product is used with a bang for diluting gypsum mixtures, but the milk must have a fat content of 3.2%. Milk is added in a proportion of 10% of the amount of water, you can add more, but then the hardening time of the alabaster will also increase.
If Vetonit putty is used for finishing, then it is added to the alabaster in the proportion - 4 parts gypsum - 1 part Vetonit.
One bag of boric or citric acid is enough for 5-10 kg of dry gypsum; first, the acid is diluted with dry alabaster, then the mixture is poured into water and kneaded.
PVA glue is used in the proportion of 1 part glue to 3-4 parts water, and washing powder is added 100 grams per 5 kg of dry alabaster.
Effectively used to slow down the setting of plasticizer for concrete. A plasticizer is added at the beginning of mixing alabaster; the proportions used are the same as for concrete; they are written by the manufacturer on the packaging.
Announcements on NN.RU – Construction
I will make exclusive mirrors to order in a baguette with falsetto molded frame Price: 200 rub.
Hello dear residents of holiday villages, we offer you our services in landscaping your: terraces, verandas, gazebos, balconies.
Wall cabinet Palermo 550? Call)) ??The modular living room “Eco-2” is a choice from a variety of elements with the possibility. Price: 10 rub.
The Dastorg factory is selling out - kitchen bench straight horizon-4 free delivery in installments without interest. There are other models. Price: 5,300 rub.
| MaiAsim [30.5K] |
LiveInternetLiveInternet
—Categories
- ***IN THE WORLD OF ANIMALS (411)
- bugs (5)
- animals (59)
- Koteikino (169)
- birds (25)
- fish (8)
- puppy (16)
- lizards, frogs (2)
- ***VEDA (882)
- aromatherapy (2)
- fortune tellers (42)
- mushrooms (64)
- stone kingdom (25)
- World (81)
- Magic (228)
- Charms and prayers (22)
- oxymomon (208)
- runes and staves (11)
- herbalist (149)
- traditions (39)
- ***SURVIVALS (10)
- ***KIDS (110)
- ***FOR THE SOUL (134)
- ***FOR DIARY (1103)
- clipart (103)
- next buttons (103)
- comments (43)
- tutorials (184)
- congratulations (23)
- dividers (25)
- frames (271)
- themes and schemes (192)
- flash animations (44)
- backgrounds (74)
- photoshop (17)
- epigraphs (23)
- ***FOR COMPUTER (96)
- Internet adventure games (12)
- wallpaper (10)
- programs (11)
- tips (26)
- ***HOME SWEET HOME (287)
- whether in the garden, in the vegetable garden (50)
- decor (37)
- and inside (20)
- repair (13)
- from outside (23)
- flowers at home (79)
- flowers on the street (65)
- ***WONDERFUL PEOPLE (244)
- famous personalities (24)
- stories (25)
- remember - mourn (25)
- ***FINE ART (1947)
- illustrations (265)
- pin up (19)
- sculpture, figurines (91)
- sur (29)
- fantasy (56)
- Artists (1486)
- ***HISTORY (242)
- Great Patriotic War (76)
- USSR (38)
- Stalin (21)
- ***MOVIE, MOVIE, MOVIE. (6)
- drama world (56)
- cartoons (18)
- servants of Melpomene (124)
- movie, movie, movie. (37)
- ***BOOKSHELF (709)
- Yevtushenko (25)
- Irina Samarina- Labyrinth (33)
- bookshelf (31)
- radio play (14)
- Rozhdestvensky (18)
- poems (462)
- Eduard Asadov (6)
- Yuri Vizbor (2)
- ***BEAUTY AND HEALTH (517)
- hair (84)
- home pharmacy (239)
- home cosmetics (74)
- beauty terrible power (27)
- manicure (21)
- rejuvenating (45)
- legs (5)
- weight loss (17)
- ***FASHION NEWS (258)
- atelier (162)
- Boho (32)
- stars and mods (2)
- national costume (1)
- shoe (4)
- finishing (15)
- retro (21)
- ***MUSIC (70)
- clips (24)
- let's dance (4)
- let's sing (25)
- ***A LITTLE ABOUT POLITICS (448)
- anti-corruption (58)
- Barmaleyka (2)
- Have an opinion (126)
- reserve (14)
- history (160)
- Konstantin Semin (7)
- Superpower News (5)
- ***POSTRYAPUSHKI (2029)
- without fish and meat (24)
- tasty treats (331)
- twists (157)
- snacks (383)
- gas stations (77)
- m-i-i-yaso (197)
- flour (190)
- drinks (178)
- national cuisine (62)
- R-y-i-bka (42)
- salads (134)
- soup (31)
- cakes (223)
- ***HOLIDAY MOOD (242)
- March 8 (8)
- valentines (11)
- palm (2)
- Maslenitsa (4)
- new year (107)
- Easter (22)
- congratulations (17)
- retro cards (62)
- ***REFLECTIONS ON LIFE (445)
- memories (14)
- funny (82)
- beauty is in simplicity (110)
- Mr Freeman (45)
- wisdom of the people (31)
- way to yourself (110)
- quote book (28)
- ***Handcrafts (1203)
- beads (81)
- embroidery needles (79)
- decoupage (14)
- bunnies (12)
- animals (20)
- quilling (8)
- beauty (220)
- baby dolls (44)
- modeling (19)
- folk crafts (21)
- with your own hands (426)
- creations (192)
- flowers (7)
- jewelry (59)
- ***COUNTRY OF THE SOVIETS (166)
- ***PHOTOS (793)
- interesting (64)
- kaleidoscope (62)
- micro and macro (5)
- worldview (194)
- I like (21)
- still lifes (214)
- photographers (106)
- fractals (11)
- flower garden (103)
- ***JOKE OF HUMOR (192)
- demotivators (16)
- Jewish thoughts (3)
- zestiness (5)
- Odessa residents joke (14)
- purely feminine (23)
—Quote book
2 audiobooks for children.. Wojciechowski S. “Mr. Toomey's Christmas Miracle” “Christmas Miracle.
Scheme “Snowflakes. texture" from Mariella_32
My little “Next” transition buttons. Part 3. My little “Next” transition buttons. Part 3.
My little “Next” transition buttons. Part 4 My little “Next” transition buttons. .
My little “Next” transition buttons. Part 5. My little “Next” transition buttons. Part 5. .
Factors influencing the drying period of plaster
Drying a plastered wall depends on several points:
- type of solution;
- temperature and weather conditions;
- the material on which the mixture will be applied;
- thickness of the mixture layer.
To create ideal conditions for the finishing coating, you must strictly follow the rules for applying and using the plaster mixture. When applying a decorative finish to a wet solution, there is a risk of not only ruining the top layer, but also the starting ball. To find out the exact drying time of the surface, you must first find out how long it takes for plaster to dry on walls in rooms with different bases.
In what cases are Rotband leveling compounds used?
These products are presented in the form of dry mixtures for leveling horizontal and vertical surfaces. Their main component is gypsum, which is characterized by good plasticity and ease of work.
Using plaster, you can level bases whose curvature exceeds 7 cm. For subsequent finishing, the resulting surface is puttied with compounds of the same name. Knowing exactly how long it takes for Rotband to dry, you will be able to complete the work in strict compliance with the technology and begin subsequent work at the right time.
Types of base
Craftsmen do not have a clear opinion about the drying period of plaster on different surfaces. Following generally accepted recommendations and observations, a 1 mm layer of solution hardens in one day. If the requirements for processing and applying the mixture are met, this period can be significantly reduced. Thus, a plastered wooden surface at an air temperature of up to 25 C and moderate humidity will dry in about 12 hours. The mortar layer for this example is 20 mm. How long does it take for plaster to dry on plasterboard walls? The dry and smooth surface of this material is an ideal base for plastering. The mixture, 2 mm thick, hardens after 8 hours.
The base is made of aerated concrete - a capricious material. With different humidity levels in the room, the drying time of the plaster lasts from 5 to 35 days.
Average drying time for Knauf compounds
It is impossible to give an unambiguous answer to the question of how long it takes for Rotband plaster to dry on walls. It all depends on the conditions in which the composition is applied, on the room temperature and humidity level. Experts say that the optimal conditions for proper setting of the compositions are a temperature of 18 to 22 degrees and a humidity of 8%. In this case, the composition will dry out 2-5 mm in depth per day.
The manufacturer of gypsum plaster talks about the following properties of Knauf products:
- the initial drying time of the layer (up to 8 mm) is about 60 minutes;
- final strength gain - after 7 days;
- operating temperature - range +5...+30 °C.
During the cold season, moisture does not escape from the walls very well, and therefore the start of work on applying putty should be postponed for another couple of days.
Types of plaster compositions
The second factor that affects the drying speed of the mixture is its type. The most popular solutions:
- Lime. It is in demand due to its low cost and ease of operation. Has high plasticity. The next layer of the mixture can be applied 6-7 hours after applying the solution. Lime plaster is a reliable type that has been proven over generations.
- Plaster. This type of mixture has gained popularity due to its thermal insulation properties and availability. How long does it take to dry gypsum plaster on indoor walls? From 30 minutes to 3 hours is the minimum period between applying layers. 5 days after applying the finishing ball, complete hardening occurs.
- Cement. This type of solution is easy to use and, moreover, versatile. Cement mixtures are suitable for use in rooms with high humidity, such as the bathroom or kitchen. How long should indoor walls dry after using cement plaster? Depending on the thickness of the layer, this mixture hardens within 2-4 days.
- Clay-cement. A solution with this composition is used in plastering stoves. It is resistant to high temperatures and does not lose its shape. The hardening time for clay-cement mortars is the same as for cement plaster.
Dependence of the drying time of the plaster on the thickness of the applied layer. Of course, the drying speed of the solution cannot but depend on the thickness of the layer. The denser the ball of mixture, the longer it will take to dry. Craftsmen do not recommend applying a layer thicker than 5 cm. A ball with a thickness of 15 to 50 mm is considered the reference.
How to speed up the drying process of plaster
You can plaster walls indoors at temperatures from 10 to 25-27℃. If the temperature is lower or higher, the coating may crack or fail to harden and delaminate. High or low humidity can also interfere with plastering. How long does it take for Rotband gypsum plaster to dry on walls at a humidity above 70%? Almost twice as long as usual, and the use of gypsum solutions in rooms with changes in humidity is undesirable.
Gypsum plaster sets quickly, what to do?
Making a solution
Now you can start making the solution. There is always an annotation on the packaging. The dry mixture is diluted with water in a ratio of 2: 1, i.e. For 1 liter of water take 2 kg of plaster. First, water is poured into the container, then the mixture is poured out. They must be connected using a construction mixer or a special attachment for a drill.
Then leave it for 5 minutes so that the chemical additives start working, then mix well again. The result of application depends on the properties of the mixture.
Do not mix a lot of solution at one time. It sets quickly - within 30-40 minutes, so 20 minutes are given for application, and another 20 for leveling. Therefore, it is better to prepare gypsum plaster in small batches.
You should not “rejuvenate” the drying solution with water. This leads to a deterioration in the high-quality properties of the mortar and a decrease in the service life of the plaster layer.
The solution is sensitive to temperature - in the room it should be above 5 °C, but below 30 °C. Otherwise, it will dry out and quickly set.
Which is better?
The choice is influenced by the list of required work. For door slopes and arches it is better to choose coarse-grained putty, for walls and ceilings - medium-grained.
Foreign consistencies are more expensive, but there are also Russian ones, which are in no way worse.
If a machine application method is planned, then the plaster must be appropriate. If you need to purchase consistencies of different fractions, then only from one manufacturer with a similar composition.
You cannot combine mixtures from different manufacturers. Firstly, they may contain different additives that will not combine well. All this will reduce the quality of the plaster layer. Secondly, they can have different colors, and the result will not look aesthetically pleasing on the walls.
It is worth paying attention to the composition. If the chemical additives are more than 30%, then such a mixture will be more plastic, take longer to set, and may slide down the wall. Such plaster mixtures are not suitable for manual application, only for machine application.
Application technique
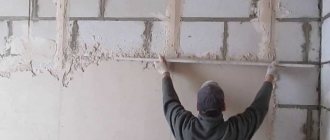
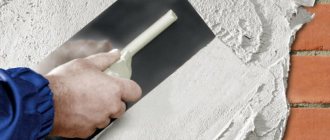
When applying manually, the solution is scooped up onto a trowel and thrown onto the wall from bottom to top. The bottom layer should be thicker than the top ones. Then, as a rule, the layer is leveled from bottom to top with oscillatory movements from side to side. All bulges, blemishes and marks from the rule are removed with a spatula or trimmed with a trapezoidal rule.
From time to time it is necessary to run a spatula along the previously laid plaster from bottom to top to avoid sagging. You can check the dryness of the layer by slightly pressing it with your finger. If it is pressed through, then you need to wait some more. Until the plaster layer has completely hardened, the beacons are removed. The resulting cracks are sealed with the same substance using a spatula.
If there is a reinforcing mesh, then the first layer of plaster should be more watery, the mixture closer to sour cream. The plaster is picked up on a trowel and thrown onto the mesh. When it dries, you can apply the next layer.
After 30-35 minutes, when the walls are dry, you need to moisten them with water until they become matte. Afterwards, the wall must be sanded with a sponge trowel using radial movements to remove small imperfections and remove gypsum milk.
Smooth the surface with a wide spatula. This procedure is carried out once, after which you can use textured paints and glue wallpaper. There is no need to use any additional putty materials.
If you plan to cladding with clay tiles, then this function can be skipped.
If you plan to paint the walls, then you need to do a gloss finish. This procedure makes the walls smooth and is carried out 3-4 hours after filling, but no later than every other day. To do this, the walls are generously moistened with water, and then run over the surface with a steel spatula using shaving movements.
READ Calculate how many blocks are needed for a bathhouse
Gypsum plaster can also be applied using a machine. This equipment is precious, so for one-time repairs it is better to rent it or invite a team of experts. The machine consists of a container for the solution, a hose with a nozzle-gun, a compressor, a power cable and a control panel.
The finished mixture is loaded into a container and supplied under pressure through a hose. The gun is held at a distance of 30 cm from the surface. The layers of plaster should overlap. Afterwards, the surface is rubbed in the same way as with the manual method.
Installation of beacons and mesh installation
To regulate the thickness of the plaster, beacons can be installed. They are placed vertically in increments of 10-20 cm smaller than the size of the rule. The lighthouse should stand 20-25 cm from the corner of the room.
If the layer thickness is planned to be more than 4-5 cm, then it is necessary to install a zinc-coated reinforcing mesh. Otherwise, the layer may retreat under its own weight. The largest layer of gypsum plaster is 8 cm.
Before installing the mesh, you need to apply markings in increments of 40 cm. Holes are drilled at these points and dowels are inserted. In these places, the mesh is attached with an overlap of more than 1.5 cm using stainless steel screws. The mesh can also be placed on construction adhesive, but not pressing it too hard against the wall.
If you need to strengthen a door or window opening, then the mesh is strengthened at an angle. A suitable area is cut off with metal scissors.
Installation begins from any upper corner of the room. It should be strengthened so that there is a gap of 3-5 mm between the wall and the network. This is necessary so that it is placed inside the plaster layer.
If the reinforcing mesh vibrates when touched or does not lie tightly, then it is additionally secured with wire, which is threaded in a zigzag through the cells. There should be no deflections, otherwise air pockets may form and over time the plaster will pull away from the wall.
Peculiarities
Gypsum plaster is made in accordance with GOST 31377-2008. Specifically, it is responsible for the quality of consistency, the main indicators of which include humidity, high weight and maximum grain size. With all this, vapor permeability is not regulated by GOST, although it is also a fundamental technical parameter.
Technical properties:
- maximum thickness without introducing reinforcing mesh – 5 cm;
- average consumption per 1 sq.m – 8 kg;
- setting time of the solution – 40-60 minutes for manual application, 90 minutes for machine application;
- complete drying of the surface – 3-4 hours;
- plaster strength gain – 5-7 days;
- operating temperature range – from 5 to 30 °C;
- dilution ratio with water – 2:1;
- thermal conductivity – 0.23 W/m °C;
- vapor permeability – 0.12 mg/ppa;
- surface adhesion force – 0.3 MPa;
- environmental friendliness - does not emit harmful substances;
- long period of operation;
- frost-resistant;
- does not shrink;
- does not burn, fireproof.
Gypsum plaster has the highest vapor permeability. It perfectly absorbs excess water from the air, and dries quickly when the temperature rises.
In addition to its advantages, gypsum plaster also has disadvantages. These include low water resistance. The mixture is suitable for rooms with normal humidity, although there are also special compositions with additional protection.
Iron elements such as staples, nails, screws, etc. cannot be hidden under gypsum plaster, because absorbed moisture will promote corrosion of the metal.
Regardless of the pros and cons, gypsum plaster is perfect for finishing apartments. It has thermal insulation and noise insulation qualities, which is important in apartment buildings, and also improves the local indoor climate.
Plaster has the highest adhesion to various materials and has a wide range of applications. Ideal for use on brickwork, concrete walls, aerated concrete blocks and foam concrete. It can be applied over old gypsum plaster, provided it is intact. After drying, it forms an even, monochromatic coating.
Mainly, gypsum plasters are used for interior work, but in the near future they began to produce consistencies for exterior work as well. The latter in their own composition contain additional mineral and polymer additives that protect the facade from precipitation.
For interior finishing, gypsum plaster mixtures are distinguished by fraction: fine-grained, medium-grained and coarse-grained. Fine-dispersed ones contain grated sand. This plaster must be applied only in a thin layer, less than 1 cm, otherwise it will crack.
The best plasters are medium-grained. They are universal, used everywhere in rooms with normal humidity for walls and ceilings, the maximum thickness of such plaster is up to 5 cm.
There is also hydro-resistant gypsum plaster for wet rooms. This plaster is suitable for finishing bathrooms and kitchens, especially in the apron area.
There is no need to use such plaster as a final plaster, but it is perfect for painting or ceramic tiles.
There are starting and finishing plaster mixtures. The starting one is used to eliminate gross defects and deep cracks; it can be used to set a texture, repair door and window openings, and level collapsing walls.
The maximum layer of plaster is at least 3 cm. Finishing plaster is used for finishing premises, eliminates minor defects and requires puttying and glossing. Typically the layer thickness does not exceed 0.5 cm.
For finishing facades, gypsum-polymer and gypsum-mineral compositions are produced. Gypsum-polymer is used for concrete and gypsum concrete surfaces, as well as sand-lime brick. They are applied in a thin layer, have greater strength and frost resistance compared to conventional gypsum mixtures, are lightweight, but take longer to dry.
Often polymer facade plasters have a relief pattern. Gypsum-mineral mixtures are more plastic due to mineral plasticizers, which at the same time act as a binder.
Despite additives that increase resistance to temperature changes and atmospheric conditions, gypsum plaster is not recommended for use as a finishing coating. It will still absorb moisture and eventually become unusable. The exception is regions with a dry climate and rare precipitation.
It is optimal to use gypsum-based plaster as an intermediate layer between the wall and facing material, such as tiles or stone.
Mixtures are also distinguished by the method of application.
- For manual work, the compositions contain less chemicals, their setting time is 40 minutes.
- When applied by machine, it takes more time to work, so the composition contains special additives that increase the setting time by 2-3 times (1.5-2 hours). First, the master needs to apply the solution to the walls, and then only begin leveling with the rule.
Often dry mixes for machine application contain crushed sand. It promotes better mixing of the mixture and its unhindered flow through the gun.
Most often, plaster is found in white and gray colors, but you can find pink and beige. Lime-gypsum plaster has a whiter color due to the added lime. Also, titanium and zinc white in the composition give a white color. If necessary, you can add dye to the solution, the main thing is that it is combined with gypsum and additives in the mixture.
Sources:
https://mirglobo.ru/raznoe/gipsovaya-shtukaturka-bystro-TVerdeet-chto-delat-kak-mozhno-raenimirovat-gipsovye-shtukaturki-knauf-start-finish-posle-zimy-shtukaturki-shpaklevki-kleya-stroitelnye- i-otdelochnye-m.html https://odinstroymarket.ru/gipsovaya-shtukaturka/
How can you speed up the drying process?
Of course, I want to finish the renovation as soon as possible. But how to speed up the natural drying time of plaster in order to quickly begin decorative work? Craftsmen do not advise getting carried away with artificial drying of plastered walls, so as not to damage their texture. But there are still a few tricks that will help you get the job done faster:
- Postpone repairs to the warmer months. Autumn and winter are not the best season for renovation work. At low temperatures outside, the plaster will harden slowly. Therefore, if there is nowhere to rush, it is better to wait for the warmth.
- Use dry heat in the areas being treated. To speed up the hardening process, you can use electric batteries, but you need to carefully monitor the temperature. There is a risk of cracks appearing on the surface.
- You can use bright lighting, hair dryers or special compounds to speed up hardening. But before use, you should carefully read the instructions for the plaster mixture and the method of influencing it.
- Before applying the mixture, you need to treat the surface. How long does it take for primer to dry on a wall before plastering? Different compositions have different drying times, but on average about 2-5 hours. Priming will ensure the necessary adhesion of the plaster to the base.
- Gypsum compounds dry much faster. If the purpose of the room allows, it is better to use solutions with gypsum.
Sources:
https://www.remotvet.ru/questions/21812-pochemu-shtukaturka-rotband-srazu-tverdeet-posle-zamesa.html https://sense-life.com/poleznye-sovety/5-ulovok-pri-rabotax -s-gipsom-chtoby-ne-zastyval-slishkom-bystro/ https://stroyremontiruy.ru/tematicheskie-statji/populjarnye-statji/410-kak-zamedlit-skhvatyvanie-gipsa.html https://www.liveinternet. ru/users/sonyagoda/post452747918/ https://otdelkasam.ru/raboty/shtukaturka/skolko-sohnet-shtukaturka.html
Composition and installation technology of the material
Gypsum putties
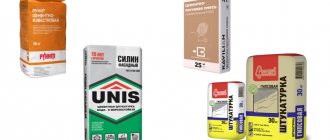
Starting gypsum putty PW-01
- Basically, all the characteristics of gypsum plaster depend on its purpose, since it can be used as a starting, finishing or universal finishing of premises (ceilings, walls, plasterboard structures of various types) . The decisive factor in the use of a particular solution is the condition of the rough base, that is, the degree of plane differences. But all such mixtures have one thing in common - they are all prepared as a powdery mass and diluted with water.
- Thus, starting putties are used in cases where differences in the base reach from 10 to 50 mm in depth, although in some cases the last figure may be greater . However, it is undesirable to apply a mixture thicker than 50 mm, and if such a need arises, this is done in two approaches - the first cape covers the hole, making it smaller, and the second reaches the desired level. The starting mixture is laid along beacons that level the desired surface.
Finishing gypsum putty EUROGIPS
- The finishing putty, as required by the instructions, is applied only in a thin layer to a previously leveled and primed surface . Such plaster, as a rule, is made for painting or applying a stencil design - the result is an almost mirror-like surface.
- For a layer of no more than 20-30 mm, universal gypsum plaster of the ROTBAND KNAUF type is successfully used . The uniqueness of this mixture is that all finishing is done in one layer and dries for no more than 48 hours, which creates undeniable advantages when renovating premises. Rotband is almost never sanded, since it is possible to create a smooth surface using a spatula.
- In addition, gypsum putties are fully used in modeling - they are used to glue ready-made cast fragments and seal joints . If you are wondering why gypsum plaster hardens quickly, it is due to the binding component, namely gypsum. This is precisely the decisive factor in its use for figure sculpting.
Cooking method
Now let's find out how to thin gypsum plaster. To do this, we need a rubberized bucket (in extreme cases, you can get by with a galvanized or enameled container) and a low-speed drill with a mixer for putty. It is important to consider the size of the mixer - the larger the bucket, the larger its blades should be.
It may happen that you do not have a low-speed tool - in this case, you can use an ordinary drill. In this case, you should set the wheel at the start button to minimum speed, but so that it remains possible to rotate the mixer in the thick mixture. Well, in this case, the mixer itself needs a small one (only for putty, not for paint), since the engine power is not enough for mixing.
We continue to describe how to thin gypsum plaster: pour water into a bucket, the average temperature of which should be 15⁰C-20⁰C. The ratio of water and powder is usually indicated on the bag by the manufacturer, but craftsmen most often fill the container to one third and fill it with putty, trying to ensure that the mixture has the same concentration as thick sour cream.