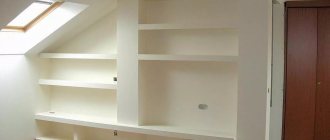
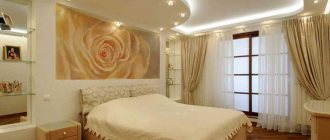
A plasterboard niche with lighting will be an excellent design solution for decorating a living space. It can be designed both in a new house and in an already lived-in apartment. The ease of working with gypsum boards will allow you to realize the most intricate designs of the master. After special elastic plasterboard appeared, it became possible to create niches of any shape.
An example of the design and decoration of a plasterboard niche with lighting
The backlight in them can create a soft diffused radiation effect.
Types of lighting fixtures
There is a wide range of lamps for lighting, but only fluorescent, neon and LED representatives are suitable for the design of a niche. In the photo you can see similar samples.
Luminescent
Such lamps are well suited for lighting plasterboard niches, however, they are used infrequently, as they have a short service life. These devices can be used as the main source because they are very bright and do not get very hot, up to 35ºC. For this reason, the lamps are completely safe; they are best installed in apartments where small children are present.
Design option for a plasterboard niche with fluorescent lighting
If such spotlights are chosen, it is best to give preference to closed (silicone) ones.
Neon spotlights
They are more popular, they have a wide color palette, and are used to decorate the interior of a room. The price of such lighting is usually higher than any other, because most often neon lamps are made individually for a given room. The device consists of tubes with neon gas, operates silently and consumes little energy. Even when working for a long time, the devices only heat up to 40º C. The service life of such lamps is at least 10 years.
LEDs
Also widely distributed. Their use will help to beautifully decorate the interior of the room. The operational properties of LED backlighting, its similarity to daylight, allow the lamps to be used for a long time and safely.
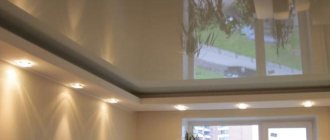
Diagram of LED lighting in a plasterboard niche
Most often, bright strips with LEDs are placed in a box with a significant recess.
Another solution
Expanded polystyrene cornice
If for certain reasons the formation of a niche or box is impossible (for example, there is already a single-level ceiling made of plasterboard and you don’t want to break it), then in such a situation the solution would be to install a polystyrene foam cornice.
A wide decorative cornice is the simplest way to create a hidden type of lighting. But it is rare for several reasons:
- the cornice allows you to install only the lightest light sources;
Note! Only an LED strip can be installed on a polystyrene foam cornice without additional equipment.
- low strength of the resulting structure;
- low thermal stability.
At the same time, the advantage of using such a cornice is the ease of installation and the fact that all the work can be easily carried out by one person. Installation of the cornice occurs as follows:
- we retreat 5-10 cm from the ceiling surface. This is the optimal distance;
- draw a marking line around the perimeter of the room;
- Glue the cornices along the line. They can be glued both to wallpaper and to bare plaster (a more preferable option, but only after priming);
- We use liquid nails or acrylic putty as an adhesive;
- the joints between the cornices also need to be glued for camouflage;
- after this, the entire structure can be painted to match the color of the overall interior or ceiling:
- then install the backlight.
As you can see, installing a hidden type of lighting for plasterboard ceilings has several implementation options. Choose the most optimal one for you and forward to achievements!
Features of creating lighting in a niche in different rooms
The design of a niche can perform several tasks:
- It will hide various imperfections of the wall plane.
- Replaces expensive furniture.
- Allows you to decorate an unusual interior, imitate a window or other desired object on the wall.
- It will help to visually enlarge the room in size and allow you to decorate it beautifully.
Before carrying out work on arranging a niche with lighting, you need to design the location of the devices. A professional electrician needs to re-equip the wires and determine the coordinates of the sockets for the rational installation of lighting fixtures.
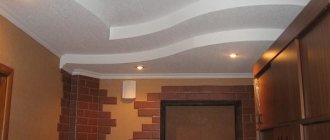
A selection of several options for lighting in a plasterboard niche
The formation of lighting in a plasterboard niche in certain rooms has some features:
- When constructing lighting in a kitchen niche, special attention is paid to the arrangement of lighting. It can be installed both at the top of the model and in the sides of the recess. During family gatherings or receiving guests, such a resource will create a nice homely atmosphere. When deciding to build several plasterboard boxes in the kitchen, they need to be decorated in the same style, with similar lighting. It is also necessary to think about the main lighting lamps; it is better if they emit diffused yellow light;
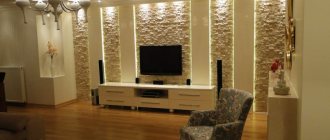
- Lighting in the living room niche will help create a distinctive personality in the interior. One spotlight will fit a small box, and the sides of the structure can be decorated with mirrors; they will reflect the shining light. In this case, the living room will take on a mysterious look;
Decorating a niche with lighting in the living room - If there is no lighting in the niche located in the bedroom, the plasterboard model will look massive. In addition, such dim lighting can be used as a night light. Soffits in a strip with LEDs have the ability to change color; this property will have a relaxing effect and create an intimate mood. Powerful neon lamps are not suitable here; they are not able to convey a cozy atmosphere.
Making a niche for a TV
Designs such as niches are also used to place some furniture in the wall. When planning the interior of the hall, owners often think about the possibility of securely mounting the TV broadcaster. A plasterboard niche for a TV would be appropriate here. Such a design will turn an ordinary screen into a decorative element, and will also allow the device to be securely and conveniently positioned.
Original design of a niche for a backlit TV
Even a person with minimal construction skills can handle the installation. By choosing a niche in the wall for a TV, owners will be able to give the room a cozy atmosphere.
Required materials and tools
After the calculations are completed, drywall tools and materials are prepared. It can be:
Diagram of a plasterboard niche with lighting
- GKL for walls;
- metal mounting profiles;
- necessary lighting devices;
- grinder, drill, hammer drill, metal scissors;
- measuring instruments, building level, plumb line;
- reinforcing tape, perforated corner;
- elements for fastening parts: screws, dowels;
- putty mixture.
How to make LED wiring
LED wiring is marked in the ceiling niche. If it is decided in advance that it will decorate the ceiling, then the horizontal profiles of the second level should have a protrusion of at least 10 cm.
Frame for a niche for LED wiring.
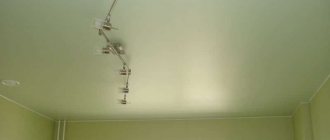
After the body is covered with plasterboard and the niche is formed, you can glue the LED strip in it with double-sided tape. Properly designed lighting will transform the ceiling - turning it from boring and ordinary to original and positive.
Stages of work on creating a plasterboard niche with lighting
The wall where the plasterboard niche with LED lighting will be built must be level, large bulges should be removed, and holes should be filled with putty. The video shows the step-by-step process of installing a plasterboard niche with lighting.
Marking
Before installing the structure, you need to draw it on the wall, carefully measuring and marking everything. Markings are also made on the ceiling, stepping back from the wall to the depth of the shelves. Here they make marks for installing the guides. When taking measurements, you need to pay attention to the sinker at the plumb line; it should be positioned freely, without touching anything.
Frame installation
- Metal profiles PN (ceiling guide) 28x27 are attached to the marks located on the ceiling and floor; vertical posts consisting of metal profiles PP (ceiling profile) 60x27 are fixed in them with self-tapping screws.
- Following the measurements of the excavation depth, short pieces of PP are installed horizontally at a distance of 50 cm to connect the structure, checking with a level. This is done so that future shelves rest firmly on these parts of the frame.
To strengthen the external corners, the profiles are connected by forming a comprehensive closed device; for arched, curved lines, a specialized profile is used, and it is also possible to cut the PP 60x27 sidewall for bending along the required contour.
Sometimes a hidden backlight is built, with a border around the perimeter using profile sections protruding beyond the frame.
Open lighting is built after finishing.
Attaching GLK sheets to the profile and installing lighting
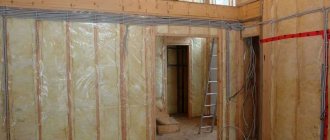
Before you make a niche from gypsum plasterboard with your own hands, electric wires for lighting are placed and strengthened in the frame. Drywall elements cut to measurements are attached with self-tapping screws to the inner surface of the niche, to the profile.
An example of a niche frame sheathed with gypsum plasterboard sheets
Using the markings, holes are made for the lighting fixtures, and the ends of the wires are placed there to connect them later. You can make the curved parts of a plasterboard arch in the following ways:
- Roll strips of drywall with a needle roller and wet the surface. The part is bent and attached to the frame, where it dries, taking the desired shape;
- If the bends are small and the drywall is thin, it is enough to bend it with your hands and place it on the frame, attaching it with self-tapping screws;
- Deeper curves can be achieved by cutting strips into parts of the plasterboard structure. Having placed it on the frame, securing it well, the cuts should be filled with putty;
- Then the outer walls surrounding the niche are cut out and installed. When cutting strips, it is recommended to make few joints between the elements.
The process of assembling a curved niche made of plasterboard with lighting.
They must be on the profile; at the place of the cuts, you need to chamfer the plasterboard. The self-tapping screws must be embedded deeper into the material; these places are then carefully puttied.
Further processing of the niche surface
The entire surface of the manufactured plasterboard niche is primed with at least 2 layers, thoroughly drying each one. GKL is treated with starting putty, gluing the corners and joints with reinforcing tape and a perforated corner to avoid cracks. After drying the layers, the final finishing of the product occurs to create an absolutely flat surface.
Plastered surface of a plasterboard niche
Finishing of the model
The types of decorative finishing for a do-it-yourself plasterboard niche with lighting can be very diverse: coating with water-based paint, decorating with wood, plastic, wallpapering and much more, which will be preferred by the owners of the room.
Frame assembly
Most often, the installation of a suspended ceiling made of plasterboard occurs in the living room. This is explained by the parameters of the room, because in most residential buildings the living room is the largest and allows you to effectively place light points.
To assemble the basic frame, follow these steps:
- at the corners, stepping back 10 cm from the ceiling, make marks, connect them together in a horizontal line, check the correctness of the markings using a building level;
- along the drawn line, mount a UD profile with a shelf width of 40 mm, fixing it to the wall using dowels;
- perpendicular to the guide at a distance of 40-50 cm, CW profiles with a shelf width of 50 mm are fastened with self-tapping screws and fixed to the ceiling using hangers;
For rigidity between the starting profiles, it is recommended to install stiffening ribs (jumpers) in steps of 50 cm and connect them to the starting “crab” profile.
Then the frame is sheathed with sheets of plasterboard 6.5 or 9.5 mm thick, so as not to weigh down the structure. It is better to choose a brand of slabs that is moisture resistant. As a result of fulfilling the above requirements for the material and arrangement of the frame, the ceiling in the living room is obtained with optimal load-bearing capacity, the service life of which is unlimited.
Connecting the backlight
As already mentioned, all electrical wiring under the drywall is installed at the stage of assembling the frame from the profile. Its ends need to be brought out and the niche covered with plasterboard. Backlight installation steps:
- First, closed-type lamps are installed, connecting them to the wires. These can be special devices with silicone filling, their heating temperature does not exceed 35 ͦ C;
- Installing a strip with LEDs requires the presence of a power supply, which is placed inside the niche.
LED bulbs located on self-adhesive tape will come in handy. It is mounted on the wall inside the niche or placed as indicated in the project. To direct the flow of light into the recess, a side is constructed using a starting profile or a piece of drywall. It is sealed with plasterboard, plastic or metal overlays; - Neon tubes are also equipped with a side;
- Spotlights are placed in the prepared openings of the box. Their contacts must first be connected to the wires.
The photo shows examples of niches decorated with several types of lighting. In this regard, a specialized inverter for generating electricity must be equipped at the bottom of the structure, hidden behind the drywall. When making a plasterboard niche in a wall using lighting, you must have certain knowledge, which can be obtained from a specialist.
Box formation
The box for hidden LED lighting is the most important component: a strip is mounted in it, which will reflect light rays from the ceiling surface and distribute them throughout the room.
Box assembly steps:
- draw the boundaries of the future box on the base ceiling;
- attach a supporting profile along the border of the drawn line;
- stepping back 10-15 cm from the wall, secure another load-bearing profile, forming the inner perimeter of the box;
- every 40 cm, attach cuttings of the starting strip to the profile, the length should extend beyond the base drawn line by 10 cm;
- connect the supporting and starting profiles with suspensions;
- sheathe the gypsum board frame;
- Install corner profiles at the joints of plasterboard sheets, seal the seams with putty, sand them, and prime them.
Box frame