DIY plasterboard shelves often have an unusual appearance and can accommodate a large number of different items. Thus, even equipment can be installed on a rack with additional metal reinforcement. In order to make a structure with your own hands, you first have to decide on its shape, then purchase all the materials.
Of course, such work requires certain skills, so it is better for beginners to choose the simplest shelf option or turn to specialists. Below we will tell you how to do this work yourself.
DIY plasterboard shelves
Advantages and disadvantages of drywall
Drywall is classified as a universal material that has various purposes - ceilings, niches, and all kinds of shaped structures are made from it. This popularity is due to the following advantages:
- GCR is easy to process; structures of any shape can be cut from it.
- Drywall is a lightweight material. Of course, when transporting solid sheets, they may seem too heavy. However, the finished shelves are weightless. In addition, the profile frame will also not weigh down the structure. It turns out that even a large shelf does not overload the load-bearing wall.
- Upon completion of all work, the plasterboard shelves are finished - at this stage you can give them an unusual design, thanks to which they will look harmonious in any interior.
- Even over time, such structures do not deform and retain their original appearance for a long time.
- The cost of such material is significantly lower compared to natural wood, plastic or furniture panels.
- It is not necessary to use solid sheets to make shelves - pieces of gypsum plasterboard that may have remained after installing the floors will also work.
Plasterboard construction can also be durable
Despite the large number of advantages of this material, some of its disadvantages should be highlighted:
- fragility;
- the appearance of deflections under the influence of a large load;
- poor resistance to moisture.
Tools and materials
At different stages of the work you will need materials and tools for drywall. The raw materials must be carefully prepared so that the process can proceed without interruption.
| Work stage | Tools and materials |
| Drawing up a drawing diagram | Paper. Pencil or pen. Ruler or tape measure. |
| Surface marking | Plumb or level. Laser pointer for measuring differences. Corner for marking profile joints. Pencil or marker. |
| Assembly and installation of the frame | Profiles (guides) for complex, heavy-load-bearing structures will also require rack-type profiles. Self-tapping screws for drywall of the selected diameter. Screws and screwdriver. You need to buy a knife or metal scissors. |
| GKL sheathing | Plasterboard sheets of selected diameter. Drywall knife. Screwdriver and screws (self-tapping screws) for fastening profiles. |
| Sealing joints between sheets | Putty (dry, which needs to be dissolved or a ready-made mixture). Special reinforcing tape for sealing joints. Putty knife. Sandpaper for smoothing out uneven surfaces. |
| Finishing | Dye. Wallpaper for gypsum boards. Primer mixture. Putty knife. Glue. |
Having acquired all the above materials and tools, the process of creating corner shelves will be easy and quick.
Types of plasterboard shelves
There are several main parameters by which such designs differ. Before choosing one option or another, you should familiarize yourself with them.
Table No. 1. Types of gypsum plasterboard shelves
| View | Description |
| Open | Such shelves mainly have a decorative appearance; they are placed to display various souvenirs, cups, photographs and other decorations. |
| Closed | These are already more functional shelves, so they are often made deep to accommodate many items. |
Open shelves
Table No. 2. Types of shelves by type of placement
| Accommodation | Description |
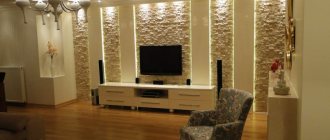
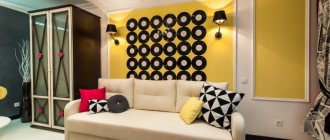
| Central | In the center of the room, a large structure consisting of many shelves is most often installed. This option will best fit into the interior of the living room. |
| Angular | Such plasterboard structures will fit perfectly into the interior of a small room. Moreover, they are not only decoration, but also perform a functional task. Quite often, a bookcase is placed in the corner. |
Position of shelves in the corner
In this case, any plasterboard structures can be designed as follows:
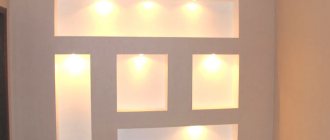
- With backlight. Light bulbs are often built into various shelves and niches. Their exact number will depend on the size of the structure. Otherwise, this design allows you to highlight various items on the shelves, which is especially important for dark rooms.
- No backlight. This is a standard design and is quite easy to install.
LED lamps are often used for lighting
Shelves made of gypsum plasterboard are:
- decorative - usually these are very light structures that are not intended for heavy loads;
- functional - such shelves can withstand heavy loads (for example, books can be placed on them in several rows, so this design requires preliminary installation of the frame).
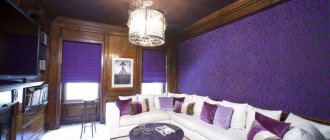
An unusual version of plasterboard shelves
Video - Shelves made of gypsum plasterboard: original ideas
Things to think about in advance
Since it is easy to assemble a wide variety of compositions from gypsum sheets, their shape and size will be a secondary factor. It is much more important to take into account the conditions in which the assembled structure will be used. This is, first of all, humidity. Different types of gypsum plasterboard are suitable for different conditions - in ordinary rooms, any is suitable, but for humid rooms, only moisture-resistant ones are needed.
In addition, when choosing a gypsum board, it is necessary to take into account the possible loads to which the structure assembled from it will be subjected. The thicker the sheet, the stronger the shelf or niche will be. However, the thickness of the sheet affects the appearance of the shelves, therefore, you need to look for a compromise solution, since a niche with shelves made of thick plasterboard may not look very nice.
Additional decor in the form of built-in lighting will significantly transform the entire composition and give it additional functionality. At the same time, the cost of the entire structure increases, not only by the cost of the lighting itself, but also by the cost of installation work. In the absence of relevant experience, it is better to entrust electrical installation work to a specialist.
In what rooms are plasterboard shelves installed?
Universal gypsum plasterboard shelves can be installed in any type of room:
- in the living room - most often, shelving is placed along the entire wall, because in such niches it is very convenient to install various equipment;
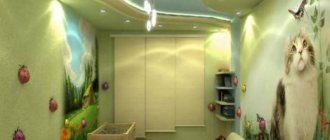
- in the nursery - plasterboard shelving in the child’s room is often installed in order to zone the space, which will make it possible to better separate the sleeping area from the play area (this idea should be taken into account by parents who need to equip a room for two children);
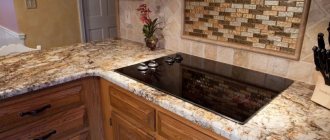
- in the kitchen - usually in the kitchen such shelves are left open, because this way it will be more convenient to use them for their intended purpose (such a structure should be well strengthened from the inside, because the dishes are quite heavy);
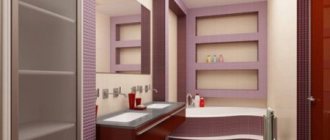
- in the bathroom - in a room of this type there are always not enough shelves, and so that they do not take up extra space, it is recommended to make them hanging;
You can read about how to make hanging shelves with your own hands in our article.
- in the corridor - here it is better to install closed shelves, which are useful for storing various items; if necessary, mezzanines can be made;
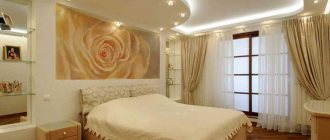
- in the bedroom - in such a room you can install shelves of any type, first of all, it will depend on the dimensions of the room.
Plasterboard niches in a children's room
Properties of plasterboard sheet
A plasterboard sheet is a product consisting of two strips of thick mounting paper and a solid gypsum-based plasticizer between them. GCR has many unique features.
So, it has the following advantages:
- environmental Safety;
- flexibility allowing the creation of curved structures;
- affordable price;
- ease of processing and installation;
- no thermal expansion;
- water resistance after appropriate treatment;
- non-flammability;
- possibility of equipping with lamps of various types;
- strength to withstand significant loads.
By installing plasterboard shelves in the hall, you can not only decorate it, but also hide some defects and unevenness on the wall.
Finishing
To give the structure a finished look, the surface is finished. To do this you need:
- Initially, it is necessary to apply a primer to the drywall so that the putty material adheres firmly to the surface. The primer is applied with a spatula in a thin layer.
- The first layer of putty is applied to the drywall with a spatula; it should be of such thickness as to hide all the seams, the caps of the screws recessed into the gypsum board, and the joints between the sheets. Simply put, the result is a homogeneous structure without protrusions and depressions on the surface.
- The first layer is sanded off with sandpaper to ensure a smooth surface.
- Then apply a thin second layer of putty with a spatula. When the material has hardened, they begin the final stage of the process - painting the drywall or gluing it.
You can create different designs for plasterboard shelves. Some build lighting fixtures into the structure, others decorate it with multi-colored glass. In any case, by creating a niche from plasterboard with your own hands, a person opens up the chance to organize the interior according to his own ideas and ideas.
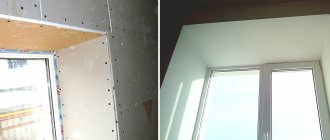
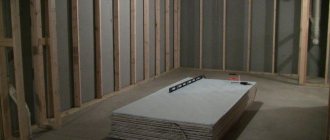
Frame covering
Diagram of the correct joining of drywall sheets.
In order not to make mistakes when preparing blanks from gypsum plasterboard, it is recommended to make a pattern for each of them. Newspapers, sheets of Whatman paper or wallpaper are suitable for this. Only after careful fitting can you apply the pattern to a sheet of finishing material and cut out the part.
You can do this using:
- sharp knife;
- hacksaws for wood or metal;
- jigsaw.
The finished fragment is placed on the frame and screwed to it with metal screws. Their caps need to be recessed into the surface by 1-2 mm. Curvilinear gypsum plasterboard fragments are wetted and, after achieving the required flexibility, attached to the profile. After drying, they can be processed.
Excess material protruding beyond the edges of the frame can be sanded off using a belt grinder. Finer sanding of the edges is done by hand with sandpaper.
Related article: DIY glass painting with acrylic paints