The advantages of this solution
There are many advantages that distinguish plasterboard compositions.
First of all, it is the ease of working with the material. Indeed, absolutely anyone can cope with this. The only difficulty will be lifting rather heavy sheets to the ceiling. However, this can be solved by connecting an assistant to the work. Behind the surface of the assembled ceiling covering, you can hide wires, ventilation ducts and other communications. If the surface of the concrete floor is uneven, you do not have to level it first - drywall will perfectly hide the existing imperfections.
The cost of the entire structure consists of several components: the cost of the material itself, the price of a set of profiles for the frame and the cost of external finishing. At the same time, the total amount will not be too large if you create not the most complex composition.
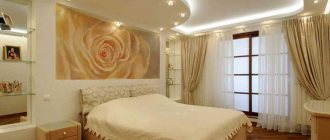
The lighting will be exactly the way it should be. Recessed lights can be placed anywhere and completely illuminate the entire nursery. If you wish, you can arrange decorative lighting, which is very important in children's rooms, since at night it can serve as a night lamp. In the photo below, a children's bedroom, in which lighting is installed on the ceilings made of plasterboard.
There are simply countless design options for such ceilings. Colors, textures, shapes of the composition - everything you think of can be realized. You just need to remember the basic rules that are associated with the principles of arranging the ceiling surface.
Drywall arches
An arch is one of the most popular elements that can be created using drywall. Doorways are often designed in the shape of an arch in small apartments, where there is a need to separate adjacent rooms, but there is no desire to use ordinary doors that will “cut” and reduce the already small space. Arches are also used as a purely decorative element.
It is not difficult to create such a design yourself. You will need to build a frame, and to give the profile an arched shape, you can make cuts on its side edges every 10-12 cm or more often if the bend of the arch is stronger.
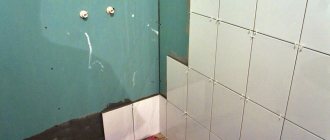
Installation of the frame is not much different from a similar process when leveling walls, for example. In order to give the drywall a curved shape, one of its sides together with the gypsum is slightly moistened with water (you can first pierce the surface with a needle roller), and then applied to the pattern of the required shape. When the sheet dries, it will have the desired shape. Moreover, you can find a special type of drywall on sale, called arched. It has a minimal thickness (6.5 mm), making it easy to bend.
Open zoning
This type of zoning may include decorative partitions that are equipped with a variety of niches, columns and other plasterboard structures. Such zoning can serve not only practical purposes, but also become an excellent decoration for the apartment.
There are several design ideas for partitions for open zoning:
- A decorative open partition can separate the bedroom and living room. Such a partition can simultaneously become a wall for creating a false fireplace or some other decorative plasterboard structure on the bedroom side.
- A partition installed between rooms such as the bedroom and living room may include a special niche for installing a TV. This niche can be an excellent decorative solution for both rooms. So, on one side of the partition you can install shelves, and on the other you can come up with a decorative design that decorates the bedroom.
- Partitions are often equipped with shelves that go right through the wall. On such through shelves you can install a terrarium or an aquarium, which will decorate both rooms at once.
- In addition to useful solutions, a partition is often created as a purely decorative element. Such a partition can be completely transparent. It won't serve any practical purpose, but it looks pretty good from a design point of view. Such partitions are often equipped with various lighting elements, curly shapes cut from plasterboard sheets and other original solutions.
With open zoning, the partition can even be located in the middle of the room, dividing it as if into two zones that are not separated from each other. This can be either a design decision or a practical division of the room.
Types of plasterboard ceiling structures
Despite the fact that drywall seems to be a rather fragile material, structures of any complexity can be made from it. There are different options for ceiling structures, but in the nursery they are made:
- Single-level;
- Multi-level.
Single-level designs are suitable for modest-sized rooms. Thanks to them, it is easy to hide any defects, resulting in a completely flat surface that is convenient to decorate. In multi-level structures, in most cases, decorative elements are ceiling levels with different shapes and contour configurations. They can easily zone a spacious children's room and create special areas for games and educational activities. Different ceiling levels are often made to roughly divide a room where several children live together.
Plasterboard partitions: photos in the interior, types, shapes, design
With the help of such a fairly common and fashionable decorative element, you can not only perfectly divide a single room into functional zones, but also significantly transform a modern interior space. The storage space, which is part of the room, can be separated using a stylish designer partition with shapes that organically are combined with the interior and do not look out of place in it or create a contrasting accent, highlighting the structure with a color that is radically different from the general design. The gypsum plasterboard structure adjacent to the staircase not only separates the flight of stairs from the room, thereby zoning the space, but also ensures a safe descent and rise.
A partition with niches and shelves filled with various decorative little things functionally separates or separates the space, creates an aesthetic design and creates a rather unboring design. This decorative element, due to its dual function, is quite popular, since cabinets can be used not only for storage, but also as a room divider.
Useful tips
When starting a major renovation of an apartment, many may encounter such common problems as uneven walls and ceilings, cracks, insufficient insulation and a complete lack of sound insulation in concrete walls. In all these cases, the optimal solution would be to use drywall; it can easily help resolve such problems. This way you can save energy, because you will avoid using plaster and cementing all surfaces in the room, and money.
If you need to cover the entire room with plasterboard, then you need to start facing work from the ceiling. Only after this can you proceed to installing the slabs on the walls.
When carrying out design work indoors, you need to know how compatible the materials that you will use when decorating the premises are. Remember that plasterboard is quite fragile, and walls made from it cannot then be faced with ceramic tiles or other heavy facing materials. If you decide to place plastic panels on top of the plasterboards, then you will need to place a sealant (in the form of self-adhesive tape) between these materials.
Plasterboard boards are most often mounted on an aluminum frame, with which you can create the most incredible designs (including all kinds of niches and multi-level ceilings).
To avoid unpleasant situations during the work process, it is worth drawing a detailed plan for the location of all plates and mounting profiles. It is also recommended to transfer this drawing from paper directly to the surface in the room.
How to do it
Before you finally make a bet on a plasterboard partition, instead of a bulky and heavy brick wall, you need to think about everything. First of all, contact the housing and communal services, where they will tell you whether the walls can be demolished.
Dividing a room with a plasterboard partition
Important nuances
In order to avoid problems during the redevelopment process, you need to:
- View the apartment project plan in the housing cadastral passport. A room with a usable area must be no less than 9 square meters. The width should not be less than 2 meters 25 centimeters.
- And also remember that rooms such as a sanitary unit, as well as the kitchen area, cannot be moved under any circumstances.
- If you plan to use plasterboard to divide the kitchen space and the room, and they will be separated by a plasterboard arch, then you cannot install a gas stove in the kitchen.
Zoning of a one-room apartment - You should also be aware that load-bearing walls must not be demolished under any circumstances. As a rule, this is reported by BTI employees or representatives of the housing and communal services.
Return to contents
Decorations for walls and ceilings
One of the main functions of plasterboard sheets is to make ceilings and walls as smooth as possible. However, you can use your imagination and creativity and create a unique design using beautiful figured plasterboard elements that look three-dimensional (they are attached to the surface). But such a design will need to be thought out in advance, because the frame should be created taking into account the size and shape of the figures.
In a children's room you can attach a butterfly, a boat to the wall, stars, clouds and much more to the ceiling. For bedrooms and living rooms, you can create a variety of shapes with your own hands. They can be quite fancy - it all depends on your tastes and the overall interior. Spotlights are well suited for decorating complex multi-level structures: with their help you will highlight plasterboard elements and make them effective accents.
Creative ideas: partition for zoning a room made of plasterboard
Zoning of residential and non-residential premises with plasterboard partitions has become widespread relatively recently. This type of renovation allows you to visually divide a room into certain zones or acquire additional living space. Plasterboard partitions can have different geometric shapes and designs, and can include through or regular niches, columns, arched and other elements.
To divide a room into a bedroom and a living room, you can build a full-fledged wall - a partition made of plasterboard, which will meet the necessary requirements in the field of sound insulation and functionality. Such a wall can hide communications or a small hiding place behind a wide picture; it can include decorative and functional elements with lighting.
- Open - dividing a room into two rooms is done only visually. For this purpose, a decorative false partition is erected.
- Closed - the pier being erected is an additional wall with an arched opening or door.
With open plasterboard zoning, the partition can be located anywhere in the room: it can be divided in half or one part can be made smaller than the other. In small apartments, zoning rooms helps to organize the living space more conveniently. For example, in a one-room apartment, with the right approach, you can arrange a full-fledged bedroom and a fully functional living room.
How to install a ceiling in a nursery yourself
It should be noted right away that the process of creating a ceiling structure on your own is complex. Here you need not only tools and knowledge, but also some skills in construction work. In addition, if you have taken on the construction of a structure, then you need to plan a separate stage of product design. You will need the ability to draw, cut and come up with original shapes for hanging installation. Well, why haven't you changed your mind yet? Then do not forget that before starting work, the room must be cleared of bulky interior items.
The entire process of installing a ceiling structure consists of several stages:
Marking. The perimeter of the room is marked with a horizontal level. On the old ceiling, draw the shape (simple or complex) of the new ceiling. It is imperative to calculate the distance from the main surface of the ceiling to the lowest tier.
- Creation of a metal frame. The frame must be rigid. The service life and its reliability depend on this. When assembling a structure of several tiers, work begins from the lower section. For this purpose, UD and CD profiles, connectors of various types, as well as fastening parts are used.
- Assembling the frame of the first tier. UD profiles are attached along the drawn lines on the walls and ceiling using dowels. On flat areas everything works out without problems. Curvilinear profiles require a different solution. The profile flanges must be cut on both sides or a segment cut out (this depends on the direction of the bend). Then, without much effort, it is bent in the way you need for the project. The connection of two planes: horizontal, starting from the walls, and vertical, starting from the ceiling, is carried out with CD profiles.
Options for plasterboard ceilings in a children's room
The assembly of the lower tier is considered completely completed. It is good to have a diagram consisting of the assembly of the structure and photos taken from construction sites. They will be a visual guide to completing the work.
- Laying electrical wiring.
- Installation of the second tier. The principle of assembling the second level tier is similar to the first. It must be tied not to the walls, but to the side of the lower tier. To add rigidity to the structure, the lower tier is attached to the ceiling.
You can do this in one of two ways:
- using a U-shaped bracket;
- make fasteners from the UD profile, the so-called “boots”. The frame attached to the “boots” will be more rigid and durable.
- Covering the frame with plasterboard. Before covering, it is necessary to check the wiring of the closed communications and their functionality. We cut out the necessary holes for the lamps, and then the frame can be sheathed with plasterboard.
After covering, you need to correctly install the arched perforated corner. It is he who makes the ceiling lines clear, and the shape of the ceiling takes on the correct appearance. Internal corners must also be made correctly. This is a very important stage and not everyone will be able to complete it. You may have to turn to those who have the necessary experience.
- Putty. To give the product an aesthetic appearance, it is carefully puttied. The surface of the ceiling should be smooth, without depressions or bulges, and without a single scratch. Such a surface can be obtained by using an abrasive mesh installed in a vibratory grinder for cleaning. After priming and installing the ceiling plinth, the finished ceiling is painted.
- Central decorative element on drywall. Placing a decorative figure in the center of the ceiling space will make your ceiling unique and original. You can choose it from the photos posted on the websites of design studios. Making your own decor is no longer as difficult as assembling a plasterboard ceiling.
To do this you need:
- provide a small frame for the figure (it will be attached to the plasterboard ceiling and should not be visible from all sides);
- the figured element is drawn on drywall and cut out using a jigsaw;
- putty work is performed on the figures below;
- The completely finished decorative composition is attached to the frame with self-tapping screws. Once again they are covered with putty in the places of fastening recesses. They paint the element by choosing a harmonious combination, taking into account the color of the entire ceiling.
Zoning a room with a screen
The most convenient way to divide a room into zones is to install screens. They move easily and can be removed at any time. Standard screen dimensions: height - 180 centimeters, width of one door - 45–60.
Accordion screen . The lightest and most budget-friendly screen. If desired, it can be quickly folded and does not take up much space. The number of sashes may vary. The width must be chosen depending on the size of the zone you want to separate.
Monolithic screen . It's essentially a movable wall. It consists of one block and several sections inside it. There are different designer versions - with glass, bamboo, stained glass.
Flexible screen. It can be adjusted to any room: flexible material allows you to unfold it in a semicircle, place it straight or in a wave. This is an excellent option for the smallest one-room apartments, for example, Khrushchev-era apartments.
Screen cabinet . A functional partition not only divides the room, but also replaces wall shelves and massive cabinets. On the nursery side you can store toys, and on the living room side you can store photographs, books, and souvenirs.
You can purchase a three-leaf screen of an original rattan shape at the Office Magic furniture house. It will not only help to zone the room, but will also become the accent of the entire interior.
WHERE CAN I BUY?
What: accordion screen Where: furniture house “Office Magic” Price: from 8,150 rub. Phone Website : office-mag.com
Tips for choosing decor
If you are decorating a room for a boy, the following recommendations will come in handy:
- Age. The older the boy, the simpler the decor should be. Cars and fairy-tale characters become a thing of the past, and the young man’s hobbies come to the fore. Photo printing from the formulas of their chemistry, physics, mathematics, writing in a foreign language, car brands looks impressive - literally everything that a young man likes can be displayed on the ceiling.
- Color solutions are more strict and modest. However, even here you should not resort to black shades; it is better to limit yourself to coffee, chocolate, and blue colors. It is unacceptable to paint ceilings scarlet or orange - these are aggressive tones that affect the psyche, and at puberty it is not stable.
To choose the right decor, ask what the young man himself likes - the bedroom is still his area in which he has to spend a lot of time. And the better the space is organized, the more comfortable your child feels in the house.
What to choose for a girl? Difficulties arise immediately: girls grow faster, change their tastes, outlook on life, and set priorities. In addition, today it is fashionable to be a self-sufficient person, not inferior to young men, you will have to either often change the decorations in the nursery, or select neutral design options:
- Pink is no longer a “girlish” color; it can be used up to the age of 5-6 years, and then replaced with more pleasant shades: peach, yellow. But if your daughter prefers all the undertones of red, leave the design to the child’s taste.
- Replace drawings from childhood with patterns, ornaments, and fairy tale characters with movie characters. In this matter, you should ask the teenager’s opinion; it is likely that your child is a good drawer himself and will be able to paint the ceiling to his own taste. Even if you have to redo it later, entrust the work to your daughter.
- Zoning of the premises. Girls are very sensitive to the delimitation of space: rest, study, games - everything should occupy only its own area. Combinations of textures and materials, the use of curved or diagonal dividers, decorating the ceiling with shaped elements, lighting will help - drywall can be decorated with whatever and however you like, this is the peculiarity of the material.
The children's ambience in the room does not last long, for about 5-6 years, but the design of the ceiling should be approached with the utmost care. If you do not plan to change the cladding, choose neutral decor options: light shades, standard lighting options. In this case, the main decorative load will fall on the walls and floors.
When decorating a room for a boy and a girl, it is important to follow one rule - to delimit the space so that each of the children has their own place to relax and study. This can be easily done using figures on the ceiling or decorating a painted plasterboard ceiling with lighting in a nursery - there are many options
And if you complement the textured patterns with different shades of color, the result will be beautiful and practical.
Many users look at plasterboard ceilings in photos, in which the children's room appears in the form of a fairy-tale forest or a frame from a favorite cartoon, and prefer to take this option as a basis. But you should take into account the rapid growth of the baby, as well as the possibilities: both financial and the room itself. For example, in a small-format room, excess detail will be inappropriate, and in a large room, colorful figures can cause discomfort, especially if they are not only on the ceiling, but also on the walls and floor.
Before choosing a decor option, think through all the little details, and also the fact that you will have to take care of numerous elements and decorations - the ceilings in children's rooms need to be thoroughly cleaned of dust, this is necessary for the baby's health.
Design rules
With the help of drywall you can turn the most incredible design ideas into reality. When planning to begin installation (if this is not the usual wall cladding with plasterboard slabs), it is necessary to draw up a detailed plan and indicate all the dimensions of future structures.
It is advisable to completely vacate the room in which such work will be carried out.
Before finishing, walls and ceilings must be cleaned of dirt and dust, and existing cracks should be filled with putty. After this, you need to make markings for installing the plasterboard structure. A metal frame will be mounted along the intended lines, onto which the plasterboard slabs will be attached (using self-tapping screws). After this, all that remains is to putty all the joints on the resulting structure and decorate it, focusing on the general style of the room.
Plasterboard walls can be perfectly decorated with paints, any type of wallpaper, decorative tiles or artificial stone. On walls that are lined with smooth plasterboard, you can create a relief surface using decorative putty.
These can be not only traditional solid partitions, but also patterned or openwork walls, complemented by shelves and small niches (for placing decorative items in them).
Lighting and backlighting
Another important factor in decorating a children's room using a gypsum board ceiling is high-quality and properly selected lighting. Even the most extravagant and stylish ceiling can get lost against the general background without the appropriate light. It is worth planning each individual element and its location in advance, so that later it will be easier to secure them in specially prepared holes.
The most successful lighting technique in combination with a plasterboard ceiling can be called diode and neon strips. They create a particularly beautiful effect of a gentle glow and visually help to increase the height of the room.
If you want to use chandeliers, then they should not be too bulky. The ideal option is compact spherical elements. A decorative addition to the main light source will be spotlights that will help distribute light waves evenly.
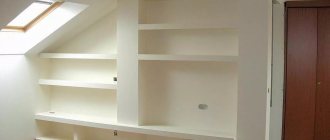
Drywall niches: purpose and features
Niches, which can easily be made from plasterboard, are not only a beautiful decorative element that can add zest to the interior, but also a convenient and functional place for storing various kinds of things and accessories. By decorating the niches with special lighting, you can advantageously zone the room, and at the same time also save significantly on the purchase of furniture.
Currently, a very popular option is to decorate a blank wall with niches for installing a variety of household appliances and a decorative fireplace. Thanks to this solution, there is simply no question of purchasing very expensive and high-quality cabinet furniture. To create a complete and complete interior in the living room, it is enough to organize a niche for installing a TV and home theater with lighting and shelves. To complete the interior solution, all that remains is to install a cozy sofa and decorate the room with suitable textiles.
An equally effective solution would be to create a special niche for installing a hidden cornice. The peculiarity of the design is that a person entering the room will only see the curtains falling from the ceiling. All unnecessary elements will be hidden from his eyes. Thus, with the help of niches you can hide almost any defects in the room and create an original and unique interior.
Another purpose of the niche is as the head of the bed. The original design of the wall in the niche will allow you to create a unique and unique bedroom interior.
The niche can be rectangular, square, round or in the form of an arch - special arched plasterboard is used for such work.
Zoning premises using drywall: advantages
As mentioned above, quite often drywall is used to zone rooms. For example, one of the most common options today is to decorate areas in a children's room with partitions that divide it into two parts: one for work and play, and the second for sleeping. To ensure that the partition does not take away part of the lighting between zones, it can be made with niche shelves in which toys, the child’s favorite books and other accessories will be stored.
In the same way, almost any room can be divided into zones: a living room - into a relaxation area and an area for receiving guests, a children's room, in which several children live, - into zones with their personal space, decorated in accordance with the tastes of the kids.
Types of partitions
It is quite possible to build interior walls yourself. Let's consider various designs of internal vertical planes.
Frame walls
The frame of stationary fences is erected from a metal profile and wooden beams.
The wall can be a thin or three-dimensional structure.
Let's consider two options for constructing fencing frames and their cladding:
Metal
A lightweight mounting profile is used to construct the frame. The construction of the base of the wall consists of several stages:
- markings are applied on the floor, ceiling and wall;
- dismantle part of the floor covering down to the concrete base of the floor;
- install the supporting main profile; fasten the channel to the room railings with dowels;
- then install transverse metal elements on self-tapping screws;
- after this they begin covering the frame; cover the frame with sheets of plasterboard, fiberboard or chipboard;
- The finishing of the partition surface is made from various materials in such a way that the appearance of the fence does not introduce disharmony into the overall color of the interior of the children's room.
If the structure of the fence is a through structure, then the openings are made square or in the form of round holes (portholes). Square openings create shelves on which various objects, toys, flowerpots and other children's things are placed.
Wooden beam
The wooden frame is mounted in the same order as the profile base.
The only difference is that the wooden elements are fastened together with screws.
In addition to materials such as fiberboard and chipboard, the frame is lined with construction plywood.
The final wall covering can be textiles, wallpaper and even carpet. Here the imagination of family members is not limited by anything.
Walls made of bricks and foam blocks
Inside rooms, walls are often built 1/4 brick thick. Foam block is a lightweight material. It is very popular for installing partitions. Walls made from such raw materials are called stationary planes.
The above types of fencing are most effective and appropriate when the windows in the children's room are located on opposite sides of the facade of the house.
Then each sector of the separated space of the room will have its own source of natural light.
Mobile partitions
Movable walls are vertical planes that can be moved depending on the wishes of parents and children.
Furniture fences
Zoning of a children's room can be done by arranging furniture.
A tall cabinet or low bookcase is used to separate the play area from the bed or sofa.
You can also fence off a desk for studying from the general space of the room.
Vertical blinds
Curtains made of vertical fabric strips are movable. That is, stripes of material, turning left or right, regulate the degree of illumination of a particular area of the nursery. In addition, the fabric curtain can be moved to the sides or the blinds can be moved to one of the corners of the room. For more information about zoning the space of a room, watch this video:
A guide made of a special metal profile is attached to the ceiling. Plastic clips holding the strips of material move freely along the guide bar and rotate around their axis. The blinds are controlled using two cords.
Screens
Folding vertical planes come in different heights and different designs. Screens are very light partitions. Thanks to their mobility, you can always fence off a cozy corner of the children's room, where the child will be comfortable playing his games. To learn how to make a screen with your own hands, watch this video:
The partition in the children's room can be made into an accent wall, emphasizing all the advantages of the interior of the children's room.
You may have add-ons installed in your browser that can make automatic search requests. In this case, we recommend that you disable them. If automatic requests actually come from your computer, and you know about it (for example, your line of work requires you to send similar requests to Yandex), we recommend using the Yandex.XML service, specially developed for these purposes. The most important thing for this place is lighting. An area next to a window is ideal as it provides plenty of access to natural light.
But if such a proposal is not suitable for any reason, then the child’s desk should be provided with good table lighting. The presence of a small step ensures zoning of the nursery and living room; it looks quite attractive when used as flooring: If the zoning of the room is done correctly, then in this way you can even visually increase its area and seem to divide one room into several small ones, each which will have their own purpose. For a boy, it is better to use a slightly rough, but laconic division of the room. Girls like a more sophisticated interior and therefore all the partitions that will be used, as well as the furniture that will be purchased, must have not only practical value, but also simply please the eye.
Before starting work, you need to draw up a project for the future structure and determine the consumption of materials that need to be purchased. The dimensions of the sheets almost never coincide with the required dimensions; you have to cut off the excess or add the missing. Cutting off part of a sheet of drywall is extremely simple. To do this, make an incision along the marked line with a sharp knife, not reaching the paper layer of the reverse side.
Then the sheet is broken along the cut line and the remaining paper is cut through.
How to make a niche out of plasterboard with your own hands
If you decide to build plasterboard partitions or niches in your house on your own, in this case you will need:
the building material itself (plasterboard of selected thickness)
Please note: if a significant load is planned on the erected walls, then twice as much material will be required, since it will have to be fastened in two layers; metal knife for working with metal profiles; guides (wooden slats or metal profiles, most often a galvanized profile 50x25 mm is used), level, fastening material - metal screws and dowels for attaching the guides to the wall; drill; screwdriver; spatula, putty and perforated tape for sealing joints and screw heads.. Please note that choosing drywall for decorating a room must take into account its operational characteristics
For example, for a living room or children’s room, an ordinary universal composition is suitable, but to equip niches or partitions for a kitchen or bathroom you will need moisture-resistant plasterboard
Please note that choosing plasterboard for decorating a room must take into account its operational characteristics. For example, for a living room or children’s room, an ordinary universal composition is suitable, but to equip niches or partitions for a kitchen or bathroom you will need moisture-resistant plasterboard
Step 1
The first step is to mark on the wall where exactly the niche is planned to be placed - the plan is best perceived visually. After this, measurements are taken to calculate all the materials.
Next, the profile is cut and the frame from it is attached to the wall:
Throughout the entire work, you must use a level to determine the plane:
To strengthen the structure, the profile must be fixed as often as possible. The profile is attached to each other using metal hangers and a “crab” type connection.
Step 2
The next stage is working with drywall. You can find out how and how to cut drywall here: https://sunrem.ru/kak-i-chem-rezat-gipsokarton-i-prodelyvat-v-nem-otverstiya/. We attach the cut parts to the metal frame from the profile.
Be sure to frame all corners of the niche with a metal or plastic painting corner. We draw conclusions for sockets and wires.
Step 3
Now the entire area of drywall needs to be puttied
Pay special attention to the joints - glue them with perforated tape or serpyanka mesh for strength, and also putty on top. For this purpose, finishing putty is used (you can purchase ready-made)
Step 4
The next stage is priming and painting our niche. Although it all depends on the chosen design: the inner surface can be either painted or decorated with a mirror, wallpaper or mosaic.
Advantages and disadvantages of plasterboard structures
Plaster partitions have become an almost integral part of a good renovation. But they have their advantages and disadvantages.
Photo: plasterboard construction in the living room
Advantages
- Environmental friendliness and low price . Cardboard with the addition of gypsum is inexpensive and easily available for purchase; it is an environmentally friendly and fire-resistant material. Plasterboard partitions are a good thermal insulation material, and at the same time, remaining breathable (they do not add unnecessary stuffiness to the room). This factor is especially noticeable in a one-room apartment.
- Easy to install and dismantle . Such structures are easily and quickly installed and, after work is carried out in the apartment, there is practically no dirt left.
- Smoothness and evenness of surfaces of structures . Its surface is perfectly smooth. You can paint it, wallpaper it, or lay tiles on it (in the kitchen or bathroom). Drywall is easy to bend and cut, which allows you to create structures of any shape (curly arches).
- Possibility to hide wires . You can remove the wiring under its sheets, which eliminates the need to make grooves in the walls, speeding up the repair process and making it less noisy.
Flaws
- Low moisture resistance. Even moisture-resistant drywall, used for renovations in the bathroom and kitchen, can deteriorate from direct contact with water. To ensure a longer service life in the kitchen and bathroom, they must be protected from direct exposure to water, and the rooms themselves must be equipped with exhaust ventilation. It is not recommended to install such structures in rooms where the humidity exceeds 90%.
- Poor sound insulation. When compared with other solutions used during installation, this material has low sound-absorbing properties. But this drawback is easily compensated for by installing sound insulation inside the partitions.
- Fragility . Despite its versatility, it is quite fragile. Heavy structures and objects cannot be hung on partitions made from this material. But this drawback can be easily eliminated by installing embedded plywood elements inside the structures.
Use in a one-room apartment
Video: about use in an apartment
One-room apartments often have a small area. But what to do if a family of four lives in a one-room apartment and each family member wants to have their own cozy corner?
Photo: product ready for finishing
For example, to highlight a children's corner, you can use stand-up walls made of the same material. You can put toys, books, and put flowers in the resulting shelves. Very often, in a one-room apartment, to increase space, there is the option of combining a loggia with a common room, the main thing is that the arches are made of lightweight materials, and the loggia itself is carefully insulated.
Photo: ladder-shaped design
One of the main problems in a one-room apartment is the combination of a bathtub and a toilet in the bathroom. Using plasterboard partitions, the space in the bathroom is divided, i.e. the bathtub and toilet will be separated, which will allow bath lovers to soak in the warm water longer, without being urged by the screams of their household to quickly free the bathroom for other needs.
Plasterboard fireplace
Naturally, we are talking about the construction of a fake fireplace, which will not be connected to the chimney and in which it will be impossible to light a flame. Despite this, it will look very respectable, so it can create an atmosphere of romance in the room and will decorate the living room, office or library.
After the sketch of the future fireplace is ready, they begin marking the wall and installing the frame from the profile. The finished frame is sheathed with plasterboard, which can then be decorated in any way you like: use white paint, artificial stone, ceramics, wallpaper to resemble brickwork, or you can use paint and brushes to stylize the surface to look like brick or stone.
You can simulate a flame inside in different ways: braid several logs with a garland with lamps with flickering light, insert candles into the holes on the logs, do without firewood and simply place several large candles in the portal, or cover the portal with reflective foil and embed flashing lamps. The portal can be closed with a forged grille if desired.
Types of material
Depending on its purpose, drywall is divided into several types:
- GKL boards of gray color with blue markings are universal for dry rooms.
- Drywall is “afraid” of water, so for the bathroom choose waterproof green gypsum boards with blue markings.
- Fire-resistant plasterboard sheets (GKLO) of gray color with red markings have an increased ability to resist open fire.
- Green GKLVO slabs with red markings are moisture resistant and have increased fire resistance, and therefore are ideal for kitchen design.
GCR does not look so aesthetically pleasing. First you need to seal all the joints, then putty, sand, and only then move on to decoration.
Drywall in interior design
Drywall has become a real find for modern designers, because... with its help you can create a wide variety of designs and figured arches. If a thin sheet of drywall is properly moistened, it can bend at any angle. It is worth considering that you cannot create additional load on such walls, but decorative structures, especially in a one-room apartment, can radically transform the interior.
The correct selection of plasterboard sheets and additional profiles will help give the room an original look, in which partitions and curly arches will play an important role.
Types of drywall as a material
The varieties make it possible to use it in any room. Ordinary drywall is afraid of moisture, but in rooms with high humidity, in the kitchen or bathroom, along with glass partitions, a special moisture-resistant material is used.
The problem is that it contains layers of cardboard and gypsum mortar, pressed together, and when exposed to water (in the bathroom or kitchen), it can begin to deteriorate, compromising the integrity of the entire structure.
Drywall, which is not afraid of fire, is used in office decoration without violating fire safety rules.
Drywall arches
In modern interiors, especially in living rooms and hallways, arched structures of various types are often found. The most popular are classic and domed doorway designs. Also, with the help of a decorative arch, the room is divided into separate zones. The design itself can be simple or have curved smooth lines and patterned cutouts. It depends on the imagination of the performer. An experienced craftsman must create an arch, since this process requires precise calculations and a certain skill.
For this work, in most cases, arched plasterboard with a thickness of 6.5 mm is used. The opening width and bending radius are preliminarily measured. Next, according to the obtained dimensions, the gypsum board is cut out. At the required site, a stable arc-shaped metal frame is manufactured and firmly attached, which is subsequently covered with plasterboard. At this stage, the lighting is thought out; it should be installed before the sheathing begins. The work must be done carefully and carefully to avoid gross mistakes and damage to the fragile drywall.
Plasterboard partitions for zoning space in a room - step-by-step installation instructions
The open type of delimitation allows you to place the partition anywhere, even in the center of the room: contact of the walls with the partition is not necessary at all. It can be divided into two components, one side can be assembled larger than the other. It is much easier to cover the second side, since the rim from the profile is already installed. Therefore, the drywall is fixed to the frame and the “snake”. As a result, we get a shaped guide that completely follows the bend of the gypsum board. Be very careful, since the profile bends quite easily under the pressure of the screw and you have to press it by hand. It is necessary to hold the part not at the point where the hardware is screwed, otherwise there is a risk of piercing your hand.
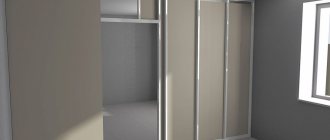
For walls to be painted, a water-soluble primer is suitable. If wallpapering is intended, it is better to use a water-based paint solution as a primer. If this is not done, the drywall will quickly “eat the wallpaper glue and the coating will peel off. If the design of the false wall involves the installation of sliding doors similar to a sliding wardrobe, after assembling the base, the rail system is secured.
This type of doorway design is preferable to swing doors. Drywall, due to its fragility, cracks due to constant impact loads. To strengthen the frame, a transverse bar is installed at the level of installation of the guide rail.
How to decorate a wall inside a niche
Any plasterboard construction needs design. It can be ordinary paint or hand-painted - it all depends on the creativity and imagination of the owner.
It is also worth considering that the choice of finishing material for a niche will depend on its functional purpose.
What items are planned to be placed here? If we are talking about technology, for example, a TV, then in order to avoid eye fatigue, the surface should not be too pretentious or distracting.
If a niche is created to accommodate a home library, books and magazines, then it is necessary to choose more practical finishing materials that do not collect dust and are easy to clean.
For a niche that serves as a decorative element, decorated with figurines or valuable objects, the design must be selected accordingly - more expensive wallpaper that attracts attention, Venetian plaster or mirrors. The niche at the head of the bed can also be covered with wallpaper or covered with decorative plaster
The niche at the head of the bed can also be covered with wallpaper or covered with decorative plaster.
Wallpaper
The simplest solution would be to decorate a niche with wallpaper. You can choose wallpapers with a similar shade and simple pattern, as well as contrasting or bright ones.
Textile heavy wallpapers with ornate patterns will create a feeling of luxury and chic, while plain ones can become a pleasant accent, adding a certain color to the interior.
Decorative plaster
Good quality plaster will definitely be more practical, and Venetian plaster will also add a touch of luxury. The plaster mixture allows you to create a certain texture, but at the same time remains more resistant to cleaning than wallpaper.
Decorative brick or stone
One of the most relevant solutions today. Brick in a niche will add rigor and brutality to the interior, especially if modern minimalism or loft is chosen as the style.
Mosaic or tile
You should not be of the opinion that ceramic tiles or mosaics are only appropriate in the kitchen or bathroom. This durable and practical material gives scope for creativity to any designer. Glass mosaic or matte porcelain tile with wood texture - you just need to choose the appropriate option for a specific interior.
Laminate or wood
It is also one of the popular solutions when choosing material for decorating a niche. Especially if the interior contains details with the same texture and color.
Mirror
A mirror sheet or tile will visually expand the boundaries of the niche, creating the feeling that there is a continuation of the room behind the wall. Mirrors will look especially advantageous in a niche that imitates a fireplace.
Bedroom design
The bedroom is a place where a person should spend his time with maximum comfort. A figured arch with smooth shapes in combination with soft lighting will create the most favorable atmosphere for productive relaxation.
The bedroom, like other rooms, can be divided into certain zones. From a logical point of view, it is not worth creating a workspace here.
The interior can be made in a different style, but you should not overload the recreation area with third-party items. When constructing a partition, it is advisable to think through niches for decorative lamps or for storing books and magazines.
Tips for decorating the ceiling in a children's room for a boy
When creating a room design for their son, parents need to take into account many nuances. Pink shades and patterns in the form of flowers or princesses are not suitable for the ceiling in the room of the future man. Boys' main hobbies are cars, airplanes, etc.
You can make creative patterns on the ceiling from plasterboard that your child will definitely like.
When decorating the ceiling covering in a boy’s room, you should pay attention to the following tips:
Firstly, it is very important to consider the age of the child. The older it is, the simpler the shapes and patterns on the ceiling covering should be
A ceiling with drawings in the form of a car or a cartoon character is perfect for the room of a preschooler or elementary school student. But for a middle school child, it is better to avoid such images. It is not recommended to use ceilings in “girly” colors in a boy’s room. The best options are soft blue, beige, light green, etc. Undoubtedly, it is very important to take into account the tastes of the child himself. Designers do not recommend using bright, flashy colors for ceiling coverings. They can have a negative impact on the psyche and contribute to increased excitability of the child. Boys' preferences may vary. If a child likes a large number of details, then a multi-level ceiling is quite acceptable in his room. However, if your son is a minimalist, it is better to install a single-level cover.
Plasterboard partition for room zoning
Solid partitions with doors make it possible to make the life of a family with a child in a one-room apartment or studio more comfortable, allocating personal space to each generation. They also isolate the kitchen with its aromas from living spaces. Drywall is one of those materials that is pleasant to work with. It lends itself well to cutting. Therefore, solid, decorative walls and arched openings are made from it. It produces beautiful original products of various configurations. As you can see, frame-sheathing partitions made of plasterboard can be very different both in design and shape, as well as in purpose and decor. Yes, their main role is to zone space, but there are many solutions to this problem.
And the best part is: each of us can find another, our own, completely different solution. When performing all work, you must strictly follow the markings. Cut the cardboard as accurately and evenly as possible so that the seams are barely noticeable. You can divide a room in different ways.
If two zones need to be completely isolated from each other, a continuous partition is erected. Essentially, it is a wall between two different rooms.
Plasterboard cabinet
Drywall allows you to build even some pieces of furniture, incl. cabinets, bar counters, tables and even sofas and beds. Such furniture is relatively easy to manufacture, allows you to implement any of your own requirements, it can be finished in any way you like, hidden communications can be installed, and the cost of such solutions is low. The only negative is the stationary nature of such furniture, but in the case of a wardrobe this disadvantage is insignificant, because ordinary built-in wardrobes also cannot be moved from place to place.
It’s not difficult to create a cabinet from plasterboard on your own. It all starts, as always, with creating a frame, and at this stage you already need to know how the interior space of the future cabinet should be arranged: how many shelves and how high it should be, where the hangers will be located, etc. If the length of the shelves is higher than 1 m, it is better to strengthen the frame. In this case, a wardrobe made of plasterboard will not be inferior in strength to its counterparts made of chipboard. The fittings and façade can be used the same as for conventional sliding wardrobes - from the outside it will not be clear what the wardrobe is made of, but at the same time it will cost you less than usual, and it will be much easier to equip internal lighting in it.
(no votes yet)
Door and window openings
If you plan to make partitions with a door, then you need to attach a horizontal profile along the height of the upper edge of the door frame. The vertical posts and horizontal lintel are secured so that the solid side of the beam profile faces the inside of the opening. It is better not to install the lower base in place of the door, so that later you do not have to make a threshold.
The frame for the arched opening is made from a standard profile. To bend the profile, cuts are made on its sides with great frequency.
The drywall is attached to the frame with self-tapping screws in fine increments directly through the sheet without preliminary holes. The screws are placed evenly at a distance of about 30 cm from each other.
Electrical cables are laid inside the partition at the stage of constructing the frame. If necessary, holes are made in the profile for the cable.
Puttying drywall is necessary to hide installation defects and seal seams. Paint or wallpaper is applied over the finishing putty. Fastening panels and tiles is done in the same way as on other surfaces.