Design of plasterboard and suspended ceilings
Thanks to the wide variety of design solutions, you can make a choice for any room. It is important to install the joint between a stretch ceiling and plasterboard correctly; If you have no experience in performing such work, it is recommended to turn to professionals.
Drywall around the perimeter
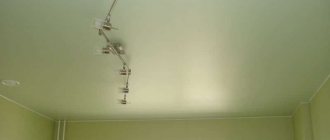
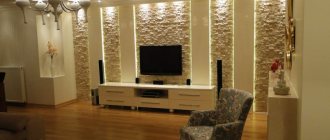
This finishing option is chosen more often than others. First, a prefabricated box is installed around the perimeter of the room, onto which a profile is attached to tension the fabric. When the frame is assembled, the lighting fixtures are installed. The advantage is the simplicity of space zoning; the room turns out to be well lit by artificial sources.
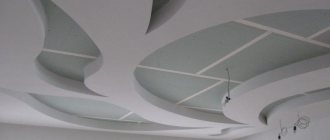
Figured ceilings with drawings
A more complex, but original option. Several figures of different sizes and shapes are constructed from plasterboard. Afterwards the fabric is stretched; It’s better to hire an experienced team: it will be difficult to stretch the film yourself.
The result will be an individual design, invented independently, a more sophisticated interior.
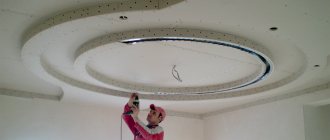
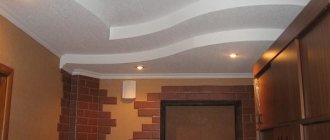
A simple design option is to install drywall in the middle of the room in the shape of a circle or oval. An insert of PVC film is made in the center; the tension fabric can also be made outside the plasterboard contours.
The advantages of such complex options are simplicity in zoning space, visual depth and volume.
The sequence of actions when creating a combined ceiling: from design to installation
First of all, you need to decide what the finished ceiling should look like, what shape the structures will be and where the lamps will be located. It is best to entrust the creation of a ceiling design drawing to a professional designer. You should not save on this, because both materials and installation work are quite expensive. It will be unpleasant to discover in the end that the appearance of the ceilings does not meet expectations and is in dissonance with the rest of the interior.
When creating a complex ceiling design, we recommend using special visualization programs, or even better, contact a professional.
You also need to keep in mind that the installation of a composite ceiling is carried out only in a room completely free of furniture.
General sequence of actions:
- The ceiling is measured. It is necessary not only to measure the perimeter at the height of the structures, but also to take into account height differences, the angle between the walls, all protruding parts of the walls, ceilings and communications.
- A ceiling drawing is being developed taking into account all dimensions.
- Ceiling surfaces are cleaned. This item may have to be completed first, as old finishing elements may prevent you from measuring the ceiling correctly.
- The outline of the structures is applied to the ceiling.
- All planned ceiling levels are marked on the walls.
- Marking of lines for fastening load-bearing structures is done. Typically, a step of 0.6 m along the length and 0.4 m across the width of the room is used. For accuracy, it is recommended to use a laser level when working.
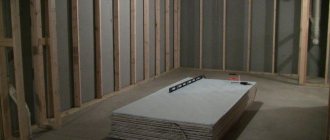
- Holes are drilled for lathing the combined ceiling.
- The sheathing is installed. When installing, it is important to maintain horizontality. To do this, you can tighten the marker thread or regularly check the horizontal level with a level.
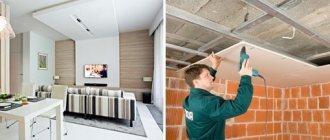
- The boxes are lined with plasterboard. All work with drywall cannot be carried out alone, since the material is quite heavy and unstable to bending.
- The joints of the plasterboard sheets with each other and with the walls are glued with reinforcing tape.
- All mounting holes are filled with the first layer of putty.
- Holes for lamps are drilled.
- Finishing putty is being carried out.
- The surface is sanded and dust-free.
- The plasterboard part of the combined ceiling is painted in the desired color.
- After the paint has completely dried, the wiring and electrical equipment are installed, which must be hidden behind the boxes.
- The level of installation of the web of the tension part of the structure is applied to the plasterboard box and walls.
- In accordance with the level, a mounting baguette is attached with a fastening step of 6 - 8 cm.
- The suspended ceiling is installed to the plasterboard in accordance with the type of canvas.
Color combinations
The color of the ceiling coverings should also be combined with other decor. They should be selected so that they match the color of the walls, furniture, and curtains.
Two-color combinations
Contrasting combinations are better for a children's room. However, you should not choose bright shades that contrast too sharply: they can have an irritating effect and prevent the child from calming down and falling asleep. Invite a designer to choose the appropriate option. Bright colors can be used to decorate the living room.
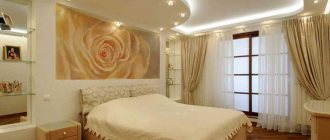
In the bedroom it is better to install monochrome panels, or combining 2 pastel shades: beige, light blue, pink, white. They are also suitable for rooms with not too high ceilings: they will visually increase the space.
Multicolor options
Choosing a range of colors for a combined stretch ceiling will be more difficult if several shades are planned. You should not choose combinations that are too contrasting: they will irritate, cause fatigue, and can quickly bore the owners. In addition, each shade will evoke its own associations, so excess can cause emotional overload.
When choosing colors, you should also avoid an abundance of brown, black and dark gray: even diluted with bright accents, they will have a depressing effect and contribute to the development of depressive states.
The combination with the pattern will look original. A good option is to use several shades of the same color. If a person wants to use several bright colors, they should use compatibility circles: with their help, they choose colors that go well with each other.
Combination by design
The combination of plasterboard and stretch ceiling allows you to create original and unusual design solutions.
Single level
The simplest variation for calm, elegant interiors in bedrooms and living rooms. A more original look can be achieved by using a non-standard shape of inserts (instead of the usual rectangles, ovals and circles, you can choose more complex geometric shapes). Can be installed in rooms with low ceilings.
Two-level
Suitable for large rooms with high rough ceilings. It is often found in decoration not only in residential premises, but also in public institutions.
Multi-level
A more difficult option to install. The number of levels is usually more than two. The higher the room where the panels are installed, the greater the number of levels that can be installed. The advantage is the ability to create complex designs.
Origins of the combination
The appearance of suspended ceilings is not just a new stage in the finishing niche. In fact, the owners of modern apartments, most often located in not very cozy multi-apartment panel buildings or even in life-torn Khrushchev buildings, have got their hands on a powerful design tool that helps push the bar of room expressiveness to a qualitatively new level. In addition, the polyvinyl chloride film used for the installation of suspended ceilings had all the necessary qualities that guaranteed many years of safe and stable operation.
The owners were especially pleased with the opportunity to decorate their ceiling with original photo printing, which gave each room artistic originality and a truly designer charm.
However, the ability to create multi-level ceiling structures still remained with plasterboard. A reasonable decision followed quite quickly - to combine two completely different technologies in one project in order to create spectacular and monumental-looking multi-level structures. At first, this combination of two approaches to design clearly manifested itself in the private sector, where there are much more opportunities for the implementation of extraordinary creative projects, and then it began to be successfully implemented in practice in the case of much more modest apartments.
Combinations by surface type
The combination of several different materials will create a more original combined stretch ceiling. The combination of elements with different textures looks original and allows you to create an individual interior.
Gloss
Thanks to the mirroring effect, glossy canvases help to visually enlarge the space. GCR can be installed around the perimeter of the room. It is possible to enhance the effect with the help of lighting fixtures: a ceiling made of plasterboard and a suspended ceiling with lighting will visually increase the room in height and volume. You can install it in any room: bedroom, hallway, kitchen, or personal office.