Water heated floors today are one of the best options when creating a heating system in a private home. This is the most economical and comfortable type of heating. Pipes are taken away from the boiler and laid in all rooms. Most often they are poured into a screed. However, there are other options.
Today there are building materials on sale that allow you to create a warm water floor without screed. This is an easy to install system. You can handle the installation yourself. Before starting repair work, you need to familiarize yourself with the technology of this process.
Features of water heated floors without screed
The installation of a water heated floor without a screed has many advantages over the traditional installation of pipes in a layer of concrete. This system allows you to install heating even on wooden floors. In this case, the floor level will not rise too much.
Water heated floors can be installed in a private house. This option is not suitable for an apartment. For such premises, electrical systems are used. A water heated floor is a system of special pipes. They move away from the cauldron. An installation that runs on solid fuel, gas or electricity can be used as heating equipment.
Several pipe circuits extend from the boiler. Each of them leads to a separate room. Using a special comb, the supply of heated coolant through the pipes is adjusted. Shut-off valves with thermostatic valves determine which circuit the heated flow should be directed into and which circuit should be shut off.
A water-heated floor without a laminate screed works on the same principle. The difference lies only in the installation features. When heated, uniform heat from the floor will rise upward. Unlike convectors, batteries and other similar heating devices, a pipe system creates the most comfortable heating in the room. The highest temperatures will be found at the base of the floor. The air near the ceiling will be colder. In the case of using convectors and batteries, everything happens exactly the opposite. This distinguishes underfloor heating from other heating systems.
Materials for installing a water floor
H2_2
Before laying the pipes, a base is laid on the floor in the room - wooden or polystyrene with channels for the pipes. The pipes are covered with waterproofing plates.
Floor pipes are made of various materials: copper, cross-linked polyethylene or propylene, metal-plastic. Polyethylene pipes are most often used, as they are easy to install, durable, resistant to aggressive environments and inexpensive. In a system assembled from such pipes, various antifreezes, not just water, can be used as a coolant, and without the slightest harm to the pipes.
In the store, pipes are sold wound into coils. After delivery, it is strictly forbidden to remove the loops from the bobbin and simply pull out the pipes, as this can lead to the appearance of pipe kinks. You can unwind the pipes directly during installation of the circuit, gradually, to avoid the appearance of creases.
For thermal insulation of the base, it is recommended to choose polystyrene foam mats. They provide optimal thermal insulation, and they also have grooves and protrusions that greatly facilitate laying pipes at the required spacing without additional markings. The size of one plate is 50x100 cm, they are fastened together with a special lock.
A popular solution is a water-heated floor system. It consists of modules made of wood with recesses for pipes. The modules vary in width: they can be 13, 18 and 28 cm. You need to select modules based on the pipe laying step.
To install the system, you must purchase special plates made of galvanized steel or aluminum. A heat distribution plate made of aluminum is necessary to redistribute heat along the bottom surface of the finishing coating. By acting on the lower part of the finishing coating, it thereby heats the floor surface and increases the temperature in the room.
When is a heated floor installed without screed?
A light water heated floor without screed is preferable only in some cases. It is installed in rooms with low ceilings. If in such a room you lay a water floor in a screed, the small room will become even smaller. The height of the room will be reduced by approximately 10-15 cm.
In some cases, the interior design does not allow reducing the height of the ceilings. In this case, preference is also given to a pipe laying system without screed. This solution will be an ideal solution for the owners of a wooden house. Heavy screed cannot be laid on such floors. Its weight will act on wooden surfaces, gradually destroying them. The dry system weighs several times less.
It should be said that the screed needs to be properly filled. If homeowners are renovating themselves but have never created concrete foundations before, this can cause a number of problems. The screed must dry under certain conditions. It needs to be constantly moisturized. In a wooden house, this will lead to the appearance of fungus, which will destroy the walls.
It should also be said that concrete screeds gain strength within 1 month. You cannot live in the house at this time. If you need to carry out repairs quickly, dry installation of a water floor will be the ideal solution. There will be no need to wait a long time for the system to gain strength and dry completely.
Materials used
Immediately before laying heated water floors in a wooden house, the bases themselves are reliably insulated. Therefore, at the preparatory stage you will have to select the following groups of components:
- brand of insulation;
- material of water conduits (pipes);
- type and brand of insulation plates.
Thermal insulators
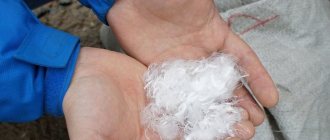
Of the materials known and available to the user, basalt (stone) wool is optimal for insulating heating structures. The thermal insulator is permeable to water vapor and combines well with wood, allowing it to “breathe” and prevent rotting. On the other hand, when installing mineral wool, it is important to provide conditions for the removal of vapors, since otherwise it gets wet and loses its thermal insulation properties.
To insulate coatings on the first floors, it is recommended to use insulation based on it with a density of 40-80 kg/m³ and a thickness of up to 200 mm. For interfloor ceilings, the same material with a thickness of 50-100 mm is quite suitable. Its task in this case expands and, in addition to thermal insulation, is complemented by obtaining good sound insulation.
Polymer-based insulation materials, which include polystyrene foam, expanded polystyrene (EPS), and foamed polyethylene, are almost impermeable to moisture. When using them, you should follow the rules for laying slabs, since if the technology is violated, the wood at the points of contact with the polymer will begin to turn black and then rot.
Pipes for heated floors
Pipes made of metal-plastic, polyethylene or polypropylene are suitable for the water circuit.
When choosing pipes laid on mats for heated floors without screed, the following points must be taken into account:
- Tubular products with a diameter of 16 and 20 mm are selected.
- The most suitable materials are cross-linked polyethylene, metallized plastic and copper. Preference is given to polymer products based on SP.
High-quality polyethylene pipes from well-known manufacturers are no cheaper than metal-plastic samples and are almost as good as them in terms of performance. There is no fundamental difference between individual types of polymer products; they are equally good for heated floors.
Copper pipes are noticeably more expensive, and their installation requires a lot of effort and time. But in terms of thermal output, none of the known materials can compare with copper. The only thing that attention is drawn to in this case is the inadmissibility of their use in conjunction with aluminum distribution plates. These metals are incompatible in their chemical structure, which is why the contact area oxidizes over time and then breaks down.
Distribution plates
The thermal conductivity of aluminum is high, so it is often used for water circuits.
Since the thermal conductivity of aluminum-based workpieces is higher than that of steel products, this material is most often used in their manufacture (with the exception of copper pipe wiring). At the same time, you should know that good aluminum plates are much more expensive than their galvanized counterparts (about 1.5-4 times). The observed price dispersion is associated with different thicknesses of plate blanks. Therefore, experts advise choosing thick-walled plates for heat removal that can accumulate and then release thermal energy.
Among modern technological materials, flexible corrugated pipes made on the basis of stainless steel stand out. They are durable and can be installed without welding or soldering. In addition, during operation, these products transfer heat well, which allows them to be used in lightweight deck structures.
Comparison of heated floors with and without screed
Laying a water-heated floor without a screed has a number of advantages over the usual type of installation. The speed of creating a heating system in this case increases significantly. Dry installation is lightweight. This allows you to significantly increase the service life of interfloor ceilings.
The thickness of the finished structure is only 3.5-6 cm. This allows the use of a similar heating system for different rooms. You can install such a system yourself. In this case, you do not need to exert much physical effort or have deep knowledge and skills in carrying out such work. This is one of the simplest types of water pipe installation.
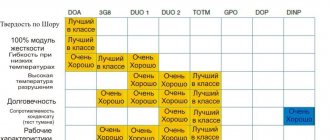
Materials for dry installation can withstand temperature changes and are also characterized by high heat and sound insulation. If necessary, the water floor system can be easily dismantled.
Considering reviews of a warm water field without a screed, it should also be said about its disadvantages. Since there will be no screed on top, the heat will not be evenly distributed over the floor surface. Because of this, it is necessary to reduce the laying step between pipes. As a result, you will need to purchase more pipes and coolant. The pump should also be more powerful.
At the same time, wooden structures, unlike concrete, differ in thermal insulation properties. This will require more energy when heating. Also, the materials used in installation are resistant to moisture.
Methods for laying contours
When arranging the contours of a water floor, three laying patterns are traditionally used: spiral, snake and double snake. The choice is determined by the design features of the apartment and the ease of installation of the pipeline system.
Spiral (snail)
When laying heated floors, the pipe joints must be within reach for repairs.
This installation method is the most common and most efficient in terms of energy consumption. When implementing it, pipes are laid along the perimeter of the room, starting from the walls and towards the center (with a decreasing radius). Then the route is laid in the opposite direction. The main advantage of this scheme is the uniform heating of the room due to the elimination of thermal “dips”.
You can choose an arbitrary pipe laying step, starting with the smallest of 10 mm. The snail circuit allows you to set up a heating system in rooms of any shape and size. With its help, it is possible to make one large loop that covers the room or several smaller turns that go around large furniture, for example.
Snake and double snake
When laying with a snake, calculate the distance between the pipes.
The method of laying with a snake consists of arranging individual threads of the floor in large loops. It is suitable for rooms that need to be divided into functional zones with their own temperature conditions. The first loop is laid around the perimeter of the room, after which the single snake is launched from the inside. For this reason, a well-heated coolant circulates in one half of it, and a slightly cooled coolant in the other, which on average ensures the required uniformity of heating. When using a double snake circuit, the media supply and output circuits are located next to each other throughout the room.
Types of materials
Installation of a water heated floor without screed is carried out using one of several methods. The base on which the pipes are laid out can be wooden or polystyrene. It has grooves into which pipes are inserted. Metal plates are also placed on the base. They allow you to evenly distribute heat over the floor surface.
When the pipes are laid out in the grooves, they are covered with various materials. They are designed to ensure the rigidity of the base. First, waterproofing is laid on the pipes. Next, GVL sheets are installed. Without them, the structure will not be strong. The topcoat can then be installed. This could be tile, laminate, parquet or carpet. These materials have a certain thermal conductivity.
Tile finishes are best suited for any type of underfloor heating system. This is the most thermally conductive material. When using it, the cost of heating the room will be lower. The floor will warm up faster. However, this type of finishing is not suitable for every interior. Therefore, other varieties are also used.
It should be noted that when choosing laminate, parquet or carpet for floor finishing, preference should be given to varieties with a minimum thickness. In this case, the thermal insulation effect of these materials will be less.
Wood flooring systems
Wooden systems are quite popular, due to their environmental friendliness, affordability and ease of installation. A convenient option for most users is modular dry heated floors, which include OSB or chipboard blocks. The blocks have special channels designed for pipe installation. A wooden dry water heated floor is easy to install, and its elements are standardized.
High-quality processed wood is used as inter-tube boards. The dimensions of the boards may vary, but standard products have a cross-section of 21x120 mm or 28x120 mm. You need to select the sizes of blocks or boards depending on the distance between the pipes. In any case, the materials will be laid on top of the logs in such a way that the existing grooves allow pipes to be laid according to the chosen pattern.
A wooden system of dry heated floors can be laid in different ways, but there is always a certain number of requirements for the base:
- Laying of logs is carried out in a certain step, the size of which depends on the floor covering used. For tiles, a step of 30 cm is suitable, and for other coatings, the laying step can be increased to 60 cm.
- There must be a waterproofing layer under the thermal insulation. Typically, a waterproofing polyethylene film of sufficient density is used, but if desired, you can use another material with similar characteristics.
- High-quality installation of heated floors in wooden houses requires the presence of good thermal insulation, which is located in the space between the joists. The easiest way to work is with thermal insulation boards made of mineral wool or expanded polystyrene. The latter option is preferable, since polystyrene foam can withstand moisture without problems. Mineral wool, when wet, loses its properties.
- On the installed joists you can build a subfloor, which must be securely fixed and have a height difference of no more than 2 mm per 1 m2. However, there is no particular need to create a subfloor, but without it, some difficulties may arise with the installation of a heated floor.
The main methods for arranging a wooden dry heated floor are as follows:
- A “floating” structure that does not have a rigid connection to the base. For this design, ready-made fiberboard blocks with pre-made gutters are suitable. These modules are laid on top of the joists, the space between which is filled with heat-insulating material. A metal strip is placed on the fiberboard and pipes are attached. The distance between the pipes and their diameter can vary depending on what kind of heat transfer the finished structure should have. If necessary, you can supplement the system with a layer of hydro or vapor barrier. In the case of soft finishes, a supporting sheet with a thickness of at least 22 mm is required so that the structure can withstand loads. In addition, the laid slabs will serve as a distributor and accumulator of thermal energy. Modules for a floating structure can also be used when laying heated floors on a flat base.
- In the second version of the system, inter-tube boards are used instead of modules. Their length may vary, but the width and thickness must be the same so that the structure can be laid out with the required pipe laying pattern. The boards can be laid on any leveled base, but it must have heat and waterproofing layers on it. With proper installation of such a structure, the thermal expansion of the materials will be completely unnoticeable.
- GRANAB system. Such a heated floor without a screed in a frame house is initially designed for installation on top of any base, regardless of their alignment (for more details: “How to make a heated floor in a frame house, which option to choose”). The key feature of this underfloor heating system is the modules mounted on height-adjustable legs. After laying out the modules, wooden blocks for laying pipes, metal elements and the pipes themselves are laid out on top of them. Further installation technology looks as usual.
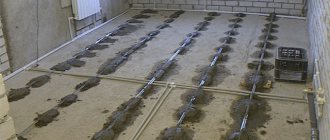
Procedure for installing pipes on polystyrene mats
It’s easy to make a warm water floor without a screed with your own hands. First, the rough surface is cleared of construction debris. If necessary, the base must be leveled.
A polyethylene film is laid out on the prepared surface. Its thickness must be at least 200 microns. Waterproofing sheets made of polyethylene are laid out overlapping (10-15 cm). The joints must be firmly secured with tape.
A damper tape is laid out around the perimeter of the room. It compensates for possible expansion of the system when heated. Then polystyrene mats are laid out. If their thickness is small, the joints need to be coated with glue. Metal slats are placed between the protrusions. Pipes are inserted into their grooves. Another layer of waterproofing is laid on top of them.
Then you need to lay out 2 layers of gypsum fiber sheets. The joints of the first layer should not intersect with the previous layer. The thickness of this flooring should be 1 cm. The joints should be coated with PVA glue. The layers must be fastened with self-tapping screws. It is important not to damage the pipes.
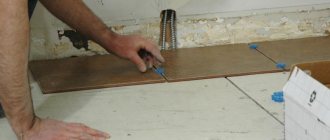
After this, the finishing coating is installed. You need to lay a special underlay under the laminate. When installing tiles, you should choose the right adhesive. It must be acrylic based.
Pipeline installation methods
The technique for laying polystyrene and slatted systems has its differences. Installing the pipeline in both options is not particularly difficult. Therefore, the entire installation process can be independently completed independently.
On a polystyrene base
The first stage of installation is preparing the rough floor surface. To do this, the base should be leveled, excluding differences of more than 5 millimeters, and all debris should be removed.
Installation on a polystyrene base is carried out in the following sequence:
- But polystyrene slabs are laid on a clean and level subfloor. In this scheme, they are used not only as a basis for laying the water circuit, but also as a heat-insulating material. Sometimes additional insulation of the working surface is required.
- Installation of polystyrene modules is carried out from the corner of the room. According to the pipeline layout, slabs with straight and rotary grooves are alternated. The polystyrene elements are fastened together with specially installed locks.
- Metal compression plates with grooves for laying the pipeline are placed on the slabs.
- According to a pre-planned plan, a water circuit is installed and covered with a thermal insulation substrate. After this, a test connection of the system is carried out and the equipment is checked for leaks.
Installation of polystyrene boards
The finishing base in the form of tiles requires a rough coating. It is made from multilayer plywood or chipboard. Laminate and parquet are laid directly on the substrate.
On a wooden base
The system is laid on a wooden floor according to a rack layout or using modules. The last option is quite simple to do:
- the wooden base of the floor is cleaned of dirt and dust is removed.
- insulation is installed;
- chipboards with ready-made grooves for the pipeline are placed on top;
- aluminum plates are placed in the recesses;
- Chipboard slabs are fixed together with locks at the ends;
- A water circuit pipe is installed in the grooves.
After laying according to this scheme, the structure is covered with gypsum fiber board material. After this, you can lay the finishing base.
Rack laying has a slightly different structure:
- The foundation is being prepared. The old coating is checked for suitability. All defects must be corrected, and bad, weak elements must be replaced.
- Thermal insulation material is spread on the rough base. It is laid between the joists. Polystyrene or mineral wool are good for these purposes.
- A damper tape is fixed around the perimeter of the room, protecting the structure from expansion.
- The insulation is covered on top with boards, the thickness of which must be at least 28 millimeters.
- The installation of wood strips must be carried out so that there is a gap of 2 centimeters wide between them to accommodate the pipeline. Wooden floors are secured to the base with self-tapping screws. For convenient laying of the pipeline at turns, the ends of the boards are rounded.
- Aluminum plates are fixed into the prepared grooves. A water circuit is installed in them according to the established scheme.
To protect against extraneous sounds emitted by the system during operation, the entire structure is covered with film. After this, moisture-resistant gypsum fiber sheets 10 millimeters thick with high strength are laid, and the finishing material is placed on them.
Slatted wooden base
A water-heated floor without a screed under a laminate can be mounted on a wooden base. It comes in two types. The first category includes a slatted base, and the second – a modular one. They have certain differences during installation.
The supporting layer of the slatted structure is cut from chipboard or MDF boards. You can also use moisture-resistant plywood. The thickness of the wooden flooring should be about 2 cm. Their humidity should be about 10%.
Strips are cut from slabs of the selected material. If the pipe pitch is 15 cm, the stripes should be 13 cm wide. This system should also be used for other types of pipe laying. The difference between the width of the step and the boards should be 2 cm.
The installation process in this case is also relatively simple. First you need to prepare the surface appropriately. It is cleaned and leveled. Next, a layer of waterproofing is laid out on the floor, and a damper tape is installed around the perimeter of the room.
A heated water floor without a screed is mounted with your own hands using slats, mainly on a wooden base. This can be solid flooring or joists. Before starting their installation, you need to develop a plan in accordance with which the pipes will be laid out.
Do-it-yourself dry heated floor installation
You can install a dry heated floor system yourself - there are no difficulties in such designs. The biggest problem that can arise is with metal distribution elements. Of course, assembling the system with your own hands will require a lot of time, but you will be able to save a lot on installation.
For self-assembly of wooden structures, the following are best suited:
- Sanded edged boards;
- Chipboard and MDF with a thickness of more than 22 mm;
- Moisture-resistant plywood with a thickness of over 20 mm.
When choosing materials, you need to pay attention to the amount of different harmful emissions. Considering that all elements of the system are constantly exposed to heat, the absence of emissions hazardous to human health is a very important quality. You also need to pay attention to the moisture content of the materials - it should be no more than 10%. If this rule is not followed, then the wooden structural elements will actively warp and become completely deformed over time.
Next, you need to adjust the sheets of material to the required dimensions:
- With a laying step of 150 mm, the width of the strips should be 130 mm;
- With a step of 200 mm, the width should be 180 mm;
- With a step of 250 mm, the width of each strip should be 230 mm.
A damper tape is laid out and fixed around the perimeter of the structure, after which you can proceed directly to the installation of the planks. Their installation must be carried out in accordance with the selected layout of heating pipes. The gap between all strips should be exactly 20 mm. If there is a need to make a turn, the slats and slats are rounded.
The assembled structure of planks allows you to insert metal plates. These elements should occupy most of the surface - at least 80% of the total area. A pipe (usually polyethylene) is attached to the grooves. First of all, you need to place a layer of waterproofing over the pipes (if we are talking about polyethylene film, then its thickness should be about 200 microns). Next, 10 mm moisture-resistant gypsum fiber sheets are laid.
The design described above will be quite sufficient for the further installation of any floor covering. The only exception is ceramic tiles, which are heavy. In this case, a duplicate layer of plasterboard sheets will be required, and they must be of increased strength. These sheets are fastened to the base using self-tapping screws, and during the installation process care must be taken not to damage the pipes. The tile itself is attached using a special adhesive.
For dry heated floors that will be located under the tiles, wide pipes with a diameter of 20 mm are best suited. The step of their installation is relatively small and is about 10-12 cm. The thing is that the tile has a high heat capacity, so to create the full effect of a warm floor, it needs to be heated very well. To maximize heat transfer and increase the efficiency of the heating system, a wooden heated floor must be properly insulated.
The installation of polystyrene systems has a number of characteristic features. In the slabs (the thickness of which starts from 20 mm and is selected depending on the required insulation), recesses are very carefully cut, and the scheme for their preparation must completely coincide with the pipe layout diagram. To avoid mistakes during the cutting process, you must first lay out the structure in rough form and carefully mark the slabs.
The installation process itself is very similar to the technology for installing a wooden heated floor. Perhaps the only difference is that polystyrene dry heated floors can only be installed on a flat base covering made of wood, plywood, plasterboard sheets, etc.
Installation of floors on wooden slats
In accordance with the created plan, slats are cut out and laid on the floor surface. They are fixed using self-tapping screws. The pipe is laid out across the support boards of a wooden base or joist.
To install a water heated floor without a concrete screed, you will need to mark the pipes on a wooden base according to the plan. They can be mounted in the form of a “snake” or “snail”. The first option is simpler. On both sides of the marking, the place for the wire is covered with slats. The gap between them should be about 2 cm.
In places where the pipe is rounded, the strips also need to be rounded. Metal plates are laid between the slats. They are fixed to a wooden base using self-tapping screws. The plates cannot be placed everywhere. The minimum number of them in a room should be 80% of the area. Pipes are inserted into the grooves of the metal plates without fixation.
After this, the heating element is covered with waterproofing around the entire perimeter of the room. The membrane can also reduce noise when heating pipes. You will also need to lay two layers of gypsum fiber board sheets on top. After installing them, you can install the finishing floor covering.
Step-by-step instructions for installing electric infrared heated floors
Before installation, remove the old floor covering and, if necessary, level the subfloor with a self-leveling mixture.
Lay the backing, securing the strips together with tape.
Next, sheets of underfloor heating are laid, which need to be cut in places where there is no heating element.
For convenience, film strips can be secured together with tape.
Next, you need to connect the system - the ends of the copper element are secured together with special clamps.
Then connect the wires to the terminals as indicated in the diagram; they must be insulated.
To ensure that the joints of the wires do not interfere with the laying of the laminate, a cutout is made in the thermal insulation and the wires are laid there.
At the last stage, the thermostat is installed and the floor is connected to it.
That's it, you can start laying the laminate.
Modular system
A warm water floor without screed can be installed using a wooden modular flooring. In this case, the pipes are laid out in special slots. Grooves are cut into the thickness of the square slabs. Most often they are made from chipboard.
This installation option is designed for solid wood bases and joists. Chipboard slabs with slots for pipes are laid out on the floor surface and connected using grooves. They are provided in the design of the modules. This type of base for installing water pipes is the easiest and fastest to install.
Pipe installation is carried out according to established technology. First you need to prepare and clean the base. Then waterproofing is laid on it. The modules are laid out on top. This method does not require calculations and drawing up a plan. Factory modules already have a pipe groove system. Wooden slabs simply need to be laid out on the floor and connected using the lock provided by the manufacturer.
Next, metal slats are laid out on them and pipes are laid. Two layers of thin gypsum fiber sheets are also laid out on top. After this, the final coating is performed. For self-installation, you should choose modular designs.
Laying a wooden outline
Warm floors without the use of concrete mortar are installed in wooden private houses in which the floor is made of logs. The surface is leveled. For this purpose, fiberboard sheets are used. Next, build a wooden outline.
You can make the blanks yourself or purchase a ready-made circuit from the manufacturer. To align the workpieces, passages are provided not only for the longitudinal arrangement of the line, but also for turning the pipe. The bending diameter should be equal to 5 times the diameter. The width of the wooden plate for bending must be at least 10 cm.
Floor heating with a wooden contour is used under linoleum or laminate. It is necessary to fill the water line under the tile with concrete mortar. How is the workpiece made for installing the liquid circuit?
- Markings are made on the prepared surface. It makes installation easier.
- Strengthen the damper tape.
- The pipeline should be located at a distance of 30 cm from the wall; Planks of similar width are installed around the perimeter.
- Leave space for the metal plate; 5 cm
- Install a rounded wooden blank.
- The longitudinal plates are mounted in increments of 5 cm. The width of the planks is 10 cm.
- The blanks are reinforced with self-tapping screws. A plank with a rounded wall is connected to a plank near the wall with staples.
- Aluminum plates are installed in the resulting gutters; they are reinforced with self-tapping screws.
- The water circuit is brought out.
- After testing the heating system, the line is covered with gypsum fiber board, a linoleum backing. Laying the floor. This coating is not suitable for tiles. The thickness of the substrate for the finishing coating should not exceed 3 mm.
If a high-heat boiler is used, it is recommended to install a three-way valve with a remote temperature sensor and a thermal head on the circuit. For lines longer than 66 m, it is recommended to use a circulation pump. “Warm floor” is provided without radiators, as an independent system.
We recommend: What should be the height of the heated floor?
User reviews
A warm water floor without screed, according to reviews, is installed quickly and without any problems. At the same time, owners of private houses claim that the simplest type of installation is the use of modular wooden or polystyrene slabs. Such materials can be purchased in specialized stores.
However, if you want to save money on your family budget, you can choose the rack and pinion pipe installation method. In this case, you need to have enough free time. This is a more complex and lengthy installation process.
If you carry out all the steps correctly, you can get a high-quality system. It will be reliable and durable. In this case, heating of the premises will be uniform and less expensive than when using batteries. It is better to entrust the connection of pipes to the boiler to a professional. The safe operation of the heating system depends on this.
Having considered how to install a warm water floor without a screed, you can install the system yourself.
Laminate is a wood-based floor covering that itself is not very cold. But in winter it also cools down greatly, bringing discomfort to apartment residents. Therefore, floor insulation under laminate
- a fairly popular solution.
There is an opinion that it is impossible to make a heated floor with this coating. This is wrong. Due to the low thermal conductivity, the heat-insulating substrate and the composition of the coating itself, it is more difficult to achieve a high temperature on it than, for example, on tiles. But if the heated floor is installed correctly, it will not damage the laminate
and will be able to heat it to a comfortable temperature.
Installation of underfloor heating
Water heating is installed both as the main and as an additional source of heating. If the cottage has radiator heating, then a liquid floor line is provided in cold areas. It is connected to the battery. Options for connecting the liquid circuit may vary.
- A bypass with a three-way mixer is installed on the supply circuit. The hot coolant is supplied to both the radiator and the “warm floor”.
- A more economical way is to use chilled water, which circulates in the return circuit. Its temperature is not less than 50 0C. It is fed into the floor line.
- If a “warm floor” is used without main radiator heating, then a boiler is installed. A pipe is led from it to the supply manifold; it has outlets for the floor circuit. A circulation pump and a three-way mixer with a control device are installed on the collector. The other end of the pipe is connected to the return manifold. A pipe comes from it that supplies water to the boiler.
The floor liquid line can be laid without the use of a concrete screed. A contour is created for the pipeline. It can be made of polystyrene boards or wooden boards. Heat distribution plates are used to direct heat upward towards the floor.
YouTube responded with an error: The request cannot be completed because you have exceeded your quota.
- Related Posts
- How is a heated floor connected?
- Features of Korean heated floors
- What kind of warm floor is better to put under the tiles?
- How to lay Ononor heated flooring?
- How to make a dry heated floor?
- Do you need an anchor bracket for underfloor heating?
What you need to know before installing heated floors under laminate
1. Specific power of underfloor heating – no more than 100 W/sq.m
At too high temperatures, laminate, like any wooden covering, can dry out and become deformed, causing it to begin to “walk” and look unsightly. To prevent this from happening, choose heating systems that are not too powerful.
2. Maximum heating temperature +26 °C
For the same reason, and also because of the harmful fumes of formaldehyde, which can be released when some types of laminate are heated strongly (from +30°C), it should not be heated above +26°C. Use only class E1 and E0 coatings with heated floors (the class indicates the formaldehyde content in the composition) and be sure to set the thermostat to no more than +26°C.
Installation of heating cable and mat under laminate
3. Look at the coating markings
There should be a mark on the packaging of the coating stating that it can be used with heated floors, as well as the maximum heating temperature. Check the composition of the product - it should be as natural as possible.
4. Only for floor heating
Since the heating systems used for this flooring material have low power, they will not be able to fully heat the room. They are used only to create warmth underfoot.
5. The optimal thickness of the tile adhesive layer (screed) is 10-20 mm
If the thickness is higher, the coating simply will not be able to warm up. If it is lower, the cable may overheat.
6. The thickness of the coating itself is no more than 25 mm
According to manufacturers' instructions, if the cable is thicker, it may overheat and fail. Fortunately, the thickness of the laminate rarely exceeds 10-12 mm.
7. Use a thermostat
This device will help you control the heating temperature of the coating, turn off the heated floor if it is exceeded and will not allow the cable to fail.
On our website you can buy heated floors under laminate for installation without screed. Warranty for Energy heated floors is 20 years.
Warm floors, unlike other, more traditional types of heating, are by far the most efficient and economical. Despite the fact that in most cases homeowners are put off by the very thought of complex installation of a heating system of this kind, underfloor heating can radically change your idea of how to heat living spaces.
The main problem with heated floors is that many people imagine a warm water floor as a heating system that is inextricably linked with the installation of a new concrete screed. However, the technologies of our time have made significant strides forward and today the screed is no longer a stumbling block for craftsmen. There are a number of methods that can be used to avoid heavy wet work associated with preparing and pouring concrete when laying a water floor. What options exist for installing water floors without concrete screed equipment? Let's take a closer look at these methods.
Electric heated floor: compatibility with laminate
Electric underfloor heating as an alternative to water heating is suitable for rooms where it is not possible to connect the latter option.
Electric flooring is divided into two types:
- infrared film;
- cable.
Advantages of infrared electric floor
Infrared radiation from a heated floor is equivalent to heating by the sun's rays and the heat of a living organism.
It is considered the most economical, as it consumes a minimal amount of electricity compared to other electric heaters.
Installation is very simple, you just need to follow the instructions.
This system does not require as much time to warm up as a water system.
Infrared rays warm up objects and do not dry out the air like radiators. All the heat comes from bottom to top, and not vice versa, which is much more comfortable.
IMPORTANT! Under any electric floor, whether it is laid under a laminate without a screed or under any other covering with a screed, you must use a polystyrene backing, cork or other underlays recommended by the manufacturer of the heated floor.
Specialists from construction stores will help you choose a suitable substrate.
Is there an alternative to concrete screed?
We usually associate laying a water circuit for a heated floor with installing a new concrete screed. Is it really necessary to solve this difficult task at home, to engage in labor-intensive and large-scale work? Logically, in order to protect the heating system pipes laid on the floor from damage and give the entire structure the necessary rigidity and strength, it is necessary to create a strong and massive cast structure. If you are the owner of a private house and just yesterday you had a housewarming party, there are no questions. The best option for installing a warm water floor would be to pour a new screed.
The situation looks completely different in situations where you want to install a similar heating system on the upper floors of a private house or in a city apartment.
Note: the ceiling is one of the main load-bearing structures of multi-storey buildings. When designing a building and during the construction process, the strength of the floors must be calculated. A conventional screed itself creates a certain load on the floor panels. What can we say in cases where, together with a heated floor, you create an additional load of several hundred kilograms on the existing floor by installing a new screed. There is an excessive load on the supporting structure, which is fraught with unpleasant consequences.
You should also take into account the fact that the new screed will significantly reduce the height of the ceilings in living rooms.
The listed factors become an obstacle to the implementation of the technological possibility of installing heating in your home according to the “warm floor” scheme. However, in this case, there is a successful, convenient and practical option - an alternative to traditional technology. Water heated floors without screed are a fairly common technology today, which has recently become quite widespread. The engineering solution is to use ready-made materials that are placed into a kind of pie through which the heating circuit pipes pass. In a professional environment, such systems-structures are called floor (dry).
This technology is very well suited for residential premises that are not designed for laying a new screed. Usually these are inter-apartment floors and attic floors. Flooring systems are versatile and can be used in almost any situation.
Note: by giving preference to a flooring system as an alternative to a concrete screed, you actually save your own money, both on the work itself and on materials. The whole job will take much less time. The absence of dirt, which involuntarily accompanies concrete work, also means a lot.
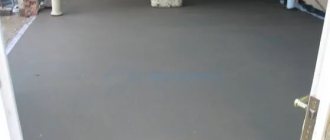
Filling the screed
After the pipe is finished, you should start pouring the screed. It is better to use a “wet” screed, because it has the greatest heat transfer. The grade of concrete can be used m200-m300.
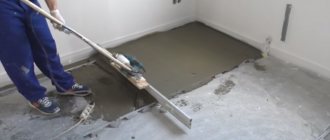
Before pouring the screed, we recommend laying a reinforcing mesh over the pipe for additional reinforcement.
Many manufacturers recommend pouring screed at least 5 cm from the top of the pipe. Often they pour 7-8 cm. If you pour in a smaller layer, you may have a “zebra” effect. This is when cold and warm areas on the final coating are clearly felt.
After the screed has been poured, heated floors cannot be used for 3 weeks. The screed should dry evenly. Afterwards you can fully use the water floor.
As a result, if you approach our instructions wisely, then heated floors with such a device will delight you in your home for decades. I hope this material was useful to you. Don't forget to check out the others too!
Polystyrene underfloor heating system
Let's start with the fact that no special preparation is required to install a polystyrene heated floor system. The plates can be mounted on a ready-made concrete base, on a plank or wooden covering. Due to the lightness of the structure itself, the polystyrene system can be installed in frame and panel houses. The design in this case looks like this:
- polystyrene plates consist of special heat distribution elements - lamellas made of aluminum and galvanized steel. The pipes of the main heating circuit are installed directly in the grooves. The basis of the entire design is to create the necessary rigidity, which is achieved through the use of a finishing coating made from gypsum fiber board sheets. The sheets of the finishing layer are laid in a checkerboard pattern.
The plates used in the work can be of two types: regular, foam and extruded. The thickness of the slabs required for heated floors is only 10-40 mm. Heating circuit pipes are installed into the thickness of the slabs, which are covered with polystyrene mats on top. Thanks to special grooves and bosses, the plates and sheets are securely fixed to each other. Polystyrene mats have mounting fasteners on the sides, thanks to which individual elements are fastened into a single, integral field.
Don't forget about metal plates (aluminum or galvanized iron). For this system, such plates are the main element of heat exchange, transferring heat from the heating circuit to the floor surface. With the help of the plates, heat is distributed evenly over the entire floor area.
For reference: The peculiarity of this system is that the height of such a cake is only 50 mm. For comparison, the minimum height of a concrete screed is only 80 mm.
Uponor method
The technique has become widespread due to its affordability. The main thermal insulation material is mineral wool. Pipes and plates are selected by customers depending on preferences and expense levels. The panel can be anything.
The order of work has certain nuances:
- 25 by 25 mm bars are nailed flush with the edge of the beams below. Upstairs is a 20mm thick subfloor.
- Vapor barrier is provided by covering the beam and subfloor with film. The overlap between the canvases is at least 10 cm.
- The film is covered with slabs with mineral wool as a base. The material will lose its properties if the base bends even a little
- A waterproofing film is laid out over the joists. The side with moisture protection should be at the top.
- Boards 2 cm thick are nailed across the joists. In this case, a distance of 30 mm from the wall is required.
- The pipes are subsequently laid in metal plates, which are placed in the cracks.
- The ends of the pipes run along the walls to the heated floor comb. The last stages are checking the tightness, turning on.
Waterproofing membrane and film are different materials that are important not to be confused with each other. In this case, the pipes are laid only in a snake pattern.
Waterproofing membrane and film are different materials that are important not to be confused with each other.
Advantages and disadvantages
If we talk about the positive aspects of systems without screeds, we should highlight the following:
- The result is lightweight, but reliable and energy-efficient structures.
- If leaks occur, they can be easily detected and eliminated, which cannot be said about the warm water field in the screed.
- With this installation you can save space. Usually the cake is 2 to 5 cm thick.
- If metal heat-dissipating plates were used during installation of the heating system, then the pipes do not retain heat. As a result, heated rooms warm up faster. Also, such systems respond quite quickly to automation commands.
- Water floors without screed take much less time to install. This is due to the fact that you do not need to make a solution, level it on the surface, and then wait several weeks for it to dry.
The only disadvantage that can be noted is the high cost of metal elements. There is also an opinion that the heat transfer of such heated floors is lower than that of screed heating systems, but this has not been confirmed.
What should be the thickness of the screed for heated floors?
The thickness of the screed is chosen depending on the purpose of the room, its height, and the characteristics of the floors. The following factors are taken into account:
- too thin a layer quickly deforms;
- too thick - it takes a long time to warm up, which leads to increased labor costs.
Attention! The minimum thickness of the layer above the pipe is 30-45 mm, the total thickness is 60-70 mm. When using self-leveling compounds, the total layer thickness is 45-50 mm
Using solutions of self-leveling compounds, screeds are made in rooms with low loads, for example in bedrooms. A concrete layer of 70 mm or more can withstand high dynamic loads, heavy furniture, and household appliances.