Is it possible to paint the inside of a microwave?
The internal coating of microwave ovens comes in three types:
- Ceramic. Such surfaces are both hard and brittle. Microwaves are difficult to scratch, but a strong accidental impact may cause chips and cracks to appear in the chamber.
- Steel. Microwaves made of stainless steel are considered the most durable; they do not peel off, do not crack, and withstand high temperatures well. The only downside is that it is difficult to clean from contamination.
- Enameled. Such microwave ovens have a smooth, but rather thin coating on the inside, applied over the metal. They are cheap and look attractive, but the enamel begins to flake off over time.
Ceramic microwave ovens usually do not need to be painted inside. Steel microwaves can be treated, but enameled ones are even necessary if the factory coating has come off and rust stains have formed in its place. Such defects impair not only the appearance, but also the performance of the device.
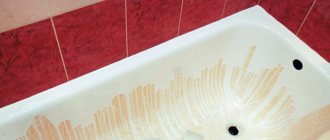
When the enamel is severely worn out, the microwave begins to spark.
What to do if paint is peeling
From the inside, the walls of the microwave are constantly exposed to high temperatures, and grease also gets on them. If handled carelessly, scratches may occur. Places where the coating is damaged become clogged with grease and food residues. This causes the formation of rust, leading to the complete destruction of the household appliance.
The paint peels off or cracks due to poor cleaning, when hard brushes or products containing abrasives are used to remove dirt. Therefore, when cracks and rust are first detected, it is recommended to paint the walls. With the help of such actions, the service life of the device increases by about three years, since the corrosion process stops.
Before painting, the type of coating is determined:
- Ceramics. This material has good hardness, but it is fragile, so even with the slightest mechanical stress, chips or cracks form. The advantages of ceramics include smoothness, so the process of removing plaque does not require significant effort.
- Stainless steel. The material is durable and reliable, resistant to temperature changes, but removing fat is quite difficult. It is prohibited to use aggressive cleaning agents during maintenance, as this leads to the formation of dark spots or scratches. Therefore, only special products for microwaves are selected or steam cleaning is carried out.
- Food enamel. Microwave ovens with this coating have a short service life. The advantages include the smoothness of the walls and the absence of pores into which dirt gets clogged. Cleaning is a simple procedure, but long-term use causes deformation. Bubbles appear on the coating, so it simply moves away from the walls. As a result, rust is found inside the microwave oven. If the material is not updated, crackling and sparks will appear during operation of the equipment.
When rusty areas are first detected, the following actions are performed:
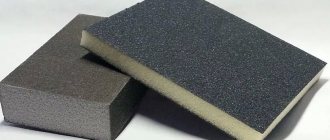
- the place of chipping or peeling of the coating is cleaned using coarse sandpaper;
- debris generated as a result of work is removed with a vacuum cleaner;
- the surface is treated with fine-grained sandpaper;
- the cleaned metal is degreased with any solvent;
- the surface is covered with a primer;
- the wall is leveled with putty, and only an alkyd composition is selected;
- the putty is cleaned with fine sandpaper;
- holes available in the equipment are sealed with masking tape;
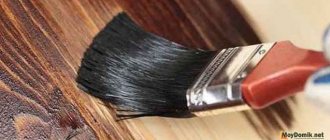
- paint is applied, and two to three layers are done;
- Each layer is dried for at least 24 hours; the air temperature should not be lower than 20°C.
If there are not only peelings from the inside, but also dents formed due to rust, they are first sealed with two-component compounds. To paint the inside of a microwave oven, you need to use non-toxic and heat-resistant products.
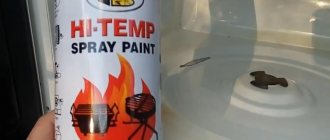
How and what paint can be used to paint a microwave oven inside and outside
If enamel defects appear in the oven, it is not necessary to replace the entire unit or send it for service; you can simply restore the paint inside the microwave. When choosing a composition, you should be guided by several rules:
- The paint must be harmless. When heated, chemicals can evaporate from it, so it is prohibited to use toxic products; they are dangerous to food and human health.
- The selected composition must tolerate changes in humidity and temperature well. Otherwise, the new coating will not last long and will quickly peel off during use.
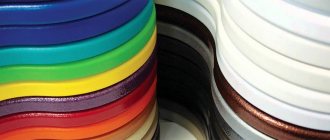
Advice! When choosing a product, you should pay attention to the aesthetic side and choose a color scheme that matches the original shade of the device.
There are several enamel options available in specialized stores that can be used to paint a microwave oven.
Organic food
Heat-resistant paint is microwave safe because it is designed specifically for use on food containers and remains safe even when in direct contact with water or food. Enamel is expensive, but it can withstand strong heat and high humidity, and does not deteriorate under the influence of acid and alcohol fumes. You can use it to paint aluminum, steel and other metal substrates.
Organic food enamel contains zinc powder, which protects microwaves from corrosion.
Shungite
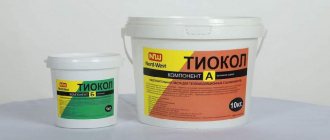
Shungite enamel is characterized by high density, good electrical conductivity and durability. It has antistatic properties and is suitable for application to surfaces that are regularly exposed to intense temperatures. In particular, it can be used to paint the inside of a microwave oven.
Shungite is often used for painting acrylic bathtubs and radiators
Epoxy
A good paint for the inside of a microwave oven is inexpensive epoxy enamel, a universal coating that can be used to restore almost any surface. The main disadvantage is that the heat resistance is not very high; at temperatures above 120 ° C, the composition begins to deteriorate. Otherwise, the product is durable and stable, and tolerates changes in humidity well.
Simple microwaves without grill or convection can be painted with epoxy coating
Automotive acrylic
If the paint inside the microwave has peeled off, you can make repairs using acrylic automotive enamel or a spray primer. The composition is sold in spray cans. Most often it is used for minor body repairs and masking scratches and abrasions. It is not difficult to paint the inside of the microwave with such a coating, but first you must carefully remove all traces of corrosion in the device.
To paint the inside of a microwave, one can of acrylic is usually enough.
Types of paints
Stores today offer a huge range of paint and varnish products, so you can get confused as to which composition is best to choose to paint a microwave at home. Here is a list of paint mixtures that are suitable for painting the inside of a microwave oven:
- organosilicon food colorings. They are the best option for microwaves and consist of silicone varnish, special additives, pigments and fillers. These solutions are 100% safe for cooking, they are approved by GOST, although they are not cheap, they do have the necessary quality certificate.
Organosilicon dyes have the highest resistance to extreme temperatures and are suitable for painting the inside of a microwave. These paints are resistant to mechanical, chemical and high humidity. To paint with this composition, you can use a regular brush; the mixture spreads evenly on any type of metal, and perfectly protects it from corrosion and rust. After applying the paint, an effect similar to cold galvanizing is created, so the microwave oven can be used for a very long time;
- electrically conductive. They consist of silver, aluminum and zinc; after drying, the coating becomes resistant to the adverse effects of various factors. For example, the paint layer can be operated at a temperature of 170-200 degrees. Although electrically conductive compounds are not cheap, they are great for painting the inside of a microwave oven. These paints do not emit any harmful or toxic substances when heated, and are absolutely safe for humans. The most popular electrically conductive paint is from Zinga;
- shungite. Shungite is very similar in its characteristics to graphite; it is a natural material that is an electrically conductive composition. After painting, the device becomes fireproof; shungite mixtures are used in the field of finishing; they are well suited for painting a microwave at home. Shungite coating can easily heat up to a temperature of 300 degrees and forms an antistatic film that is completely safe for humans;
- automotive acrylic paints. They have increased strength and high reliability, so they are suitable for painting microwaves. Most often, these mixtures are supplied in aerosol cans, making their use very convenient; you can easily paint any hard-to-reach places. These paints are reasonably priced; one can is enough to paint two layers of the inside of a microwave oven. Acrylic dyes provide excellent protection against corrosion, rust, withstand the negative effects of steam, moisture, grease and strong heat without damage, are environmentally friendly and durable;
- special coloring agents for household appliances. These are enamels based on epoxy resin, for example, New-ton dye. It is produced in the form of an aerosol and is white in color. The disadvantage of the composition is the ability to withstand temperatures of a maximum of 100 degrees, so these mixtures are used more often for treating the outside of microwaves.
Preparing for painting
Before you paint the inside of the microwave with enamel, you must first prepare it. The process comes down to several stages:
- The surface of the oven is cleaned from the inside using a metal scraper or coarse sandpaper. Particularly carefully treat areas with scratches and swollen blisters.
- After cleaning, the microwave oven is sanded using sandpaper. The main attention is paid to the joints between the bare areas and the old coating.
- The microwave chamber is degreased using acetone or solvent. It is necessary to completely remove any dirt or greasy marks.
The smoother and cleaner the surface, the more convenient it will be to paint the inside of the microwave, and the better the new coating will fit. If you apply it without prior preparation, it will not last long and will peel off quickly.
How to remove rust in the microwave
When the old enamel inside the microwave peels away, rust spots quickly appear on the exposed areas. These must be eliminated before painting the unit.
Removing stains is carried out according to a simple scheme:
- Rusty areas are treated with coarse sandpaper to bare metal.
- Using a powerful vacuum cleaner, remove iron dust and remnants of old coating.
- Sand the cleaned areas with fine-grained sandpaper to make them as smooth as possible.
- Wipe former rust stains with solvent or acetone.
- Prime the surface of the microwave inside with a special compound, for example, PF-0244, GF-021 and similar.
- Use alkyd putty to smooth out minor irregularities, if any remain.
- Once again treat the chamber with fine sandpaper and leave to dry.
After such preparation, you can directly paint the inside of the microwave with the selected enamel.
If you paint a stove over rust, the coating will quickly crumble and the stains will continue to grow.
How to restore coverage
One of the simplest options is to paint problem areas with any heat-resistant composition of the appropriate color. However, if you want to get a strong and durable coating, then you should take the matter more seriously. To eliminate the flaw, you will need an aerosol can with automotive acrylic primer and the same nitro enamel of the desired color (usually white).
Preparation
Inspect and feel the entire inside surface of the camera: it is quite possible that you will find swollen areas. These should be removed to expose clean metal. The entire coating must be cleaned with fine sandpaper and degreased with a solvent (for example, acetone). Further:
- Seal the magnetron exit area and the backlight hole with adhesive tape (insulating tape) so that the pieces of material overlap each other;
- Remove the outer casing to ensure good ventilation during painting;
- Place a plastic bag on the microwave door and secure it with the same tape.
Primer treatment
The stove should be painted in a ventilated area. Place the device on one of the faces at an angle of 45 degrees so that the back wall rests simultaneously on the wall and the floor. Now, holding the door with your hand, apply primer from a can. It is advisable to wear a respirator and gloves. The composition is applied from a distance of 25–30 cm. The number of layers is 3, each of them needs to be dried, for which you can use a regular hairdryer. When the primer has been applied in the required amount, leave the oven to dry completely (1 day).
How to paint the inside of a microwave at home
It is not difficult to paint the inside of the microwave if it is peeling, but it takes quite a lot of time. The algorithm looks like this:
- The unit is completely disconnected from the network, the work table is covered with newspapers or unnecessary cloth and the microwave oven is placed on it with the door facing up.
- Before painting the device, all preparatory work is carried out - cleaning, degreasing and priming if necessary.
- The waveguide and air duct are sealed with masking tape; the new coating should not get on them, otherwise damage to the working parts of the device may occur.
- Painting begins from the depths of the microwave oven, and then the side walls of the unit, bottom and ceiling are treated.
- Drops of paint that fall on inappropriate places are immediately removed with a cotton swab dipped in solvent, without waiting for the composition to dry.
- The enamel is applied in one layer and the uniformity of distribution is carefully controlled. The inside of the microwave must be painted without drips or bubbles.
- At the end of the work, the oven is left open to dry. This can take from three hours to 2-3 days, depending on the enamel.
- After the first layer of coating has completely dried, paint is reapplied.
- The microwave oven is again left to dry for several days.
After the new enamel has completely hardened, the masking tape is removed from the air duct and waveguide. You can turn on the microwave oven after another 3-4 days.
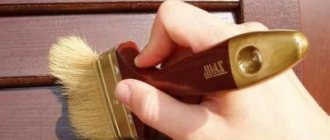
Attention! The most convenient way is to paint the inside of the microwave using a spray can. When using the product in a jar, you need to work with a foam roller, which will ensure maximum uniformity.
When painting the inside of a microwave oven, a brush is used only for processing joints in the corners
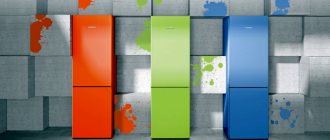
How to paint the outside of a microwave at home
The real need to paint the outside of a microwave rarely arises. The outside of the oven does not heat up and is rarely subjected to such aggressive influences that the coating on its sides peels off. But if the microwave is already old and has lost its attractive appearance, you can renew its outer enamel.
The easiest way to paint a microwave is with the remnants of the product used for the interior surfaces. But if you wish, you can buy almost any composition without a strong odor and with good durability. The microwave will not come into contact with food from the outside, so the requirements for the safety level of the enamel are less stringent.
The painting itself is carried out according to the standard algorithm:
- The microwave, unplugged, is placed on a work table previously covered with newspaper. There is no need to turn it over, but the door should be closed.
- Scuffs and scratches on the outer walls are cleaned with sandpaper, sanded, and then degreased and, if necessary, a primer is applied.
- After the leveling composition has hardened, the microwave is enameled twice or three times. Allow each layer to dry completely before applying the next one. The timing depends on the type of enamel; before painting the stove, you need to read the instructions for the selected composition.
At least 24 hours should pass between applying the last layer and turning on the microwave for the first time.
It is not recommended to wash the microwave oven with wet sponges for two weeks after painting the outside
Types of coatings and causes of chipping
The cost of a microwave oven depends on the number of functions, capacity and internal coating. There are:
- Enamel surface. Most often found in inexpensive models, it is easy to care for, but can be easily scratched by abrasive powders.
- Stainless steel surface. Withstands high temperatures, has a long service life, and looks beautiful. Among the disadvantages, they note a higher price than with an enamel camera. Requires constant attention to remove grease splashes that easily stick to the surface. After a short period of time, the “newness” ceases to shine.
- Ceramic surface. It differs from enamel and steel in how easy it is to care for the surface from the inside, but it costs much more than its competitors and is fragile.
Microwave ovens with enamel coatings are considered the most popular and cheapest. But they are easily scratched when washing a dirty microwave with abrasives and chemicals that harm the inner layer. Damage to the integrity of the coating can also occur over a long service life due to frequent and improper use. This:
- too much power used to heat food;
- putting an empty furnace into operation;
- heating and cooking food in dishes with metallized elements.
The recommendations for using microwave ovens indicate:
- It is prohibited to use the device if cracks, chips, swelling or cracking of the enamel, or rust stains appear;
- this leads to harm to the health of users;
- may cause short circuits and fire.
Through tiny cracks, microwaves cannot escape beyond the interior of the chamber, but if you ignore the problem, they will increase over time, and the oven will only have to be thrown into the trash. If the expiration date of the purchased household appliance has not expired, and the internal surface could not withstand the load and peeled off, the oven is sent to the manufacturer for repair or replacement. Otherwise, the owner himself decides to repair the device or throw it away if the enamel has peeled off in the microwave.
If a household appliance is expensive, has not lasted long, is needed for heating and cooking, and the paint has begun to peel off only in one or several places, you can restore the integrity of the internal coating using special means. And in this case, with proper care and compliance with operating rules, the microwave will serve for a long time and with high quality.
Recommendations for painting and coating care
A video on how to paint the inside of a microwave oven recommends paying attention to the type of enamel you choose. The product is applied from a can in zigzags, but with a foam roller you need to make forward movements in one direction.
After updating the coating, you should carefully care for the microwave, so the enamel will last longer. Any dirt inside and on the outer walls is removed immediately, without allowing it to dry out. This is especially true for fat, which is very difficult to remove after complete hardening. With good care, the need to paint the inside of the stove will arise less often.
If possible, sudden temperature changes should not be allowed in the microwave. Even heat-resistant coatings are gradually destroyed by regular “shock” exposure.
Warning! When cleaning your microwave oven regularly, do not use metal scrapers or aggressive detergents.