Can all types of wallpaper serve as the basis for new ones?
If you decide not to remove the old covering, you must remember that not all modern wallpaper materials can be the basis for new wallpaper.
For example, it is impossible to apply a new one to a finish decorated with a convex relief pattern. Glue on such a base will not be able to hold and the surface will be uneven. Non-woven and vinyl sheets also cannot serve as the basis for a new finish, due to the presence of a protective film that will prevent the glue from deeply saturating the surface. This means that it will not be possible to glue new wallpaper efficiently, as it will quickly peel off and simply fall. It will also not work to glue new canvases onto liquid wallpaper.
What helped in the past when gluing wallpaper onto newspapers?
Glue on the stove is another brilliant invention of the Soviet people. This remedy was actually brewed at home. The paste was based on water and starch (or flour), because there were no special solutions in stores.
This glue did its job perfectly, but took a very long time to dry. Without a newspaper layer, the wallpaper, smeared with paste, looked completely unpresentable. But there was another side effect: starch glue often harbored living creatures such as bugs and cockroaches.
Repairing ceilings also caused difficulties in Soviet times, because there was no special paint for the ceiling either. At first, people had to remove the crumbling whitewash; to do this, they had to wash it for a long time, and then apply a new one with a brush.
In any case, now for many people memories of Soviet renovation evoke nostalgia. The process was a team effort and often felt like an exciting adventure. And for those who had “golden hands”, the repair did not seem something terrifying at all. Although now people are unlikely to exchange modern comfort for Soviet romance.
Rules for gluing non-woven wallpaper
Tips on how to properly glue non-woven wallpaper are relevant for horizontal and vertical surfaces. The technology is applicable for wallpaper with and without a vinyl layer.
Rules:
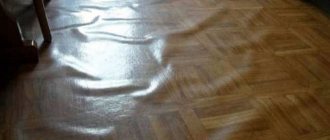
- Non-woven wallpaper does not stick in drafts and dry rooms. The sticky compound dries too quickly, resulting in blisters.
- The glue is applied to the walls and ceiling without additional coating of the wallpaper.
- The strips of material are laid close to each other without overlapping.
- Air and folds are expelled with a special brush or spatula from the center to the edges, from top to bottom.
- Excess glue should be washed off from the wallpaper with a soft cloth or sponge immediately after smoothing.
- All pieces of furniture must be removed, and it is recommended to cover the floor with film, newspapers or cardboard.
Non-woven wallpaper is glued to a surface that has been primed and cleared of old coating. The measure reduces glue consumption, and appropriate compositions prevent the occurrence of mold.
On the wall
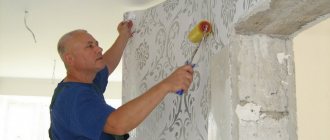
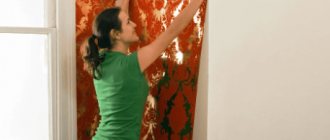
Wallpapering on a non-woven basis begins with preparing the room. Sockets, switches, and heating devices are removed from the walls. If it is possible to remove the baseboards, remove them too. Afterwards the old coverings are removed.
The walls need to be primed. To stick non-woven wallpaper on a wall instead of a special compound, just walk over it with glue. It is diluted according to the instructions, using twice as much water as indicated for gluing.
In the place where you start gluing the meter-long non-woven wallpaper, mark a straight line with a pencil using a plumb line. Experts recommend placing the first canvas in the corner closest to the window.
Wallpaper should first be cut into sheets along the length of the wall. Plain and vertical patterns are cut into strips equal to the maximum height of the room + 6-10 cm. Each subsequent piece of wallpaper with a pattern should be checked with the previous one to make sure that the pattern will meet at the joints.
After everything is prepared, start diluting the glue. In this case, it is imperative to comply with the proportions indicated on the label.
Rules for sticking non-woven wallpaper and procedure:
- Glue is applied to a section of the wall under one strip without gaps. The roller is used for a large space; the corners, areas near the ceiling, floor and future joints are coated with a brush.
- The edge of the canvas is applied to the ceiling, with a slight overlap.
- Smooth out and carefully unravel so that the side matches the pencil mark or the previous canvas.
- The strip is rolled from top to bottom from the center to the edges, expelling air and pressing the material to the surface. It is convenient to do this with a silicone roller.
- Using a pressing spatula, additionally pass along the edges near the ceiling and floor.
- Excess glue is removed from the material with a sponge.
- The allowances are cut using a special tire or spatula using a construction knife.
Cuts are made in the openings of sockets and switches on the wallpaper. You can eliminate the excess after finishing the room. Defects will be hidden under the devices.
In the corners
To glue the wallpaper evenly in the inner corners, you need to place the canvas with a slight overlap on the second wall and glue it in the usual way. It is worth walking around the corner with the tip of a plastic pressure spatula, achieving tight contact of the wallpaper with the wall surface. The second canvas is glued in the same way with an allowance of about a centimeter on the already pasted wall.
After both strips are carefully glued and aligned, the spatula is pressed tightly against the corner, and the allowances are carefully trimmed using a construction knife. It is advisable to break off the blade before doing this to renew the cutting surface. The trimmings are removed, and the second sheet is rolled again to the corner.
A joint on an external corner is not allowed. For boxes and openings, the wrapping technique is used. The canvas is first carefully glued to one side of the corner. After this, it is carefully stretched and smoothed with a spatula to the second wall.
To the ceiling
The ceiling is treated in the same way as the wall. The surface must be cleaned and primed. It is convenient to apply the glue with a roller with a long handle. The canvases are laid across the room so that the weight of one strip is less.
It is more convenient to work in pairs, since long strips of wallpaper will sag and get in the way. To stick non-woven wallpaper on the ceiling yourself, you will need a long surface, like a table. It’s more convenient if you can glue each piece of wallpaper without moving the table.
Some craftsmen make a special high holder for the free edge of the canvas. You can pre-roll the cut strips like an accordion or a roll with the inside out. The technology completely repeats the steps for walls.
Why is this necessary?
The main question that everyone who sees such a process asks is why do this. There may be several reasons for such non-standard use of periodicals:
- If you are going to decorate a room in which the walls are covered with lime plaster or other similar material, the adhesion of the wallpaper to the surface will not be very good. If you first cover the surface with paper, the base will better hold the wallpaper.
- In some cases, the base could crumble and was unstable. The pasted sheets of periodicals significantly strengthened the surface and subsequent finishing was much easier, without the risk of the plaster falling off and the panels peeling off.
- If there are small irregularities or scratches, glued pages will level out these shortcomings. When wet, the paper will swell and shrink after drying, forming a more even surface.
- This material can act as a topcoat rather than a base. In this case, you will get a very original interior design.
The main reason for using such techniques in finishing was the banal impossibility of buying a good primer or ordinary putty. We had to look for ways to strengthen and level the plane before finishing. At the same time, the pasting technology will be slightly different from working with traditional coatings, and a few tips below will help you figure out how to glue newspapers to the wall.
1 Characteristics of wallpaper with non-woven base
Non-woven fabric does not require special care, it does not absorb moisture, so to keep the finished coating clean, it is enough to wipe it with a soap solution. Unlike paper counterparts, non-woven wallpaper does not need to be impregnated with glue, for this reason it is applied exclusively to the wall, which saves a lot of time.
Non-woven fabric is denser than paper material, so it hides minor surface defects well. And the presence of a high-quality edge allows you to glue the sheets close to each other, the joint in this case turns out to be inconspicuous, barely noticeable, and the entire surface looks like a single whole.
What is non-woven fabric
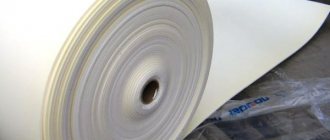
Non-woven fabric is a special material that is known more to seamstresses, who use it to seal certain parts of clothing. It feels like fabric and visually looks like paper. So what is it really?
Non-woven fabric consists of 70% ordinary cellulose, the main component of paper, and 30% binders. The fibers are intertwined and knitted in a certain way, so the fabric is strong and elastic. Due to the fact that they are made using a press, the result is durable and wear-resistant. Therefore, non-woven wallpaper has a long service life, resistance to mechanical damage and fire resistance. You can clearly see the sample in this photo.
How to hang non-woven wallpaper and what is needed for this
In order to hang non-woven wallpaper easily and simply, in addition to the desire for change, you will need some tools and some useful tips. As well as a short guide in the form of step-by-step instructions.
So, for work you need the following tools and devices:
- non-woven wallpaper in the required quantity;
- glue for non-woven wallpaper;
- roller for applying glue;
- thin brush for applying glue;
- plastic wallpaper spatula for smoothing wallpaper;
- metal spatula 250-350 mm long for trimming;
- stationery knife;
- regular knife;
- scissors;
- sponge;
- glue tray;
- a plumb line or level to obtain a vertical line;
- roulette;
- pencil, not too soft;
- rubber roller for smoothing wallpaper (optional, as an option);
- small rubber roller for smoothing joints and hard-to-reach places (optional);
- correct putty;
- ladder.
Wallpaper spatula
Preparatory processes
Smooth walls and straight corners
You need to start wallpapering after the walls have been leveled, puttied and the molding under the ceiling has been glued.
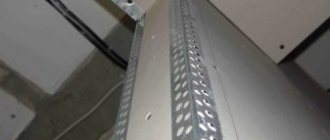
It is very important to check the condition of the corners. It is the corners that are quite crooked
A slight unevenness or slope of one wall on the wall itself is not so visible. But when two walls meet, and even with varying degrees of inclination and unevenness, the result is not a very beautiful “perspective”. That is, later you may end up with a very ugly corner that will ruin all the work. At the same time, it can take a lot of time and effort to glue a clumsy corner, but the result will still be unhappy. Therefore, it is important to correctly assess the condition of the corners and, possibly, contact a specialist, because... straight corners are the lot of craftsmen. Of course, if the corner will be permanently covered by a closet or these are the back corners in a narrow room that are practically not visible, then you don’t have to worry about them too much. But if it is an open corner in a visible place, then you need to treat it carefully and correct its defects as much as possible before wallpapering.
Primer of walls
Before wallpapering, the wall must be primed with a deep penetration primer and allowed to dry for the required time (indicated in the instructions for the primer, usually 1-2 days).
If you've just removed old wallpaper and the wall is in good condition, you can probably skip this step.
It is important that the wall has a uniform, strong coating, does not “dust” and has the same “absorption” (degree of moisture absorption). In this case, you can independently decide whether the wall needs to be primed now.
But experts recommend priming the walls before wallpapering.
If the walls are uneven, they need to be puttied. More details here.
Brief recommendations for working with non-woven wallpaper
Non-woven wallpaper is glued end-to-end and it makes no difference how you glue it - from the window or to the window. The main thing is to choose the correct order of gluing so that it is convenient to glue and there is an optimal cutting of the wallpaper.
It is better to start from a corner or from the doorway in order to get a strictly vertical first stripe.
To properly glue the canvases, you need to make markings on the wall in the form of a vertical line. It is advisable to draw the vertical line in such a way that the edge (joint) of the wallpaper does not run along the line, but with an indentation of 2-5 mm, so that the line does not fall into the seam. You should also try to draw a neat line; you can make it in the form of strokes. It is better to use a harder and well-sharpened pencil.
If the wallpaper is without a pattern or is plain, then trimming the wallpaper to height can be done while gluing. If a selection of designs is required, then it is better to cut the wallpaper into canvases in advance.
It is necessary to pay attention to the fact that trimming the top of the wallpaper under the baguette is done immediately after gluing each canvas, and not after completing the gluing of the entire wall or even the room. You need to cut the top while the glue has not yet hardened, then you can get a smooth edge ideal for a baguette
Removing the wallpaper under the baguette
What tools will you need?
To prepare in advance, you need to purchase and prepare:
- container for mixing the adhesive mass;
- wide rubber roller;
- narrow roller and dry rags;
- spatula for mixing glue;
- wallpaper knife and scissors;
- level or plumb line;
- pencil or ballpoint pen;
- a brush with a wide blade.
Once everything is at hand, begin preparation.
Cutting the canvases
To properly prepare the material itself, you need to do the following:
- Even at the stage of purchasing wallpaper, you need to check the batch numbers. Otherwise, the tubes may differ in color. If something was overlooked and one roll does not match the others in tone, it can be used for pasting hard-to-reach places, above window or door openings, in corners. Where the difference in color will not be noticeable.
- Using a centimeter tape, measure the height of the wall, add 5–7 cm to it for allowances at the bottom and top. This value is transferred to the wallpaper and cut to the required length. The next strips are compared with the first. If the products have an abstract design, they do not need to be customized. For large and small ornaments, a combination of lines will be required. It is better to do this on the floor, using 2 rolls at the same time.
Advice. It will be easier to align the strips glued to the wall if you first apply markings to the surface: vertical lines, the distance between which is equal to the width of the roll.
Algorithm for gluing on walls with your own hands
First, the wall is coated with glue. The width of the treated surface is greater than the width of the roll. Lubricate with a special soft roller or a wide thick brush. When preparing the stripes, take into account the need to adjust the pattern. Non-woven wallpaper needs to be glued joint to joint.
Stage 1: diagram and marking of walls
The width of the roll is measured from the window, and a vertical strip is drawn along the level or plumb line. This is a guideline so that the fragments and joints are even. By marking the wall along its entire length, you can determine the required number of solid strips, which should be cut in advance.
Stage 2: preparing wallpaper
If non-woven wallpaper is glued without matching the pattern, the fragments are cut with a small margin in length (5-7 cm more than the ceiling height). When it is necessary to adjust the pattern, the margin is made larger by the amount indicated on the packaging of non-woven wallpaper opposite the corresponding symbol.
Stage 3: gluing
The pasting process begins from the window. When applying fragments, you must ensure that they are vertical. To do this, markings are applied to the wall.
When gluing non-woven wallpaper, only the wall is covered with glue. If the canvases are heavy (vinyl-coated), it may be necessary to apply glue to both the wall and the wallpaper.
Rolling with a roller or smoothing with a rag, press the middle of the strip along the entire length, having previously unrolled the wallpaper.
Remaining air and excess glue are expelled from the axis to the edges, which are rolled with a narrow special roller for tight adhesion. There should be no overlaps.
Stage 4: final
All protruding parts of the fragment are cut off with a wallpaper knife. To ensure an even cut, apply a wide metal spatula to the cutting line. Below you can leave the wallpaper as is, since after gluing, a plinth is installed that hides the defects.
Pasting technology
Fundamentally, the process of gluing this mole material will differ from working with standard wallpaper. However, when gluing rooms with crumbling walls or covered with lime, the work will proceed a little differently.
- First, you need to clean the entire surface of dirt and inspect any crumbling or peeling areas. Having identified such defects, you need to get rid of them - remove the peelings and level the surface using plaster or putty compounds, not forgetting to first prime the areas to be repaired.
- When the putty dries, the entire surface needs to be primed again. You can apply a special base-strengthening composition - there is a large selection of suitable mixtures in stores.
- Further, much will depend on how the newspaper sheets are intended to be used - as a base or a finishing coating. If this is a base, then the surface of the wall is covered with glue and allowed to dry completely. After this, glue is again applied to the wall and the paper is glued to it.
Important: do not try to spread glue on the paper itself - it tears easily when wet and you won’t be able to transfer the soaked sheet onto a flat surface.
- If you want to get an original wall finish, then newspapers can be pasted after preliminary preparation. It involves cutting off the edges of the pages to get rid of uneven edges. In addition, after such pruning, the sheets look better and the design is more interesting. The rest of the technology is similar to the previous point.
How to hang wallpaper correctly: video and step-by-step instructions
Once you have decided on the type of coating and adhesive composition, you can proceed directly to gluing. This is done in the following sequence:
The walls are being prepared. This process involves pre-drying the surface. If the wall has been recently plastered, the plaster should be completely dry. Otherwise, there is a high risk of wallpaper peeling;
Priming walls using a long-handled paint roller
- primer is applied. This can be a special solution or the adhesive composition on which the wallpaper will subsequently be glued. The primer is designed to seal cracks in the walls and hide minor irregularities;
- In a special container, according to the instructions, glue is diluted. You need to stir it for at least 10 minutes, the solution should be homogeneous, without clots or lumps;
- using a level, draw the top line, which will serve as a guide for gluing the first sheet of coating;
Marking and cutting wallpaper into sheets
- the room is de-energized, all sockets and switches are removed from the walls. Holes for them in the canvas can be cut both before and after gluing. The main thing is to mark with a pencil exactly where the cuts need to be made;
- Before gluing, you need to make sure that there are no drafts in the room. It is highly not recommended to turn on fans or air conditioners and open windows during the process;
- Each roll is cut into strips. It is recommended to leave an allowance of 10 cm along the length. Before cutting, cut lines are drawn using a tape measure and pencil;
Applying glue to wallpaper using a wide brush
Glue is applied to the prepared canvas. The solution must be applied evenly, coating the edges of the strip well
It is very important not to leave dry, uncoated areas, which will subsequently not stick to the wall and will create a swelling effect. The question of what glue to use for vinyl wallpaper on a paper base was discussed above; glue is applied to the wall
If you are using meter rolls, skip this point and proceed to the next one; The prepared canvases are glued to the wall. This must be done end-to-end, without overlap. Residues of glue that appear through the seams are removed using foam rubber or soft cloth;
Pasting walls must begin from the corner of the room or window opening
the edges that remain below and above are trimmed using a blade or a stationery knife. It is best to do this when the sheet is already dry, otherwise the cut risks getting uneven.
How to stick paper-backed vinyl wallpaper in the corners and on the ceiling of a room? These processes have their own subtleties, which will be discussed below.
The nuances of wallpapering the ceiling
The process of wallpapering the ceiling is carried out before the walls are covered. For finishing the ceiling, it is better to choose a lighter vinyl option, since heavy wallpaper can come off under its own weight. Otherwise, the difference with pasting the walls is minimal, but this process is more labor-intensive, and it is in the case of the ceiling that the help of a partner will be very useful.
When pasting the ceiling, it is recommended to remove all furniture and carpeting from the room. The remaining items are covered with plastic wrap. To protect your face and head from glue, you should use a special hat and glasses.
How to properly glue wallpaper in the corners of a room
From which angle you start gluing wallpaper is absolutely not important, but it is worth considering that this process requires special care. The task is easier if the corners in the apartment are even.
If they have errors, they must be corrected, otherwise the final result will be unsatisfactory.
Vinyl wallpapering the outer corner of the room
When gluing vinyl sheeting in the corners, it is necessary to cut through one of the joints. This means that when there is less than one strip left to the corner, you need to measure the distance to it (from the pasted surface) and cut the canvas with an allowance of 3-4 cm. These centimeters will extend onto the perpendicular wall. Then you need to glue the second sheet overlapping, and carefully cut both sheets at this point. This way you will get a smooth and neat joint. At the junction, the wall is coated with glue, and the wallpaper is smoothed with a roller.
Why did the USSR put wallpaper on newspapers?
For those who do not have experience in wallpapering in Soviet times, this method of using newspapers may seem wild. But in the past, this printed material helped people out a lot. The shelves of hardware stores were not overflowing with special repair products back then, and people came up with a variety of ways to make their homes look neat and attractive.
The Soviet people found a very original way to use newspapers: they used them to level walls. After all, modern renovations require a flat surface before wallpapering, and the composition of current products perfectly hides unevenness. In the USSR, one could only dream of such a miracle material, and wallpaper glued to it without any auxiliary means only emphasized the unevenness of the walls. Newspapers also extended the life of the plaster.
And the quality of wallpaper in Soviet times left much to be desired. The people had only paper wallpaper at their disposal; they had never even heard of non-woven or vinyl wallpaper. The thin paper kept coming off, making the whole process a nightmare. But thick newspaper material perfectly leveled the walls. In addition, the use of a press helped to hide the poor quality of the glue.
Perhaps there are still fans of this method of wallpapering somewhere, although there are probably not many of them. However, it is a fact that in Soviet times absolutely all ordinary people used this life hack.
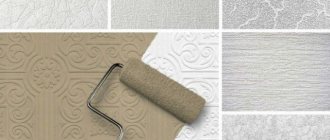
Types of non-woven fabrics
Thanks to a wide range of products, everyone can choose products to suit their taste, based on the interior of their house or apartment. Let's look at all of them in more detail.
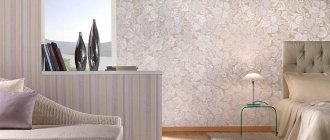
Smooth
Ideal option for painting. These are purely non-woven products consisting of one layer of material. Different types of cellulose fibers are used for production. There are modified and unmodified smooth non-woven wallpapers, glued and unglued. The thickness and density of the canvas depends on the manufacturing method. After gluing them, you need to paint the non-woven wallpaper in the selected color.
Foam trellises on non-woven fabric
They consist of two layers. Obtained by exposure to high temperature. During the process, the vinyl heats up and a porous structure forms. The resulting products are foamed. This allows you to form various patterns and designs on canvases. Wallpaper with hot stamping on a non-woven base feels very soft to the touch.
Embossed
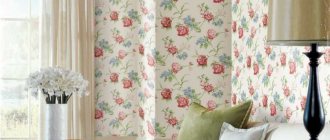
They are made only from several layers. This creates a structural pattern or pattern on the surface. The advantage of such coatings is that they can imitate some popular building materials and have different patterns. Materials: decorative plaster, wood, leather, fabric. From drawings: monogram ornaments, abstraction, flowers with sparkles and others.
For painting
An improved version of the nasty non-woven wallpaper. One of the most popular options all over the world. They are used for interior decoration of offices and private housing construction. The advantage of this option is that the fading old color can be renewed. Even if you’re just tired of it, changing the color is easy.
These are both smooth and textured wallpapers. No adjustment is required when cutting, which simplifies the work. And creative people can paint the surface not with one color, but with several, creating a unique and original design.