How to whitewash the ceiling
Before whitewashing the ceiling, many people ask a question that relates specifically to the choice of material. In many construction portals, whitewashing is done using water-based paint. The issue is controversial, because water-based emulsion belongs to the category of paint and varnish products. Therefore, when it is used to decorate the ceiling plane, they say - painting the ceiling. That is, this material has nothing to do with whitewashing.
Although the word “whitewash” comes from the word “white”. And since water-based paint is mostly white, hence the confusion. And yet we insist that the process of applying paint to the surface being processed is called “painting”.
So what materials can you use to whitewash the ceiling:
- aqueous solution of slaked lime;
- aqueous solution of chalk.
The first material is moisture resistant, perfectly hides minor defects in the ceiling surface, and has bactericidal properties, so whitewashing wet rooms is a priority. The disadvantage of lime mortar is allergenicity. Not all people can tolerate it, so this point must be taken into account. The second disadvantage is the unpleasant odor during use. But it disappears as soon as the ceiling dries.
Lime for whitewashing the ceiling Source i1.wp.com
The second material, that is, chalk whitewash, has a deeper and richer white color. It has all the same characteristics as lime, but chalk is hypoallergenic, plus it meets all the requirements of sanitary and hygienic standards.
Now about how to prepare both solutions for whitewashing. In fact, it is not so simple, because there are no specific recipes, so the masters mainly prepare them by eye, and each of them has their own proportions for mixing the ingredients. But there is an approximate consumption - this is 0.5 liters of mixture per 1 m² of ceiling surface. Typically, the components of the solution are combined per 10 m².
Attention! Remember that either of the two solutions can be stored for no more than 36 hours.
So, how to prepare lime mortar:
- slaked lime is rubbed through a fine sieve, there should be no lumps or pebbles;
- 1.75 kg of material is poured into warm water and mixed thoroughly; you can use a construction mixer or a drill with a special attachment;
- 100 g of table salt and 50 grams of blue are poured here;
- All this is thoroughly mixed until a homogeneous mass is obtained.
Preparation of whitewash from slaked lime Source ecoenergy.org.ua
It should be noted right away that the lime mixture will not give a rich white color for the ceiling. But its superiority over chalk whitewash is its high masking qualities, with the help of which small cracks are whitened.
Now about how to properly prepare a chalk solution:
- the chalk will also have to be sifted through a sieve, 3 kg will be left;
- you will need glue: PVA or carpentry glue at the rate of 30-100 ml;
- as well as laundry soap, which is ground on a grater, you will need 50 g of material;
- and lastly - 10-20 g of blue.
The preparation process is as follows: first, laundry soap is dissolved in warm water, then glue is added, and lastly chalk mixed with blue. The latter is added in small portions. The whitewash for the ceiling is ready.
And the last thing is the amount of water. Here the average calculation is as follows: for 1 kg of base material, 2 liters of water.
Now about how to determine whether the whitewash was prepared correctly. To do this, you will need either a knife or any metal pin with a smooth surface, for example, a long nail. The selected instrument must be vertically immersed in the prepared solution and pulled out. If the glass mixture does not leave any traces, it means it is not thick enough. What to do - add chalk or lime. It should be understood that the main material is added in small portions, and a check is made after each batch.
The video shows the technology for preparing chalk whitewash:
Second position. If, after removing it from the prepared mixture, there are lumps or the whitewashing material left on the testing device, it means that the prepared solution is too thick. You need to add water to it. And here everything is exactly the same - water is added in small portions, and after each batch a check is made. In both the first and second cases, it is necessary to ensure that a thin white layer remains on the metal surface. And the metal would not be visible.
If the solution for whitewashing the ceiling is ready, it must be left for about fifteen minutes so that it “reaches.” The mixture is then passed through a fine sieve. And just before whitewashing, it is mixed again.
So, we figured out how to whitewash the ceiling and how to prepare solutions. Now let’s move directly to the topic of the article, namely, how to whitewash a ceiling.
Features of whitewashing the ceiling with lime
To whitewash the ceiling with lime, you need to prepare a working solution; to do this, perform the following steps:
- Take 2-3 kilograms of slaked lime and dilute it with a small amount of water, no more than 1 liter.
- Add about 100 grams of soaked table salt or 200 grams of aluminum alum.
- If necessary, a dye is added; in most cases, approximately 500 grams of ordinary blue is added to the lime mortar.
- The mixture is thoroughly mixed and warm water is poured into it, bringing the volume to 10 liters.
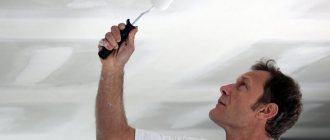
Whitewashing the ceiling with lime mortar is done using a roller, a hard paint brush or a spray gun. The direction of the first layer should coincide with the direction of the flow of sunlight from the window opening. The second layer is applied in a perpendicular direction. This technology allows you to get a beautiful and even coating without traces of painting tools.
In the process of whitewashing the ceiling with lime mortar, certain rules should be followed:
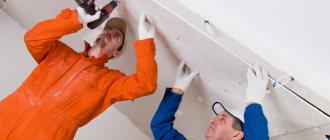
- Home craftsmen without experience in whitewashing ceilings with lime are recommended to use a roller or sprayer to achieve a better result. He also recommends that you read the recommendations of experienced painters on the question of which roller to whiten the ceiling with.
- Paint brushes must be soaked in warm water.
- The working area is well moistened before applying the lime mortar.
- During operation, the temperature in the room should be monitored; it should be at approximately the same level. The same rule is followed during the drying period of the whitewashed surface.
- Drying the painted ceiling should occur in natural conditions, without the use of heaters.
As for whitewashing the ceiling with a roller using chalk mortar, similar rules are followed.
How to whitewash a ceiling
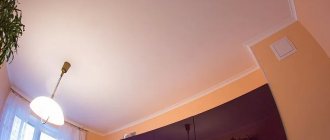
When the renovation reaches the ceiling. The most interesting question is to stretch or whitewash? A stretch ceiling allows you to give free rein to your imagination; it can be ordered in any color, texture, with or without a pattern, made multi-level, and installed with built-in lamps. but the main thing is that you don’t need to worry about preparing the surface. However, the good old whitewashing of the ceiling also has its advantages!
For example, if you need to renovate a room quickly and inexpensively, or if you prefer environmentally friendly materials, whitewashing the ceiling is an ideal option for you.
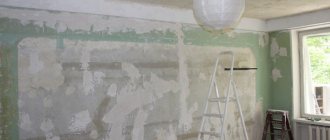
Ceiling leveling
The process of leveling the ceiling before whitewashing is as follows:
- The floor and furniture in the room where the work will be carried out must be covered with plastic film, as the process is accompanied by the formation of a large amount of dust and small splashes.
- Inspect the work area for cracks, gaps and irregularities.
- If present, problem areas are moistened with water and filled with plaster.
- For a ceiling with a chalk coating, you should use a special adhesive putty. To prepare it, take 2 parts of wood glue, 2 parts of plaster and 1 part of chalk. It is recommended to first dilute the glue with water, taking 1 liter of liquid per 50 g of dry matter. The finished solution adheres well to the surface, is easy to apply and does not require much time for the work process. The composition is applied to the problem area using a spatula, the first layer should be applied across the crack, the second along it. After filling the problem areas, the surface is rubbed with fine sandpaper or pumice.
- The ceiling, previously covered with lime mortar, is treated with a different composition. It consists of 1 part of well-cleaned fine construction sand and 2 parts of quicklime, diluted with water to a slurry. The finished mixture should be thick enough so that it can be easily applied to the ceiling surface.
- After eliminating the imperfections of the ceiling surface, one or more layers of primer should be applied. Thanks to this treatment, a kind of film is formed on the ceiling, which prevents strong absorption of the working solution into the base. As a result, with insignificant costs for whitewashing material, the ceiling acquires an attractive appearance.
Any home craftsman, before actually performing painting work, should learn how to prepare whitewash for the ceiling.
Different methods and their differences
Lime whitewashing may be the most budget-friendly way to give your ceiling surface a fresh look. But there are also some difficulties, especially in terms of preparing the solution, the desired composition and consistency.
There are several points that present some difficulty for a person who has never encountered such dyes. The easiest way is to buy a dry concentrate of such whitewash, ready for dissolution.
Chalk solution . It is easier to prepare, but there are also some nuances in its production. Fewer ingredients will be needed, and the process of creating the solution itself is easier to control than in the case of lime.
It is advisable to use both of these options in cases where the previous coating was made using such solutions. Moreover, it is undesirable to apply chalk coating to a lime coating, and vice versa.
Water-based and water-dispersion paints. Everything here is much simpler than with self-prepared chalk or lime solutions. Paints, as a rule, are sold ready-to-use, and the most that needs to be done with them is to dilute them a little with plain water.
Quicklime
Quicklime, or calcium oxide, is sold in packages (bags) in the form of small lumps.
Quicklime
To prepare a ready-made whitewash solution from it, it is quenched with water. This process requires special precautions, as it may be accompanied by a violent reaction, boiling water and splashing of the mixture.
Lime slaking
Lime is a strong alkali that can cause serious burns, so when extinguishing it is necessary to wear safety glasses, gloves and clothing covering exposed areas of the body. In addition, you should have a weak solution of acetic or citric acid ready to use to wash the skin in case of a burn. The acid neutralizes the alkali.
Quicklime is poured into a container and gradually filled with water in a 1:1 ratio, stirring. During the slaking process, the lumps disintegrate, turning into a white powder - fluffy lime. For whitewashing, you can immediately prepare lime milk. To obtain it, water is added during the quenching process until the desired consistency is obtained.
After slaking the lime, it is better to leave it for a day so that this process is completed completely. The milk of lime is then strained through cheesecloth to separate any small remaining lumps.
It is better to slak lime in metal containers, because plastic ones can be damaged due to high temperature.
In the video you can see the reaction force during extinguishing to understand the importance of following safety precautions:
You can avoid all the difficulties associated with the slaking process by purchasing a ready-made semi-finished product: fluffed lime or lime dough.
Benefits of whitewashing
Do-it-yourself whitewashing is a cheap and quick finishing method. Some consider it a relic of the past. However, a number of advantages make whitewashing very popular today:
- A simple process algorithm. I follow fairly primitive rules; you can do everything yourself;
- Availability. Materials and technical equipment are cheap and readily available;
- Environmentally friendly. This method of surface treatment is rightfully considered the most hypoallergenic and clean;
- Beauty. The color after this treatment is even, white and pure;
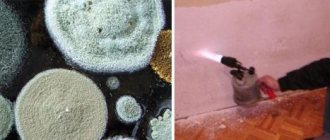
- It has a pronounced bactericidal effect, thereby preventing the formation of mold;
- Water resistance. Condensation cannot damage the whitewash layer or cause color changes.
This method of surface treatment is rightfully considered the most hypoallergenic and clean.
Tools for whitewashing
Before whitewashing the ceilings yourself, prepare the necessary tools - this work is performed in one of three ways, for which they are used:
- roller;
- sprayer, also known as a spray gun;
- brush.
If painting is carried out with a roller, then the coloring composition will lie in an even layer, without forming spots or streaks. To get a good result, whitewash is applied in two layers. You will need to have not only a roller, but also a container for the solution, a mixing tool, a paint tray and a small brush for applying paint where the ceiling meets the wall.
A whitewash brush can be purchased at any building materials store at an affordable price. When using it, the composition splashes, so you should protect the furnishings in the room from it and use special eye glasses.
The use of a sprayer allows you to lay the whitewash in an even, neat layer. Using a spray gun to whitewash the ceiling, you will reduce the time it takes to complete the work. When using paint, make sure it is free of lumps. Its consistency should be more liquid compared to whitewash, which is applied with a roller or brush.
No. 5. Preparing a solution for whitewashing
Since lime is used more often, we’ll start with it. The process of preparing the material is simple, but it still requires care. So, how to dilute lime for whitewashing?
- First you need to prepare all the necessary ingredients in the required quantities. We will need 10 liters of water, 2-3 kg of slaked lime, 150-200 g of aluminum alum, 50-100 g of coarse salt, which is pre-soaked, and a teaspoon of blue (if whitewash is needed) or 400-500 g of dye;
- dissolve all components in a small amount of warm water (about 1 l), then bring the volume of the solution to 10 l and mix thoroughly;
- if you are preparing a solution of colored whitewash , then it is better to immediately prepare the amount required to finish the entire surface. Otherwise, it will be almost impossible to repeat the shade, no matter how accurately you measure all the ingredients;
- quicklime at your disposal , then you can extinguish it at home. It is enough to mix it with water in equal proportions and stir thoroughly for 15-25 minutes. It is advisable to then leave the lime for 15 days in a closed container - this way it will lie on the surface as evenly as possible;
- The consumption of lime whitewash solution depends on the type of tool used for application and the characteristics of the material. The average consumption is 0.5 liters of solution per 1 m 2 of surface.
Now let's look at how to dilute chalk-based whitewash:
- 30 g of wood glue, 3 kg of sifted chalk, 15-20 g of blue to enhance whiteness are dissolved in 5 liters of warm water. This amount of solution is enough for approximately 10 m2 of surface;
- The consistency of the solution can be checked with a knife. If you dip the blade and pull it out, the solution should not completely drain from it. If it drains, completely exposing the blade, then you can add a little more chalk, and it is better to do this in small portions.
Note that ready-made dry mixtures are also available for sale, where lime or chalk has already been mixed in the required proportions with other components - you just need to add the required amount of water. Such mixtures are more expensive if you take all the ingredients separately, but the difference is small.
What can be used as a tray?
In fact, a tray is not a complex high-tech device that cannot be replaced with anything. This is a common form, with an incredible number of analogues. For example, a regular food container (large size) can be used as a replacement. The most important thing is that the roller fits into it.
Or you can take a square-shaped basin. Basically, almost any waterproof object that is square or rectangular in shape will do.
Important: Before you start painting, you need to rinse the roller thoroughly, because it may contain various contaminants or unnecessary substances that will end up on the wall in the future. Few people want to redo all the work because of their inattention to detail.
Possibility of sharing
A priori: a brush and a roller can be used when working on separate parts of the same object. There is no contradiction between these instruments; on the contrary, they complement each other well.
Application of rollers
As already mentioned, a paint roller is a flat tool . Its task is to paint large surfaces; in relation to ceilings, these are primarily plasterboard and plastered ceilings, previously well-primed and puttied for painting (it is best to use fiberglass to avoid cracking). Small rollers are also good for painting wide ( from 150 mm and wider ) ceiling, window and door slopes.
Using brushes to paint ceiling elements
No matter how good and effective a roller is, there are places that are inaccessible to it or where painting, although possible using a roller, is ineffective. These include:
- Areas where the ceiling meets the walls, corners.
- Narrow ceiling slopes (for example, differences between levels of a multi-level plasterboard ceiling).
- Niches in the ceiling (for placing lighting and hidden ceiling cornices).
- Elements of stucco decor: ceiling cornices and moldings, rosettes, caissons, etc.: it is in principle impossible to paint these elements efficiently without using a brush.
In some cases, brushes are also used to paint the ceiling plane : wood, concrete, etc. to create a deliberately roughly painted surface - similar decoration techniques are often used in loft and vintage styles. It turns out that a perfectly evenly painted surface is not always needed; some trends in interior design, on the contrary, require the creation of “brutal” textures (when painting wood with a brush, you should work in the direction of the grain).
A brush and a roller can and should be used together when painting ceilings; the question is “which is better?” there is no clear answer: it all depends on the stylistic solution of the interior, the design of the ceiling and the specific element that is to be painted; the main thing is to choose the right tool for a particular operation.
Repair and constructionComment
Required Tools
In order not to rush around looking for the right tool while working, prepare everything in advance. You will need:
- wide brush (15 cm) or roller;
- narrow brush (5-7 cm);
- plastic containers;
- stepladder or table;
- latex gloves;
- old newspapers, rags.
Depending on the situation, you may need:
- spatulas;
- sponges;
- serpyanka;
- sandpaper.
Benefits of whitewashing the ceiling
- Environmentally friendly material, absolutely safe for humans;
- Lime whitewash has disinfecting properties;
- The ceiling covering becomes moisture resistant due to the small pores that form when whitewash is applied correctly;
- Whitewash is resistant to abrasion;
- The whiteness of the ceiling, depending on the solution used, will last from two to four years;
- Cost-effective option.
Find out how to paint a ceiling with a roller - which roller and paint to choose and how painting technology differs from whitewashing.
Painting wallpaper - a detailed guide to choosing wallpaper and painting methods.
Do-it-yourself dressing room made of plasterboard - construction technology from scratch.
Whitewashing the ceiling with a roller yourself is very simple. Even a beginner in the construction business can do this. It is very important to properly prepare the ceiling, use a foam roller to apply the whitewash, and constantly stir the solution during application.
Ceiling surface whitewashing technology
Let's start this section of the article with the fact that there is a strict prohibition. It is based on the postulate that it is possible to whitewash a ceiling with lime mortar only if it has been whitewashed with this particular material. The same applies to chalk whitewash. That is, you cannot apply chalk if the surface was previously covered with lime.
Chalk leaves marks on the palms Source wallscloud.net
How to determine what building material the ceiling was whitewashed with. To do this, you need to run it with a damp hand. The lime will not remain on the palm, and the chalk will cover its entire surface. But on a lime ceiling there will be wet stains, but not on a chalk ceiling.
If the ceiling is whitewashed for the first time, then this problem does not exist. Therefore, first we will consider the option of whitewashing on an unprepared surface. And then we’ll deal with whitewashing the ceiling using the old whitewash.
Whitewashing a plastered ceiling
In principle, this process is divided into two stages: preparation of the ceiling plane and direct application of the whitewash material.
At the first stage, the ceiling is simply leveled and brought to maximum smoothness. For this purpose, today they use putties, which are applied in one or maximum two layers. The latter is sanded, but not always, because the whitewash material hides minor surface defects. So you don't have to use sanding. The only thing that needs to be added is that the use of primers will change the adhesive properties of the ceiling surface. Therefore, both the plaster layer and the putty layer must be treated with a deep penetration priming liquid.
Attention! Whitewashing is applied after the applied layers have completely dried.
Primer of the ceiling surface Source stroychik.ru
So, let's move on directly to the process of applying whitewash. There are two effective ways. To do this, use either a paint roller or a spray gun. How to whitewash a ceiling with the first tool.
To do this, the roller is dipped in the prepared mixture, rolled over the tray and the ceiling is whitened using V-shaped movements. This is how you can achieve uniform painting. Some craftsmen carry out whitewashing like painting. That is, stripes are applied with a roller, parallel to each other with an overlap of 5 cm on each side. But in this case, you must adhere to one rule: apply stripes only perpendicular to the wall where the window is installed. If a two-layer application of whitewash material is used, then the first layer is applied parallel to the wall with the window, the second perpendicular.
Attention! The second layer of whitewash can be applied only if the first one has dried well.
In this process, a brush or small roller is necessarily used to clean hard-to-reach places. Previously, in general, they used wide brushes, brushes or brushes for whitewashing. But that's all in the past.
As for the spray gun, this is the fastest, most effective method that evenly distributes the whitewash material over the ceiling surface. Often one layer is enough to cover the ceiling completely.
Whitewashing the ceiling with a spray gun Source kakpotolok.ru
Whitewashing over old whitewashing
So, let's move on to the next question - how to whitewash the ceiling using old whitewash.
In general, experienced craftsmen know that the best option, which will lead to a high quality of the final result, is a completely cleaned ceiling surface before the plaster or putty layer. And a new whitewash is already being carried out on it.
But if the task is to “refresh” the ceiling, that is, to carry out cosmetic repairs, then you can apply whitewash material over the old finish. The main thing here is that the ceiling plane meets certain quality standards. For example, there was no peeling of the old material, no cracks appeared on the ceiling, no dark spots, etc.
That is, if everything is in order, then the technology for applying the whitewash layer is no different from that described above. But if the quality of the ceiling leaves much to be desired, then you will have to get rid of the old finish. How to do it right.
Whitewashing over old whitewashing Source repaireasily.ru
Washing the ceiling
Since we are considering two types of materials used for whitewashing, namely, chalk and lime, we will accordingly consider two technologies - how to wash off whitewash from the ceiling.
Let's start with lime whitewash. For a very long time paste was used for this - a mixture of water and flour. It was simply applied to the ceiling surface and waited for the material to dry. After that, the applied layer was removed with an ordinary spatula, which also captured the lime whitewash, because the paste is, in principle, glue that is tightly bonded to the lime layer.
Today this option is not used, it is too complicated and time-consuming. Therefore, first they tap the ceiling with a hammer, and then try to remove the lime with a spatula.
Removing whitewash using paste Source potolok-exp.ru
Attention! Wetting the whitewash and then trying to remove it will not work. The lime will simply spread over the surface, decreasing in thickness.
But chalky whitewash is removed with warm water, to which ordinary vinegar is added. The ceiling is simply treated with a water-vinegar mixture and time is allowed (10-15 minutes) for the decorative layer to swell. And then remove the chalk with a spatula.
If the whitewash does not swell the first time, the ceiling is wetted again. It is better to rub problem areas with a sponge and let the area dry.
And one more thing - how to determine that the ceiling is ready for a new chalk whitewash. Just run your hand over it. There should be no traces of chalk left on it.
The video shows how to remove whitewash from the ceiling:
Do-it-yourself whitewashing rules
To process the desired surfaces with lime, no special skills are required; even using this material for the first time, you can easily learn during the work process. But it is still necessary to take into account some nuances and then the repair will be fast, safe and of sufficient quality.
Whitewashing the walls
Walls can be whitewashed with lime both indoors and outdoors. Whitewashing the outside of a house is most quickly done with a spray gun. In order for the lime to adhere well, not change its color and not swell, it is necessary to first prepare the walls.
Rust stains, dirt, and greasy areas are removed from surfaces. If there are cracks, they need to be treated with a primer; good adhesion of the lime to the walls is ensured by treating them with a metal brush. Lime does not adhere to paint, so the layer of old paint must be removed.
Whitewashing is best done in cloudy weather; bright sunlight distorts perception and does not allow you to achieve even strokes. When using a spray gun, you need to hold it at an angle of 90 degrees to the wall, this will ensure less consumption of the solution and evenness of its application.
The video shows how you can whitewash walls with lime using a spray gun:
Whitewashing the cellar
Using lime to treat all surfaces in a cellar intended for storing food is considered the best option. Lime destroys all microorganisms, disinfects the room, prevents the appearance of fungus, due to these factors the shelf life of products increases, vegetables do not rot. Lime is resistant to moisture, so it protects the walls of the cellar from moisture.
The cellar is whitewashed with a fairly thick solution of lime; you can use both spray guns and brushes. Spraying devices are usually used in large areas, but when using them, safety precautions must be observed.
The spray gun creates clouds of tiny lime particles; in a closed space, such as a cellar, this cloud negatively affects the mucous tissue of the respiratory organs and eyes. To avoid harm to the body, you need to wear glasses and a respirator that fit tightly to your face.
If the cellar is being whitewashed for the first time, then it is advisable to apply a second coat after applying the first layer and drying it.
Whitewashing the stove
Some private houses, dressing rooms and other premises have brick walls. Whitewashing with lime is the most practical option for quickly repairing them. The surfaces of the stove quickly become dirty with soot and grease and therefore require regular updating.
Lime can be used at any time, especially since a brush can also be used for small surfaces. In order for the solution to be smooth and easy, the oven must be cooled and all greasy stains must be removed with sandpaper or a scraper.
How to whitewash and decorate a stove with lime can be seen in the photo below
Furnace No. 1
Furnace No. 2
Furnace No. 3
Furnace No. 4
Furnace No. 5
Whitewashing the facade
The easiest way to whitewash the facades of buildings and houses is to use spray guns. Windows, doors, decorative elements need to be closed, and whitening should begin from the highest points, moving down. It is advisable to whitewash external walls in calm, cloudy weather.
Whitewashing the ceiling
Separately, whitewashing the ceiling with lime is carried out if the remaining walls have wallpaper or other finishing material. If you plan to change the wallpaper, you must first remove the old ones, then whitewash the ceiling and only then re-paste the walls. All old coverings need to be removed from the ceiling, cracks must be repaired, and dirt must be cleaned. Rust and mold can be easily removed with a solution of copper sulfate.
Lime milk applies most easily and evenly to a wetted surface, so it is advisable to moisten the ceiling. After preparing the ceiling, you need to cover the floor, furniture, and windows with waterproof materials, since lime splashes well and is difficult to wipe off when dried.
The ceiling is whitewashed in two layers. The first layer begins to be applied from the window, making strokes perpendicular to the light. The second layer is applied to the still wet first, strokes are made parallel to the sun's rays. This whitewashing technology ensures the adhesion strength of the lime and the absence of streaks.
Repair lessons or how to whitewash a ceiling with your own hands:
Tree processing
Whitewashing tree trunks with lime solves several problems at once and is carried out in the spring and autumn. Treating trees in the spring protects the wood from pests and prevents the sun's rays from burning the bark. In autumn, lime is used to reduce the impact of temperature changes in winter.
Grown trees are whitewashed; young plants are not treated, since lime clogs the pores of the bark and thereby disrupts the growth processes. Before processing, you need to remove all dried parts and clean areas with rotting bark.
For whitewashing, lime is used in combination with copper sulfate. Two kilograms of lime are diluted with 10 liters of water, after preparation, 400 grams of vitriol are added to the solution.
Chicken coop treatment
Whitewashing the chicken coop with slaked lime allows you to disinfect the room. It’s even better if the lime slaking is carried out in the chicken coop itself, naturally without its inhabitants. The vapors released when lumps of lime are dissolved penetrate well into all cracks and destroy bedbugs, ants and other small insects.
In a chicken coop, you need to whitewash both the ceiling and walls, and it is advisable to do this several times a year. In the spring, whitewashing is done to prepare the room for the summer; before the onset of cold weather, lime helps remove all parasites.
In summer, it is advisable to whitewash the walls in the chicken coop at least twice, this will interrupt the breeding chain of many insects. Additionally, before whitewashing, walls can be treated with a weak bleach solution. The practicality of using lime for treating animal premises is rated 5 points; it is an inexpensive material, environmentally friendly and has the most optimal disinfection properties.
Consumption for whitewashing
Lime milk is usually used to whitewash walls and ceilings in a house. The consumption of lime for every 2.5 square meters is approximately 0.5 kg of lumps of lime, diluted in the appropriate proportion with water.
How to whitewash a ceiling using old whitewash: 11 steps
You can whitewash the ceiling yourself, without the help of specialists. Among the huge variety and modern possibilities for decorating shelves, whitewashing still remains a relevant method of finishing it. Whitewashed ceilings are cheap and simple. In addition, sometimes you can refresh the ceiling without touching the previous finishing layer, then the question arises of how to whitewash the ceiling using old whitewash.
How to whitewash a ceiling with chalk
Before whitewashing the ceiling with chalk, you need to take care of preparing a working solution for whitewashing the ceiling. To do this, do the following:
- Take about 5 liters of warm water.
- Dissolve about 3 kg of chalk, 30 g of wood glue and about 20 g of regular blue in water. Blue in the chalk solution for whitewashing allows you to enhance the whiteness of the bleached ceiling. To obtain a bluish surface, you need to add more blue.
- All components are thoroughly mixed.
- Next, take a regular kitchen knife and lower the blade into the prepared mixture. Determine the required consistency: if the solution flows off the knife, then the addition of dry chalk is required. The procedure is repeated until a viscous mixture is obtained.
Having made the right decision about which roller is best to whiten the ceiling, having prepared the working solution and the necessary painting tools, you can begin directly painting the ceiling with chalk solution.
Coating the ceiling surface with chalk mortar using a whitewash roller is carried out several times, and each subsequent application is carried out only after the previous layer has completely dried.
The best results are obtained when using a paint roller or spray gun. In any case, before whitewashing the ceiling with a roller in the room, you should cover the furniture and floor with plastic film, old sheets or newspapers, thereby protecting them from splashes of the working solution.
In addition, you need to know how to properly whiten a ceiling with a roller. It is recommended to start the whitewashing process in the corners and junctions of the ceiling and walls. These difficult areas are coated with a paint brush. This approach allows you to avoid marking already finished and decorated walls.
How to find out what was applied to the ceiling before
There are two main ways to determine what kind of whitewash there was before:
- External characteristics. If you run your hand over the surface, the chalk smears, but the lime does not. In the case where the ceiling was painted with water-based paint, the coating simply peels off, but leaves no traces;
- We use lemon juice. Ordinary chemistry. Chalk will hiss under the influence of acid.
If you run your hand over the surface, the chalk smears, but the lime does not.
What to do with cracks
To achieve a beautiful, even color, you must level the surface. After removing the old layer, cracks or bumps often become noticeable. To eliminate this situation, it is best to use adhesive putty. It is quite easy to prepare. You need to take 1 liter of warm water and dilute 50 g of glue in it. A mixture of gypsum, wood glue and gypsum in a 1:2:2 ratio is added to the liquid. We wait until the putty is completely dry and carefully rub the entire canvas. After this, it should be primed.
To achieve a beautiful, even color, you must level the surface.
Work on preparing the ceiling for whitewashing
The attractive appearance of a whitewashed ceiling makes the room more cozy and comfortable, so it is very important to know how to whitewash a ceiling correctly. However, to obtain a high-quality result, it is necessary to properly prepare the ceiling for applying chalk or lime mortar. Neglecting this stage leads to the appearance of greasy and rusty stains, which are clearly visible on the whitened surface. In addition, it is almost impossible to evenly apply chalk to the surface without prior preparation.
The preparation process is also divided into several stages. First of all, remove the old coating. You can remove old whitewash with a sponge, after moistening it in a soap solution. If it is difficult to remove the old coating, you can use a wide spatula. If the ceiling was treated with chalk, the cleaning process will be very simple and quick. As for the old lime coating, a lot of effort is required.
To understand what composition was used previously, just run your finger across the surface of the ceiling. The chalk coating will leave a mark on the hand; the absence of marks indicates the use of lime mortar.
Then traces of dirt are removed. After removing the old coating, the surface is inspected for rusty and greasy stains, mold and other contaminants. If there is mold and rust stains, the surface is washed with warm water and treated with vitriol solution. Grease stains are removed with a sponge soaked in a solution of soda ash, followed by washing the surface. If stains cannot be removed with a soap solution, then you can use a mixture of synthetic drying oil and lime, the components are taken in a ratio of 1:20. A good result is achieved by painting over stains with a mixture of two parts water and one part liquid glass. To treat surfaces on which individual areas are heavily smoked, you can use a three percent solution of hydrochloric acid.
Before whitewashing the ceiling, the surface is leveled. Without leveling the surface, it is impossible to whitewash the ceiling efficiently. Careful treatment of the ceiling space will increase the degree of adhesion of the lime mortar to the working surface and prevent the formation of air bubbles on the ceiling.
Important nuances
When repairing the ceiling surface, you should take into account the purpose of the room. For example, if this is a bathroom, it requires the use of a special composition that is resistant to high humidity and can protect the ceiling from fungus. Otherwise, the paint will lose its attractive appearance within a short time and, most likely, will begin to crumble.
When performing painting work, it is necessary to remember safety, since the whitewash must not come into contact with the respiratory system, eyes or skin. To do this, use a respirator, rubber gloves and special glasses. The fact is that the coloring composition can cause serious allergic reactions, and sometimes chemical burns.
Preparatory stage
If you have already studied all brands of spray guns and chosen the best option for yourself, then it’s time to prepare the wall for painting. To do this, you should use a small reminder with tips:
- completely remove the old coating;
- level the surface;
- apply a layer of putty;
- prime;
- wait for it to dry completely.
If you lose sight of the last point, the percentage of “adhesion” of the paint and varnish material will be lost, and later various defects will appear that significantly spoil the appearance of the wall.
It is very important to prepare the required amount of diluted paint. It often happens that the first portion is not enough and immediately, on the spot, a person begins to create a second attempt.
No matter how hard you try, the shade will still differ significantly or insignificantly due to the difference in the amount of “ingredients”.
At the end of the preparatory stage, bring a ladder (if the height of the room requires it), and also find personal protective equipment.
Practical part
a jonnesway in hand , you can start pouring the previously obtained paint into your device.
After this, operate the gun of the device until direct spraying begins. This is necessary in order to expel excess air.
You need to direct the gun according to the “top to bottom” principle, moving the device from the ceiling to the floor to the side. If you still had to use a ladder or construction sawhorses, then finish the top part first, and then move on to the bottom.
The most optimal distance between the sprayer and the surface to be treated is about thirty centimeters.
If the resulting color seems light to you (make allowance for the fact that the result has not yet dried), then you can apply a new layer again. Then the shade will be more saturated.
remontyes.ru
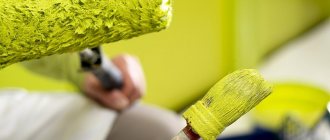
In order to maximize the effect of using high-quality paint, it is important to do the job with a good tool. High quality brushes and rollers help to apply paint more evenly and thickly, which in turn ensures a great appearance and long life of the coating. Also, such tools speed up and make work easier.
You can learn about which specific tools you need to choose depending on the work you plan to perform and how best to use them in our article.
Brushes are made from natural bristles or man-made fibers such as nylon or polyester. When working with oil and alkyd paints, it is better to use natural hair brushes, but artificial hair brushes are also suitable, but it is recommended to apply latex and acrylic paints only with artificial fiber brushes. They hold their shape much better and retain their elasticity, regardless of the amount of water in the paint.
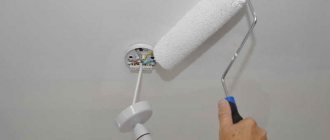
Primer for better application
It is very important to prime the ceiling well before whitewashing. In this way, the applied material will adhere better to the old layer, minor irregularities will be hidden, and the service life will increase. The soil also has moisture-resistant properties and is bactericidal. The primer will make the surface less porous, which means that the amount of chalk, lime or paint solution will be significantly reduced. For processing it is better to use a strengthening mixture.
It is necessary to dilute the primer in accordance with the instructions, and then carefully and evenly apply it to the surface to be prepared. It is impossible for smudges or “bald patches” to remain. After waiting for complete drying, if possible, it is advisable to apply another layer.
The soil has moisture-resistant properties and is bactericidal.
Creating a color scheme
After the required type of material has been selected, you need to decide on the shade. You can choose the color you like, or you can create a shade yourself. Any color from a large palette of colors will help you create a color scheme.
Kohler – enamel with a rich color. With its help you can get unique shades.
This is especially beneficial when you want to paint in several shades, but there is no point in buying material of different colors.
Tinting is a very simple process, accessible to everyone, but you must follow the dosage. Before starting work, the color is mixed with water, then added to the base. Depending on the desired color intensity, different proportions of color and base are mixed. Ultimately, the amount of pigment should be from 1.5 to 20%, depending on the type of base.
Color bases have many advantages. Among them:
- long service life;
- resistance to fading and abrasion;
- brightness;
- quite budget price;
- wide palette of colors.
For a successful combination of colors in the interior, you must remember three approaches to choosing a combination:
- Monochromatic. Colors of the same tone, where the color scheme varies within one color.
- Color harmony. When one color is selected and next to it a shade that combines with the main one.
- Contrast. On the contrary, you can play on the contrast of colors, which will definitely make the interior bright and stylish.
Related article: Interesting ways to age a door
Any combination of colors will look good in the room, depending on the style you choose.
Types of rollers
It is necessary to study the characteristics of the tools in advance, and then there will be fewer problems with the choice, because these products cannot be called universal. They are of the following types:
- With foam rubber. An excellent option if varnishes and adhesives are applied. The only drawback is the ability to wear out quickly. It is better to use the tool when processing canvases.
When painting walls, it is recommended to avoid using such a roller. This device absorbs large amounts of paint, causing drops and smudges to appear on the surface.
- Fur. They have good absorbency. Almost all the paint remains on the treated surface. As a result, we get a uniform layer, devoid of smudges and unpleasant changes. Can be combined with any colors. Flint from such rollers may remain on the base.
- Velor. Also compatible with any type of paint. They contribute to the formation of smooth and beautiful layers that have no roughness. But this variety is capable of absorbing a large amount of material. Therefore, it is not always suitable for those who are interested in how to paint with a roller.
- Thread or polyamide. Such rollers are made from fabrics stitched with special threads. An ideal option for covering walls with any variety of materials. These tools are convenient and easy to work with and will allow you to achieve the desired result. The main thing is to be careful to avoid splashing. Then it will be easy to figure out how to paint walls with a roller.
When choosing a tool, you must conduct a careful visual inspection. The presence of fibers and protruding threads on the surface is unacceptable. If you choose fur products, then the longer the pile, the better. An ideal solution for wallpaper with deep patterns or walls with uneven surfaces. A short pile is acceptable if you have to process walls where everything is smooth.
But it is not only the type of material that needs to be taken into account. An equally important factor is the width of the roller. 30 centimeters is the optimal parameter for use in city apartments. If the roller has an increased width, then difficulties arise during further work. It will require taking diluted paint in large quantities, and the process itself will become more complicated.
It is recommended to purchase not only the roller, but also additional components for it. For example, the process is made easier thanks to the extension handle. Or a special grater - it helps to get rid of residual material.
The use of paint rollers provides the following advantages:
- Process large areas in a short time. The quality of the finished surface pleases customers for many years.
- Compared to a brush, a roller is a more convenient and pleasant tool for constant use.
- Long handle connection. This will allow you to stay on the floor while you work.
But the device also has some minor drawbacks. Those who are concerned about how to paint with a roller should also remember them.
- Inconvenient processing of joints and corners. Then the brushes do a better job.
- Some varieties absorb too much paint. In this case, a special spinning device will help.
Professional ceiling painting
If you do not have enough skills and knowledge on how to properly whitewash ceilings, you can use the services of professionals. This solution has many advantages. It allows you not only to save time, but also to get excellent results. A professional will use a minimum amount of paint to whitewash the ceiling, so the repair will not cost much more than painting it yourself. The main thing you should pay attention to is the skill of those who are to be hired.
It must be remembered that whitewashing old paint is an inexpensive and simple way to transform the interior of a room for the better. It should not always be used and only when the previous layer is even and holds up perfectly. In this case, water-based paint, lime, and chalk applied directly to the old base will adhere reliably.
Whitewashing is not difficult. You need to turn to experts for help and hire professionals in order to save time if the owner of the premises is a busy person and does not have the opportunity to carry out repairs.
No. 6. How to whitewash the ceiling and walls: brush, roller or spray?
Theoretically, whitewash can be applied using the following tools:
- brush;
- roller;
- spray gun;
- vacuum cleaner with air blowing function.
Let us immediately note that the first two options are more applicable - using a vacuum cleaner and a spray gun makes sense when there is a large surface area that needs to be whitened.
A brush for whitewashing is taken with a special one, made of natural bristles, 15-20 cm wide. After work, the brush can be washed and used again later. To whitewash a brick wall, you can use a brush with natural bristles. It is advisable to soak it in water several hours before use. In this case, the wooden handle swells a little and holds the bristles well, which will not fall out during the whitewashing process.
Before applying the mixture, it is important to mix it well again to ensure an even shade. The first layer is applied perpendicular to the window, the second – parallel to the frames. In this case, the streaks from the brush will be minimally noticeable. Experts recommend slightly moistening the surface of the ceiling and walls before applying the mixture.
It is better not to use a whitewash roller. When there is only one layer, this tool will still work, but when applying the second layer, the dried first one may fall off. If you act carefully, you can get a beautiful matte surface.
A sprayer and a vacuum cleaner are used only when there is a large surface to be finished. The consumption of the solution increases, it is applied in a thicker layer, but it will be possible to mask small defects. If you have a sprayer at your disposal, then no questions arise.
You can also apply whitewash with a vacuum cleaner if it has an air blowing function. Among the numerous attachments in such models there should be a polyethylene lid with tubes. This cap is the sprayer. It must be put on the can and connected with a hose to the outlet in the vacuum cleaner. It turns out that when you blow out air with a vacuum cleaner, the air enters the sprayer, draws the solution from the can and sprays it through the nozzle. As a rule, there is a special hole on the sprayer, covering which you can obtain the required solution supply pressure. It is better to apply the solution in a circular motion, spraying at a distance of 70-100 cm.
Ceiling whitewashing technology
The DIY whitewashing technology is quite simple and anyone can do it:
- We clean the room and cover the floor.
- We clean the surface from the old layer.
- Level the ceiling using putty.
- We prime.
- Apply the dye perpendicular to the window.
Apply the dye perpendicular to the window.
Safety precautions
Safety precautions are critically important so that repairs do not harm your health. You will need a respirator, as there will be a lot of dust and after just an hour of working without protection, coughing attacks will begin. You should protect your eyes with construction glasses. They can be found in any hardware store, they are not expensive - 150-200 rubles (the price is valid for March 2021), and the eyes will be safe, because the whitewash solution is quite acidic and can greatly irritate the mucous membranes of the eyes. It is also worth wearing closed old clothes (which you don’t mind) or a special suit to protect your skin. You can't do without gloves.
You will need a respirator, as there will be a lot of dust and after just an hour of working without protection, coughing attacks will begin.