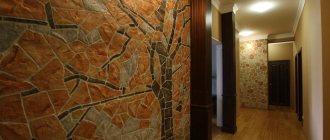
A wide variety of finishing materials can be used to finish the slopes of a door or window opening. One of them is a door slope made of stone. This is a stylish design solution that gives the room a special mood depending on the type of artificial decorative stone.
There are several techniques for decorating slopes and the openings themselves - this can be a strict symmetrical finishing of the entire opening from the outside or partial: the edges can be torn, the masonry can extend to a fragment of the wall. In any case, finishing the slopes of the front door with decorative stone or window openings always looks modern and elegant.
Types of masonry
There are two types of masonry - with and without seams. The seam looks better when laying elements of a clearly defined geometric shape.
Seam preservation
When performing finishing work from artificial stone, you can use a masonry technique that preserves the seams. In order for the seams to be even, it is necessary to install plastic wedges between them. This will keep the masonry elements in the required position while the adhesive solution sets.
To maintain the gap between the stones, plastic wedges are used
When finishing slopes with stone, work begins in the lower corner. Cover part of the wall with the adhesive solution using a comb spatula. The decorative element is applied to the wall and pressed.
Stone surface finishing technique
If the door slopes do not have a door leaf, then the decorative stone is laid overlapping. If there is a door, the color and texture of the openings should fit harmoniously into the interior and be combined with other decorative finishing materials.
Joining seams
The jointing occurs after the decorative material and the wall surface have completely set. The instructions from the manufacturer of the artificial stone contain recommendations on the use of the type of grouting composition.
Using a syringe gun, the seam is filled to a depth not exceeding 5 mm. This will give the masonry a more pronounced relief.
Seam cutting is done using a syringe gun.
When the grout begins to set, it must be leveled using a shaped spatula or spatula.
A spatula or spatula is used to grout the seam.
The remaining grout from the front surface can be cleaned off with a brush.
Clean seams with a brush
A stone door slope will look more solid if the grout color is gray. Light grout against the background of dark decorative masonry will refresh its overall perception.
Monolithic masonry
When designing a door slope without seams, the work takes less time. The monolithic nature of the masonry is achieved by placing the elements as closely as possible to each other. With this method, the adhesive solution is applied directly to the product .
In monolithic masonry, the elements are laid as close to each other as possible
It is important that there are no traces of glue left on the outside.
The adhesive solution is applied to the stone
When laying, it is necessary to control the vertical direction of the masonry. If the products have the correct geometric shape, then it is important to ensure their correct horizontal position.
Check the evenness of the masonry using a level
At the final stage, the masonry is coated with a solution that increases the strength and water-repellent characteristics of the material.
Clinker tiles as finishing
In order to renovate an apartment, you can use an excellent replacement for brick - clinker tiles. This material is affordable and beautiful. Clinker tiles are produced from raw clay. The method of laying the material is practically no different from using simple tiles. The surface of the finishing material is covered with glaze during manufacturing, so the color of each element will be preserved for a long time. The matte relief of the tile is very difficult to damage even if there is a strong blow to the wall. The advantages of clinker tiles include:
- structure that is similar to brick;
- the ability to retain heat in the room.
As for the disadvantages, there is only one: clinker tiles have a high water absorption coefficient. Even an inexperienced person can use the material. In order to make a brick wall using this tile, each part will need to be coated with glue and secured to the work surface. There must be a cross between each tile to fix the seams. If you want a result as close as possible to the original effect of a brick wall, it is better to give preference to unglazed tiles. But it is better not to install such tiles in a room with high humidity. In the photo: Interior of a living room in an eclectic style apartment
Before applying paint, it is necessary to prepare the wall according to the recommendations above. Therefore, both eliminating unevenness of the original surface and priming the wall are important steps. On a note. To get an unusual effect, you can dip a short-nap roller into a tray with silver paint and paint the protruding areas of the wall.
On a dried wall, several rows of bricks are marked by hand. Imitating brickwork using plaster is considered an excellent design solution that you can do yourself. This option is also optimal in terms of repair costs. To decorate a brick with your own hands, you need to study the technology of performing the work.
Benefits of plaster
This type of finishing has a number of undeniable advantages:
- The main feature of plastered brickwork is the simplicity of the work. And if you use special stencils, the reduction in labor costs will become even more noticeable.
- An absolute advantage is the cost of work and materials. In addition, plaster is recognized as a material with high environmental characteristics that do not have a negative impact on human health.
- Finishing with plaster will not affect the area of the room, since the thickness of the layer is small and does not visually affect the narrowing of the room.
- Imitating brick from plaster is quite possible for a person who does not have special knowledge and skills.
Materials and plaster
For further work you will need:
- Construction basin for diluting plaster mortar;
- Spatulas;
- Rule;
- Trowel;
- Master OK;
- Drill with attachment;
- Primer roller;
- Oilcloth to protect the floor covering;
- Gloves;
- Level.
Depending on the effect you want to achieve, different types of plaster mortar are used. To imitate white brick, gypsum plaster is used. If it is necessary to obtain colored bricks, gypsum plaster is tinted by adding color. The ingredients are mixed using a drill with a special attachment.
Important! If you have no experience in such work, you should not mix a large amount of the mixture - the solution hardens quickly.
Preparing the wall surface
Even smooth walls need to prepare the surface before applying plaster. This is especially important in cases where there are visible damages on the walls, such as potholes or cracks. Cement mortar is used to eliminate the above defects. Only after the solution has completely dried can you begin to coat the wall with a primer. It is necessary to use a deep penetration compound, and to apply the primer you can use a foam roller. It is worth noting that when carrying out repairs in new buildings, experts do not recommend applying plaster in the first two years. New houses shrink, so cracks may appear in the plaster.
Methods of applying the solution
There are various ways to apply plaster under brick. Let's look at each of them in more detail.
By cutting seams
A solution about 1 cm thick is applied to the surface of the wall. As soon as the plaster begins to set, you can begin to mark the seams of the future masonry. Here you can use one of the following methods:
- Using a stretched rope, the horizontal seams of the future masonry are marked, after which the markings are cut with a knife by hand.
- Using a special template corresponding to the size of the brick, a small imprint is made on the surface of the plaster by applying the template to the wall with a certain force. Next, seams are cut along the formed lines with a knife.
Using texture extrusion
For marking, you will need a stencil made of rubber or plastic. And, of course, be careful in your work, since you will have to monitor the junctions of horizontal lines and not allow the markings to shift vertically. The sequence of work is as follows:
- A layer of solution, no more than 5 millimeters thick, is laid out on the surface.
- The stencil is soaked with water. This prevents the base from sticking to the solution. Next, it is applied to the wall and pressed against it until an imprint appears.
- The steps from the second paragraph are repeated for adjacent areas.
- The resulting masonry is primed and covered with a finishing layer of paint.
Using masking tape
In this case, sufficiently high-quality surface preparation will be required. You will have to clean out even the smallest irregularities and mark the future masonry.
- Painting tape is applied along the seams of the future masonry. First, horizontal stripes are glued along the markings, and then vertical sections.
- The plaster is mixed in the container according to the manufacturer's requirements.
- The resulting solution is applied to the surface with tape, smoothed and given a texture.
- After the solution dries, the tape is removed and the unevenness is corrected.
- After the layer has completely dried, you can begin finishing with paint, wax or varnish.
This method of simulating brickwork does not require the use of special tools. All that is required from a person is accuracy and perseverance.
Using a stencil
To imitate a brick with your own hands, you can use a stencil cut from linoleum. The prepared sample is fixed on a wooden frame in such a way that the frame helps to remove the mesh from the applied mortar. The mortar is applied to the prepared wall surface and leveled. A stencil is placed on top under the brickwork (the linoleum mesh should fit snugly against the wall). Another layer of plaster no more than 5 mm thick is applied to the stencil. The resulting surface is smoothed, and after the solution dries, the stencil is removed. Once the solution has dried, you can remove blemishes using a grater or brush.
Using a special roller
Another way to decorate a brick in an apartment is embossing using a special roller. Thanks to the specific texture of the tool, the plaster is laid on the wall immediately in the form of a brick. Moreover, one pass with such a roller provides several rows of masonry at once.
Important! The force on the roller and the rolling speed must be identical in all sections of the wall. This is the only way to get a complete picture.
Better rolling can be ensured by wetting the solution before the roller. A small spray bottle is perfect for this.
Finish coating
If you want to get the most realistic coating, then you need to use several shades of paint for mixing. The surface, which is covered in a dark brown tone, looks gorgeous. The white color of the seams between the bricks will give the imitation masonry even greater attractiveness. The contrast of such a composition does not leave anyone indifferent. When performing finishing, it is recommended not to deviate from the general design concept. The presence of color solutions allows you to gain a certain freedom of choice. For example, a brick wall can be of different colors, and at the same time match the color of the furniture or flooring.
Making a textured roller to imitate brickwork
To make a roller for brickwork yourself, you will need a regular roller and sealant, as well as a container of soapy water and a rod for working with the roller. The sequence of actions looks like this:
- The tubular part is removed from the handle, put on the rod and placed on the supports.
- A layer of sealant is evenly applied to the roller. To distribute it over the entire surface, you can use an old bank card. The sharp protrusions of the sealant are pressed down with fingers dipped in soapy water.
- A strip of sealant is applied in the middle of the cylinder, which will imitate a masonry seam. Two more identical stripes are applied along both edges of the cylinder. As in the previous case, sharp protrusions are smoothed out with your fingers.
- Two longitudinal lines are drawn. The first is between the first and second rings of the seam, and the second is on the opposite side between the second and third rings.
To use the product for work, all you have to do is wait until the sealant is completely dry.
Finishing a window opening with artificial stone
Decorating windows with stone looks no less impressive than decorating doorways. An important condition is the size of the elements. It is necessary to trim the window slope with a small facing stone so that the finished window opening does not look massive.
It is recommended to use small products for window cladding
Window slopes must be leveled and primed outside and inside. When using artificial material, reinforcing the surface of the slope, even if it is made of plasterboard, using reinforced mesh is not required.
The material is laid on the windows using the monolithic method, starting from the bottom of the slope. When the lower fragments are securely fixed, you can continue laying out the upper rows. Corners should be formed by trimming the end sides of the facing products at an angle of 45 degrees.
Modern glazing technologies imply careful attention to every detail, so questions about how window sills and slopes are designed also do not go unnoticed by the craftsman. Proper repair of these structural elements of the window will provide it with a longer service life and prevent the risk of cold air entering the home. Let's talk further about how the interior window slopes are finished, and what materials need to be used for this.
The need to finish the slopes inside the window
The relevance of finishing window openings indoors and outside the house with sandwich slabs, plaster, etc., as well as the front door with decorative stone, is very high. Internal factors, the action of which can negatively affect the quality of the window itself and its slopes, include:
- increased humidity indoors;
- the appearance of condensation on the window due to a significant difference in temperature outside the window and inside the house.
External factors that have a destructive effect on the window and its slopes include:
- precipitation, wind, sunlight;
- sudden changes in ambient temperature;
- mold, mildew, harmful insects.
Proper finishing of windows and doors with decorative stone allows you to raise the level of resistance of the window structure to the influence of the described factors to the highest possible level. This will ultimately extend the service life of the windows, improve the appearance of window openings in particular, as well as the facade of the house as a whole.
You can see a window with high-quality slopes inside the room in the following photo.
Wood finishing
Traditional and solid design with natural wood.
Of course, decorative platbands decorated with carvings are expensive. But they are beautiful and durable. By the way, with the renovation of the interior, we can repaint them or change the shade with varnish.
Modern wood decor will make the opening created after removing the door look like architectural perfection.
Exact imitation from chipboard
Decorating coatings protect the “wood” imitation.
Finishing the entrance door opening with chipboard is also in demand. It is acceptable in the interior of any style. This is a wood-polymer composite made of veneer and synthetic resins. And accurate markings and a good tool will reduce time and material when creating openings of any configuration.
Chipboard panels will accurately convey the richness of wood, and will cost little.
Drywall
Most often, the decoration of indoor slopes and entrance doors is done using plasterboard. This is a finishing material with high performance parameters, which allows you to quickly and with a minimum of effort make slopes perfectly smooth and resistant to external influences.
Drywall is lightweight and its installation on vertical surfaces is not particularly difficult. It is beautifully painted in the current color shade. In addition, such materials, when properly treated with antiseptic compounds, can prevent the risk of mold and mildew developing at the joints of slopes and window frames. Window finishing with plasterboard is shown in the following photo.
Material selection
You should not think that you can choose any type of drywall to design slopes in your house. The material should be selected taking into account its operational parameters. And they differ for different types of drywall, which should be taken into account by the master before materials are purchased and window repairs begin.
Types of drywall
Absolutely any window is a source of moisture in the form of condensation, which is formed due to the large difference in temperature in the house and outside. As a result, the materials used to repair slopes must certainly be resistant to this factor. This means that you need to select only moisture-resistant plasterboard sheets, on which the presence of condensation will not have a negative impact. Otherwise, the repair will retain its functionality and attractive appearance for only a short period of time. In addition, it is worth using antiseptic compounds to cover the surface of the material, as well as special paint for its finishing.
Measurements
Finishing the slopes of plastic windows in a house should always begin with taking measurements, for which you will need to stock up on a measuring tape. The final results of the master’s work largely depend on the quality of this stage of work. If the slope does not fit as tightly as possible to the window frame, there will be a risk of developing such negative consequences as:
- the appearance of mold and mildew outside and inside the premises;
- the appearance of microcracks through which frosty air will begin to penetrate into the house during the cold season. Gradually, without adequate measures to eliminate the problem, the cracks will grow, and with them the costs of heating the premises;
- reduction in the service life of the window structure, its rapid wear both in quality and aesthetic terms.
Taking measurements
Installation of slopes
Finishing slopes with plasterboard begins with an analysis of the measurements taken. All window parameters are transferred to plasterboard sheets, from which you need to cut out pieces that are ideal for the window opening.
Drywall cutting process
Installation of such canvases can be carried out on the lathing, on the profile, or without them. The choice of technology should be determined by the fact in which state the slopes are. Visually evaluate whether they are processed with high quality, as well as what quality the double-glazed window itself has.
Installation of drywall is carried out using a special adhesive composition if the walls are perfectly even. If not, you will need to first bring them to this state.
Next, you need to attach the strip to the window profile or frame, which will securely fix the drywall on the side of the double-glazed window. Plasterboard panels are installed on top of the planks, carefully treating the resulting voids with sealant. Then the structure will be devoid of cold bridges.
Removing excess polyurethane foamInstalling a slope angleMetal lathingInstallation of plasterboard slabsFinished plasterboard slope
Buy decor for exterior window decoration
The choice of suitable decoration from all the existing variety is primarily based on the appearance of the house itself, its style and exterior solutions. There are no right or wrong options here: any combinations and selected sets are just a matter of taste.
The question of choosing material for façade framing is much more clear. Among all the stones used today, the leading position in terms of price/quality ratio is occupied by artificial stone. It is durable, weather resistant, relatively easy to attach, highly detailed, and affordable.
On the catalog page you can see the full range of window decoration options available for ordering. If you have any questions or would like to place an order for facade stucco molding, contact us in any way convenient for you or request a call back in a special form on the website.
PVC panels
No less popular today is the repair of slopes in a house with PVC panels on the profile and doors with decorative stone, thanks to which the entire structure acquires a solid appearance. Such repairs, as shown in the photo below, have a long service life and retain their properties for a long time.
PVC panels
Plastic panels are selected taking into account the size of the window opening, as well as its technical parameters. Before starting repairs, you will need to prepare the surface of the slopes. Then, PVC parts of the current size are cut out, which will be mounted around the entire perimeter of the window on wooden slats and profiles.
If you want to insulate the house, the space between the wall surface and the panels should be filled with a layer of mineral wool or construction foam. Finishing slopes with PVC profile panels is also advantageous because PVC materials have a smooth surface, are produced in different color shades, and look harmonious in the interior of a private home. This allows you to save on the final painting of the slopes.
Another attractiveness of this method lies in the fact that all elements of the window structure (window, slope) acquire the same expansion coefficient, which will ensure they fit tightly together and prevent the risk of cracks forming.
Scheme for finishing a slope with PVC panel
Surface preparation
To install plastic slabs on a slope, you need to carefully prepare the surfaces. To do this, I carefully cut off the excess mounting foam using a utility knife, and the surface itself is cleaned of dirt and dust, coated with an antiseptic, and primed. Next, you will need to install a metal frame made of guide profiles.
A hairdryer can help remove paint from walls.
Installation of the guide profile
Measure the profile along the outer edge using a construction tape, and then its outer width and the distance from the top edge of the window structure to the surface of the window sill. Take a U-shaped profile of the current width, cut it into pieces using metal scissors, according to the window measurements. Next, the sections are screwed at intervals of 20 cm using screws along the outer part of the window frame. The top and side profiles are mounted in the same way.
Metal profileInstallation of starting profile
Lathing
To organize the sheathing, you will need wooden slats with a cross-section of 20x40 mm, which are fastened on the far corner of the slope from above and on the sides with dowels in increments of 30 cm. The sheathing must have perfect evenness, for which the thickness of the wooden slats is trimmed with a plane and the work is checked with a building level.
Fastening the sheathing
Panel installation
Finishing with plastic plates can be easily done with your own hands. To do this, cut the material with a jigsaw, then fix it on the upper profile and secure it to the sheathing using self-tapping screws.
The side profile is mounted in the same way as the top bar. And the gaps between the window frame and the wall need to be filled with construction foam, for which the surface is first moistened with water. After this, you need to lean the plastic panel against the base and secure it to it with metal screws.
Fastening PVC panels
Installation of F profiles
The F profile is cut and inserted along the edges of the panels. In those areas where the corners come into contact with the fasteners, you will need to make a small cut. At the same time, the slopes of the front door should be decorated with decorative stone, which looks very expensive. At the end of the work, you need to fill the joints with white sealant, carefully filling the gap with the compound, removing excess volume.
These measures will not only make the window even more attractive, but also protect it from mold, mildew, and rapid wear.
F profile for slopes
Basic rules for decorating jambs with stone
- Symmetry. Both sides of the opening, regardless of whether there is a door jamb in it or it is dismantled, are finished identically. Only this approach will ensure the completeness of the composition.
- Height proportions. Priority is given to the bottom of the door. This applies not only to the vertical, but also to the horizontal axis. That is, the base of the opening, with any method of its design, should visually look more massive. In accordance with this, a scheme for decorating the jamb is drawn up, taking into account the size of the purchased samples.
- A combination of texture and seams. The task of a master working with artificial stone is to achieve complete naturalness of the cladding. Experts recommend that before starting installation, lay out the “picture” on the floor and evaluate the effect it gives. How to position the products relative to each other, with what interval or offset - all such nuances are calculated in advance.
- Compliance with the jamb material. This must be taken into account even before purchasing decorative products. If the door frame and slopes are well polished and varnished, then stones with a smooth front surface are used to decorate the opening. And it is advisable to attach textured samples around a jamb that is untreated (made independently) or with a “rough” wood pattern.
Sandwich panels
Repair of window and front door slopes can be done with sandwich slabs, as shown in the following photo. The window sills and windows are decorated with sandwich slabs, and the door slopes are decorated with decorative stone. Sandwich slabs retain their visual appeal and original performance parameters for a long time.
Sandwich panels
In accordance with all the rules and regulations, repairs of window structural elements can increase the degree of resistance of windows to the negative effects of negative factors inside and outside the house. The distance between the wall and the sandwich plate must be filled with construction foam, which will act as additional insulation for the structure.
Installation of such plates is not particularly difficult. The sandwich board is fixed to the base using liquid nails, which will provide the connection with high practicality, density, and durability. Check the angles of the slopes for compliance using a small tool.
Installation of sandwich slabs should be carried out on wooden blocks, which will give the surface of the slope ideal evenness even if there is a deviation of the slope from the vertical. To ensure a neat appearance for the joints of the plates, they need to be treated with silicone.
Installation diagram of PVC sandwich panels on window slopes
The procedure for designing the opening
Decorating the slopes of the front door with decorative stone is done using the same technique as the interior door. The only difference is in the choice of material - not every imitation is suitable for these purposes.
Preparing the base
- The excess is removed - old paint, plaster, and in some cases the door is also dismantled if an arched opening is planned. The task is to achieve a flat and durable surface on which the tiles will adhere securely.
- Marking the wall according to the diagram for fastening the stones.
- Applying notches (grooves) to the base. This increases its adhesion to the cladding.
- Treat all segments to be finished with a primer. The goal is the same; Plus, this composition prevents the absorption of moisture by the wall material.
- After drying, it is advisable to apply concrete contact to the base. This product will further increase the level of adhesion, which means that the fixation of the stone will be as reliable as possible.
Plastering
Finishing window slopes outside or inside the house is often done by plastering the surface. But applying this method is only relevant if the slopes are perfectly even. The layer of plaster mass should not exceed 2 cm in thickness, otherwise the slopes will quickly crack and become unusable. This type of finishing goes well with finishing door slopes with artificial stone.
| Stages of work | Target |
| Slope preparation | Removing greasy stains, dust, applying antiseptic |
| Slope primer | Increases adhesion of finishing materials |
| Applying the first leveling layer of plaster | The plaster is sprayed with a spatula and leveled using the following rule: |
| Slope reinforcement | To impart stability to the structure outside the house, you can use a reinforcing mesh on the slope, which is pressed into the first layer of plaster |
| Applying a decorative plaster layer | Finishing the base, giving it texture, painting |
Applying plaster
Features of choice
- The color must contain at least two shades. The uniformity of color neutralizes the naturalness of the decorative stone. It is immediately clear that this is just an imitation, and not the most successful one.
- Edges. The front surface is free of large fractions, dye clots, stains and stains. On the back side, the base should not be perfectly smooth - this will reduce the quality of adhesion of the decorative stone to the door jamb; or rough, or with notches (grooves).
- Sample edges. You need to decide on the type of seam between the stones. If it is chosen to be even along its entire length, then chips of up to 2 mm are allowed. Some owners prefer to lay masonry with a visible seam; in this case, edge defects can be more significant - up to 6 mm.
- Surface treatment level. First of all, this relates to the moisture resistance of decorative stone. If there is no protective layer, it is better not to purchase; independent application, and high-quality one, is a complex process that requires practical experience.
Common mistakes
It often happens that the finishing of window slopes inside is carried out in violation of technology, which entails a number of negative consequences. In other words, these structural elements of the window opening acquire low resistance to the effects of negative factors indoors, which entails rapid wear of the slopes. This is why it is so important to identify the most common mistakes made by inexperienced builders when finishing window slopes:
- incorrect measurements of the base for installation of sandwich or PVC panels, plasterboard, etc., which leads to a loose fit of materials to the slopes;
- neglect of antiseptic and sealant increases the risk of mold and mildew developing under sandwich panels, drywall and other finishing materials for decorating slopes;
- When using plaster mixtures, inexperienced craftsmen often try to correct defects in the base by applying an excessively thick layer of finishing. And this is unacceptable, since plaster more than 2 cm thick may crack after drying;
- When finishing door slopes with stone, you should not give preference to too cheap material. Decorating even with artificial stone cannot be too cheap, because such savings affect the quality of the finish.