Every person wants his room to look stylish and beautiful. And, of course, most people choose paint as the material for interior decoration. But sometimes it happens that self-painted walls don’t look as beautiful as expected. This happens because people make mistakes when painting walls. For example, they choose the wrong tool and use brushes where work with a roller is required.
But painting walls without the help of professionals is actually quite simple. You just need to know the techniques that painters use and not neglect the recommendations from professional decorators.
What should you have on hand?
Most people who are going to paint walls do not consider it necessary to prepare anything other than a brush and a can of enamel. However, there should be quite a lot of items at hand.
When painting walls you may need the following:
- putty knife;
- handle for extending the paint roller;
- rags;
- paint rollers of different diameters and covers for them;
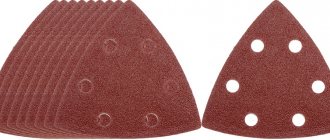
- sandpaper;
- scraper and paint tray;
- brushes, flat and round, of different widths and hardness;
- foam sponge;
- masking tape.
And, of course, you need to choose the right paint. If you are not sure what kind of enamel is required, you need to carefully study the samples.
What to look for when choosing a paint roller
Which roller for which paint?
When you come to the store, it is difficult to analyze the quality of the roller solely by its appearance. Not all sellers have personal experience in using paint rollers, so they can only advise on manufacturers, price and similar characteristics. The paint roller should be chosen correctly so that it is convenient to use, and the resulting result fully satisfies expectations.
Here are some tips to help you choose the perfect paint roller:
- When painting the ceiling, you should choose a tool that is not heavy, so that your hands do not get tired in the first couple of minutes. Ideally, rollers with a long handle are suitable for the ceiling so that you can paint while standing on the floor, but they weigh a lot and are more suitable for professional painters.
- For walls, the weight of the tool is also significant. Take, for example, a fur roller. After impregnation with paint, it becomes even heavier, and it is very difficult to use it for a long time without good physical preparation.
- The colors of the fur coat can also be different. It is much more convenient to work with a white fur coat or any other. Rollers with dark piles have the ability to fade over time, and the long pile of low-quality rollers can remain on the wall along with the paint.
- Make sure that there are no seams on the fur coat, because this will cause discomfort during painting. Such rollers leave marks on the surface. Of course, they can be removed, but to do this you will have to apply another layer of paint, and maybe more than one.
- Don’t be shy to try each handle for strength. You can press on the roller to see how hard it is and whether it bends during use. Also, the handle itself should be comfortable; for this you need to hold it in your hand.
The most important thing when using a paint roller is that the painting process is uncomplicated, and the surface turns out well painted even after the first coat. At the same time, I want the cost of the tool to be low. A huge selection of options in construction stores fully fulfills all the requirements of customers, so feel free to go looking for your roller, armed with our advice.
Prepare in advance
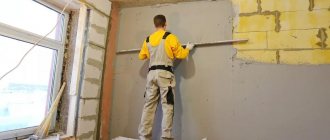
Many people begin preparing to paint their walls the same day they plan to begin their renovation. And this is the most common mistake. After all, removing furniture, placing protective flooring, installing stepladders and other similar actions not only take time, but also require effort. Accordingly, people start painting walls already pretty tired. And this certainly affects the result of the work.
In the 1960s, everyone was called that: in a Ukrainian village, almost all men have the same name
Bill Gates: Nuclear energy will be the best choice in the future
Celebrities who post strange things on their Instagram account
Professionals prepare the room for painting not on the day they start work, but in advance. Even if you plan to paint the walls on the weekend, but you don’t have time during the week, you need to prepare in advance. This doesn’t have to be done at once; you can spend a little time every evening.
Specifics of coating, wear factors
Pros and cons of concrete floors
A concrete floor is durable, but without a protective coating it generates a lot of dust.
First, let’s look at all the advantages of the coating:
- Strength, wear resistance. That’s why they love to use it for flooring in factories, production and warehouse areas where daily mechanical loads are high;
- Durability - with proper filling and operation, the floor can last about 20-30 years without repair;
- Practicality - all the necessary components are cheap and available. And in order to eliminate various floor defects that have appeared during service, it is usually enough to fill it with a thin layer of cement-sand or concrete mixture;
- Hygiene and environmental safety: the material does not accumulate static electricity; when used correctly, the dense structure prevents deep penetration of microorganisms, bacteria and fungi; Natural and harmless materials are used in production.
Now let's talk about the disadvantages:
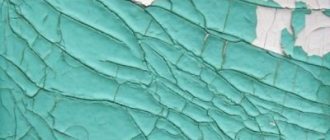
- The material has a porous structure, which is why when mechanical damage occurs to an unprotected surface, characteristic dust appears. The floor seems to be “peeling”, and gray dust settles on all objects in the room. Inhaling tiny particles of concrete can hardly be considered beneficial to human health. But in order to prevent the material from collecting dust, it is enough to cover it with a protective layer of paint;
- Unattractive appearance of the coating. Yes, a gray concrete floor can hardly be called beautiful. Although for a garage, warehouse or industrial premises this is hardly a serious drawback;
- Water permeability, sensitivity to chemical compounds in gasoline, oils, and auto chemicals. With constant exposure to moisture and aggressive chemicals, the coating can collapse literally in a matter of months. To avoid this, it is enough to take care of its protection in time;
- The appearance of cracks, chips, roughness, subsidence. Over time, any coating deteriorates. But if this happens ahead of schedule, it means that important rules of pouring or operation were violated: the laying technology was not followed, the features of the base were not taken into account, the load on the coating was too high. These nuances should be taken into account when pouring a concrete floor.
The main factors of material wear during operation in a garage
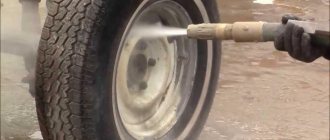
Before painting, the concrete floor is thoroughly dust-free and wet cleaned.
- Large load on the coating. The car leaves and enters the garage premises every day. Often this is where light repairs of the car and any work related to keeping it running are carried out;
- High humidity. The garage does not always have good heating and ventilation, so in the autumn-winter period the room can be quite humid. Water also gets onto the floor when raindrops run off the surface of the car or snow melts;
- Exposure to low temperatures. Often there is no heating at all in the garage or it is not good enough;
- Exposure to chemicals: gasoline, motor oils, anti-freeze, car shampoos and polishes, anti-corrosion liquids.
Important! The paint must be resistant to moisture, aggressive chemical compounds, temperature changes and mechanical abrasion.
Repair and clean the walls
Before you begin painting, you must carefully inspect for damage.
Every little detail matters. Any scratch or roughness will become visible after applying a coat of paint.
The most convenient way to check the condition of the walls is to wash them manually. When running a sponge over the wall, you cannot help but notice the damage.
Dangerous fence: an ice wall made of icicles has appeared in the UK
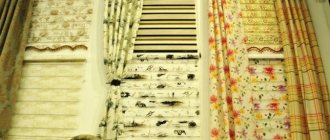
Create a wow effect: stylish trendy textiles in the interior 2021
Auto experts tell us how to properly warm up your car after a cold night
Of course, all detected defects must be eliminated before painting.
Dismantle everything you can
Paradoxical as it may seem, many people forget to remove the sockets and switches before painting the walls. Meanwhile, these items interfere with painting, especially if they are covered with masking tape.
Before starting repair work, professionals dismantle everything possible, not limited to switches and sockets. For example, if it is possible to remove the baseboards, they do it.
Peculiarities
Any type of repair work has its own characteristics, and painting the floor is no exception. Most often, wooden flooring is chosen as flooring. Before you buy paint or varnish for the floor, you need to understand the origin of the existing floor covering. The material used for its manufacture is important when choosing paint or varnish, as well as the means with which the preparatory work will be carried out. You can paint the floor using acrylic, oil, wear-resistant and universal rubber paints.
It is necessary to take into account the characteristics of the room where painting work is planned. The intensity of use, exposure to external factors, average temperature and humidity are very important when selecting paint, since the service life of the painted surface will depend on its properties. If the surface itself has been previously painted, then it is necessary to determine the degree of compatibility of the used paint with the new product.
If the goal is not renewal, but the application of a new layer, then you need to either prime or treat the surface with a special compound before applying the decorative layer.
When purchasing paint, check the type of tools
The choice of the type of tool depends not only on the desired result, but also on what type of paint is chosen for the repair. For example, latex paint cannot be applied with rollers made of lush faux fur. But for whitewash and chalk paints, such a tool is perfect.
Model Pogadaeva became the first participant in the eighth season of the show “The Bachelor”
How to sharpen scissors: unexpected uses for ordinary aluminum foil
Goat and other 5 signs of the Chinese horoscope who will have good luck in 2021
When purchasing paint, you need to consult which tool is best suited to work with it. If you have never worked with the enamel you have chosen before, it is better to purchase several tools of different types.
When and how to use a brush?
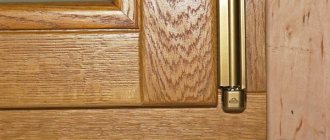
Brushes come in different shapes and sizes. Flat, wide brushes are designed to handle large, flat spaces. Edge brushes have a straight edge and are not very wide.
They are a good choice when it comes to painting doors and window frames. Flap brushes have bristles cut at an angle. They are typically used for painting difficult surfaces and applying artistic strokes. Round brushes are ideal for working with stencils.
The brushes are easy to use. The bristles should not be completely immersed in the paint; they are only immersed in the enamel by a third. If the paint is taken directly from the can, then the bristles need to be moved from the center to the inner edge and then remove the brush. Of course, the edge of the can should be used to squeeze out excess paint. Paints are collected from buckets in the same way.
An ignoble act. Anastasia Makeeva's fiance left his wife and 4 children
Computer threat, or Why a child needs to be prepared for the digital world
Security expert gives advice in case of robbery on the street
When decorating, you should try to make long, smooth brush strokes to avoid the appearance of streaks and marks.
Tips for choosing the right brushes
- To ensure that consumables are used economically when painting, and that the paint itself is applied in an even, neat layer, without smudges or streaks, it is better to take brushes with split ends. The hairs should be thick at the beginning and thin and flexible at the end. When bending them, they must not break.
- Regardless of what surface you need to paint, you need to buy a brush whose hair length will be approximately one and a half times the width of the brush.
- Many people do not know this general rule: before painting with a new brush just brought from the store, you need to wash it in soapy water and dry it well. Thus, it is cleaned of dust, dirt, hairs, grease, and so on. Make sure the brush is completely dry before painting.
- To prevent paint and varnish material from flowing down the handle, from smearing your hands, and from wasting paint, its bristles should be lowered into the paint can about half the length.
- If you need to paint objects made of wood, then the brush should be inserted along the grain. After all, some hairs will remain on the surface. If the wood is not treated, then it is better to use inexpensive brushes.
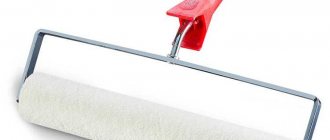
Rollers are an item that is used to work on objects with a very large area. Based on surfaces and tasks, rollers are made different in appearance.
Rollers are used quite often, but still, its main use is on large areas.
It will do an excellent job of painting flat floors, walls and ceilings, but it should not be used in complex curved shapes. The roller has a soft main part in the form of a cylinder, which is called a fur coat.
Thanks to this structure, it can easily regulate paint consumption and can also make the surface more textured, which is impossible to achieve with a brush. Depending on the size, rollers are divided into small, medium and large.
The largest ones are used for large, flat surfaces where the product is used extensively, for example, painting the ceiling. The smallest ones are most often used for small surfaces or difficult to paint areas, such as corners.
Professionals in this business always have in stock many types of rollers that are suitable for any type of painting. Rollers have a fairly high price, but they last longer and can also perform specific tasks.
The properties and parameters of such a tool change based on the material from which the roller handle is made, as well as the fur coat. There are different types of rollers on sale:
- From foam rubber;
- Made from velor;
- From felt;
- Made from natural fur of various animals;
- From mohair;
- From different polymers.
If the painting will be made of acrylic or latex, then it is better to buy a synthetic roller for it. But for oil-based paint, you can buy any roller.
The larger the roller cylinder, the greater the amount of paint it absorbs and the greater its consumption.
This needs to be remembered, especially when buying a mohair or velor roller. A roller takes more consumables than a brush, but at the same time it reduces work time and labor costs.
Advantages of a roller compared to brushes:
- Using a roller, you can paint a large area very quickly, compared to a brush. Even if the coverage area is not very smooth and even. Going over it once with a roller can be compared to going over it with a brush dozens of times.
- If the area was not prepared before painting, the roller will still paint it evenly.
- Today there are a huge number of different consumables that can give different textures to surfaces. And many brushes are not suitable for most of these modern products. For example, it cannot be combined with liquid plaster.
- With a roller there are no visible strokes on the surface.
But there are also disadvantages:
- Rollers are much more expensive than brushes. But over time, you can only buy a new cylinder for the roller, and this is already economically profitable.
- There is no way to paint hard-to-reach places with a roller; here you will still have to use a brush.
- The roller quickly becomes unusable, even if you don’t buy a new roller, you will have to change the fur coat.
When and how to use a roller?
When working with paint, you must cover your hair and wear goggles and gloves. When painting large areas, you need to use an extension screwed to the handle of the paint roller. This device will help you reach the upper zones.
The length of the pile should correspond to the type of paint. The roller must not be overloaded with paint. You need to fill the hole in the tray with enamel and lower the roller into it halfway, and then roll it out with force on the platform.
The paint must be applied in a special way. First, the paint is rolled out on the surface in a pattern resembling the letter W. Then the paint is rolled out again, but this time horizontally. At the end of the painting, vertical stripes are applied.
You need to cover the entire surface with paint, without gaps. Don't worry if the first coat looks thin, appears lighter than the chosen color, or doesn't completely cover the original surface. Second and third stripes of paint provide even coverage that closely matches the chosen color.
Color solutions and decor
Gone are the days when only one color was used to paint a floor. Brown paint and several of its shades were produced specifically for wooden flooring. Today, manufacturers produce a wide color palette, thanks to which you can choose absolutely any shade. Water-based paints are especially distinguished by their color range. There are both ready-made options and those that can be given the desired shade using a special colorant. White paint is the base, to which a certain amount of the desired color is added. In order to get the desired shade of paint, you can add several colors.
Matte varnishes also have different colors and shades. With their help, you can give any wood flooring a touch of noble wood. Painting the floor covering can be done using one color or shade, evenly distributing the product over the entire surface. There are special stencil devices with which the surface of the old floor is transformed by applying a pattern. The technology is simple: a stencil with a cut out pattern is applied to the floor surface, and paint is applied to the open areas.
You can use either a sponge or a roller as a tool.
What should we not forget?
Many times people ruin their own work by improperly removing masking tape or moving stencils.
If you try to remove the masking tape with a sharp movement, there is a high risk of “tearing” some of the paint from the wall. Also, the tape should not be removed until the enamel is completely dry.
But with stencils everything is quite the opposite. There is no need to remove them smoothly; on the contrary, the stencil is removed in one clear movement.
If you need to take a long break while working, brushes and rollers should not be simply abandoned, left in paint, or immersed in solvent. They should simply be wrapped in film or placed in a bag and tied.
Found a violation? Report content
Painting the ceiling with a roller
If you do not have the skills of professional painters, then a roller will come to your aid. In this case, the most important thing is to choose a quality tool.
The length of the tool should be within 25-40 cm. When choosing a “coat” material, it is better to give preference to fleecy material: foam rubber and velor rollers are cheaper, but they absorb paint very strongly, increasing its consumption, and also create smudges and bubbles on the surface being painted . The work will also turn out much more beautiful if the strength of the roller's pile is at a high level and the roller itself does not deform. To check this, you can squeeze the roller and tug on its bristles. By purchasing an additional plastic tray, you will receive an excellent painting set.