Painting walls requires perfectly smooth and even surfaces, since any, even minor, defects can ruin the appearance.
Plastered bases have a coarse-grained structure. The paint not only does not hide flaws, but also emphasizes the rough surface of the plaster.
Putties can level the walls and make the surface suitable for applying any painting compositions.
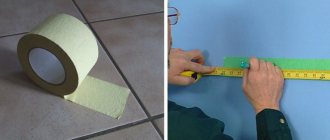
Figure 1. Puttying walls for painting.
Purpose and application
Acrylic putty protects the surfaces of walls and ceilings from mechanical damage and harmful environmental influences. It also serves to level them before decorating: painting and wallpapering.
Acrylic putty is used for exterior work and interior decoration. It is used to fill cracks, level walls and ceilings.
Acrylic putty is used to treat different types of surfaces
The material is also used for puttying construction bandages, for repairing concrete, wooden surfaces, and drywall. Use it to seal cracks and depressions from anchors on the walls and ceiling.
Is it necessary to putty the walls under wallpaper?
This should be done for several reasons:
- Plastered walls have many defects that will be visible when wallpapering. They can especially stand out when gluing striped wallpaper or thin, light colors.
- After plastering, when drying, the walls may have cracks. They definitely need to be sealed. Because the reasons for the appearance of this deficiency are unknown - they expand due to soil movement, but if the solution is not made correctly, they can remain unchanged.
- After puttying, the walls become more protected from external factors.
- Puttying a plasterboard wall is necessary because craftsmen do not recommend gluing wallpaper onto “bare” plasterboard for many reasons - from loss of the appearance of the wallpaper to unpleasant surprises when removing it.
Surface filling is carried out in several stages:
- Determining the unevenness of the wall and its preparation.
- Applying the starting mixture.
- Finishing coating and bringing the surface to perfection.
If the putty work is carried out correctly, the surface will be ready for wallpapering.
Correct work will prevent the putty layers from peeling off and the wallpaper falling off.
Advantages and disadvantages of the material
Acrylic mixture has a number of advantages that set it apart from others:
Acrylic putties have an elastic consistency, making them easy to work with
- safety and reliability;
- high adhesion and versatility;
- wear resistance and strength;
- fire resistance;
- moisture resistance;
- resistance to ultraviolet rays;
- long service life;
- quick drying;
- elasticity;
- efficiency;
- possibility of tinting;
- no shrinkage;
- no smell.
Due to its advantages, acrylic putty is in wide demand among buyers.
Like any type of putty, acrylic material has disadvantages:
- high price;
- dust during sanding of each layer of putty;
- small thickness of the putty layer;
- does not withstand low temperatures when applied.
The putty must be applied at a temperature not lower than 10 degrees, otherwise it will lose its elasticity. Despite the listed disadvantages, it still has more advantages.
Acrylic putty loses the elasticity necessary for work at temperatures below ten degrees Celsius
Bringing out corners
An angle spatula can only be used if there is a strictly right angle of 90˚ between adjacent walls. Otherwise, such a tool will only rip off the previously applied putty.
Work with an angle spatula as follows.
Using a spatula, apply and level the working mixture to the adjacent walls along the entire length of the corner. Special evenness is not required, the main thing is to fill the corner with a slight excess.
After this, the work is carried out with an angle spatula. It is pressed tightly against one of the adjacent walls (without fanaticism), and the other is barely touched. Deviation from the vertical is approximately 15-20˚. That is, the corner edge of the tool itself should not be adjacent to the corner of the wall along its entire length. The tool touches the corner only with the bottom edge.
Move the corner spatula from bottom to top, approximately 4/5 of the height. Then, in the same way, it is lowered from top to bottom.
This version describes the process of filling a vertical corner; the horizontal corner is dealt with in the same way.
If the angle between adjacent walls is not straight (not 90˚), then it is leveled with ordinary spatulas.
See also: Drywall arches
But you will need a metal profile. It is fixed to one of the walls strictly vertically , at a distance from the corner equal to the width of the blade of the spatula (narrow spatula). Screwing in self-tapping screws is allowed, as the holes can then be easily covered.
The sequence of actions will be described using a vertical angle as an example. First, putty is applied to the wall without a profile along the entire length in a corner. In this case, the corner is “filled in” with a slight excess. On the same wall, using a façade spatula, level the applied mixture using vertical movements of the tool.
Then, move the spatula from bottom to top, along the wall with a limiter (metal profile), while simultaneously pressing the back side of the canvas with the fingers of your free hand. The angle between the spatula and the wall is ≈30-45˚.
With this approach, an even angle between the walls is obtained, without changing its geometric value.
After work, the metal profile is unscrewed and the holes under it are covered.
Composition and technical characteristics
The composition of acrylic putty includes:
- liquid acrylic and acrylic resins, due to which the material acquires elasticity;
- modifiers - protect against cracking and shedding;
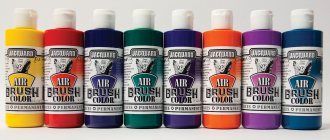
- dyes - you can choose any shade of the mixture;
- filler - gives the putty a uniform texture;
- antiseptic additives - not found in all acrylic putties, give it resistance to pathogenic microorganisms, fungi and mold.
The technical characteristics of acrylic solutions include:
- able to combine with mineral supplements;
- service life up to 25 years, shelf life of paste material - 1 year;
- the application layer should be no more than 5-7mm;
- the density of the material is 1.8 kg/m3.
The thickness of the applied putty should not exceed 5-7mm
The drying time of the material is 12 hours. A thin layer can dry faster, in 6-8 hours. In a humid room, the solution takes longer to dry.
Question 4: how to prepare the base for applying the first layer
Preparation consists of three stages:
| Image | Description |
| Removing old coatings : fragile plaster, whitewash and paint are removed from the wall surface. | |
| Dust removal : the wall is vacuumed or swept with a sweeping brush. Dust will noticeably weaken the adhesion between the starting finishing layer and the base. | |
| Primer : The wall is treated with a penetrating acrylic primer, which will glue the remaining dust, make the base more durable and enhance adhesion to the finish. On problematic surfaces (for example, on smooth concrete walls) adhesive primers with the addition of quartz sand are used. |
Some tips for cleaning walls from old coatings:
- Nitro enamels, oil and alkyd paints are removed with a spatula after softening with a remover or heating the surface area with a construction hairdryer;
- Whitewash and weak plaster can be removed without dust with the same spatula, having first moistened it generously with water twice at an interval of 10-15 minutes;
- Water-based paints can be removed by sanding.
Types of acrylic putty
Acrylic putty is divided according to purpose into starting (leveling) and finishing (decorative).
According to their purpose, putties are divided into leveling and decorative.
They differ in grain size. The starting one is intended for sealing large cracks. The high grain size of the building material allows you to hide unevenness and minor defects in the internal and external walls.
The finishing putty is applied in a thin layer and is the final step when treating the surfaces of walls and ceilings. It removes minor scratches.
The finishing putty has a smaller grain size and gives a perfectly flat and smooth surface.
According to the area of application, acrylic putty is:
- for interior work;
- façade;
- universal.
Universal putty has properties that allow it to be used both inside and outside the building.
For interior work
Acrylic putty is used to treat the walls and ceiling inside the building.
Putty for interior work is used for finishing all types of residential premises
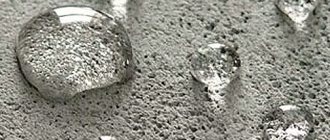
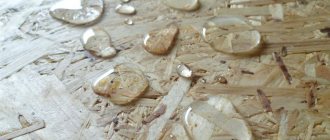
If the surface of the walls and ceiling is concrete or wooden, then there is a danger of their destruction under the influence of moisture and water vapor. To protect walls from them, use water-dispersed acrylic putty.
The acrylate mixture has an important feature: it protects against water. It provides waterproofing of walls and ceilings.
Facade
Facade putty is intended for external use. It forms a protective layer that protects the facade from the harmful effects of the environment: dust, precipitation, wind. Facade putty has thermal insulation properties that protect the house from heat loss. It is used to level the surface of facades for cladding. It also performs a decorative function.
Facade putty is used for exterior work.
Universal
Universal putty is used for both interior finishing and exterior work. It applies to any surface and dries quickly.
Drying, sanding and sanding
Each layer of the substance should be thoroughly dried for 24 hours. Otherwise, subsequent work will be carried out with problems. To avoid the appearance of unevenness and make the surface smooth, you should walk along the wall with sandpaper. You will need to sand until the bumps disappear.
To avoid the appearance of unevenness and make the surface smooth, you should walk along the wall with sandpaper.
Comparison of acrylic, latex and gypsum putties
We offer a table from which you can conclude which of the proposed putties is better, and you will see the advantages of the acrylic mixture.
| Acrylic | Plaster | Latex |
| It comes dry, which needs to be diluted, and ready for use. | Sold as a dry mixture | Ready mix |
| Strong and durable, resistant to mechanical stress, does not crack | It is characterized by high strength, hardness, and is resistant to cracking | Durable, but does not withstand low temperatures, hard |
| It is easy to apply, but at low temperatures it loses elasticity and dries quickly. Each layer is sanded | Elastic, easy to apply, sanding simply and quickly. Knead in small portions because it sets quickly, thickens and dries. | Viscous, viscous, difficult to apply, difficult to smear on the surface, application requires experience. It must be applied in a thin layer, otherwise there is a risk of cracks. A lot of dust flies while sanding |
| Eco-friendly, does not emit harmful substances | Eco-friendly, natural material | Toxic |
| The putty breathes, but vapor permeability is low | High vapor permeability | The basis of latex putty is acrylates. Low vapor permeability |
| Used for interior and exterior work in any premises. Moisture resistant | Absorbs water, so it is used only in dry rooms, requires a perfectly leveled surface | Can be used in any room, even with high humidity. Suitable for interior work |
| Suitable for processing any surfaces: concrete, wood, metal, drywall, plaster | Used for finishing concrete and wooden surfaces, drywall | Not suitable for processing metal surfaces |
| High price | Low cost | High price |
The degree of readiness of the putty
Putty is divided into dry (diluted with water) and ready-made. Each of these mixtures has its own advantages and disadvantages.
Features of dry putty:
- The main advantage is that the cost of dry putty is lower.
- It lasts longer.
- Its main disadvantage is that the viability of the already prepared mixture is very small - it must be used as soon as possible to avoid spoilage (solidification).
- Lots of dust during cooking.
- It is necessary to observe strict proportions when preparing it.
- It is quite difficult to work with it without finishing experience.
The finished putty is characterized by:
- There is no need to prepare it - just mix it thoroughly in the bucket in which it is packaged.
- There is no dust.
- It is easy to apply - even a beginner can do it. Perfect for treating ceilings.
- High price.
- The maximum layer of application on the surface is up to 2 mm.
After opening the container, the putty is suitable for use for 24 hours. After this period, hardening occurs. During work, you need to close the bucket so that the material does not deteriorate ahead of time. So when purchasing, you need to calculate the amount of material as accurately as possible, so that the unused solution is not thrown away in vain.
How to choose
The primer and putty should be taken from the same manufacturer, preferably a well-known one.
It is better to choose a paste mixture for painting; a powdery material is suitable for wallpaper.
Preference should be given to products from one manufacturer
If you need to treat a damp room, then you need to pay attention to whether there is information on the packaging about the permissibility of such use.
When choosing a building material, look at the shelf life of the finishing material and labeling. Putty produced no more than 2 months ago is considered fresh.
Puttying different surfaces
If we are dealing with brick, cement or concrete, then when working it is advisable to use cement in two levels: starting and finishing. The choice of putty used will depend on the class of cement in the composition. For finishing plasterboard surfaces, the ideal option is gypsum. Gypsum can also be used on other surfaces. If funds allow, then feel free to use a polymer putty to level the putty. If the walls are being treated for painting, then it is best to use ready-made solutions.
For tools, stock up on a set of spatulas, a drill with an attachment or an industrial mixer, a mixing container, sandpaper or a hand sander, a roller, a brush and a primer tray.
Working with acrylic putty
Working with acrylic putty is not difficult, it is important to study the instructions and follow all instructions. Let's consider the sequence of work.
Surface preparation
Before you begin to putty the surface, you need to remove the old coating from the walls. If there was wallpaper on the wall, then they are removed in 2 ways:
| 1.Dry. It consists of removing wallpaper without using water. Use a spatula to pry up the loose piece of wallpaper and rip it off the wall. | |
| 2. Wet. If it was not possible to remove the wallpaper using a dry method, then moisten it with warm water. After they are saturated with moisture and the glue swells, they are removed from the walls with a spatula. |
You need to start cleaning the walls using the dry method. If it doesn’t help, then move on to the wet method.
Paint is removed using 3 methods:
| 1.Thermal. To clean the old coating, use a hair dryer and a spatula. Use a hairdryer to warm up the painted surface. The swollen paint is removed with a spatula. | |
| 2. Chemical. Spray a special remover over the surface and wait 2 hours until it dissolves the paint. | |
| 3. Mechanical. This method is more complex and time-consuming. To remove paint, use an ax to make notches. A hammer drill or drill is also used to remove paint from the wall. |
These methods are effective to varying degrees. Some of them are more labor-intensive and require greater labor effort, while others require more time to remove paint from the wall. The choice of method depends on your desire and the availability of certain tools.
The old plaster layer is removed with a spatula. If the layer is weak and voids have formed inside, then the plaster falls in pieces. If the plaster is strong and difficult to remove, then the wall is pre-moistened with water.
To remove plaster, the wall surface is moistened with water.
In addition to a spatula, a grinder, a chisel and a hammer are used to remove the plaster layer.
Primer
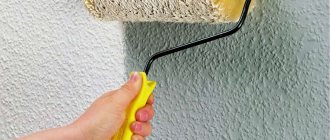
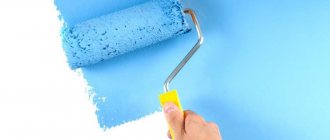
The primer is necessary so that the surfaces on which it is applied will easily adhere to it. The primer is poured into the bath. Joints and corners are brushed. A roller with a long handle is lowered into the bath and the primer is collected.
It is important to apply it correctly in order to completely saturate the walls. Liquid should be released at the front of the roller.
To avoid drips, excess solution is removed by rolling a roller along the ribbed surface of the bath. If streaks do form, they are smeared with a slightly damp roller.
A roller dipped in primer is rolled out over the tray so that the excess liquid drains back
It is better to use a fluffy roller because it picks up more mixture and does not create bubbles.
Roll out the solution on the wall. The first layer dries for 3-4 hours. After it has completely dried, apply a second one. After drying, 2 layers seal the cracks. Serpyanka mesh and putty are placed on the seams. Sand the dried seams with sandpaper and prime.
Puttying the surface
When applying a layer of putty, use 2 spatulas: large and small.
Using a small spatula, the mixture is taken from the container and placed on a wide tool. With its help, apply starting putty from the corner of the wall and stretch it over the surface. Movements must be confident. The spatula is pressed tightly against the wall at the same angle. If sagging appears as a result of applying the mixture, then do not be upset. They will be removed during the sanding process.
When puttingtying walls, the spatula should be held at a right angle
The first layer of starting putty is applied at 6 mm. If the base is covered with cracks, then a special reinforced mesh is applied to it. They putty the wall in strips with an overlap of 7-8 mm. After the first layer has dried, the surface of the walls is cleaned (polished). The starting putty is applied in 3 layers. When applying subsequent ones, you should change the direction of each.
The finishing putty has a very thin layer, so the spatula is held almost perpendicular to the wall. After drying, sand it with sandpaper with 150 abrasive.
After treating the walls with finishing putty, the surface is sanded with sandpaper.
Surface cleaning
After the putty has dried, cleaning is done, i.e., sanding the surface of the walls or ceiling. Sand it by hand or with sanding machines.
For processing, you can use a sanding block, an abrasive mesh or sandpaper.
Sanding starts from the top corner:
| 1. Sand small areas of 1 m with spiral movements, pressing lightly on the wall. | |
| 2. To make flaws visible, place a lamp on the wall. With good lighting, any defects can be eliminated. | |
| 3. After sanding, check the surface by touch to see how smooth it is. | |
| 4. The rule is to identify irregularities in the form of gaps between it and the wall, which should be removed. |
After work, remove dust with a vacuum cleaner or a wet cloth.
Features of wood putty
Remove old materials from the wooden surface: paint or varnish. The wood is cleaned of dust, sanded first with sandpaper with a coarse abrasive, then with a fine-grained one. Cracks are covered with putty. The cracks are sanded with sandpaper after they have dried. Use a dry cloth to shake off excess putty. Then the wood is painted.
The process of puttying wooden surfaces is practically no different from puttingtying ordinary walls.
Applying basic putty to the walls - step-by-step instructions
Step 1. At this stage you need to use two spatulas, one large and the other medium. Using a medium-sized spatula, apply the solution onto the volumetric one with which we will putty the wall.
Distribute the solution over a spatula
Step 2. Next, moving from the corners of the room, you need to gradually apply the mixture to the floors in a layer of no more than three millimeters. The maximum thickness will be only in those areas that need to be leveled. Layers of putty are usually applied overlapping. The optimal distance is no more than 6-8 centimeters.
During operation, a large spatula is held at an angle of 45 degrees.
Step 3. After finishing a certain part of the wall, you need to check the uniformity of the putty application using a square. To do this, run the tool along the surface, which will allow you to find areas where there is not enough solution.
A square is constantly used during work
Step 4. When finishing the corners of the room, you must use a special spatula in the form of a corner.
Using a special spatula makes the process much easier
Step 5. After you finish applying the putty, you should not wait for it to fully set; you need to sand the surface. For such purposes, it is recommended to use a grinding machine with a sandpaper attachment.
Surface treatment allows you to remove sagging and unevenness that could be left by spatulas
Prices for popular models of sanders
Sanders
Step 6. After the wall has dried, it is checked again for uniformity, only with the help of lighting at an angle. If imperfections are visible, they are covered with an additional layer of solution. Only in this case, you should no longer apply the solution to the entire wall, but only to the flaws.
Upon completion of the putty, check the uniformity of application of the solution using backlight
Tips and tricks
Experts advise thoroughly mixing the finished mixture before puttying so that some components that weigh more do not settle to the bottom.
Other tips:
- If the composition is brought in from the street, then before using it it must stand for 2-3 hours in the room.
- The application layer should be no more than 3 mm. The thinner the layer, the neater the surface looks. Cracks are sealed with 5 mm putty.
- It is better to carry out external work in cloudy weather at a comfortable temperature.
- The solution is stirred in parts because it dries quickly.
- After removing the old finishing layer, the surface is leveled, the cracks are sealed and putty is applied in an even thin layer. If it is necessary to apply a pattern to the putty, then it is done immediately after applying the layer so that it does not lose its elastic properties.
- If the mixture thickens in the heat, then it is diluted with water. Water in the solution should be no more than 5%.
- The primer and putty must be of the same brand. The remaining putty is stored in a hermetically sealed container to extend shelf life.
When working in hot weather, the surface of the walls must be moistened. It is prohibited to use heat guns and other heating devices to speed up the drying of putty walls.
In hot weather, the wall surface is moistened with water
Features of finishing putty
It is necessary to install additional lighting to get smooth walls for wallpaper
Applying the final layer of putty has the following features:
- If you plan to smooth the walls to apply wallpaper with the thinnest base, then you need to constantly monitor the uniformity of the coating using light sources on different sides.
- The finishing composition must be diluted and applied according to the same principle as the previous one. Only the thickness of this coating should be no more than 1.8 millimeters. Therefore, the solution on a wide spatula should be carefully distributed over the entire surface.
- This putty must be applied in a double layer. Only the additional layer should be distributed after the previous one has completely dried. Moreover, each of these layers should be carefully sanded. If in the first case we used sandpaper, then here it is allowed to use natural leather.
- The solution must be spread in the corners with a rubberized spatula, which will help hide imperfections.
- After grouting, you must wait until the wall dries. Then the surface should be covered with an additional layer of primer.
Only if you have smooth walls will you be able to hang wallpaper in accordance with the rules
Video - Do-it-yourself wall putty
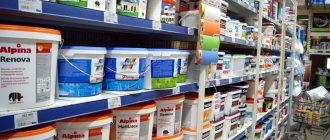
Review of popular manufacturers
It is best to choose putty from a well-known manufacturer. The material from a popular company is of high quality, easy to apply and lasts a long time. Let's look at which acrylic putties from which manufacturers are offered on the modern market.
"Knauf"
The acrylic putty produced by the brand is of high quality. It is durable and comes in a wide range of colors. Suitable for all surfaces, including wood. It adheres perfectly to concrete and brick because, in addition to acrylic, it contains gypsum and mineral additives.
Acrylic putty "Knauf" has gained popularity due to its versatility and high quality
A package of 25-30 kg costs 400 rubles.
"Ceresit"
The company's products are famous for their strength, elasticity and frost resistance. The fine-grained structure helps to bring surfaces with large differences to an ideal appearance. The putties contain gypsum, which helps the material dry quickly and prevents cracking.
Ceresit putty is durable and elastic
Price 800 rubles per package of 25 kg.
"Prospectors"
The Russian company produces putties using German technology.
The putty has astringent properties and high adhesion to surfaces. Easily covers large uneven areas. Not afraid of low temperatures. Shelf life is about 12 years. Once opened, it can be stored in packaging for up to 2 years.
Acrylic putty “Starateli” is a high-quality mixture that allows finishing on any surfaces
The cost of a 20 kg package is 250 rubles.
"Bolars"
A Russian manufacturer produces acrylic starting putties. They have increased strength, frost resistance, and moisture resistance. They do not absorb moisture, so they are actively used not only in dry, but also in wet rooms. Construction mixtures withstand the negative effects of the environment: precipitation, low temperatures. The putty is easy to apply due to its plasticity and high adhesion to surfaces.
Acrylic putty "Bolars" is intended for facade and interior decoration of rooms with normal and high humidity
25 kg of mixture costs 330 rubles.
SCANMIX TT
Putty is used to level facades. Its component is cement, so it easily lays on concrete. The material is moisture resistant and is used to seal large cracks and level surfaces with significant differences in height. Cement is a natural substance, so the putty is environmentally friendly and safe for human health.
SCANMIX TT putty is an acrylic putty designed for facade work.
The cost of acrylic putties for exterior work is 470 rubles per 25 kg.
"Vetonit"
The putties of this manufacturer are of high quality, are not afraid of frost and moisture, are easy to apply, strong and durable. Capable of repairing significant chips and leveling any surface. The material is economical. They can be used to treat large areas of external walls.
Vetonit putty is made from environmentally friendly raw materials, therefore it does not emit toxic substances
The cost of 25 kg packaging varies from 500 to 600 rubles.
"Glims"
The acrylic material of this manufacturer stands out among other building materials due to its wide temperature range from -50 to +70 degrees. It is characterized by high wear resistance. Used for treating walls made of concrete and brick. When applying the mixture, the leveling layer lays down easily. No stuck solution will accumulate on the spatula. Glims putties are characterized not only by good adhesion, but also by high vapor permeability. The solution can be applied not only in a thin layer of 1-3 mm, but also in a thicker layer - up to 20 mm.
Glims putty is used for interior work in rooms with moderate humidity
The cost of packaging, depending on weight, is 360-650 rubles.
"Volma"
Acrylic mixture "Volma" is distinguished by its composition. It includes gypsum-containing fillers and cement. It is used for leveling concrete, plastered facades. High adhesion and elasticity allow you to perfectly level the surface. The putty layer has high thermal insulation properties. They keep the house warm.
Acrylic mixture "Volma" has a high degree of adhesion to most materials
The price of a 25 kg package is 380 rubles.
In order for the cladding to serve for many years and delight you with its appearance, it is important to properly prepare the surface of the walls and ceiling. The best product for exterior work and interior decoration is acrylic putty. It has a number of characteristics that distinguish it from other building mixtures.
When is reinforcing mesh needed?
In some cases, during plastering work, builders install a special reinforcing mesh made of metal or plastic wire. By analogy with reinforced concrete structures, it is designed to resist tensile loads that can occur due to temperature changes and transfer of deformations of the load-bearing wall to the outer finishing layer.
The mesh helps increase adhesion, i.e. improves the adhesion of materials, prevents cracking and delamination. In addition, the use of fittings minimizes the consequences of possible technology violations, for example, non-compliance with temperature and humidity conditions.
For finishing up to 50 mm thick, the use of mesh is optional and directly depends on the client’s requirements and the allocated budget. If this indicator is exceeded, most professionals prefer to install it, despite the fact that this requirement is not in the current SNiP 3.04.01–87.
What tools are needed at different stages
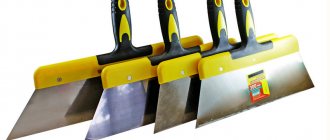
The main tools needed when plastering walls are:
- Spatulas of different types and sizes.
- Grinding abrasive.
- Container for the mixture of the required volume.
When mixing on your own, you will need a special whisk attachment to mix the mixture more thoroughly.
Spatulas can be either metal or rubber. In work, it is more convenient to use one long and one short to more quickly seal up possible overflows of the mixture. To make it easier to putty joints, you should also stock up on a corner spatula, which will make it easier to apply putty in the corners.