Characteristics of apartment insulation under wallpaper
To begin with, we suggest that you familiarize yourself with the features of heat-insulating plaster in relation to its composition:
- material based on sawdust - this filler is cheap, so this plaster is the most economical, plaster has low resistance to moisture, so it is only relevant in rooms with low humidity levels, this option is not suitable for insulating walls in the bathroom, veranda or on the balcony;
- materials based on polystyrene foam are an excellent option, which is characterized by high thermal insulation and sound insulation characteristics, however, the insulation is unstable before ignition and has low fire safety, so its installation is not relevant in places where the heating temperature of the walls is too high; in addition, during the combustion of polystyrene foam, emissions are released substances that are highly toxic;
- materials in the form of perlite or vermiculite are another type of mineral-based insulation; among the positive qualities of such a material, we note its high fire safety, resistance to chemical and biological substances, and environmental safety; however, the material tends to quickly absorb moisture, therefore, it needs additional vapor barrier ;
- Another option for insulation is a material in the form of foam glass; among the advantages of the material, we note its moisture resistance, environmental safety, and good thermal insulation properties.
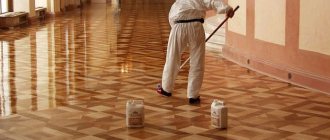
Please note that the use of plaster solutions for thermal insulation of a room requires their further finishing using putty. Because after plastering, roughness remains on the walls.
Plaster compositions are sold packaged in bags, weighing from 10 kg. Each of the compositions has an individual consumption rate.
Types of wall-mounted systems
Electric heating floors come in cable and infrared types. In them, temperature regulation and control is carried out using a thermostat.
Heating mat on the wall
Cable
Cable systems are ordinary wire, which can be single-core or double-core. When laying a cable floor on a wall, the wire is laid in a “snail” or “snake” pattern.
One of the types of cable heating is mats, this is the same single- or two-core heating cable, which is fixed on a special sheet. Therefore, the mats are easier to install; they can simply be rolled out on the surface.
The service life of cable-type heating devices is quite long. In terms of electricity consumption, they are comparable to conventional electrical appliances. But cable heating has a significant drawback - electromagnetic radiation .
Infrared
In infrared systems, heating is carried out due to long-wave infrared radiation that comes from carbon elements. This heating is environmentally friendly, as it does not emit electromagnetic waves.
The infrared heating method is:
- Film. Carbon plates sealed in polyester. The film is light and has a small thickness, so installing this system is quite easy.
- Rod. Carbon rods fixed on a special mesh. Rod systems are also called intelligent, so they have a high cost.
It is important to note the following point: foil insulation cannot be installed with electric infrared floors.
Insulation for walls under wallpaper - possible options
To insulate internal surfaces intended for wallpapering, various materials with enhanced thermal insulation properties are used. Special substrates not only maintain a comfortable room temperature, but also perform a number of additional functions:
- hide defects and minor irregularities in processed, insulated surfaces;
- reliably soundproof the living space, making it difficult for extraneous noise to penetrate;
- prevent moisture condensation, which causes dampness and promotes the formation of mold.
Insulation for wallpaper
Heat-protective materials, which are the basis of the finishing, can be conditionally classified as follows:
- roll thermal insulation;
- special substrate “Polifom”;
- cork lining.
When deciding on the use of a specific heat insulator, the following factors must be taken into account:
- the costs of its acquisition;
- thermal protection characteristics;
- Possibility of self-sticking.
Let's consider the performance characteristics and properties of the most common types of heat insulators used for finishing.
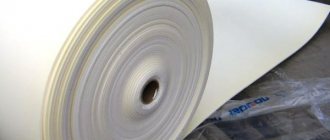
Roll insulation for wallpaper
Thermal insulation materials offered in rolls are a protective coating with a backing made of thin polystyrene foam, which is easily glued. The following is used as the supporting base of polystyrene foam thermal protection:
- thin foil. The foil base effectively maintains the temperature in the room by reflecting heat;
- paper. It has increased adhesion and can be located on both sides of the polystyrene foam layer;
- cardboard. The material is securely glued to the surface using standard adhesives.
The gluing of polystyrene foam insulation is carried out using the following compounds:
- glue designed for fixing heavy wallpaper;
- plaster mixture based on fine-grained gypsum;
- special types of construction adhesive mixtures.
Special glue for heavy wallpaper
Wallpaper is glued to a polystyrene foam base using a special polymer-based cement adhesive.
The features of this type of substrate are:
- thermal insulation efficiency;
- reliability of fastening;
- resistance to high humidity;
- excellent noise protection;
- vibration absorption;
- preventing mold formation.
Rolled thermal insulation is easy to use and can be easily glued to the base on your own.
Thermal insulation for wallpaper brand "Polifom"
Thermal insulation based on polyethylene foam, known as “Polifom”, is close in structure to heavy types of wallpaper. Consists of the following layers:
- a heat-insulating substrate made of polyethylene foam having a porous structure saturated with air bubbles;
- paper protection located on both sides of the heat insulator and facilitating gluing of the insulation.
With a high-quality sticker, polyethylene foam (“Polifom”), which has a thickness of 5 mm, reliably hides irregularities and small protrusions on the surface.
Wallpaper backing
Advantages of "Polyphom":
- high coefficient of adhesion to various types of bases;
- ease of self-gluing to walls;
- no need to use special adhesives;
- thermal conductivity coefficient of no more than 0.04 W/mK;
- The dimensions of the material in a roll that are convenient for performing work are 0.5x14 meters.
“Polifom” is glued to a previously prepared surface. Three days later, after the glue has completely dried, you can begin wallpapering.
Cork insulation for wallpaper
If it is not possible to ensure the flatness of the walls, it is advisable to give preference to a substrate made of balsa wood. It has a set of advantages:
- impeccable environmental friendliness;
- excellent thermal insulation;
- increased sound absorption;
- attractive appearance.
The original texture of the insulation allows it to be used as a decorative cladding when finishing premises.
Disadvantages of cork substrate:
- susceptibility to moisture, which is easily eliminated by impregnation with moisture-repellent mixtures, including wax-based ones;
- the need to use special adhesive mixtures. To facilitate fixation, the side of the material in contact with the wall is impregnated with a special compound;
- the presence of deep imprints on the front surface due to mechanical impact or careless gluing of the cork base.
Polypom insulation
The minimum area of a roll with a cork base allows you to thermally insulate 5 square meters of wall.
Popular materials
There are several types of substrates, depending on the raw materials:
- Paper. Thick paper allows you to correct the wall if it is not possible to dismantle the old, damaged plaster.
- Non-woven fabric. The base is similar to ordinary non-woven wallpaper. They are durable, but lightweight and have good sound insulation characteristics. However, they are quite expensive materials.
- Cork. Inexpensive technical cork is used as the starting material, which is why the resulting material is distinguished by its low cost. The substrate has excellent heat and sound insulation characteristics, it levels the walls well, but requires installation skills and a special adhesive composition.
- Polyethylene. It is made of foamed polyethylene. It hides wall defects well, has such characteristics as sound insulation, and retains heat in the house.
Expanded polystyrene or its more common name is polystyrene foam. The simplest thermal insulation material known to a wide range of consumers. It is characterized by low cost and good thermal insulation qualities, therefore it has a wide range of applications. With its help, walls, floors, ceilings, and even house facades are insulated.
However, it is absolutely impractical for wallpapering. This conclusion can be made based on the following features of polystyrene foam:
- Polystyrene foam has a loose structure, its surface is very fragile and not rigid enough for wallpaper. In other words, if someone suddenly presses on the wall or leans against it, a dent will form in this place and the wallpaper will tear. Also, during use, abscesses may form on the canvas.
- In stores, foam plastic is sold in the form of slabs, therefore, in order to ensure high-quality thermal insulation, the foam layer must be at least 5 cm. The main problem is the seams - they protrude too much above the wall surface and will be noticeable under the wallpaper.
- When carrying out cosmetic repairs, it will be possible to dismantle the old wallpaper only together with the insulation. This is not very convenient and adds additional work, since you will have to glue not only wallpaper, but also a new backing.
- And the last, most important factor is fire safety. To comply with all the rules, you must first cover the foam and trim it with non-flammable material, which is also impractical.
If, nevertheless, the choice has settled on polystyrene foam, then to create a rigid base for the wallpaper, you can use three additional coatings:
- Cover it with plasterboard.
- Cover with special plaster with reinforcing properties.
- It is necessary to use a fiberglass-based plaster mesh.
Insulation can be made from various materials. However, the most common is polyphome. It is made of foamed polyethylene. Its thickness can vary from 4 to 8 mm. Polyfoam is an environmentally friendly material. There is a paper lining on both sides. You can purchase polyform in the form of rolls in a specialized store. Roll parameters:
- Length – 14 m.
- Width – 0.5 m.
- Thickness – 5 mm.
- Density – 30 kg/cube m.
Penolon is a polymer and is chemically cross-linked. It is characterized by elasticity, light weight and hygiene. The material is quite resistant to exposure to aggressive environments such as acid, alkali, alcohol and gasoline. It is not subject to deformation, and also has a low coefficient of vapor permeability and heat conductivity. Areas of application of Penolon:
- Levels walls.
- Suppresses noise and vibration.
- Reduces the spread of cold from walls.
- Facilitates the work of pasting walls.
- Eliminates the "crying walls" phenomenon
Penohome is a universal material with different densities. It is a European bloc. Has excellent sound insulation properties. Copes well with high humidity and helps insulate the room.
The cork substrate has high heat and sound insulation. Significantly increases the degree of adhesion of the finishing coating and the base. In addition, the material is made from natural raw materials and is an ecological, natural and safe product for health. Technical features of the material:
- Thermal conductivity coefficient – 0.04 W/m2.
- Material density – 100-130 kg/m.
- Belong to a material of normal flammability (class - G3).
- Weight – 200 kg/m3.
This provides excellent ventilation of the walls and rooms themselves. This material is also very elastic, so it easily masks non-critical defects in the base and is not very expensive. Rolled interlining has the following characteristics: length – 10-12 m, width – 0.6-1 m. The canvas can be glued vertically and horizontally.
What materials cannot be used
Relatively recently, a popular method of thermal insulation was covering walls with foam plastic (expanded polystyrene).
Due to its low cost, the material is often used to this day for facades, ceilings and other surfaces. However, it has huge disadvantages and is not suitable for wallpaper upholstery:
- Wallpaper glued to polystyrene foam is easily subjected to mechanical stress and comes off. This occurs due to the fact that the material does not have the required rigidity;
- To achieve the desired level of insulation, you will need a layer of foam plastic at least five centimeters thick. Such a design will not stand out aesthetically;
- during the subsequent renovation of the room, you will have to remove not only the wallpaper, but also the insulation itself. It will not be possible to remove the finishing material without damage;
- One of the important reasons why foam cannot be used is flammability. According to the rules, during installation it must be insulated with another non-flammable layer.
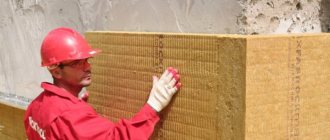
Insulation with mineral wool under wallpaper
Required materials and cost
Basalt slabs are often used for finishing houses and residential premises. Known for its insulating properties:
Installation features
Another advantage of mineral wool is that old coatings can be left on interior floors, but only if the surface is fairly flat. If not, it is advisable to level it using special plaster.
You can learn more about the features of installing mineral wool in this video:
How to choose insulation: tips
In order for the thermal insulation material to meet the stated requirements, it is necessary to choose the right type, taking into account the condition of the walls and the type of wallpaper. Recommendations:
- Roll-type insulation has additional functions: it levels the surface, has sound-proofing and vapor barrier properties, and wallpaper can be glued to it several times;
- when purchasing, read reviews about the manufacturer and the technical qualities of the product;
- consult with the seller before choosing, check the characteristics of the material;
- Cork insulation costs on average from 900 to 6 thousand rubles, while roll insulation costs around 900-1000 rubles per piece. Prices vary depending on the company.
Warm paints
Corundum
Multicomponent heat insulator on a polyacrylic base. Ceramic microspheres of different densities are used as a filler in its composition, which allows you to create a thin porous coating.
One common application is the insulation of cold water supply lines. A layer of thermal paint prevents the appearance of condensation and corrosion on metal pipes.
Depending on the surface being treated and the required degree of insulation, several types of insulation are available:
Akterm
The Akterm range of mixtures includes more than 15 products, many of which are highly specialized and designed to solve specific problems.
Among the thermal insulation compositions, the most popular are the following:
Astratek
Cost of insulation
The price range of these products may vary depending on the chosen manufacturer, as well as the material itself. Below is the average cost per item:
- Roll insulation for wallpaper, price varies from 800 to 1000 rubles. total area 5 sq.m.
- Cork insulation. Depending on the thickness, the cost of the product varies from 800 to 6000 rubles.
- Polyph. 1100 rub., per package. Total area 7 sq.m.
The most widespread among all the presented materials was the polyphome. It is easier to glue it to the wall, and if you follow all the manufacturer’s recommendations, it perfectly insulates the walls of the room.
Roll insulation.
These insulation materials include two types: polyethylene foam and balsa wood backing. The latter will cost significantly more and is rarely used for such purposes, since the material can be glued to walls without finishing with wallpaper. Read more about this material further.
Wallpaper backing by Polif.
This substrate is made of physically cross-linked polyethylene foam Isolon, on which a layer of paper is applied on both sides. It serves as additional wall insulation and also reduces the level of extraneous noise. It is resistant to bacteria, fungi and other microorganisms. The thickness of the substrate can be 3 or 5 mm. It all depends on what kind of insulation and sound insulation effect you want to achieve.
Advantages of the wallpaper underlay Polif:
It's easy to work with quickly. The work of gluing them to the walls can be done by one person
And in one working day he can easily stick the backing on all the walls in one room. It partially insulates and soundproofs the premises; for greater effect, you need to pay attention to specially designed materials for insulation and soundproofing. Hides significant unevenness on the wall, so the walls do not need to be perfectly prepared for wallpapering. The front side is white, which is quite convenient when gluing white wallpaper onto a backing.
Flaws:
The main disadvantage is that the material is soft. And if you touch the wall on which this substrate is glued harder, a dent will remain on it. Thus, you can even damage the wallpaper. If you glue thin paper wallpaper onto this backing, there is a risk that all the joints of the backing will be visible in the sun. Does not allow walls to breathe, so it is not recommended for use in bedrooms
But now few people pay attention to this, since vinyl and non-woven wallpaper cannot be glued in bedrooms.
Installation.
First you need to prepare the walls for gluing the backing. To do this, remove old wallpaper or whitewash from the walls. Then the walls are primed and puttied. As I already said, the walls do not need to be perfectly smooth. The most important thing is that they are even.
Next we glue the backing to the walls. It is glued with PVA glue or glue for heavy wallpaper. First we apply glue to the canvas, and then apply it to the wall. And glue it to the wall, smooth it with a roller or plastic spatula.
The wallpaper backing is glued from corner to corner, joint to joint. At the corner, the canvas is not transferred to another wall, but the excess is cut off and they begin to glue, again from corner to corner, another wall.
In order for the joints to be glued in the same plane, it is recommended to stick masking tape on them during the gluing process.
Thus, we glue the wallpaper backing to all the walls.
Cork wood base.
As I said earlier, this material is very rarely used as a backing for wallpaper. Previously, it was used more often until the Polyfom substrate appeared on the market. But we need to talk about this type of wallpaper backing.
Advantages:
- An environmentally friendly material made from cork, which allows the walls to “breathe” and creates a wonderful microclimate in the room.
- Performs the function of additional insulation and sound insulation.
- The material is hard, which cannot be said about Polyphomus. When you touch it with your finger, it does not deform much.
- Hides significant imperfections on the surface; if your walls are more or less even, you only need to remove the preliminary finishing, prime the walls and immediately glue the balsa wood backing.
Flaws:
- This substrate is dark in color, so light-colored wallpaper cannot be glued to it. Since the dark color of the substrate will be visible through them.
- High price and need to be glued with special expensive glue.
Selection of adhesive composition
Different types of insulation require different adhesives. Expanded polystyrene insulation and polyfoam can be fixed to the wall using adhesives designed for heavy wallpaper.
The most durable adhesives are those based on carboxymethylcellulose (CMC) and methylcellulose with the addition of PVA. Among domestic brands, KMC Super Extra and Moment Classic stand out. Foreign wallpaper adhesives are widely represented on the Russian market.
Special mention goes to Kleo, Semin (France), Pufas and Metylan (Germany).
Cork insulation cannot be glued with regular wallpaper glue. Special adhesives are used for it. Adhesives received positive reviews: Pufas K12, Lacrusil, Multifix, Wakol.
Work technology
The workflow can be divided into:
- preparing walls for insulation and purchasing material;
- process of gluing insulation.
Materials and tools
The following materials are needed:
| Illustration | Description of material |
| Thermal insulation material. In our case, this is insulation for walls inside the house under EcoHit wallpaper. It is sold in rolls 14 meters long and has a thickness of 5 mm. A special advantage of this option is the white color, which allows you to create an ideal base for wallpaper of any color. The price per linear meter is 100-130 rubles. | |
| Glue . Any composition intended for heavy wallpaper will do. It is worth purchasing it taking into account the fact that you need to apply glue to both wallpaper and walls. | |
| Putty . Needed for leveling walls and sealing small cracks and irregularities. If you have perfectly smooth surfaces, then this composition is not needed. | |
| Primer . Used to strengthen the base. Choose deep penetration formulations with anti-mold additives. This will prevent the development of fungus under the insulation layer. | |
| Special paper tape . It is used for drywall joints, but is also ideal for joints in our insulation. |
Tool for work:
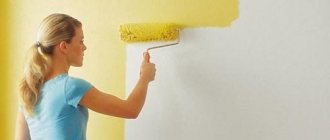
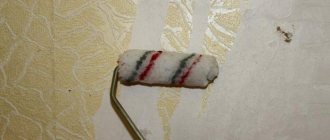
- Medium pile roller . Instead of a roller, you can use a wide brush or a special brush;
The roller allows you to quickly and evenly apply wallpaper glue to the wallpaper and wall
- Construction knife . The most inexpensive option with segmented blades will do;
A construction knife allows you to cut the insulation very evenly
- Tape measure, level and pencil . The level must be longer than 50 cm in order to use it as a guide when cutting. If you have a short version, then you will additionally need a metal strip or a flat wooden strip;
- Wallpaper scraper . Used if you need to remove remnants of old coating from walls;
A special scraper makes it easier to remove old wallpaper from the wall
- Wide and narrow spatula . The optimal sizes are 10 and 25 cm; they are easiest for an inexperienced master to handle;
- Sponge or rag.
Press the material with a soft cloth
Surface preparation
The instructions for performing the work look like this:
| Illustration | Description of the stage |
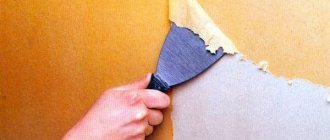
| Old wallpaper is removed . The process is simple: first, the surface is generously wetted and left for 20-30 minutes. Wallpaper gets wet and comes off much easier and faster. If you have many layers of wallpaper and they stick strongly, then it is better to use a special remover to remove them. | |
| Separate irregularities on the wall are repaired . This option is suitable for surfaces that are mostly smooth but have cracks or damage in some areas. All defects are simply repaired with putty and leveled along the main plane. | |
| If there are a lot of unevenness, then the entire surface is puttied. The composition is applied in such a way as to eliminate all significant flaws and prepare the wall for gluing insulation. Unevenness of 2-3 mm per meter is allowed, but no more. After drying, the putty is sanded with sandpaper to remove all noticeable sagging and smooth the surface. | |
| The walls are primed. The easiest and fastest way to apply the composition is with a roller. When processing, it is important to control the surface in order to apply the primer everywhere. For very loose and porous substrates, it is recommended to apply the treatment twice. | |
| Create optimal working conditions . The temperature should be above 10 degrees, humidity less than 70%. There should also be no drafts. |
Roll insulation for walls under wallpaper is glued like this:
| Illustration | Description of the stage |
Wallpaper glue is being prepared. All proportions are indicated in the instructions on the package. The consistency should be approximately the same as in the photo.
| |
Measurements are taken and the insulation is marked. The process is:
| |
| The material is being cut . To do this, a guide is set according to the marks. You need to hold it very securely so that it does not move during operation. You should cut in one motion along the rail with strong pressure. If the insulation is not cut through completely, it bends along the line and is cut through. | |
| Glue is applied to the insulation. The composition is evenly distributed over the surface. Pay special attention to the edges, as very often they are not processed enough, and then you will have to apply glue. After this, the canvas should be left for 5-10 minutes so that it is better saturated. | |
| The adhesive composition is applied to the wall . The area being processed is slightly wider than the size of the canvas. It’s best to start from the corner so that you don’t have to trim and measure the difference later. It is best to distribute the glue with a roller; it is much faster than with a brush. | |
| The insulation is exposed on the wall . You need to start from the top, carefully press the material against the wall and level it over its entire height. As long as the glue is fresh, the element will move easily. | |
| Vertical is checked. When gluing with your own hands, it is very important to align the first element evenly. The rest of the canvas will be glued to it, and if you miss this moment, the entire coating may go awry. You can check the vertical using a building level or plumb line. | |
| The sheet is pressed over the entire surface . To do this, take a sponge or rag and, using movements from the center to the sides, process the entire sheet from top to bottom. This way you will press the element completely and drive out excess adhesive if there is any. | |
| The second sheet is glued end-to-end. Thanks to the large thickness of the insulation, joining the sheets is very easy. The process starts from the top, little by little the sheet is leveled and pressed at the joint. But you don't want to press too hard to prevent the joint from lifting up.
| |
| The canvases are joined at the corners. You cannot bend them; you need to connect the canvases and carefully press the material in the corner. If you suddenly get a gap at the joint, it is best to fill it with sealant. It is elastic and fills empty space well; the main thing is to remove the excess with a spatula after application. | |
| The joints are taped . This allows you to fix the canvases and they will not come apart when the glue dries. In addition, the connections will be stronger this way. The glue takes three days to dry. After this, you can glue wallpaper or other sheet materials. There is no need to remove the adhesive tape from the joints. |
Effect after insulation
People planning to renovate their apartment doubt that insulation under wallpaper really “works.” First of all, the question is about its thermal insulation abilities. To prove the performance of roll materials, the following examples can be given:
- Polyfom has a thermal conductivity coefficient of 0.03 W/mK, which can be equated to brickwork more than 10 cm thick or a wooden covering 5 cm thick.
- Foil insulation 5-6 mm thick provides thermal insulation similar to a half-brick brick wall.
- Numerous experiments show that cork insulation 8-10 mm thick raises the temperature inside an unheated room by 3-4 degrees.
These examples perfectly show that the insulation under the wallpaper copes with its task. In addition, it must be taken into account that the cork creates a thermos effect. It helps keep the house cool in hot weather. To obtain complete comfort in the house, you should ensure a combination of wallpaper insulation with external wall insulation.
Features of cork insulation
Another type of roll backing for wallpaper is cork material with a thermal conductivity coefficient of 0.04 W/mk, a density of 100-130 kg/m3 and a flammability class of G3, which is considered the absolute norm.
To insulate walls under wallpaper, a material with a thickness of 10 mm is usually used. Completely natural, the insulation does not pose a health hazard and demonstrates the following advantages:
- durable;
- environmentally friendly;
- not static;
- does not contribute to the appearance of microorganisms even in a damp room;
- increases the level of thermal insulation in the house;
- improves sound insulation;
- Levels the surface of the walls.
Using cork insulation inside an apartment or house allows you to normalize the optimal level of microclimate, regardless of the weather and time of year.
The disadvantage of the material is its high cost compared to the insulation described above, which fully explains its 100% naturalness.
Does it save you from mold?
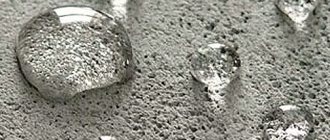
The answer to this question can be confidently given in the affirmative. Resistance to mold and fungal attack is inherent in the very nature of these materials. Cork tends to absorb moisture, but even this circumstance does not lead to these negative phenomena. Polymer insulation is good waterproofing; they do not accumulate moisture, which prevents the formation of a favorable environment for mold.
Roll insulation is rightly considered a practical and effective substrate for wallpaper. They smooth out small surface defects, provide hydro-, steam-, and thermal insulation of the room, and protect walls from mold and fungi. The costs are offset by comfort in the home and an increase in the service life of the finishing coating. If the insulation is installed correctly, it will perform its functions for a long time and reliably.
Pros and cons of insulation from the inside
The advantages of liquid insulation include:
- The ability to resist fire, so there is no need to worry about fire safety.
- Low thermal conductivity, due to which this material is in great demand.
- Liquid insulation can be applied to any surface, which opens up wide possibilities for application.
- There are no costs when installing the material.
- Liquid heat insulator is not susceptible to mechanical damage and sudden temperature changes, due to which it has a long service life.
By the way! It will be interesting to know: Do-it-yourself facade thermal panels
The video shows instructions for using liquid thermal insulation for walls from the inside:
Liquid heat insulator has certain disadvantages, which include:
- The long service life is not particularly long, but it can be increased if the material is applied correctly.
- There is no guarantee of thermal conductivity. Today there is not a single manufacturer who would indicate in their documentation the exact amount of stored thermal energy.
- Sensitivity of the material to negative conditions of transportation and storage.
- To obtain high-quality insulation, the material must be applied in a thick layer. This sometimes leads to high consumption of heat insulators. At the same time, the difference between actual consumption and practically is quite large.
Information from the article will help you understand what a disc dowel for thermal insulation looks like and how it is used.
This article describes which heat-insulating plaster for interior work is one of the best and how to choose it correctly.
For those who want to learn more about comparing thermal insulation materials for walls, you should follow the link and read the contents of this article.
How to glue insulation to walls with your own hands
When thinking about how to insulate a wall inside an apartment under wallpaper, you need to know that the technological sequence of operations for thermal insulation of walls under the finishing coating is similar to the process of gluing wallpaper and includes the following steps:
- Processing the base for gluing thermal protection.
- Preparing insulation and glue for further work.
- Sticker of heat-protective material for future finishing.
Let us dwell in detail on the specifics of each stage of work. At the preparatory stage, perform the following activities:
- Clean the surface of any existing wallpaper.
- Remove loose pieces of plaster and remaining trim.
- Remove protruding nails, protruding reinforcement and fasteners.
- Use a chisel to knock out concrete and cement sagging.
- Clean the surface from dust and dirt.
- Seal the cracks and cavities with cement mortar.
- Coat the prepared surface with a deep penetrating primer.
- Reapply primer to improve adhesion.
PVA glue
Experts sometimes use PVA glue for priming and antiseptic treatment, which, like primer, is applied with a paint brush or wide roller. After the soil has completely dried, further measures can be carried out. The drying time is regulated by the manufacturer of the primer composition and is indicated on its packaging.
Follow the following algorithm to prepare the substrate and adhesive mixture:
- Calculate the required number and sizes of substrate fragments.
- Use a tape measure to measure the dimensions of the future thermal protection sheets.
- Cut the insulation into pieces of the required sizes.
- Carefully study the manufacturer's instructions for preparing the adhesive composition.
- Dilute with water and vigorously mix the glue ingredients.
Please note that the amount of roll substrate required to complete the work must be calculated as follows:
- Determine the total area of the walls to be thermally insulated.
- Divide the resulting value by the area of one roll of backing.
- Multiply the estimated number of rolls by a safety factor of 1.05–1.1.
- Round up the resulting value.
The final stage of work is the installation of insulation, which must be carried out under the following conditions:
- ambient temperature and the surface being treated is more than plus 10 °C;
- maximum moisture concentration in the room up to 70%;
- complete absence of drafts.
Wallpapering
Further procedure:
- Mark the vertical and mark the base.
- Apply the adhesive evenly to the wall surface.
- Lubricate the back of the insulating sheet with glue.
- Let the material soak for 5 minutes.
- Attach the insulation to the base, following the markings.
- Remove air bubbles by smoothing the surface of the glued sheets.
To smooth out and remove air bubbles you can use:
- wide spatula;
- regular roller.
When performing work, pay attention to the following nuances:
- uniform lubrication of the surface with glue;
- no gaps when installing panels;
- sticker of the backing from the ceiling to the floor;
- rolling with a roller from the center to the outer parts;
- the need to glue the joint areas using masking tape.
Ventilation of the room can be carried out no earlier than 24–72 hours after completion of thermal insulation measures, depending on the properties of the heat-insulating material.
Installing heated floors on the wall
Let's look at the installation of heating devices using infrared film as an example, since this is the most suitable and easy-to-install model of electric heating for walls.
Heating warm wall DIY infrared heater
It should be taken into account that when installing the film on the wall, the strips are attached not horizontally, but vertically. In addition, the wires are connected from above.
You need to start building a heating system by preparing all the components and tools that will be needed for the job.
Then you should develop a layout diagram for the heater. According to technology and standard standards, you need to make an indent of 1 - 4 cm from the edge of the wall. One strip should not be allowed to overlap another.
Work on installing wall-mounted infrared heating is carried out in the following sequence:
- The wall surface is cleaned and leveled. It should be smooth, without deep depressions or cracks. If the wall has large differences, then it is better to putty it, applying a thin layer of mortar.
- A heat-reflecting coating is installed. For this, you can use any heat-reflecting material, but it should not have a foil layer. A heat-reflecting layer is necessary to direct heat flows inside the room and prevent them from escaping outside.
- A frame is being constructed to install the finishing touches. A sheathing is made on which sheets of plasterboard or chipboard will be attached to the wall.
- The film is laid. It is fixed to the wall with dowels. For this purpose, there are special places on the film where conductive elements do not pass. There should be gaps of no more than 5 cm between the rows of strips, this will ensure uniform heating of the room, without the formation of cold zones. If you need to cut a film of a certain size, then this must be done along special lines that are on the canvas.
Another way to fix the film is to glue it to the insulation using special glue.
- A temperature sensor and thermostat are installed. The regulator should be placed in a convenient place, preferably close to the power source. The temperature sensor is installed between the heating elements and connected to the thermostat.
- The system is connected - this should be done according to the instructions that came with the device. The film strips are connected in parallel using clips, all contacts are insulated with bitumen tape. The power wires are connected to the thermostat.
- Functionality is checked. Each strip of film should heat evenly. If this does not happen, then you should check the quality of the contacts; sometimes it is necessary to replace a separate defective section of the film.
Only after you are sure that the heating device is functioning well can you proceed to installing the finishing material.
Installation of cork underlayment: what do you need to know?
Insulation based on cork material is attached to the walls, following the diagram:
Clean the surface of old finishes, remove dust, dirt, putty cracks, chips and uneven surfaces.
- Prime the cleaned surface.
- Cut strips of insulation in accordance with the parameters of the walls.
- Prepare glue according to instructions.
- Use a roller or brush to lubricate the insulation strips and the surface of the walls.
- Glue the backing end-to-end, sealing the seams with glue.
- Trim off excess backing with scissors.
The glued substrate is left to dry for several days, after which wallpaper is glued on top using the same technology.
Another alternative option for insulation on walls under wallpaper is an expanded polystyrene backing with characteristics similar to expanded polystyrene material. Sold in rolls, glued using the same principle using wallpaper glue with the addition of gypsum-based plaster. To simplify the process and improve the result, insulation is combined with fiberglass mesh.
How to glue roll insulation under wallpaper?
When placing various insulation materials on the walls, construction work is carried out in stages, and have minor differences:
- Regardless of the type of roll insulation installed under the wallpaper, the old wallpaper is removed and the walls are cleaned of dust and dirt;
- the surface is leveled by applying plaster followed by a primer (for cork insulation, a deep penetration primer is used);
- sealing individual cracks and dents with a special composition made from a mixture of gypsum and chalk, which can be easily purchased at hardware stores or prepared independently;
- according to the manufacturers’ recommendations, glue is diluted that is suitable for a specific of the above insulation materials;
- cut the rolled material in accordance with the size of the room;
- when using Polyfom, the insulation itself is covered with glue;
- if cork material is used, then cover both it and the surface of the wall with glue, and then install it;
- Any roll insulation is always glued end-to-end.
Rolled insulation under wallpaper greatly simplifies repair and construction work on insulation and noise insulation of various types of premises. The price for these types of building materials is quite affordable. Separately, we can mention the relatively high cost of cork insulation, but their quality is unrivaled and therefore they are in high demand.
Is it possible to glue wallpaper over foam plastic?
The most popular insulation material was and remains polystyrene foam - ordinary polystyrene foam. Due to its minimal cost and good thermal insulation characteristics, this material is used everywhere - for insulating walls, facades, ceilings, floors, etc.
Of course, the rationality of using this insulation is difficult to dispute, but it is worth understanding that polystyrene foam is not the best choice for direct wallpapering.
Firstly, the surface of the foam does not have sufficient rigidity, as a result of which, even with minimal external influence (someone leaned against the wall, or the wall was caught by some object), the wallpaper will break through.
Secondly, since polystyrene foam, like Izover Optimal insulation, is a slab material, and for effective insulation from the inside of the walls you will need at least a 5-centimeter layer of insulation, the joints of the foam plastic after pasting will be very noticeable under the wallpaper.
Thirdly, when the time comes to redecorate the room, and you need to change the wallpaper, you will have to change the insulation along with it, since you will not be able to tear the wallpaper off the surface of the foam without damaging the latter.
Related article: Why walls in a private house become damp
And the last factor that prevents you from gluing wallpaper onto polystyrene foam is the issue of fire safety, since according to SNiPs, polystyrene foam must be insulated with a layer of non-flammable material.
If you want to insulate the walls from the inside of the house with polystyrene foam, then for subsequent wallpapering you can either cover the thermal insulation with plasterboard, or cover the insulation with a reinforcing plaster composition using fiberglass plaster mesh. But for such a thing, sometimes it’s easier to buy polyurethane-based insulation in Kirov.
Plastering foam plastic using reinforcing mesh
We insulate with our own hands
Before insulating a concrete floor, you need to carefully check the condition of the base. If there are cracks, crevices and potholes on the subfloor, this will reduce the quality of the thermal insulation work, so the defects must be eliminated. In case of height differences (this can be checked using a level), the surface is leveled with leveling mixtures.
Expanded polystyrene
Expanded polystyrene (EPS) is a type of foam material that comes in the form of individual slabs. Such products are characterized by low thermal conductivity and high strength. The service life can reach 20-30 years.
Mineral wool on joists
The advantage of this material is low thermal conductivity and increased sound insulation properties. Such insulation for concrete floors can only be used in the technology of laying on joists, since the material cannot withstand loads.
The frame is created using timber and chipboard or plywood (layer thickness from 18 mm). Assembly occurs using self-tapping screws and dowels. The speed of assembly will be increased by a hammer drill and a drill, as well as a mounting knife, a level (construction level) and a tape measure.
Before making a frame, you should read the recommendations of experts:
- The film is laid overlapping on the subfloor (the joints can be 15-20 cm). The strips are attached to each other with tape.
- The bars should have dimensions of about 110*60 mm. They are laid edgewise on the base. The pitch is chosen taking into account the thickness of the coating; it is about 300 mm.
- You can secure the logs to the base using dowels and self-tapping screws. To begin with, the logs are drilled through, and you need to go a little deeper into the base. The fastening pitch is 40-50 mm.
- Mineral wool is laid between the floors. The material should tightly fill the entire space. To do this, roll out the roll and cut the cotton wool in the places where the joists pass.
- Plywood is laid on top of the joists. The sheets are placed joint-to-joint, with a distance of about 10 mm from the wall. The long side of the plywood should be perpendicular to the bars. This layer is attached to the frame using self-tapping screws.
Prices for Rockwool mineral wool
Rockwool mineral wool is in high demand due to its good performance characteristics at an affordable cost. The price of this material depends on the size and thickness of the layer. In construction stores in Moscow, packaging can be found for 470-500 rubles.
Under the screed
Insulation of a concrete floor in a private house can be done under a screed. Here you need to stock up on polystyrene foam boards.
The prepared base must first be cleaned of dirt and dust.
Immediately after this you can begin installation:
The damper tape is glued around the perimeter so that it covers the junction of the wall and the floor. Glue is applied to the first polystyrene board. It needs to be distributed in the center and in the corners. The next slab is covered with glue according to the same scheme. The slabs must be glued tightly to each other (joint to joint). After the first layer has been laid, proceed with the installation of the second row.
It is important to remember that the slabs are laid with a shift. The insulation for a concrete floor is covered with a layer of film and the joints are sealed with tape. A reinforced mesh is placed on top (there should be a gap of 2-3 cm from the wall to the mesh). Beacons are installed on the reinforced layer. You can fix them with a small amount of solution. The solution is poured into the recesses formed between the beacons and leveled using the rule. After drying, the beacons are removed, and the resulting recesses are filled with solution.
Foamed polyethylene
Steam- and moisture-proof polyethylene is often used as a substrate for linoleum and laminate, but complete insulation of concrete floors in a private house will not work. It is better to use it in a heated floor system or complement another thermal insulation system.
Expanded clay
Thermal insulation of concrete with expanded clay is used in the technology of laying under screed. In this case, instead of polystyrene foam boards, expanded clay is poured onto the base covered with waterproofing mastic (layer thickness of at least 10 cm). After checking the level of the layer, the expanded clay is covered with a reinforced mesh and filled with a solution with the addition of expanded clay.
The name of such a heating and cooling system
To be honest, I myself did not fully understand how to correctly name such a system in a nutshell.
Uponor calls these systems: Uponor Plaster - Universal system for walls and ceilings.
Rehau calls such systems: Rehau Rautherm S - Unified surface heating/cooling system.
If you think that warm walls are a new thing, then you are mistaken. During Soviet times, such systems were made. Recently, an acquaintance from Germany came to visit me; he lives in an apartment with warm walls. The apartment was built by Soviet builders about 40 years ago.
In Soviet plumbing books of the 80s, such a system was called a panel heating system. In our company, the name “warm walls” has stuck. First one client said so, then a second, a third, and it stuck. The name is not entirely correct, since everyone we installed pipes on their walls used for cooling.
By the way, both Uponor and Rehau produce ready-made panels with pipes built into them. True, due to high prices, such panels have never been ordered from us. But we install pipes on walls very often.