Lada 2112 › Logbook › pearlescent paint
Features of pearlescent paint In all the variety of paint and varnish coatings, it is difficult to remember the advantages, disadvantages, properties of certain solutions, so the question often arises, what is pearlescent color?
Compared to the market value of other coloring compounds, mother-of-pearl is considered an expensive paint. This is caused by a number of specific characteristics: The original shimmering effect is the main difference between mother-of-pearl and its competitors. Reliable protection against small chips and scratches. Thanks to the additional varnish coating, the car's surface is impact-resistant, but only to some extent. Good heat resistance is ensured by multi-layer application of paint over the entire surface of the machine. The procedure is carried out using paint with a temperature identical to the heating of the body. This is an important point in car processing, since if the temperature range is unequal, the result will not be of the highest quality. Painting with mother-of-pearl is relevant in certain weather conditions and for car owners who take good care of their cars. Paint does not have broad protective properties, such as hammer or polymer paint, so it is easily damaged by strong impacts and temperature changes. There are several ways to apply pearlescent paint. The most common is sequential coloring with increasing iridescent shade. Additional varnish provides a brighter shine. Experienced car owners or those who contact a car service can choose the second painting option - mixing several colored pastes with pearlescent pigment. It is important here not to exceed the concentration of one or another ingredient. The rich palette of pearlescent paints has rich bright and pastel colors. No additional textures or frills are needed to make the car more noticeable. An important advantage is that you can prepare an exclusive coloring composition by mixing 2-3 pearlescent colors. Stages of painting with mother of pearl
Mother-of-pearl color is considered elite in the automotive industry, which is why products painted with this shade are in great demand and have a high price. Black mother of pearl is widely popular. The painting process is complex and requires patience and care: The temperature of the spray booth and the car must be the same. This will ensure better adhesion of the paint to the surface of the car and even distribution of color. The part to be painted must be cleaned and degreased. If necessary, cracks must be filled with primer and polished to zero. Mother of pearl is very similar to gloss, so any irregularities are very noticeable. Once the surface is ready for painting, you can begin applying the undercoat. The interval between cleaning and the first coat should not be long. The sooner the application of the substrate begins, the better. The shade of the substrate must match the base one. The base layer is the main pearlescent paint, which needs to be applied in 2-3 layers, not counting the varnish. The composition should be diluted with a solvent so that the mass becomes moderately fluid. The optimal option is 2:1. Painting is carried out using a spray gun. The first layer dries quickly, and after 30 minutes the next one can be applied. The paint from the pooler must be poured into a clean container and solvent added in the same ratio. It is enough to paint the car in 2 layers and proceed to the varnish coating. The first varnish layer must be applied with a minimum amount of solvent, the second - as described in the instructions. The pearlescent varnish should dry and the solvent should evaporate. It is enough to wait 30 minutes before reapplying the fixing layer.
Source
How to get pearlescent color
It is very difficult to obtain a white pearlescent shade. To do this, it is necessary to use special pigments that can reflect color.
When a ray of light hits the pigments, a beautiful iridescence is formed, which changes shade depending on the viewing angle. It is worth noting that mother-of-pearl painting is recommended for use in certain weather conditions and for careful drivers, because in the event of serious impacts, it will not protect the body from scratches and chips.
Drivers are presented with a wide range of bright and soft shades. To make the car more noticeable, no additional textures or frills are required.
You can simply mix two or even three unique shades, which will allow you to prepare an exclusive coloring composition.
Follow some recommendations when applying pearlescent paint, and you will certainly get an impeccable result; it’s always nice to show off such a machine to your loved ones:
1. Visual depth can be achieved by double and triple painting. But do not confuse “mother of pearl” with metallic and chameleon shades.
2. When selecting all the components for painting, try to select one specified brand. Simply, formulations of different brands may reject each other, and cracks or swelling may appear on the surface of the car.
Multi-layer painting of the body surface cannot be avoided if you decide to achieve an iridescent effect.
3. The most difficult task when painting is creating uniform highlights on the body. This effect can only be achieved if the paint used is the same temperature as the car body.
If it's colder, the shimmer effect will look completely different. The difference between such transitions will be visible to the naked eye. The same temperature of the paint and the surface guarantees strong adhesion to the metal.
Before application, the surface must be highly polished, because all defects will appear as it dries.
4. The shade of the base should be the same as the base one; the sooner you apply it after cleaning, the better it will affect the body.
5. When making paint, check its fluidity by diluting it with a solvent. Apply the paint in two layers, and be sure to seal the result with varnish. It is applied in several layers.
The first with a minimum amount of solvent. Usually 30-40 minutes are enough for the solvent to evaporate and the layer to dry, then you can carry out the procedure again to fix the varnish layer.
Many people recommend contacting specialists who will advise you on choosing a color. He will also be able to tell you what kind of paint or pigment can achieve the desired effect.
It is worth remembering that this paint is more capricious.
Even after a heavy rainfall, a poor coating can be damaged. Do not skimp on materials and then you will be confident in the result. This is almost the only negative, otherwise you get an original and beautiful appearance.
Be sure to study the recommendations indicated in the paint content; during work, do not forget about protective equipment.
Do-it-yourself car painting with mother-of-pearl: technology, stages and materials
Painting a car in pearlescent color»>
You probably know what mother-of-pearl looks like on a car, since you wanted to decorate your car like that. But not everyone knows what this paint is. Pearlescent pigment is obtained by combining solutions based on mica particles - crystals of synthetic origin. In their structure they can be compared to a prism. They redirect light just like a prism. Therefore, the shade changes depending on the incidence of light; crystals, which are colored only on one side, contribute to this. Mother-of-pearl is mixed with any paint solution for cars - according to the standard, there are 100 grams of mother-of-pearl for 10 liters of car paint.
Pearlescent color - types of paints
The shade of pearlescent paint changes due to its constituent components. When exposed to light, this effect is achieved due to synthetic crystals, which are colored only on one side.
Decorative properties are provided by the process of mixing mother-of-pearl with the base of the coloring paste. The concentration of elements depends on the preferences of the car owner and the result he wants to get.
On average, a normal solution requires 100 grams per 10 liters.
There are several types of paints, and they are classified according to the following criteria:
- Color;
- Level of crushed mica - light reflectors;
- Selected application option.
In the first case, pearlescent pastes can be presented in any shade due to the fact that the paint with shimmering mica pigments is diluted. Drivers often choose the following colors: silver, blue, red, white.
Although the white shade is popular, you need to be prepared for the fact that it requires special care. If a chip or swelling appears on the surface, it will be immediately noticeable with this color.
To avoid streaks and fading, future owners of a white pearlescent shade will have to thoroughly mix the paint with a solvent. The remaining shades are not so whimsical; once a stain appears, it can be retouched, and it will not be so noticeable.
As a rule, when cracks appear, they try to completely repaint the car.
The consistency directly determines how much the surface will shimmer. The mica particles must be larger; this is the only way to achieve a brighter color and refraction.
Select compounds with an index of more than 20 micrometers. Small particles of mica do not exceed this figure. This paint covers evenly and has a smooth transition of shades.
The application of pearlescent color can be carried out in two ways:
- Pearlescent paste is applied to the painted surface in one layer. In this case, the consistency is no more than 1% iridescent pigment.
- Mixing pearlescent paste with acrylic paint. A solid base color should be applied first. And apply decorative varnish on top of the painted surface for strength and durability of the coating.
We prepare the car and select materials for painting
You need to prepare the body in the same way as for regular painting. You can understand this issue in detail on our website. Preparation consists of high-quality body cleaning, grinding, and degreasing. If the current paint layer has cracks or depressions, then this must be corrected before painting with a primer. Most motorists are familiar with this process from doing chores in their home, office or apartment.
It is advisable to carry out grinding with a grinding machine, because the work will be completed faster, and the chance that you will miss some area is minimal. This list of work must be carried out in a clean and dry room, preferably with ventilation. Protective elements in the form of gloves and long sleeves are not only desirable, but necessary, since mother-of-pearl should not get into the skin.
How to paint a car correctly
For painting, not taking into account the preparation, we will need a ready-made composition, a spray gun, varnish, a substrate and of course a solvent.
For those who are going to try their luck in making their own, we recommend purchasing car pastes from one company. After all, the compositions differ depending on the manufacturer, so mixing them will lead to damage to the entire paint and varnish material. The result of such an unsuccessful experiment is cracks and swelling on the car body.
Pearlescent paint is more capricious than regular paint, so you need to approach this work as seriously as possible. But don’t be surprised if, after a good rainfall, streaks appear on the new paintwork – you have to pay for beauty, especially for white paint. This is perhaps the only negative. The plus is originality and beauty, which is rarely seen on the road. Don't forget about the temperature of the paint booth and body. Carefully read the instructions that the pearl paint contains. And, of course, don’t forget about protective ammunition.
Source
How to apply
Paint can be applied with various devices, the end result will be slightly different. Therefore, the use of mother-of-pearl is considered an opportunity to create different design ideas.
Paint can be applied with various devices, the end result will be slightly different.
Sponge
The sponge is intended for creating patterns and is not used to completely paint the base. First, the sponge is moistened and squeezed out well before immersing it in the paint, from the excess of which it will also need to be freed.
The sponge is intended for creating patterns and is not used to completely paint the base.
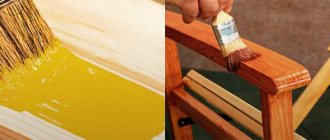
Brush
It is used for processing corners and hard-to-reach areas; large areas are difficult to cover. Also, the consumption of funds will be large. If you choose two round brushes, you can apply an unusual pattern of two shades, for example, white and blue, they are painted chaotically.
It is used for processing corners and hard-to-reach areas; large areas are difficult to cover.
Spray gun
The tool helps to quickly and evenly apply the composition to the entire base. But a more liquid consistency of paint is used, to which water is added.
The tool helps to quickly and evenly apply the composition to the entire base.
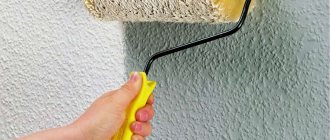
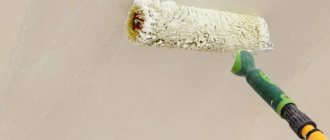
Roller
A foam roller is used for painting. It can also reduce the labor intensity and time needed to cover the entire base. There are rollers with a textured surface. to create an unusual textured base when painting.
A foam roller is used for painting.
Brush
The brush is easy to use, but it takes a lot of time. Working in large rooms is difficult. Typically used for painting small objects or hard-to-reach areas.
The brush is easy to use, but it takes a lot of time.
Putty knife
The pearlescent composition is viscous, for this reason a spatula can be used to distribute it. You can choose a spatula made of metal or plastic.
The pearlescent composition is viscous, for this reason a spatula can be used to distribute it.
Features of working with pearlescent paint for cars
As a rule, a car owner is pleased when his car stands out on the road from the crowd of production models. Pearlescent paint for cars is one of the ways to give the body a bright and shiny color, especially noticeable on sunny days. This coating attracts the attention of others and gives the impression of a premium class. It is not for nothing that at first, painting with mother-of-pearl was the prerogative of exclusively expensive models.
Today, such a color is no longer exclusive - any car can be painted if desired. But before you get started, you need to stock up on basic knowledge and skills.
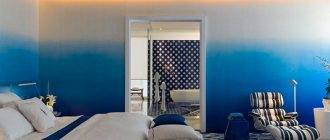
Pearlescent paint for different interiors
To make it easier to decide which style to choose, you need to know some techniques for proper use in the interior, adding to decor and varnish products:
- The use of special devices, rollers. brushes, etc., so that the layer is textured, and drawing on the base;
- Old finishing material is covered with mother-of-pearl to lighten it and improve its appearance.
Old finishing material is covered with mother-of-pearl to lighten it and improve its appearance.
Types of pearlescent paint
Each type of paint with pearlescent pigment has its own special characteristics. Let's consider the main groups of characteristics for classification.
By grain size
One of the main technical parameters is the size of the mica elements present in the paint. Experts use the term “grain”.
The larger the particle size, the brighter and more unusual the refractive effect will look.
Typically, a car is painted with mother-of-pearl with an index of twenty micrometers. There are also smaller fractions - such mica allows you to achieve:
By method of application
The large number of components included in the paint makes it important to choose the method of its application. There are two main methods of painting with mother of pearl.
Pearlescent varnishes
Any paint requires reliable protection. The pearlescent color of the car is traditionally fixed with a special varnish used at the final stage of painting.
Such varnishes are mainly made on the basis of acrylic and are two-component.
Pearlescent varnish can be completely transparent or contain additional pigment. Today, manufacturers produce varnishes of various shades, with color fractions already added to them.
Based on consistency, varnishes are divided into liquid and thick. To use the former, a professional hardener may be required, and for the latter, a solvent.
In any case, the addition of optimizing compounds is carried out immediately before using the coating, in strict accordance with the instructions. Incorrect mixing can disrupt the structure of the composition, causing mother-of-pearl for cars to lose its unique properties.
The final coating technology depends on some features of the varnish:
By color
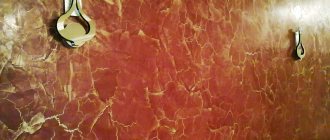
The palette of pearlescent paints is very diverse. However, the most popular are still the classic shades shown in the photo below: black, white, blue and red mother of pearl
Why did pearlescent paints become popular?
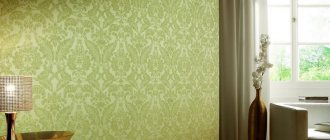
Pearlescent wallpaper paint allows you to implement many design ideas. It gives an unusual glow to the coating, resulting in a pearly shine, and is suitable for use on wood, plaster and other substrates. Such a coating is obtained due to the introduction of natural or artificial mica. This substance can give a different effect to the product; mother of pearl will be transparent or translucent. Or glass is used.
The demand for mother-of-pearl color is explained by the permissibility of painting a variety of objects inside a building with it. You can also experiment, getting different effects that look original and attractive.
The demand for mother-of-pearl color is explained by the permissibility of painting a variety of objects inside a building with it.
Technology of painting cars in mother-of-pearl
As a rule, they prefer to entrust the car painting procedure to specialists. However, there are not many difficulties in it, and with proper preparation any car owner can handle it. The main thing is to follow the basics of the technological process.
Preparatory work
Before applying mother-of-pearl to a car, it is important to make sure that the body is ready for painting. To do this, it is necessary to carry out a standard set of procedures, including grinding, straightening and, if necessary, additional painting of problem areas.
When working with paint and varnish coatings, it is important to observe fire safety measures and use special clothing, including gloves and respiratory masks. The room should be well ventilated or equipped with an exhaust hood.
Painting features
The highest quality and most beautiful mother-of-pearl effect is achieved using a three-layer dyeing method:
You should prepare all the necessary components in advance so that you can apply them one after another as they dry.
It is important to take into account that the temperature of the paint and the car does not differ from the air temperature inside the garage.
The tool required for painting a car is a conventional spray gun, equipped with a filter to remove possible dirt impurities and connected to a compressor. With its help, the material is evenly sprayed.
After applying and drying the base layer of paint (“base”), a mixture with pearlescent pigment is applied using a sprayer. You can understand exactly when you can start this phase using a visual assessment - the dried base acquires a characteristic matte shade.
Advantages and disadvantages of paint
Among the advantages that Xeralik has compared to mother-of-pearl paints and varnishes, it is worth highlighting:
- higher color saturation;
- no distortion in color display;
- maintaining the base color, for example, blue, used for the base;
- if the lighting is normal, then Xeralic is characterized by the appearance of sparkles, and in dim light it creates a film with a silky effect on the car;
- Xerallic staining is characterized by iridescence in 4 planes (in mother-of-pearl - in 2).
Painting a car blue xeral in daylight
Using blue or black as the base colors looks the most elegant and attractive. However, there are several disadvantages that paint has. They are:
- high cost of pigments and other paint additives. This helps to increase driver vigilance and prevents him from making sudden maneuvers or parking in certain places;
- the presence of even a small scratch implies the need to repaint the part completely, which requires additional financial costs;
- the need for the premises to comply with many standards (you cannot paint a car outside): it must be warm there, drafts are not allowed.
Author: Vysotsky Alexander Petrovich
Higher education: Chita State University, Institute of Technological and Transport Systems, specialty - cars and automotive industry. Repair of passenger cars of domestic and foreign origin. Chassis repair,…
Features of white mother of pearl for cars
One of the most popular shades among car owners is white pearl (see photo below). It combines classic and spectacular, but at the same time requires special care when painting the car.
White mother-of-pearl is extremely sensitive to dyeing technology. Even a slight disruption in the dyeing process can ruin the color scheme.
For this reason, some car owners prefer another option - white metallic. But this type of coating cannot compare with pearlescent paint in terms of visual effectiveness. “Metallic” is a simpler and more unpretentious option, which today is even produced on a serial basis.
The best solution: turn to a specialized and reliable car service center for painting services.
If you still decide to carry out the work yourself, you need to carefully prepare and take into account all the nuances. Selecting components for painting is an important step. It is better to purchase the highest quality materials, after consulting with specialists.
The specificity of white color is that it not only does not hide various irregularities and defects of the body, but, on the contrary, emphasizes them.
To avoid such flaws, for painting in white pearlescent color it is recommended to use only the three-layer application method described above.
Mother-of-pearl coating is a worthy option for restyling the appearance of a car. And if you decide to make such an update, we wish you excellent results.
Three-layer paint “white pearl”
White paint, when pearl particles are added to it, hides the effects that these particles give. What happens when you add pearl to white is that it looks "dirty" and the effects of sparkle, depth and color change don't show up. So, in order for the white to remain bright and to add pearlescent effects to it, the paint is applied in the form of a three-layer coating. The pearlescent pigment is added to a clear binder and applied as a separate layer to the pre-sprayed white base coat. The shade of the white base layer changes slightly and acquires a pearlescent sheen. Next, a varnish is applied to protect the paint.
Painting with three-layer “mother of pearl” “in transition”
In the 80-90s, painting with single-color enamel without smudges and dust was considered the highest aerobatics among painters. Since the mid-90s - applying “metallic” without stripes and “apples”. Then they began to master the “smooth transition”, learned to adjust the shagreen on the parts to the factory...
Technological progress poses new challenges for the modern painter. In particular, skills in working with three-layer coatings - “mother-of-pearl” and “xyrallic”.
Today we’ll talk about repairing three-layer mother-of-pearl using the “smooth transition” method. This type of repair, which is considered the most difficult, will provide a good demonstration of all the intricacies of working with “three-layer.”
Features of three-layer coatings
A three-layer or three-stage coating is a type of “base + varnish” coating.
The first layer of such a coating is a layer of base substrate of one color or another, on top of which a layer of “spectacular” paint is applied and this “sandwich” is completed - a transparent varnish. A three-layer coating most often has a mother-of-pearl effect, the main components of which (mica microparticles) are found in the second layer.
Repairing such a coating has two features.
The first is that the mother-of-pearl layer (the one in the middle) has high transparency - under it we seem to “see a little” of the substrate. This gives a characteristic visual effect to the three-layer coating: the mother-of-pearl particles are “illuminated” from all sides, both from above, through the transparent varnish, and from below, by light reflected from the substrate.
This transparency of the mother-of-pearl layer creates certain difficulties during partial painting. Because if we can see the substrate under the mother-of-pearl, then its border may also be noticeable when touching up the paint. You can try to hide this border with additional layers of mother-of-pearl, but this will greatly change the shade of the coating, which is unacceptable.
Second feature. Since the color properties of the technical layer strongly depend on the thickness of the transparent pearlescent layer, during repairs we can never know in advance how many layers of pearlescent paint will need to be applied.
Moreover, not only the number of layers matters, but also the manner of applying the paint. Each painter has a slightly different layer thickness. That is why pearlescent paint for repairs is usually prepared strictly according to the formula, and is not tinted.
To determine how many layers of mother-of-pearl need to be applied, it is recommended to conduct a special preliminary test before starting painting. After some practice, this test does not require much time or materials, and you can be guaranteed to avoid color mismatches on the new and old surfaces.
Light interference as a principle for achieving pearlescent effect
The pearlescent effect is based on the physical concept of light interference.
Interference is an interesting and beautiful phenomenon. Without going into details, its meaning lies in the reflection of light rays from transparent parallel planes, which are located at a microscopic distance from each other, comparable to the wavelength of a particular part of the color spectrum.
The distance between these planes is so small that our eye is not able to see it and perceives two rays reflected from the lower and upper planes as one.
Interference of incident and reflected light rays
The distance between the first and second planes affects which part of the color spectrum will be reflected and what shade of mother-of-pearl our eye will catch. In other words, if the distance between the planes is proportional to the wave from the blue part of the spectrum, then we will perceive blue, and red - red.
As the viewing angle changes, these colors change. So, if you look at the interfering plane at a right angle, then the distance between the reflecting surfaces visually appears smaller, and we see one color corresponding to the wavelength of a given reflected part of the spectrum (with decreasing distance, the hue shifts to the violet region of the spectrum).
At right angles, the distance between the planes seems smaller and we see one color (moving into the violet region of the spectrum)
If we look at the plane from a sharper angle, then the distance between the reflective surfaces visually increases, and we see a different hue (with increasing distance, the hue deviates towards red).
At an acute angle, the distance between the planes seems greater and the color changes, moving towards red
It is this change in the intensity of the rays at the slightest movements of the eye, this color shift that is perceived by the eye as a “pearl” effect.
Life is full of examples of light interference. For example, a puddle into which gasoline has been spilled will shimmer with all the colors of the rainbow until the turbulence of the water calms down and a transparent film of gasoline lies on the water in a layer of the same thickness.
Or a soap bubble. The light is reflected from both walls of the bubble and where the wall is thinner, the colors go purple, where it is thicker we see a reddish spot.
The most obvious example of the phenomenon of light interference is soap bubbles.
The general condition for replicating this effect is two or more reflective planes placed parallel and at a very close distance from each other.
The components of pearlescent paints are made precisely according to this principle.
In fact, each pearl particle is a miniature prism, with the help of which Newton at one time decomposed light into its seven components. Only pearlescent pigment does not completely decompose light into its component colors, but does so selectively.
a) refraction of light rays by a Newtonian prism; b) refraction of light rays in a grain of mother-of-pearl
Thanks to this, we see not just the color of mother-of-pearl pigments, but light of a certain color range, which is refracted in particles of mother-of-pearl and perceived by our eyes.
Preliminary tests
You can conduct a simplified test, or you can do a more accurate one.
For any of them, you must first prepare three identical test plates.
Simplified test
After drying the test plates, we apply each of them to the car part (tightly, without gaps) and select the application method in which the paint most accurately matches the color of the original coating.
Color comparisons must be made from different viewing angles and lighting.
Let’s say the second plate matches, which means that when painting it is necessary to apply 2 layers of mother-of-pearl under the same painting conditions and gun settings that were used to make the test plate.
Accurate test
If you want to achieve an even more accurate match of the repair coating to the original, it is recommended to conduct a more complex test.
As a result, we have four zones on each test plate:
The first zone is 1, 2 or 3 layers of pearlescent paint, respectively. The second zone is the same plus the last drip layer. The third zone is the same as in the first zone, but covered with transparent varnish. The fourth zone is the same as in the second zone, but covered with transparent varnish.
This test is a double control: the varnished areas of the test plates can be compared with the surface of the part, and the areas without varnish allow you to control the process of applying pearlescent paint before applying the varnish.
Car painting technology
Coating the body with Xerallic requires compliance with a number of requirements and application technology, otherwise the result will not only be disappointing, but will require repainting.
Preparatory stage
The procedure for painting a car requires careful preparation and procurement of materials. It is recommended to carry out the work in a warm, well-ventilated garage, but closed from contamination. The room must be clean, as dust particles will spoil the result.
To work you need to prepare:
- sander;
- abrasives;
- sandpaper;
- degreaser;
- primer;
- spray gun.
Before applying paint, the body is treated with a sanding machine. Considering the high cost of Xeralic. Some car owners resort to partially painting the body with glitter: the hood, wings, and parts of the doors. In this case, it is necessary to use masking tape and an orbital machine.
To obtain a high-quality coating, work must be carried out in good lighting, otherwise the shiny pigment will lie unevenly. Drafts are not allowed in the room: this will lead to uneven drying of the coating.
Paint application process
The Xeralik coloring technology consists of 3 stages. Each step is the application of a certain layer:
- The first is the substrate. This is the main body color, the basis for applying reflective particles. Standard automotive paint is used as a substrate.
- The second is a pigment consisting of 1 or 2 components. A special powder is dissolved in a transparent base - a bider. It is better to choose the color of the pigment as close as possible to the shade of the substrate in order to achieve a harmonious combination.
- The third is varnish. This is a topcoat applied as a protective layer. Masters advise applying varnish in 2 layers, with each layer drying in between. The first layer is polished to improve the xerallic effect.
It is recommended to apply layers evenly over the entire surface of the body, since even small deviations in proportions will lead to changes in color saturation in individual areas. Particular attention should be paid to the concentration of glitter: it should be the same on all parts of the body.
Shiny pigment is added exclusively to a transparent base. You should not add Xeralic to the substrate: in this case, the effect of overflow will not be achieved. If you add microparticles to the varnish, the surface of the body will become rough.
Surface preparation
In one of the previous articles, painting with a metallic transition was discussed in detail and presented schematically. In it we looked at repairing minor damage to the rear fender with a transition over the varnish on the C-pillar.
Let's complicate our task by the fact that the damage on the wing is quite large and located in the central part of the part. And since creating a transition on mother-of-pearl requires a lot of space, we won’t be able to create a transition within the element in this case. You will have to stretch the transition to the adjacent part (door).
When repairing three-layer coatings, the total number of layers is large, and a large area is required to create a transition. Therefore, it is often impossible to perform this repair within one part.
Another complication is color. In our case, under several layers of translucent mother-of-pearl there will be not just a colored substrate, but a base layer with metallic inclusions. According to the developers, such a coating looks even more beautiful (additional shine and depth), but during repair it creates additional difficulties, since in this case the transition must be made not only along the mother-of-pearl, but also along the substrate. For this we will use a colorless base.
As for surface preparation for partial repair of three-layer coatings, its steps are similar to those described in the above-mentioned article.
The priming area is treated with material graded P400-P500 dry or P800-P1000 wet. The remaining area of the part, as well as the adjacent element, is treated with Scotch-Brite gray modification (ultrafine) using matting paste.
Instead of gray Scotch Brite, you can use similar matting felt from other companies, or graded paper P800-P1000 when processed with a dry sander, or graded material P1200-P1500 when sanded by hand in a wet manner.
After matting, the part is thoroughly washed with water to remove paste residues, dried and degreased. Then, having dusted the part with a jet of compressed air and a sticky cloth, you can begin applying the first layers of coating.
Applying a colorless base
Before applying the substrate (especially if the substrate is not just colored, but with metallic inclusions like ours), it is recommended to apply a layer of transparent base to the part (or most of it), designed to eliminate the visible boundaries of the repaired area.
When repairing three-layer coatings, it is not advisable to apply a colorless base to the primer area. Since there are still many layers ahead of us, the likelihood increases that a large amount of solvent from these layers will affect the soil, sub-dissolving it. This may cause the edges of the primed area to appear.
And since the task of a colorless base is to accept particles of the applied material in the transition zone, we will apply it precisely in this zone, without wasting it on the entire surface.
In our case, the mixture is applied starting from the beginning of the door and somewhere halfway, closer to the handle - it is in this area that the transition will be located.
Application of the substrate
The base substrate is applied in 2-3 layers, each of which should cover a larger area than the previous one. Waiting time between layers is 5-10 minutes at 20°C.
Sometimes it is recommended that after applying two covering layers, add a certain amount of “pure” mother-of-pearl to the base composition and apply another 1-2 layers of this mixture to the surface, gradually expanding the area to be painted. This technology allows you to bring the base shade as close as possible to the mother-of-pearl layer and thus make its border invisible. But remember, in order to “crank out” this action, the base and pearlescent paints must be prepared in the same resin system.
Another important point. Since the thickness of a three-layer coating is greater than that of a conventional two-layer coating, there is a possibility of a decrease in the adhesion and strength characteristics of the coating during further operation. To prevent this, manufacturers often recommend adding a hardener to the substrate - this increases the adhesion between the layers.
Smooth transition when painting with metallic
Standard transition. 1,2,3 - sequentially applied layers of paint, overlapping each other by 10 cm. The first layer is applied to the repair area.
- Some colors will differ from the original color even if the paint is chosen correctly. Painting with a smooth transition is important so that the repair is not noticeable. Achieving a smooth transition from new to old paint, where it is difficult or impossible to determine, distinguishes a professional from a beginner.
- The standard and most commonly used method involves applying the first layer slightly behind the repair area (10-15 cm), the second - further than the first layer, and the third layer - even further.
- One of the limitations of the conventional fade painting method is that each new coat of paint is applied to a dry surface. Thus, metal particles may not adhere correctly, and these imperfections will be noticeable after varnishing.
Reverse transition. Layers of paint are applied starting from the area farthest from the repair area.
- The reverse transition technique is used if the paint has a complex color or the arrangement of metallic particles is important. Using this method, the painter applies the first coat to the furthest area first, then applies a coat closer to the repair area, and so on. Due to the fact that each layer is applied on top of the previous wet layer, the metallic particles in the new layer will fall as they should.
- You can also use a transparent base (diluted binder) as the first layer. This layer was written above. First, diluted binder is applied to the panel. Next, paint is applied using the standard or reverse transition method.
- At the end of each pass, you need to gradually release the spray gun trigger. You can read more about the smooth transition method in the article “how to paint without differences in color.”
Application of “mother of pearl”
We remember how many layers of pearlescent paint we need to apply (this amount was determined by the test) and 15-20 minutes after applying the substrate, we smoothly spray the required number of layers with a wait of 5-10 minutes between them.
You need to apply mother-of-pearl in such a way that the painted area covers the applied substrate, but does not extend too far beyond its border.
Remember that the thickness of the mother-of-pearl layer greatly affects the shade. Therefore, if two or three layers of mother-of-pearl are required to obtain the desired shade, you still need to “enter” the transition zone with only one layer.
To do this, it is recommended to use the narrowing method shown in the diagram below. The first layer is applied to a larger area, and the second to a smaller one, remaining “inside” the first layer. Thus, at the junction of the old and new coatings, we will always have only one layer of mother-of-pearl and the repair boundary will not be noticeable, since the paint is transparent and the color transition will look smooth.
Applying varnish
After 15-20 minutes, the surface is varnished using standard technology (two, one and a half, or one layer, depending on the dry residue). In our case, the transition over the varnish is not performed and both elements are completely covered with varnish.
If you need to do a varnish transition, follow the instructions in the metallic gradation article linked above.
As you can see, despite the more complex technology, surfaces painted with three-layer “pearls” are quite amenable to the same types of repairs as two-layer ones, including painting with a “smooth transition”.
The described technology will allow you to make the repaired coating indistinguishable from the original, even despite the certain technological complexity of “pearl” paints.
Source