Story
The first painted glass elements appeared hundreds of years ago. Throughout this time, they either lost their popularity or regained it. According to the found written sources, this was at the beginning of the 12th century. Drawings were created on such glass using special paint made from copper and iron.
Stained glass painting in the Middle Ages could only be seen in churches. A peculiar play of light immersed parishioners in a mysterious atmosphere of reverence. The Renaissance can be considered the peak of popularity of stained glass art. Many wealthy citizens began to prefer this type of window decoration.
In the 16th century, due to religious wars, glass painting as an art died out. The decrease in demand during the Enlightenment was influenced by the desire for transparency and the massive destruction of painted products. Only in the 19th century there was a revival of stained glass painting in Russia, thanks to the order given by Nicholas I to build a glass factory. This type of decor remains popular to this day.
Film paints
They are also called “adhesives”. Film paints are the simplest material. True, and the most unpredictable. After drying, the colors change significantly. Before using them in your work, it is worth making several samples. “Adhesives” form a translucent dense layer after drying, even if applied in a thin layer. This is their disadvantage. If the paint is applied too thickly, sloppy streaks will appear on the work.
Film paints are more suitable for activities with children. It will not be possible to create fine artistic work using this material.
The paints are applied to a transparent film, and then, after drying, the image is separated from the plastic base and pasted onto a smooth surface. Removing the design is as easy as applying it.
Where and how is glass painting applied?
By painting on glass, you can create amazing, stylish paintings with your own hands, using all the advantages of the material. Stained glass painting decorates windows, mirrors, various partitions and other interior elements. It is also used to decorate furniture - cabinet doors, kitchen facades. Even large objects will look light and elegant if intricate patterns are applied to them.
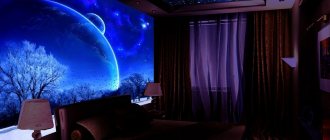
Decorate glass furniture in commercial office premises. These could be counters, doors, windows. In an apartment or house, this type of decoration is most often used in the bedroom, hallway, and living room. You can make a beautiful screen in the Hanami style and draw cherry blossoms. Such a zoning element will fill the room with the spirit of the captivating east. You can work with stained glass paints using the following techniques:
- Mosaic stained glass. Characteristic are geometric, floral patterns and carpet patterns;
- Painted. Absolutely all areas of the glass are painted. The paints are liquid, spread and mix, creating stains and new shades;
- Contour filler. First, an outline is drawn and a sketch is created. Then the space is filled with colors;
- Multilayer. Paints are applied in layers of varying degrees of dampness. In this way, the most realistic images are created;
- Spot painting. Contours are used to form an image. The saturation of the dots is changed by color and paint density.
Differences between fired and unfired stained glass paints
If you are just starting your journey as a stained glass artist, then it is better to opt for unfired stained glass paints. They are much easier to use than fired paints. Fired stained glass paints are used by venerable graphic designers.
In addition to being relatively easy to use, unfired stained glass has greater transparency and brighter colors.
For example, if you paint a glass vase with burnt paints and dry it in the oven, the colored areas will lose their transparency. And through the design created with unfired paints, you can easily see the back wall of the product.
If you are planning to paint window glass, then your choice will be unfired stained glass paints. They will provide the necessary transparency for the passage of light. In addition, window glass is very problematic, if not impossible, to dry by firing.
Required materials and tools
Stained glass painting is an imitation of ordinary stained glass using stencils and other artist’s tools. Their large selection allows both professionals and beginners to practice this type of art. To work with any glass painting technique, you will need special paints, brushes and some auxiliary materials (napkins, alcohol, palette, coating varnish, etc.).
Choice of colors
Material for drawing is presented in a huge assortment. When choosing paints, you should take into account their properties, abrasion resistance, and purpose. Glass paints can be used for decoration, professional painting of large objects, entertainment with children, and educational master classes. The expected effect is important - transparency, matte, glossy finish. The choice of paint is influenced by the subject of painting (windows, ceramic dishes, bottles, vases).
Some types of paints cannot be used to paint objects that come into contact with food due to their toxicity. There are materials that cannot withstand contact with water and detergents.
Acrylic paints
The composition includes natural and synthetic pigments, water, and binders. Acrylic paints are produced in a wide range of colors. They can be transparent, covering, or create a stained glass effect. The material varies in composition and method of hardening. For homework, it is better to choose a water-based base that dries quickly at room temperature. The main advantages include the following facts:
- Light resistance, smooth glass coating;
- Wide palette of shades, bright colors;
- Possibility of dilution with sparkles;
- Abrasion resistance;
- Do not spread when applying acrylic to glass;
- They do not have a pungent odor;
- Convenient packaging (jars, cans, tubes).
Stained glass paints
Diverse in composition, texture, consistency. They are divided into three main groups - organic solvents, water-based, acrylic mixtures. In addition to regular paints for beginners, there are mixtures with various effects and decorative inserts. Popular decor is created using the following materials:
- Sticky. Forms a thin film after drying. It can be removed from a convenient base and transferred to any surface;
- Chandelier paints. Have a metallic sheen;
- Volumetric. When fired, the mixture partially flakes off, creating a corrugated pattern;
- Granular. Special granules are glued with glue, and during heat treatment of the product they spread. The result is a pimply picture;
- Transparent mother-of-pearl. Apply over the base color and add additional shine;
- Structural. Available in jars in the form of a paste. After drying, they create an imitation of natural surfaces (stone, wood, leather);
- Paints with additives. Add various sparkles and luminescent pigments.
Gel paints
They have a thick consistency. The gel does not spread or slide down a vertical surface. The main area of application is painting mirrors, windows, doors, partitions. It is convenient to work with the mixture using stencil technology. Can be used to decorate glass plates and mugs.
You can work with transparent, opaque, translucent gel. Any shade from the palette can be combined, glitter can be added, and relief can be created using a palette knife. A stunning frosty pattern effect can be achieved by using translucent satin gel. Water-based mixtures do not require fixing and adhere firmly to the surface. If necessary, they can be easily removed by applying a wet cloth to them for several hours.
Ceramic (fired)
Used to decorate dishes, bottles, vases and other decorative elements of various shapes. In order to fix the special paint well, the objects are fired after painting. After which they can be washed with water without fear that the picture will peel off.
Ceramic paints are made by mixing clay, colorless glaze, fluxes, artificial and natural pigments. Depending on the method of application, the material can be underglaze or overglaze. For good adhesion, sugar and glycerin are added to the paint. The fired mixtures are applied to the product and subjected to heat treatment.
Film paints
Such mixtures are often used to decorate mirrors, windows, and shop windows for any holiday. Their peculiarity is that they can be deleted at any time. Suitable for frequent design changes when thematic painting is no longer needed.
When using film paints, the design will first need to be applied to acetate film. After the painting has dried, it can be easily peeled off and moved to any place. If the pattern is small, its template can be placed in a plastic file and traced along the contour with paints, then leaned against the desired element. Such paints do not adhere to the surface. Before cleaning or washing windows with a film pattern, the application should be removed. After the procedures you can return it back.
Markers
Ceramic and glassware, colored with a marker for painting on glass, looks very original. You can work with materials of various classes and sizes. The thickness of the rod and the smoothness of the line will depend on such indicators.
The drawing can be immediately applied with a marker or first made an outline with a simple pencil. After firing, the graphite will disappear, leaving only the colorful pattern. It is better for novice craftsmen to choose plain dishes with a smooth surface. In order to correctly provide for the proportions, you should draw up a sketch of the full size of the object.
Paints that require preparation
The art of glass painting is constantly being improved. From a once rare hobby it turns into a ubiquitous hobby. You can create an original design on a mirror, door, or vase with special paints, which have long been no longer in short supply. Anyone can try themselves in any of the techniques. In order not to spend money on large quantities of material, you can make your own paints using the following recipes:
- Gelatin-aniline mixture. Prepared immediately before work. This paint cannot be stored, so you should mix the solution only once. To prepare, you will need to pour 10 g of gelatin with three tablespoons of hot water, prepare powdered aniline dyes, and mix everything together. The fluidity of the mixture depends on its temperature;
- Nitro-oil composition. Creating your own paints allows the artist to fully control their quality. You can make it from any vegetable oil, it’s better to take flaxseed oil, and pigment. The coloring matter should be placed on the sanding plate, the oil should be added and mixed slowly using a muller;
- Soviet recipes. In the 80s-90s, paints from all kinds of available materials were used to paint glass. PVA glue was chosen for the base of the mixtures. It was mixed with food coloring, gouache, pen refills, acetone and various solvents.
Selecting Brushes
You can paint on glass with any painting brushes. They make it very easy to draw complex outlines of drawings. If the area is large, it is better to use large construction brushes with a rounded end. To apply the fixative and transparent varnish, wide models of brushes are used.
For glass painting, objects for painting with both natural and synthetic bristles are suitable. Natural bristles are best used for water-based and oil-based paints. After watching several master classes, you can quickly learn how to hold a brush correctly when working in various techniques.
Auxiliary tools and materials
The main working materials for painting on glass are brushes and paints. For each technique, special coloring mixtures and auxiliary materials are selected. The following methods to simplify painting are often used:
- Lead tape. Adhesive strips create a stained glass effect;
- Outliner. The colored paste in the tube lays out in a thin pattern on any surface. After hardening, it forms a relief contour that prevents paint from spreading;
- Masking tape. Protects transparent areas from accidental staining;
- Palette knife. A metal spatula is used when decorating large objects;
- Tools for fixing errors. While the paint is still wet, you can wipe it off with a cotton swab dipped in water or solvent. The still unhardened edges of the contour are smoothed with a toothpick;
- Materials for templates. Most often, paper and film stencils are used. For products with complex shapes, you can use a simple pencil, a disappearing outline.
Synthetic solvent based material
Stained glass paints are divided into two types. The first includes water-based paints. The second one is based on a synthetic solvent. The latter type has a number of advantages and is one of the materials used by professional craftsmen. The use of stained glass paints based on synthetic solvents requires some experience. By the way, their cost is relatively high.
The craftsman recommends using water-based paints at the initial stage. With their help it is easy to apply patterns. Over time, it is worth switching to materials based on a synthetic solvent.
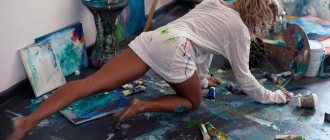
DIY glass painting
An ordinary person, who has not even studied the basics of decorative and applied art, can engage in this type of artistic creativity. Painting on glass at home has become possible thanks to the simplification of technology, a large selection of materials for work, their low cost, and the ability to use stencils.
You can draw on a glass surface yourself at any age, even together with all family members. With each new craft you will gain experience. In the future, the acquired skills will allow you to create a magnificent, original design on the surface, turning a nondescript glass vessel or object into a masterpiece. The main thing in this matter is patience and accuracy.
How to prepare glass for painting
Having firmly decided to bring the idea to life and start painting on glass, you first need to choose an object that will be the basis for the work, be it a window, glass, bottle, plate, mirror or other objects. For beginners, it is better to use a base with a flat, smooth surface, since it is difficult to work with curves and convex places, the paints spread on them, and a complex design may look bad and may not meet the design or requirements placed on it.
Having decided on the element, it is necessary to prepare its surface. If the craftsman is satisfied with the color of the product as the main background, simply wash it with soapy water, then rinse with clean water. If there are labels, the glass object should be immersed in hot water for a quarter of an hour, then remove any remaining glue. To prevent lint from the towel from remaining on the glass, it is better to let it dry on its own. When the item is completely dry, it must be degreased; this can be done using an alcohol-containing liquid.
If you want to change the background color, after all the preparatory operations, you need to cover the surface with a special layer of primer (primer) and wait until it dries. Next, apply two layers of acrylic paint of a suitable color. The next layer cannot be applied until the first one is completely dry. At the final stage, the glass element is varnished.
How to transfer a drawing to glass
Having decided on the image, the next step is to display the design on the glass. There are several ways. The fastest way is to immediately draw a picture on the glass surface. However, only a specialist who is confident in his abilities can do this. It is better for a novice master to use the following simple techniques:
- Place the sketch under the glass. Having placed the image under the glass surface, use a contour on the glass to redraw it from above. This method is perfect for flat, smooth, transparent objects. If the element has a round, complex shape, where it is impossible to attach the paper, even using tape, it must be slightly wetted in water, after which it will become pliable, take almost any shape, and will stick well to the glass without additional clamps.
- Copy paper. For opaque objects, bottles with a narrow neck, and mirrors, a paper pattern is unacceptable. In this case, it is better to use a carbon copy. The main thing in this method is to attach the sketch and carbon paper well to the surface of the object. If the image accidentally moves, the work will have to be done again.
- Cling film. A piece of cling film is placed on top of the prepared drawing, and for reliable fixation it must be larger in size than the sketch. Using a glass marker, draw contours along the surface of the packaging material. Next, the film with the translated image on the front side is fixed on a glass object so that there are no voids or folds between them. Using a bamboo stick and a gel pen, carefully trace the contours. As a result, the marker will be transferred to the glass.
Stencil technique
Stencils allow anyone to paint on a glass surface, even if they are very bad at drawing. At the same time, finished products can be bought at specialized retail outlets, but many craftsmen prefer to make them themselves, which allows them to choose any image they like. To do this, just lay a sheet of loose paper over the drawing, trace the contours, and cut out the blank along them. Let's look at step-by-step instructions on how to work with templates:
- We prepare the surface of the selected object, degrease it.
- Lay the stencil evenly on a plane. Using tape, we fix it in the corners and around the perimeter. You can also use temporary spray adhesive to avoid accidental shifts of the template, which can negate all the work done.
- Now we begin painting (for this method you can use stained glass and acrylic paints). Apply the coloring agent to the surface.
- It is better to paint from the borders to the center; you need to pick up the paint little by little, apply it in a thin layer, removing smudges and excess with a napkin.
Point technique
This method is also called point-to-point. To draw an image using a non-traditional drawing technique, you will need to purchase contour paints. It is better to start getting acquainted with this species on simple, unnecessary objects. Let's look at a simple master class on applying a dot pattern in the form of a flower to the surface of a glass:
- We take a ready-made sketch of the required size. It can be printed on a printer, cut out from a magazine or book.
- Using temporary spray adhesive or soaking the paper in water, fix the image on the inside of the glass.
- Degrease the outer surface of the container.
- We draw dots along the contour of the drawing, preferably of the same size, and they should be evenly spaced from each other. For work you can use any colors you like.
- Having outlined the outline, we begin to fill out the drawing. Dots are also plotted here. To do this, you can use a different color or shade of the main one.
- After the paint layer has completely dried, it is advisable to apply a colorless varnish to the picture.
Contour technique
For work use contour paints. Initially, the drawing is outlined, and after it dries, the internal voids are painted over. This method allows you to divide the process into several stages and make a detailed drawing of the picture. For clarity, let’s look at a master class on drawing contours on the surface of a plate:
- We prepare the surface of the kitchen utensils.
- We apply the prepared stencil, using a marker we transfer the outlines of the image onto the plane of the object.
- Having removed the template, we begin to apply contour paints to the resulting lines. It is better to use a thick composition, with its help you can create the smoothest lines.
- To avoid line joints when working, semicircular and curved boundaries must be drawn in one motion. Straight lines are the most difficult and require some skill.
- In the body of the image itself, you can additionally draw different patterns and curls.
- After the outline has completely dried, you can begin painting.
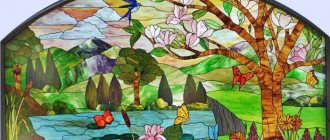
Stained glass painting
There are several techniques for simulating artistic stained glass: photo printing, film stained glass, poured glass, artistic painting. We will study the first methods a little later. Let's take a closer look at the last option. Let's look at how to paint a window using stained glass paints:
- We prepare the base and degrease it.
- We apply the prepared template to the glass surface, fix it, and trace the contours with a pneumatic marker.
- Using black acrylic paint, draw the marked lines.
- After complete drying, use a brush to paint over the empty cavities of the picture.
- Stained glass paints are distinguished by the fact that they spread a lot, so it is not recommended to apply another color before the previous one has completely dried, in order to avoid the possibility of mixing colors. It is also better to use varnish substances based on organic resins for work.
- After completing the drawing, it must be completely dried naturally. If you use a hairdryer to dry it, the paint may subsequently crack or darken.
- At the final stage, when the surface is completely dry, it is necessary to coat it with colorless varnish.
When changing colors, you must thoroughly wash the brush and wipe it with a cloth.
Filled stained glass
The best way to imitate real stained glass. For work, it is advisable to use contour and stained glass paints from the same manufacturer. On large surfaces, you can use stained glass lead tape, which will also prevent coloring substances from mixing and spreading over the surface. Let's look at the step-by-step instructions for making stained glass on glass for an interior door:
- We create a sketch ourselves. If we don’t have the skills, we download ready-made projects online.
- We attach the selected pattern to the bottom of the prepared base and secure it with tape.
- Draw all the lines on the surface of the glass using a contour. The height of the contour mixture depends on the planned thickness of the paint layer, which affects its transparency.
- Having dried the workpiece, we proceed to filling the resulting cells. This can be done with a brush, or more quickly using a syringe. It is necessary to fill from the edge of the line to the center. We carefully remove the leaks.
- The cells must be filled one at a time. Upon completion of painting, the structure is dried, after which it can be installed in the doorway.
Marbling
A fashionable new technique for decorating glass objects. Both flat glass and voluminous candlesticks and various glasses are suitable. With this simple technology you can create unique things. This master class will tell you how to decorate a set of glasses:
- Fill a deep container with water, drop a few drops of paint into the center for marbling;
- When the dye spreads over the entire surface, drop in another color, then a few more different ones and dilute;
- Stir with a long wooden stick, forming a beautiful pattern;
- When the pattern is ready, carefully take out the stick so that the paint does not drag on it;
- We degrease the wine glasses using a rag and alcohol, seal the top edge with construction tape and immerse the objects one by one in water;
- The glasses must be moved in the water, as if winding a pattern.
Painting with film paints
To work, you will need film paints of the required colors, acetate film or a regular file if the template is small. We place the drawing under a transparent film and trace its outline using a special modeling outline. Any unevenness can be corrected with a simple toothpick or match. Now the picture should be left for 12 hours to dry.
We paint the drawing with film paints, stretching them with a brush or toothpick so that they come into contact with the outline. After complete drying, up to 24 hours, the painting can be removed and transferred to any glass interior item. It is better not to decorate outdoor windows in this way, since their surface can collect condensation.
How to pin a picture to a stack
After finishing the work on applying paint to the glass, the picture must be secured. To do this, you can use various varnishes and a special spray. Stained glass mixtures based on water or solvent are coated with transparent varnish. If you don't have such material on hand, you can use hairspray that is transparent for nails.
There is no fixer for film paints, but such an application can simply be removed and transferred to any other place while wet cleaning takes place. Paints for firing can be cured in a conventional oven.
Precautions when working with stained glass paints
When paint dries, it releases toxic fumes. Therefore, you should only throw away used jars and tubes when they are closed. Items decorated with stained glass paints must be dried in a well-ventilated area. Keep household members and animals away.
Contact with skin may cause irritation or itching. Therefore, if this does not cause much inconvenience, it is better to work with stained glass paints with gloves.
If you accidentally swallow paint or get it on your mucous membranes, you should immediately consult a doctor. The eyes and nose should be rinsed immediately with plenty of water. Be sure to show the specialist a jar of your paint.
All paints are flammable and flammable. Keep them out of the reach of children. Their location is not allowed near heating and heating devices, as well as near sources of open fire.
Table 2. Stained glass painting in the interior.
| Application | Feasibility of decoration | Peculiarities |
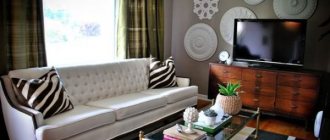
| Paintings | Stained glass windows made with paints look like watercolor paintings. At the same time, they do not fade from direct sunlight and can be washed. Pictures on glass can be hung on any wall: the rays of the sun will not discolor the composition, and in dark rooms it is possible to use stained glass lighting. On a glass canvas you can reproduce various scenes and various drawing techniques. The size and geometric shape of the glass base of a stained glass picture depend only on the wishes of the customer. | Glass paintings can be decorated with stained glass inserts, rhinestones, semi-precious stones or beads. Such paintings can be framed with imitation frames, flat (painted), three-dimensional (made using other stained glass techniques) or placed in a baguette. |
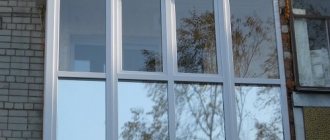
| Window | Stained glass painting can occupy the entire area of the window, covering up the unsightly cityscape. Stained glass painting can be located around the entire perimeter of the window, only along the vertical part of the frame, only on one sash, in the corner of the window - depending on the customer’s wishes. | At night, the painting will be practically invisible, so such windows are often equipped with lighting. |
| Doors | Doors can be decorated in various ways: stained glass painting can occupy their entire area, or be only on glass inserts, the geometric shape and size of which do not matter when decorated in this way. Both frame and all-glass doors can be decorated with painting. | Doors with painted stained glass will be appropriate in any interior, since an experienced artist will create an image that will organically fit into any style of the room. |
| Ceilings | Stained glass painting can occupy the entire area of the ceiling or be placed on it in the form of inserts. Using stained glass painting you can decorate ceiling lamps and chandelier shades. All ceiling structures decorated with twist painting are much lighter than ceilings decorated using other stained glass techniques. | The pattern of stained glass painting on the ceiling can be repeated on the shades of wall and table lamps, floor lamps or night lamps. In addition, with the overall design of the room, a pattern of stained glass ceiling painting - or its individual elements - may be present in the interior decor. |
| Partitions | Using stained glass painting you can decorate the entire partition or part of it. Painting can be present not only on the glass inserts of the partition, but also on elements made of other materials. Stained glass painting on the partition does not increase the weight of the entire structure, which eliminates the need to use additional reinforced fasteners. | A partition decorated with stained glass paintings can be equipped with lighting and serve as an additional source of lighting. |
| Tables | Stained glass paintings can be used to decorate tabletops and table legs separately. The pattern on the tabletop can be located around the perimeter, in the center, in the corner, or fill the entire surface of the table. | The table and other objects in the room can be decorated similarly to each other at the request of the customer. |
| Kitchen fronts | Stained glass painting in the kitchen is resistant to water, elevated temperatures and household gas combustion products. Not only the facades of kitchen cabinets and cabinets, but also the aprons on the walls are decorated with painting. | In the same style as the facades of cabinets and cabinets, you can decorate the ceiling lamp, door or table with chairs with stained glass painting in the kitchen. |
| Wardrobes | Individual pieces cannot fall out of this stained glass window - it is the most traumatic, which is especially important for families with small children. Stained glass painting is not afraid of exposure to direct sunlight and allows you to decorate the entire surface of the cabinet facade. Sliding wardrobes with stained glass paintings are equipped with lighting and can serve as an additional source of lighting in a dark room (for example, a corridor). | Wardrobes, the facades of which are decorated with stained glass paintings, can become an independent element of room decor. |
Algorithm of actions
Glass painting is a creative process. However, in your work you need to follow a clear algorithm:
- Prepare the product. There may be labels on the glass, glass or vase. The product should be placed in hot water for fifteen minutes. Then clean the glass thoroughly.
- Degrease the surface. This should be done using a cotton pad and a liquid containing alcohol. Then the product must be thoroughly dried.
- Select the required sketch and transfer it to the glass.
- Outline the ornament, then carefully remove the excess.
- Fill in the details of the image with paint. Dry.
The method of filling parts with paint depends on the type of material. Acrylic paint is applied in strokes. For this, brushes and sometimes a sponge are used. It is better to apply stained glass with a brush with a very thin tip. In this case, the surface of the product must always be in a horizontal position. Otherwise the paint will bleed. And you need to start from the edge, generously filling the elements with paint. Thanks to its high fluidity, it fills the contour with a thin and transparent layer.
Some paints require baking. You need to read the instructions carefully. Thus, alcohol-based stained glass paints do not require baking. They can withstand washing in hot water. But painting on glass with acrylic paints involves firing. The main thing is to set the temperature and mode correctly. Otherwise, the paint will change shade or burn.