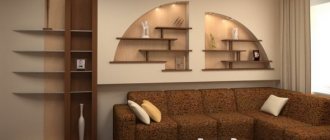
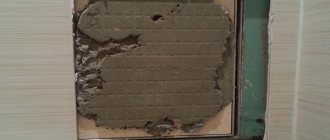
A plasterboard niche is a great way to transform a space without making any major changes. And the built-in LED lighting will make such a design light and airy.
Plasterboard slabs can be called one of the best inventions intended for construction. Note that currently not a single repair can be done without this material. Thanks to plasterboard, there is a great opportunity to implement the most original ideas in interior design: hanging multi-tiered or single-level shelves, window slopes, various kinds of niches. In addition, plasterboard is very often used for leveling walls and zoning rooms using partitions.
Peculiarities
Drywall can be considered one of the best building materials. Rare repairs can be carried out without using its sheets. There are a large number of available options for its use - ceilings with one and several levels, slopes, smooth walls, partitions and screens. Among these and many other options for using drywall, the niche is not the least important.
The advantages of gypsum boards are quite obvious:
- lack of toxic properties;
- strictly standardized sizes;
- possibility of use in a variety of conditions;
- ease of decoration.
The plasterboard slab is always 120 cm wide and the length is either 250 or 300 cm. The material used for the walls is 1.25 mm thick.
A thinner gypsum board (0.95 cm) is used for ceilings, and for arches an even thinner option (0.65 cm) is needed.
Plasterboard niches are much better than the usual exquisite furniture , because they allow you to abandon bulky hanging shelves and whatnots, and original-shaped stands. Such designs are not very practical, are not suitable for every interior and often serve only as dust concentrators. With the help of recesses, it is easy to place the most important and pleasant things for people on the walls, give them a new meaning and radically change the atmosphere in the room. In addition, you can remodel the appearance of a room very quickly and at minimal cost.
This is interesting: Plasterboard ceilings in the interior (16 photos): design options and ideas
How to close a hole in a wall using drywall. Step-by-step instructions with video
Indoor construction or renovation work often involves major changes. Redevelopment of structures should be approached very responsibly; project approval will be required.
After moving the door blocks, you will need to cover the opening in the wall with plasterboard to create a single plane. The use of gypsum plaster boards in this case is more appropriate, since it ensures fast and high-quality implementation of all activities.
Backlight options
To decorate a plasterboard niche, you can use different light sources. Today the most popular are:
- Spotlights;
- neon lamps;
- LED Strip Light.
Niches for decoration in the living room
Spotlights are the most difficult to install - they require additional wiring. Therefore, the installation of such lighting must be planned at the renovation stage. Once the walls are painted, it will no longer be possible to place spotlights in a niche.
To illuminate a niche, you can use LED strip, spotlights or neon lamps
Neon lamps are suitable for unusual, stylish interiors. They are not cheap, so they are rarely purchased. Such lighting creates a special atmosphere in the room. LEDs are often used to decorate plasterboard niches and arches. This tape is easy to install and highly secure.
Many niches in the living room
LED strip for a niche
It is widely used for decorating rooms, as it has low energy consumption, lasts a long time and shines brightly. Therefore, the tape is used to illuminate deep niches.
Plasterboard niches in the bedroom
The product bends easily and is suitable for unusually shaped wall recesses. For example, it can be installed not only in a square niche, but also in a round or oval one. LEDs hardly heat up and are considered a safe and environmentally friendly material.
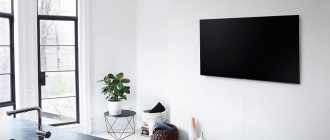
Niche for a TV in the living room interior
Spotlights
They are suitable for the hallway and bedroom: they are usually placed one at a time in small niches. With the help of such lamps you can focus on the items on the shelves: beautiful vases, expensive figurines, original souvenirs. These lamps are suitable for decorating a mirror in a hallway.
Refrigerator niche in the kitchen
This is not just illumination of a niche, but a full-fledged source of lighting in the room. Therefore, at the renovation stage, you need to plan where the lamps will be located, and whether their light will irritate. If necessary, they can be easily replaced by sconces.
Niches for flowers in the hallway
Neon lamps
They create a special atmosphere, formal or private. They are more often used to decorate interiors in the art deco, loft, techno, and minimalist styles, but they can also fit into the classic style.
Plasterboard niches in a modern living room with a fireplace
Neon lamps are made to order for a specific interior. Consumables are expensive, which is also reflected in the final price of the entire backlight.
Niches for vases in the corridor
Preparatory activities
Drawing up a drawing
No one will work “blindly”. Therefore, you need to choose a place and take all the necessary measurements, taking into account the volume of the niche and the convenience of attaching its frame to the wall, not only with your own hands, but also with the help of tools available in the house. It is hardly reasonable for the owner of a city apartment to purchase, for example, a grinder especially for such a one-time job.
Remaining material after cutting it is, as a rule, an extra expense. Whether profile trims, slats, or small fragments of gypsum boards will be useful on the farm is unknown and unlikely. All materials necessary for home-made niche production are sold in the form of blanks of standard sizes.
To reduce the amount of waste, it is advisable to correlate it with the dimensions of the place where the structure is supposed to be installed, thereby optimizing costs. Consequently, design features depend on the products (samples) that are intended to be purchased. By the way, this particular nuance is often not taken into account if something is done in the house with your own hands.
The dimensions of the niche compartments in those places where household appliances (for example, a TV) are supposed to be installed on the shelves should be slightly larger than the size of the equipment. This is due to the need for natural cooling of the equipment in operating mode. Otherwise, overheating and equipment breakdown are inevitable.
Technology for creating plasterboard niches
GKL is a universal material used in finishing premises and constructing partitions. The surface created with its help is perfectly flat, ready for final finishing, after which the seams become invisible. A plasterboard wall in the living room can be found in almost every apartment that has undergone a major renovation. An additional advantage of the material is the ability to bend it, design arches, waves and install any other curved elements.
The process of creating a niche from gypsum plasterboard in the living room is divided into 4 stages:
- A profile is applied to the wall, holes are made through it using a hammer drill, into which dowels and screws are driven. The distance between the fastening elements is 40–50 cm. In this way, the outline of the future structure is collected.
USEFUL INFORMATION: How to make a frame for a mirror from ceiling plinth
- To give volume to the decorative element being built, cross members are installed along the entire perimeter of the product perpendicular to the wall. They are also fastened using self-tapping screws. If the height of the niche reaches the ceiling, the upper crossbars are attached to it, and the lower ones to the floor.
- The outer contour is formed along the edges of the crossbars. At the same stage, electrical wiring for spotlights is installed.
Make sure that the cables do not touch the profiles; it is better to hide them in corrugation or plastic boxes.
- The final stage of constructing a niche is lining it with plasterboard. Having carefully measured each of the sections, cut the sheets into pieces of a suitable size. Fix the slab fragments to the profiles using self-tapping screws. The distance between fastening elements is up to 20 cm.
After installation, the surface is puttyed and finished.
The nuances of covering gypsum board niches
This process has several features.
- When adjusting gypsum boards, try to avoid large gaps, this is especially true in corner areas. After all, even after careful finishing they can crack.
- If the construction of curved surfaces is envisaged, it is recommended to use a special, thinner type of material: the so-called arched plasterboard. It bends much easier than standard wall or moisture resistant.
- To give the appropriate shape, do not wet the sheets; after drying, they become more brittle. It makes more sense to use the “dry” bending method, making transverse cuts and filling the resulting gaps.
- When puttying, the joints are sealed with reinforcing mesh and a special putty compound for seams.
Plasterboard finishing
After complete assembly of the plasterboard structure, it is gradually prepared for finishing:
- The corners are additionally covered with special perforated corner pads - this helps protect them from damage. To do this, putty is applied to them in a thin layer, into which a corner is pressed, the excess mixture comes out through the perforated holes and is easily removed with a spatula.
- The seams are additionally glued with reinforcing mesh and sealed with putty on top. After drying, sanding is carried out.
- The holes from the heads of the self-tapping screws are also sealed with putty, and after drying they are rubbed in the same way as seams.
- The niche is covered twice with a primer mixture. The second layer is applied only after the first has completely dried.
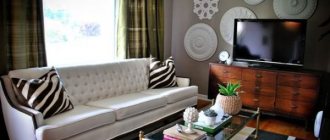
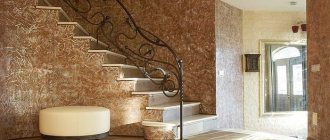
Living room interior with niches
In addition to hiding electrical wiring, communications and wall defects, niches in the hall successfully perform decorative and design functions. Their use in the living room is an excellent interior solution that fits into almost any stylistic direction from modern high-tech to classic or minimalism. They will become an attractive and stylish accent.
USEFUL INFORMATION: Which stretch ceilings are better: choose together
Several options for designing niches in the living room:
- The coloring for this element can be done to match the main shade of the room or, conversely, in a contrasting color scheme. Other materials are also used for decoration - decorative stone, moldings, mosaics, stained glass.
Molding is an overlay strip, an original decorative element that fits organically into the design of niches.
- In small living rooms, mirror inserts are often used to visually expand the space.
- If a niche serves as a partition for dividing and zoning the living room, then to give the wall a feeling of integrity it can be draped with fabric and decorated with stained glass.
Photos on the Internet and thematic magazines will help you correctly fit a plasterboard niche into the interior of the living room. If selected correctly, such designs will increase the visual appeal of the room, become a bright central accent, or, conversely, hide some unpleasant features of the layout from view.
It is also important to consider the lighting used. With the help of built-in spotlights, you can create spectacular illumination of treasured trinkets, books, and household items placed on the shelves in the living room.
This is interesting: Plasterboard partitions in modern apartments: ease of design (52 photos)
Shapes and sizes
Take a close look at your living room. Its shape, size, and finish will tell you how best to decorate the niche.
For rooms with narrow, long furniture, a horizontal recess is suitable, while a vertical recess will fit perfectly next to a window or door against the background of large furniture. It is worth considering the option of a corner niche: without cluttering up the space, it will bring freshness to your interior. In addition to standard niches in the wall, floor niches are very popular today. They are used for large vases and TVs. To disguise curtain rods, niches in the ceiling are used, creating the effect of textiles flowing from the ceiling. Whatever place you choose for the niche, it is important to remember that it should not be blocked by furniture.
If you wish to disguise the appliance, the surrounding wall design must match. A modern design is best - clear lines, glass and metal inserts.
It is not necessary to maintain correct lines and equal distances. Complex geometry will only enhance the effect of the new element.
Adding a variety of lighting will highlight the design of the room. It’s worth thinking about this at the niche design stage in order to install all the necessary lighting fixtures on time. It will be too late to do this after registration. There are a lot of lighting options: lighting devices can be different in color and shape, located around the entire perimeter or work in a single point. LEDs are in demand. Their advantages include soft diffused light, ease of installation and cost-effectiveness.
Be sure to consider the expected load on the niche, especially if you plan to use internal shelves.
Having familiarized yourself with all the nuances, you can begin to design a niche.
Kinds
Using niches you can place, for example, a curtain rod for hanging curtains. A hidden version of such a device cannot be noticed from the outside; the observer only detects canvases descending from somewhere above. No distractions!
The portal is most often formed on the basis of galvanized profiles ; the wall is prepared in advance and sheathed with the original layer of gypsum plasterboard. To create niches, it is recommended to use sheets 1.5 cm thick, because individual elements of such recesses can be large and are designed to withstand hanging televisions and other structures weighing up to 10 kg.
It makes sense to illuminate niches for refrigerators from the inside by placing a strip of built-in LEDs under the very edge of the ceiling. As with other lighting options, the wiring location should be made as close as possible to the existing electrical network.
You can also hide in niches:
- corner wall;
- closet;
- curtains and battery.
Examples
Let's look at some successful examples of designing niches in the interior.
In this room, niches completely occupied one of the walls. Since the room is quite spacious, there were no plans to expand the space. Vertical recesses only emphasize the height of the ceilings. The central niche is used as a place for a TV, and the rest are used as shelves for decorative elements. Glass inserts emphasize the modern style in which the living room is designed. The designers used the same color for all walls. By adding spot lighting, they provided accent to the necessary areas.
The next photo shows a very similar use case for a niche. The difference is the color combination of the recesses with the upholstery of the sofa. The impression of a single harmonious image is created. The contrast of colors brings freshness to the interior, making the room cozy.
A great example of using niches instead of a cabinet. This option is suitable for both spacious rooms and standard halls in the Khrushchev building. This use of wooden inserts gives the room a sense of security and stability. The shelves are used to store decorative items, each of which is favorably emphasized by light.
By placing the bed in the recess of the living room, the owner of the room combined a bedroom and a living room. By adding an original curtain, we will get a secluded and calm place to relax.
The owners of this apartment chose to abandon smooth, straight lines. A partition with built-in niches helps to unobtrusively separate the dining area and kitchen area from the living room. They can be used to store books, indoor plants or left empty.
With the right approach, you can simultaneously use several forms of niches, correctly combining them with each other.
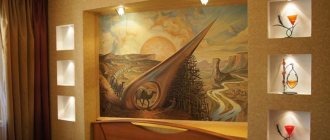
Using other textures
There are several ways to decorate a niche using stone texture. In this photo, the corner niche is only partially decorated with stonework.
Here we see a wall made entirely of stone.
The interior space can be decorated with a contrasting color, or you can add sophistication with the help of a mirror. Lovers of the loft style will love the design using brickwork.
The recesses decorated using wood look noble. The combination of dark tones, sandy elements and warm lighting looks advantageous.
Drywall products can be attached to any wall and fit into any design. It is a mistaken opinion that they are appropriate only in expensive, luxurious interiors. They can be used even in the most modest apartments. A competent design, color scheme, plus highlighting lighting - and you are guaranteed a beautiful and unique living room design.
See below for a master class on creating a niche from plasterboard.
Bonus: 4 original ways to arrange an alcove niche
Most often, alcoves are either features of the space configuration, or are provided for at the rough stage of renovation. But there are several more design ways to get this functional interior detail.
Between the top and bottom cabinets
Take a look at the photo: this recessed niche appeared thanks to the distance left between the upper and lower cabinets in the hallway. This helped to make the most of the space, organize storage vertically, and at the same time leave a little visual lightness and air.
Niche between cabinets in the hallway
Between the wall and the closet
This alcove is also equipped without any “wet” work: it was formed thanks to the gap between the wall and the storage system.
Advice . In the same way, you can use, for example, the space between two cabinets or shelving.
Niche between wall and cabinet
Around the window
An interesting move is to visually separate the space around the window and create a kind of niche area.
Advice. It is not necessary to address the physical arrangement of the alcove (changing floor and ceiling levels and other additional cost items). You can limit yourself to highlighting the area with color, finishing materials or textile curtains.
Niche around the window
Main types of drywall
Drywall is absolutely harmless to humans, non-toxic building material. It is produced in the form of slabs, the basis of which is gypsum, lined with special cardboard. The produced material has the dimensions established by the standards: width 120 cm and length 250-300 cm. The most common three types of plasterboard: arched, wall and material for decorating the ceiling surface. Drywall can be divided into types according to its area of application:
- GCR is a universal material. It is used only for decorating dry rooms. The color of the plate is gray with blue markings.
- GKLV can be used for finishing work in rooms with high humidity levels. The color of the plate is green with blue markings.
- GKLO is a building material with an increased level of fire resistance. The color of the plate is gray with red markings.
- GKLVO is a material characterized by a high level of resistance to moisture and open fire. The color of the plate is green with red markings.
Today, various types of niches and partitions made of plasterboard are especially popular. With their help, you can divide the room into certain zones. Let's take a closer look at how this is done and which options are most in demand.
Selection of materials
For frame
There are few options for a niche - wood or metal profiles.
From a practical point of view, it is better not to mess with wood, regardless of the specifics of the room. The main reason is that it gradually dries out, and changes in humidity and temperature have an effect. As a result, the entire structure will “lead” over time. And since drywall, by definition, is a fairly brittle material, a niche whose frame is assembled from wooden slats will not stand for long.
Metal profiles for drywall can be different, so it is wiser to opt for aluminum - the weight is less, the workpieces are cheaper, and processing is easier (since the material is soft).
For covering a niche
There are several types of drywall on sale. One thing is certain - for a niche it is necessary to choose products in the “moisture resistant” category. But in terms of thickness, you should focus not only on the shape and dimensions of the box, but also on the purpose of the shelves. If you are not going to put something massive on them, then arched plasterboard is quite enough. Its thickness is less than its ceiling and wall counterparts (about 6 mm), respectively, and the cost is lower.
How to do it yourself?
Step-by-step instructions for making a plasterboard niche always begin with preparation and collection of the necessary material part.
Home DIYers will need:
- several guides (made of wood or metal);
- plasterboard sheets;
- construction level;
- screwdriver and drill;
- dowels and screws;
- putty;
- putty knife.
The installation of the frame must comply with the drawings; The guides are fastened to the walls using dowels; they can be tightened together with self-tapping screws. However, structures included in a metal profile can also be connected with a riveter. This option allows you to avoid cracking of the drywall or not fitting it tightly enough to the guides.
The sheets placed on the frame are covered with plasterboard and puttied. The options for subsequent finishing are quite varied. This includes painting, wallpapering, decorative stone, and cladding with ceramic tiles. Shelves installed in addition to niches can be wooden or glass. The decision must be made in accordance with the dominant style in the room. All that remains is to place the desired interior items there and enjoy the result.
Preparing a niche for installing a TV with your own hands is quite possible. For work you will need aluminum profiles (ceiling-wall, guides and flexible). You will definitely need a number of hangers, connecting components, angles and extensions. The gypsum board and profile are secured with self-tapping screws, sometimes dowels are used. In most cases, you can get by with standard sheets of drywall, but there may be situations where arched material is required.
The gypsum board will need to be puttyed and primed, and all seams and joints will be sealed using serpyanka tape.
Before the production of a plasterboard niche begins, it is necessary to clearly determine whether it will protrude outward or recessed inward. The second method will require covering a significant part of the wall with sheets of material, but such a solution makes the space more expressive.
It is equally important to select the configuration of the element being created:
- rectangular (horizontally or vertically);
- square;
- oval;
- curved shape;
- original design.
The principles are well known to everyone - if the line is extended upward, it will help raise the ceiling, and if directed horizontally, it will expand too narrow walls. Atypical geometry is justified only if the room itself has a shape different from the standard one. But with the usual straight walls, various experiments are not always compatible, and if they can be carried out, then only on the instructions of an experienced designer.
To improve the area around the TV, you can make a number of shelves for sound equipment and decorative elements. Often they create racks or cabinets that, together with a niche, form an integral ensemble. Important: always leave 50-70 mm from the back wall of the TV to the niche so that you can safely place cables and provide ventilation. Free space should also be left around the perimeter of the screen.
When installing guide profiles, dowels can be placed a maximum of 0.4 m apart from each other. Then comes the turn of the vertical parts (ceiling and floor). The frame is covered with plasterboard gradually, and first of all they work with the most complex elements. The screws are placed at a distance of 25-30 cm.
In addition to primer, putty and serpyanka, you need to use a metal corner with perforation (they cover the outer edges).
Sequence of work
We list the sequence of work that allows you to decorate a wall aesthetically and correctly:
- Marking - drawing on the wall the location of the recess, its shape and size. This is done using a pencil, tape measure and ruler. If there is electrical equipment, indicate the location of the electrical cable and the location of the built-in socket and lamp.
Mounting frames made of metal profiles on the wall - for this, metal guides are cut to size and connected in the form of frames. Inside the frame, jumpers are made along the width - every 400 mm. The width of the frames determines the depth of the future niche.
To cut the profiles you will need metal scissors. To connect them together, use small self-tapping screws with a drill head, 9 mm long. The frames are screwed to the wall at the marking location. They are placed perpendicular to the wall. The horizontal and vertical profiles on the wall are checked with a level. For curved and arched shapes, a flexible profile is used.
Note: if the walls of the room were initially uneven, it is necessary to level them and create a “base”. Otherwise, there will be gaps between the side surfaces of the niche and the wall.
The assembled frame is covered with gypsum board sheets. To do this, they are cut to a specific size. Cut them with a drywall knife. Pass the edge of a knife along the surface of the gypsum board and then lightly hit the sheet of gypsum board. The sheet breaks where it is cut with a knife. After that, the finished pieces of drywall are applied to the frame and screwed with self-tapping screws. To do this, use self-tapping screws 25 mm long and a screwdriver or screwdriver.
The sequence of covering is the side surfaces first. Then - all the others. If there are sockets and lamps, holes are cut in their locations. For curved and vaulted recesses, arched plasterboard is used - it is bent, as when arranging arches and round columns.
Important: the heads of the self-tapping screws are deepened flush with the surface of the gypsum plasterboard, “set in flush.” This will make it easier to putty joints and recesses and will allow you to obtain an absolutely flat interior surface.
Further operations are performed if the drywall is planned to be covered with paint, plaster or wallpaper.
- Primer – performed with an adhesive mixture. Priming the surface improves its adhesion and ensures high-quality fastening of the future putty to the drywall.
- Alignment and sealing of joints and seams with reinforcing sickle tape. It is glued on PVA. Before gluing the serpyanka, the edge of the gypsum board sheet is cut to a chamfer, approximately 25°. This will allow the joints to be aligned without any bumps.
How to position?
The ideal placement of a plasterboard niche in a hall requires familiarization with basic design principles. Most often, such structures occupy the center of the room, although they can also be made on the longest or accent wall. If there is an empty corner or other unused space in the room, this is where you should install the recess. In the bedroom, a spacious niche with shelves becomes a replacement for a wardrobe and it needs to be placed in the same place where it stood before.
There are other recommendations:
- in the bathroom, it is advisable to place a niche either at the far wall, or deepen it into the side plane (so as not to absorb space);
- in the hallway it is worth placing this structure opposite the front door a few steps away from it to make it easier to put and take things;
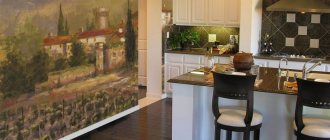
- in the kitchen, the optimal location of the recess is the place where the TV will be located, since it is for this that the recess is mainly prepared;
- in the bedroom, it would be a good idea to install a structure in which the bed will be completely or partially hidden;
- in corridors where there is an unused corner, there is no need to additionally look for a place to work with plasterboard sheets.