Self-leveling flooring, what type of flooring is produced, what is the difference between the compositions, and also what type of coating can be obtained, beginners often ask these questions. After all, choosing the right material on sale is not so easy; the variety can lead to a dead end. To simplify the solution, the intricacies of a certain material are studied, so the features of this type of floor finishing will be discussed further.
What is a self-leveling floor?
The poured floor is a composition that can then be distributed on a horizontal surface and create a durable coating after hardening. The product can serve not only as a leveling layer, but also to create a beautiful final finish for the floor in an apartment or house.
What effect is obtained depends on the type of elements used in the composition. You can often find a comparison of the coating with linoleum and tile materials, due to its gloss and evenness.
The product can serve not only as a leveling layer, but also to create a beautiful final finish for the floor in an apartment or house.
Area of use
Why do you need a self-leveling floor? In fact, poured floors have a very wide range of applications. They are used on:
- production facilities;
- sports complexes and stadiums;
- warehouses;
- shopping pavilions;
- enterprises with specific features: high humidity, low temperature, influence of chemicals, transport loads.
Which one is better to choose?
When choosing, take into account the type of room where the renovation will be carried out. Whether it will be a living space or not. The loads in these options are different, for this reason the liquid floor can be used differently. For a residential building, it is more suitable with a polyurethane or epoxy base.
These types can also withstand high humidity, for this reason they are also suitable for bathrooms and toilets. In bedrooms and other rooms where they live, the optimal choice would be to use a polyurethane type, which is more versatile in its characteristics.
Their application is done in a thin layer, this saves consumption, at least two millimeters, otherwise it will not be possible to obtain wear resistance.
For a residential building, it is more suitable with a polyurethane or epoxy base.
Sex classification
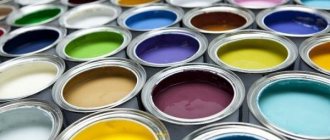
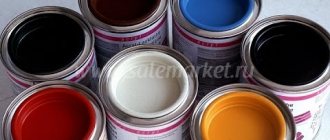
Liquid flooring is conventionally divided into two types: mineral and polymer.
Reference: Liquid polymer for flooring is a synthetic-based material that is most often used in shopping centers and warehouses. Mineral materials are a mixture of various modifiers, which are responsible for the ductility of the material, and cement. They are most often used as a basis for leveling the surface. And only then they begin to lay the finishing coating.
Liquid floors are divided into 4 types:
- methyl methacrylate;
- cement-acrylic;
- materials based on epoxy resin;
- polyurethane.
Preparing the mixture
The installation of a self-leveling floor involves the preparation of a solution, because the compositions are usually sold in dry form. This stage is important; if the mixture is diluted with water incorrectly, some of the properties may be lost.
Be sure to look at the amount of water and mixture on the packaging, where the manufacturer prescribes the required proportions. They decide in advance how much composition they will prepare for pouring; hardening occurs quickly, and it is necessary to have time to apply it.
First, water is poured, then the mixture is poured in, slowly, then it is easier to avoid lumps. The elements are diluted with a mixer until a homogeneous mass is obtained.
First, water is poured, then the mixture is poured in, slowly, then it is easier to avoid lumps.
Advantages and disadvantages
Below we present the general advantages and disadvantages of self-leveling floors.
Advantages:
- aesthetic appearance;
- relative ease of filling;
- hardness, high impact resistance;
- durability 10 years or more;
- high adhesion, the ability to pour on almost any substrate;
- hygiene, ease of cleaning and operation;
- there are no seams or joints;
- fireproof;
- resistant to various chemicals;
- maintainability.
The self-leveling floor will meet all the described advantages if the technology for filling it is fully followed.
Flaws:
- high price;
- complexity of technology;
- the floors “do not breathe”, regular ventilation of the room is necessary;
- cold, it is necessary to insulate;
- difficulty of dismantling.
Device Tools
The list of tools required for pouring floors is not that long. For this reason, they often decide to carry out repairs themselves. You should ensure that you have the following tools in advance:
- Building level;
- Containers for preparing the composition;
- Construction mixer;
- Brush, needle roller to remove air from the layer;
- Special squeegee for leveling the coating;
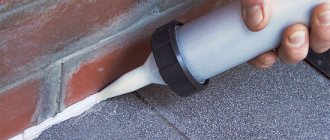
- Damper tape, it will protect the walls from contamination, helps protect the layer from cracking under the influence of temperature changes;
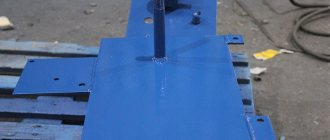
- Steel marker beacons.
You should make sure you have the tools in advance.
Characteristics of the resin mixture
Epoxy mixtures create a floor with a transparent, glass-like surface. The disadvantage is that it may not withstand the fall of a very heavy object - it is not shock resistant. But it is resistant to corrosion.
Methyl methacrylate mixture is needed to create an extremely durable floor that is resistant to aggressive environments, moisture, temperature and shock. It is not always possible to prepare this mixture for self-leveling floors with your own hands - you need gloves and a mask. It contains toxic substances.
It is better to abandon this option altogether if you are creating a floor in a residential area - there is really no reason to create such a durable surface.
Floor marking and consumption calculation
To prepare as much mixture as will be needed to treat the entire surface, calculate the consumption in advance. Manufacturers prescribe the consumption characteristic of the composition, but the figure is averaged, taking into account the creation of optimal working conditions. The indicator is written in kg/sq. m. surface, so you should definitely know what area will be processed.
The average is multiplied by this result, and the thickness of the layer that is required to obtain an even coating is also taken into account. In the average consumption, an option is indicated when a millimeter layer of solution is made. The average consumption is also multiplied with the expected thickness of the fill.
But in order to calculate what the coating will consist of and what thickness of the layer, mark the surface. This helps to identify the fill level. Step by step it works like this:
- A mark of 1 m in height is made on the wall from the doorway.
- A parallel line is made along the entire perimeter of the room; it will help control differences.
- Down from the drawn strip on the wall, measure 1 m to the floor, several such measurements are made along the wall. This helps identify uneven areas.
- When the highest and lowest level indicators are obtained, these results are subtracted and the answer is given to the question of which layer is made the minimum; thickness is usually added to it, sometimes 3 cm is added to it to create a durable coating.
- Using the marks, you can install nails, pull the rope to make it easier to monitor the evenness, and then beacons-benchmarks are mounted on the floor.
To calculate what the coating will consist of and what thickness of the layer, mark the surface.
Scope of application of liquid floor
The qualitative characteristics of the liquid floor allow it to be used in industrial premises with heavy loads:
- industrial workshops and warehouses with moving special equipment;
- public facilities, shopping and exhibition centers;
- medical institutions;
- pharmaceutical and chemical industry enterprises.
At home, liquid floors are poured in the bathroom, toilets, and kitchens. The coating is widely used in finishing country houses.
The cost of pouring liquid polymer floors is price per m2. | |
| Name with turnkey material | Price, rub. per m2 |
| Epoxy dust removal up to 0.3 mm | From 250 |
| Epoxy dust removal (0.6 - 08 mm) | From 500 |
| Epoxy coating in one layer (1.6 - 2 mm) | From 950 |
| Epoxy in 1 layer with leveling (2.3 - 2.9 mm) | From 1200 |
| Epoxy in 2 layers (2.4 - 3.1 mm) | From 1250 |
| Dust removal polyurethane up to 0.3 mm | From 250 |
| Dust removal polyurethane (0.6 - 08 mm) | From 500 |
| Polyurethane coating in one layer (1.6 - 2 mm) | From 950 |
| Polyurethane in 1 layer with leveling (2.3 - 2.9 mm) | From 1200 |
| Polyurethane in 2 layers (2.4 - 3.1 mm) | From 1250 |
| Prices for work only | |
| Anti-slip coatings up to 1.8 mm | From 600 |
| Thickened anti-slip | From 775 |
| Antistatic epoxy up to 2 mm | From 445 |
| Antistatic color 2k | From 830 |
| Polyurethane - cement (5 - 10 mm) | From 555 |
| Decorative (chips logos, etc.) | From 445 |
| Polymer-cement | From 445 |
| Quartz-filled | From 500 |
| Polymer cement up to 60 mm | From 445 |
| Marble floors | From 670 |
| Chemical resistant | negotiable |
The cost of work per square meter can be reduced depending on the area of the pour.
How to prepare the base
The final result will depend on the quality of foundation preparation. It is necessary to remove all types of contamination; if any, then old coatings are eliminated. To exclude the presence of poorly adhered elements, which can lead to peeling of the solution and the appearance of cracks on the surface.
All defects are identified, the depressions must be sealed with a putty mixture, and areas with prominent elements are sanded. Sanding should be done with fine-grained sandpaper. Contaminants are removed again. Damper tape is glued around the perimeter of the room.
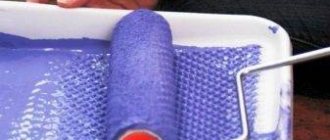
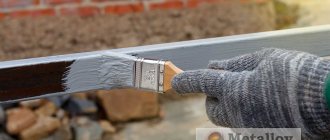
A primer layer is applied, which serves for increased adhesion to materials, as well as for better evenness of the coating. Select the composition for the base. Proceed to the next steps only after the primer has dried.
A primer layer is applied to enhance adhesion to the materials.
How to properly fill a floor with your own hands
Before starting pouring, the following facts should be analyzed:
- the entire area of the room should be filled in one day and as soon as possible (for large volumes it is better to invite a team of craftsmen);
- work should begin from the wall opposite the exit from the room;
- the composition should not be left to spread on its own, but should be leveled with a squeegee (use a spatula in hard-to-reach places);
- Before pouring, you need to close all windows and make sure there are no drafts.
Immediately after obtaining an even layer of the composition, it is processed using a needle roller. This procedure should not be ignored. In this way, the air that got into it during mixing is removed from the mixture.
If it remains, then after hardening, voids will form in these places, which will become the starting point for delamination of the surface.
After 12 hours, people can move on the floor, but complete hardening occurs no earlier than 72 hours (the exact time is indicated in the instructions for use).
The thickness of the self-leveling floor varies depending on the composition and conditions of subsequent operation, ranging from 1 to 5 mm. Material consumption is calculated based on the instructions for an area of 1 m2 with a thickness of 1 mm.
Next, the numbers are multiplied by the area of the room and the thickness of the required layer.
Technology and sequence of actions
The instructions for working with quick-hardening flooring compounds assume a fast pace of application from the master. The solution is prepared in small quantities. When pouring has been done, distribution occurs using a squeegee; in difficult areas, you can use a spatula.
To remove any air that may have remained during mixing of the components, pass over the layer with a needle roller. The finished solution hardens in about 40-60 minutes, and the ease of leveling remains less, for this reason they move quickly.
You should not take breaks, otherwise drying will proceed unevenly, causing delamination of the coating.
To remove any air that may have remained during mixing of the components, pass over the layer with a needle roller.
How long does it take to dry?
There are instructions in the instructions about how long it takes for a liquid floor to dry; they can be different, because the ingredients used are different. As a standard, you will be able to walk on many types of floors within half a day. But experts advise waiting a full day. During this period, the coating is covered with film.
You can walk on the dried surface using special paint shoes.
Experts advise waiting a full day.
Comparative characteristics
All types of coating intended for residential premises must undergo GOST certification. But each of them has its own individual device features.
Epoxy, polymer and methyl methacrylic coatings have good wear resistance. The technology for laying the latter has a greater level of complexity. In addition, the compositions are quite caustic, since in a liquid state they emit a strong, pungent odor. But the mixture hardens quite quickly, compared to other types.
Polyurethane mixtures are very elastic; unlike others, they can withstand severe dynamic loads. But the epoxy composition is not afraid of chemicals, so it is perfect for rooms with static loads. Cement-acrylic mixtures are often used as a basis for leveling surfaces.
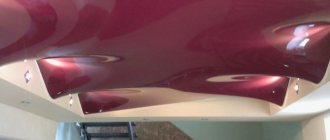
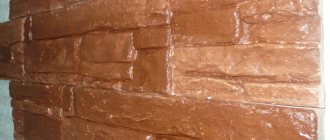
Self-leveling floor with 3D effect
3D floors are gaining great popularity as they allow you to get any image in volume on the surface. Designers use them in different interiors.
Before obtaining a 3D image, work begins by applying a base self-leveling floor to create the necessary smooth surface without flaws. Then the self-leveling floor is applied to the self-leveling floor, but only when the first layer has dried.
First, a pattern is glued onto the base layer; it is important to distribute it evenly, completely knocking out any remaining air. Afterwards you can pour in the finishing solution. The layer will be 3-4 mm thinner. If desired, after drying, you can further consolidate the effect by applying varnish.
3D floors are gaining great popularity as they allow you to get any image in volume on the surface.
How to care for coatings
Despite the fact that the description of all types of coatings allows us to conclude that liquid flooring is very durable, it must be looked after. Maintenance begins almost immediately after the surface hardens. In order for it to serve you faithfully for many years, the protective layer must be periodically updated. At least once every six months, cover the floor with a new colorless layer.
Important! Before applying a new layer, the remaining remnants of the old one should be removed from the coating. This is done using special products sold in hardware stores. Also, do not forget about systematically cleaning the floor from dirt and stains.
Due to the presence of a huge number of positive characteristics, liquid floor coverings are becoming increasingly popular. If you strictly follow the application technology, the surface will look like new even after a few years.
A huge selection of materials and colors allows you to create unique interiors with interesting ornaments and designs. The video of self-leveling flooring clearly demonstrates the aesthetic advantages of surfaces in comparison with traditional flooring materials. The absolute harmlessness of the compositions allows you to install the floor even in children's rooms.
Possible errors when filling
Beginners often neglect the stages of work, believing that they have little impact on the process. But this results in a poor quality result. Typical errors include the following:
- Violation of the proportion of solution preparation;
- Poor quality repair of surface defects;
- No primer layer.
It’s easy to avoid all these mistakes if you act step by step, without missing the important nuances described earlier.
It’s easy to avoid mistakes if you act step by step, without missing important nuances.
Self-leveling floors can be an excellent option for creating an original floor in your home. The presence of 3D drawings increases design possibilities. You can fill it yourself, but you should act step by step and not miss important steps.
Consumer qualities of poured floors
Not so long ago, this type of flooring made a splash in the building materials market. To understand whether a self-leveling floor is needed, it is worth considering their main qualities, which have their own reviews from many consumers:
- Versatility. The covering will be appropriate in any room;
- The surface of most types has antistatic properties. This means that practically no dust settles on it;
- Resistance to chemical influence;
- The seamless surface eliminates the possibility of dirt accumulation. At the same time, monolithic surface is quite easy to care for, since it does not absorb moisture;
- The materials do not emit any toxins and do not change the humidity level in the room;
- The self-leveling floor system allows the installation of “warm floor” devices;
- Long service life. If you properly care for the surface, it will serve you for at least 20-25 years;
- Huge decorative potential, allowing you to implement non-standard design ideas.
But owner reviews are not always positive. Some consumers also note the negative aspects of liquid floors:
- If you poured the base incorrectly, after hardening it will be almost impossible to remove it yourself;
- Inexperienced consumers who decide to save money and do the filling themselves will encounter many difficulties during the work;
- If the application technology is violated, after some time, areas of the floor may even swell.
The video lessons presented below will allow you to familiarize yourself with the main stages of applying liquid flooring and the nuances of preparatory work.
Cracks and their elimination
There are situations when, due to careless operation or due to a violation of technology, cracks appear on the surface of the liquid floor. They should be eliminated immediately, without waiting for an increase.
Necessary
- slightly expand the resulting damage;
- remove dust from its surface;
- cover with primer mixture;
- fill with new solution.
If you don’t want such troubles to await you at the end of a job you’ve done yourself, invite professionals.
The polymer materials manufacturer Streamline pours liquid floors using its own materials.
The result of the work is guaranteed. If you want to buy floors cheaper, read the news from our online store, where we publish not only tips and pouring rules, but also promotions for discounts on certain groups of products, as well as discounts on floor installation.
How to choose the right filling composition?
Before purchasing mixtures, there are several important points to consider:
- Purpose of the premises.
- Condition and quality of the subfloor.
- The loads that fall on him every day.
- Risk of chemical exposure to the substrate.
Note! It is useful to decide at the purchasing stage what technical qualities the future floor should have. There are liquid floors that have an anti-slip effect, and some are antistatic.
Generalization on the topic
As you can see, the technology for laying liquid flooring is quite simple. If you wish, you can do it yourself by carefully studying the detailed step-by-step instructions and videos posted on our website. The most important thing is to strictly adhere to the listed recommendations, do not experiment and do not allow yourself to deviate from the proposed plan.
The most important and crucial moment is preparing the foundation. The quality of this work determines how the liquid floor will look. The new coating dries quite quickly, but it will be able to withstand all loads only after a week.
- How to pour cement screed on beacons yourself
- Industrial floors
- Parquet varnish Marshall Protex
- Rubber crumb coatings
Comments and reviews on the material