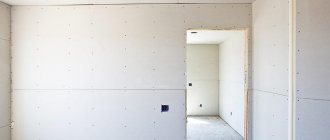
Primer for drywall is a special composition that is used to treat the wall before applying the finishing layer. The primed base has better adhesion to the finish and receives additional protection from adverse influences. For the final surface coating, decorative putty, facing tiles and paint are used.
What are primers used for and is it necessary to apply them?
In addition to increasing the adhesion of materials, primer mixtures are intended to protect the coating.
When processing metal structures, they become invulnerable to corrosion. Priming wood allows you to emphasize its natural texture and provide it with fire-resistant characteristics. Distributing the solution over a base made of stone or plasterboard prevents the formation of excess dampness, which provokes mold and mildew.
Drywall primer allows you to reveal the properties of the finish so that it corresponds to the declared quality and special characteristics. When wondering whether it is necessary to prime drywall before puttying, it is enough to evaluate the main functions of such a mixture.
Why prime drywall:
- Drywall primer eliminates minor defects, dents and damage to the base, making it smooth and even.
- The composition gives the coating anti-mold and anti-fungal properties. It also protects the finishing layer from rodents and other pests.
- Priming structures provides additional reinforcement and protection.
Only moisture-resistant material, which is designated in the labeling as GKLV, is not subject to processing. There is no need to prime the surface yet if you plan to apply finishing putty. This layer is elastic and sticky, so it is simply impossible to additionally cover it with a moisture-repellent mixture.
It is important to consider that the primer mixture does not form a film on the wall, limiting air circulation. Its structure resembles a braided mesh.
Before installing the facing tiles, you will need to prime the coating. In addition, it is better to do this in 2 stages. In this case, it is not necessary to level the putty layer much, because decorative material has such properties.
Another argument for priming drywall before caulking is the ease of later disassembly if you want to change the finish.
And a little about the author’s secrets
Have you ever experienced unbearable joint pain? And you know firsthand what it is:
- inability to move easily and comfortably;
- discomfort when going up and down stairs;
- unpleasant crunching, clicking not of your own accord;
- pain during or after exercise;
- inflammation in the joints and swelling;
- causeless and sometimes unbearable aching pain in the joints.
Now answer the question: are you satisfied with this? Can such pain be tolerated? How much money have you already “wasted” on ineffective treatment? That's right - it's time to end this! Do you agree? That is why we decided to publish an exclusive interview with ARMEN DZHIGARKHANYAN, in which he revealed the secrets of getting rid of joint pain, arthritis and arthrosis.
If sickle tape is used when sealing joints, then during the work it is important to check that no threads stick out from the tape - excess fibers must be carefully trimmed and covered. To work with plasterboard ceilings, it is recommended to use special sanding floats with clamps or an electric sander. The most common composition that is available on the construction market in various degrees of viscosity.
The main components of an acrylic product: To treat the plasterboard surface, several types of primer are used: impregnating, adhesive and universal. Craftsmen prefer liquid mixtures with high covering power and decent penetrating ability. They can also be used when preparing a surface for wallpapering or before painting.
You should not choose solutions that cost less than 400-500 rubles per 10 liters.
Reasons for the ambivalent attitude towards gypsum board primer
There are constant discussions among experts about whether it is necessary to prime drywall before puttying. After completing the repair work, many craftsmen do not treat the gypsum board with a primer. However, this leads to gradual destruction of the facing layer and causes a number of problems.
Arguments for
Experts who recommend priming drywall before puttying give the following arguments:
- This mixture efficiently fills cracks and damage, which reduces the consumption of material for subsequent layers.
- During the hardening process, the primer forms a reliable frame on the plasterboard sheet. Such protection copes with almost any vertical loads, which is important when installing porcelain tiles on walls.
- The putty solution cannot provide identical absorbent qualities for the entire substrate, so unevenness will form after the paint is distributed.
- The soil does not interfere with the vapor permeability of the structure, since it does not form a dense film, but a kind of network of threads that does not allow moisture to pass through.
- The primer improves the adhesion of plasterboard with the putty solution.
- Antifungal substances are added to the primer mixture, which allows it to be used for treating rooms with high humidity. It is indispensable for walls in the kitchen or bathroom.
- Acrylic-based products are safe for the environment and the human body.
Arguments against
Opponents of soil point to the following features:
- Before the advent of primer mixtures on sale, plasterboard sheets were treated with paint or covered with wallpaper, and decorative plaster was used. The finishing layer remained on the surface for decades. Conclusion: the soil was developed to earn money, and construction services indicate the importance of this stage in increasing the final cost of the work.
- Drywall sheets have good adhesion to any type of putty. Therefore, priming them is not entirely justified.
- Primers may contain toxic components. They are capable of releasing harmful substances into the environment.
- Putty can act as a primer solution.
- After priming, the coating no longer allows air to pass through, because microholes become clogged.
It is quite difficult to immediately refute the above opinions. In addition, there are a number of situations in which gypsum boards are not primed.
Application Tips
Priming drywall can be done with various tools:
roller; brush; spray bottle.
You can choose one option or another based on the area that needs to be primed.
If it is small, then it is better to work with a brush; if it is medium, then a roller can be as effective as possible, but for large spaces, a spray bottle will be the most convenient. To work with the ceiling, it is most convenient to use a roller, and in inconvenient places, touch up the paint with a brush.
In order to begin work on priming the wall, you must first sweep away dust and dirt so that the composition adheres better.
The primer itself in the container needs to be shaken and mixed, after which a small amount should be poured into the tray. When everything is ready, the selected tool must be dipped into the tray and the primer applied vertically in even stripes. In particularly inconvenient places you need to work with a brush , which can reach remote corners and prime them.
When choosing a good mixture, it absorbs quickly and dries evenly. If this process proceeds differently, it is better to apply a second layer , which will even out all the flaws and ensure a good result.
When working with a spray bottle, it is important to correctly follow all the instructions on the packaging, because each manufacturer has its own characteristics of the primer material. In this case, it is better to apply two layers, but with an interval of five hours , so that the first layer has time to dry.
After priming, the putty will be applied in a thin and uniform layer, which will ensure material savings, ease of work with it, and a good final result.
Under the wallpaper
Once the plasterboard walls have been erected in the room, the next step is undoing the seams and working with the joints. It is after this that the priming process occurs, which must be done with a brush so that the composition penetrates well into all the cracks, joints and places where screws are attached .
When this process is completed, the next step is to putty the problem areas that need to be leveled and hidden. Part of the mixture is applied to the joint or hole from the screw, leveled, and a reinforcing tape is laid on top, on which the finishing layer is already laid, which will need to completely level the surface.
As soon as the puttying stage is completed, you need to wait a certain amount of time for the material to dry completely. Only after this does the surface grinding begin.
When all the walls have acquired a completely smooth appearance, there are no flaws on them, you need to re-apply the primer, but this time to the entire surface of the drywall . If large areas can be treated with a roller, then in the corners you need to use a brush.
The primer dries for about six hours , and only after it is completely ready can you move on. The next step will be to putty the entire surface of the drywall.
If wallpapering is intended, one layer will be enough . Once the applied layer has completely dried, it is sanded until completely smooth.
We recommend: How to make an artificial stone with your own hands at home: step by step we make an artificial decorative stone
When this stage is completed, you need to remove any remaining dust from the walls and cover them with an acrylic type of primer, which will penetrate deeply into the surface and help better attach the wallpaper to the wall.
Before laying tiles
To ensure that plasterboard walls do not differ from ordinary ones, tiles can be laid on them, this is especially important in a bathroom or kitchen. The work process has its own characteristics, without knowledge of which it will not be possible to achieve a good result, and the tiles will not stay on the wall surface for a long time.
Working with plasterboard walls begins with the fact that they are primed, this makes it possible to subsequently begin the puttying process. The primer will help to better hold the material on the drywall, protect it from moisture, and prevent the appearance of fungus and mold.
Once the primer has been applied, you need to wait until it is completely dry , and then take up the spatula.
A wide tool is best suited for the work , onto which the solution is applied and applied to the wall in parallel, calm movements along the wall. The first layer should not be absolutely even, because all flaws will be masked by the finishing putty.
As soon as the first layer has dried, you can begin finishing the wall. When the second layer is ready, it needs to be sanded well.
Once the wall is completely prepared, you can dilute the tile mixture and apply it to the surface of the wall or tile using a notched trowel.
During the work process, it is important to constantly monitor the evenness of the masonry, checking it with a level.
Tile on a prepared plasterboard wall will look very impressive, it will also have a functional load.
For painting
When creating plasterboard structures that will eventually be painted, it is important to properly treat their surface so that the result fully meets expectations.
The first thing to do is to prime the joints and places with screws, onto which the first layer of putty is then applied. This allows you to cover obvious unevenness, but for a more significant result it is important to use reinforcing tape, onto which the putty is applied for more serious tasks. Only after all obvious irregularities on the wall have been removed can you begin to apply primer over the entire surface of the wall.
Apply the first layer of putty to the primed wall and wait until it dries completely. It is advisable to sand down obvious irregularities , then apply finishing putty, wait until it dries, and sand to a completely smooth surface. Only after this is the final layer of primer applied, on which the paint will be applied.
Due to this procedure, the painting process will be as easy as possible; the paint will not be absorbed into the drywall or flow down it.
If during the first puttying it was possible to achieve an even coating, then you can do without using finishing putty, replacing it with a high-quality primer, onto which paint will be applied later. In both cases, the result will be of high quality.
How to choose a primer for drywall
Before priming drywall, you need to choose the right composition for this procedure.
Taking into account the type of surface and components of the mixture, the following groups are distinguished:
- Water repellent.
- High penetration compounds.
- Adhesive.
- Heat resistant.
- Antiseptic.
The selection of a suitable option is carried out taking into account the functional purpose of the building and operating conditions.
When preparing and processing gypsum boards, you should take into account the type of finish that will be applied in the following layer:
- If you plan to paint the surface, it is better to use a primer with medium adhesion.
- For thick wallpaper or tiles, a deep penetration mixture will be required.
- In rooms with excessive humidity, a specialized water-repellent solution is used.
If you have not decided on the choice of product, it is recommended to buy a universal primer for gypsum boards.
Primer selection
If you have no doubt that drywall needs to be primed, then the next step is to select a suitable primer. Before purchasing, you should carefully study the label of the product you are purchasing. It must indicate the expiration date and manufacturer. The cost of primers is not very high, so you don’t have to worry about overpaying. For gypsum plasterboard primers, you should choose compositions for interior work. Compositions for finishing facades inside an apartment should not be used; they contain substances harmful to human health. You should opt for a penetrating type of primer. It has a fine filler structure, so it penetrates more deeply into the body of the drywall. The solid content in such compositions is no more than 12%.
For working with drywall, acrylic primer is best suited. It fits on any surface. The drying time of the solution is from 2 to 4 hours. It is applied to sheets of drywall before and after puttying. The most popular brands are TESSAROL, Teknos, Vega, Betokontakt.
USEFUL INFORMATION: Basic rules for plastering walls
Types of primer material by composition
The classification of priming products is carried out taking into account the components that are used for their production. The most common are acrylic options.
Acrylic primer
The mixture is made on the basis of acrylic copolymers. The size of the components present in the composition is much smaller than the pore diameter of the surface being treated. This feature ensures soil penetration deep into the wall up to 10 cm.
The substance quickly adheres to materials that allow moisture to pass through, including drywall. Acrylic primer is a universal product that does not have a characteristic odor or toxic substances. This allows it to be used both for external and internal work. Penetration ability increases the wall's protection.
The main properties of acrylic primer include:
- Vapor permeability. This property prevents the surface from clogging, allowing it to “breathe” freely.
- Universal purpose. The primer is suitable for subsequent painting or laying tiles. In addition, the primed base can be covered with any wallpaper.
- Effective filling of pores. The coloring composition is distributed evenly over the coating without changing the tone.
- Saving paint and glue consumption during finishing work.
- Good adhesion to different materials.
Choosing a composition for different surfaces
Today, the building materials market offers a lot of varieties, among which the main options can be distinguished:
- Acrylic primer. This is the most optimal and universal option, equally suitable for any surface. Dries within two to four hours. Ideal for subsequent puttying.
- Phenolic. It is most widely used in the processing of metal and wooden surfaces. Can be used for putty.
- Alkyd. For use on wooden surfaces only. Cannot be used for putty.
- Perchlorovinyl. Suitable for external walls made of brick and cement.
- Glyphthalic. Ideal primer for wood and metal. However, its use is limited due to the toxicity of the substance.
- Polyvinyl acetate. It is used only for surfaces where polyvinyl acetate paint will be applied.
- Polystyrene. Also toxic, but quite balanced.
What is the best primer for wood putty?
Wood is a natural and harmless material. In order to increase its durability and service life, it will require treatment with a special material - a primer for wood.
The best option is an alkyd primer. It is necessary to highlight its advantages and disadvantages, which determine its significant prevalence.
Pros: increased strength; high performance properties; ability to work in sub-zero temperatures.
Cons: long drying time; the need to use the harmful substance “White Spirit” as a thinner and cleaner.
What primer to use before puttying concrete walls
A primer for concrete is important in cases where it is necessary to create a high-quality coating. It is known that concrete surfaces are prone to destruction, as well as the destructive effects of mechanical, chemical and natural factors
A properly selected primer for concrete should provide the opportunity to:
- Create a smooth surface.
- Ensure uniform distribution of coating.
- Provide sufficient strength.
- Create protection from destructive factors.
- Reduce material consumption to create the next layer.
Some of the most appropriate primer options for concrete include: alkyd primer, polystyrene primer, polyvinyl acetate primer.
Is treatment required before putting drywall?
If the surface of the drywall is not contaminated with debris and dust, then a primer may not be needed, since the putty will be able to obtain sufficient adhesion.
However, the seams formed during the installation of plasterboard sheets require attention, and they must be primed. It is recommended to use the material only for interior work and high-quality products from leading manufacturers.
Types of primers for surface treatment
When wondering how to prime drywall, you need to take into account that, depending on the purpose, primer mixtures are divided into the following types:
- Deep penetration.
- Under the wallpaper.
- Before laying tiles.
- For treatment with water-based paint.
Deep penetration primer for drywall
Finishing with heavy wallpaper or tiles is impossible without first applying a deep penetration mixture. The surface treated with this composition is characterized by improved adhesion. This primer provides an antiseptic quality to the base.
In addition, the solution is resistant to high humidity, does not contain toxic substances and is completely safe for health. The mixture can be used for premises for various purposes, including children's rooms.
Under the wallpaper
To treat the base for subsequent wallpapering, different types of primer are used. If you plan to glue “heavy” rolls, including glass wallpaper and series made of bamboo, textiles or non-woven fabric, you need to use a primer with high adhesive characteristics.
The wallpaper is pasted onto the wall, which is previously puttied. Therefore, it is allowed to use a primer for both clean drywall and putty.
Under tiles
Compositions for laying tiles are necessary for:
- Reducing the level of moisture absorption by drywall.
- Strengthening the fibers of the material.
- Eliminates the problem of mold and mildew.
Once dry, the primer will form a thin film that will prevent moisture from moving from the tile adhesive. An acrylic mixture of deep penetration is recommended for treating the base.
For painting with water-based paint
Before finishing with water-based paint, you need to apply a water-based polymer primer.
Like coloring compounds, such primers:
- Dries quickly.
- They do not have a pungent odor.
Deep penetration solutions are not suitable for painting.
For these purposes, a universal primer is used, which has the following properties:
- Penetrates into the pores of the base material.
- Increases adhesion of paint and substrate.
- Forms a film that reduces the consumption of the color mixture.
- Protects the surface from fungus and mold.
Which is the best primer for gypsum plasterboard under putty?
Under the putty solution, primers for indoor work are used. It is important to choose a deep penetration primer based on acrylic polymers. When interacting with surface voids, the material forms an additional frame, holding a layer of putty on the plasterboard.
Is it necessary to prime the gypsum board before puttingtying?
Relying only on the arguments of supporters and opponents of priming drywall before puttying, it is impossible to draw clear conclusions in favor of one of the parties. In practice, there are situations when a primer must be used without fail, and there are situations when it is not necessary.
When to
To understand why a gypsum board primer is needed for putty, let’s figure out what a primer is and why it is used.
A primer is a construction mixture applied as the first layer to the surface of walls or ceilings of any material to create reliable adhesion between them and the applied cement (gypsum, cement-gypsum, lime, etc.) mortar or glue, as well as leveling the absorbency of the base .
Not all priming functions are listed in the above definition. There are much more of them:
- adhesion between materials increases;
- the consumption of materials applied to the ground (putty, glue, paint) is reduced;
- the process of applying putty, adhesive and coloring compounds is simplified (the surface is smoother);
- The surface of the wall or ceiling material is strengthened.
In relation to plasterboard, the listed functions are important when finishing walls with wallpaper (later, during repairs, you can remove the wallpaper from plasterboard without any problems, without damaging the cardboard) and ceramic tiles (the surface of the plasterboard will withstand the load and will not collapse).
It is necessary to prime drywall under putty and when applying decorative plaster. Here, the absence of a waterproof film (created by a primer) on the plasterboard leads to a disruption of the hydration process (gypsum actively absorbs water). And this means a reduction in durability, at best, and cracking or peeling of the plaster, at worst.
When not
There are not many situations in life when you don’t need to prime drywall before puttingty.
1. In rooms with high humidity, moisture-resistant plasterboard is used for walls and ceilings (designated as GKLV, color green). Him:
- both the cardboard frame and the gypsum core are treated with waterproofing agents, which minimizes the material's ability to absorb water;
- increased strength;
- Antiseptic agents have been added to the composition, inhibiting the growth and reproduction of mold and bacteria.
In principle, such gypsum plasterboard cannot be primed for one simple reason: the water-dispersion primer will roll off the surface of the walls and hang on the ceiling in drops, since the material has waterproofing. It is impossible to treat with other types of primer that do not contain water due to the high toxicity of the primer.
2. Painting requires perfectly smooth walls , which can only be achieved by applying finishing (very finely ground) putty (the presence of tiny particles of gypsum and polymers allows you to get a perfectly smooth surface, which cannot be done with starting putty).
If the surface of the drywall is primed, you will have to putty it 2-3 times, since the finishing putty is not laid on the ground (it cannot be applied to a poorly absorbent surface). If priming is skipped, then it is enough to apply the finishing primer once. The quality and durability of the painting will not be affected, and the cost and time savings are significant.
Attention: the seam and the fastening points of the screws are always primed (it is advisable to paint the heads of the hardware in advance with oil paint to prevent rust from breaking through), after which starting putty is applied to them. After this, the entire sheet can be coated with a finishing putty composition.
3. Do not prime drywall even if you plan to replace “dry” plaster with “wet” plaster in the near future (5-7 years) .
How to properly use drywall primer
Before treating the base with soil, you need to select the appropriate type of finish, taking into account the purpose of the room. If the soil is produced as a concentrate, it will need to be diluted. By default, water-dispersed mixtures are used, which need to be diluted with liquid.
Acrylic and latex based compositions are suitable for application without dilution. Before applying the primer, you need to remove dust and dirt from the base. Before distribution, the mixture is poured into a container and then applied to the structure using a roller or brush.
Preparing tools
Before starting work, it is important to prepare tools, including:
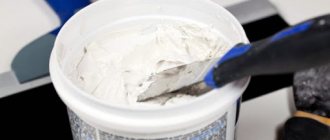
ready-made putty; spatula; wide brush; primer; serpyanka.
You must make sure that there are no burrs on the seams; if necessary, you need to get rid of them using a wide brush. The seams are coated with a protective primer, leaving it until completely dry, at the next stage you can begin sealing. Put a little mixture on a spatula and add it to the joints, spreading it lengthwise. A serpyanka is applied to the seam and leveled with a spatula. The tape should be buried in the mass. You can start sanding only after the surface has dried. You need to polish the seams using a grouting mesh or sandpaper. The surface should be smooth, the seams are coated with primer again and left to dry.
How to best apply primers
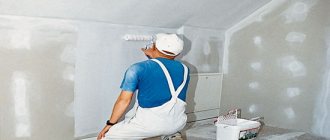
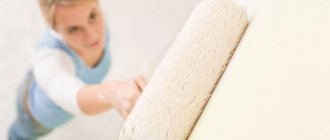
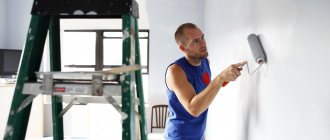
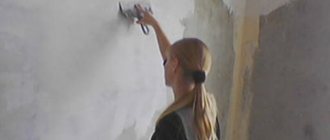
The soil is distributed onto the surface to be treated using a roller. It is better to use a brush in joints, corners and hard-to-reach places.
How to prime drywall before starting and finishing putty
Before applying putty, it is necessary to prime the entire coating. Before this, the surface is cleaned of dirt and dust. To improve the final result, it is better to re-process after the first layer has dried. Priming is carried out using traditional painting equipment, such as a roller and brush.
Features of the priming process before puttying
Before applying the putty solution, you need to fill the joints with a primer. All seams are treated with reinforcing tape. It is better to cover the fasteners, which use self-tapping screws, with a special putty for seams.
Preparation before wallpapering
Before you hang wallpaper, you need to properly prepare the coating. Therefore, it is worth cleaning the wall from dirt and dust, and then applying a composition with antifungal properties.
When the layer has dried, the seams and screws should be sealed. You also need to clean the putty from sagging and level it.
The next step is to allow the primer to dry. Before wallpapering, the structure should be covered with a thin layer of putty. When applying the putty solution, you need to strengthen the outer corners with metal or plastic corners.
Preparing the surface before gluing tiles
Before laying the facing material, it is necessary to apply a deep penetration primer with antiseptic properties.
Such processing will allow:
- Strengthen the base.
- Improve the adhesion characteristics of materials.
- Reduce water absorption of gypsum boards.
- Apply a protective layer to prevent mold and mildew.
All voids are covered with sickle tape. It is fixed using joint putty. After preparation, the material must be primed again, distributing the mixture evenly over the entire area. There is no need to sand the putty, since the tiles themselves level the surface to be treated.
How to prime plasterboard walls
GKL primer is performed according to the following scheme:
- First, the entire coating is processed.
- Next comes the reinforcement of joints and seams, as well as the installation of corners.
- Then the putty is primed.
The next stage comes down to priming the walls using a brush and roller.
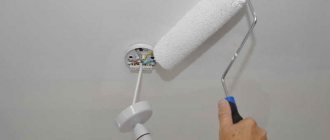
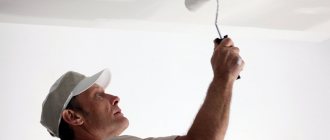
How to apply on the ceiling
The use of gypsum boards for ceilings has been practiced for a long time. After installing the sheets on the ceiling surface, you need to properly process it. It is important to eliminate all defects in the plasterboard, hiding all damage and problem areas. The procedure is carried out by puttying.
To distribute the putty solution over the ceiling, you will need to additionally prime it. This treatment will protect the material from temperature changes and humidity. It improves adhesion and simplifies the distribution of putty.
The base coating can be processed using a roller. It is better to prime corners and awkward areas with a brush. After completing the work and the primer has dried, apply an initial layer of putty, carefully treating the joints and screw heads. Serpyanka is used at the joints.
If the first layer of plaster has dried, you can eliminate obvious defects and apply an additional layer. It is important that it is as even as possible. After all layers have dried, you need to sand the ceiling with sandpaper and proceed to the following procedures.
Drywall priming technology
You can begin priming plasterboard surfaces immediately after completing installation work. To prime the gypsum board, you will need to purchase the following materials and tools:
- ready-made liquid primer:
- roller on a long handle;
- brush 100-150 mm wide, for processing corners;
- container for working with primer. It is most convenient to use a special cuvette with a corrugated wall to squeeze out excess liquid solution;
- respirator for respiratory protection;
- safety glasses for eye protection;
- protective clothing and gloves to protect the skin.
Step-by-step instructions for applying primer to plasterboard surfaces:
- The primer is being prepared. If a solution has been purchased that requires additional preparation, it is placed in a separate container and dissolved with water in accordance with the instructions.
- A portion of the prepared solution is poured into a cuvette. After wetting the roller evenly, begin to distribute the primer over the surface of the wall or ceiling. All parts of the drywall should be carefully treated. Particular attention should be paid to the seam between the individual sheets.
- Hard-to-reach places (corner joints, junctions with the floor or ceiling) are treated with a brush. The uniformity of the coating allows subsequent high-quality application of putty.
- If the instructions for the primer say that it is necessary to apply two or three layers to the surface, the next layer is applied only after the first has completely dried.
- After the last layer of primer has dried, you can begin to putty. To obtain a better quality coating, it is recommended to apply primer to the rough layer of putty after it has dried.
How long does it take for primer to dry on drywall?
The drying time of the primer is determined by several factors.
Among them:
- Environmental parameters such as humidity and temperature. The greatest drying efficiency is observed at +15...+20°C and humidity 60-80%.
- Thickness of the primer layer.
- Type of primer mixture. Formulations with a high content of volatile substances and the presence of solid components dry out faster than water-based products.
Under favorable conditions and room temperature, one layer dries in no more than 2-4 hours. In non-residential buildings, the process time increases to 5-6 hours.
DIY drywall putty
Before you putty the drywall, prime the surface. Any primer is applied to a dry, clean base. Therefore, we first remove dirt from the surface and remove dust (you can use a vacuum cleaner or a slightly damp cloth). After this, prepare the soil according to the instructions (sometimes you need to dilute it with water, sometimes you just need to stir it), pour it into a container and apply it with a brush or roller.
Once again we go through the seam, applying fresh putty about 0.5 mm thick, take the soaked reinforcing tape and glue it to this compound.
Use a spatula 8 cm wide and press the tape well onto the surface, squeezing out the excess putty from underneath it.
A few words about which putty is best to use for gypsum board. Any one will do - gypsum or polymer based (latex).
Polymer putties are usually finishing - they provide a very thin layer and a smooth surface. There are both starting and finishing plaster ones. Difference in particle size. You can use any, as long as the quality is good. To putty surfaces, you will need a large spatula - with a blade of 40 cm or more and a narrow one - 10 cm.
The first layer is applied with starting putty. It is applied in a layer of about 5 mm (the maximum should be checked in the instructions for the specific putty) and hides all the unevenness. Dilute it with water until it becomes thick sour cream, stir thoroughly so that there are no lumps. Perforated corners are used to design external corners - slopes, protrusions, etc. First, a piece of the required length is cut off. The metal is very thin, it can be cut even with ordinary large scissors, but if you have metal scissors, the work is easier.
Edges are cut at 45C or less, not 90C. So, when puttingtying drywall, the edge will not curl up.
- Environmentally friendly and chemical resistant.
- Moisture resistance and the presence of antiseptic components.
- High level penetration ability.
- Apply a layer of finishing mixture to the dried plasterboard wall primer under the putty.
- Once hardened, the surface should be cleaned. If the finishing will be completed by painting or wallpapering, then another application of primer is performed.
- When puttingtying drywall, special attention is paid to the joints of two sheets and the recesses left after tightening the screws. This coating will not be able to hide even small flaws, and in some cases will even highlight them. Therefore, proper puttying of drywall is the key to high-quality wall painting. The second method is simpler, and it takes much less time than the first, however, in terms of quality, such a coating will be significantly inferior to the one we did before. You can choose a manufacturer based on ease of use of the solution.
For example, some companies tint mixtures in yellowish or pinkish shades so that it is easy to monitor the uniformity of the layers. Using a clean roller, the soil is distributed evenly over the surface. If a composition with color indexing has been chosen, then it becomes easy to control the areas where the solution is applied during work, as well as the completion of its drying period. The choice of primer material should be approached very carefully. First of all, you should pay attention to the price. If the price of the mixture is half as much as the price of the same primer from well-known manufacturers, then you should not be happy and choose the cheap one. In a business like construction, the stingy one definitely pays twice.
It is better to choose a proven rather than a cheap manufacturer. Before you start directly priming, you need to choose the right tool with which to carry out the work. Usually this is a soft roller, a brush for hard-to-reach places and a painting tray. When choosing a primer, pay attention to the manufacturer. You should not try to buy soil from an unknown company, even if it is cheaper - the quality of construction work is more important.
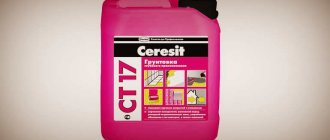
Primers from the following manufacturers are recommended: “Knauf”, “Caparol”, “Tikkurila”, “Ceresit”.
Questions and answers
At different stages of priming drywall, inexperienced craftsmen may encounter difficulties. To avoid them, you should familiarize yourself with the basic questions and answers.
Do I need to prime plasterboard walls before puttying or wallpapering?
The procedure is performed to strengthen the sheets and eliminate the problem of putty peeling. If you do not prime the wallpaper before gluing it, the adhesive mixture will be so absorbed into the drywall that if you want to change the wallpaper, it will be impossible to remove it.
Why prime drywall?
Some craftsmen consider priming walls an optional step in preparing the material for putty. The construction of plasterboard walls itself is a flat plane, so workers often neglect the soil and the puttying process itself. This approach to repair is impractical, because the use of soil provides the following features:
- Treating drywall with primer will give its pores a compacted structure, which allows you to use paint and glue, as well as putty, more economically.
- Depending on the composition of the primer, it may have antifungal properties and also prevent moisture penetration.
- The wall material itself consists of cardboard and gypsum filler; the primer additionally protects and strengthens the surface of the drywall.
- Using a primer, small depressions and scratches that were made during the installation of gypsum board sheets are eliminated.
- Primer of drywall under wallpaper greatly facilitates the process of subsequent gluing of the finish. The same point applies to other materials: tiles, paint and fiberglass.
The use of a primer ensures reliable adhesion of the two surfaces. The mixture perfectly cleans drywall and gives it a smooth structure, which is then treated with putty.
An important step is priming the drywall seams. In the process of cutting chamfers, uneven edges remain on them. When a brush with primer is passed along these edges, they are smoothed and will not interfere with further puttying.
Primer for drywall under wallpaper is a necessary phase of work if putty is not used. In this case, the material will have better adhesion to the wall. The primer will also ensure that old wallpaper comes off easily when it's time to replace it. If this is not done, the wallpaper will come off the drywall along with pieces of material.
What else do professionals recommend?
Anyone who still doubts whether it is necessary to prime drywall can take into account some of the recommendations of gypsum plasterboard specialists. If the surface of the HA remains clean after trimming, without a hint of dust, then there is no need to prime it. No primer or original seams are required. However, in most cases, horizontal HA joints are given an angle of 45 degrees during installation to ensure better contact with the putty. Such seams must be primed.
In addition, the instructions for finishing work clearly indicate the need to prime the putty before painting.
The primer does not take much time to dry. In addition, these compounds are not expensive. After all that has been said, any sane person will draw the right conclusions and decide for themselves the advisability of using a primer on HA.
Basic functions of soils
In any case, priming plasterboard walls provides undeniable advantages; modern primers perform many useful functions. Thanks to priming before puttying or applying other finishing materials, the surface acquires the following protective properties:
- adhesive;
- water-repellent;
- bioprotective;
- antiseptic;
- fire protection
Mixtures are sold in stores that perform either one or several of the above functions; the best primer for drywall is the one that provides maximum surface protection and simultaneously performs several positive functions. In addition, the best primer is the one that best suits the specific type of material being processed, its properties and characteristics.
Several modifications or varieties of drywall primers are available. Alkyd, acrylic and phenolic compositions are best suited for this material; other types of primers are unsuitable for treating internal surfaces and are used for external protection of buildings. Thanks to the correct selection of a primer for plasterboard slabs for tiles or for painting, you can avoid various troubles, for example, when the paint is excessively absorbed into the surface and lies unevenly on it, which is why the aesthetics of the final painting suffer.
Some people apply wallpaper to drywall without using a primer. This is strictly forbidden, because the glue can very quickly be absorbed into the sheets of drywall, which will lead to their destruction and rapid peeling of the wallpaper strips. In some cases, this will require not only re-sticking the wallpaper, but also completely replacing the drywall.
What is drywall made of?
We will not give you a long description of drywall, since the name makes it clear what it consists of.
Drywall is plaster of Paris that is clamped in a cardboard “vice.”
In other words, the part that will be puttied is the most natural cardboard, i.e. paper.
The level of adhesion of the cardboard itself was quite significant, which undoubtedly plays into the hands of everyone during repairs.
Plaster and putty are well applied to cardboard walls.
Preparing drywall and room
After purchasing the primer mixture, as well as completing the installation of gypsum boards, it is necessary to properly prepare the surface and room for further processing. First of all, the sheets are cleaned to give the proper appearance. To do this, the following operations are carried out:
- Drywall joints are being cut.
- Make sure that all screws are recessed into the gypsum board, otherwise their heads will interfere with further processing.
- When the seams are cut, brush over the surface to remove dust particles (mandatory procedure).
- A reinforcing mesh is fixed over the seams.
If you can’t remove all the dirt with a brush, you should use a damp cloth. The main thing is that there are no traces or fibers left on the surface.
It is impossible to prime the gypsum board immediately after its installation - first you need to prepare the surface