Hello, regular readers and new audience! Have you ever had to do repairs in a short time? And this story happened to me: at work I was given a couple of weeks of vacation, during which I had to get my apartment in order and relax. For this reason, I had to abandon the traditional screed and put drywall on the floor under the tiles. As a result, I did not wait several days for it to dry, but immediately finished the work and calmly went on vacation. Of course, many people worry that tiles on drywall floors won't last long. But if you follow technology, there won’t be any difficulties. And how to do it? Let's figure out all the intricacies together.
Should I put drywall on the floor under the tiles?
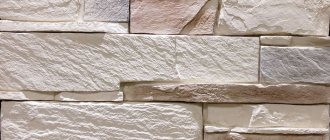
Installation of drywall for further tile laying is quite simple. To ensure the durability of their products, plasterboard manufacturers treat the front and back sides of the slabs with a water repellent. It makes drywall panels resistant to the effects of high humidity. Panels that are intended to level the floor are sanded and necessarily treated with special impregnations that prevent the chalking process.
The technology for installing drywall under tiles in various residential and public buildings was developed by qualified Knauf specialists. Special types of drywall are produced, which are intended for installation in places where there are quite high mechanical loads.
Consumption of plasterboard for floor tiles
To calculate the amount of materials needed for arranging the floor and laying tiles, you need to know the area of the room. The table shows an example for a room of 20 m² with a dry mixture thickness of 40 mm.
| Material | Quantity |
| Drywall (sheet has an area of 0.72m²) | 30 sheets |
| Expanded clay | 10.5 bags |
| Vapor barrier film | 24 m² |
| Edge tape | 1 roll |
| Phosphated self-tapping screw | 610 pcs. |
Floor construction
The created plasterboard floor has several layers:
- Vapor barrier. In frequent cases, it is polyethylene in two layers.
- Backfill. To do this, take expanded clay. Sometimes the material is perlite or quartz sand.
- Two layers of plasterboard for Knauf “Superpol” floor. Regular sheets of drywall are used less frequently. “Superfloor” has special edges that are overlapped and glued, and also secured with self-tapping screws.
Scheme of a floor made of plasterboard sheets
Preparatory work for laying drywall on the floor under the tiles
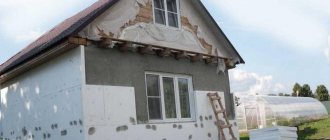
The arrangement of floors begins after completion of installation and test run of all systems (heating, electricity, underfloor heating). Next, pre-treatment of the base is carried out, which includes cleaning, leveling uneven areas, and filling all kinds of cracks and potholes. It is necessary to properly seal the joints between horizontal and vertical structural parts.
Before laying tiles, take care of the base
Drywall
must be laid on a perfectly flat, clean surface. It is recommended to pre-level the concrete base with a screed. After it has dried, you can continue working on arranging the plasterboard floor with your own hands. The technology allows for simultaneous insulation. To do this, add dry mixtures:
- perlite, which is characterized by fine grinding, is evenly leveled over the base.
- expanded clay, it is used more often, is a budget option, has good technical and performance properties and is a high-quality insulation material;
- sand.
Before filling the selected mixture, a polyethylene film is laid on the base. It serves as a vapor barrier, which reliably protects the bedding, as well as drywall, from the influence of moisture.
The parts of the film should be overlapped (keep about 20 cm), fastening them together with tape. It is necessary to lay a waterproofing tape along the walls (it serves as additional sound insulation). If drywall is installed on a wooden floor, then the base is covered with bitumen paper or roofing felt. The dry mixture is poured onto the vapor barrier in a layer of the required thickness. In small rooms, the bedding is evenly scattered over the entire base (the level should be controlled).
In a spacious room, it is recommended to divide the floor with slats. Guides help to obtain a level surface. It is important to distribute the mixture evenly over the entire base, filling it to the required level.
When the vapor barrier is laid and the bedding is distributed, the installation process itself can begin.
If you decide to lay drywall in two layers, then the second layer is installed offset, observing a step of 40 cm. It is recommended to cover the floor with special brands of plasterboard that are intended for such finishing (it is better to consult the seller). It should be taken into account that the weight of the slab can be 18 kg (regular slabs have less weight).
Advantages and disadvantages of the method
Using drywall, the floor can be made absolutely flat.
If you lay drywall on the floor, you need to know what the benefits will be from this, as well as what the negative aspects of such work are. Let's start with the positive aspects:
- the floor is much easier to make flat and smooth. For laying linoleum, this may not be so critical, but if tiles or laminate are used, then this point is very significant;
- there is no need to carry out any additional work to prepare the floor before laying gypsum boards;
- this method is comparatively cheap, because plasterboard sheets will cost less than mortar and related materials for concrete screed;
- Using gypsum board for the floor, you don’t need to wait for something to dry before laying the decorative coating;
- time costs are much lower than classical repair methods;
- the building material used does not create the same loads as concrete pavement.
GVL sheets are laid on a dry backfill, so there is no need to wait for the layers to dry.
Among the disadvantages, the following points can be noted.
- Drywall is not the most reliable material for flooring. Over time, it may begin to crumble, spoiling the entire structure of the finished coating. Therefore, only moisture-resistant plasterboard is used for the floor, but it would be even better to use gypsum plasterboard. Gypsum fiber board is excellent for these purposes. It has the properties of gypsum plasterboard, but is stronger and more reliable. As a result, such material will cost more.
- Even if you lay drywall in 2-3 layers, it still remains a fragile material. With sufficient mechanical impact on the floor, gypsum boards can be easily damaged. Therefore, you cannot do without additional coverage. Linoleum won't help much here.
- Don't rely too much on leveling the floor with plasterboard. All leveling will be carried out before laying the plasterboard sheets, and they will only preserve this effect.
How to lay drywall on the floor under tiles: instructions
Before starting to level the floor with plasterboard and further laying tiles, it is recommended to bring the gypsum plasterboard into the room where the slabs will be installed. The process of adaptation to environmental conditions (humidity, room temperature) takes 10-12 hours. After this, you can safely begin attaching the drywall. It intensively absorbs moisture, as a result of which it changes its size. Therefore, it is necessary to maintain small gaps from the wall to the gypsum board. First, the first layer of drywall is laid out.
Plasterboard option for tiles
During the installation process, it is not recommended to walk on the dry mixture. Because as a result, unnecessary voids may form under the drywall, and later the slabs will sag. The sheets are installed offset to each other. To reduce the amount of waste, the next row should be started by cutting off the previous strip. When laying the next slab, carefully coat the edges of the previous one with glue, and immediately remove the excess with a wet cloth.
It is recommended to secure the plasterboard floor to the base with long self-tapping screws. In this case, you should maintain a distance of 20-30 cm, retreating about 3 cm from the edge of the panel.
These are the optimal parameters, which are enough for the sheets to be securely fixed to the floor. This process must be repeated until the drywall
will not cover the entire area of the room. To get a high-quality floor, the entire installation process must be controlled by a level.
If the sheets are laid in two layers, then the second is placed offset - it is recommended to maintain a step of 40 cm in relation to the first. After installation is complete, excess film, tape and drywall must be cut off with a knife. Next, the tiles are laid on drywall, or another coating is used (laminate, linoleum).
Laying technology
How to properly lay drywall on the floor under laminate or parquet?
Here are step-by-step instructions for using regular wall moisture-resistant plasterboard.
- We take out the furniture;
- We clean the floor from debris and dust;
- We lay polyethylene on the floor. The strips are laid with an overlap of 10 centimeters and taped;
Laying vapor barrier polyethylene film.
- Pour expanded clay screenings onto the floor;
- We place beacons in it (steel corners or a galvanized profile for drywall are suitable for this role) and set their position strictly according to the level;
- We rake the backfill over the beacons and, if possible, compact it;
- We remove expanded clay screenings above the profiles using a long rule;
Leveling the expanded clay backfill along the beacons.
- We repeat backfilling and leveling, rearranging the beacons, until the entire floor is covered with screenings;
Backfilling is carried out from the window to the threshold. To prevent expanded clay from spilling over the threshold, a block or board is attached to the doorway.
- We begin to lay out the first layer of drywall from the door to the window.
Laying the first layer of drywall.
At the joints with the walls, it is cut so that there is a gap of about 10 mm between the edge of the sheet and the wall. Curvilinear cuts are made with a jigsaw and a wood saw. To obtain a straight edge, the sheet is broken at the edge of the table, after cutting it to a quarter of its thickness with a sharp knife.
After breaking off the sheet, you need to cut through the kraft paper from its back side.
When laying gypsum board on the floor, avoid stepping on the edges of the sheet: the first layer can easily be pressed into the bedding. You cannot step on expanded clay - dents will remain. To move along the backfill, use islands made of thick plywood or the same plasterboard, glued in two layers;
- The second layer of gypsum board is coated with strips of PVA glue and laid with all seams bandaged at least 50 millimeters. Along the edges, the sheets are tightened with self-tapping screws in increments of 15 centimeters; in the middle, the sheet of the second layer is pulled to the bottom sheet in increments of 20 - 25 cm.
When using ready-made floor elements, only the edges are glued and tightened.
Drywall for tiles on the floor: the pros and cons of the option
The following advantages help you choose plasterboard when laying floors and tiling:
- Leveling the floor is done using the “dry method”; unlike wet methods, this option allows you to maintain constant humidity in the room.
- Speed of work and ease of installation.
- You can easily lay drywall with your own hands or with a partner, without special preparation, just following the technological rules.
- When carrying out repairs, the trimmings are used to perform dry screeding in other areas.
- The slabs are lightweight and do not create significant loads on the floors. This is very important for multi-layer installation (two layers).
- Affordable price. Covering the floor with plasterboard is cost-effective.
- GCR is easy to process, cuts well, and is easy to work with conventional drywall tools.
- GCRs have a perfectly flat surface, where it is convenient to lay tiles and other finishing coatings (carpet, linoleum, laminated plasterboard, parquet).
- The plate is an excellent sound and heat insulator.
- It is convenient to hide various communications under the panels, as well as install a heated floor.
The decision to level the floor with plasterboard is a very smart one. This is a rather labor-intensive process, during which many different details should be taken into account. It is not recommended to lay expensive piece parquet on a plasterboard floor. But ceramic tiles can be laid easily. The video shows the process of installing a floor made of waterproof plasterboard.
Preparing to lay tiles
Only high quality ceramic tiles should be used.
- The pattern should be clear and even.
- The tiles must be smooth and uniform.
- When struck lightly, ceramic tiles should produce a dull sound.
Due to the use of a base made of plasterboard sheets, it is necessary to select the highest quality adhesive composition. You can pay attention to the following options:
- Liquid nails are good in everything except their cost. For beginners, a more suitable adhesive composition cannot be found, if the budget allows;
- Cement adhesive is a budget option. It is difficult to work with, and any mistakes are fraught with the appearance of various defects. But it costs quite little;
- If you need something as easy to work with as liquid nails and not as expensive as cement adhesive, you can opt for flexible tile adhesive.
Screeding the floor with plasterboard and laying tiles: rules and technologies
The standard for high-quality floor coverings is dry floors made of gypsum fiber board or waterproof gypsum plasterboard. This finishing material is similar to drywall, which is made from building gypsum and cellulose, as well as a number of other technological additives. It can be used to level the floor covering. Modern installation technology is quite simple, so you can do it yourself, and it is also very reliable and practical. Dry gypsum fiber floors have a number of advantages:
- it is a homogeneous material, devoid of a cardboard surface coating;
- the density is significantly higher compared to drywall;
- good fire and frost resistance;
- pure material. Does not emit harmful substances;
- sound insulation up to 35 dB;
- facilitate the construction of the building;
- has a certificate of compliance with international standards;
- floor leveling is carried out without special costs;
- easy to install due to its low weight;
- has good strength;
- can be used both in private houses and in high-rise buildings.
Plasterboard for the floor: how to choose, preparation for installation, as well as the subtleties of laying it on a wooden floor
The base for the finishing floor covering must be strong, level, and reliable. And in many ways, the result of the work done will depend on the materials used to create the subfloor, as well as on the correct installation. That is why experienced builders do not recommend that beginners use types of coatings that are difficult to use. One of the best options for creating a rough base for the finishing coat is plasterboard for the floor. It fully meets all requirements, and its installation is very simple and can be done by any novice builder without experience.
Drywall for floors
What you need to know about plasterboard for floor tiles
Types of finishing material:
- Regular gypsum fiber sheet.
- Moisture-resistant sheet KNAUF. Knauf sheet is a finishing material characterized by high quality and environmental friendliness, intended for dry construction. Both sides of the sheet can be treated with a water repellent.
Depending on the shape of the longitudinal edges, the screed has the following varieties:
- With straight edge. Used in rooms with damp, dry climates.
- With folded edge. Used for covering frame structures.
Areas of application of KNAUF:
- for screeding floor subfloors;
- for structures that must comply with fire resistance standards;
- to protect the ceiling and walls along the escape route;
- for buildings that have attic floors with wooden elements.
A high-quality screed is the key to a smooth floor. The main nuance here is worth noting that at the stage of laying the screed, the floor is leveled.
The use of plasterboard in floor construction
The use of plasterboard sheets for lining floors is extremely rare. This is due to the strength characteristics of the material and the complex structure of the base. In principle, it is not prohibited to use gypsum floor slabs (Fig. 1), but once you decide to make just such a design, you will have to be patient and carry out some types of additional (preparatory work).
Types of screeds: why put drywall on the floor
Screeds are divided depending on the material:
- Wet. Made from a solution of cement and sand, it is also called continuous. Wet screed takes a lot of time and requires a lot of effort. Laying
cement screed alone is a very complex and time-consuming process. And leveling the floor takes a lot of time and a lot of money. A small nuance is that the cement screed takes about two weeks to dry, and it is also worth clarifying that it must be moistened all this time so that cracks do not occur. After 3 weeks you can lay the coating. - Dry. Also called the team. In the dry version of the screed, everything is much simpler, because A gypsum fiber sheet is applied to the floor slabs covered with backfill, and the floor can be laid on the sheet itself. What benefit do we have? Installation takes much less time, it is not labor-intensive, can be easily done on your own, and under this type of screed you can provide communication, thermal protection and sound insulation. It should be noted that in this method, leveling the floor can be done much easier.
The main cases in which gypsum boards are used:
- in buildings with wooden coverings. With the help of sheets they reduce the load on the structure;
- in the cold season, when a wet screed can simply freeze;
- when communications are being laid or it is necessary to carry out insulation and soundproofing of a wooden floor;
- when renovation deadlines are running out and there is no time to tinker with the floor for a long time.
Leveling the floor with a dry screed: subtleties and special knots
What a dry floor screed is should be clear. The technology is indeed simple, but there are some points that are not clear “just like that.”
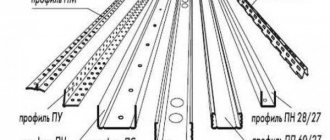
These are Knauf profiles for dry screed and the rules for them
Lighthouses and working with them
Setting up beacons for dry floor screed is a whole story. Branded ones - those that are used by representatives of the company, are difficult to buy. They simply don't exist. They are usually replaced with drywall profiles. They work with them like this:
The most difficult thing when doing a dry floor screed is to level the expanded clay and prevent dips and voids
You have to get smart somehow
In general, it seems clear and easy until you start doing it. The beacons are not secured by anything - I pressed a little harder, and he left. You have to control the effort, constantly check whether the bar has moved or whether the level has dropped. If you have a laser level, it’s still easier. Otherwise it's really difficult.
Beacon installation options
Laying beacons on flat cakes will cause problems with the deflection of the GVL. Above these “piles” the layer of expanded clay will be smaller, which will cause deflections. There is an option - screw in self-tapping pins and adjust them in height. Attach platforms to them on which to rest the profiles. After leveling, it will be necessary not only to remove the profiles, but also the platforms. It would also be very good to unscrew the screws. This will be ideal.
There is another way, but it is acceptable for not very wide rooms. The guides are screwed to the walls; special rules will need to be made for them. In order:
- We screw the profiles to the walls at a certain height. It is clear that they must be aligned in a horizontal plane.
Here is the guide on the wall. Also, at the same level, we attach it to the second one. We take a long, flat board, a piece of thick polymer. It is important that the bar is level, without bending. If there is any defect, it must be eliminated. We make cutouts on the sides so that the plank can slide along the beacon guides. The cut should be such that the lower edge of the strip installed on the beacons is at the level to which the backfill must be leveled.
This is a non-standard option: beacons for dry screed are screwed onto the walls
And this is how to make a rule for beacons on walls
It's much easier to work this way. Firstly, your rule is guaranteed to be in place. There is no need to constantly check the position of the beacons. Secondly, it is easier to stack the sheets from the floor rather than balancing on the sheets. Thirdly, you can tighten the screws after the entire floor has been laid. Fourthly, the beacons are removed after installing the sheet material and do not interfere with the process in any way.
The secret of installing drywall on the floor under tiles
It is necessary to clarify a nuance that is very important when laying dry screed. Do not forget that this screed is very afraid of water, so it is necessary to lay a moisture-proofing layer on the ceiling, on which the bulk material will subsequently be placed.
As a moisture-proofing layer, you can use polyethylene film, bituminized paper or glassine.
Backfill materials must meet these criteria:
- porosity. Necessary for sound and heat insulation;
- granular composition. Affects subsidence under loads;
- mineral composition. Has a fireproof purpose;
- flowability. Necessary for leveling the layer;
- hygroscopicity. Necessary to prevent high humidity.
For backfilling, you can use expanded clay screenings or various types of sand.
Little secrets:
- the floor to be covered should not be at an angle;
- sheets are laid in the door openings using the end-to-end method;
- if the backfill thickness is more than 10 cm, it is necessary to place an additional layer of sheets under the screed.
If it is necessary to insulate the floor, then heat insulators are:
- Expanded polystyrene. Externally similar to polystyrene foam, therefore, very heat-saving. But you need to be careful, as they are flammable.
- Fibrous: mineral and glass wool.
- Backfill: sand, expanded clay, slag pumice or crushed stone.
Technology for installing drywall on floors under tiles
Let's look at everything step by step:
- Prepare the floor. If necessary, the previous floor covering must be removed. It is best to do this right up to the concrete floor. Next, all irregularities should be eliminated. This process can be done using cement or plaster. We remove debris from the ceiling. It is necessary to mark the floor. When marking, you should take into account the location of heating and communications systems, floor height, and also door openings. Marking can be done using a laser or water level. We carry out waterproofing. For this, as noted earlier, film, roofing material or any other moisture-resistant coating is suitable. Coating joints are passed using mastic or film tape intended for this purpose.
- Laying backfill. A variety of materials can be used as backfill. It is better to use film if the ceiling is iron. In the case of a wooden floor, glassine is more suitable. The applied layer must be leveled using a level. The thickness of the backfill varies from 3 to 5 cm, and is influenced by the amount of unevenness in the surface slab. Next, metal profiles are installed in the form of beacons, which must be removed before laying the gypsum fiber sheets. If loose backfill is used, then the sheets begin to be placed from the door, insulation of another type is placed from the window.
- Laying dry screed. The sheets must be overlapped, and the layers must be glued offset. Do not forget that the sheets of the first row must be coated well with glue. There must be at least two layers laid. This technology makes the floor more durable. After puttingtying the second level, everything needs to be primed well. Next, you need to fasten the covering elements taking into account the gaps left. You can fasten using glue or self-tapping screws. Gaps are made so that the floor does not touch the walls. The gaps themselves are filled with mineral wool. If necessary, you can go over it with a primer. And only then do the finishing touches.
Laying flooring and tiles is quite simple and straightforward. This screed also allows you to level the floor in the shortest possible time. In general, installation can take no more than a day.
Allow me to introduce
Device
First, let’s talk about what a plasterboard floor or dry screed is.
It includes the following layers (from bottom to top):
- Vapor barrier . Usually dense polyethylene plays this role. It prevents dampening of the backfill and filtration of water vapor through the ceiling: drywall and gypsum fiber board are not resistant to moisture;
- Backfill . As a rule, expanded clay screenings are used for this purpose; less often, the floor is leveled with perlite or quartz sand. The backfill layer can have a thickness from 20 to 150 millimeters;
Please note: expanded clay screenings (coarse sand) combine high grain strength with a porous structure, providing good thermal insulation qualities and minimal weight, which means a small load on the floor.
- Two layers of gypsum plasterboard or gypsum plasterboard . Either ready-made floor elements can be used (the most common dry screed on the Russian market is Knauf Superpol), or ordinary sheets of wall plasterboard or gypsum fiber sheets. Wall gypsum plasterboard is laid with obligatory overlap of seams; Knauf Superpol slabs are made with edges that overlap and are attached to each other with glue and screws.
Ordinary wall plasterboard can be used to level the floor.
In addition: a damping edge strip is laid around the perimeter of the room between the backfill and the walls. It eliminates the transmission of acoustic vibrations to the walls when walking, and also compensates for the expansion of the dry screed during fluctuations in humidity and temperature.
Advantages
What is good about gypsum board or gypsum board against the background of traditional concrete screed?
- Relatively cheap. With a total screed thickness of 4 centimeters and the use of Knauf Superpol materials, leveling the floor in a room of 20 square meters with your own hands will cost less than 13,000 rubles;
- Guaranteed absence of leaks through the ceiling - no wet work is carried out. For comparison: with the slightest violation of the seal of the substrate, the ceiling of the apartment below will be saturated with cement laitance, which, of course, will not please your neighbors;
- Speed of work. Leveling the floor in the notorious room of 20 square meters will take one working day, 30 m2 - two days, 50 m2 - three;
Manufacturers and sellers focus on speed of work.
- Light weight screed. Due to the low backfill density, dry screed can be performed even on wooden floors;
- The floor is ready for the finishing coating immediately after completion of the work. For comparison, a concrete screed gains full strength only after a month;
- Dry screed can be used for laying any lines - water supply, wiring (of course, in corrugated PVC tubes), air conditioning lines, etc.
Flaws
In essence, this solution has only one drawback - limited compatibility with finishing coatings.
Many organizations offering the installation of dry screeds promise in their advertisements that gypsum fiber board and gypsum plasterboard can be installed on the floor under any type of covering (including carpet and linoleum). This is actually a half-truth.
Under a soft coating, a relatively weak gypsum-based material will retain a flat surface only if safety rules are strictly observed; in particular, falling heavy objects on the floor, walking on the floor in stiletto heels, horseshoe heels, and in general any strong mechanical impacts should be excluded.
GCR does not differ in mechanical strength. The edge of the leaf in the photo was crushed when it was stepped on.
I strongly advise limiting the list of finishing floor coverings to deformation-resistant materials that allow you to distribute the load over the maximum area of the substrate:
- Tiled;
- Parquet board;
- Laminate.
The laminate will protect the drywall from impacts and distribute the load over the maximum area.
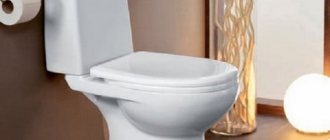
Drywall for bathroom floors: how to choose and use
Did you know that plasterboard for covering frame structures has its own analogue, which can be used when installing flooring - a special sheet for the floor? The composition of this finishing material includes pressed gypsum, reinforced with dissolved cellulose with the addition of various technological “additives” that increase the strength and moisture resistance of the product.
Note that such a sheet has one feature that makes it easy to distinguish it from its plasterboard counterpart: it has a homogeneous structure with the absence of a cardboard shell. Today we will try to talk about this material in more detail - we will look at the main characteristics of its types, give advice on their use, and also talk about the nuances and features of the technology for laying gypsum plasterboard floors.
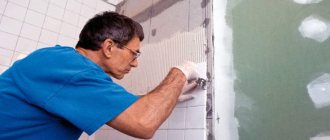
If installed correctly, tiles can be laid on drywall
Preparatory stage
In order for the flooring to last for a long time, it is necessary to fulfill a number of conditions before laying it. The first thing you need to do is purchase special plates designed specifically for this type of work.
At the next stage, you will need to prepare the “rough” floor for further installation:
- The surface is cleaned of small particles.
- Cement or other screed mortar is applied.
- After drying, you can begin installing the floor covering.
What and how to make lathing for plasterboard on the wall
At the second stage, it is also recommended to lay a layer of thermal insulation material. For these purposes, expanded clay is best suited, which can be replaced with perlite.
Before starting work, a polyethylene film is laid on the surface in two layers (this approach allows you to create a vapor barrier), each piece of which must be fastened to the next one. A waterproofing tape is laid along the perimeter of all walls, which prevents drywall from coming into contact with them. This tape is also used to increase sound insulation in a room.
At the end, expanded clay is applied to the film, which is leveled using guides. Such preparation of the floor will not only provide high thermal insulation of the room, but will also protect the drywall from moisture penetration from below.
In addition, before laying gypsum boards, it is recommended to lay out all sheets on the floor and leave them for 12 hours. This must be done, since the material adapts to the current temperature and humidity parameters within the specified time.
Another question that should be clarified before considering installation technology: is it possible to walk on drywall? As already noted, this material is quite durable, so it can withstand the weight of an adult. However, the sheets must lie on a hard surface.
Types of drywall: which one is suitable for tiles
Durable and environmentally friendly gypsum fiber is produced in the form of rectangular slabs with straight (PC) and folded (FC) edges. Specialists from KNAUF, a constant leader in the production of high-quality finishing materials, distinguish two types of gypsum fiber boards with different performance properties that determine their scope of application:
- Standard slab has high strength, hardness and fire safety. Can be used for finishing industrial and residential premises with normal humidity levels. Available in the form of rectangular sheets 2500 long, 1200 wide and 10 or 12.5 mm thick.
- Moisture-resistant board is a material treated with special hydrophobic substances with high moisture resistance. It is used in rooms with high humidity: bathrooms, showers, toilets or kitchens. Suitable for finishing attics, basements and garages. Available in both regular (2500x1200x10 or 12.5 mm) and small-format versions 1200x1200x10 mm for more convenient installation.
The KNAUF company produces a special type - floor element (EP) “KNAUF-superfloor”, made by gluing two mutually offset sheets of GVLV 1200x600x10 mm. The edges of the product have folds 50 mm wide, its total thickness is 20 mm. The advantage of the EP slab is that it is completely ready for installation in the KNAUF prefabricated floor substructure.
Characteristics of drywall: why it is suitable for floors and tiles
In addition to hardness and strength, which is achieved due to the high concentration of the reinforcing element - cellulose, the material has a lot of other positive characteristics:
- Possibility of use in any type of interior decoration - the slabs are used for laying floors, installing interior partitions, covering walls and ceilings.
- Humidity control – the structure of the material allows you to dry the room by absorbing excess moisture, and also “give” it back when the air becomes drier.
- High viscosity - the product is easy to install and does not crack or crumble during processing.
- Low thermal conductivity - excellent thermal insulation properties of the material allow it to be used as a reliable insulation material. This property is most in demand when used for laying floors.
- Non-flammability - it is used as fire protection for buildings and building structures. In the event of a fire, the material can prevent the fire from spreading to adjacent rooms and limit its access to important communications.
- Light weight - light (about 18 kg) slabs do not create a serious additional load on load-bearing floors, their transportation and installation are not particularly difficult.
- Possibility of laying on a wooden floor or a concrete base - installation of the floor covering is completed in a fairly short time. You can lay carpet, parquet boards, linoleum, laminate or tiles on the finished surface.
- Frost resistance - the slabs can withstand repeated freezing and thawing, which allows them to be used in cold, unheated rooms: garages, garden or country houses.
Features of using gypsum plasterboard for flooring under tiles
Today, most craftsmen prefer the dry method of leveling the floor. Unlike “wet” screed, this method avoids the following problems:
- use of additional materials (concrete, sand, cement, gravel);
- the formation of large amounts of construction debris and dirt;
- time spent waiting for the cement mortar to dry.
Leveling the surface in this way is not only easier, but also much faster - after laying it on the floor, you can immediately begin its final finishing.
Please note that the use of modern materials for finishing floor coverings requires the construction of a reliable and absolutely level base. Naturally, not all coatings can boast excellent heat and sound insulation characteristics, so a screed made of gypsum fiber sheets will be the best option.
Tools and materials
To carry out work on the floor, you must have drywall tools and purchase materials. Tools:
- Long rule.
- Level.
- Construction knife for cutting drywall.
- Jigsaw, small wood saw.
- Screwdriver.
- Thick film.
- Regular tape.
- Expanded clay or "Flechendicht Knauf".
- Drywall for floors "Knauf".
- Metal corner or profile.
- Board, limiter.
- Regular and long drywall screws.
- PVA glue.
- Foamed polyethylene.
Having collected everything you need, you can begin preparatory work and attaching drywall.
Installation of drywall on the floor under tiles
Installation can be carried out on any base - you just need to take into account some features of the installation technology. If increased requirements are placed on the thermal insulation of a room, then the floor will have to be reinforced with other materials, for example, polystyrene foam boards.
It is necessary to carefully calculate the total thickness of the coating with additional insulation - this indicator can significantly affect the height of the room.
The structure of the slab allows the installation of a “warm floor” system on its surface. However, it should be remembered that the use of thick floor elements in this case is not recommended - ordinary sheets with a thickness of 10 mm are quite suitable.
Required Tools
GVL sheets are most often used when the base of the floor does not have significant differences in height. Typically this figure is up to 5 mm. But there are other technologies that allow the use of material to create a flat surface. In any case, you will have to stock up on all the necessary tools, which include:
- Tape measure for making precise measurements indoors, including determining the size of sheets on the surface.
- Pencil – make notes and marks on sheets of paper, as well as on walls in the room.
- Putty knife.
- Cutter – for fully cutting sheets into fragments. If you use a high-quality tool, there will be no problems with damage to the material.
- Level.
In this case, it is very important to pre-calculate the required number of gypsum fiber sheets that will have to be purchased to complete the entire scope of work.
Preparing the base for drywall on the floor
Before starting installation activities, you should prepare the base by insulating it and installing guides. When leveling the floor in residential premises, expanded clay with a granule “caliber” of no more than 50 mm can be used as insulation. Under the insulating layer it is necessary to lay waterproofing - PET film, roofing felt or glassine.
Guides made of wooden beams, which need to be mounted on the surface of the floor base, will perform two functions at once:
- a reference point that determines the level of insulation backfill;
- lathing for laying and fastening slabs.
After filling the expanded clay, it must be leveled using a rule, leaning on the guides, and carefully compacted, paying special attention to the corners of the room.
Preparatory activities
Among these materials, perlite has the best quality. Its grind is fine, which allows it to be distributed over the surface in an even layer. The density is very high. Due to the high cost of products, perlite is most often mixed with sand in a ratio of 1 to 3. A cheaper material is expanded clay. But even in this case, it has excellent performance and characteristics. It simultaneously acts as insulation for the base of the floor.
Before starting work, plastic film should be laid on the floor surface. It is usually folded in two or three layers for better quality and durability. Thus, a vapor barrier is created that can protect the subsequent bedding in dry form, as well as gypsum fiber board sheets from high humidity. This moisture can come to the surface from under the floor.
The Knauf company offers its own material, called Flachendicht waterproofing.
The process of installing drywall on the floor under tiles
The process of installing a dry screed is a labor-intensive and responsible undertaking that must be carried out in several stages in a certain sequence:
- We lay a mounting tape along the wall near the floor, which will absorb impact noise and compensate for deformation from load and temperature fluctuations.
- We lay the first layer for the floor, installing the sheets from the corner closest to the entrance door to the room. We fasten the slabs to the sheathing using self-tapping screws of the required length.
- We apply the adhesive composition to the finished surface and install the second layer of slabs, laying them “in a staggered manner” with an offset of 250-300 mm. For reliability, it can also be attached to the sheathing using longer screws.
We have already talked about ready-made floor elements in the form of sheets, which are glued with an offset, forming folds for a more reliable connection. If you care about the strength of the floor and want to simplify its installation, then this is just your choice. The only caveat is that this option is somewhat more expensive than its standard counterparts.
Dry screed technology
The technology for laying Knauf loose flooring is quite simple, but even it requires sufficient experience and skills. Therefore, in order to get the job done quickly, efficiently and not spoil expensive material, it is better to contact qualified specialists. The contact details of such craftsmen can always be found in construction supermarkets or on specialized websites, and customer reviews can also be found there.
The entire process of installing a dry screed can be divided into several stages:
- preparatory stage;
- marking;
- vapor barrier device;
- expanded clay backfill device;
- installation of sheets of dry Knauf screed.
Let's take a closer look at each stage separately.
The nuances of laying drywall on the floor under tiles
During the installation of dry screed, several nuances arise that need to be given the closest attention:
- Make sure that the width of the gaps between the plates does not exceed 2 mm. Before laying the finishing coating of linoleum or carpet, you will need to putty both the seams and the screw heads.
- Remove excess adhesive solution, do not let it accumulate in the seams and near the walls.
- Upon completion of work, apply a layer of primer to the surface of the new floor, which can “combine” with the applied adhesive composition.
- If the floor installation includes ready-made panels, cut the folds from those edges that will be adjacent to the main floors and strengthen the edges of the sheets to the guides using self-tapping screws.
- When installing a “warm floor” system, you should lay an additional layer of insulation from polystyrene foam boards - they will prevent heat loss through the base of the floor.
In conclusion, I would like to note that today’s approach to repair requires the use of modern materials and the application of new technologies. We believe that installing a screed using gypsum plasterboard for the floor fully complies with this rule. Most professionals prefer this method of leveling the surface, rightfully considering it the simplest, fastest and least expensive. What do you think about this?
Types of floor screeds and their features
During construction or renovation, an important element is the installation of a durable rough screed covering, on which a decorative covering such as laminate, parquet, linoleum or ceramic floor tiles will then be laid. Today there are several types of screeds. This is a classic cement or concrete screed, it is applied wet. There is also a semi-dry screed using a minimal amount of water. There is a so-called self-leveling floor, which serves to level the surface of the subfloor. And finally, a type such as a dry screed, which is installed from gypsum fiber boards over a layer of expanded clay backfill without the use of water.