In the loft style: we make imitation brickwork in the interior
Recently, the so-called loft style has gained great popularity, including, among other things, open brickwork or its imitation on one or more walls.
Owners of apartments in brick houses are lucky in this regard - it is enough to leave the wall as it is or remove the plaster, but those living in panel or wooden houses should not be upset either. In this master class I will show how, if desired, you can make an imitation of brickwork on any surface with your own hands.
I’ll say right away that this process is not complicated, anyone can do it, but it will take a sufficient amount of time.
To work we will need a number of tools and devices:
- gypsum plaster;
— container for mixing plaster;
- wooden slats with a cross-section of 1x1 cm, a length of 1 meter or their equivalent (I ordered it from a carpentry workshop);
- level;
- glue gun and sticks for it;
- spray bottle;
— spatulas wide and small;
- a grinding machine or a block with sandpaper (for large areas, of course, the first is desirable);
- primer;
- paint, brush, roller for painting;
- ruler, pencil.
1. First, let's prepare the surface for application - remove everything that falls off or is about to fall off. Otherwise, surface unevenness does not matter.
2. We cut one of the wooden slats into 6.5 cm long blocks - we will need them for jumpers between the bricks. The bricks themselves are 25x6.5 cm (natural size).
3. Using a level, ruler and pencil, mark the lines for the location of our bricks and glue the guides using hot glue.
Please do not pay attention to the plaster mesh on the wall. This was the first experience, and the decision to do brickwork on the mesh was wrong. With our plaster thickness, a mesh is, in principle, not needed. This was confirmed in practice by experiment No. 2.
4. We spread plaster, wet the wall and cover it with plaster. This needs to be done quickly enough 
Align with a large spatula along the guides.
I recommend mixing gypsum plaster in small portions, about 1 square meter at a time. At first, you can do less, so to speak - a test batch.
The already painted ceiling was protected with masking tape.
5. If we want to get a beautiful, smooth, “new” brick, wait 15-20 minutes until the plaster sets a little, then draw the side of a spatula along all the guides and disconnect them from the wall.
If we want a beautiful, “old” brick with chips and unevenness, we wait until the plaster dries thoroughly and becomes hard, and only then we remove the guides.
I like the first option, but I plan to make chips and uneven spots in places.
After the guides are removed, I still manually form the perimeter of the brick, wetting it with water and smoothing out the unevenness.
For comparison, in the photo below the guides were removed when the plaster was completely dry.
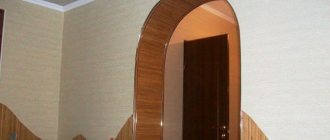
An interesting point of decoration around the front door. There is a small gap between the door and the wall, sealed with foam and a protruding corner of the wall. For convenience, I use a piece of plastic cornice as a limiter.
6. On the dried area, you can begin to “seal the seams.” This process is easier to do if you put the plaster in a thick plastic bag, cut a small hole in the corner, squeeze it into the seam (like pastry cream) and spread it.
7. If you are satisfied with the result obtained, then you can skip this point. But I wanted to make the wall smooth. Sanding is the most unpleasant, noisy and dusty stage in this process.
8. After sanding, you need to thoroughly clean the wall from dust, prime it and paint it. I painted it with washable interior paint in 2 layers.
Results of the work:
PS In conclusion, I want to say that there are a lot of ways to imitate brickwork, so I will allow myself to voice the positive and negative aspects of this particular method, based on my own experience of “construction and operation” (in operation for the third year now).
Pros:
- fits on any surface (in my experience - a concrete wall, a wooden partition);
— perfect evenness of the walls is not important + removes unevenness;
— the ability to select the degree of “aging” of the brick;
- naturalism (many of my guests thought that I lived in a brick house);
— wear resistance;
— easy to update (paint, repaint, plaster);
- environmental friendliness.
Among the disadvantages, I can note the significant labor intensity of this method and a large amount of dust at the repair stage. No disadvantages have been found in operation yet. There is no desire to update the wall, since it still looks decent and is not boring.
Thank you for attention!
Loft in the interior
Giving an apartment the image of a factory warehouse, technical room, or attic is quite simple in our time, due to the availability of projects, a wide range of materials and relatively reasonable prices. The work is easy to do even by yourself, focusing on ready-made designs by designers and photos on the Internet. But an apartment is a place intended for relaxation and the interior walls must correspond to this. Coziness, cleanliness, comfort, despite the rough style motives, are relevant for industrial projects.
Author: OM DESIGN
Free creative people, students and other pioneers of the loft in America in the 30s, having no funds for repairs, did everything with their own hands and used for this purpose whatever came to hand. And those parts of the industrial areas for which there were not enough materials remained as they were.
Walls 4-5 meters high are not easy to decorate. And in combination with their considerable length, there was an impressive area, which required funds that few of the “discoverers” could afford. The maximum that was done to give at least some refinement to the interior was to paint the walls and decorate them with improvised means. But this is rather an exception; often the brick, wood or concrete surface remained untouched.
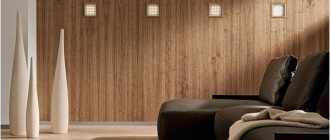
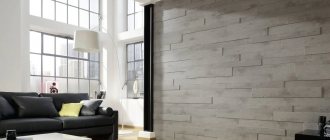
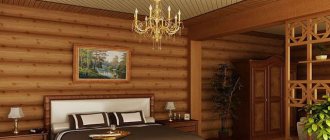
Wooden decor for walls in loft style
The industrial style is also “friendly” with wooden coverings, but they need to be used in doses. Too much wood will take the interior into a chalet or country style. Although wood is a traditional material for a loft, it is important to maintain a balance between the more traditional ways of decorating walls for a loft and wood that is not so familiar to walls. Wood textures domesticate the loft, while more familiar brick and concrete add the necessary brutality. In addition to aesthetic value, panels made from solid natural wood have other advantages: they provide the necessary thermal barrier and sound insulation; behind them you can hide electrical equipment, curvature of walls and other defects. Although there is no need to hide them in the loft, this functionality can be useful for a “soft” loft. The following is used as wood decor:
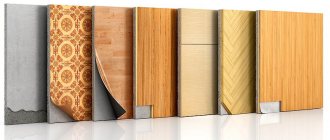
- barn boards
- decorative panels
- wooden sheathing
- saw cuts and slabs
Advice from the experts
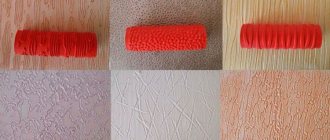
You can create chips and cracks characteristic of concrete with a simple brush.
Some brands of plaster tend to change color and simulate texture depending on the intensity of light. By setting different levels of light in the room, you can easily change the style from classic to high-tech.
When creating the effect of a concrete slab, do not achieve a perfectly flat surface. There are chips and microcracks on the slab. You can make them using a regular brush with multidirectional movements.
On large surface areas, take an assistant: one applies the plaster, the second then creates the desired effect.
Material characteristics
Good decorative plaster for the living room, in addition to its attractive appearance, should have decent performance characteristics.
- Environmentally friendly. Safe plaster does not emit toxic substances, does not contain allergens, and does not smell after drying.
- Moisture resistance. If your living room is combined with a kitchen, choose materials that are resistant to moisture, or buy a protective compound.
- Wear resistance. The plastered surface withstands mechanical stress and does not wear out over time.
- Fire resistance. High-quality decorative plaster does not support combustion.
How to create the effect of concrete using decorative plaster
The technology for creating concrete surfaces from decorative plaster includes three successive stages. The preparation of the walls is especially important, since if the preliminary work is performed poorly, subsequent peeling of the material and other similar troubles are possible. If you do not coat the surfaces with a primer, a layer of dust will prevent the plaster from laying down correctly. To prevent such problems and enhance the adhesion of the material, primer mixtures are used.
Main stages of surface preparation
Finishing work includes the following stages:
- Preparatory process. The walls are removed from various defects, such as chips and cracks, and then carefully primed with special mixtures.
- Main works. Decorative plaster is carefully applied in several layers.
- The final stage. The final touches are made and the final appearance of the surface is finalized.
Next, let's look at the process in detail. To begin with, the old coating is removed from the walls, then they are leveled and primed. To get really good adhesion of the material to surfaces, it is advisable to prime the walls several times.
How to apply decorative plaster-concrete
Application does not require a large amount of tools, you just have to pay attention - take a high-quality specialized tool. This will help you avoid mistakes and disappointment. For example, a low-quality metal spatula can “give” rusty stains that appear through all layers.
To work with this material the following is used:
- Trowel with rounded edges - a tool used for layer-by-layer coating;
- Plastic trowel – for smoothing the surface;
- A stamp with the desired pattern - it is used to apply an asymmetrical relief;
- Sponge - use it to shade the surface layer of wax. This is necessary to highlight the pattern;
- Spatula – for mixing the solution and making it easier to work with the main tool;
- Bucket for the mixture and its coloring
- Electric drill with mixer attachment
The following may also be useful for preparing the surface:
- Graters – for removing old coating
- Chisel, hammer
- Grinding machine
- Spatulas
- Rule - for leveling walls
- Reinforcing mesh
- Sandpaper for sanding
Don't forget about personal protective equipment:
- Gloves
- Respirator
- Glasses
- Workwear
- Covering material
Application technique
Before applying plaster to the walls, you should decide on its future texture.
It would seem, what to think about here, this is concrete? But even its simple surface can look different. For example, you can make an impression on a decorative layer, as if from wooden formwork. Or add fastening elements for concrete panels. Wall preparation includes:
Alignment . If you adhere to SNiP, then at least improved plastering is needed. The consumption of material and the appearance of the entire finish will depend on this. Plaster for concrete is applied in a thin layer and does not hide large defects in the walls, so their preparation is very important.
Cleaning . Dust and dirt should not impair the bond between the decorative material and the base.
Primer . To improve the adhesion (adhesion) of the plaster mortar, the walls need to be primed with contact primer with quartz sand. Suitable, for example, is “Betonokontakt” or analogues.
Selecting a working surface . Those sections of the wall that will not be plastered to look like concrete should be covered with film or masking tape. Door jambs and window slopes also need to be protected from contamination.
The technique of applying concrete-effect plaster is quite simple and anyone can do it themselves. Let's look at the work process step by step:
- Applying a base layer of decorative mixture . “Art concrete”, microcement or their analogues are placed using a metal trowel on the surface to be decorated (walls, floor or ceiling) and evenly distributed in a layer of 1-3 mm. It is important to ensure that the joints of the layers are not visible.
- Giving texture . Before the solution sets, pits, rough protrusions, scratches and grooves are created with a stiff brush or brush. You can work in any direction. Using a trowel or spatula, you can leave straight lines on the plaster, imitating traces of formwork.
- Smoothing . When the plaster begins to set, you need to smooth the protruding tops with a trowel and compact the texture. The result will be the effect of polished concrete.
- Applying decorative wax . To give the light gloss characteristic of concrete, the plaster is coated with a layer of wax. It will also protect the coating from moisture, add a light shade and highlight the texture.
Consumption of plaster for concrete is 0.7-1.2 kg/m² (with a layer of 1 mm).
Drying time - 24 hours.