voronenie oruzhiya
Initially, bluing of weapons was purely practical, protecting the metal from corrosion. Today, coating is also used to restore metal to its original appearance; moreover, blackening looks much more impressive and less noticeable in hunting conditions than metallic shine.
- 1 When is bluing necessary?
- 2 Features of technology and methods of bluing weapons at home 2.1 Cold bluing weapons
- 2.2 Hot bluing weapons
When is bluing necessary?
The concept of “blueing” came to us back in 1880, when it was often practiced by the best gunsmiths of that time. Then and now it is the best finishing method for high-quality double-barreled shotguns and modern piece rifles.
Professional and amateur hunters, as well as those who simply take care of their weapons, resort to various methods of bluing weapons. This process is carried out both by specialists and at home. What we get as a result:
- The product is completely protected from corrosion, because rust does not form on the blued layer;
- the product looks more presentable;
- when hunting in sunny weather, the black barrel of the gun is not noticeable;
- resistance to abrasion and other mechanical damage.
Blueing a weapon has many advantages.
If you are not lucky enough to become the owner of a blued weapon initially, use one of the many methods and overcome this unfortunate misunderstanding.
Rusty varnish for bluing
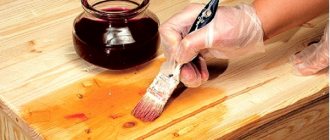
One of the most effective home methods is acid oxidation, or as it is also called “rusty varnish”. This is a special composition that promotes enhanced oxidation of steel and forms magnetic iron oxide.
To prepare “rusty varnish”, you need to take: technical hydrochloric acid (50 ml), carbon steel or cast iron shavings (30 g), concentrated nitric acid (54 ml), metal scale (20-30 g), and distilled water (1 l).
“Rusty varnish” must be prepared only in the open air and only while on the leeward side.
Otherwise, you may be poisoned by the gases released during cooking. You need to take a glass container, pour hydrochloric acid (50 ml) inside, add scale and cast iron shavings (one third), then add nitric acid (one third) to this mixture. We do everything very carefully; for protection you need a respirator, gloves, goggles, a robe or an apron.
“Rusty varnish” treatment
After some time, you will notice that the prepared mixture begins to turn green and bubble, releasing a brown gas and heat. When the mixture calms down a little and stops bubbling violently, add another third of nitric acid and the same amount of scale and chips. There will be an immediate resumption of the reaction, and then it will subside a little again. Then we throw in the remaining acid and shavings.
You will get a mass that is red in color. The main thing is to leave it in a sealed container for about 24 hours until it infuses. After just a day, pour distilled water into the mixture and that’s it. Your varnish is ready. It does not require any special storage conditions. When finished, this varnish is absolutely safe and can serve you for many years.
Theoretical basis of bluing
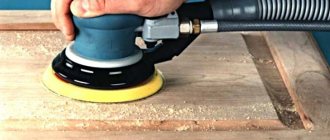
After you have done the “rusty varnish”, you should start preparing the metal surface. It is very important to sand it well and then polish it. For sanding we use coarse sandpaper, after which we begin to treat the surface with fine abrasives.
Cleaning trunks
Having done this, do not forget to degrease the metal surface. To improve this process, it is worth considering the nature of the oils and fats you want to remove. To properly and thoroughly degrease the surface into the solution, add emulsifiers.
Such substances include “liquid glass”, this is the most common office glue.
Features of technology and methods of bluing weapons at home
The bluing process is essentially a chemical reaction, so it is carried out under special conditions and in compliance with certain rules. The room in which manipulations will be performed must be well ventilated or have a powerful exhaust hood. To work with acid and other chemical compounds, do not use metal containers, only earthenware, porcelain or glass.
Materials for processing can be sandpaper, powdered pumice, and fine sand. With their help, the surface of the weapon is thoroughly cleaned and polished. Liquids must be used in the correct proportions, because... Most compounds are chemical based and can be harmful to weapons.
Regardless of the bluing method, it is necessary to prepare the following tools and materials:
- steel wool;
- latex gloves;
- protective glasses;
- cleaner;
- weapon oils (lubricating and cleaning);
- applicators (cotton swabs, rags, brushes, toothpicks).
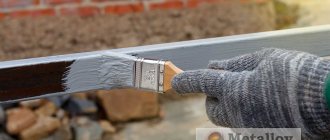
To blue a weapon you will need gun oils.
It is impossible, as experts say, to perform high-quality blueing at home. This is especially true for the oxidation of steel, which requires industrial conditions.
Home metal processing methods include cold, hot, and oxidizer bluing. Let's look at the features, as well as the advantages and disadvantages of each of them.
Burnishing in saltpeter
Burnishing in saltpeter Safety precautions 1. When bluing, you must use household gloves, a mask, and, if possible, glasses; the work will be carried out with chemicals that can leave burns.
2. It is necessary to add reagents strictly to water, and not vice versa.
3. If part of the concentrate has boiled away and you need to add water, then add it gradually
4. Reagents are always introduced gradually.
5. All utensils used must be made of stainless steel, absolutely clean and dried. Never use aluminum cookware.
6. The room where bluing is carried out must be well ventilated. Necessary tools, devices and materials. 1. Set for bluing in saltpeter 2. Tool for removing old bluing 3. Sandpaper starting from 320, 600, 1000, 2000 (80, 120, 240 if strong shells) 4. Clean rags; 5. Gun Oil Preparation
To remove the bluing, use a bluing remover of your choice and remove the bluing according to the composition instructions. After the old layer comes off, the parts must be thoroughly rinsed in warm, running water and immediately dried with a hairdryer or blown with air.
If you want to remove serial numbers deeply driven into the metal, then you need to start processing this place with 80 sandpaper, gradually moving to 120, 320, 400, etc. In this case, you need to clean it to a perfectly smooth state, otherwise after bluing the numbers will appear.
If you don’t need to remove deep numbers, then you should start immediately with 400 sandpaper, then 600, 800, 1000, 2000. This will remove even the smallest scratches and polish the surface, making it shiny. To achieve the best quality, the part must be rubbed without changing direction.
You can process notches on the trunk and other hard-to-reach places using a plastic card; to do this, you need to place a bent piece of sandpaper on its edge.
Degreasing Your kit contains: 1) A large blue bag 2) A transparent bag weighing about 200g 3) The smallest transparent bag is about 30-50g Take two tablespoons of the mixture (50g) from the blue bag and the smallest transparent bag, dilute it all in 1 l of water, and bring the resulting solution to a boil.
Then place the degreased parts into the solution so that the plane of their contact with the bottom of the dish is minimal and boil the parts for 20-30 minutes. Blueing
While the degreasing process is taking place, it is necessary to prepare a solution for bluing. To prepare it, you must first dissolve the remaining contents of the blue bag in 1 liter of cold water.
When preparing the solution, a chemical reaction occurs, releasing a strong, pungent odor. Also, it is necessary to avoid contact of the solution with the skin, because in this case, you can get a chemical burn. If the solution gets on the skin, it must be washed off immediately with running water and soap.
In the resulting solution, it is necessary to dissolve the entire contents of the remaining transparent bag weighing 200 g. Mix everything thoroughly. In this case, a reaction will occur, releasing heat. After this, place the container with the solution on the stove and bring it to a boil.
After the degreasing process is completed, use any objects or tools that prevent the degreased parts from interacting with your hands, remove the parts from the degreasing solution and rinse thoroughly in warm, running water.
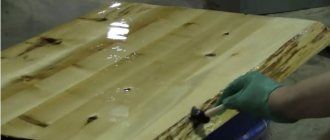
Without waiting for the washed parts to dry completely, they must be placed in the prepared and boiling solution for bluing, be sure to cover with a lid and leave the parts in the bluing process for 30-40 minutes. At a good temperature, the parts will begin to turn black within a couple of minutes, if the reaction does not occur, increase the temperature. After 30 -40 minutes, you need to reduce the temperature if you are using a stove. It is necessary to achieve a temperature of at least 125-140 degrees. You can use a thermometer. We continue to cook, as a rule, after 80-90 minutes of cooking, the parts acquire a deep black color. But you will notice it after the parts are lubricated with oil. After 90 minutes, turn off the solution and leave to cool to 100 degrees. There is no need to remove the parts, otherwise black spots may appear due to temperature changes.
It is possible to burnish parts only until the solution begins to acquire a reddish tint or foam. In this case, the solution will no longer be suitable for bluing. If the temperature is higher than expected, the solution may fail before 90 minutes.
After cooling, without removing the parts from the dish, place them under running cold water; try not to direct the water pressure towards the parts. Parts can be removed after complete washing. Dip them in a pre-prepared boiling solution with laundry soap for five minutes. This is done in order to expel the remaining solution from all cracks.
If the cooking methodology is violated, the coating of the parts may acquire either a matte surface or a rusty surface. If this happens, try washing the parts with a household liquid cleaner (for example, fairy). If the surface still remains matte or rusty, then you can try polishing the surfaces with a soft cloth with goi paste. If the above steps do not help, then the bluing process will need to be repeated by removing the coating again.
After washing the parts in a soapy solution, they must be washed with water, then with acetone, ballistol or VD.
If everything is satisfactory, then we carefully treat the parts with gun or machine oil. It would be a good idea to warm up the oiled parts a little with a gas burner; this will allow the oil to penetrate deeper into the micropores, but you should not overheat. At this point, the bluing can be considered complete.
Restoration of red coatings.
In the case when you need to restore the coating of red milled parts, you need to boil them in the solution for about 30-40 minutes, after which they are removed from the solution like all parts. If you cook longer, they may turn out black.
Oxidizing agent treatment
The oxidation method is often carried out by specialists in laboratories where the necessary reagents can be found: potassium nitrate and sodium hydroxide. The product is pre-prepared. Using steel wool, surfaces that will be blued are processed. Next comes the dyeing process itself:
- For 10-15 minutes, the weapon is placed in a cleaning composition to remove lubricants, dirt, and oil. Trisodium phosphate, denatured alcohol, or kerosene can be used as a bluing cleaner;
- Rinse off the cleaner under running cold water, but leave the product on for longer than 2 minutes. Kitchen detergent is washed off with hot water;
- Using a steel wire, the weapon and its individual parts are immersed in the prepared solution. Small elements can be immersed using a sieve. The solution for hot bluing is heated to a temperature of 135 degrees. The barrel of the weapon is immersed at an angle. This way you can avoid the formation of air inside;
- the sieve with small parts needs to be moved from time to time so that they are evenly colored;
- The soaking time in the bluing solution ranges from 15 to 30 minutes. You need to navigate by color. When the product acquires the desired shade, it is removed and washed in cold water;
- The washed parts and the main product are placed in a container with boiling water to remove residual chemical reagents. Keep the weapon in boiling water for up to 15 minutes. Parts with figured carvings up to half an hour;
- Finally, the blued parts are placed in a reservoir of water-repellent oil. During operation, it will protect products from corrosion and various contaminants.
Kerosene is used as a cleaning agent for bluing.
Plus bluing by oxidation is that the result is quite durable. Knives treated in this way become protected without destroying the hardness of the metal. The disadvantage is that the method is quite expensive and is not suitable for those who do not have at least a superficial knowledge of chemistry.
Birchwood Casey's Complete Guide to Metal Blueding
There is nothing more beautiful than the rich color of a well-oxidized firearm or the natural finish of a blued long gun. Nothing will help you treat metal surfaces as flawlessly as Birchwood Casey.
METAL PREPARATION
1. Before re-oxidizing or bluing, it is necessary to remove the old coating and rust. First, after removing the stock/forend and trigger mechanism, clean all metal surfaces with a sponge soaked in Birchwood Casey Cleaner-Degreaser and rinse thoroughly with water (see Expert Tips below). Always use gloves when preparing and performing the oxidation process.
Expert advice - Cleaning and degreasing are critical. At this stage, smooth out the corners. For best results, use Birchwood Casey Cleaner-Degreaser. If this product is not available, regular liquid soap can replace it. If necessary, carry out the cleaning procedure two more times!
2. Apply Birchwood Casey Blue & Rust Remover using a soaked pad and leave on for 2 minutes. Using a small steel wool pad (moistened with Blue & Rust Remover), lightly buff the metal to remove old bluing and loose rust. Continue the process until a glossy shine appears.
3. If the metal surface has deep scratches and/or pitting, lightly sand the surface using 280-grit sandpaper and then polish with steel wool. To remove deep ulcerations, a needle file may be needed (see Expert Tips).
Expert Tips -
When
sanding metal surfaces, wrap the sandpaper around the hard, flat side like a file. This will reduce hand fatigue and will also ensure a smooth surface and sharp edges.
4. In any case, take your time when preparing the metal surface. Continue polishing until desired results are achieved. Also, don't forget the trigger, screw heads, and other parts that need to be machined. Disassemble all mechanisms into parts for metal preparation and processing.
5. Reapply Cleaner & Degreaser using a sponge and rinse again cold water. When doing this, be careful not to touch the metal with your fingers, as this may leave noticeable marks that will appear after the oxidation process.
Expert Tips - When preparing metal rounded surfaces, such as those found on muskets and shotguns, for bluing, take a strip of cloth-backed sandpaper or emery cloth and quickly work the barrel in a back-and-forth motion to a boot-like shine. This technique is fast cutting, so be careful not to cut unwanted grooves. Apply proper polishing using steel wool.
COLD BLUEING (OXIDATION)
1. Apply Birchwood Casey Perma Blue® Paste or Liquid Gun Blue using the applicator to the entire surface. The work must be carried out quickly but carefully. You can divide the surface into 2 or 3 sections for ease of work.
2. Leave the solution on the metal for 30-60 seconds only. Not longer. Then neutralize the chemical reaction by immediately and thoroughly rinsing with cold water followed by dry wiping (see Expert Tips below).
Expert advice - time is of the essence when oxidizing. For best results, do not allow the solution to contact the metal surface for more than 1 minute. It is best to keep the solution in contact with the metal surface for as little time as possible.
Ž3. After or during washing, polish very gently with fine steel wool to harmonize the colour, if necessary. If you use steel wool for polishing, you should use the Cleaner & Degreaser again to remove any oil that may form on the surface. Evaluate the quality of the oxidation performed. If there are streaks on the surface or you would like a deeper/darker color, repeat steps 1, 2 and 3 until you achieve the desired color.
4. Assemble your gun. You have completed the oxidation process. To keep your gun looking like new, apply Barricade Rust Protection from time to time or after every shooting session.
BLUEING
In earlier times, metal bluing was a slow-moving rust-forming process that combined a chemical reaction and certain atmospheric conditions to create a thin layer of corrosion on the surface of the metal. This was time consuming and an inconsistent process.
Nowadays, bluing is a quick and easy process thanks to Birchwood Casey Plum Brown™ Barrel Finish. Proper preparation of surfaces to be blued is an important step in the process. If you're bluing an antique long gun or heavy whaling gun, you'll likely have to repair scratched, pitted, rusted, or post-file areas. Refer to “Metal Preparation” on page 9 for this important task.
1. Birchwood Casey Plum Brown Barrel Finish requires heat to activate the true bluing process of the product (the chemical reaction between the solution and the ferrous metal). When properly preparing and cleaning/degreasing steel, apply heat using a butane torch, gas, hotplate, or whatever is safe and convenient. For best results with a propane torch, use a high-flame nozzle and keep it 7-10cm from the surface.
Holding the barrel in a vise can cause cold spots (as the vise heats up). Instead, remove the gun carriage from the curved hanger to correct this problem.
2. Heat evenly by moving the heat source back and forth along the object being blued. Note that heavier areas (such as the breech of the barrel) get hotter and retain heat longer. In addition, small parts are more susceptible to overheating. Therefore, heat to 135 °C. For temperature control, read Carmichel's Tips below. It is not necessary to heat the entire barrel at once. You can heat and process the barrel in parts.
Expert advice - time plays a decisive role when bluing. For best results, do not allow the solution to contact the metal surface for more than 1 minute. It is best to keep the solution in contact with the metal surface for as little time as possible.
3. Once the ideal temperature of 135°C is reached, apply Plum Brown Barrel Finish using a soaked swab in long, even strokes. A rich dark color will appear immediately. (See Expert Tips below).
Expert advice - 135 °C is the temperature required to achieve a dark color effect when bluing. Achieving the exact temperature is not very critical, but it is important that the heating is as even as possible. For example, a long-barreled rifle must be heated evenly, so the temperature should be neither too high nor too low in any part of the barrel. Uneven heating can result in possible uneven coloring.
If the color appears too dull in this area, it is likely due to a cold spot. Heat the area immediately. If the metal is too hot, the solution may bubble and foam, resulting in a lighter, uneven color. In this case, cool the metal slightly before continuing processing. Take your time and apply the solution carefully, paying particular attention to color, texture and smoothness.
4. During the bluing process, you may notice a lack of uniformity in both depth and color. This is usually the result of a precipitate formed after a chemical reaction. Don't worry about this. As long as the color is not too deep, the process works well on shiny and semi-shiny areas.
5. Once the metal is cool enough to handle, rinse thoroughly cold water, dry with a clean cloth and lightly polish with steel wool. If you desire a deeper, more uniform finish, repeat the entire heating and bluing process.
6. Once bluing is complete, wipe down all surfaces with Barricade Rust Protection. This is very important after rinsing, the product will penetrate the surface and provide a deep, rich, red-brown, even coating. Leave the product on for 24 hours.
7. Reassemble your treated firearm.
Plum Brown Barrel Finish is a protective finish that will withstand heavy gun use and frequent use of cleaning chemicals. To keep your gun looking good, simply apply a coat of Barricade Rust Protection every now and then or after every shooting session.
ELIMINATION OF DEFECTS
Perma Blue Gun Blue
The result of bluing is a spotty and uneven finish. Why?
- Either the metal was not properly cleaned and degreased, or the contact with the solution was too long, more than 1 minute.
The metal did not become burred.
- Perma Blue Liquid or Paste Gun Blue should not be used on stainless steel or aluminum surfaces.
- The solution was in contact with the metal for too long, more than 1 minute.
The bluing is coming off.
- This happens if the metal has not been cleaned, degreased or not rinsed well enough with water.
- The solution was in contact with the metal for a long time.
The metal looks good after oxidation, but gradually becomes covered with rust.
- Barricade Rust Protection or other water-repellent rust preventatives were not applied.
- The bluing is not completely dry before applying oil.
- Not rinsed enough with water.
Plum Brown Barrel Finish
Uneven application. Why?
- Uneven heating may result in uneven coloring.
- The metal is not well cleaned and degreased.
- The chemical reaction may result in a precipitate.
The appearance was great, but the next day rust appeared.
- Not washed or dried well enough before applying each subsequent coat or water repellent oil.
- Barricade Rust Protection or other water-repellent rust preventatives were not applied.
You can buy everything you need for proper bluing of metal from the manufacturer Birchwood Casey in our online store 009.RU with delivery throughout Russia. Follow the news on the website, on social networks (VKontakte, Facebook), and you will be the first to learn about ongoing promotions, new products, and will be able to familiarize yourself with our products in more detail.
For any questions you may have, you can contact our consultants by email or by phone +7-985-456-90-09, +7-495-589-54-33.
Criteria for choosing a bluing method
Before you begin the bluing procedure itself, you need to decide which method will be most effective in your particular case. This is done according to several criteria.
- The degree of wear of the previous bluing. If most of the coating remains, it can be renewed using alkaline bluing or cold bluing. If more than half of the coating has been erased, it is recommended to completely remove the old layer and carry out the processing procedure again.
- Age of the weapon. Antique samples were processed using thermal bluing. Unfortunately, today this method is not in demand due to the length of the process. You can repeat it at home using special preparations available for sale, or seek help from a specialist. There are some rules here. Ancient weapons with silver soldering cannot be treated thermally, because... salts can dissolve silver.
- The rationality of one or another method of bluing in terms of cost. It is at least unreasonable to bury a cheap barrel using an expensive thermal method.
- The cost of the bluing methods themselves. Here they are guided by common sense and foresight. If now an expensive coating method seems unnecessary, then in the future such savings may result in expensive restoration. Also, cheap bluing methods will protect the weapon for a short period of time, and the procedure will need to be repeated over and over again. And if you calculate the cost of regular events and one, but for a long period, then the second option will not seem so expensive.
Safety rules and regulations
Any manipulation with weapons requires compliance with safety precautions, especially for manipulations at home. Failure to comply with the rules of conduct is dangerous to the health and life of not only you, but also those around you.
- Before bluing your firearm, be sure to unload it and remove any woodwork.
- Solutions with chemical components can emit harmful fumes, so the entire process should take place in a well-ventilated area.
- Select special utensils and tools for bluing, keep them separate from household equipment and wash them well after use.
- Working with chemicals requires full protection to avoid burns.
Whichever bluing method is chosen, it requires preliminary preparation:
- cleaning the surface of the workpiece;
- thorough surface grinding;
- degreasing, after which you need to continue working only with rubber gloves;
- using only those products that are suitable for bluing weapons at home;
- final processing of the product.
When starting bluing, you should strictly follow the order and sequence of actions to prevent damage to the weapon.
Warnings
- Before using any of the methods described above, make sure the gun is unloaded! Also remove the magazine. X Source of information
- Carry out all blueing processes in well-ventilated areas. Caustic salts used for hot blueing are particularly poisonous.
- Do not attempt the hot blueing process on aluminum. This will cause a violent chemical reaction with chemically aggressive salts, which can ultimately lead to serious chemical burns. Hot blueing is also not recommended for old weapons, or double-barreled shotguns, in which soldering, including silver, was used, since the blue solution will dissolve all the solder. X Source of information