The final stage of apartment renovation - finishing work is carried out from top to bottom, unless it is a spot repair of the cladding. Repairing the ceiling in an apartment is carried out first, not because it is the most visible of the enclosing structures, but due to the inevitable contamination of all bases located below in the process of finishing it. However, the finishing design of the ceiling base often becomes unusable before the cladding of the walls and floor - the ceiling, although not subject to abrasive effects like floor coverings, clearly shows on its surface the consequences of other negative factors - deformations and vibrations of the building, leaks from above, pollution. Therefore, renovation of ceilings in an apartment is sometimes carried out more often than finishing other enclosing structures, that is, not as part of a large-scale renovation of the interior of a home, but as an operation that can be performed independently - when installing protection against damage to the cladding of walls and floors. Accordingly, the need to frequently perform this type of work forces us to do the ceiling repairs ourselves in order to save money.
Let's look at how to repair a ceiling in the most common situations and in the most affordable ways.
Calculator for calculating the amount of dry building mixture for plastering the ceiling
The initial values for the calculation will be:
Ceiling area. For a rectangular room, calculating it is not difficult.
- The planned minimum thickness of the plaster layer depends only on the specific conditions of the room being finished and the wishes of the owners. As a rule, a layer less than 5 mm is not applied when plastering.
- The amount of difference in ceiling height that needs to be eliminated by plastering.
- Master's qualification level. A professional will waste no more than 5% of the solution, but for a beginner, at first, even 15% of the solution may not be enough.
The resulting value will initially be expressed in kilograms. But dry plaster mixtures are sold in paper bags of 25 or 30 kilograms, and purchasing an open bag is great stupidity, since no one can guarantee the quality of the solution. This means that one way or another you will have to round up the amount of purchased composition up to the whole number of bags. This supply will still not be superfluous - all the repairs are still ahead! This is also taken into account by the calculation program.
Proper whitewashing of the ceiling with your own hands
Do-it-yourself ceiling painting technology
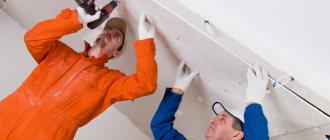
Drips and rust on the ceiling, loose plaster - all this can significantly spoil the interior of your home. But if you whitewash the ceiling correctly, the room will become brighter, fresher and more comfortable. Whitewashing is perhaps the easiest way to do ceiling repairs yourself. To do this you will need the following tools and materials:
- chalk, or slaked lime;
- if necessary - hydrochloric acid solution, denatured alcohol, copper sulfate;
- wood glue;
- blue;
- laundry soap;
- brush or brush;
- roller (spray);
- hammer and spatula.
Now let’s look at the step-by-step process of whitewashing the ceiling with your own hands.
- First of all, wash off the layer of old whitewash with warm water using a brush or dry brush. If rusty spots are visible, wash them and treat them with vitriol. A 2-3% solution of hydrochloric acid will help remove traces of soot. Before working with acid, cover furniture and wear protective clothing.
- You can get rid of drips with this remedy: mix lime slurry with synthetic drying oil in a ratio of 20:1, or stir lime with denatured alcohol in water until the consistency of milk. You need to paint over the stains with this mixture at least 3 times.
- Beat off the loose plaster with a hammer, and fill all cracks in the ceiling with gypsum or lime mortar.
- After finishing the putty work, strengthen the gaps between the ceiling slabs, at windows, doors and in corners. To do this, glue a strip of bandage to wood glue, or use a sticky sickle. Sand the treated surface.
- Now prepare the soap maker primer. Take 40% laundry soap (200 g), cut it into small shavings and dissolve in 3 liters of boiling water. Stirring vigorously. Pour in 100 g of drying oil. Pour this solution into lime slaked in water (2 kg per 5 l) and mix thoroughly. Cover the ceiling with this primer.
- After the surface has dried, it must be covered with lime mortar in 3 layers.
The recipe for the solution is as follows (based on 10 square meters): dissolve 90 g of wood glue, 2300 g of chalk, 17 g of blue, 60 g of laundry soap in 3-4 liters of water. Dissolve and stir until the consistency of liquid sour cream.
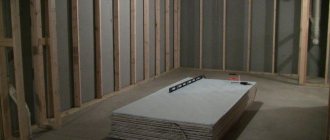
Preparing and leveling the ceiling
Next, repair work is built based on what you need. If you plan to level the ceiling, then do it using a gypsum mixture or plaster. But before leveling, be sure to prime the ceiling, as mentioned earlier. This will provide better grip. To level the ceiling you will need a bag of plaster and putty. The consumption of materials depends on the area of your ceiling. When you come to the store, choose the appropriate packaging volume. If in doubt, check with sellers to determine how much plaster and putty will be required for your area.
Tools used in work
- plaster trowel;
- two spatulas - large and small.
Take your choice of tools seriously. You should not save, but it is better to purchase high-quality spatulas and trowels, because the final result of your work will depend on this.
1. trowel; 2. spatula; 3. plaster spatula 350 mm
It is better to choose the main (large) spatula with a size of 35 cm; its length is approximately equal to the length of the arm from the elbow to the fingertips. It is more convenient to use and easier to manage.
Applying plaster
Dilute the dry plaster mixture with water according to the instructions on the package and mix well. For more thorough mixing, you can use a low-speed drill with a mixer attachment.
Advice! Prepare the plaster in small portions, because... it hardens very quickly and becomes unsuitable for work.
After applying each layer, the surface is left to dry for a day. At this point, the rough leveling of the ceiling is completed and you can begin working with putty. It will help smooth out all minor unevenness.
Applying putty
Putty is used for fine finishing of the ceiling. It is used after rough leveling of large cracks, irregularities, depressions and surface differences with plaster. The same rule applies here as with plaster - after applying each layer, a day must pass before applying the next one.
Important! Putty, unlike plaster, is applied only in a thin layer. It does not withstand application thickening of more than a few millimeters.
After the putty has dried, the ceiling can be sanded to a perfect shine.
Types of putty according to degree of readiness:
- There are dry putties. They are sold packaged in bags. They must first be diluted with water and mixed;
- Ready-made putties, usually sold in buckets. As mentioned earlier, we recommend using ready-made putties, because... they are easy to work with.
It is advisable to use polymer putty for painting. She has the longest “lifetime”, i.e. after application, it can be stretched for a longer time, which means it is possible to work and level the entire surface thoroughly before the composition begins to dry. It also has a very fine grind, which will have a positive effect on the final cleaning of the surface.
The putty is chosen relative to the base on which it will be applied. Construction store consultants will also help you with the selection.
Important! Finishing work is always carried out in well-lit rooms. Use lamps or spotlights.
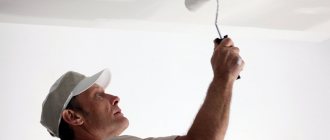
After plastering is completed, the ceiling must be covered again with a layer of reinforcing primer. Application should be uniform over the entire surface. Use a paint roller for this, and a brush for hard-to-reach places. When covering highly absorbent surfaces, several coats may be required. After applying the primer, the consumption of subsequent materials, as noted earlier, will be greatly reduced. The primer also acts as an antiseptic. If you are quite satisfied with the ceiling, then proceed to its immediate finishing.
Types of ceiling repairs
Do-it-yourself painting of a plasterboard ceiling
Today there are many such types, from cosmetic renovations and modest decorations to incredible works of art. It all depends on financial capabilities and design preferences. Among the most common options for repairing the ceiling and ceiling structures in an apartment with your own hands, which we will describe step by step, choose:
- wallpaper finishing;
- painting;
- gypsum board;
- plastic panels;
- tiles;
- suspended structures.
If installing plastic and tiles does not require special skills, and the work itself is no different from that performed to repair walls and floors, then all the others have pitfalls.
Pros and cons of different coatings
Based on your requirements, you can choose the cheapest ceiling repair, and for this you need to know how the selected inexpensive types of coatings will differ. The easiest way is to list the main positive and negative aspects of their use:
- Whitewash. Finding a cheaper type of coverage is difficult. For a minimal cost you will get a clean white ceiling. However, soon it will lose its beautiful appearance and will require updating. You are guaranteed constant costs for this.
- Dye. Much better than whitewashing, although it is more expensive. Here you can play with color, texture and even choose a waterproof option. It will last long enough to not have to think about it. However, in addition to the higher price, it is worth noting another disadvantage - the plane will have to be leveled so that there are no visible defects. This also costs money.
- PVC tiles. You can even stick them on an uneven ceiling. It's very simple and takes very little time. In addition, such repairs will be very cheap. The downside is the “cheap” appearance of the surface and the possibility of yellowing of the tiles after some time.
- Wallpaper. The choice is ambiguous. Previously, you would not have surprised anyone with wallpaper pasted on the ceiling, but now you rarely see such a finish. However, if you choose plain white wallpaper for painting, you can give the surface a visible texture, and, if desired, even paint it. The disadvantages include the difficulty of gluing - if there is the slightest mistake, the joints of the panels will be visible and ruin everything.
Based on the listed characteristics of different types of coatings, you can choose exactly what suits you.
Pasting wallpaper
Repair of the corridor in the apartment. photo and design. repair of floors, walls and ceilings. step-by-step instruction
To apply wallpaper to the ceiling, the joint efforts of at least 2 people will be required. This is quite a difficult job, since you will need to hold the wallpaper above your head and join it correctly. To work, you will need glue, selected wallpaper, a roller, a construction knife, as well as a glue bucket and dry rags.
The wallpapering technique looks like this:
- after thorough preparation of the surface to be glued, it is necessary to prepare the glue in accordance with the manufacturer’s instructions;
- wallpaper is cut into panels of the required length, parallelly joining the pattern on adjacent sections, if necessary;
- A cut piece of wallpaper is spread on the floor, glue is applied to the back side with a brush and it is allowed to lightly saturate the wallpaper;
- in the meantime, glue must also be applied to the surface of the ceiling along the entire length of the panel;
- then a piece of wallpaper is rolled into an accordion and pasted onto the surface of the ceiling, gradually straightening it out;
- using a roller, remove all air bubbles from under the canvas, and wipe off excess glue with slightly damp rags.
All other sections of wallpaper are glued in the same way. If there is a decorative pattern on the wallpaper, you should make sure that it matches the adjacent canvases. The room is closed and the wallpaper is left to dry for a week.
Redecoration process
Having decided on the method, materials, and tools, we begin the repair process. It consists of three stages:
- Removing old coating;
- Surface preparation;
- Finishing.
If the ceiling was previously whitewashed, first remove the old layer with a wet sponge or roller. If there is a thick layer, use a spatula.
Wallpaper is easier to remove; it is pryed off with a knife or spatula and removed from the walls. In areas where they do not come away from the wall well, simply moisten them with water, the process will go much faster.
Paint, like whitewash, is removed with a spatula.
The second stage includes surface preparation. Before you start gluing or painting, you need to prepare the surface well. The cleaned surface is primed for better adhesion. Then the walls and ceiling are leveled by applying plaster.
The final stage is finishing. After completing the surface preparation, the application of finishing materials begins.
It is better to use a roller to apply paint. It is advisable to dilute the first layer of paint in a large amount of water and apply it to the ceiling, the adhesion will be better. After this, paint the surface 2-3 times.
For wallpapering, it is important to choose a good adhesive suitable for the selected type of wallpaper. The adhesive is intended for gluing vinyl, paper, non-woven wallpaper
If the surface has previously been painted, it is necessary to treat it with water and soda, then rinse with clean water and wipe dry.
Spread the wallpaper with glue using a brush or roller and fold it in half so that it is saturated. The walls are also smeared with glue, finishing material is applied and smoothed from top to bottom with a roller or a regular rag. There should be no draft in the room, otherwise the wallpaper will begin to come off the wall or ceiling.
Updating a room with your own hands will save time and money, transform the room, make it fresh, clean, and cozy.
Pasting wallpaper
To apply wallpaper to the ceiling, the joint efforts of at least 2 people will be required. This is quite a difficult job, since you will need to hold the wallpaper above your head and join it correctly. To work, you will need glue, selected wallpaper, a roller, a construction knife, as well as a glue bucket and dry rags.
The wallpapering technique looks like this:
- after thorough preparation of the surface to be glued, it is necessary to prepare the glue in accordance with the manufacturer’s instructions;
- wallpaper is cut into panels of the required length, parallelly joining the pattern on adjacent sections, if necessary;
- A cut piece of wallpaper is spread on the floor, glue is applied to the back side with a brush and it is allowed to lightly saturate the wallpaper;
- in the meantime, glue must also be applied to the surface of the ceiling along the entire length of the panel;
- then a piece of wallpaper is rolled into an accordion and pasted onto the surface of the ceiling, gradually straightening it out;
- using a roller, remove all air bubbles from under the canvas, and wipe off excess glue with slightly damp rags.
All other sections of wallpaper are glued in the same way. If there is a decorative pattern on the wallpaper, you should make sure that it matches the adjacent canvases. The room is closed and the wallpaper is left to dry for a week.
Pasting wallpaper is the final stage of cosmetic repairs
After painting the ceiling in 2-3 layers, proceed to wallpapering. If you plan to glue the ceiling plinth.
1.Priming the walls before wallpapering
Before gluing the wallpaper, prime the entire surface of the walls with wallpaper glue, diluted as indicated on the glue package: preparing glue for priming the surface.
2.Marking before wallpapering
Using a long building level or plumb line, draw a vertical line to guide the first canvas. Wallpaper is traditionally glued from the window, but with modern butt gluing this does not matter. You can also glue from the door.
3.Preparing wallpaper before gluing
Wallpaper is cut into sheets with an allowance (5-7 cm) along the length. When cutting canvases, take into account the frequency of repeating the pattern (rapport). Be careful when selecting adjacent canvases in height to match the pattern. If the wallpaper is “unmatched” then you are a little lucky.
4. Wallpapering
Wallpaper is pasted in two ways.
Gluing paper and vinyl wallpaper
Cover the wallpaper sheets with glue (paint roller or paint roller), naturally from the end side. Fold the canvases in half (with glue inward, edges in the middle). Maintain in this condition for the time indicated on the glue packaging (usually 3-7 minutes). Do not hold the canvas. It's better not to hold out than to overextend. Be especially careful and attentive when using thin paper wallpaper. If they get too wet, they will simply fall apart in your hands.
The glue-impregnated canvases are applied to the wall along a pre-marked vertical level. Smooth out wrinkles and bubbles with a pressure roller or a stiff brush. I do not recommend using a rag, because... Some types of paper wallpaper may have paint washed out.
Gluing non-woven wallpaper
Wallpapering walls
When gluing non-woven wallpaper, the glue is applied to the wall. The wallpaper itself can be cut into canvases according to size and selected pattern. Apply glue to the wall with a roller and glue the canvases end-to-end, making sure that the pattern of adjacent canvases matches.
5.Cutting the wallpaper
Since the pieces were cut with an allowance in length, after gluing the canvases under the ceiling and at the baseboard, cut off the excess wallpaper with a construction knife along a metal ruler or with a special wallpaper trim resembling a spatula. Keep the blade sharp. The dull canvas tears and pulls the paper of the canvas along with it.
6.Gluing the wallpaper border
Glue the top part of the canvases, up to the planned border. Beat off horizontal border level marks along the entire perimeter of the room. The “end” of the line should meet the “beginning”. Using a sharp knife and a metal ruler, trim the canvas around the perimeter. Glue the border butt to the cut edge. Do not glue the bottom of the border. Glue the bottom panels, bringing them under the border. Glue the bottom part of the border, first cutting off the excess from the canvas.
You can glue the border without such “bothering” - into the “overlay”. Use special glue for gluing borders.
Gluing the wallpaper border
Clean the room. Don't open the windows! Avoid drafts until the wallpaper is completely dry! The wallpaper is up!
Surface preparation
The old covering is removed from the ceiling. Each type of old material has its own removal method. To destroy whitewash and plaster you will need a sponge, water and a spatula (how to wash off old whitewash from the ceiling?). The surface must be thoroughly soaked and then the remaining material must be removed with a spatula.
It is very important that the whitewash or plaster is completely removed. The same method applies to wallpaper.
If cracks are found in the ceiling, they must be repaired. The next stage of preparation is priming. The process is carried out using cement mortar and a roller. It is very important to wait for the material to dry completely before carrying out the rest of the work.
Preparing the ceiling before renovation
Surface cleaning is performed only in case of secondary repairs. If you are the happy owner of an apartment in a new building, you can skip this stage. So, the most popular option for old finishing is whitewashing, lime plaster or wallpapering. All these materials are easy to clean, and this stage does not require increased labor costs.
A paint roller with a long handle is dipped in warm water, then wrung out until it is moderately moistened. As water is absorbed from the roller, it is wetted again and passed over the same place with more intense pressure.
It is important to know here that it makes no sense to wet the entire ceiling at the same time. It is cleaned in small areas, according to the scheme: wet 2-3 square meters, clean with a spatula until the floor slab or putty - wet the next area
A well-moistened layer of old finishing can be easily removed, but can greatly pollute the room. The room must be completely empty before work begins.
After cleaning a small area, it is worth removing the waste from the floor to give yourself the opportunity to step on a relatively clean surface. If you notice loose plaster under the outer layer to be removed, it should be removed completely or partially. This can be realized using the same spatula, which is used to knock down and pick out all the loose areas.
A ceiling painted with water-based or oil-based paint will be much more difficult to clean than whitewash. There are mechanical and chemical methods of removing paint, where the first option is carried out with sandpaper or a spatula. The process is labor-intensive, and perfect removal of old finishes is extremely difficult to achieve.
To implement the chemical method, you can buy a special remover, which softens the paint in a period of time from 4 to 12 hours and makes it possible to remove it quickly
This composition is sold in construction and hardware stores; when applied, it requires special precautions: avoid contact with eyes and exposed skin.
A ceiling on which polystyrene tiles have been glued may have an unpleasant surprise in store for its owner in the form of glue residue. They can only be removed with a hard metal spatula, and this must be done. Wallpaper from the ceiling can be easily removed when wet, compared to all the listed types of finishes, and is the most practical to remove.
Ceiling priming
The final stage in the preparatory work. At this stage of work, we need to improve the “adhesion” of the ceiling surface and treat the area with an antiseptic. This is why everything is covered with a primer.
Before applying the solution to the surface, it is necessary to examine the ceiling for the presence of mold, fungi and other misfortunes. If such areas are found, they must first be treated with antifungal agents. Then let the surface dry thoroughly.
We apply the primer using a roller, so the composition is evenly distributed over the area. Use a brush in hard-to-reach places.
Causes of stains on the ceiling
Do-it-yourself repairs after painting the ceiling will be needed if stains appear on the surface. The reason for their appearance lies in the following:
- If during operation the roller was periodically soaked in water or washed, then stains may appear if the coat of the instrument was poorly wrung out after washing.
- When using low-quality liquid paint, the appearance of stains is a natural process.
- Stains appear immediately after painting in case of flooding by neighbors above.
- If the tool’s movements were chaotic during operation, then the spotty surface is a consequence of such a violation of the painting technology.
- The paint composition appears in spots on the base, which has not been primed.
- If there were sudden temperature changes in the room while the paint was drying, then the problem will also appear.
- Stains that do not dry out for a long time appear when painting on a wet or freshly painted surface.
- If there are tar, oil, mold or rust stains on the base ceiling, they may appear as dark spots on the paint finish.
Attention! Stains and spots on the painted surface appear due to uneven absorption of paint by the base.
Removing old finishes from the ceiling
Next you need to remove the previous coatings. This could be: lime, paint, wallpaper, and so on. This work is simple, but labor-intensive and requires additional protective equipment.
Advice! Use a respirator and gloves, and wear a hat that will protect you from dirt and falling debris.
Previous coatings can be removed in different ways, depending on their composition.
- The paint is washed off with special means, the lime is washed off with water, the wallpaper is first torn off and then soaked with water.
- Foam tiles from the ceiling can be easily removed with a metal spatula. In order to properly repair the ceiling, it must be cleaned to the ground.
How to remove water-based paint from a ceiling
It is important to understand that there are cheap paints and high-quality expensive ones. To remove cheap water-based paint, just soak it with water.
To remove cheap water-based paint, just soak it with water.
Algorithm of actions:
- Wet the paint once with hot water at a temperature of 60-80 degrees. To do this, you can use a regular long-haired paint roller, a paintbrush or a brush;
- Wait 10-15 minutes;
- Wet the paint again with hot water at the same temperature;
- Using a steel spatula, remove the soaked layer of water-based paint.
In the process of performing such work, small scratches may appear on the ceiling, so after removing the old paint, the ceiling will need to be puttied. To do this, use ready-made finishing putty, which is usually sold in buckets. It is easy to apply a small layer to the ceiling and sand it. Also carefully inspect the condition of all seams. If necessary, seal them with plaster. This will be discussed in more detail below.
1. paint roller; 2. brush-brush
It is important to know that high-quality expensive water-based paints are not afraid of water. Therefore, such paint can only be removed with sandpaper and it will be difficult to do.
She skins very poorly.
In such a situation, it is recommended to apply a good primer, and after a day a new coat of paint. Of course, this option can be considered in the case of cosmetic repairs, when there is no serious damage to the ceiling.
Coating the ceiling with primer
After cleaning the ceiling, it is recommended to always use a coat of primer.
| There are two types of primers | |
| aquatic | alkyd |
Any type can be used in apartments. The main function of the primer is to create a strengthening protective layer due to deep penetration into the surface being treated. This saves any subsequent material applied on top of it. Most primer compositions are universal and suitable for both adhesive and lime materials. When purchasing, you can always consult the seller.
Advice! To apply the primer, use the same paint rollers and brushes. After which they are easily washed with running warm water.
Watch the video to see what cleaning and priming a ceiling looks like in practice:
https://youtube.com/watch?v=zBj9zVRQBT0
Preparation of ceiling surfaces for various repair methods
Ceiling repair technologies require appropriate preparation of the base. Not only the aesthetics of the final result, but also the functionality of the finish depends on the quality of the preparatory work, so we will consider methods of preparing the surface in relation to a specific cladding method. Let's start with the work that needs to be done on a concrete ceiling base before any repairs.
Inspection and cleaning of the ceiling
The ceiling plane is tapped with a hammer to identify areas with peeling plaster and putty.
Removing a layer of emulsion paint
If no defective plastered areas are found, and the planned finishing is whitewashing or painting, then proceed to remove the old paint - as a rule, it is a water-based composition, since concrete in residential premises is not coated with oil or enamel.
The ceiling is moistened with water several times to saturate the paint to a state where it can be easily removed in layers using a spatula. On the ceiling, wetting is easier to do with a spray gun; in the absence of this device, use a paint roller, preferably a foam roller.
Removing worn plaster
When plaster layers are identified that have lost adhesion to the base, the defective coatings are cut off with a hammer, chisel and spatula. If the plaster remaining on the concrete crumbles when scraped, it also needs to be removed, even if you plan to install suspended ceilings - a fallen fragment of the old finish, even if it does not damage the decorative shell, will be visible on it from the outside. Ideally, it is better to remove all old layers from the floor slabs so that the new leveling coating is uniform in all areas of application.
If there is exposed reinforcement under the exfoliated solution, then it is cleaned of corrosion to bare metal and covered with two layers of a solution of red iron or lead in drying oil.
Important! It is not allowed to cut out exposed reinforcement - it is in a pre-stressed state, and removing even one section will lead to a change in the stress balance in the slab.
Cleaning joints between slabs and cutting cracks
After dismantling the plaster, inspect the quality of the sealing of the longitudinal joints of the slabs and the connections between the walls and the ceiling. As a rule, old filling materials have to be removed to the entire accessible depth of the seam - this is conveniently done using a narrow and long chisel or hammer drill.
Cracks in the concrete slabs are inspected for orientation and prospects for further opening. Longitudinal and diagonal cracks are not dangerous; transverse cracks are best shown to experts from the construction department of the local government. To study the dynamics of damage, control beacons made of paper or gypsum mixture are installed on them, indicating the installation date.
Repair of concrete base
After all worn-out coatings have been removed from the floor slabs, repair and sealing of the ceiling base begins.
Sealing joints between slabs
If the depth of the cracks exceeds 3 cm, then it is better to seal them with polyurethane foam - an elastic and sealing composition that perfectly replaces cement mixtures in this situation.
To do this, the joints are blown with a stream of air or cleaned of dust with a vacuum cleaner, after which their internal surfaces are moistened with water - the adhesion of the polyurethane foam to wet surfaces is higher.
To seal slab joints, it is advisable to use a proven type of foam, which, after hardening, forms a dense, homogeneous, fine-celled mass. The guide nozzle of the foam canister is inserted into the gap until it stops and by pressing the dispenser the seam is filled to 2/3 of the depth.
Important! During operation, the cylinder must be positioned with the bottom up, otherwise gas will come out of it without forming foam.
After a day, excess foam is removed with a stationery knife. If a frame or frameless installation of heat-sound insulation is planned on top of a concrete base, then the foam is cut flush with the surface. If the surface is to be leveled with mixtures, then the excess is trimmed so that 1.5 -2.0 cm remains on top of the cut to the level of the slab - for applying the cement mixture.
If the width and depth of the cracks where the walls meet the ceiling allows, they can also be sealed with polyurethane foam. If the cracks are narrow, they are filled with sealant using a mounting syringe or moisture-resistant cement-based tile adhesive.
Filling potholes in the ceiling
If, when dismantling the old plaster, areas with spot delamination of the concrete of the floor slabs are formed, then they are primed with a latex-based composition and, after drying, the following actions are performed:
- areas with exposed reinforcement, cleaned to metal and coated with red lead solution, are covered with a layer of repair cement mixture, for example, KT Tron, MBR-400, Ceresit CD 25 or Ceresit CD 26;
- potholes more than 3 cm deep without reinforcement are also sealed with a repair mixture to restore the thickness of the protective layer of concrete above the reinforcement;
- sinks less than 3 cm deep are filled and then rubbed with a leveling cement composition.
Waterproofing concrete ceiling
Anyone who has ever repaired a ceiling after a leak will definitely waterproof the ceiling base after completing all the work described above. This can be done most effectively with the help of deep penetration waterproofing compounds, for example, “Penetron”, “VodoStop” or “Lakhta”, which, when they enter defective concrete cavities, seal them and, upon contact with water, initiate crystal formation in their mass with the growth of crystals towards the entry moisture.
After complete curing and drying of the repair cement compositions, the ceiling surface is generously moistened with water (until absorption stops) and, using a brush, roller or spatula, covered with two layers of penetrating waterproofing, which is prepared by mixing the dry mixture with water according to the instructions for use or is sold ready for use. After the insulating coating has dried, the base is suitable for applying any other leveling or insulating mixtures.
Effective ceiling waterproofing can be done in a more cost-effective way - by applying a bitumen-based composition, but the bitumen in the coating imposes restrictions on the subsequent use of leveling mixtures - an additional base of plasterboard or expanded polystyrene will have to be installed on top of such waterproofing.
The production of waterproofing the ceiling base completes the operations that must be performed before performing any finishing of the concrete ceiling surface. Subsequent types of work depend on the operating conditions of the room and the choice of method for decorating the ceiling.
Methods for basic leveling of concrete ceilings
The order in which the ceiling base leveling procedure is performed depends on a number of factors, including the planned functionality of the ceiling finish. For example, if it is necessary to perform thermal insulation, then you should decide what kind of insulation will be used. Installation of rigid types of foam plastic on the ceiling is possible in a frameless manner, but the concrete base should not have differences in height of more than 5 mm - the foam sheets will repeat the defects in the surface profile, and the finishing will have to be done after unwanted additional leveling, which will significantly make it heavier.
If you choose a soft material (one of the types of wool) as insulation, then in most cases to install it you will have to install a frame with an additional outer shell. But at the same time, the frame method of insulation eliminates the need to further level the ceiling - an additional base mounted on the frame in a horizontal plane will hide defects in the concrete surface.
Important! Stone (basalt) wool is produced in varying degrees of rigidity, and its more rigid varieties still allow the installation of insulation in a frameless manner, followed by plastering over a reinforcing mesh.
If there is no need to insulate and soundproof the ceiling (if this is done effectively enough on apartment floors), you can proceed to leveling the ceiling base using one of the following methods.
Leveling a concrete ceiling by plastering
Plaster is a time-tested and relatively inexpensive method of leveling concrete and brick bases for finishing. If the ceiling slabs in a room have significant differences in height (up to 5 cm), then one of the ways to bring them to a common horizontal level is plastering with cement-sand mortar.
Without the skills to perform this type of work, especially finishing ceilings, you should not undertake it yourself, especially on a large area. You can pour cement-sand mortar with your own hands and, after it sets, rub small-sized potholes in the plaster. Plastering the entire surface of the ceiling should be entrusted to professionals, having previously waterproofed the concrete base with a penetrating mixture. At the same time, it is useful to know the technology of plastering in order to control the quality of this type of finishing:
- the concrete base of the ceiling must be prepared for plastering - frequent notches are applied to the slabs with an ax or a grinder with a disk to improve adhesion to the mortar, after which the base is primed;
- along the perimeter of the walls, using a laser level or a transparent hose with water, control lines of the plane are drawn on which the base should reach after plastering;
- along cords stretched between opposite control lines, point “beacons” made of cement mortar are installed on the ceiling, which, after curing, are connected to each other with mortar, forming parallel guides of the required height;
- the space between a pair of parallel guides, after they have hardened, is filled in layers using a plaster trowel with cement-sand mortar;
- after the solution has set, its excess is removed by wiring along a pair of parallel guides of a flat rail;
- The shells remaining on the surface after installing the slats are rubbed with a trowel.
Important! Curing of the completed plaster coating should occur without drafts and additional heat sources (heating devices); within 5 days, starting from the third, the plastered surface must be moistened.
Leveling the ceiling with leveling mixtures
This method differs from plastering in terms of material and execution technology - instead of cement-sand mortar, dry cement-based leveling mixtures are used, which, after mixing with water, are applied to the concrete surface using a spatula.
The advantage of the method is the ease of preparation of the composition, which does not require compliance with the proportions of the components, sifting and has increased adhesion. The mixture prepared according to the instructions on the package is easily applied to the ceiling using a spatula and does not come off from the base as easily as happens with cement-sand mortar. Leveling cement mixtures are produced in many varieties, differing in characteristics or their numerical values - the degree of elasticity and tensile strength, waterproofing properties, the adhesion force of the “living solution” and its “survival time”. A wide range of these materials allows you to choose a composition that suits specific operating conditions and save on purchasing a universal mixture, the price of which is always higher precisely because of its versatility.
Cement-based mixtures are used to level ceilings with slab height differences of up to 3 cm. If it is necessary to apply a layer with a thickness close to the maximum, layer-by-layer leveling is carried out, waiting for the previous layer to completely cure.
As for surface preparation, the concrete base for the ready-mixed mixture does not require scoring - only priming.
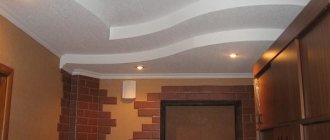
Flat plasterboard ceiling
If the ceilings in the apartment have significant differences, but are at the same time quite high (3 m or more), then you can facilitate the process of their basic leveling by installing an additional base of plasterboard sheets (GCR) on them. GKL is laid on a frame made of wooden blocks or a special steel profile with mounting fittings, which is attached to the walls and concrete ceiling.
Frame installation
The manufacture of the frame begins with marking its structure on the ceiling and calculating the need for materials. There are several ways to arrange the frame, depending on the size and thickness of the standard gypsum board sheet. Based on the most common size of drywall 120x250 cm, the marking of the frame structure is carried out with a transverse step of 60 and a longitudinal step of 60 to 80 cm.
Then, along the perimeter of the walls under the ceiling, a starting line is drawn - a mark along which the frame will be mounted. The distance from the ceiling to the starting line should take into account the functionality of the new ceiling covering - with the planned implementation of heat and sound insulation, and even with additional protection of the hygroscopic insulation from steam, this value should take into account the thickness of the insulating materials. If the purpose of the plasterboard ceiling being installed is only leveling, then this distance will correspond approximately to the cross-section of the steel profile used.
ud-profiles are attached to the walls along the starting line using self-tapping screws; jumpers made of cd-profiles are mounted perpendicular to them, which are additionally fixed to the ceiling with hangers along their span.
If it is planned to soundproof the ceiling, then the installation of the frame is carried out on a vibration suspension - special suspensions and gaskets that prevent the transfer of vibration to the mounted structure from the concrete base.
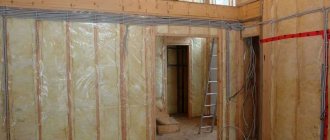
Heat, sound and vapor barrier materials planned for installation are placed between the frame and the ceiling in a certain sequence - the vapor barrier should be located on both sides of the insulation, and in the case of a foil internal vapor barrier - with the foil towards the room.
Drywall installation
After calculating the consumption of gypsum plasterboard (room area plus 15%), the material is purchased and they begin laying it on the frame using metal screws (if the frame is made of a steel profile). Drywall sheets are cut with a utility knife by making a cut on one side and bending the plasterboard in the opposite direction, followed by cutting the opposite shell.
Before installation, the joining edges of the gypsum boards are chamfered with a knife to ensure that the seam can be filled to its full depth with gypsum mixture. The joints of the sheets are arranged so that they are located along the jumpers of the frame, otherwise the constant appearance of cracks in the finishing along the seams is inevitable.
In this case, the sheets are laid “staggered”, or offset, so that the joint of two sheets is not a continuation of the seam of two adjacent gypsum boards. Self-tapping screws along the seams are placed in a checkerboard pattern, maintaining a pitch of 12-17 cm and recessing their heads flush with the surface of the drywall.
After the installation of the gypsum boards is completed, the heads of the self-tapping screws are puttyed and the joints of the sheets are filled with a special compound from Knauf, while the seams are simultaneously glued with reinforcing serpyanka tape 5 cm wide. After the seal has cured and dried, the surface of the joints is treated with sandpaper, and the ceiling, after priming, is ready for finishing.
Ceiling finishing
When the repair of leaks on the ceiling is completed and their consequences are eliminated, the ceiling is dried, cleaned and treated, proceed to the next type of work - finishing, which consists of several stages:
Puttying damaged areas. The putty is mixed with water in a ratio of 1:3. Apply it to damaged areas, smooth seams, and seal breaks and cracks. The layer should be even, at the level of the previous primer. The putty takes a long time to dry, about 2-3 days. After applying the solution, close all the windows in the apartment and leave the coating to dry. The next day, the windows are opened and thereby reduce the level of moisture in the room. After drying is completed, the ceiling is inspected for stains and defects. Existing stains are removed with a brush, and defects are eliminated by applying a layer of primer.
- Reapplying putty
. Another layer of putty is applied to the ceiling surface and dried for several days. - Painting
. The best choice when repairing a ceiling is water-based paint. Its consumption will be 0.2 liters per square meter. Acrylic water-based emulsion can be easily washed off with soap, it dries for several hours and does not have a strong odor. A little paint is poured into the tray and the roller is lightly lubricated in it. Slowly pass it along the surface of the ceiling. Stripes of paint are applied parallel to each other. As the roller dries, more pressure is applied to it. The paint dries in 5-7 hours. When leaving the house, close the windows so that drafts do not damage the painted coating. It is better to darken the room by covering the windows with paper sheets. After the first layer has dried, apply the second.
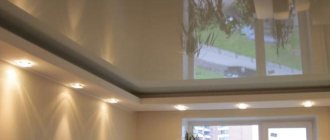
What kind of suspended ceilings are there: the pros and cons of suspended ceilings
Stretch ceilings today are the most original and modern finishing solution. They consist of a frame around the perimeter and a polyvinyl chloride fabric stretched over it.
Installation of a stretch ceiling begins with the installation of baguettes, which are located 4-5 cm below the main ceiling. After preparing the frame, the room is heated to 50-60 °C (to increase the elasticity of the canvas) and the PVC film is stretched. At the end of the work, chandeliers or lamps are installed.
The description of this type of suspended ceilings is different: they can be glossy or matte, the color range of the canvas is also very diverse; in addition, almost any drawing or photograph can be depicted on its surface.
Suspended stretch ceilings have a number of pros and cons.
The advantages of this type of ceiling covering include the following:
- the color of the ceiling will not fade during the entire period of operation, and the canvas will not become saturated with odors;
- if water leaks into the room from above, it will not penetrate further than the coating, since the canvas is moisture-proof and can withstand up to 100 liters of water;
- installation of the ceiling can be carried out at any stage of the repair and even when it is completed;
- the surface of the ceiling does not attract dust, and if necessary, it can be easily washed with plain water;
- the material used for tensioning practically does not burn, and when ignited does not emit harmful substances;
- The coating can be installed and dismantled many times without losing its properties.
The main disadvantage of suspended stretch ceilings is that, despite their reliability, they can be damaged by a sharp object. This must be remembered when carrying out other repair work indoors. In addition, experts advise not to point an opened champagne bottle at the ceiling, as there have been cases where the bottle cap caused irreparable damage to the coating.
Method of applying putty
Let's look at how to repair the ceiling with your own hands, if you use a putty mixture for this. Puttying takes significantly more time than plastering. Although the goal of both processes is the same - leveling the surface. In addition, the puttying technology is somewhat different from working with plaster. In this case, the worker will need two spatulas (narrow and wide), a painting mesh, a mixing container, as well as two types of putty - the starting “Isogypsum” and the finishing “Satengypsum”. The surface is pre-treated with the Betonkontakt primer mixture.
Let's describe how to repair a ceiling using putty:
- The thoroughly cleaned and primed surface must be examined for the presence of potholes or level differences. In these places it is necessary to apply the starting putty in several layers. This material practically does not shrink, and its layer in some places can be 5 cm. For work, it is most convenient to use a wide spatula or a rule.
- A painting mesh is placed into the wet starting putty. This simple method of reinforcement makes the ceiling surface more durable. The mesh needs to be slightly pressed into the surface of the putty, for which purpose a wide spatula is passed over it with some pressure.
- If there is no need for additional leveling of the surface, repairing the ceilings in the apartment before painting can be done with finishing putty. It is applied to the surface with a wide spatula, removing excess. If desired, you can use a painting mesh for reinforcement.
- When the first, main layer of putty is completely dry, you can apply the finishing layer, leveling it until smooth.
The final cleaning of the surface until smooth is carried out with special graters and emery. It removes the slightest nicks. After this, the final decor can be applied.
Alternatively, the ceiling surface can be covered with plasterboard panels. The joints and irregularities between them are filled with a putty mixture, and then the ceiling is decorated according to your choice - painted, whitewashed or wallpapered, or a decorative finish is made.
Wallpapering and tiling the ceiling
Not so long ago, the most fashionable solution was to decorate the ceiling with wallpaper. But time has passed, and now ceiling tiles made from polystyrene material are gaining great popularity. A special feature of the process of gluing such material is that the ceiling for gluing wallpaper and tiles must be even. By looking at DIY ceiling repairs, photo tips for using this tile, you can easily understand the process of its installation.
To wallpaper the ceiling you will need:
- physical strength of at least two, and preferably three, people. The gluing process is not as easy as the painting process. Here it is necessary to measure, cut, coat the wallpaper with glue and paste it in an awkward position;
- the material itself, which must be pre-selected;
- wallpaper knife or stationery knife;
- a rubber roller for rolling wallpaper on the wall, and a nap roller for glue;
- special tray for glue;
- rags.
Stages of wallpapering the ceiling:
- Preparing the ceiling and preparing the glue according to the instructions;
- Next, you should measure the required amount of wallpaper for the ceiling and cut off several strips at once, the pattern of which should be the same;
- The cut strips of wallpaper should be spread on the floor so that the pattern is at the bottom. You should carefully coat them with a brush with glue and leave for five minutes for better absorption;
- Coat the ceiling with glue;
- Then you need to attach a strip of wallpaper to the ceiling and use a roller to roll the wallpaper so that no air bubbles remain under the wallpaper;
- The remaining glue is wiped off with a wet rag;
- The wallpaper on the ceiling should dry in a room where there is no draft, otherwise the entire work will be ruined.
An important point: the edges of the wallpaper must be generously coated with glue, otherwise during the work the edges simply will not stick to the wall.
Ceiling tiles
Gluing the ceiling with tiles is much easier than the previous method and all the work can be done by just one worker. For gluing you will need: tiles, acrylic glue. Required tools: installation gun, spatulas, utility knife and painting thread.
Stages of work:
- you should calculate the center of the ceiling by drawing a diagonal from the corners;
- Pasting should begin from the middle of the ceiling. To do this, glue is spread on the tile with strokes along the edges and in the center, then the material is glued strictly according to the markings;
- All finishing material should be installed in this way. If the end tile does not fit, you need to cut it with a stationery knife.
- For beauty, ceiling plinths and borders should be glued along the edges.
Ceiling tiles
Polystyrene tiles are a budget-friendly type of finishing that allows you to get a washable ceiling covering, smooth or with a pattern. Ceiling tiles can be either white or colored, usually pastel shades, and their surface is rough or laminated. Due to their moisture resistance, the tiles can be glued in the bathroom and kitchen, as well as on the balcony. The durability of polystyrene tiles is from 2 to 10 years, depending on operating conditions.
Prices for ceiling tiles
ceiling tiles
Foam ceiling tiles
The surface of the rough ceiling for finishing with tiles must be cleaned of old coating and dust. Cracks, defects and small irregularities do not need to be repaired; the tile completely hides them. If the differences are significant, a leveling frame of wooden slats is built under the tiles or plaster is used.
Glue the tiles with special glue - “Moment”, “Titan” - or use liquid nails. When installing and adjusting, the tiles can be easily cut with a knife. The joints of the ceiling and walls are additionally decorated with ceiling plinths to complete the finish. You can also use elements that imitate stucco - they will give the ceiling originality.
Gluing ceiling tiles without seams
Scheme for gluing ceiling tiles
Ceiling tile adhesive
Sequence of work when installing ceiling tiles
Wallpaper
Wallpapering the ceiling is rarely used. This is due to the complexity of the application process, the visibility of imperfections and the selection features. For example, in small rooms you should avoid large patterns - this will make the space even smaller.
Consult with the designer: a combination of wall and ceiling decoration can give the effect of a “box” - a shrinking space.
Smooth material requires a perfectly leveled and puttied surface, so voluminous wallpaper that masks unevenness is often chosen for the ceiling. Another problem is the difficulty of combining the pattern on the rolls and gluing large panels: this is almost impossible to do alone.
An option that combines a paper coating and ease of painting is liquid wallpaper. A mixture of cellulose chips and decorative compounds is applied like putty. No particularly careful leveling of the ceiling is required; it is possible to use different colors and create patterns. The only drawback is the high price. It is also not recommended to use wallpaper in general in the bathroom - the porous structure will be an excellent home for mold.
How to repair a ceiling in a room: puttying
This option, such as applying putty, can also be considered as a method of leveling the surface, only it takes more time than the previous one.
Tools and materials for repairing ceilings in this case are:
- Isogyps coarse putty;
- Satengips finishing putty;
- Betonkontakt primer mixture;
- painting mesh;
- narrow spatula;
- wide spatula;
- kneading container.
As for the main stages, they consist of:
- If there are small irregularities or differences in height after the previous stage, two or three layers of coarse putty are applied. This putty has less shrinkage and can be up to 5 cm thick. In order to remove excess and also level the surface, you should use a spatula or rule.
- A painting mesh is applied on top of the previous layer. It will provide the necessary reinforcement and also add strength to the entire surface. Using a wide spatula, press the mesh into the mixture to fix it.
- If the overlap is fairly even, you can simply apply Satengips finishing putty. Using a spatula, apply a layer to the surface and remove excess. For greater strength, you can strengthen the layer with reinforced mesh.
- After the applied layer has completely dried, apply the finishing layer of putty and level the surface as thoroughly as possible.
Reasons for the appearance of streaks after painting
All kinds of stains and stripes on the surface appear for the following reasons:
- The wrong tool was selected for the job. A roller with a coat that was not suitable for the chosen type of paint was used.
- Using a low-quality paint mixture can also lead to this problem.
- During the work, the technique for applying the color mixture was not followed.
- The tone of surfaces painted with different tools may vary slightly. This happens when work is carried out with a roller and brush, or when they combine the use of a spray gun and other tools for applying the paint mixture.
Important! A surface painted with a brush appears darker than one painted with a roller or spray gun.
- If you decide to change the shade of non-tinted paint by adding pigments, then stains are a consequence of such a violation.
- Stains appear when the pigments in the tinted paint are insufficiently mixed.
Work technology
The technology for finishing the ceiling may vary depending on the original surface coating. In addition, the initial surface treatment for finishing will depend on the period for which the repair is planned to be maintained. If a long service life is not required, the preparatory work phase can be shortened.
The technology for finishing the ceiling includes several stages.
- Development of a plan diagram for ceiling type, shape, color schemes, placement of wiring and lamps.
- Preparing the base for installation of the ceiling finishing itself. This stage may include dismantling the old coating, leveling the surfaces, sanding, priming and other manipulations to prepare the base for the coating. If the ceiling was painted with oil paint, the secondary coating will be the most difficult. Other paint will not adhere to such a base, so to change the surface you will have to apply a fresh layer of the same oil paint or completely get rid of the existing layer. In addition, complete dismantling must be carried out on bases with wallpaper. Experts do not recommend gluing several layers of wallpaper, since an excessively heavy structure will simply pull it away from the ceiling.
- Direct installation of the selected structure.
It is worth considering the main stages of finishing in more detail.
The main stage in the repair is surface preparation. This stage must be approached extremely carefully, since the convenience of subsequent finishing and the service life of the coating will largely depend on the initial preparation.
Preparation usually occurs in several stages. The very first action is to insulate the walls and floors from building materials if they are not planned to be renewed. Next comes the most difficult stage. It includes removing the old coating, if any. It is necessary to get rid of old wallpaper, oil-based coatings, for example, oil paints, whitewash layers. To remove paint, you can use special removers that can be bought at hardware stores. Their cost is low, but they will help save time and effort on other repairs.
If repairs are carried out in a room with high humidity, it is possible that fungus can be found on the ceiling and walls. If, after a thorough inspection of the surface, black-brown stains are found, it is necessary to urgently get rid of them using special antifungal agents, which can also be purchased at hardware stores. You can protect yourself from this problem if you add a special anti-fungal agent to the material used, which is an excellent prevention of the secondary appearance and spread of the virus. If the lesions are too large and deeply ingrained into the concrete, then you can remove it using a hammer drill or gouge it out with a special tool, and then go over it with plaster, closing the holes.
After leveling the ceiling, it is necessary to secure the surface with another thin layer of finishing putty, and then walk around the entire perimeter of the ceiling with a primer, which will help get rid of unnecessary dust and improve the adhesion of the finish and the rough ceiling.
At the same stage, and in the case of choosing a multi-level ceiling, you can attach a frame or box, which will serve as the basis for fastening.
Overview of main solutions
Even a cheap whitewash refreshes the ceiling and makes it more attractive.
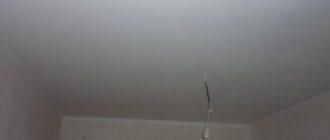
I won’t deal with how to build a plasterboard structure or create a plane with large differences. We will look at simple options that are used when the surface has turned yellow, stains from leaks or other minor flaws have appeared on it that worsen the appearance. Current repairs are good because they can be carried out very quickly and at the same time transform the ceiling beyond recognition.
Special tiles allow you to cover all defects quickly and efficiently
Option No. 1 – whitewashing the ceiling
This is the simplest ceiling repair that can be done. A few decades ago, most ceilings in apartments were finished in this way, but even now this solution has not lost its relevance. Whitewashing is perfect where you need to refresh the ceilings at minimal cost, because with its help you can make the surface snow-white.
Whitewashing gives the surface whiteness and neatness
First, let's figure out what materials you will need for the job.
Chalk is the main material for whitewashing
| Material | Description |
| Construction chalk | It is sold in different packaging, but the most popular is 5 kg packaging due to ease of storage and carrying. The manufacturer does not matter, as long as the composition is finely dispersed, that is, very thoroughly ground, this will allow you to achieve the best quality of work. The price of a 5 kg package is 100-150 rubles |
| Blue | It is sold in bags weighing 20 grams, which is exactly what we need to prepare one portion of whitewash. The composition costs about 30 rubles per package, we need it to give additional whiteness to the surface |
| PVA glue | Adding this composition allows you to make the whitewash much stronger, now the layer will not crack so easily and will maintain its integrity much longer. Most often, building compounds are used, but carpentry and even stationery compounds can also be used if nothing else is at hand. |
| Primer | Without strengthening the surface, I do not recommend carrying out any work on finishing the ceiling. Therefore, purchase a deep penetration acrylic-based composition; its cost per liter is 50-100 rubles. The benefits of soil are very great: it strengthens the surface and improves the adhesion of the whitewash to the base |
Blue allows you to make the finish coat perfectly white
. As for the tools, you need the following set:
- If you need to remove a layer of old whitewash, then a scraper or spatula and a sponge for soaking the surface will be useful;
- The easiest way to apply the composition is with a roller; this ensures good distribution of the composition over the surface and high speed of work. For junctions and other difficult areas, a brush will not be superfluous; with its help you can treat all the corners so that the coating is as high quality as possible.
Immediately purchase a tray for the roller - it’s much more convenient to work with it
The instructions for carrying out the work consist of the following points:
- First you need to clean the surface; if there is old whitewash on it, which does not adhere very well and peels off in certain areas, then it must be removed . The work is done using a scraper or spatula, to simplify cleaning, you must first wet the area with warm water and leave it for 10-15 minutes, after which the layer will separate easily;
The work of removing the old layer often takes longer than applying a new coating
If your whitewash holds well and is not cracked anywhere, then you don’t have to remove it, just clean the ceiling of dust with a brush or vacuum cleaner.
- A primer is applied to the prepared surface; before use, it must be thoroughly mixed (if you have a concentrate, it is diluted with water in the proportions indicated on the package). The soil is distributed in an even layer, after finishing the work you should wait for the composition to dry completely, this can take from several hours to a day;
The soil strengthens the surface
- Next, whitewash is prepared; for this, 30 grams of PVA glue, 20 grams of blue and 3 kilograms of construction chalk are added to 5 liters of warm water. The mass is thoroughly mixed until completely homogeneous, the composition must be left for 10 minutes, then mixed again;
There should be no lumps in the whitewash
- Application begins with the junctions with the walls, go over them with a brush, you can also treat the space near the chandelier so as not to stain the wire with a roller;
- The main stage is carried out with a roller, whitewashing is applied from any angle convenient for you, you need to move the tool back and forth in one direction. Try to distribute the whitewash evenly so that it covers all areas, but does not accumulate on the ceiling in the form of drops and smudges. Until the composition dries, it will be dark, do not worry, the surface will later turn white.
Whitewash is applied in an even layer, the surface will become white only after drying
Option number 2 - painting the ceiling
If your surfaces are smooth and have simply turned yellow over time or the paint on them has cracked, then repairing the ceilings in your apartment will not take much time, you just need to repaint them.
In this case, the set of necessary materials will look like this:
- For paint, it is best to take modern water-based compositions; they have high quality and adhere well to the surface. I recommend choosing moisture-resistant coatings, as you can wipe them with a damp cloth, which will keep the surface looking perfect for much longer. The cost per liter starts from about 50 rubles;
The paint can be either white or colored
- A primer must be used before paint; firstly, it strengthens the surface, and secondly, it reduces its absorption, thereby reducing paint consumption and improving the coverage of the base. An ordinary acrylic-based primer is used, as I wrote above, you will have to pay 50-100 rubles per liter, if you wish, you can buy a concentrate and dilute it immediately before use.
For wet rooms, choose formulations with antiseptic additives
In this case, the following tool is used:
- You can use the same roller to apply paint and primer, the main thing is to wash it thoroughly after each use. Difficult areas are treated with a brush, its size is selected arbitrarily, see for yourself what is more convenient for you;
- To reach the ceiling, you can use a stepladder, or you can use a special telescopic extension for the roller handle. You can buy it in the same place as the painting tool, and it will cost about 200 rubles.
The extension cord allows you to paint the ceiling while standing on the floor
The workflow when applying a new paint coating looks like this:
- First of all, you need to clean the surface of dust and dirt, walk over it with a brush to remove everything unnecessary and leave the ceiling completely ready for processing;
- In this case, applying the primer is done in the same way as in the section above. You need to process the entire surface and not miss a single area. If the ceiling strongly absorbs the soil, it is better to repeat the treatment after a few hours, this will achieve the best effect;
- The paint mixes well, after which you must first paint the junctions around the perimeter, this will simplify further work and will allow you to avoid splashing the walls with a roller (although if they have wallpaper, it is better to cover them out of harm’s way);
First, all junctions are painted
- The paint is applied to the roller so that it is evenly distributed over the roller, you need to dip it in the bath and squeeze it out on a special grid, this will also remove excess composition. The photo below shows how to do this, it’s simple: you need to swipe back and forth several times;
The tray ensures uniform application of paint to the roller
- Staining is done in a certain sequence. Tips for carrying out the work are simple: try to apply the paint evenly to the ceiling; for a good effect, you need at least two layers, and the last one is always applied along the distribution of natural light. To make it clearer, below is a diagram showing the direction of the finishing layer; application in different directions, among other things, improves the quality of painting .
It is important to apply paint correctly
Remember that each subsequent layer is applied after the previous one has completely dried. Most often, two layers are enough, but if the color is uneven, then three, and sometimes all four layers may be needed.
The number of layers is determined after the surface has dried, if it is perfect, then the work is finished
Option No. 3 – wallpapering
I remember one and a half to two decades ago, ceilings were widely covered with wallpaper, and this was considered a very stylish solution. Nowadays, this solution is used much less frequently, but in some situations it can be used not only to repair the ceiling, but also to make it much more attractive and interesting.
Using wallpaper you can highlight a niche in the ceiling
Another interesting solution that I personally really like is the transition of wallpaper from the wall to the ceiling. This gives the interior a special charm and looks very stylish if you choose interesting wallpaper and decorate the room in a single concept.
This is how you can immediately finish the ceiling and wall
Among other things, I would like to note such an option as paintable wallpaper; they can be glued to the ceiling, and subsequently refresh it or change the color very quickly and easily. The main thing is to choose a material that will look good in different shades.
Paintable wallpaper is an excellent solution for the ceiling
Let's figure out what will be used for work:
- Wallpaper - it is better to choose denser options; they can hide minor surface defects and make the ceiling perfectly smooth. As I wrote above, paintable wallpaper is a good solution, but it’s up to you to decide. I would like to note on my own that it is better not to use cheap paper wallpaper - it quickly turns yellow on the ceiling;
The selection of wallpapers is huge, so you can easily choose the option you need.
- Wallpaper adhesive is selected according to the type of coating you will use. There are many options on the market, but the brands “Methylan”, “Kelid” and “Cleo” have proven themselves best. The quantity is calculated based on the area; on average, the packaging is enough for 4-6 squares, but this figure may vary among different manufacturers;
Methylane compounds are most popular among professionals
- The surface must be primed before wallpapering, so do not forget to buy a strengthening compound. In separate reviews, I looked at options for processing with a solution of wallpaper glue and PVA glue, but it is better to buy a specialized primer, it is both simpler and more reliable.
You can’t do without a tool:
- To prepare the composition you will need a container and a stirrer; you can also use a stick as this tool;
- For me personally, the easiest way to cut wallpaper is with a construction knife, but if you prefer scissors, then use them;
Cutting can be done with both scissors and a knife
- The glue is applied either with a brush or a roller. If the volume of work is small and the sheets of wallpaper are small, then it is easier to use a brush; in other cases, a roller is preferable;
- You can smooth the wallpaper using ordinary rags, but it is much more convenient to work with a special spatula; with its help you will quickly expel air and excess glue from under the coating. You can buy it at any hardware store.
A special spatula makes it easier to level the wallpaper.
If you have everything you need at hand, you can get to work.
Let's figure out how to properly paste the ceiling with your own hands:
The process is simple, but requires strict implementation of each recommendation
- The ceiling must be cleaned of the remnants of old coatings, if any, it is important to remove all excess. After this, dust is removed, walk over the surface with a brush or vacuum cleaner, when the preparation is completed, you can begin work;
- The primer composition is applied to all surfaces that will be covered with wallpaper. Everything here is simple and clear, the main thing is to treat the ceiling evenly in order to strengthen it and prevent the wallpaper from peeling off later;
- Preparing glue is a simple procedure, since all the necessary information on the process and proportions of the components is indicated on the packaging . You should just do everything as recommended by the manufacturer. I would like to draw your attention to the fact that some adhesive compositions must be infused for a certain time after mixing; if you have this option, then prepare it in advance;
The composition is thoroughly mixed so that the glue is completely dissolved in water.
- The wallpaper needs to be cut in advance so that later you don’t have to be distracted and measure and combine the sheets with hands stained with glue. The length of the canvas should be 5-10 cm longer than the actual length of the ceiling; the margin will allow you to adjust the position of the element without any problems. If there is a pattern or design on the wallpaper, then they must be precisely combined; cut the sheets only when you are sure that everything fits together and fits;
- When everything is ready, you can start applying the glue; most often it only needs to be applied to the back side of the wallpaper, but sometimes the walls also need to be treated, it all depends on the type of coating (it is always written on the wallpaper packaging how to apply the glue). The composition is distributed in an even layer, after which the wallpaper is folded in halves and left for some time to soak;
When applying glue, pay special attention to the edges
- The work begins from the most visible part of the ceiling, so that there is a whole canvas there, and not a cut piece . The sheet is carefully straightened out (at least two people need to work) and aligned with the wall to which it is adjacent on one side; if the wall is uneven, it’s okay, the baseboard will cover all the flaws. The wallpaper must be straightened gradually in order to gently press it to the surface without damaging it;
You can use a brush or mop to maintain the material
- The surface is smoothed using a rag, brush or spatula, which I mentioned above. You need to work in the direction from the middle to the edges. Watch carefully to immediately expel air bubbles; using fresh glue this is done simply and quickly. Work continues until the sheet is completely glued;
It is important to press the wallpaper well over the entire gluing area.
- Then the next sheet is taken, here, first of all, you need to combine the drawing or pattern, do this very carefully, any displacement will be noticeable. It is worth pressing the canvas precisely from the joint, so that during the work it does not move, and your work is not in vain. Further alignment is carried out in the same way as in the case above;
It is very important to accurately align the pattern, since any defect is visible much better on the ceiling
- The following sheets are glued in exactly the same way, here we can only note that the joints need to be pressed especially carefully; if they come apart somewhere, then you need to carefully bend the material and apply glue. To press joints, many craftsmen use a special rubber roller; if you wish, you can also buy one and use it during work;
This roller is convenient for pressing joints
- Trimming the excess along the edges is done using a sharp construction or wallpaper knife so that the line is perfectly straight, you can use a ruler or level as a guide. Just align the bar along the line and carefully run the knife, then remove the cut piece.
You need to cut off the excess very carefully
Option No. 4 – covering the ceiling with tiles
This finishing method seems to me to be one of the simplest, since it is very simple to implement and it is not necessary to have a flat surface; small flaws, water stains and other imperfections will be hidden by the tiles.
Tiles are a simple solution for ceiling repairs
The set of materials required for work is extremely simple:
- Ceiling tiles in the right quantity. There are many options, but I advise you to choose those types in which the seams are not visible after gluing; this type is called seamless tiles and looks best on the ceiling. When purchasing, take into account the design of the room so that the decoration is combined with the rest of the interior elements;
There are many different options available in stores.
- To glue the elements you will need a special composition. There are several options, but I prefer to use liquid nails. As practice has shown, they hold up well, are easy to use, and do not show yellow spots on the surface; the compositions are sold in special tubes or tubes.
The reliability of the ceiling tiles depends on the quality of the glue.
The following tools are required:
- A construction knife for cutting tiles; you can also use a hacksaw if the thickness of the elements is rather large and cutting them with a knife will be inconvenient;
- A glue gun, they are standard and fit all tubes. If you have tubes or compositions of the “Titan” type, then this device is not necessary;
Using a gun, applying glue to the panels will be quick and efficient.
- To mark the room, you will need a tapping cord and a level. But the work can be done much faster using a laser level, if you have one, of course.
The cord must also be equipped with powder to beat off lines
Let's look at how to repair the ceiling in an apartment with your own hands by gluing tiles onto it:
- The surface, as in all the cases discussed above, must be cleaned of the remnants of the old finish, then the dust must be removed, after which a primer can be applied. Everything here is also standard: one layer for hard surfaces, two for porous ones;
- Then you need to find the center of the room, for this the cord is pulled between opposite corners and a line is struck along the ceiling, the intersection point will be the center. You can also make lines along the width of the tiles for reference; this is not necessary, but it will make it easier for you to control the workflow;
Marking must be done with an assistant
- Next, take a tile onto which glue is applied; it must be distributed around the perimeter and in the middle in separate dots or crosswise lines. It is important that there are no large areas without glue, and each element is tacked not only at the edges, but also in the middle, the glue is applied with a snake, the photo shows one of the options for distributing the composition;
Correct application of glue is the key to reliable fastening
- Work starts from the middle of the room, place the tiles along the lines and press them tightly to the surface. It is important to fix each element well so that it holds securely;
It is important to place the first tile correctly, you will build on it later
- Next, the remaining elements are glued; you need to go along the circle, and not lead one row, this way you can control the location of the tiles more accurately. If necessary, a cut is made at the location of the lamp using a construction knife;
Cutouts are very easy to make
- After you have glued all the intact elements, trimming will most likely be required along the walls; for this, the tiles are first marked and then cut with a knife. It is important to do the work carefully so that there are no gaps that are too large to be covered by the baseboard.
The trimmed elements should not rest against the wall, leave a gap of approximately 10 mm
- Lastly, the baseboards are glued; how to trim them is described in a separate article; here I will just note that the work must be done after the glue on the tiles has dried.
The plinth gives the ceiling a finished look
Stretch ceiling
One of the most popular ways to repair a ceiling is to stretch a special fabric over a pre-assembled frame. The result is an absolutely flat, smooth surface with the desired shade and texture. Stretch ceilings are durable and easy to use, they are suitable for any room, all you need is the right selection of fabric.
Stretch ceiling in the apartment
Canvases for suspended ceilings are:
- based on PVC film;
- fabric, made of polyester with polyurethane coating;
- from natural fabrics.
The latter type of suspended ceilings is rarely used due to the high price and complexity of installation. But ceilings made from specialized fabrics are easy to install and operate. Which material should you prefer?
PVC canvases have a number of features, the list of advantages is quite large:
- absolute moisture resistance and the ability to hold hundreds of liters of water in case of leaks;
- due to antistatic properties, they do not absorb dust and odors;
- not prone to condensation;
- A wide selection of shades and textures from matte to mirror allows you to choose the canvas to suit any interior.
They also have a number of disadvantages, as well as installation restrictions:
- PVC sheets do not tolerate sub-zero temperatures, they crack and collapse;
- they are easily damaged by sharp objects;
- the width of the canvases is not large and is no more than 3.5 m;
- installation requires special equipment.
Glossy stretch ceiling made from PVC film
Unlike PVC sheets, fabric ceilings:
- allow you to create a seamless ceiling up to 5 meters wide;
- are not afraid of temperature changes.
Disadvantages of fabric ceilings:
- cannot hold a large volume of water and collapse in case of strong leaks;
- absorb odors, so it is better not to install them in the kitchen;
- the color palette is much smaller, and the texture resembles woven fabric.
Matte seamless stretch ceiling
Designers and finishers recommend using PVC sheets for wet rooms, fabric sheets for cold loggias or balconies, and to be guided by taste in other rooms.
The design of the ceilings is quite simple: guide moldings are mounted around the perimeter of the room at the desired height, the canvas is attached to them and stretched. In this case, the installation of PVC sheets is carried out using a heat gun, and fabric sheets are installed using a cold method. Lamps and other built-in elements are installed on special fittings.
Installation of stretch ceiling
Stages of installing a stretch ceiling
Options for fastening a stretch ceiling
How to properly stretch the fabric
Stretch ceilings can be single-level or multi-tiered and, at the customer’s request, combine different colors and textures of the canvas. Sometimes additional effects are used - photo printing, imitation of the day or night sky, water and others. The service life of suspended ceilings is from 10 to 25 years.
Having chosen the method of finishing the ceiling, it is worth studying in more detail the technology and features of the material you like. In most cases, ceiling repairs can be done without the involvement of specialists, creating comfort and coziness in the house with your own hands.
Which material to choose
There are quite a lot of options for how to inexpensively and quickly update the ceiling surface. Everything will depend on the materials used. Both the price and the time spent on repair work may change.
Polystyrene tiles
One of the simplest, fastest and cheapest finishing options. It can be glued directly to the ceiling, provided that the old coating is held strong enough. If the previous finish is not very durable, it will need to be removed.
All work can be done alone, and such an update will take very little time. The downside is that there is not a very large selection of finishing options. Also, you will need a relatively flat surface for gluing parts, since strong differences in height with such a finish will be very noticeable.
Painting
This way to get a new and beautiful coating will be optimal if the ceiling was also painted last time. All actions can be reduced to a banal repainting of the entire surface.
The easiest way is to repair the ceiling with water-based or water-dispersion paint. They are inexpensive, easy to lay on a plane, and with even floor slabs, the alteration will take one to two days at most.
The disadvantages of this method include the need to have a beautiful and even ceiling initially. If there are defects larger than a centimeter and deeper than one millimeter, they will be visible even after painting, so you will have to first level the entire plane, which leads to an increase in cost and more time.
Plastic panels
Another inexpensive and very easy way to get a new ceiling covering. In terms of time, this option will be more expensive, since you will have to build a sheathing to attach the plastic panels.
Among the positive qualities, it is worth noting the ability to hide almost any flaws on the floor slab. The panels will hide everything, even very serious defects. Also, the advantages of this option include the fact that the plastic is insensitive to moisture, which means it can be used in rooms with high humidity.
The appearance of the coating, after such repairs, turns out to be quite beautiful, and its cost will not go beyond reasonable costs. Such finishing takes more time, but only because of the need to make a frame.
The disadvantages of this option include the fact that when a ceiling is repaired with plastic panels, it is necessary to construct a frame or lathing to secure them. This will not only require additional costs, but will also take more time. However, the existing advantages in the form of ease of installation and low cost of such finishing outweigh the negative aspects.
Tension coverings
Oddly enough, this method can be considered not too expensive, and at the same time quite fast. Time is needed only for the production of the canvas itself, which will be stretched.
If about a week is allocated for repairs, then it is quite possible to complete it within this period. Sometimes, a company needs less time to produce a canvas for a standard room. Installing the canvas takes half a day, so everything will go very quickly.
The downside is the inability to do everything yourself. You will still have to order the canvas from a company that does this. It is also better to entrust the installation of the canvas to specialists. And the cost of tension coverings will be higher than that of alternative methods of updating ceilings.
Whitewash
This option is more suitable for use in old houses and apartments. Nowadays you don’t see a whitewashed ceiling very often. However, if the previous renovation was carried out using whitewash, then the best and cheapest option would be to whitewash it again and that’s it.
You just need to know exactly what the whitewash was used before - lime or chalk. These two materials are not “friendly” with each other, so they won’t fit on top of each other. For chalk it is necessary to whiten only with chalk, and for lime - with a lime composition.
If the floors are even and do not need leveling, then the result can be very surprising in its quality. In the photo, the ceiling repair was done with your own hands and the quality of the coating does not raise any complaints.
In terms of cost, whitewashing will be one of the cheapest ways to give a surface a great, fresh look. It will also take a little time. Everything will depend only on your dexterity and skill.
There are several disadvantages - a lot of dirt, especially if you have to remove old whitewash, you need a very smooth surface of the ceiling to get a decent result.
Ceiling pasting
It is especially suitable for repairing ceilings in rooms. You can cover it with wallpaper or tiles.
Gluing wallpaper to the ceiling is a difficult process that requires the participation of at least two people. Before gluing, you begin to prepare the material that you will glue.
Cut the canvas from the roll according to the width of the room; the second canvas will need to be adjusted according to the design to the first, so it may have to be cut on both sides. We do the same with subsequent paintings.
Turn the wallpaper over with the pattern facing down and apply wallpaper glue liberally. While the glue is soaking, apply it to the ceiling. Then we carefully begin gluing the wallpaper to the ceiling, smoothing it with a roller. We try to avoid air bubbles. If they appear, carefully drive them out.
We begin work by marking the room. We need to find the center of the ceiling, from which we will glue the tiles. After gluing all the tiles, we finish decorating the ceiling by gluing the borders.
In order to choose what kind of ceiling you want to make, it is best to familiarize yourself with the various ceiling options. This is easy to do, just type on the Internet a photo of the ceiling repair. Having chosen the ceiling that suits you, you can begin to implement your plans.
Eliminating the consequences of a leak
First you need to find out the cause of the leaks - it could be damaged pipes or neighbors living in the apartment above
It is necessary to handle electrical wiring with care. If there is a lot of water near the ceiling chandelier, you should inform electricians about this to prevent a short circuit
First of all, turn off all electrical appliances and, if possible, de-energize the apartment.
If there is a lot of water near the ceiling chandelier, you should inform electricians about this to prevent a short circuit. First of all, turn off all electrical appliances and, if possible, de-energize the apartment.
If a leak is detected, you should act as quickly as possible. If the consequences are not eliminated within two days, mold and a damp smell may appear. The mold needs to be removed and a cleaning company must be called in.
If there are panels on the ceiling, they are removed, wiped and dried in the sun. All surfaces must be dry and clean. Drying is carried out as quickly as possible to prevent the spread of fungus and mold. You can do this in the shortest possible time using a hair dryer.
If the floor covering is damaged due to flooding, it is dismantled and taken out to dry, and the soaked elements must be replaced. In an apartment in which the insulation is made with sheets of plasterboard, the walls are carefully inspected. When the gypsum boards get wet, they need to be dismantled and replaced with new ones.
Before major ceiling repairs begin after a leak, you should remove all items that should not be damaged by moisture.
How to finish the ceiling yourself?
Probably every apartment owner, especially a man, likes to solve household chores on his own. Just finishing the ceiling, think about it. In fact, there may be some problems with this. Painting or whitewashing won't even make you strain, but preliminary leveling of the surface for further processing - here you can stop for a very long time.
You should not level the surface yourself if you do not have experience; use the help of friends and acquaintances. Oil-based and water-based paint are the best options for painting. If you decide to glue wallpaper, then you can’t do without an assistant, because the panel in the glue weighs a lot. If the pasting is done using ceiling tiles, then you can do it yourself. Lightweight material, each component is attached one after another.
Hanging and hemming sheets save a lot of money, but not extra time. Unless you are a master at installing such structures. The only disadvantage of installation is that it will take a long time if you do it yourself. We strongly recommend installing suspended ceilings with professionals. Although, with some patience and skill, you can handle this on your own.
Coloring
Painting the ceiling is not so popular today: there is a fairly extensive range of trendy modern materials for decoration, but many owners prefer this method of finishing.
Before painting, the ceiling must be thoroughly primed, and only when it is completely dry can it be painted.
Painted and dried surfaces can be finished with ceiling plinth, gluing it at the junction of the ceiling and wall. If they are already attached, they need to be covered with masking tape and the joint between the baseboard and the ceiling should be treated with paint, and brushes should also be used on narrow areas that are inconvenient for a roller.
Working with a roller can be made easier by attaching a long auxiliary handle to it. Standing on the floor, it is convenient to control how evenly the paint layer lies on the ceiling. Painting is carried out in several layers: after the first application of paint, it is necessary to ensure that the surface is completely dry, since only a completely dried layer makes it possible to determine the quality of the paint. If necessary, paint application is repeated.
Do we plaster or putty?
These works are required if you want to paint, whitewash or wallpaper. To do this you will need a flat surface. It can be achieved with these two options.
Which one to use is up to you. The plaster is easy to apply, but its thickness on the ceiling can reach several centimeters, which makes it very heavy, in addition, using it, you reduce the height of the room. Puttying is a more labor-intensive process.
The material shrinks a lot during work, so it is applied in several layers, which takes more time and effort, but the surface, when carried out correctly, turns out to be smooth and has less weight.
Related Posts
- Wallpaper for the bedroom
- How to glue wallpaper: common mistakes in gluing yourself
- How to glue vinyl wallpaper on non-woven backing?
- How to tear wallpaper off the walls if it won't come off
- How to calculate wallpaper: how many rolls and glue are needed to cover a wall. methods for calculating and determining the quantity of materials
- Technology of painting wallpaper with water-based paint
- How to glue fiberglass correctly?
- How to glue wallpaper on painted walls: water-based, oil and acrylic coating
- How to glue corners with non-woven wallpaper
- Liquid wallpaper. types, how to make, how to apply and more
- Wallpaper combination: modern options and rules for use in the interior. 105 photos and videos gluing master class
- How to make a ceiling in a private wooden house and do-it-yourself finishing
- Liquid wallpaper
- Which wallpaper to prefer: vinyl or non-woven
- Vinyl wallpaper with non-woven glue
- How can you glue old wallpaper that has come off the walls and how to do it correctly?
- How to remove a suspended ceiling: working with harpoon, cam, wedge fastening, dismantling PVC cloth and seamless fabric covering
- Caring for matte and glossy stretch ceilings
- Is it necessary to prime the walls after the starting putty before the finishing putty?
- Top 15 ways to visually increase the height of the ceiling
- Leveling the ceiling and do-it-yourself plaster for painting
- Cost of painting walls and ceilings
- How to glue meter-long non-woven wallpaper with your own hands
- Why line the roof and ceiling with clapboard and how to do it correctly? nuances of the procedure
- Is it worth replacing wallpaper with paint in an apartment: what to paint with, is it possible to do the work yourself, and what paint to choose for the wall
Read with this
- Wallpaper for the bedroom
- How to glue wallpaper: common mistakes in gluing yourself
- How to glue vinyl wallpaper on non-woven backing?
- How to tear wallpaper off the walls if it won't come off
- How to calculate wallpaper: how many rolls and glue are needed to cover a wall. methods for calculating and determining the quantity of materials
- Technology of painting wallpaper with water-based paint
- How to glue fiberglass correctly?
- How to glue wallpaper on painted walls: water-based, oil and acrylic coating
- How to glue corners with non-woven wallpaper
- Liquid wallpaper. types, how to make, how to apply and more
Coloring
When deciding how to repair a ceiling with your own hands, you turn to painting as a finishing method quite often. This popularity is primarily due to the availability of paints and varnishes on the construction market, as well as the ease of performing the work. Moreover, in some areas, such as kitchens or bathrooms, painting is a practical and convenient option. Mandatory conditions for high-quality ceiling painting are careful preparation and leveling of the surface. Otherwise, all irregularities will be visible.
Most often, water-based paint is used, less often - oil-based paint. Before use, just stir the paint thoroughly and, if necessary, dilute it until the desired thickness and color are obtained. After this, you can finish the ceiling - repair the ceiling by painting. To work, you will need a brush and a paint roller with a long rod. Painting begins from the wall, where a narrow strip is worked with a brush. For the central part of the ceiling, use a roller.
Sometimes an already painted surface needs a do-it-yourself cosmetic repair of the ceiling. In this case, the ceiling is examined for the presence of blisters and peelings of old paint. Defective areas are cleaned with a spatula and then painted again. In this case, a full repair will soon be required. However, if the old paint layer is holding up well, you can simply refresh the appearance of the ceiling by applying a new coat.
How to clean the base of an old coating
This is a dirty and unpleasant stage of work. Before leveling the surface for painting, it must be cleaned down to the concrete base. For this work you will need a strong metal scraper (an old spatula can be used), a sharp hatchet and a brush. When cleaning, it is advisable to protect your hands with gloves and your respiratory organs with a respirator. Work must be carried out from scaffolding of a suitable height (so that your head does not rest, you can freely reach the ceiling).
The technology for implementing the process depends on what exactly needs to be removed:
- Wallpaper. It’s easiest with old wallpaper - they are usually removed immediately, or after pre-wetting;
- Whitewash. The same can be said about whitewashing: although a lot of dirt arises when cleaning it, this procedure generally does not encounter any particular difficulties. The whitewash is first soaked in warm water, then cleaned off with a sharp scraper.
- Dye. The most inconvenient type of finish to clean, as it does not get wet from water. Only diligence, a scraper or a sharp hatchet will help here. Although there are recommendations for the use of special liquids for removing paint, however, due to the toxicity inside the home, it is better not to use them.
- Putty. Old putty exists under any of the above finishes and must also be removed. Sometimes it seems that the old putty layer is very strong and can be left. But such a solution is accompanied by the risk of swelling (often at the last stage of repairing the ceiling, during its painting).
- Frame systems, panels. Here, dismantling is the easiest, since it is not accompanied by the appearance of dirt.
When cleaning the concrete surface, all discovered seams and cracks deserve special attention. They must be carefully opened, removing all the solution inside.
Soundproofing in an apartment is an important repair item
Today, when arranging a home, all efforts are aimed at creating comfortable conditions, one of the points is ensuring silence. Sound insulation of modern new buildings is far from ideal; Soviet housing stock has slight advantages in this matter
In this matter, special attention should be paid not only to the floor and walls, but also to the ceiling (the upstairs neighbors are also noisy)
Today we will talk about how to soundproof the ceiling in an apartment. A common way to eliminate sounds from the outside is to finish with plasterboard, under which additional material is placed. Basalt or cellulose wool, reed or ortho-insulating boards, foam glass, fireclay, linen mat, polyurethane foam blocks, coconut fiber, and cork can be used as insulation. A metal frame is attached to the ceiling, and slabs are placed on it, then sound insulation is placed between them. By the way, mineral wool slabs have a sound absorption coefficient of up to 95%.
Suspended ceiling
Suspended two-level ceiling covered with plasterboard
The widest field of activity is provided to those who, when renovating apartments, have chosen to use suspended ceilings. These ceilings are based on a metal frame, attached through special hangers to the main ceiling.
The outer side of the frame is finished with facing elements. Such elements include PVC panels, MDF panels, mineral fiber and fiberglass boards.
Suspended ceilings have many positive qualities:
- Simple to implement and do not require preliminary surface preparation. The old coating also does not need to be removed.
- Electrical and telephone cables, protrusions, and also elements that cannot be removed but want to be hidden are hidden.
- With the help of suspended structures, original lighting of the room is created.
- A wide field of activity for a person with imagination and developed spatial thinking.
- Layers of heat and sound insulation laid in the frame system will save on heat and create a comfortable environment.
We will consider the question of how to repair a ceiling with your own hands using a hidden suspension system, which is most often used in residential premises. The fact is that there are fewer hidden communications in the apartment and there is no need for frequent access to the space covered with ceiling material.
For a single-level ceiling, the procedure is simple:
- A guide profile is fixed along the perimeter of the room, observing the horizon.
- Using special hangers, longitudinal profile strips are attached to the ceiling. The distance between them is 50-60 cm.
- Between them, transverse strips are installed, which are also secured through suspensions on the ceiling. The distance between them is approximately the same.
- And now all that remains is to choose the ceiling covering according to your preferences. PVC and MDF panels will mark the final coating and the work will be completed. If the frame is covered with plasterboard, then there may be various finishing options. The drywall can later be painted or wallpaper can be pasted onto it.
We install a multi-level plasterboard ceiling ourselves
The work will require special attention, so take your time to do it as quickly as possible. It's better to spend more time, but then you will enjoy the result.
- First of all, you need to mark the ceiling surface around the perimeter. To do this, it is best to use a laser level. The consumption of drywall and profiles depends on how correctly the measurements are taken. Place marks at the fastening points of the guides, and drill holes in these places with a hammer drill.
- Installation of a plasterboard ceiling is carried out using two types of profiles: guide and ceiling, or frame. Secure the horizontal profile along the marking line. Insert dowels into the holes and secure with screws.
- Install a rack profile inside the resulting guides and secure it with self-tapping screws. It is at this stage that insulation and soundproofing material can be laid.
- After the installation of the frame is completed, proceed to fastening the sheets. You will need a helper for this as the sheets are very large. Apply the drywall to the frame and begin attaching it. Use a special screwdriver attachment for this; it will help tighten the screws to the desired level.
- Trim the sheet of drywall with a hacksaw where it sticks out. On the sheets of the first level, mark the boundaries of the second level with a pencil. Attach the profiles and guides for the second level directly to the first layer. For a straight ceiling, use a two-level connector: it allows you to fix the levels one below the other.
As you can see, a do-it-yourself plasterboard ceiling, even a multi-level one, is not a very difficult task.
Installation Tips
These tips apply to any type of ceiling and are universal. Let's start with the stages:
- Dismantling, cleaning. Be sure to remember the large number of necessary tools. Hats, goggles, respirators and gloves are a necessity. With them you do not put your health at risk. Next, take care of the sawhorse and portable scaffolding, creating a sturdy structure that can make the whole process easier. It is necessary to cover the floor, cover all interior items, and even better, get rid of them. Next, we moisten the surface and remove the old coating. A spatula is needed for cleaning wallpaper and old whitewash. We use the cleaner if the ceiling has been painted. Ceiling joints also need to be cleaned. If any of the elements in the ceiling system begins to work poorly, this trouble must be eliminated, as well as all drips, mold, and mildew must be removed.
- Preparatory work. They are quite simple. It is necessary to use a level to understand the slope of the ceiling. If the structure is bent, then special marks are made for further correction. Cracks or joints of ceiling tiles, unevenness, all need to be repaired using plastic compounds. Also do not forget about priming and drying.
- Alignment. Plastering and filling works. Everything is simple here, if you are going to whitewash, paint, lay wallpaper, then you need to level the surface with a plaster mixture. You will need a level as well as other tools. Primer, putty, smoothing, re-primer. After all the processes, you can start gluing textured wallpaper or polystyrene boards.
- Installation, frame installation. In suspended or suspended ceilings there is no need to go through the leveling stage. We destroy all the disadvantages of the ceiling and begin sealing the seams, then treat the ceiling with special compounds. After this, it is necessary to install battens for the false ceiling. A metal profile or wooden lath always acts as a frame in a future structure. If the master has chosen wood, then it must be treated with special fire-resistant coatings.
- Sheathing, facing works. Several standard panels need to be cut and suitable plasterboard blanks must be created from them. They should completely match your ceiling. A frame is created, you need to use fasteners for further installation. The structure is primed, then it is puttied and installed.
- Whitewashing, painting. This type of ceiling treatment is one of the easiest and most complex at the same time. You can paint anything, even a drywall surface. But you should understand that this can only be done after high-quality surface preparation. Be very careful with working solutions. Any contact with the eye can impair your vision, even to the point of losing it. You'll have to see a doctor. Therefore, it is imperative to wear safety glasses.
It is also worth saying a few words about creating lighting, strengthening the entire structure and adding decorative details. Always focus your attention on the option you want to get in the future. Don't think about the price. Create the ceiling of your dreams in your head and only then think about how much it will cost you. This approach will allow you to quickly determine what you want.
You shouldn’t strengthen the structure or create lighting without the help of professionals. Especially in the case of stretch ceilings. This is an overly complex design and any mistake can lead to the loss of large funds. It is worthwhile to competently approach the issue of safety, as well as creating all the necessary conditions for fast, uninterrupted work.