Features of the material
Self-adhesive or self-adhesive film has high performance characteristics. This is due to its structure and composition, which includes durable polymer substances that protect the base from damage. The film imitates different types of surfaces, so you can easily choose the right solution for a specific interior. The film has a protective layer on the inside, which is peeled off before gluing the base.
This material boasts many advantages:
- resistance to elevated temperatures (up to +80 degrees), temperature changes;
- strength, resistance to scratching and other types of mechanical impact;
- moisture resistance, can be used in rooms with high humidity and where regular washing of walls and furniture is required;
- wide range of assortment and style solutions, suitability for a variety of surfaces: wood, glass, metal, plywood, plastic;
- ease of gluing, minimum time for work, absence of dirt and the need for complex tools;
- the possibility of gluing old coatings without special preparation;
- long service life, ease of further maintenance.
To update the interior with self-adhesive, you do not need to invite professionals; you can easily handle the work yourself. However, all actions must be performed correctly, in a strict sequence of steps, since the film is a rather capricious material, and if not done carefully it can lie unevenly.
Areas of use
Self-adhesive film is used in almost all rooms in the house and outside. It is indispensable when installing indoor and outdoor advertising, in design, construction, finishing work, and furniture repair. The material is especially often used in the kitchen, because here furniture deteriorates most quickly due to increased temperature and humidity, fumes, especially with poor ventilation.
If you stick film on kitchen cabinets, you can protect them from grease drops and damage, because damaged material is easy to remove. Most often in the kitchen they use self-adhesive with imitation wood, stone, or give the kitchen set a bright, beautiful look with the help of colored film. Dining tables and kitchen worktops are also prone to damage from sharp objects and can be extended with self-adhesive adhesives. The solution to the problem will be very inexpensive and quick.
Other areas of film use:
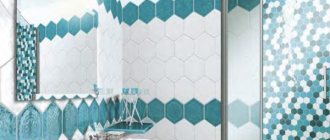
- Bathroom, toilet. Film is the best option for protecting walls from splashes, drops of water, and detergents. There are no unsightly streaks left on it, and it is much easier to clean than tiles: just wipe with a damp cloth. If you don’t have the time and money to completely renovate your bathroom, you can get by by covering the walls with self-adhesive film. In addition, the film prevents mold from growing, which is very important for a damp room. In the bathroom, finishing with a special mirror film or holographic canvas is welcome: the interior will be original and attractive.
- Children's room. Kids often draw on furniture, walls, and other surfaces. It is difficult to remove paint from wallpaper; sometimes it immediately deteriorates after washing. An excellent option would be to purchase self-adhesive tape and protect walls or individual sections of them, as well as furniture and doors. It’s easy to remove the “painted” material and replace it with a new one, because such cosmetic repairs will cost a minimal amount.
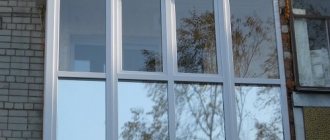
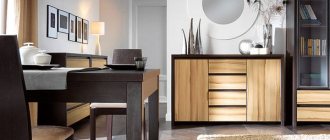
- Living room, bedroom and hallway. In these rooms, furniture, doors, mirror frames and even old windows are updated using film. Self-adhesive will prevent the paint from cracking, crumbling, and will make it easier to clean the window sills. In addition, you can protect your window from the sun during the hot season by tinting it with film.
Using self-adhesive, you can refresh the interior of any room, for example, stick it on stools, solid elements of a sofa and armchairs. Beautiful, bright film is an ideal material for creativity, which is widely used to create children's crafts. Self-adhesive is also useful for making original stained glass windows, decorating balconies and loggias, updating various interior items, and cutting out interior stickers yourself.
Types of material
Self-adhesive film is a universal, yet diverse material that can be classified by type of base, surface, structure and decor.
Classification by material and purpose
Self-adhesive is made from paper, vinyl, impregnated fabric, as well as plasticizers, pigments and stabilizers. The material is divided according to the main substance, which is included in the composition:
- propylene;
- polyvinyl chloride;
- polyester.
Moreover, each material has a combined composition, it’s just that the main component occupies the largest share in it. All self-adhesive can be classified as decorative. There are also special types of film: heating (reflects heat from a plane, used for finishing walls with heating structures) and membrane (used for waterproofing in construction).
Division by structure
The structure of self-adhesive sheets can be single-layer or two-layer. The first option is the cheapest; PVC resin, plasticizers are used to make such a film, and stabilizers are used to impart strength. All of these substances are mixed until a homogeneous mass is melted, then extruded and a film is obtained. By adding different plasticizers, a single-layer material can become elastic or rigid.
Two-layer self-adhesives have two different fabrics: a base and a cover. The base is made of fabric or paper, the cover consists of a certain type of PVC. To produce a two-layer film, pump or calender molding, caching or extrusion are used. This material turns out to be plastic, and it is much more convenient to work with it than with a single-layer material. However, the technical characteristics of single-layer film are higher, it is thicker and more durable.
Classification by surface type and design
Depending on the type of surface, after gluing the material, you can get absolutely any effects. Main types of films:
- Glossy. They are especially often used where there is no natural light, for example, in the bathroom or in rooms located on the north side of the house.
- Matte. Suitable for spacious, bright rooms, giving them a noble and stylish look.
- Transparent. Designed to protect surfaces from mechanical damage, protect furniture from cuts and scratches. Also suitable for renewing and protecting glass products.
- Holographic. They create a beautiful play of light and interesting tints. Due to the change in shade depending on the angle of illumination, such a film is perceived as three-dimensional.
- Mirrored. Popular in small rooms, they allow you to visually enlarge them. Most often used in the bathroom and kitchen.
As for the appearance of self-adhesive, it can imitate different types of materials and structures, for example:
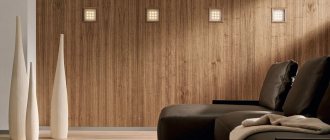
- veneered coating (for most known types of wood);
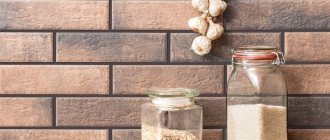
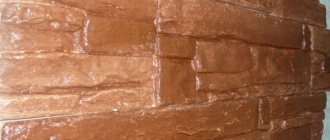
- a natural stone;
- tiled or porcelain tiles;
- art canvas;
- various fabrics, especially velvet, tapestry and velor;
- leather and suede;
- cork cloth;
- metal, gold and silver plating.
The film can also have bright colors: blue, red, yellow and other tones of the gamut. For children's rooms, they often choose material depicting cartoon plots, fairy tale characters, and other interesting themes. On sale you can also find a film on which the drawing is done independently, and then it is easily erased with a rag.
What surfaces can the material be glued to?
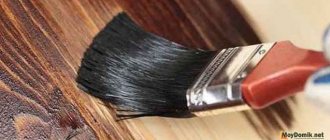
Self-adhesive film can be used on most coatings used in interior decoration. If we are talking about drywall, it must first be puttied and primed. Wooden products must also be primed and a layer of special varnish applied. Apply 2 layers of acrylic primer to the metal.
You cannot stick the film on a base that has protrusions, irregularities, or defects: all of them will stand out strongly, and the quality of the gluing will leave much to be desired. Before work, you need to level the material and sand it well. It is also extremely undesirable to stick film on old wallpaper, especially in the kitchen, where grease settles on the walls. The self-adhesive will quickly peel off from such a coating.
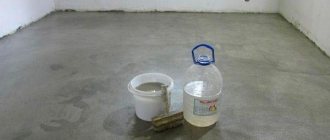
Preparation of the base and material
Self-adhesive is very easy to apply. First you need to think over a new design for the room or individual items, and purchase suitable material. To apply the film without bubbles, the surface must be carefully prepared. After leveling and removing the remnants of the old, peeling coating, it is important to clean the base from dirt, grease, dust and other contaminants. Immediately before work it should be primed.
For gluing you may need:
- ruler;
- pencil;
- sharp knife or scissors;
- putty knife;
- clean rag;
- needle.
It is better if an assistant participates in the work when gluing large surfaces. Professionals also advise using a construction hair dryer, which is used to heat the joints and go well over the corners of the surface to be glued - this will help make the coating perfectly even. If you don’t have a hair dryer, you can use a regular household hair dryer.
The width of the self-adhesive is usually 50-100 cm, so when purchasing you need to immediately select the optimal size piece. The material must be unrolled, a piece cut out, or decor cut out from it. It is very easy to cut geometrically correct parts, because there are always markings on the back of the film. When cutting, it is advisable to leave a small margin (1-2 cm) in case of error in measurements. The film must be cut very carefully and evenly so that there are no jagged or torn edges.
Removing film coating from glass
The film material is not durable, and after a few years it is necessary to replace it with a new one. To make the process go quickly and without flaws, choose one of the options described below:
- Using a sharp tool, you need to remove the film from the corner, then carefully pull it;
- Heat the surface to 40 degrees and remove the coating;
- Using a product containing ammonia, spray the surface. The substance promotes the removal of the film.
The film material is not durable, and after a few years it is necessary to replace it with a new one.
Applying self-adhesive to furniture
If the part to be glued is small, for example, the facade of a cabinet, gluing is carried out on a dry surface. Larger furniture elements should be moistened with water and soapy water. In this case, there will be a chance to correct the position of the canvas if it lies unevenly. The doors, if possible, should be removed, as should the fittings.
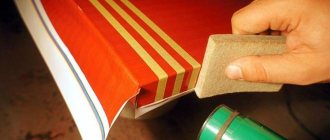
You need to start gluing from the top. First, you should separate 8-10 cm of the film from the base and apply the sticky part to the upper area of the product. Fix the area, smooth it from the center to the edges with a rag to expel all air bubbles. The lower part of the film with the unseparated substrate should hang freely. Next, you need to slowly, in parts, separate the rest of the film from the substrate and go down along the surface of the product.
If after completing the work there are still bubbles, they should be pierced with the thinnest needle, squeeze out the air, and iron the problem area. When a “wrinkle” appears, you need to blow it out with a hair dryer, then carefully smooth it out. It is also advisable to use a hairdryer to treat all corners and joints. Only after finishing the work can you return the fittings and hang the furniture doors in place.
We glue
And now the time has come to start gluing self-adhesive wallpaper. Now we will figure out together how to glue self-adhesive film. Take scissors or a utility knife and cut the first strip of wallpaper so that it is slightly longer than the height of your walls. Paste the first part of the wallpaper along the drawn vertical line. You should make sure that the edge of the wallpaper coincides with this line exactly. Then apply it to the wall, smooth it with a roller, and remove excess glue with a sponge or soft cloth.
After this, take the next strip of wallpaper, soak it (by the way, the soaking time for certain self-adhesive is different, it is indicated on the wallpaper packaging) and attach it to the first strip. Due to the greater length than the height of the wall, you can adjust the wallpaper pattern to match. Continue like this and you will soon reach the last strip.
By the way, very important notes: immediately wipe off excess glue with a sponge or rag; cut off any excess wallpaper before it dries.
There are wallpapers that do not need to be soaked. The film is removed, the wallpaper is applied with one of the edges up, and then smoothed from top to bottom using a roller.
Common Mistakes
In order for the material to lie smoothly and the result to be truly high-quality, you need to avoid the mistakes of novice craftsmen:
- do not apply the film on a dirty base;
- when cutting, do not forget about a small reserve;
- immediately think about combining the pattern on the film;
- cut the material carefully, without leaving nicks;
- get rid of air bubbles without leaving their removal for later;
- do not forget about drying the film after gluing, because it has the ability to absorb moisture.
In some cases, you have to sprinkle the self-adhesive with a little talcum powder, which will reduce the speed of adhesion. It is usually recommended to do this if the surface to be pasted is large in size.
Decorative films for windows. Features of choice and installation subtleties
You can give your interior a unique flavor and uniqueness in various ways. One of them is window decoration. Currently, you can purchase decorative film for windows at any building and finishing materials store. Their range is incredibly rich, and manufacturers offer products that differ significantly, both in their technical characteristics and in price.
In order to confidently make your choice, based not only on the beauty and brightness of the design you like, but subsequently not to be disappointed in the choice, we will tell you in this article about decorative films, their characteristics and ways to decorate windows with your own hands.
Removing self-adhesive film
It happens that the color of the film becomes boring or the material deteriorates and has to be removed. There is no need to try to paint the self-adhesive or paste it over with a new layer, you need to completely remove it. To remove this strong and durable material, follow these instructions:
- moisten the base with hot water;
- wait 5-10 minutes until the glue swells;
- take a sharp metal spatula or knife and start separating the film from one or more edges;
- if necessary, warm the film well with a hairdryer to melt the glue - this will work faster;
- completely clean the surface of adhesive material;
- Remove remaining glue with alcohol and acetone.
Caring for the self-adhesive is easy - you can simply wash it with a damp sponge and detergent. It is better not to use powders or granules that can leave scratches.
With self-adhesive film it is easy to update the interior without extra costs, which is why this material is very popular among users.
How to cover furniture with self-adhesive film: master class + tricks and tips
- Description
- Comments 1
About the types of self-adhesive film, about its properties, the subtleties of its gluing and care for it - in our review.
Self-adhesive film is a simple and affordable way to quickly update furniture and hide its defects (scratches, abrasions). Of course, in terms of resistance to external influences, the film cannot compete with, for example, wood or natural stone, but with proper care it can last for quite a long time, and besides, it can be quickly changed.