Choosing a border strip taking into account its main characteristics
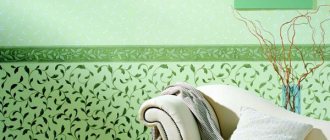
Border tape, or frieze, or edging, or edging are the names of the same universal finishing material, with the help of which you can very quickly and economically complement the interior and give it expressiveness and a characteristic shade. Those who claim that this is the last century, and borders have already gone out of fashion, since interiors with their use are very reminiscent of the furnishings of the times of the USSR, simply do not know how to use them correctly. Especially considering that the modern type of frieze is distinguished by high aesthetic qualities and is impressive in its diversity.
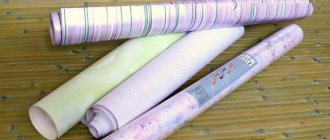
This decorative element is a strip ranging from a few centimeters to a whole meter wide and is sold in rolls ranging from 5 to 10 meters in length. Choosing a border strip shouldn't bring many problems. Most stores selling finishing materials offer a large number of ready-made wallpaper collections, which already contain one or more frieze options. If you first hung wallpaper and then realized that you need to complement the interior to complete the picture, then you need to pay special attention to the material used to make the edging.
The most common of them:
- Paper ones are the thinnest and most delicate type, which are glued and removed very easily. However, due to their delicate texture, they can tear or get wet if the gluing process is not done carefully. They do not have a particularly long service life and quickly fade under the influence of ultraviolet radiation. But this is the most budget option.
- Vinyl - differ from the previous ones in an increased level of strength to mechanical stress, have a more dense structure, are not subject to fading, and therefore have a decent service life. Various contaminants are easily removed from their surface using ordinary detergents, which do not damage the surface, unless, of course, you rub with the hard side of a sponge. Due to this practicality, they are often used in rooms with specific environmental parameters, such as the kitchen or bathroom.
- Acrylic – have also proven themselves to be a very practical decor, resistant to external factors. The cost of acrylic borders is slightly cheaper than vinyl ones with almost equal performance characteristics.
- Textile - this interesting type of frieze consists of two layers. The first layer is the base, made of paper. A fabric layer is glued onto it, which performs a decorative function. Velor is often used for such purposes. The disadvantages of this chic element are poor resistance to moisture and mechanical stress. If handled carelessly or placed near pieces of furniture, such as a sofa or armchairs, where there may be constant contact with pets or hair clips, it may become scratched, come apart or lose its luster. In addition, dust will quickly settle on it, especially if the tape is not small in width. Allergy sufferers should definitely avoid this idea. Caring for a textile frieze is complicated due to the inability to remove dust or dirt simply with a damp cloth.
- Made from fiberglass - the most practical of the options, which is resistant to both mechanical and other types of influences. This frieze will have an attractive appearance for many years. Its stability allows this decor to be used in any room. Due to this, it has the highest cost.
To prevent borders from creating obvious contrast, it is necessary to select a material identical to the material of the main wallpaper. For example, silk-screened acrylic wallpaper decorated with paper borders will instantly lose its chic and rich look and instead become awkward and vulgar. The same happens in reverse situations. Borders are designed to hide the junctions of two types of wallpaper, eliminate the consequences of sloppy pasting or smooth out transitions between two or more colors, and perform the function of zoning. At the same time, they should remain an interior decoration. As for the choice of pattern and color, border tape comes in:
- Plain;
- With ornament;
The surface of the tape can be:
- Smooth;
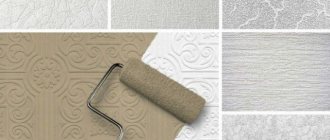
- Embossed;
- With gold, bronze or silver plating;
- Lace.
Depending on the scope of application, curbs for:
- Children's room - you will not confuse them with any others. Elephants, giraffes, dolls, butterflies and other heroes always “live” on them;
- Living room - such a border looks quite noble and rich. It can depict various stripes, monograms, floral patterns, elements of ancient Roman frescoes, calligraphic inscriptions and much more. Sometimes such a small element, with an appropriate design, is enough to demonstrate a particular design style;
- The dining room is the most “delicious” variety, on which fruits and vegetables, tempting sweets, various drinks or simply words corresponding to the kitchen theme can be drawn. In this room, borders are often used to accent a window or doorway, a beautifully lit wall cabinet or pencil case, or on the wall opposite the dining area.
Paper borders for wallpaper in the nursery: specific application
Paper border is often used in the nursery. And this is a smart move.
The border will help in this case:
- Divide the room into a zone (work, play, neutral);
- Visually change the space, visually enlarge or expand it;
A border for wallpaper will help to separate the lower third of the wall, which in a nursery makes sense to cover with other wallpaper, denser, washable, and practical.
A clear mistake would be gluing a border in the middle of the wall. Not only does it not look very impressive, it cuts off a considerable part of the wall, visually, of course. But it is not forbidden to glue the border vertically in the middle of the wall.
Options for combining frieze with wallpaper
After you have become familiar with the main features of wallpaper borders, you need to figure out how to properly combine them with wallpaper. The two main characteristics by which they are usually combined are color or pattern. There are actually not many selection options, taking these conditions into account, but they are the most successful and help to truly create a holistic and piquant interior.
Plain wallpaper + frieze with ornaments
One of the classic, noble combinations. This design option is suitable for discreet people who prefer elegant and seasoned interiors with their own twist. In this case the width of the tape should be such that the design is clearly and clearly visible on it. So that from a distance it does not resemble just a stripe of a distinctive color. With this combination, compatibility is ensured with the help of shade. Therefore, the main rule is to choose a border with an ornament that will have areas identical in color to the main wallpaper. Even a small amount of this color match will ensure a harmonious perception. With this technique you can easily diversify a calm environment, make it more dynamic and lively.
It is very successful to use a border with patterns in spacious rooms where a special emphasis is placed on the walls. Opposite them there may be no furniture at all. This option is also optimal for decorating a children's room. You've probably often encountered the fact that caring parents try to make their child's life as bright and colorful as possible and please him in every possible way. In this regard, they decorate the room depending on the child’s preferences. Often this is done using themed wallpaper or photo wallpaper with characters from their favorite cartoons. This is a costly and not entirely justified matter. After all, at an early age, a child very often and quickly changes his hobbies. Today he was delighted with dinosaurs, and tomorrow he became interested in airplanes... That is why it is much easier, faster and more economical to replace a border with a boring and no longer relevant image than to re-paste the wallpaper in the entire room.
Against the background of neutral walls with a thematic frieze, you can place paintings with a corresponding image to support the idea. This is not a strict rule, just a recommendation for practical parents. Other combination options look no less successful in the room of small owners.
Wallpaper with a pattern + plain frieze
This combination will add some calm and orderliness to a pattern-filled room. In this case, the frieze should display a color that is in the minority on the main wallpaper. This way you can avoid oversaturation with one tone. The width of the tape is selected depending on its location on the wall, which we will talk about a little later. One thing is for sure: a strip that is too narrow against the background of large elements of the design will look ridiculous and will simply get lost. If there is mother-of-pearl on the wallpaper, you can choose a plain ribbon to match it. Thus, seemingly ordinary wallpaper with an ornament will acquire charm and sophistication. Usually in such cases gold or silver edging is used.
Plain and colored wallpaper + border options
Wallpaper with a pattern always looks more expressive and interesting, but there are times when decorating the entire room from top to bottom with colored canvases is unacceptable. This is especially true for small rooms. You risk making them visually even less spacious and stuffy. In this case, you shouldn’t completely abandon the patterned wallpaper you like. You just need to use them in smaller quantities. A popular option is to decorate the lower part of the wall with such canvases, and the upper part with plain, pastel or the same color, but without a pattern. The place where there will be a junction of two types of wallpaper must be hidden either with a plain tape of a distinctive color, or with the same pattern, but having a different orientation, as in the example below, walls decorated in this way in living rooms or bedrooms look very harmonious.
Wallpaper with ornaments + frieze with a pattern
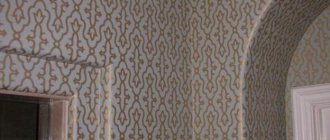
If you like this particular composition, then you should be very careful. By choosing the wrong ornament, you risk oversaturating the room with all sorts of designs, and then only the walls will catch the eye, and not your luxurious furniture or original decorative items. This solution in itself is very rich and rich. Based on this, the most successful option would be to use a border tape of medium width, which depicts the same pattern as on the main canvases, but in a smaller size. Or combine wallpaper of different tones, but with the same pattern, which should be repeated on the tape. In this case, it is optimal to position the frieze so that the direction of its pattern is perpendicular to the direction of the pattern on the wallpaper.
Dark and light wallpaper + border tape
Many designers love to create different color combinations to make the interior more expressive and voluminous. Not only does it look impressive, but it also has a practical point of view. Even the most careful and pathologically prone to cleanliness housewives will not be able to avoid soiling the walls from below. This is especially true for passage rooms such as a corridor . Therefore, very often the lower small part of the wall or half of it is covered with darker wallpaper. On top, preference is given to light colors. The junction of two canvases can be effectively hidden with the help of a well-chosen border. Wallpaper, in turn, can be either plain or have an unobtrusive pattern. This leads to two options for border tape:
- Plain textured wallpaper of different colors can be combined using a border that has the color of the lower or upper canvas, but with an ornament. For example, a dark blue bottom and a white top will be successfully complemented by a white border tape with a blue ornament, or vice versa.
- Wallpaper with patterns in different colors can be complemented with a plain ribbon to match the color of the pattern. For example, the bottom canvas is dark gray, and the top is light gray. But both canvases have a black or white pattern. An unusual distinction in this case will be a thin black or, respectively, white edging.
Wallpaper does not fit together: a step-by-step guide to solving the problem
Before you begin repairing and decorating walls yourself, it is important to know and follow the correct technology for all of the above work. When cutting wallpaper, make sure that the individual parts of the design or pattern match; to do this, use a pencil and a well-cutting utility knife. Consider the distance to the ceiling from the top edge of the wallpaper. To avoid darkening and yellow spots on the wallpaper, try to use only high-quality glue. When gluing, also monitor the room temperature - avoid sudden changes and drafts.
In order to fix seams, a split joint between wallpaper, a dark and yellowed defect, wear or stain, the following tools are needed:
- A patch on which there is an element of the design that falls on the joint;
- Ribbon, cord, decorative edging or wallpaper border to radically eliminate an uneven joint or disguise it;
- Glue (even PVA will do);
- Scissors or stationery knife and pencil;
- Brush or sponge;
- Roller;
- Soft sandpaper;
- Water;
- Unnecessary wallpaper trimmings;
- Coloring paste.
Step 1. Moisten the edges of the wallpaper, leave for a few minutes so that they are saturated with moisture.
Step 2. Apply special joint glue to the edges of the wallpaper (PVA glue will also work). This is the kind of glue that will set immediately.
Step 3. Try to align the joints on the wallpaper with your hands, without overlapping on thick wallpaper (for example, vinyl). Roll along the edges, straighten the canvas and remove air bubbles, remove excess glue with a sponge.
Step 4. Remove the unsightly gap between the wallpaper sheets. To do this, wet the edges with a damp sponge and try to pull them together and place them on the glue. Unfortunately, it happens that this method does not produce results. In this case, craftsmen advise veiling the visible defect with a decorative edging or wallpaper border.
Step 5. This step must be applied if you still were not able to beautifully connect the joints between the wallpaper.
Rub the decorative side of the unwanted wallpaper scraps with sandpaper, then mix the resulting powder with glue and apply this mixture to an inconspicuous area of the wall. If the color of the mixture matches the tone of the wallpaper, then feel free to apply it to the gaps between the joints. Or use a special tinting paste.
Another option for masking a gap is to create an artificial joint using patches, which are carefully cut with a utility knife and placed between the wallpaper panels.
But still, the simplest and most effective method of correcting joints is the use of decorative braid, cord, piping to match the furniture or curtains. To harmoniously decorate your room interior, decorate the frames of photographs and paintings with the same border. All this will help hide the failures of your renovation work!
Thus, you see that uneven, unsightly joints between wallpapers do not yet provide a reason to completely re-glue the walls, and today there are simply an immeasurable number of ideas and options for eliminating this defect!
ogodom.ru
Secrets of successful application and placement of borders
When you have precisely decided on the type of wallpaper and, based on our recommendations, selected the most suitable border, you will certainly be faced with the question of how to correctly arrange the elements on the wall. Let's consider the most successful options:
- Horizontal location is the most familiar for many. The most common option is when the border is located exactly in the middle of the wall. This is acceptable for rooms with normal ceiling heights. More interesting would be the location of the curb somewhere at 1/3 of the wall height. This will help raise low ceilings a little. To hide a bad wallpaper trim or encourage guests to notice your chic stretch ceiling or exquisite lamp, place a border strip directly under the ceiling. A wide ribbon will be more noticeable.
There are a lot of options for such borders, sometimes they can be made in the form of large flowers, unusual birds or inscriptions. With the help of such an element, the interior will seem more thoughtful and complete. Another option for horizontal placement is directly above the floor level. In this case, the border can have a width of 20-30 cm and be made in the form of young grass with primroses or simply have an interesting pattern. - Vertical orientation is especially relevant when you want to highlight the wall on which the emphasis is placed. This can be a wall of a distinctive color, edged around the perimeter with a border with an ornament in the same color as the main walls. Or, conversely, a wall with patterns and a clear monochromatic border. In any case, such a solution will have a more expressive and neat appearance. After all, you will not only clearly mark the boundaries, but also hide the joints or trimming in the corners, where it is quite difficult to do this beautifully. Especially without proper surface preparation beforehand. A vertical border can also be wonderfully placed on the plane of a long wall in a place where wallpaper of different types meets.
- Diagonal separation is extremely rare. But this option also has a right to life. The rooms, one of the walls of which is divided by a diagonal line, look very extravagant and creative. Besides this there is one more plus Using this direction - diagonals help to expand the space and slightly dissolve its boundaries, thereby making the room more spacious. Please note that the latest design decision in the design of a backsplash in small kitchens was the diagonal arrangement of tiles. Which also manifests itself in the way the flooring is laid. So why not? They will look especially impressive wide stripes with a beautiful pattern against the background of plain walls. But you shouldn’t be zealous either. The width of the curb should not exceed ¼ of the height of the wall. In the case of two parallel stripes, even less.
- We highlight window or door openings. This is another not-so-standard way to use a border for wallpaper. However, if you have such a desire or need, then you should not talk yourself out of it. To highlight the window opening, you can stick tapes around its perimeter. This is acceptable if the curtains do not interfere with further viewing of such a solution. If you already have your favorite curtains, place a wide border with a beautiful pattern directly above the curtain rod and across the entire width of the wall. Of course, it must match the color or texture of the other finishing materials. Doorways are designed in a similar way. In the case of gluing a border around a door frame, for example, instead of platbands, you can match its color to the door leaf, and the pattern to match the color of the walls. It can also be the other way around. Main, so that the color of the walls and doors is reflected in the appearance of the edging.
It is also worth noting that in addition to their excellent aesthetic qualities, borders can help visually highlight a particular area. Thus, you can quickly and easily perform space zoning without much expense.
This can be done especially successfully when the border is placed vertically at the junction of canvases that are identical in texture but different in color. This technique is often used to separate a small area of the bedroom for a work area. Or when combining a living room and a kitchen.
How to hide joints between wallpaper + photo
Many fans of wallpaper decor are well aware of the situation - the craftsmen seem to be very good, and the wallpaper is expensive, and after hanging the wallpaper on the walls, seams between the panels clearly appeared. Unofficially, every third case of renovation with walls decorated with trellises is faced with the problem of how to hide the joints between the wallpaper. It is almost impossible to disguise the stripes by changing the lighting, and re-pasting the entire room is expensive, so before taking radical measures, you can try to eliminate the problem using simpler means.
Defect options
Most often, owners blame both the craftsmen and the quality of the wallpaper. But if the craftsmen are professionals, and before this room they managed to glue kilometers of canvases with high quality without any comments, why did they not take into account the peculiarities of the brand of trellis when gluing. Indirect confirmation is the fact that the same problem occurs with both cheap paper and expensive non-woven wallpaper.
The answer to the question of how to make wallpaper joints invisible does not have a clear answer, since the defect itself at the joints can manifest itself in different ways:
- The neighboring canvases have separated, and a thin gap has formed through which the wall is visible;
- A lighter or darker uneven strip of glue residue appeared along the joint;
- The joints at the border of the wallpaper have risen like a “house”;
- At the joints, the difference in shades of the two canvases is clearly visible.
The last point is the most unpleasant. It often happens that when buying wallpaper in a company store, you can purchase rolls from the same manufacturer, the same brand, but belonging to different batches. To sell mismatched items and make the product attractive, salons collect leftover rolls from different batches into one and sell them at a slightly reduced price.
For your information! Even within the same batch, wallpaper may differ in shades.
Many manufacturers, due to the peculiarities of the technology for applying paints to the panel, are not able to ensure ideal distribution of the toner; as a result, one edge turns out to be slightly darker and more saturated than the other. It is impossible to hide such a defect, so an icon with two vertical arrows directed in different directions is placed on the roll. This means "reverse sticker sequence". To hide uneven coloring, each subsequent roll must be turned 180° before cutting and gluing. If you do not pay attention in time to the icon hidden in the text of the marking, the discrepancy in shades at the joints can only be corrected by painting the trellises.
Five ways to hide joints
Correctly hiding a defect at a joint is often even more difficult than gluing wallpaper correctly. You can learn how to work with trellises from the instructions, while you have to come up with and look for ways to hide defects on your own.
You can hide joints using one of the following methods:
- Clean the edges of the wallpaper from any remaining glue;
- Shade or paint the walls to hide the background, revealing the gap between the joints;
- Try to flatten the wallpaper panels after first slightly moistening the trellis material;
- Paint the wallpaper or hide the joint using a special tinting paste.
Advice!
Before trying to hide joints with paint or tinting compound, you will need to practice in a closed area, for example, behind a closet, where the furniture is covered by wallpaper. The easiest way to hide revealing light spots is to try to paint over them with special paint or pencil. To do this, you will need to buy a special coloring composition.
To hide the white stripe between the panels, just apply a tinting color to the seam using a brush or ear stick. Wipe off excess paint with a clean napkin.
Unfortunately, hiding the joints in such a simple way is only possible with plain wallpaper, if you can choose the composition of a suitable color.
The riskiest way to hide seam problems is to use tinting paste. To prepare it, you will need to trim the wallpaper, from which the surfaces with paint are removed with a sharp knife or sandpaper. Colored paper dust is mixed with glue and the joint is rubbed. In this way, restorers restore old books and paper products; the method is complex, so it is not always possible to hide the problem.
In particularly difficult cases, owners decide to use polyurethane decorative strips that are glued to the joints. In this way, you can hide any defects, even if the shade of the panels is different.
How to hide a joint contaminated with glue
Excess glue at a joint is the simplest case, but only under one condition, if you pay attention to the problem in time. If the wallpaper is glued by hired craftsmen, you will need to check the quality of the work in the first hours, while the glue is still wet.
On vinyl or non-woven wallpaper, it is enough to simply wipe the glue with a dry and clean napkin; on paper, excess adhesive material is blotted, like an ink stain, without rubbing on the canvas. After the wallpaper has dried, the joints must be checked again, since over time, glue stains tend to turn yellow and appear in the picture, after which it will be impossible to hide them.
On dark wallpaper, residual glue at the joints can be hidden using a retouching pencil. Before decorating the seams on the wallpaper in the photo, the marks are wiped off with a paper eraser.
The most difficult case
It is most difficult to hide joints with a gap when the edges of the panels have diverged so much that the wall is visible. To hide the unmasking seam, you need to try to move the edges and fix the canvas using proven glue. Many two-layer wallpapers react differently to moisture. Most trellises swell and become plastic when liquid glue is applied. After gluing to the wall and smoothing, the width of the canvas can increase by several millimeters, and after drying the reverse process occurs.
To hide the resulting gap, you first need to moisten the edges of the canvas using a spray bottle or spray bottle. After 10-15 minutes, the wallpaper will become soft, and you can lightly press the canvas with your hands and try to connect the edges of the panels. The seams are glued with PVA glue and rolled with a rubber roller.
If it is not possible to hide the joint in this way, for example, joints on paper wallpaper are very difficult to hide in this way, you can try to decorate the seams, as in the photo.
Colored stripes and individual fragments are suitable for decorating joints; you just need to stick them on the panel so as to hide the defect and at the same time distract attention from the problem area. Wallpapers of different patterns will help to ideally hide a frayed seam, since a brighter color always attracts the eye. Before you make a joint from different wallpapers, you need to plan an overlap transition. The glued new trellis does not even need to be cut.
Fighting the edges that have risen up like a house
Not the most difficult, but quite common case when joints rise and twist, photo. Usually craftsmen in such a situation, in order to hide their imperfections, blame the quality of the wallpaper and poor glue. In fact, the problem lies precisely in the lack of professionalism of the workers. In the process of coating the cloth, experienced craftsmen apply glue to the edges twice, because the adhesive mass dries much faster along the edge of the cloth. To hide the raised joints, just apply an additional layer of adhesive under the seam line and roll the trellis with a rubber roller.
It is much more difficult to hide a defect at the joints in a situation where the seams have risen along with pieces of soil and whitewash. This means that the preparation of the wall surface was carried out extremely carelessly, and when shrinking, the wallpaper tore off the adhesive seam at the joint. In this case, you have to spend a lot of time soaking and removing the old glue from under the joint, and only then gluing and rolling the fabric. If you try to re-glue the seams as they are, the remnants of the old glue and whitewash will make the seam stand out, and under certain lighting the defect will appear in a new way.
Conclusion
A good way to hide joints involves using thin strips of paper or wallpaper of the same color as the main fabric. This will ensure normal adhesion strength, the absence of raised seams and unmasking light spots between the panels. To do this, you will need to moisten the edges of the panel, and after the glue has soaked, carefully lift the seam and glue in an additional strip. The method works with any wallpaper.
2proraba.com
How to stick borders correctly
First of all, you need to know that border tape differs in the method of gluing.
- Some varieties are self-adhesive. In order to begin work, you only need to remove the protective tape from the adhesive layer.
- Others are simply impregnated with adhesive. In this case, you just need to slightly moisten their base, wait a couple of minutes and stick on.
- But most still require the same actions as regular wallpaper. In this case, you need to pay attention to the glue itself, which should be marked on the packaging “for wallpaper borders.” Or ask the seller to select the required option.
As for the gluing process itself. Many people mistakenly believe that the border is glued directly on top of the wallpaper. This option is acceptable only if a paper border is used on paper wallpaper. Due to the minimal thickness of this material, no bulges will form on the wall surface in the future, and the frieze itself will stick easily and reliably. If other materials are used, the border is glued only to the wall. Therefore, it is necessary to begin work by preparing the surface itself:
- If it has defects in the form of deep scratches or dents, they must be smoothed out with a layer of putty.
- After drying, it must be sanded with fine sandpaper or a special mesh to remove irregularities.
- After this, the entire surface to be pasted is primed.
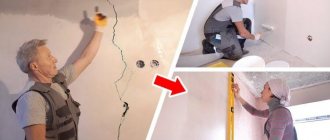
- After the soil has dried, it is very important to markings. This will be the key to the correct placement of the border on the wall. To do this, use a building level and a special painting line. With one movement you can accurately apply markings over a large length at once.
- Now you need to measure how much tape you will need. Don't cut end to end. Leave a centimeter of extra space at each joint. The excess can be easily removed with a stationery knife, but gaps will be clearly noticeable if there is a shortage of material.
- To simplify the work, it is recommended to cut long borders into pieces 1-1.5 meters long. In this case, too, do not forget about the reserve. Cut the border in places where the design will most easily fit together. This will make your work much easier.
When you have properly prepared the walls, marked them evenly and cut the frieze, you need to start mixing the adhesive and the main work.
- Let the glue sit a little and start applying. The layer should not be too thick. Do not apply the composition to the entire length of the wall at once. For the first time, it is enough to coat an area equal to the length of the strip. In some cases, glue is applied to the border edging. You need to let it sit for a few minutes so that it gets saturated and only then glue it. This feature will be specified in the instructions for the border tape itself.
- Follow the markings carefully. Since the border tape is often applied first, it will give direction to the main wallpaper. In case of misalignment, it is better to transfer the work.
- Immediately wipe off excess glue from the surface of the frieze with a soft cloth.
- The joints of two strips must be rolled with a roller.
- When you reach the corners, make sure that the edge of the break overlaps the adjacent wall by at least one centimeter. This will ensure a joint without gaps.
- If you are decorating a window or doorway with a border, it is better to join the edges at an angle of 45 degrees. You should not do this immediately before gluing. Place the tape around the perimeter of the opening with a margin. So that its edges overlap each other and form the letter P. Without waiting for it to dry completely, take a ruler and a sharp knife. Attach the ruler at the required angle to the wall, press down well and draw with a knife. Do not press too hard to avoid pulling on the edge of the blade. Once you've made sure you've cut all the way through both layers, carefully remove any excess pieces and roll the joint. You'll get perfectly straight bevel.
As you can see, the process of pasting regular wallpaper is even more complex and time-consuming than decorative borders. By following these tips and doing everything consistently and carefully, you will certainly cope with this task perfectly.
Wallpaper tape
Hello, dear workers of your favorite newspaper! We would like to share the secret of gluing vinyl wallpaper at the joint. Maybe someone knows about such little things, but in our young family they became a small discovery.
Sincerely, Gladyrev family Rostov region,
Krasnosulinsky district
When gluing expensive wallpaper into a joint, you need to put a cash register tape (sold in bookstores and stationery stores) halfway under one edge of the glued canvas, and stick the next strip along the remaining part of the cash register tape. Then, after drying, the seam will not come apart. For example, vinyl wallpaper is more capricious when drying - it does not tolerate drafts and changes in humidity.
But before gluing the walls, you definitely need to prime them, or at least go over them with cheap wallpaper glue, diluting it thinner. You can add PVA construction glue to wallpaper glue, regardless of brand, at the rate of 250 grams per 12 liters of finished glue for greater strength.
Before cutting the rolls, you need to make sure that their series numbers match (even at first glance, identical wallpaper from different series may have slight shades of color). The length of the strip is equal to the height of the room plus “spare” 10-15 cm. We remind you: save glue, do not stretch the panels and use a roller! The remaining principles do not differ from the usual ones.
25.02.: 6513
housing.hozvo.ru
The wallpaper came apart when glued end to end
A trivial problem typical of paper-based canvases. The gluing of such canvases is carried out by applying glue twice: on the wall and on the canvas. When coating wallpaper, the paper becomes saturated with moisture and swells. In this case, the width of the canvas lengthens by about 0.5-2 mm. After gluing to the wall, the glue dries, and the reverse process occurs with the material - shrinkage. The wallpaper pulls together and forms a sad gap.
There is only one conclusion - do not glue paper-backed wallpaper end-to-end unless the manufacturer specifies this in the instructions. Rolled panels on a paper basis are made with an overlap. However, if you make it large, then after drying the seams will be visible on the wall. To avoid this result, keep the overlap to a minimum of 1-1.5 mm.
How are wall markings and wallpapering done?
Marking walls is an important procedure. Marking the walls is done using a pencil and a laser level. When the level sets the vertical, using a pencil on the wall, draw a vertical line along the entire length of the wall. Wallpapering begins from this straight line (Fig. 3).
Scheme of puttying wall joints.
Where is the best place to start marking? If the pasting is intended to be non-woven, cork or vinyl wallpaper, the marking point does not matter. Walls can be marked from the middle of the wall or from its beginning, since in the corners such wallpaper is glued in a completely different way.
How to prepare glue for use? The preparation of wallpaper glue should be carried out strictly according to the instructions provided by the manufacturer. The glue should be diluted immediately before work, in a deep plastic or enamel bucket.
How to glue wallpaper correctly? Let's look at the technology of wallpaper gluing using the example of the most popular type, i.e. vinyl wallpaper. Vinyl wallpaper consists of two layers:
- bottom (paper or non-woven);
- facial (polyvinyl chloride or vinyl), where vinyl performs protective and decorative functions.
Due to the presence of two layers in the wallpaper, they are highly durable, reliable and durable, but are quite heavy for an unprofessional craftsman. It is better to glue them together. One worker should stand on a stepladder, the other on the floor.
Recommendations for use
Gluing wallpaper joints is best done from a small stepladder that can be easily rearranged. In addition, the following tools will be needed for the job:
- construction knife;
- narrow metal spatula;
- thin brush;
- a spray bottle with water and a damp cloth;
- a piece of hard material measuring 20x30 cm (cardboard or other);
- special roller for rolling wallpaper;
- construction hairdryer.
The joints are glued, sequentially moving from one section to another. If the wallpaper has already been glued before, the damaged area is first moistened with water from a spray bottle and given time to soak a little. Then the edge of the canvas is separated from the wall with a metal spatula and then proceed according to the standard scheme.
How to use glue for wallpaper joints?
- Carefully coat the inside edges of the panels with glue. It is best to use a thin paint or art brush for this purpose.
- Place cardboard or another hard sheet over the coated area so that it overlaps both sheets.
- Press the cardboard firmly and smoothly move the turned on heat gun towards the joint. Warm up the treated area for 20 seconds.
- Remove the cardboard before it sticks and roll the surface with a roller.
- Wipe the treated area with a damp, soft cloth to remove any remaining adhesive. Do not press on the wallpaper to avoid damaging the pattern or design.
- Treat all problem areas in the room in a similar manner.
So, glue for gluing wallpaper joints is very helpful when using heavy panels, uneven walls or a draft in the room. It allows you to glue delicate wallpaper that stretches when wet. It can be used to eliminate defects in the form of loose pieces. All types of joint adhesives are suitable for non-woven, vinyl, fabric and paper wallpapers. This line of products is produced by many companies. But it is better to give preference to well-known manufacturers: Metylan, Kleo, Moment. The choice between them is a matter of taste and material capabilities.
Variety of shapes and materials
The colors, materials, and textures are so varied that choosing the right option is easy. A well-chosen frieze can raise the design of a room to new heights. The main thing is not to get carried away with the variety of materials, textures and colors, so as not to create a feeling of chaos in the room.
Shape and textures
The most convenient option for wallpaper border from an aesthetic point of view is a smooth strip. It fits most styles, but is unlikely to decorate a boring interior. Manufacturers offer various types of frieze:
- Smooth matte or glossy. Easy to use, fits easily into any design.
- Textured. Embossing attracts attention and breaks up the smooth surface of the walls.
- Lace. This is a complex type of design, suitable only for “palace” styles. The design on the border should be combined with design elements on other surfaces or furniture.
- Coated with a golden or silver tint. This frieze is even more difficult to fit into the design. If the rest of the design does not have elements of this color, then lonely splashes of gold and silver look out of place.
It is dangerous to combine dissimilar textures in one interior. Professionals sometimes achieve striking effects with this trick, but it's much safer to combine textured wallpaper panels with smooth surfaces, or vice versa.
What is edging made from?
The choice of material depends on the style and color scheme of the interior:
- Paper. The thinnest and most fragile version of the wallpaper border loses color saturation when exposed to sunlight. Paper strips adhere well when gluing, but they are difficult to work with. The material gets wet quickly and is easily damaged. The main advantage is low cost.
- Vinyl. This material is much stronger than paper, is not afraid of the sun, and will last a long time. The vinyl frieze is washable. It withstands high humidity in the kitchen or bathroom.
- Acrylic. This is a polymer material with characteristics similar to vinyl, but with greater resistance to fading and abrasion. The cost of acrylic borders is usually slightly lower than vinyl ones.
- Textile. Double-layer strip of paper and fabric. Most often, the top layer is made of velor. The border looks impressive, but, unfortunately, is impractical. The fabric cannot be washed, much less rubbed, as dust accumulates on it. If the edging is located low, abrasions from contact with furniture, damage from the claws of pets or careless movements of the owners are possible.
- Fiberglass. Reliable, practical, beautiful, but expensive.
Gluing thin paper borders to walls with wallpaper made from expensive materials is not the best idea. This will simplify the design. Expensive borders on cheap paper wallpaper are also inappropriate. Contrary to expectations, they will not add luxury to the room, but will only highlight the design flaws.
Various customization options
If there is a pattern on the wallpaper, then you should be prepared to match it when applying it to the walls. There are several ways to match wallpaper and adjust the pattern.
Direct docking
For the convenience of gluing wallpaper using this method, it is important to correctly calculate the length of the strips for further adjustment. This is done according to the following algorithm:
- The wall is measured in length and height. We record the results obtained, for example, the width of the wall is exactly 4 m, and the distance from floor to ceiling is 2.5 m.
- We measure the repeat (repetition of the pattern on the wallpaper sheet), let’s say it is 54 cm, given the length of the roll is 10 m, and the width is 53 cm.
- Now you need to calculate a number that is a multiple of the rapport (in our case 54 cm) and as close as possible to the height of the wall (in our case 2.5 m). To obtain this number, the possible value of the rapport number is determined at which all parameters will be met.
- As a result, if the step is four (4*54), the full cut will be 2.16 meters. This value is not enough for a given ceiling height of 2.5 m. Therefore, we increase the step to 5 (5 * 54), and this number is already suitable, it will be 2.7 m.
- Having calculated from the length of the roll (10-2.7 * 3) we find that 3 whole strips can be used for further use.
In this work, the first tape plays a very important role. After all, if you glue it crookedly, in the future the joints of the wallpaper will go at an angle and the whole picture will deteriorate. To prevent this, a plumb line is often used, which can serve as an accurate guide for evenly gluing both the first strip and the next ones. This measure, although optional, is recommended, because neglecting this little detail increases the risk of beveled blades.
Offset docking
With this method of gluing the joints of wallpaper, the pattern shifts along the second strip. It turns out that with the indicated shift of ½, the repeat length will be 2 times less than the original value. Consequently, a drawing 54 cm long will be reduced to 27 cm.
The pattern is adjusted so that every second strip is 2 times smaller than the first (in our case, 27 cm). But the multiplicity of the pattern in height is now determined to be 54 cm for the first, third and remaining odd stripes, and 27 cm for the second, fourth and subsequent even stripes.
Free docking
This gluing method will help you properly glue the wallpaper end-to-end and reduce material loss to a minimum. But it should only be used for canvases with small and symmetrical designs. Of course, it is worth calculating the length and height of the walls, but adjusting the design is no longer required, which saves resources and effort.
Counter joining method
This method is often used to simplify work. After all, as a result, the seam will not increase and the canvases will fit tightly to each other. To do this, the wallpaper is laid overlapping, and after adjusting the pattern, it is cut at the border in a straight line.
Choosing glue depending on the type of wallpaper
Manufacturers provide wallpaper adhesive for gluing a certain type of wallpaper (non-woven, vinyl, fiberglass, textile, paper, photo wallpaper, etc.), as well as a universal solution that is suitable for working with all types. In the latter case, you only need to comply with the following condition: the heavier the wallpaper, the thicker the glue should be mixed.
We do not recommend our clients to purchase universal glue; it is better to buy glue specifically for your type of wallpaper, narrowly targeted, or the one recommended by the wallpaper manufacturer itself (this is often the case when gluing photo wallpaper).
When buying glue, you will be faced with another choice - a dry powder mixture, or ready-made glue, diluted in the correct proportions.
There is also an option when the wallpaper is already impregnated on the inside of the canvas with an adhesive composition - self-adhesive wallpaper. It is enough to moisten them with water for a certain time, and then get to work. In some wallpapers you just need to remove the protective film while gluing. This option is attractive because you don’t need to choose glue, calculate its quantity, purchase consumables (roller, brushes) and you can safely ventilate the room immediately after finishing the painting work.
But such wallpapers have some disadvantages. They are very thin. If the wall is not sufficiently prepared for wallpapering, self-adhesive will not hide the defects and they will be very noticeable. Another disadvantage is their high cost.
Let's return to the glue, which needs to be diluted with water. This is the one that is in greatest demand. This glue is diluted in a previously prepared container with water, gradually adding a small portion of the bulk mixture. The proportions will be indicated on the packaging by the manufacturer, try to follow all instructions. Calculate the glue consumption in advance depending on the area of the walls of the room, and do not forget to round up the figure as a reserve.
For beginners, there is a type of adhesive with an indicator, thanks to which the adhesive is painted in color (pink, blue) and you can clearly control where it is applied without missing a centimeter. After drying it becomes colorless.
How are wall markings and wallpapering done?
Marking walls is an important procedure. Marking the walls is done using a pencil and a laser level. When the level sets the vertical, using a pencil on the wall, draw a vertical line along the entire length of the wall. Wallpapering begins from this straight line (Fig. 3).
Scheme of puttying wall joints.
Where is the best place to start marking? If the pasting is intended to be non-woven, cork or vinyl wallpaper, the marking point does not matter. Walls can be marked from the middle of the wall or from its beginning, since in the corners such wallpaper is glued in a completely different way.
How to prepare glue for use? should be done strictly according to the instructions provided by the manufacturer. The glue should be diluted immediately before work, in a deep plastic or enamel bucket.
How then? Let's look at the technology of wallpaper gluing using the example of the most popular type, i.e. vinyl wallpaper. Vinyl wallpaper consists of two layers:
- bottom (paper or non-woven);
- facial (polyvinyl chloride or vinyl), where vinyl performs protective and decorative functions.
Due to the presence of two layers in the wallpaper, they are highly durable, reliable and durable, but are quite heavy for an unprofessional craftsman. It is better to glue them together. One worker should stand on a stepladder, the other on the floor.
Wall placement options
The standard option - edging along the upper edge of the wall - is safe from an aesthetic point of view, but this is not the only possibility of using a border. The tape can be glued at different heights, placed horizontally or vertically.
Wall decoration with wallpaper of different textures, colors or patterns will be harmoniously complemented by a horizontal frieze strip located at the border of different finishing materials. Vertically pasted wallpaper edging will delimit zones in open-plan rooms. It can also be used as a frame for photo wallpaper or a mirror. Sometimes doorways or windows are covered with frieze.
If, after gluing, defects are discovered along the bottom of the wallpaper (too short or damaged), you can place a wide border along the floor. The same option will hide stains on light walls or the “creativity” of a little artist in the nursery.
Rules for gluing non-woven wallpaper
Tips on how to properly glue non-woven wallpaper are relevant for horizontal and vertical surfaces. The technology is applicable for wallpaper with and without a vinyl layer.
Rules:
- Non-woven wallpaper does not stick in drafts and dry rooms. The sticky compound dries too quickly, resulting in blisters.
- The glue is applied to the walls and ceiling without additional coating of the wallpaper.
- The strips of material are laid close to each other without overlapping.
- Air and folds are expelled with a special brush or spatula from the center to the edges, from top to bottom.
- Excess glue should be washed off from the wallpaper with a soft cloth or sponge immediately after smoothing.
- All pieces of furniture must be removed, and it is recommended to cover the floor with film, newspapers or cardboard.
Non-woven wallpaper is glued to a surface that has been primed and cleared of old coating. The measure reduces glue consumption, and appropriate compositions prevent the occurrence of mold.
On the wall
Wallpapering on a non-woven basis begins with preparing the room. Sockets, switches, and heating devices are removed from the walls. If it is possible to remove the baseboards, remove them too. Afterwards the old coverings are removed.
The walls need to be primed. To stick non-woven wallpaper on a wall instead of a special compound, just walk over it with glue. It is diluted according to the instructions, using twice as much water as indicated for gluing.
If the color of the wall is uneven and sharply contrasts with the color of the wallpaper, you should use a coloring primer. For heavy non-woven wallpaper, an acrylic primer marked “Adhesive” is suitable.
In the place where you start gluing the meter-long non-woven wallpaper, mark a straight line with a pencil using a plumb line. Experts recommend placing the first canvas in the corner closest to the window.
Wallpaper should first be cut into sheets along the length of the wall. Plain and vertical patterns are cut into strips equal to the maximum height of the room + 6-10 cm. Each subsequent piece of wallpaper with a pattern should be checked with the previous one to make sure that the pattern will meet at the joints.
After everything is prepared, start diluting the glue. In this case, it is imperative to comply with the proportions indicated on the label.
Rules for sticking non-woven wallpaper and procedure:
- Glue is applied to a section of the wall under one strip without gaps. The roller is used for a large space; the corners, areas near the ceiling, floor and future joints are coated with a brush.
- The edge of the canvas is applied to the ceiling, with a slight overlap.
- Smooth out and carefully unravel so that the side matches the pencil mark or the previous canvas.
- The strip is rolled from top to bottom from the center to the edges, expelling air and pressing the material to the surface. It is convenient to do this with a silicone roller.
- Using a pressing spatula, additionally pass along the edges near the ceiling and floor.
- Excess glue is removed from the material with a sponge.
- The allowances are cut using a special tire or spatula using a construction knife.
Cuts are made in the openings of sockets and switches on the wallpaper. You can eliminate the excess after finishing the room. Defects will be hidden under the devices.
In the corners
To glue the wallpaper evenly in the inner corners, you need to place the canvas with a slight overlap on the second wall and glue it in the usual way. It is worth walking around the corner with the tip of a plastic pressure spatula, achieving tight contact of the wallpaper with the wall surface. The second canvas is glued in the same way with an allowance of about a centimeter on the already pasted wall.
After both strips are carefully glued and aligned, the spatula is pressed tightly against the corner, and the allowances are carefully trimmed using a construction knife. It is advisable to break off the blade before doing this to renew the cutting surface. The trimmings are removed, and the second sheet is rolled again to the corner.
A joint on an external corner is not allowed. For boxes and openings, the wrapping technique is used. The canvas is first carefully glued to one side of the corner. After this, it is carefully stretched and smoothed with a spatula to the second wall.
To the ceiling
The ceiling is treated in the same way as the wall. The surface must be cleaned and primed. It is convenient to apply the glue with a roller with a long handle. The canvases are laid across the room so that the weight of one strip is less.
It is more convenient to work in pairs, since long strips of wallpaper will sag and get in the way. To stick non-woven wallpaper on the ceiling yourself, you will need a long surface, like a table. It’s more convenient if you can glue each piece of wallpaper without moving the table.
Some craftsmen make a special high holder for the free edge of the canvas. You can pre-roll the cut strips like an accordion or a roll with the inside out. The technology completely repeats the steps for walls.
