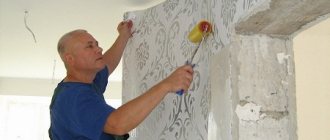
How to hang wallpaper in the kitchen so that it doesn’t fall off the next day and looks perfect? The answer is simple - find the phone number of the finishing craftsmen and pay them the required amount of money.
But if you approach the matter responsibly, then all the gluing work can be easily done yourself, saving the family budget, since it does not cause any particular difficulties.
And before you go to the store for wallpaper, adhesive solution and tools, let's look at the main types of wallpaper and the features of gluing them.
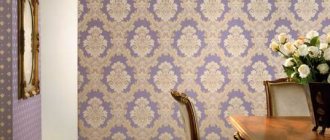
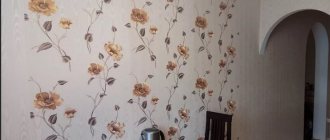
Wallpaper with patterns on the kitchen wall
Briefly about the types - which is better?
First you need to decide on the material suitable for the kitchen conditions and the desired design.
What to choose from a practicality point of view? There are the following types of coatings:
- Paper;
- Non-woven;
- Vinyl;
- Textile;
- Liquid;
- Fiberglass wallpaper.
Each of these materials may look beautiful, but, of course, they have different strength and moisture resistance characteristics.
On each roll you will find markings by which you can determine how suitable the wallpaper is for the kitchen. As you can see, some icons are underlined - it is desirable that your wallpaper have exactly these characteristics.
In the kitchen, wallpaper must be washable, durable, light and moisture resistant. In short, our view:
- The best choice: non-woven vinyl wallpaper. The canvas fits neatly on the walls, looks beautiful and is easy to glue on your own, and in addition, this material is distinguished by high moisture resistance, plus, if your walls are not perfectly smooth, this option is the most desirable.
- Worst choice: it is better not to use wallpaper made of paper and textiles, since they are difficult to clean and quickly deteriorate in the kitchen.
Choosing a design - 7 main secrets
A lot can be said about the topic of choosing wallpaper from the point of view of color and pattern, because this issue really needs to be carefully thought through. After all, we are our own designers, which means we will have to figure out the colors, prints, and the right combinations with furniture and walls in other rooms ourselves. The color and design of the canvases are selected depending on the shape, size of the room, its level of natural light, and your preferences.
Here are 7 main rules in choosing wallpaper design that you need to know:
- For well-lit rooms, choose cool shades;
- Kitchens with windows facing north are decorated with wallpaper in warm colors;
- Small kitchens of 5,6,7 square meters are decorated with light wallpaper without complex patterns. One accent wall is acceptable.
- A narrow kitchen will become wider if the walls are decorated in light colors and with a pattern of longitudinal stripes;
- A kitchen with a low ceiling shows walls with stripes or a vertical pattern;
- Win-win and most universal colors that always look beautiful: white, beige, gray, muted blue;
- Plain wallpaper is not only a tribute to fashion and always appropriate restraint, but also the best option for gluing with your own hands, easily and quickly, because they do not require joining patterns.
Advice! You can cover the walls with different wallpapers, creating interesting interior accents. To avoid problems of choice and doubt, if you want to create such a design yourself, without the help of a designer, you need to choose from one collection, where all the companion options have already been carefully selected.
Preparing the wall correctly
Work always begins with preparing the walls.
Step 1 . A high-quality result cannot be achieved unless you first remove the old wallpaper and putty the wall. All this is not difficult to do with your own hands.
To remove old wallpaper from the wall, use a metal spatula and a spray bottle (wet wallpaper is easier to remove from the wall). Old coatings - peeling paint and whitewash - also need to be removed.
Step 2 . After this, the walls must be leveled with putty. Vinyl and non-woven wallpaper can be used to cover surfaces with minor defects, but large irregularities, cracks, etc. must be eliminated.
Advice! Keep in mind that for non-woven wallpaper, one layer of putty will be enough, but for vinyl, and especially paper, a more even surface will be required.
Step 3. The last layer of putty must be sanded.
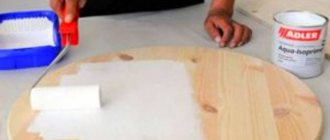
Step 4. Now you need a primer. After such operations, your old walls will be unrecognizable, and all coatings will be glued to them without difficulty.
To learn more about how to properly putty and level the walls yourself for wallpaper, watch the following video:
Preparing the tools
When deciding how to hang wallpaper in the kitchen, you cannot ignore the issue of preparing tools.
To quickly cut blades, you need:
- Square;
- Metal rulers are long;
- Wallpaper knife with sharp, replaceable blades;
- Good scissors;
- Yardstick.
And for gluing wallpaper you will need:
- A spray bottle with water, a metal spatula - to remove old layers of wallpaper;
- Plumb line, level (regular or laser);
- Rule, profile for vertical marking;
- Rollers or brushes for applying glue to panels and walls;
- Wide, narrow rubber rollers for smoothing fabrics;
- Bucket and tray for glue mixture;
- Water, clean soft rags or brush.
Let's move on to practice
Despite the fact that paper decorations for walls have long been firmly established in our lives, some people still don’t know how to wallpaper a kitchen correctly and where to start.
List of tools
Many of us are accustomed to making do with available tools and not spending money on buying special ones. At the same time, we do not think that the quality and timing of the work depends on its recruitment.
So, you will need:
- Marking cord;
- Level;
- Scissors;
- Knife – cutter with a retractable blade;
- Spatula and hedgehog roller for removing old wallpaper;
- Double cut wallpaper knife, with sliding support, is specially used for double cutting;
- Wallpaper cutter with straight edge;
- Triangular cutting edge for ease of working with wallpaper in the baseboard area;
- Conical seam bead;
- A roller with an absorbent surface or a brush for applying wallpaper paste;
- Glue container;
- Plastic spatula, pressure roller, wallpaper brush for leveling the wallpaper after application;
Surface preparation
Wallpaper should only be applied to a prepared surface. Therefore, the walls are first checked for cracks, unevenness and other defects. If necessary, the surface is plastered, puttied and primed. The scope of work depends on the condition of the base coating.
As a result, the base should be clean, dry, smooth, durable and absorbent; this can be easily checked visually and by touch. If, after applying leveling compounds, the surface is painted, it must be washed off and finally strengthened with a primer.
Advice! Residents of corner apartments should remember that the outer walls of houses often become damp, and dampness is fertile ground for the appearance of fungus and mold. In order for the wallpaper to last a long time, the walls must be treated with an antiseptic.
Gluing wallpaper
Everyone knows how to glue wallpaper in the kitchen, but not everyone knows how to do it correctly.
After preparing the surface, we move on to the main stage and begin with applying adhesives and cutting wallpaper. Instructions for preparing glue are usually written on the packaging.
Advice! When diluting glue, the following rule applies: the denser the wallpaper and the more absorbent it has, the less water the glue should contain.
- To cut strips, the roll should be rolled out with the pattern facing up. Taking into account the allowance for combining patterns, the wallpaper strip should be on average 10 cm longer than the height of the room.
- For transportation and uniform impregnation, the strips with glue applied should be folded so that the upper part is folded by 2/3, and the lower part by 1/3. After this, the folded strip is rolled into a roll and left for 5 - 10 minutes.
- You need to start gluing wallpaper from the window. To avoid deviations from the vertical, the first strip is aligned with the mark, which is applied using a level and a paint cord. Then, the glued canvas is smoothed, while removing air bubbles and excess glue.
- Alignment of the lower and upper edges is done using a knife-cutter and a triangular trimming edge or a plastic spatula.
- Next, the process of applying one piece of wallpaper is repeated.
The charm of a rustic interior
Let's start work - cut the canvas and prepare the glue
To understand how to properly hang wallpaper, you first need to understand how to cut the roll. The following cutting options are available:
- Cut along the wall, first placing the roll in the right place and marking it.
- Cut on the table, measuring the height of the ceiling once and adding 10 centimeters to it in reserve.
- Wallpaper with a pattern is cut taking into account the pitch of the repeating pattern - as a rule, this value is indicated on the packaging, but you can check by finding repeating elements.
Advice! If you are cutting several canvases at once, do not forget to label them in the order in which they will be glued to the wall.
There is another important point - diluting the glue. The adhesive composition is selected in accordance with the type of wallpaper material and diluted with careful adherence to the instructions in cool water. The composition is mixed until it acquires a jelly-like consistency. More information about the types of glue and its preparation:
Wallpapering kitchen corners
Wallpapering the corners will depend on the relative location of the corner itself - internal or external. The peculiarity of the corners of any room is their unevenness, because the corners are rarely straight. To avoid subsequent folds on the pasted wallpaper, non-woven wallpaper is never glued in a single strip in the corners.
Wallpapering the inner corners
The most common occurrence when wallpapering a kitchen will be the presence of internal corners. To do this, measure the distance from the glued strip to the corner. Another 15 mm is added to the distance. This will create the required size for the width of the wallpaper. A strip with these dimensions is cut out and the resulting piece is glued to the wall, covering the same corner. The wallpaper protrusion already lying on the other side of the wall is leveled in the usual way. The next strip of wallpaper to be glued should cover this protrusion.
How to paste walls - step-by-step instructions
So, how to hang wallpaper correctly? The walls are already completely prepared - the old coatings were removed, and the surface was puttied and primed. After the primer has dried, we select options for applying glue (depending on the type of material used):
- In the case of paper-based vinyl wallpaper, the canvas is coated;
- To glue non-woven wallpaper, glue is applied to the walls.
It is recommended to apply wallpaper both to the wall and to the canvas - this ensures better adhesion of the surfaces, in addition, joining the pattern and aligning the canvases will be easier.
If you need to apply glue to the canvases and not to the wall, then prepare a clean place for them in advance.
The glue is applied in an even layer to the wallpaper without gaps, after which the canvases are folded in half and left for several minutes. Particular attention should be paid to the wall - in the place where the wallpaper will be joined (after all, modern materials are glued end-to-end, not overlapping). Work should begin from the center of the room if it has 2 windows or from the corner of the wall where the window opening is located.
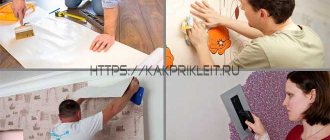
The first canvas is glued just in the corner - so that it overlaps the adjacent wall by 5-6 cm. Before gluing the first canvas, be sure to mark a vertical line along a building plumb line or level - this line is drawn with a pencil along the wall, as shown in the photo above. Start gluing the wallpaper on top, aligning the canvas exactly along the vertical line. First, the top and edge of the material are exposed, and only a rag or brush is used for pressing, but not a roller. After the upper part of the canvas is glued, open the lower part and also carefully level it to the plinth.
After the canvas is aligned and fixed, it is pressed in a herringbone pattern, first in the center, and then to the side, moving from top to bottom.
If a micro-gap forms between the panels at the joints, they can be easily moved. It will be easier to do this if the canvas is coated with the wall. At the final stage, you need to additionally coat the joints and go over them with a short rubber roller to fix them.
Then follows the quality control of gluing - the wallpaper should fit tightly to the wall without air bubbles. After the entire room has been pasted over and the canvas has dried a little, you can trim off the excess that has formed at the top and bottom. Here it is important to use a sharp knife so that there are no burrs left at the cut site, or cut evenly with scissors at the bend, as shown in the next photo.
How to glue the last piece? Measure the width of the area of the wall that has not yet been pasted over and add 1.5 - 2 cm to it (photo 1). Cut the canvas to the desired width. Now join this fabric with the adjacent fabric, glue and iron the seam, and then in the corner vertically smooth the resulting overlap with a rag or brush (photo 2).
Carefully trim off the excess at the corner, top and bottom. Wipe off any remaining glue with a sponge. Keep in mind that the resulting pattern may not line up perfectly, but it won't be too noticeable in the corner.
Types of Wallpaper
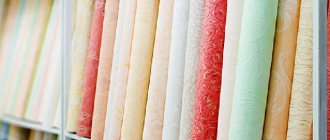
Wallpaper comes in paper, vinyl, non-woven, fiberglass, liquid and even metal. Let's look at the advantages and disadvantages of each type, and also talk about how to beautifully hang wallpaper in the kitchen.
Paper
Paper wallpaper is the most common and inexpensive. They come in smooth and embossed, with one or two layers. Their advantages are low cost (80-150 rubles per roll), environmental friendliness and therefore the ability to use in bedrooms and children's rooms, extreme ease of wall stickers, and a wide range of colors.
Wallpaper on paper basis
Among the disadvantages are: absorption of odors, inability to remove heavy contaminants from the surface without damaging the structure, loss of color from constant exposure to sunlight, short service life - about 5 years, loss of quality when exposed to water.
To glue paper wallpaper, use a special glue, or prepare a paste at home from flour and water. The adhesive solution is applied to the wallpaper, after 10 minutes they are pasted.
Vinyl wallpapers
The basis of vinyl wallpaper is non-woven or paper, on which foamed vinyl is applied on top. Their surface can be embossed or smooth, sometimes with screen printing. The advantages of such wallpaper include resistance to moisture and, as a result, the ability to remove dirt from it with a damp cloth, color fastness, and elasticity.
Vinyl wallpapers
With their help, you can hide wall defects; some types can be repainted several times. When purchasing, pay attention to the marking - a square with the number of waves in it. 3 waves is the best indicator, symbolizing maximum resistance to moisture.
The disadvantages of vinyl wallpaper are an obstacle to the penetration of air to the walls, the presence of a specific odor in some rolls (it disappears over time), expansion of the material when wet, which entails certain difficulties when adjusting the seams (not for all types). For gluing vinyl wallpaper, a special glue is used, which can be applied both to them and to the wall.
Non-woven wallpaper
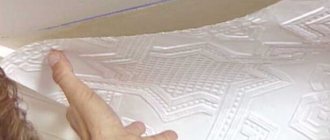
Non-woven wallpaper comes in two types - with and without vinyl coating. The peculiarity of the first ones is that they can be used for painting. Non-woven wallpaper is similar in structure to paper wallpaper, only of higher quality.
Non-woven wallpaper in the kitchen
Their advantages are greater strength and abrasion resistance in contrast to paper ones, lack of shrinkage and swelling, environmental friendliness, breathability, ease of gluing, and the ability to hide wall defects. Disadvantages: high cost and inability to wash.
For gluing, you can use glue for fiberglass or special glue for this type of wallpaper. It is applied to the wall, after which the fragments are glued.
Fiberglass wallpaper
Fiberglass wallpaper is successfully used in the kitchen. They are made from glass fibers, they are environmentally friendly and durable. Despite this name, they do not prick at all when touched and can be painted.
Fiberglass wallpaper with decorative structure
The advantages of this type of wallpaper are high resistance to wear and, as a result, durability (up to 25 years), the ability to repaint up to 10 times, moisture and fire resistance, and biological resistance.
Among the shortcomings is the meager choice of patterns and colors. To apply wallpaper, use a special dispersed adhesive, which is applied to the walls. It is better to use semi-gloss and glossy latex paints.
Despite the fact that glass wallpaper is used in the kitchen, it has high hygroscopicity (absorbing moisture from the air). Take this into account when choosing.
Liquid wallpaper
Liquid wallpaper can be used in the kitchen. Outwardly, they are similar to structural plaster, but they have a difference - some components familiar to it are not used in their production. Wallpaper is sold in powder form; the mixture must be diluted with water in a certain proportion specified by the manufacturer. The price of a package of dry solution is from 350 rubles.
Liquid wallpaper
Features of liquid wallpaper:
- No joints, no need to adjust seams;
- Giving the walls an attractive look;
- Hiding wall defects;
- Antistatic;
- Long service life - up to 8 years.
Metal wallpaper
Metallic wallpapers are becoming popular. They consist of several layers - paper, decorative coating with metal foil, dielectric paint, drawing. The wallpaper looks great in a high-tech interior; it has such positive properties as resistance to wear, resistance to sunlight, excellent soundproofing qualities and the ability to be washed. The price for a roll starts from 2 thousand rubles and can reach 12,000-14,000 rubles.
Curly patterns on metallic wallpaper
How to hang wallpaper near the door, window and in the corners?
To hang wallpaper beautifully and professionally with your own hands, you need to pay special attention to working near windows and doors in the kitchen. It's not difficult, the main thing is to know how to do it according to the rules and common sense.
How to hang wallpaper near a window?
When you reach the window, glue the next section as usual, that is, the canvas will extend onto the window opening. Make horizontal cuts on the canvas, bend and iron the paper as shown in photo 1. If a piece of wallpaper does not reach the window, then it is necessary to glue an additional piece. Use a cutter to cut the canvas so that it perfectly frames the window sill (photo 2). Cut off any excess and iron (photo 3). Now we will paste over the upper part of the window opening as shown in the photo.
The side walls and top do not need to be covered. Simply glue the pieces of canvas, joining the pattern, and, if desired, install corners along the edges of the window opening.
How to wallpaper a wall near a door?
When you reach the door, apply the sheet as usual to the door. Cut off the excess (the section that covered the door) with scissors, leaving a few centimeters of excess paper on the top and sides (photo 1). Then make a small cut diagonally as shown in photo 2.
Trim the excess paper from the top of the door frame and the bottom. Use the edge of the door frame as a guide. Iron the wallpaper along the door.
Now let's decorate the wall above the door. Hang a short piece of fabric above the door. Join the pattern and trim off the excess at the ceiling and top of the door (photo 1). Cover the other side of the door using the same principle as described above. But do not cut off the excess vertically (along the edge of the door body) until you have glued the next panel, so that later you can correct the unevenness.
How to wallpaper in corners?
There are internal corners in any room. You need to glue them as shown in the photo instructions below.
But not all kitchens have protruding corners, but many do.
Stages of pasting walls
It will be very difficult for one person to cope with such work. Even specialists with extensive experience prefer to work in pairs. One person applies the prepared panel to the top, the second combines the joints of the strips and presses the wallpaper to the wall. Using a rubber roller, he carefully smoothes the canvas, making sure that excess air and glue are removed.
It will be very difficult for one person to cope with such work. Even specialists with extensive experience prefer to work in pairs.
Excess strips that may remain at the top and bottom are cut off with a wallpaper knife. First, whole pieces are glued, then smaller ones in places above windows, doorways, etc.
Note! It is not always possible to avoid air bubbles completely. Using a needle, you can pierce them and fill them with glue.
During gluing, the room should be dry and warm (optimal temperature: +25 degrees Celsius). Windows and doors must be closed. Wet wallpaper does not tolerate drafts. Vinyl wallpaper and non-woven wallpaper are less demanding in this regard, but it’s not worth the risk.
During gluing, the room should be dry and warm (optimal temperature: +25 degrees Celsius).
See also: TV in the kitchen: how to choose, placement options, tips.
We glue the border and wallpaper near sockets, switches, batteries
So, in general, we figured out how to hang wallpaper in the kitchen with our own hands. How to properly decorate walls near batteries, sockets and switches with wallpaper? Let's figure it out.
How to properly hang wallpaper near the battery?
Start wallpapering the wall above the radiator as usual, and after gluing the canvas to the edge of the radiator, let it hang over the surface of the radiator (photo 1). Then cut the wallpaper so that it extends slightly behind the radiator (photo 2). Now use a roller to glue them behind the battery (photo 3).
How to decorate wallpaper where sockets and switches are located?
- Turn off the lights. Hang the paper on the breaker panel. Mark the position of the corners of the switch as shown in the figure.
- Using a utility knife, make a diagonal slit from one corner to the opposite corner, you should get four triangular flaps. Fold these flaps along the edge of the wall and cut off the resulting unnecessary triangles along the fold.
- Loosen the switch or socket panel and pull it out a little through the hole.
- Iron the paper under the switch panel. Then install it back and remove any excess glue. Do not turn on the electricity until completely dry.
How to properly glue a border?
- Draw control lines on the wall with a pencil at the height where you want to glue the border and stick it slightly overlapping the adjacent wall. (photo 1);
- On the second wall, glue the border in the same way to create an overlap in the corner, and then carefully trim the top layer of the border exactly at the corner (Image 2).
OK it's all over Now.
Choosing a starting point: why is it so important?
The overall appearance of the room will depend on how and where you paste the first strip: whether the joints will be visible in the future, whether the next strips will be glued evenly to each other, etc. If you decide to glue the wallpaper from one point and in a circle , most likely, you will encounter the problem that the last piece will have to be cut to fit the remaining piece of the wall. In this case, unevenness may form. If you start gluing from two points, then at the joint the pattern may not match at all.
Tip: No matter how you wallpaper, it's best to start in an inconspicuous place (like a window behind a curtain) to hide any mismatched patterns or imperfections.
Some technological subtleties
Make sure that the pattern on the pasted canvases matches.
The question of how to properly glue wallpaper is decided depending on what kind of wallpaper was purchased.
Non-woven ones with a textured pattern are cut in the same way as paper ones so that the pattern matches at the joints.
Simple ones can simply be cut into ready-made pieces. It is not a strip of material that is smeared, but a prepared, leveled wall, to which a strip of wallpaper is sculpted.
As soon as the glue has dried a little, the wall is passed with a roller to remove air. You will have to work quickly, because the special glue dries quite quickly.
Not everyone knows how to hang metal wallpaper in the kitchen. In fact, there are few subtleties here, the only condition is careful alignment of the wall. In an old house, it makes sense not to bother with plaster and putty, but simply first cover the wall with plasterboard. For tips on choosing kitchen linens, watch this video:
Special glue is also needed, and the pieces are pre-cut to carefully measured sizes. Powdered wallpaper is diluted in a special container and applied to the wall with a paint roller. But even in this case, a calculation of the quantity and a prepared smooth wall surface are required.
Liquid wallpaper application technology is not much different from ordinary paint.
Vinyl ones are glued in the same way as paper and non-woven ones - with strict calculations before cutting the canvases onto a smooth wall coated with glue.
The whole process takes literally a few minutes after the front of the preparatory work.
Just like the good old paper ones, any type of glue should be started from a corner or from a window to avoid errors.
Adjusting the wallpaper according to the pattern is very important. When gluing, you need to know the symbols on the wallpaper.
Difficult places - corners, window openings, sockets and other incidents, in order to save money, are covered with cut strips from wallpaper scraps.
Where to start gluing wallpaper in the kitchen - options
Just 1-2 decades ago, wallpaper was glued exclusively overlapping. Manufacturers even made a special thin strip along one edge, onto which they glued the next canvas. Today, such stripes are no longer made on wallpaper, and most types of wallpaper are glued end-to-end. How to decide which gluing method to use for you? It depends on the wallpaper purchased: thick ones are glued end-to-end, thin ones - overlapped.
The docking option involves gluing from a window or door. But it’s better not to start pasting from the corner in this way - perfectly even corners in apartments are rare, and the discrepancy at the joint of the canvases in this case will become much more noticeable. You can start gluing from a corner only if you plan to place tall furniture or appliances (cabinet, refrigerator) in this place.
The secret to wallpapering with overlap: move away from the window. In this case, the overlap will not be emphasized by the light from the window and will remain less noticeable.
From the window
This method is considered seamless, as it allows you to hide the joints of the canvases. It came to us back in the days of the USSR, when windows were the most important landmark in apartments. In addition, it is convenient due to the ability to hide defects with a curtain, behind which you will have to glue the remaining strip when completing the work.
The disadvantage of this type of gluing: if there is not enough wallpaper, and the store does not have the necessary rolls left, you will have to re-glue the entire room. If you start from a different point, if there is a lack of wallpaper, you can get out of the situation, for example, by gluing other similar wallpaper behind the radiator, where the difference will not be so noticeable.
From the door
The times when the window was the only level landmark in the room are long gone, and if the house is not built during the USSR, you can quite rely on the doorway when wallpapering. But in any case, it would be a good idea to check the vertical line at the door with a level or plumb line so that the next panels are glued evenly.
From the corner
The corner is the worst place to start wallpapering. This method is used if a panel is planned on the wall or if they want to glue opposite walls the same way . They also start gluing wallpaper from the corner if the window and doorway are obviously skewed and cannot act as a guide.
When choosing this method, start gluing not directly from the corner, but slightly away from it (2-4 cm will be enough). It is better to use a plumb line or level to determine the vertical, draw it on the wall and glue the canvas, focusing on it. This will help to cover the corner nicely and evenly and ensure a strong bond between the wallpaper and the wall.
From any major landmark
If the renovation of the kitchen is not carried out from scratch, but, for example, with already existing built-in kitchen furniture, then any edge of it can act as a reference point.
Should I put wallpaper behind the kitchen unit in this case? Most likely not, unless you plan to change it for many years.
From several lines
If you have a lot of helpers, and while you are pasting one wall, someone is pasting the second one at the same time, you can use the method of gluing from several lines. In this case, the joint is made above the window, and the wallpaper “meets” above the door. Or vice versa: start work from the door, finishing pasting above the window. In both cases, the joints will not be so noticeable.
And a few more tips:
- If you can’t decide on a landmark, it’s best to start pasting from the largest object: an arch, a window, an opening, a built-in closet.
- When choosing a bright print for wallpaper, start from a place where the seam is less noticeable, otherwise it will catch your eye every time.
- If you hide the joint behind furniture, consider whether you plan to rearrange or change the headset.
- Do not cut the roll into several identical pieces at once. The height of the walls may vary, and, perhaps, somewhere you will have to cut off, and somewhere, on the contrary, glue the missing pieces, which will spoil the appearance.
- Vinyl, non-woven and glass wallpaper are NOT glued overlapping.
- When gluing with an overlap, craftsmen advise moving from left to right.
- You can save some of the wallpaper in the area of the kitchen apron - there is no need for pasting.
Cutting panels and diluting glue
We measure the height of the wall. Having measured the resulting size, we cut the canvas from the roll, adding a margin. You can use the second option - attach the wallpaper to the wall and mark the cut location with a pencil. This is possible with two people working. You can't cope alone. Wallpapering can be of two types.
- Overlapping. When choosing this method, we begin gluing from the window. This will help hide the seams.
- Butt. You can start anywhere.
We dilute the glue before starting work. The instructions will tell you how to prepare it correctly. Usually, the contents of the bag are slowly poured into a container of water. At the same time, constantly stir it until the lumps are completely dissolved. Modern ones usually cook for 15-30 minutes. There is no need to prepare in advance.
We dilute the glue before starting work. The instructions will tell you how to prepare it correctly.
Note! Vinyl, non-woven and glass wallpaper are glued with special glue. The walls should also be primed with glue.
Cover the cut panel with glue, paying special attention to the edges. The wallpaper should be soaked; to do this, leave it in this form for a few minutes, and then move on to the most interesting final stage.
Cover the cut panel with glue, paying special attention to the edges.
See alsoDesign features of a narrow kitchen
What else to pay attention to
It is best and most convenient to glue wallpaper on bare walls: without sockets, switches, batteries, furniture. But, as a rule, many elements are very difficult to remove from a room (for example, dismantling a radiator requires significant effort for an inexperienced person) or impossible (for example, built-in furniture and appliances).
Nevertheless, it would not be a bad idea to at least turn off the power in the kitchen and remove the covers from the sockets. In this case, it is enough to cut holes in the pasted wallpaper and install the sockets in place, which will look much neater in appearance than cutting the wallpaper along the line of the covers.
Advice . If you decide to glue wallpaper from the window, then it is better to glue it behind the radiators and vertical heating pipes right away, while you have the strength, so as not to suffer later.
If the apartment is not new, and the walls were painted before, the question quite reasonably arises: how to apply wallpaper over paint in the kitchen? First, we suggest conducting a test: stick a piece of tape on the wall and sharply tear it off. If the paint has not come off the wall and there is not a trace left on the tape, you can glue the wallpaper without any preparation - such a painted surface will not harm it. If there are paint particles left on the tape or it has completely come off the wall, then the surface needs to be prepared in advance.
A wall painted with water-based or acrylic paint can simply be primed in several layers and allowed to dry thoroughly. If the wall is painted with oil paint or you do not know what is applied to the walls, it is better to thoroughly clean them of the previous coating.
Useful tips from the experts
1. The opinion that cheap wallpaper is easier to glue is a misconception. Ease of use directly depends on the quality of the material. If you have little experience, choose textured wallpaper, this will help hide minor flaws.
2. Walls should be thoroughly cleaned of debris. Lumps found on wallpaper that has already been pasted over may turn out to be pebbles or particles of old materials. To correct the situation you will have to tear off the panel.
3. Rusty spots will sooner or later appear on the surface. To avoid this result, glue a small piece of film over the stains. It will create a barrier impenetrable to corrosion.
4. You should be careful when working near the baguette, under the ceiling. Splashes of glue must be cleaned up immediately. Without doing this, they may become noticeable later.
5. Switches and sockets are places where you need to be careful. To make work easier, they can be removed by first turning off the voltage. When finished, install it in place.
6. After gluing the wallpaper, the first ventilation is carried out no earlier than a day later, and then not for long, and without drafts.
It is not difficult to get a good result, even for those whose experience is limited. You should think through everything in advance, prepare and follow the recommendations presented above.
See alsoHow to place a refrigerator in the kitchen: basic rules, important and useful tips
How to mark a straight vertical line on a wall using available objects
We have already talked about the importance of an even vertical when starting to paper a room. How to measure it if you don’t have a building level at hand? Proceed as follows:
- Take any long rope so that it is enough from the ceiling to the floor.
- Drive a nail into the wall just below the ceiling.
- Attach the rope to the nail.
- Tie something heavy to the rope below as a load.
- Turn on the light or shine a flashlight on the rope and use chalk or a pencil to draw a vertical line on the wall along its shadow. Alternatively, you can dip the rope in paint in advance and hang it up against the wall so that it leaves a mark on its own.
Rules for wallpapering while maintaining verticality in uneven corners
If the corners in the room are obviously uneven and it is not possible to level them, try to ensure that the canvas begins or ends 5-10 cm from the corner. At the same time , carefully coat the corner itself and thoroughly press the edge of the wallpaper.
To ensure that further work does not lose the coincidence of the pattern and straight lines, you need to draw a vertical line on the wall of the canvas (use the method described above). This will help you adjust the edge of the wallpaper evenly and match the pattern to the next strip without losing the vertical.
Kitchen wallpaper options
What wallpaper design to choose for the kitchen? For a room with a large window, cool shades are suitable, and for a kitchen that faces north, it is better to choose warm colors. In small rooms up to 7 sq. complex ornaments and designs look cumbersome, so it’s better to stick to light-colored wallpaper without bright accents.
Beige, white, gray and soft blue are considered win-win colors for kitchens. In addition, do not forget that plain wallpaper does not require adjustment to the pattern, which makes gluing much easier and will be more economical (based on the fact that you will not have to cut off significant pieces from the roll).
Calculating how much wallpaper is needed for the kitchen
To calculate how many rolls of wallpaper will be needed to cover a kitchen, it is important to carry out mathematical calculations. You can calculate everything yourself or use an online calculator on the Internet (for example, this one).
Let's look at an example of independent calculation. Let's say we have a room measuring 6x4 m and 2.5 m high.
- Measure the perimeter of the room and subtract from it the surfaces that will not be covered: windows, doors, splashback, built-in wardrobes (if any). (6 m + 4 m) * 2 = 20 m.
- Divide the resulting number of meters by the width of the roll (0.5 or 1 m). Get the number of stripes. 20 m / 1 m = 20 stripes.
- Measure the height of the walls, add a small margin for cutting (about 5 cm). 2.5 m + 0.05 m = 2.55 m.
- Count the number of strips on the roll. For example, a roll of 10 m. 10 m / 2.55 m = 3.9 m. In this case, only 3 full meters are taken into account.
- Now divide the number of strips you need by the number of strips on the roll. 20 p / 3 p = 6.7 rolls. Round up to a full roll. In total, 7 rolls will be required.
Keep in mind that when adjusting the pattern, more wallpaper is consumed. For an approximate calculation, you can use the above formula, adding an additional about 40 cm to the height of the room. That is, in our case, we need to take into account not 2.5 m, but 2.9 m.
