How to glue ceilings: step-by-step instructions
Preparation
Preparing the ceiling surface for the gluing process is an important step in ceiling repair.
First, empty the room of furniture and equipment, remove lighting fixtures, and protect the exposed ends of the wires with electrical tape. To create a favorable microclimate for work, close the windows tightly and turn off the air conditioning in advance.
Prepare the ceiling as follows:
- Use a spatula to clean off the whitewash, and wash off any remaining residue with a solution of water and soap;
- for small unevenness, level the surface with a thin layer of plaster; for significant differences, you will have to use drywall and a profile;
- After leveling, the ceiling needs to be primed. This will improve adhesion and ensure reliable fastening of the wallpaper. Apply the primer with a roller or brush.
When leveling the ceiling, you need to know how to putty the ceiling.
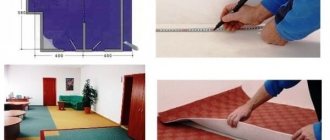
Cutting canvases and marking
The canvases should be glued along the side walls of the room, perpendicular to the window openings. Otherwise, with sufficient natural light, all joints will be noticeable.
In order to mark the ceiling, measure a distance from the wall equal to the width of the roll. Do the same on the opposite side. Draw a straight line that connects the two points.
How to glue wallpaper on walls with your own hands - detailed instructions and tips
Wallpapering walls is, in general, a simple process and can be done even by a beginner who is ignorant of the renovation business. To ensure that the pasting process does not turn into an unpleasant and time-consuming task, you should first become familiar with some of the nuances and carefully study the technology of this process.
The question may arise: well, what could be difficult here, after all, our parents glued everything themselves, without resorting to the help of craftsmen, and everything worked out great for them, so what is there to study? We should not forget that progress does not stand still and the modern market for renovation materials offers us significantly more varieties of wallpaper than before, and the technology for working with each type of wallpaper has its own characteristics.
Today, the following types of wallpaper are especially popular:
There are many varieties of these three main types:
As you can see, the choice is wide and each type has its own characteristics that should be taken into account during the work process.
Required Tools
In addition to the wallpaper itself, during the work process you will need at least a minimum set of tools that will help you correctly measure, cut, glue and smooth the wallpaper. Before you begin, make sure you have on hand:
- Stationery or construction knife
- Large scissors
- Level or plumb
- Measuring tape or measuring tape
- Bucket
- Polyethylene film
- Metal spatula
- Press roller
- Pencil or marker
- Brush or brush for applying glue
Speaking of glue, this is the most important material when gluing walls, so when buying wallpaper glue, be careful and fully read the instructions for its use, since not all types of wallpaper can be glued with the same glue.
How to hang wallpaper on ceilings alone
If you are faced with the task of hanging wallpaper on the ceiling yourself without outside help, it is better to choose non-woven coverings. First of all, because only the surface to which the canvas will be attached is coated with glue. In addition, when drying, non-woven wallpaper will not come apart.
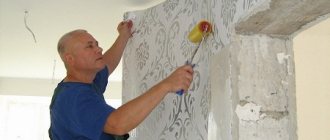
First, coat the part of the ceiling for the first strip well with glue. After this, gradually begin to apply the canvas to the ceiling, while simultaneously working with a roller or rubber spatula.
When gluing paper wallpaper, you will first need to coat the canvas and ceiling with glue. After this, leave the strip for a few minutes to soak. Then carefully glue it to the ceiling, trying to prevent the coating from spreading or tearing.
Tools
The instructions we offer will tell you how to glue wallpaper on the ceiling correctly. All the work can be done with your own hands, but having an assistant will be welcome.
To do this, you should prepare the following tools:
Stationery knife
- A sharp knife - take a stationery knife and a pack of replacement blades, since you will have to cut a lot, and steel dulls on paper very effectively;
Yardstick
- A tape measure for marking – a long ruler for precise cutting of the canvas won’t hurt either;
Applying glue with a roller is quick and convenient
- Roller with tray or brush for applying primer and glue;
Cutting fabrics is very convenient with good scissors
- Scissors;
- Cotton rags and a large sponge;
Without a wide spatula, it is difficult to cut wallpaper around the ceiling skirting boards
- A narrow spatula is for removing old paint, and a wide one is for trimming the edges of the canvas;
Deep penetration soil
- A primer, preferably acrylic , is needed to reduce the absorption of the surface;
Adhesive for paper wallpaper
- Wallpaper glue - an option for your type of wallpaper;
Wallpaper spatula
- Plastic spatula or rubber roller - to smooth the canvas on the surface;
For comfortable work at heights
- Stepladder or table;
- Chop cord.
Before starting work, if possible, remove all furniture from the room. Close all windows and vents, turn off the air conditioner and fan to avoid drafts. If the air is too dry, place buckets of water in the corners. You also need to turn off the power and remove the chandelier.
Pros and cons of ceiling wallpaper
The advantages of ceiling adhesive include:
- low cost of materials and work;
- low time costs for repairs, the ability to transform the ceiling surface in one day;
- special wallpaper for painting can be painted several times, the same color as the ceiling;
- products are presented in a wide range.
Among the disadvantages of this finishing method are:
- short service life of coatings (for paper - a maximum of 5 years, non-woven wallpaper can last up to 15 years);
- paper sheets attract dust and other contaminants.
Wallpaper selection
Any renovation begins with the purchase of materials, so before you start gluing wallpaper, it would be a good idea to purchase them. Fortunately, there are no problems with this: the assortment is dizzying, but we are interested in the most suitable options for the ceiling surface. Here are some useful tips that you should definitely use so that you don’t torment yourself later with moaning about a wrong choice:
- If the concrete base of the ceiling is perfectly flat, and the room in which you plan to stick it is not associated with constant temperature changes, then you can save money and buy ordinary paper wallpaper. Their disadvantages are considered to be the impossibility of masking even the smallest irregularities, but you are sure that your ceiling is perfect, right?
- uneven ceiling - non-woven wallpaper, remember this logical connection. This type of wallpaper allows you to hide any errors in the base, but avoid buying a canvas with a uniform color - it is better to prefer a pattern. In this case, your guests—and you too—will find your less-than-even ceiling ideal;
- If there is a real problem with the concrete base and it is not possible to hide these defects, then it is optimal to stick wallpaper with a relief surface on the ceiling. This texture creates a beautiful uneven volume and at the same time reliably hides flaws in the base from prying eyes. And yours too;
- pay attention to the weight - it should not exceed 110g/m2, otherwise the risk of the glued canvas falling off will be quite high, and you will simply waste precious time and no less precious money.
Which wallpaper is better to choose for the ceiling?
Vinyl
Beautiful relief patterns are applied to their surface; they have a wide range of colors. Minor imperfections and finishing defects on the ceiling base can be corrected using vinyl sheets. Durable material is not afraid of wet cleaning, and its surface does not fade over time.
Finishing ceilings with vinyl wallpaper is an excellent option for those who are thinking about how to glue wallpaper to the ceiling alone, since only the ceiling is coated with glue.
The main disadvantage of vinyl is its low vapor permeability, so the surfaces to be glued before starting work must be treated with special antiseptic compounds that will prevent the appearance of mold and mildew.
On a note! On the modern market you can find vinyl wallpapers on the surface of which there are micropores that allow the material to breathe.
Non-woven
They are based on foamed vinyl, which is applied to a mixture of mineral fibers and cellulose (non-woven fabric) during the production process. Such coatings have many advantages: they smooth out unevenness, adhere well, and can be painted. They are glued in the same way as paper wallpaper, but it is recommended to allow no more than 3-5 minutes for the canvas to soak.
Glass wallpaper
They are represented by a material with a more complex texture, since they contain soda, dolomite, lime and quartz sand. Such components make the coating environmentally friendly, resistant to the development of bacteria, fungus and mold on its surface. Glass particles suppress excessive surface static. In addition, glass wallpaper allows air to pass through well and is not afraid of moisture, alkaline and acidic environments.
To glue such wallpaper to the ceiling, special compounds are used, which are applied not to the material itself, but only to the surface of the ceiling.
On a note! Glass wallpaper can be painted with acrylic or water-based paints.
Paper
This is the most common and budget option used for finishing. Their other advantages include vapor permeability and environmental friendliness. Modern paper wallpaper can be wet cleaned, and the decorative properties of the materials will satisfy the needs of the most demanding consumers.
In general, paper wallpaper can be divided into three main types:
- smooth, 100% paper. To prevent the design from fading for a long time, a layer of a special primer is applied to the outer surface of the canvas during manufacturing;
- structural ones are produced using screen printing. The two-layer structure of the canvas increases the service life of the coatings and increases their resistance to UV rays;
- photo wallpaper. Today they are no longer as popular as before, but are sometimes used in decoration. The designs on such wallpaper are assembled from several types of canvases.
What you need to know about photo wallpaper on the ceiling.
Liquid
In appearance they are more reminiscent of decorative plaster and have the following features:
- elasticity;
- reliable adhesion;
- antistatic;
- environmental friendliness;
- vapor permeability;
- good heat and sound insulation;
- ease of installation.
The only drawback is that they are afraid of moisture, so they are not suitable for use in the kitchen.
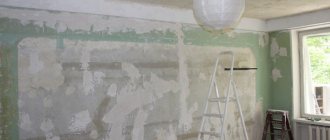
Preparatory work
Before pasting wallpaper on the ceiling, prepare the base and material for work.
Preparation should begin by treating the base.
Surface preparation
Concrete base
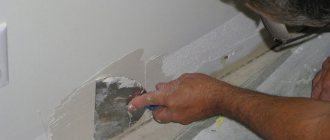
When preparing concrete surfaces for gluing, the base is stripped of the previous coating (paint, whitewash, wallpaper). Next you need to remove any remaining dust and dirt. Solvents remove greasy stains.
If cracks, chips, or potholes are found on the slab, they are repaired with putty.
If serious differences in height are detected at the joints of floor slabs, pasting should not be performed. In this case, it would be wiser to install suspended or suspended ceilings.
After cleaning and leveling the surface, the base is treated with a concrete primer.
Plasterboard base
Plasterboard sheets are an excellent basis for pasting, but to obtain a high-quality coating, you need to perform the following preparatory work:
- The heads of the screws and the joints of individual sheets are sealed with putty. The seams are additionally taped with sickle tape;
- the entire surface of the ceiling is puttied. If necessary, the dried putty is sanded with sandpaper until a flat and smooth surface is obtained;
- To ensure that the wallpaper on the plasterboard ceiling fits tightly, the surface is treated with a primer. The primer allows you to level out minor unevenness and ensures high adhesion of the base and trellises.
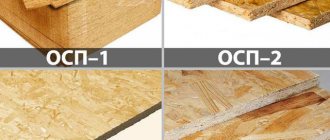
OSB and plywood bases
Ceilings made of plywood or OSB can be found in country houses. To prepare such a base for pasting, it is puttied, leveling the joints, and treated with a primer.
Marking
The question of how to properly glue wallpaper to the ceiling raises many doubts: where to start moving, how to correctly position the trellises in relation to the window? To resolve these dilemmas, it is recommended to pre-apply the markings.
The marking is a line that marks the border of the first sheet of sticker. Focusing on the correctly made markings, glue the initial trellis, and subsequent sheets are already joined to it.
It is most convenient to make markings on the ceiling using a tapping cord. The ends of the cord are applied to pre-marked points, pulled back and released. A mark will remain on the ceiling, which will be the border of the sticker of the first sheet.
Chop cord.
Traditionally, pasting begins from the wall, placing the trellises perpendicular to the window. The boundary is marked in such a way that 10-15 mm of wallpaper can be placed on the adjacent wall.
There is another way of gluing the first strip. In this case, markings are made from the middle. Find the central point and set aside a distance from it on both sides equal to half the width of the trellis. Using a cord, they beat off two lines and orient themselves along them, gluing the first trellis. Subsequent sheets lead from the center to the walls.
Preparation of glue
For each type of wallpaper you need to select the appropriate adhesive. The purpose of the adhesive mixture and the method of its preparation are printed on the packaging, but there are standard techniques for properly diluting the glue:
- water is poured into the container;
- using a drill with an attachment, the water is stirred;
- while the water is spinning in the container, powder is poured into it;
- The mixture is thoroughly stirred and allowed to stand for 10-15 minutes, after which it is stirred again. The glue is ready.
A universal version of wallpaper glue.
Cutting trellises to size
When marking trellises, it is recommended to leave an overlap of 30-50 mm to avoid mistakes. Excess is removed with a utility knife, using a wide spatula as a guide.
Wallpaper glue
The appearance of the ceiling surface finished with wallpaper will depend on the quality of the glue. If you choose the wrong composition, over time the canvas will begin to lag.
Important! Each type of wallpaper uses its own types of glue. Usually the manufacturer indicates this point on the packaging.
Dilute the glue strictly according to the instructions in the indicated proportions. To prevent lumps from forming, add the mixture to the water a little at a time, while simultaneously stirring the composition with a construction mixer. Leave the finished solution for 10-15 minutes to swell.
How to prime walls before wallpapering
This question is quite simple and the answer is the same. For priming you need to use a special priming adhesive. Today, this material is considered to be quite primitive and is rarely used anymore. Most often, the primer material is chosen depending on the type of surface on which you are going to glue the wallpaper.
Before you begin the priming process, you need to very carefully read the step-by-step instructions for preparing walls for wallpapering in order to understand how to use the material. Experts often recommend using a special acrylic composition. This primer is made of latex and acrylic, which allows you to obtain the maximum level of adhesion. The material is applied in several stages, as a base and then, if necessary. This material is perfect as a basis for a wide variety of wallpapers.
If the walls are wooden, then you can use an alkyd primer. This material was created specifically so that you can glue wallpaper to wood. One layer of this type of impregnation can dry within 15 hours.
Modern glypthal primers have also proven themselves to be quite good. This material is used both for processing wooden and metal walls. At the same time, you need to remember one important point: such a primer can only be applied in rooms where there is a low level of humidity.
How to properly prime walls with your own hands video
To ensure that the walls are properly prepared for wallpapering, do not skimp on materials. Specialists can do their work very well, but low-quality and inappropriate construction and consumable materials can spoil the entire final result of the construction and repair work, including wallpapering.
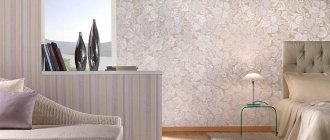
Ceiling design with wallpaper
Experts advise following the following recommendations when deciding on a design:
- the color must correspond to the basic tones that are the main ones in the interior;
- Using a combination of several shades you can achieve an interesting effect. For example, zoning a room;
- wallpaper with a varnished surface has a good ability to diffuse light, so it is ideal for rooms where there is little natural light;
- It is necessary to choose a drawing taking into account the functional purpose of the room.
Ceiling markings
The main question that we solve at this stage: how to glue the wallpaper - along or across the ceiling? The longest wall is taken as the starting point, but it would be more correct to rely on the window openings. If the room is not corner and you want to avoid the visibility of joints, then the best option is to stick it perpendicularly
window.
The guide for the first fragment can be made with a laser level, but in its absence, a cord will work just fine. Remember that the mark should not be placed across the entire width of the canvas, but slightly less. Approximately 2 cm
.
How to care for ceiling wallpaper
To extend the life of the wallpaper, you can apply a layer of protective varnish to it. Most wallpaper can be repainted several times before painting, so using varnish will significantly save time and financial costs.
If the wallpaper begins to peel off, it needs to be re-glued in time. To do this, the falling off areas are re-coated with glue.
Wallpaper with deep relief is sensitive to odors and dust. Therefore, they need to be cleaned regularly using a brush, vacuum cleaner or dry rag. Moisture-resistant wallpaper can be wiped with damp sponges.
Wallpaper on ceilings is an excellent alternative to other materials that are more expensive and more difficult to install. A wide variety of textures and shades will allow you to find options suitable for every room. By following the instructions and stages of work, you can easily and quickly hang wallpaper on the ceiling with your own hands.
Ceiling preparation
How to properly glue ceiling wallpaper?
The first step is to prepare the surface. Leveling the surface at the moment is not particularly difficult.
There are two options for this:
- Application of plaster.
- Using drywall.
Plaster
This material has been used for many years to level surfaces. The use of plaster is characterized by some knowledge in this area.
There are two types of this tool:
- Starting plaster.
- Finish plaster.
To plaster the surface you will need:
- Starting plaster.
- Finish.
- Two spatulas (large and small).
- Level.
- Construction mesh (if necessary).
- Sandpaper.
Stages of work:
- Initially, excess layers of old plaster are removed from the surface or paint is removed. After this, a layer of starting plaster is applied to it.
- As soon as it has dried, it is treated with sandpaper and then a second one is applied, then a third, and so on. The number of layers will depend on the unevenness of the surface.
- As soon as the starting layers of plaster are applied, the finishing layers are applied. The whole process is carried out in the same way. The video shows all the actions that are carried out using plaster.
- The work process is quite dusty and before wallpapering the ceiling you should first clean the room with a vacuum cleaner and wet cleaning.
Drywall
Leveling the ceiling with plasterboard
Drywall is currently a universal material, without which no repair work can be completed. With its help, ceiling surfaces are leveled very quickly and efficiently (see Leveling ceilings with plasterboard - how to do it yourself) and the most unusual structures (multi-level ceilings) are built on them.
For installation you will need:
- Metal profiles.
- Self-tapping screws.
- Dowels.
- Screwdriver.
- Hammer.
- Sheets of plasterboard (it is better to take moisture-resistant ceiling).
- Level.
- Stationery knife.
- Putty.
- Sandpaper.
Installation:
- Installing drywall is quite simple. A special metal profile frame is pre-fabricated on the surface.
- Sheets of material will be mounted on it. After this, the joints of the sheets must be covered with special tape and puttied and sanded.
- In some cases, the surface is plastered, but such actions may not be carried out before gluing.
- There should be no problems - since such material is able to quite easily perceive all the actions that are carried out on its surface.
Advice. Before gluing a plasterboard ceiling, it is necessary to treat the surface of the material with a primer solution.
Marking
How to glue wallpaper to the ceiling - the principle of operation of the chop cord
At the next stage, we make markings along which the wallpaper will be glued:
- carefully mark and draw the boundaries of the stripes - you can only make the first one, and glue the subsequent ones, focusing on it;
- we make the marking along a convenient wall - it is better that the joint is parallel to the light falling from the window;
- Apply glue and immediately apply the strip, strictly adhering to the marking lines.
How to properly glue wallpaper to the ceiling - vinyl and paper need to be soaked with glue in advance
This must be done without delay, as the glue dries quickly. If you choose non-woven wallpaper, then the glue should only be applied to the ceiling, and if it is paper or vinyl, then you should pre-impregnate them with glue as well.
Wallpaper for ceilings
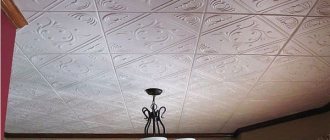
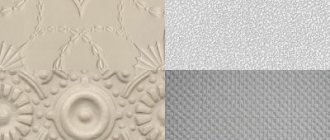
If the result is important to you, then it is better to use proven material. To cover the ceiling, embossed or special ceiling products are required. Their main difference from simple wallpaper lies in the manufacturing technology: they are made from two dense layers, and relief embossing is applied on top. The relief pattern and density of the product help hide small unevenness and other defects in the ceiling.
Special ceiling wallpaper is produced only in our country. They have a wide variety of textures (about 200 types), but have a poor range of colors, or rather they are only white.
If you pay attention to foreign products, you must keep in mind that special ceiling wallpapers are not produced in European countries. They use paintable material to cover the ceiling, and you can also follow their example.
Ceiling wallpapers are divided into different types: paper, vinyl and non-woven.
Which ones to choose?
If you have doubts about which material to choose, you should pay attention to where this ceiling will be installed. For example, wooden flooring in the bathroom or kitchen is not a very good idea, since the likelihood of fungus increases significantly
In this case, it is better to choose tension fabrics.
When choosing ceilings for a private home, you need to focus not only on their beauty, but also on practicality. If, for example, a country house is used only in summer, and in winter it is not heated, then ceilings made of wood and plasterboard should not be installed, because dampness and cold will contribute to the rapid destruction of the materials. For such rooms, plastic panels or PVC structures are more suitable.
Provided that the house is used all year round and heated in winter, you can choose wood trim. Its advantages are strength, safety and environmental friendliness. With proper care, this ceiling will last a long time.
In this case, drywall is also suitable - it will hide all the imperfections. And after installing it, you can decorate the ceiling in different ways: use plaster, paint or wallpaper. Stretch ceilings are resistant to moisture, which is why they are suitable for any room. If you can choose, for example, glossy or matte options for the kitchen or bathroom, then fabric coverings will look more comfortable in the bedroom or office.
There is no need to create special beauty in the boiler room, switchboard and other utility rooms. There must be cleanliness and order, and compliance with all safety measures comes first. In a boiler room, all kinds of pipes usually run along the ceiling. You don’t have to cover them, but simply plaster and whitewash the ceiling. But if you really need to hide all communications from view, then you should use fire-resistant plasterboard.
It is also necessary to consider the fact that access to all pipes should be available at any moment. Therefore, you should leave holes in the required places and provide them with gratings, which, if necessary, can be easily opened and the required work can be carried out.
There are a lot of materials for decorating the ceiling, as well as options for combining different textures. All that remains is to think through the design of the room and decide which ceiling is suitable for a particular home, taking into account all the factors described above.
To learn how to decorate ceilings in a private house, see the following video.
Materials and tools
It is impossible to imagine finishing the ceiling with wallpaper, like any other type of construction work, without the appropriate tools.
Before starting pasting, it is important to think through all the details, including the choice of quality materials, design technology and, of course, prepare everything necessary to carry out the “creative process” itself. As a rule, a traditional set of tools consists of the following items:
- Carpenter's pencil. It is used to mark canvases. It is not recommended to use ballpoint pens and markers for these purposes, as they may appear on the outside of the wallpaper.
- Ruler. Thanks to it it is convenient to draw straight lines.
- Stationery knife. Helps quickly cut wallpaper and trim fabrics in corners.
- Scissors. They are used for cutting fabrics in inaccessible places.
- Construction tape. Allows you to correctly measure the area and length of strips.
- Square.
- Level.
- Glue container.
- Wallpaper brush.
- Construction mixer.
- Putty knife. Used for trimming wallpaper at joints.
In addition, you will also need wet and dry rags, washcloths, a mop and brushes.