Which material is better
When deciding to make a ceiling from OSB, it is important to choose the right material as possible.
Oriented strand boards are available in the following varieties:
- OSP-1. This material is used for rough finishing of rooms with normal humidity and in furniture production.
- OSP-2. It has a higher density, but does not tolerate moisture well. Most often, slabs of this type are used to cover interior surfaces in rooms with a stable microclimate.
- OSP-3. The most common option with universal characteristics. OSB-3 perfectly tolerates decent mechanical loads. Despite the status of a moisture-resistant material, prolonged exposure to water can lead to destruction of the slab.
- OSP-4. The most expensive type, which has good resistance to various types of influences.
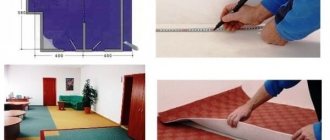
The most suitable OSB option for the ceiling is class 2 and 3 slabs. The first type is most often used to cover living rooms, bedrooms and corridors, the second - kitchens, hallways and bathrooms. Products of this type are available for sale in a fairly wide variety of sizes. The most popular sizes are 122x244 cm and 125x250 cm.
To design suspended horizontal systems, it is recommended to use slabs with a thickness of 6 -9.5 mm. The weight of one sheet in this case will be 12.9-18.6 kg. When purchasing elements for a ceiling made from pox boards, you must definitely require a safety certificate. According to environmental standards, the level of formaldehyde emission should not exceed 10 mg/100 g. This corresponds to toxicity class up to E1.
Choosing OSB for ceiling lining
Of all the possible options for finishing the ceiling in a residential area, OSB-2 is suitable; the material is dense and high-quality enough to be able to work with whole sheets of 125x250 cm.
More expensive OSB-3 boards are used only in places where condensation or warm steam is likely to appear on the ceiling. The fourth version is used only for filing ceilings in wet rooms.
The simplest OSB-1 boards are often not strong enough and resistant to moisture, so they are used to level dry insulated floors under parquet or laminate.
OSB thickness for ceiling
For cladding the ceiling surface, the material is selected based on the load and size of the ceiling. Among developers, it is customary to use two standard sizes:
- OSB-3 9 mm thick for lining ceilings in residential buildings and cottages, on terraces and verandas;
- OSB-2 and OSB-3 6 mm thick are used for apartment ceilings, balconies and loggias.
Thicker sheets do not provide any particular advantages in installation, especially since the weight of the panel is too large. If necessary, you can lay two layers of OSB on the ceiling, which is both more reliable and easier to install.
Features of OSB fastening
When starting finishing work, you need to know how to attach OSB to the ceiling.
The procedure for installing OSB boards on the ceiling:
- Frame construction. The material usually used is wooden beams with a cross-section of 50x40 mm. If there are beams, the frame is attached on top of them: in this case, it is important to achieve a uniform level, for which lintels are installed.
- It is more convenient to carry out work on installing slabs together. If you cannot find an assistant, you will have to cut the slab into several parts.
- It is mandatory to provide compensation gaps around the perimeter of the room. In addition, adjacent panels should also be separated by a certain space. First of all, this applies to those cases when a ceiling made of OSB boards is used in new private houses or cottages with unstable heating.
- To decorate a ceiling made of smallpox, metal screws are used: their length should be 2.5–3 times the thickness of the finishing material. When screwing in, the screws should be slightly recessed and flush (they should not stick out).
- Sheathing work begins from the center or from the corner, which is influenced by the previously drawn up diagram. To achieve maximum material savings, it is important to calculate all parameters in advance.
- If the sheets have an additional moisture-resistant coating, they are pre-sanded and degreased.
- To simplify all further work, the surface of the mounting elements is impregnated with a deep penetration agent. In this case, it is important to process both the outer and end areas.
Advantages and disadvantages of OSB
Oriented strand boards are a multilayer sheet of large wood chips and polymer binders. What is good about the ceiling of their OSB boards? So, the advantages of the material:
- High strength. We can say with confidence that the cladding will withstand absolutely any finishing coating, including even lining or a layer of relief plaster.
- Excellent density. The indicator for OSB is from 600 to 650 kg/m3, which corresponds to the average level of chipboard and MDF.
What does this coefficient give? It demonstrates that the material is sufficiently elastic, not brittle, and resistant to delamination, tearing, and destruction under mechanical influence.
The sheets can be hemmed close to each other with a minimum gap around the perimeter. And at the same time, do not be afraid that the OSB may unexpectedly begin to bend, twist or warp under the influence of atmospheric fluctuations.
The listed characteristics give an unequivocally positive answer to the question of whether finishing the ceiling with OSB sheets is acceptable.
The description will be incomplete if we do not mention the disadvantages of the finishing material. These include:
- High level of water absorption. The swelling of slabs when completely immersed in water per day reaches 12-25% of the total volume. The recipe for increased dampness is known - treat the slabs with waterproof impregnations. But if your upstairs neighbors tend to flood you from time to time, it is better to use something waterproof (stretch or plastic ceilings).
- Instability to biological damage. This category includes mold, bugs, fungi, and various parasites. Bioprotective compounds - antiseptic primers, impregnations, etc. will help significantly reduce the risk.
- Fire hazard. In case of fire, the greatest damage comes not from the wood, but from the binder. This polymer material melts when burned, releasing highly toxic substances, so you definitely need to take care of the safety of your home (high-quality wiring, simple fire extinguishing systems, etc.).
- High price. OSB from well-known manufacturers costs from 1000 rubles/sheet and more, while gypsum board or chipboard can be purchased 15-30% cheaper.
Oriented strand board has fewer disadvantages than advantages, and this speaks in favor of purchasing the boards.
How is the preparation going?
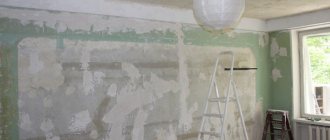
The quality of the installation of a ceiling made of OSB boards and its finishing directly depends on the correct implementation of preparatory measures.
They include the following operations:
- Application of antiseptic and fire-fighting agents to the base.
- Development of a communications laying scheme.
- If there is an attic above the room being finished, it is important to take this fact into account before laying insulation, vapor and waterproofing.
- Installation of frame racks and cutting of slabs is carried out according to a previously drawn up diagram.
- Remove dirt and dust from the surface of the base using a broom or rag. If necessary, degreasing is carried out.
- 2-3 layers of concrete contact primer are applied on top of the slabs, with a pause for each layer to dry.
- Prepare a fastening tool (screwdriver), equipped with bits of the required sizes.
- Considering the fact that the work will take place at height, it is necessary to make comfortable construction trestles of sufficient width and height.
How to attach OSB to the ceiling on the sheathing
To hide unevenness and defects of the ceiling surface or to carve out space for laying insulation, it is necessary to create a frame from wooden beams or a metal profile. The beams are selected with a minimum cross-sectional size of 50x40 mm. Before use, the timber is treated with antiseptics and fire retardants.
Despite the apparent simplicity of the work, the installation of an ideal frame made of wooden beams becomes more complicated due to the defects present in them. The easiest way to build a frame is from a metal profile for plasterboard sheets. In addition, if the base of the ceiling surface is concrete, then it is preferable to use a metal profile. It is selected of good quality with an iron thickness of at least 0.4 mm.
The procedure for assembling a metal frame
- Using a level, secure the frame from the guide profile (2) to the walls around the perimeter.
- Make markings on the ceiling in the form of a grid with a step between lines of 50-60 cm.
- At the intersections of the marking lines, fix straight hangers (4).
- Install the ceiling profile strips (1) into the frame of guides so that they are located along the transverse lines of our markings.
- At a distance of 2-3 cm from the wall, using a level, attach the first strip to the hangers and, in the same way, another one, against the opposite wall.
- Stretch the thread between them and fix all the remaining strips in this plane at 60 cm from each other.
- Secure the transverse strips using single-level connectors (3).
Manufacturing of sheathing
To achieve maximum quality and reliability when arranging an OSB ceiling with your own hands, it is recommended to use lathing.
It is constructed using the following technology:
- When using wooden beams, it must be treated with an antiseptic liquid and fire retardant. The elements must be dry before further use.
- The base of the ceiling is marked according to a pre-drawn diagram. The installation of the first elements will be carried out at a distance of 2–3 cm from the walls. The size of the installation step is influenced by the characteristics of the base and possible insulation. Most often, a distance of 50–60 cm is used. Jumpers are also installed with the same frequency, which are used to strengthen the structure, or when it comes to installing several small elements.
- The first sheathing post is mounted next to the selected wall, leveling it. A cord is pulled between it and the opposite surface: it will give direction for attaching the remaining elements of the frame. The structure must be given maximum reliability, so metal anchors are usually used for fixing to the ceiling.
- When placing communications, it is important to mark the installation locations of lamps and chandeliers.
Features of the use of OSB ceiling cladding
All cladding (including OSB), which is used to create ceiling structures in “dry construction”, is usually divided into:
- Rough ones.
- Finishing.
The finishing layer acts as the outer formative layer of the entire “pie” of the ceiling, which can either be used on its own or have some other light finishing, such as painting, wallpaper, or thin decorative plaster.
The rough filing usually solves some important technological problems, and it is covered with something else on top. For example, it serves as a platform for laying insulating materials inside the ceiling, and at the same time (together with building films) it is a vapor barrier layer... Sometimes the rough ceiling lining acts as a load-bearing base, a kind of continuous sheathing for mechanical fixation of finishing materials.
The choice of OSB for rough ceiling cladding is completely justified. This material is technologically advanced, durable, stable, beautiful, and safe for indoor use, as it has an E1 emission class.
Based on the type of installation (depending on the fastening technology), OSB ceiling linings are divided into several types:
- Pressed sheathing frame.
- The finished plane (including, it can be an oriented strand board already mounted on the ceiling - as a rough filing).
- A suspended ceiling spaced from the ceiling, the frame of which is assembled using hanging brackets.
Pressed frame foundations, as a rule, are mounted using bars or flat edged slats, which are fixed to the load-bearing elements of the floor using the “through the body” method. This technology is easy to implement, but it is only suitable when there is no need to significantly level the surface.
Spaced frames intended for fastening OSB panels to the ceiling are made using dry edged bars with a cross-section of 40X40 mm or 50X50 mm, or from galvanized “ceiling” profiles, such as CD and UD. It is quite difficult to install such a subsystem; it is more expensive, but the resulting hollow structure provides the developer with a lot of technical opportunities.
Attaching a slab to an existing surface mainly makes sense as a finishing decorative material or as a material to smooth out minor defects.
As with other types of continuous cladding, OSB slabs are installed on ceilings in compliance with many standard technical requirements:
- An expansion gap of 3 mm must be left between the OSB panels.
- A technological gap of 12-15 mm should be left between the ceiling with cladding and the walls (also near columns, stairs and other stationary elements).
- The seams that are formed by the short sides of oriented strand boards must be offset from each other by at least one span. This dressing makes it possible to distribute the loads and avoid the appearance of cracks.
- The long sides of the OSB panels on the ceiling should be perpendicular to the load-bearing frame elements or perpendicular to the floor beams.
- The short sides of the OSB boards must also be screwed, so wooden (or metal) lintels are created under them.
- To increase the vapor barrier capabilities of the linings, joints and seams of the cladding, they are covered with construction adhesive tapes.
- To prevent the spread of impact and structural noise, frames and sheathing are mounted using elastic damping materials.
- For fastening to the ceiling, it is prohibited to use nails with a smooth shaft; hardware with circular knurling or spiral shape is suitable for this. The best option for fixing OSB to the ceiling are self-tapping screws. In any case, the length of the fasteners cannot be less than 2.5 times the thickness of the slab (nails no shorter than 5 centimeters, screws no shorter than 4.5 cm).
Installation of slabs
Installation of OSB on the ceiling must be carried out with great care: the slightest mistake can lead to distortions. To facilitate fastening, the sheets are pre-drilled in several places: this will make it possible to quickly install the screw.
OSB ceiling cladding is carried out according to a certain scheme:
- It is recommended to install the first element in the most visible corner. If you start work from the center, you will need to perform complex transverse and diagonal markings. For this purpose, installation cords are used.
- Before fastening, a distance of 10–15 mm is made from the wall. The distance between the plates is approximately 3 mm. When screwing in self-tapping screws, it is advisable to recess them flush.
- Since the cross members of the sheathing are also used for fastening, they need markings. To do this, draw a line along the cut of the sheet, which should be aligned with the opposite one. This will serve as a guide for installing screws.
- In some cases, cutting is carried out on site, for which it is necessary to determine the dimensions of the part in advance. It is important that the edges of the elements fall on the frame lintels.
- The same scheme for sheathing a ceiling with OSB board is used when installing other elements.
To hem the ceiling with OSB board as tightly as possible, it is recommended to use sheets with a locking joint. Most often, this material is used for transparent decorative compositions.
Installation technology
To install OSB boards correctly, the process should be divided into stages. This will allow you to carry out all procedures efficiently and avoid problems in the future.
Preparatory work
Preliminary activities include the following:
- The ceiling is treated with antiseptic and fire-fighting compounds. The location of communications is determined in advance. If the structure is directly connected to the attic, then steam and waterproofing is carried out and an insulation plan is thought out.
- According to a pre-designed layout of the frame posts, the product is cut.
- The surface is cleaned of dirt and dust with a broom and rags and, if necessary, degreased.
- The products are coated with 2–3 layers of concrete contact primer, each one is thoroughly dried.
- A tool for fixing is prepared - a screwdriver with the required set of bits. There should also be a place to carry out the process. For greater convenience, trestles or suitable stepladders are installed.
Before laying the slabs, it is necessary to carry out preliminary measures on the ceiling surface.
Correctly carried out preliminary work allows you to avoid problems in the future.
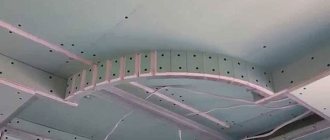
Sheathing device
To ensure that the ceiling made of OSB slabs is extremely smooth and reliable, it is erected using lathing. The creation technology is as follows:
- If a wooden beam is used, it is pre-impregnated with protective compounds against mold and mildew and fire retardants. All parts are thoroughly dried.
- The surface is being marked. The first elements will be placed 2–3 cm from the walls, and the overall step depends on the type of base and the need to install insulation. The optimal option is 50–60 cm and the same frequency of jumpers, which will be required if the structure needs reinforcement or the slabs are cut into small fragments.
- The first frame post is attached near one of the walls and leveled. A cord is stretched from it to the opposite surface along both edges to position the second part. The remaining fragments of the sheathing are laid along the resulting plane. The structure must be secured with a margin of safety, so it is better to choose metal anchors.
- Communications are laid, the location of lighting fixtures is marked.
The sheathing is a special frame onto which OSB boards are subsequently attached.
You should know! A significant disadvantage of using plastic dowels when working with concrete structures is their weakening during a fire, which can lead to collapse and blocking the exit.
Fastening the plate
OSB is attached to the ceiling with great care; any inaccuracies will lead to distortions. For ease of fixation, the parts are drilled out in several places, this will allow you to quickly install the self-tapping screw. The material must be hemmed according to a certain pattern:
- The first element should be attached in the most visible corner. If the surface is assembled from the center, then you will need to perform complex transverse and diagonal markings, as well as pull the installation cords.
- Before fixing, it is necessary to make a gap from the wall of 10–15 mm and ensure that the seam is at least 3 mm. The screws are screwed in with force to ensure the deepening of the head.
- Due to the fact that the frame cross members are also used for fastening, they are marked after installation. To do this, a mark is made on the edge of the panel, aligned with the opposite one, and screws are tightened along the resulting line.
- If cutting is done locally, then the dimensions of the required part are first measured. The edges must lie on the sheathing.
- The remaining fragments should be hemmed using the same principle.
The fastening should not be done close to the wall; you need to leave a small gap.
For a good fit, you can use slabs with a locking connection. They are suitable for situations where it is necessary to obtain a surface that will be decorated with transparent compounds.
Types of finishing
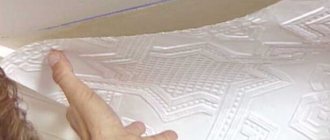
Lining the OSB ceiling creates a smooth rough base that needs finishing.
OSB ceiling finishing options:
- Varnishing
. A great way to finish an OSB ceiling. It allows you to obtain a base with a pronounced wood texture. Before applying varnish, the surface of the slabs must be properly prepared by sealing the joints with a mixture of sawdust and PVA. After drying, these areas are sanded and coated with primer. - Wallpaper
. A popular option for finishing an OSB ceiling with your own hands is to use special fiberglass wallpaper. In the case of using conventional rolls, the base of the ceiling requires preliminary putty, with mandatory reinforcement of the joints with a sickle mesh. Thick wallpaper mounted on durable glue looks best on such a ceiling.
Decorative plaster
If the walls are concrete and do not combine with wooden OSB ceilings, then the textured wooden surface can be hidden under a layer of plaster. This allows the walls and ceiling to have the same surface structure.
A regular cement mixture is not suitable for applying OSB panels to the surface. The wood swells over time, the plaster layer cracks and falls off. Therefore, in this case, special polymer mixtures are required with preliminary filling of the entire ceiling surface.
OSB filling technology
- It is necessary to make sure that the OSB sheets are securely fastened and that there is no movement of all surface areas.
- Standard preparatory work is carried out with special emphasis on filling joints. For large gaps near the walls, it is necessary to use a serpyanka mesh.
- Using a construction stapler, fiberglass mesh is aimed along the entire plane of the ceiling. Sagging of the mesh and the presence of waviness are unacceptable.
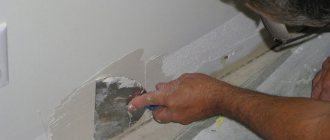
- Putty on an adhesive acrylic base is applied and leveled on top of the mesh. Application is carried out with a wide metal spatula. If the surface turns out to be uneven, then a second layer is applied.
Acrylic putty for OSB - The dried surface is polished with special flat graters with mesh sizes of 125 or 240.
- Everything is dusted with a damp sponge and primed.
The process is shown in detail in the video:
After puttying, no traces of OSB panels remain on the ceiling; the impression of a flat concrete surface is created. Now you can start plastering, wallpapering, painting or other final decoration options.
More details about the intricacies of OSB putty can be found in a separate article: OSB putty.
Decorative plastering of OSB ceilings
The process of applying the plaster mixture is similar to puttying, but is performed with a different tool - a flat trowel. Using it you can apply a thicker layer of plaster - up to 5 millimeters.
Flat trowel. Used if ceilings are finished with plaster.
There can be several layers of plaster, but no more than three. Before applying a second layer, the previous one is given time to dry and gain strength. Next, prime, allow to dry and apply the next layer of plaster.
Working with various plaster mixtures requires following the instructions on the packaging and depends on the chosen decoration method.
Working with acrylic plaster is the simplest, but has its own nuances. This is a fairly plastic mixture that can be tinted in any shade. The main thing is that it cannot be painted in parts, otherwise the ceiling fragment will differ in tone. You should work quickly, as it hardens and loses its elasticity. At the end of the work, the frosted surface is given texture using a figured roller. After hardening, minor flaws are sanded down. The final coating is gilded with mother-of-pearl varnish.
Adding texture with a figured roller
Mixtures containing sand, cement and silicates are not allowed for work on OSB. Therefore, such design options as “Bark Beetle”, “Lamb” and “Fur Fur” are not suitable, and you should take a closer look at acrylic plaster or expensive polymer compositions.
Polymer mixtures are distinguished by their durability and their service life is 25 years or more. , flock plaster has become especially famous . It consists of acrylic flocks of various shapes. After application and hardening, the surface of the ceiling will resemble suede, velor, leather or other expensive materials.
Flock plaster.
To properly apply this type of plaster, it is necessary to sequentially cover the ceiling with three components.
- First, part of the surface is covered with an adhesive base using a spatula.
- Then, using a spray gun and a compressor, the flock layer is beautifully distributed.
- Gradually the entire ceiling is covered in this way. There is no need to level the surface, since the flocks fill the depressions.
- Finally, everything is coated with a varnish component, which gives a pearlescent shine to the entire finish.
- After drying, the plaster is primed.
More information about the technologies for applying plaster to OSB surfaces can be found in the article: OSB plaster.
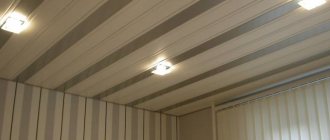
Using paint
In country houses, colored paint is usually used to decorate a rough OSB ceiling.
To prevent dark spots from forming on the finished surface during operation, you need to proceed as follows:
- Be sure to degrease the pre-cleaned surface. For these purposes, white spirit and similar liquids are used.
- The degreased surface is primed in 2–3 layers.
- The base is puttyed using a special wood compound. The optimal finishing thickness is 2-3 mm. If the ceiling area is large enough, it is recommended to pre-glue the reinforcing mesh. This will ensure a reliable finish and no cracking at the joints.
- Grinding. After drying, the putty layer is sanded with painting sandpaper No. 100-120.
- Next is whitewashing or painting. It is most convenient to whiten with a spray gun, and to paint with a wide fiber roller. Particularly popular are acrylic compositions, the use of which is not accompanied by an unpleasant odor.
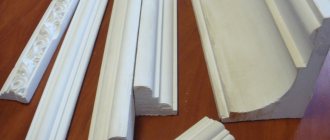
In some cases, wood or polyurethane baguettes are used to finish the ceiling made of OSB boards. This makes the room more decorated and beautiful. To glue baguettes, it is recommended to use wood glue or special mastic.
Options
In order for the ceiling to match the rest of the decor of the room, you will need to decorate it appropriately. A material such as osb board implies the following finishing options:
Since the assembly and installation of suspended structures, as well as installation of tension coverings in this case will be no different from the installation of similar compositions in any other situation, there is no point in considering them in detail. It is better to focus your attention on how the decorative finishing is done directly on the OSB board itself. We will consider each method separately.
It is not difficult to cover an OSB ceiling with such compounds. However, during the registration process you will have to perform a number of operations that are usually not thought about. These include recessing the heads of the screws that secure the particle boards and removing dust from the surface.
It is necessary to recess the heads of the screws so that the plane looks smooth and solid. When choosing this option for external design, you need to make sure even at the stage of installation of particle boards that the caps fit completely into the coating, for which purpose recesses are countersunk for them with a drill larger than the diameter of the hole. Dust is removed so that the varnish or stain lies on the surface evenly and without visible flaws.
It is best to apply the compounds with a roller of a suitable size. In the corners of the structure and other hard-to-reach places they work with a brush. It will also help prevent varnish or stain from getting onto surfaces not intended for them. Several layers are applied with the obligatory complete drying of each.
[custom_ads_shortcode2]
Direct fastening of OSB to the ceiling surface
The easiest installation option is to attach the slabs directly to a wooden or concrete surface without installing a preparatory frame. In city apartments, this option is usually used, but you need to check everything again with a level or level. Dips and bulges, previously invisible, will become much more noticeable after installation and finishing of the panels.
Owners of wooden ceilings, in addition to the above, need to decide on the orientation of the slabs to be hemmed. So, when attaching OSB to the ceiling, it is necessary to orient it across the ceiling boards to avoid sagging.
Installation of OSB on a wooden ceiling surface
As already mentioned, the surface is checked with a level, the protrusions are trimmed off and the depressions and cracks are filled with putty. It is advisable to cover the entire area with a vapor barrier or foil insulation. Then the surface is marked according to the dimensions of the OSB sheets.
The direct installation of the panels on the pre-marked surface begins. The first slab begins to be fixed from the center or from the corner.
Since the base boards can split along the fibers, nails are driven crosswise, every 30-40 centimeters. You can use a screwdriver and wood screws.
If a distortion has formed and the next OSB board does not fit jointly, it is necessary to mark the resulting distortion and cut off part of the panel with a jigsaw.
Installation of OSB to a concrete ceiling
Working on concrete is more difficult due to the need to drill using a hammer drill, and then mark the holes on the OSB board so that they coincide with the ceiling ones.
Next, the marked OSB sheet is hemmed using nail dowels.