Types and composition
Adhesive “Moment Installation”, depending on the main component in the composition, can be divided into 2 groups:
- The first includes substances with synthetic resins and solvents in their composition, but they are characterized by increased moisture resistance and high strength. The packaging is marked MP.
- The compositions of the second group are made on the basis of an aqueous dispersion of polyacrylate. The chemical composition is neutral, suitable for working with plastic. Adhesives are marked MV.
Advice! To get acquainted with all the information of interest regarding the selected adhesive composition, you can open the technical information sheet. This sheet is presented on the official resource. There you can find information about any Moment Montazh product.
Depending on the markings and abbreviations, the Moment brand mounting adhesive is divided into the following types:
- “Express MV-50” belongs to the category of acrylates, as symbolized by the MV marking. It is used to work with various materials, including wood, plastic, metal, ceramic, plaster and others. Suitable for external and internal gluing. Capable of fastening window sills, baseboards, decorative parts.
- “Super strong MV p-70” also belongs to the subgroup of acrylic adhesives, but does not contain solvents. Suitable for working with various raw materials, even PVC and foam. But it will not be able to glue Teflon, polyethylene, polypropylene surfaces. The additional letter “P” in the marking indicates the transparency of this glue, and the number 70 is the adhesive strength in kg/m². Even large and heavy parts can be held together with glue.
- “Express Decor MV-45” is a white mounting adhesive from the acrylic category, suitable for gluing various decorative parts from different materials.
- “Universal MP-40” is an assembly adhesive that is used for fastening wooden, stone, brick, marble, even glass bases and is washed off very easily.
- “Extra-strong MP-55” is a “Moment” assembly adhesive, which is made from polyvinyl acetate and carbon resins. High-strength adhesive is used for the installation of heavy, metal, wooden, ceramic, and plaster structures. They can even glue PVC, chipboard, and MDF. The description of this glue has a distinctive property - the instant formation of a film on the surface. It will protect the bonded surfaces from dust accumulation. When the materials are bonded to each other, the film breaks down, providing a strong and perfect bond.
Advice! When working with this glue, you must immediately ensure a neat connection of the two surfaces, since movements will only disrupt the strength of the adhesion. The best adhesion is ensured by the initial contact of the bases.
Curing time of tile adhesive depending on type
- The universal adhesive tile composition hardens after six hours, subject to normal indoor conditions. It is recommended to use such building material for small-sized tiles.
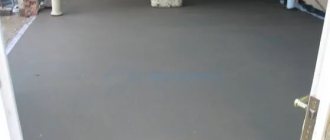
- Reinforced ceramic adhesive suitable for large tiles. The product has increased performance when exposed to mechanical and static forces. Drying time increases to 24 hours.
- The frost-resistant composition is suitable for outdoor cladding. Its drying time ranges from two days or more depending on weather conditions.
Terrace tiling with frost-resistant glue
- Pool compositions are characterized by increased resistance to excess moisture. The glue dries in forty-eight hours.
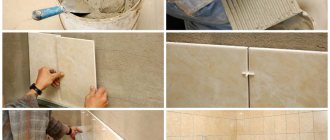
Using white glue for glass mosaic tiles
- White glue is perfect for working with glass mosaics and glass blocks, as it does not leave streaks or marks after use. This composition hardens for more than two days.
Thus, the drying time of tile adhesive directly depends on the humidity and temperature conditions of the room. If the parameters are similar to those indicated on the glue packaging, the drying time will correspond to the standards specified by the manufacturers.
Specifications
Rubber-based mounting adhesive “Moment” has the following main technical characteristics:
- Contains harmful volatile substances that emit a characteristic odor. When working, it is necessary to create good ventilation in the room.
- Moisture resistance and frost resistance down to -40°C.
- It is a construction and installation substance and performs the functions of a sealant.
- Suitable for joining smooth and non-absorbent materials.
- There are types that are distinguished by instant adhesion.
- Can be stored at -20…+30°C.
- Shelf life 1.5-2 years.
- Can be found on sale in tubes and cartridges weighing 125-400 g.
- Operating temperatures -12…+ 35°С.
- The hardening period is 10-30 minutes depending on the variety.
- Complete setting after 1 day, maximum period 7 days.
- Can be cleaned using white spirit.
- Most of the variety is produced in the form of a beige mass.
Technical characteristics of water-based construction adhesive:
- No pungent odor.
- Frost resistance and water resistance -20°C.
- Versatility - glues any materials.
- Necessary condition – 1 surface must be moisture-absorbent.
- Store at temperature +5…+30°С.
- Shelf life: 1.5 years.
- Available in convenient tubes and cartridges weighing 125-400 g.
- Suitable for indoor and outdoor use.
- Working period 5-15 minutes.
- The frozen seam can be painted with acrylic paint.
- Great initial grip force.
- Excess liquid glue can be removed with a damp cloth. Available in the form of a white mixture, after drying it becomes transparent.
It is important! In construction stores you can find a huge variety of Moment glue liquid nails. To choose the right type for certain types of work, you need to study the technical specifications or ask a consultant for advice.
On video: Liquid nails “Moment installation”.
Glue drying time table
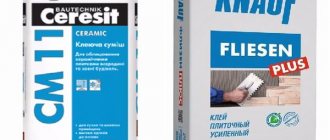
I will give the drying time of tile adhesive using the example of popular cement-based compositions: from Ceresit and Unis.
| Glue name | Time to use the solution (in a bucket), hours | Working time (after application to surface), minutes | Tile adjustment time, minutes | Grouting joints, hours |
| Ceresit SM 9 | 2 | 10 | 15 | 48 |
| Ceresit SM 11 Plus | 2 | 15 | 20 | 24 |
| Ceresit SM 12 | 2 | 20 | 30 | 24 |
| Ceresit SM 14 Extra | 2 | 20 | 20 | 24 |
| Ceresit SM 16 Flex | 2 | 25 | 25 | 24 |
| Ceresit SM 17 | 2 | 30 | 30 | 24 |
| Ceresit SM 115 | 2 | 20 | 25 | 24 |
| Ceresit SM 117 | 2 | 20 | 15 | 24 |
| UNIS XXI | 3 | 10 | 10 | 24 |
| UNIS Hi Tech | 5 | 25 | 15 | 24 |
| UNIS Belfix | 3 | 15 | 15 | 24 |
| Eunice Pool | 3 | 10 | 10 | 24 |
| UNIS Plus | 3 | 20 | 10 | 24 |
| UNIS Granite | 3 | 15 | 10 | 24 |
| UNIS 2000 | 3 | 10 | 10 | 24 |
When adding elasticizers (for example, Ceresit SS 83), the time of using the solution is reduced by approximately 25%, but the open time and the time for adjusting the tiles increase. In this case, before grouting joints, it is better to wait twice the time recommended by the manufacturer.
During hardening, the glue shrinks noticeably. Therefore, the base should be smooth, the glue layer should be uniform and not thick. If you decide to correct large irregularities in the wall using a layer of glue, problems may arise: different ends of the tile will harden at different times, and it may come off or crack due to internal stress.
Do you want to see in practice how much the glue shrinks? Make a small groove in the wall and fill it with glue. Use a spatula to level the glue with the plane of the wall, and after drying, look at the resulting depression.
Fast drying glue
There is a quick-drying tile adhesive that has a reduced setting and hardening time:
| Name | Time to use the solution (in a bucket), hours | Working time (after application to surface), minutes | Tile adjustment time, minutes | Grouting joints, hours |
| IVSIL EXPRESS+ | 0,5 | 10 | 5 | 3 |
| Bolars Express Fast-hardening | 0,66 | 15 | 10 | 3 |
| KNAUF—Schnellkleber | 0,5 | 15 | 10 | 3 |
| Founds Scorplix T-15 | 0,5 | 10 | 10 | 3 |
When working with such a mixture, it is important to mix the glue in small portions and apply full load to the coating after at least 24 hours.
Adhesive liquid nails: types and applications
The scope of application of liquid nails glue during installation is quite extensive, but their main purpose is to fix any wall panels and similar materials. The highlight of this glue is its elasticity even after complete drying. And this is what is necessary for gluing large products that undergo thermal expansion. It is elasticity that allows the material to expand and contract freely without the risk of tearing away from the surface. Liquid nails glue is unique in this regard.
How to use liquid nails
Today, Moment liquid nails glue is produced in ten varieties:
1. “Instant Grip” is an almost universal glue. It can be used to connect both porous and non-porous surfaces - it easily copes with plastic, metal, brick, concrete, wood, ceramic tiles and many other materials used in construction.
2. “Express Decor” – works well with plastic, wood and polystyrene. In practice, it has been widely used in the installation of ceiling moldings made of foam plastic, all kinds of decorative friezes and panels made of PVC, polystyrene and other lightweight materials.
3. The moment of installation “for mirrors” - the name of this glue speaks for itself. It is able to connect a mirror or glass to any type of surface indoors.
4. Liquid nails Installation moment “Super strong transparent” - produced under the DGII marking. It can be used to glue wall panels made of wood, PVC, and cork. It does an excellent job with plastic and MDF skirting boards. According to the manufacturer, it can even be used to secure a door in the opening and install a window sill.
5. “Super strong” montage moment. It differs from its transparent brother only in its nondescript color.
Types of glue moment liquid nails
6. Installation point “Super strong plus” is a modified version of the two adhesive compositions described above. Added to all other qualities is the ability to be used outdoors – it sticks to everything and to anything.
7. “Very strong” – used in connections of heavy structures. If we are talking about reliably gluing a heavy object, then it is difficult to come up with a better solution than this type of liquid nails. In practice, this glue has shown itself to be excellent when working with bamboo wallpaper and slabs.
8. Installation moment “For panels” - used for installing any types of panels on concrete, plasterboard, brick, wood and any other base.
9. “Universal” - intended for everything and at the same time for nothing. In principle, it’s difficult to say anything bad about this type of liquid nails - in fact, it is an average glue that is mainly used for gluing light and medium weight materials to any type of surface.
10. “Express” – glues quickly and efficiently. Designed for use both indoors and outdoors. Quite often used for finishing facades with gypsum or cement artificial stone.
Adhesives liquid nails photo
Summing up
Liquid nail glue can be used for all kinds of materials. It can be either foam or light plastic, or concrete. It is important to give preference to the appropriate manufacturer and type of product. When choosing glue, pay attention to where the work will be carried out, since not all such products are suitable for working outside the building, especially at air temperatures below zero.
Liquid nails are one of the simplest installation methods, which eliminates unnecessary holes and work with other tools, such as a drill. At the same time, the aesthetic appearance of the processed material does not change in any way.
Liquid nails: instructions for use
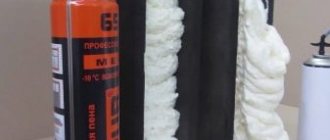
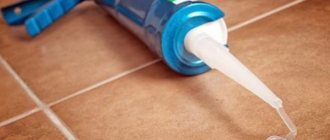
In fact, Moment Installation is unpretentious to use, but, like most similar adhesive compositions, it has a lot of nuances. And the first, most basic of all, is the need to use a special gun; without it, squeezing liquid nails out of a cylinder is tedious. The gun is inexpensive and is sold in any hardware store at a very affordable price - as a rule, we are talking about $4-10.
The liquid nail gun is quite simple to use. The metal tongue located behind the handle of the gun is pressed with a finger, after which the piston-pusher is pulled back, thereby making room for the glue bottle. When the cylinder is installed, the piston is pressed back in exactly the same way. Now everything is simple - swing the trigger and squeeze out the glue.
Gun for liquid nails photo
Many people have a question: how to open liquid nails? It's really simple. You don't wonder how to open a tube of toothpaste or hand cream, do you? There are two types of blockage of this glue - in the first case, you will have to cut off the sealed part of the plastic tube with a knife, and in the second case, if we are talking about tin or paper cylinders, you will additionally pierce the protective film located deep in the spout with a long nail. This protection is necessary so that the glue has time to reach the consumer without losing its qualities.
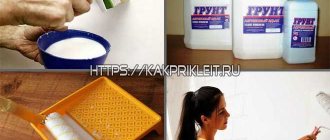
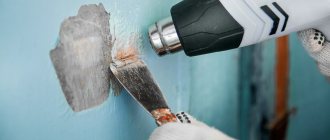
Okay, that's all lyrics, let's get back to the technology of using glue. Moment installation of liquid nails. As elsewhere, work on gluing something using liquid nails begins with preparing the surface - dust, dirt, and loose paint must be completely removed. The surface of the walls and the glued material (if it is porous) must be covered with a layer of primer to increase the adhesion of the materials.
Liquid nails instructions for use
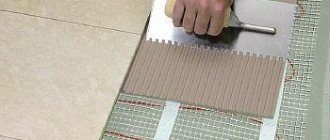
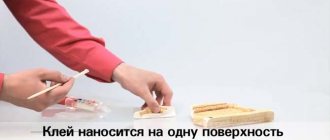
When the surfaces are dry, you can begin gluing them. Liquid nails are applied to one of the surfaces in two ways - either in continuous stripes or dotted. It is necessary to choose the application method based on the type of product. For example, it is better to glue long panels, such as PVC plastic or MDF, point by point, but the ceiling plinth will adhere more firmly if the glue is applied in a strip.
Liquid nails application photo
Did you apply glue? Now we take the glued product and connect it to the base of the wall. Press tightly, if necessary, lightly tap with your fist and tear off the product. For what? The glue should dry out within 5-7 minutes. There is no escape from this – this is the lack of technology. If you want to glue surfaces, as they say, “tightly,” then you should not ignore this point. When the glue has dried, the panel is put in place and tapped well with a fist. This, in principle, is the whole technology - now you know how to use liquid nails. Installation moment and you can safely get to work.
And finally, a few tips for sloppy craftsmen - removing liquid nails not in a frozen state is tantamount to smearing them on the finished surface, thereby ruining it. First, wait until the glue dries, then carefully cut it off with a sharp blade - these are the instant liquid nails.
Author of the article Dmitry Vorokhov
Hello, dear visitors of our site! Today we will talk about liquid nails “Moment installation”. In addition, we will look at what other products this company produces and what exactly are they - liquid nails? Let's find out how much such products cost today.
Where is the best place to use Moment Montazh glue?
In order to properly clarify the issue and areas of use of liquid glue, we must simultaneously consider what types of “Installation” exist today.
So, a series of heavy-duty adhesives that allow you to do without nails, screws, etc., consists of the following water-based products:
- "Montazh Express". It is used for attaching baseboards, trim, tiles, decorative elements and wall plaques. The glue is great for children's buildings, and for residential buildings in general. It is odorless and does not require additional solvents. Fairly good initial grip strength.
- “Editing Super Strong.” This type of liquid nails is used for fastening heavy structures - panels, window sills, decorative elements and door frames. It is also odorless and perfect for use in children's rooms. The initial grasp is simply tremendously powerful. The glue is capable of filling cracks whose thickness does not exceed one centimeter.
There are a number of other brands of glue that are made from synthetic rubber. This:
- “Universal installation”, which, as you may have guessed from the name, is suitable for working with any materials.
- “Installation Extra-Strength”, used for fastening particularly bulky structures and parts.
- "Installation for panels." Indispensable when attaching panels.
Instructions for using liquid nails “Moment Installation”
So, we’ve figured out the general characteristics, now let’s look at how “Moment” liquid nails are glued correctly.
First stage. Thoroughly clean and degrease work surfaces.
Second phase. Apply glue to the work surface using a construction gun. You can do this in one of three ways:
- mesh
- dots
- snake
Third stage. We press the two surfaces that need to be fastened with special density, give them the correct position and hold them there for two to three minutes.
Fourth stage. After this, we must wait until the liquid nails are completely dry (this is approximately twenty-four hours), and only after that the surface can be affected mechanically.
Construction gun for liquid nails
Separately, I would like to talk about the construction pistol itself. The fact is that few people know how the Moment Montazh liquid nails themselves are inserted into it. So, to begin with, we take a tube, a reservoir, and also the cartridge itself, which contains the actual liquid nails.
We screw on the dispenser, which must be cut at the end. Next we must insert the cartridge into the gun device. For this purpose, we move it to its original position, after which we fix a special tongue towards the gun.
Then we pull the rod all the way, insert a special cylinder and, using the release system, direct the drain with the ring forward so that the glue can be supplied to the dispenser. This procedure must be done until the gluing work is carried out or until the glue itself runs out.
To remove the cartridge, we again press the locking tab, hold it and at the same time pull the rod towards us in order to remove the empty cylinder from the device.
Among the advantages of this type of glue I would like to note the following:
- They do not harm the work surface and are not susceptible to rust.
- They are not only resistant to low temperatures, but also environmentally friendly.
- They harden extremely quickly, regardless of the environment.
- When working with liquid nails, no impact tools are required.
- The connections are characterized by particular strength.
- These nails can be used to glue any material, regardless of whether it is smooth or rough.
But there are also disadvantages (and where would we be without them?), and the main ones are the following:
- When working with them, it is recommended to use respirators, since for some time after work the material may emit unpleasant odors.
- Having no idea about such nails, it is quite difficult to manipulate them for the first time.
Other manufacturers of liquid nails
Among other manufacturers of liquid nails, in addition to Moment Installation itself, there are many good products. Thus, we can note the LN601 brand from the Macco company, known for its high performance in interior work.
In general, this is a universal glue, but it cannot be used when attaching mirrors or tiles. But Multi-Purpose, thanks to its excellent adhesion, can easily be used for plastic, brick, and foam.
Solvent Free is great for ceramic tiles as it dries quickly and is impervious to moisture.
If you need to glue a mirror, then the best option is probably LN-930.
And finally, it is better to fasten massive structures with Heavy Duty or Zigger 99 liquid nails. Here’s more for your reference.
about and how to do it'/>Liquid nails are widely used today in construction and repair. Instructions for using liquid nails will not be superfluous even for those who have already fastened surfaces with them and seem to have an idea of how to work with this glue. Of course, the basic techniques can be described in two words and they will coincide with the recommendations for gluing with any other compositions: apply - press. However, practice shows that everything does not look as simple as it seems at a quick glance.
Each task has its own subtleties and nuances, without knowledge of which you simply will not be able to connect surfaces quickly, reliably and accurately. And who wants to redo it afterward, returning to editing after a while? In addition, liquid nails have different modifications, determined by their purpose. In simple cases, you can use any, but if you have to deal with large, heavy objects or capricious surfaces, then you need to be more scrupulous in choosing glue.
The instructions for using liquid nails are simple, but everyone should read them before starting work. At least in order to decide whether the purchased glue option is suitable for your purposes and which of the two instructions for use concerns exactly the chosen composition. This is exactly what we will try to talk about in our article today. We hope that our tips and recommendations will help you in choosing and using this adhesive.
Compared to other construction adhesives (such as bustylate or PVA), liquid nails differ for the better in several ways:
- They are several times superior to competitors in terms of adhesion strength.
- To use liquid nails, the degree of evenness of the planes being connected is not important. Their smoothness also does not play any role: both rough and almost mirror-like surfaces are glued together.
- After drying, the glue retains a fairly high degree of elasticity.
- Does not wash out or soften with water; has good frost resistance.
- All known building materials can be glued.
- Initial setting takes little time.
Liquid nails are also used as additional fasteners when fixing parts to be joined with nails or screws. At the same time, they provide a tighter mutual fit of the elements and protect the hardware from corrosion.
If anyone doesn't know, there are quite a lot of them. There are those that can be called universal in their way, and there are highly specialized ones.
- "Snap Grip" is considered suitable for solving all problems and is used most often. Primary setting takes 5 minutes, bonds anything to any substrate: brick, metal, wood, plastic, ceramics, etc.
- Express Decor works especially well with wood, plastic and polystyrene. Received full recognition in gluing baguettes, friezes and light cornices.
- “For mirrors” lives up to its name precisely in the direction of connecting the mirror/glass with something else.
- “Super strong”, “Super strong transparent”, “Super strong plus” - all 3 varieties are used mainly for fastening various kinds of wall panels. The first 2 differ from each other only in the degree of transparency; the latter is also suitable for outdoor work.
- “Very strong” holds very heavy objects.
- “Express” is often used for wall cladding with artificial and natural stone. Suitable for façade and exterior work. When deciding on the purchase of glue, you need to soberly assess what will be installed and under what conditions.
For any type of liquid nails, there are several comments that always remain valid.
- It’s easier and faster to work with this glue using a gun - squeezing it out of the bottle with your hands is very difficult. Don't be stingy, spend 300-500 rubles on a useful device.
- Low temperatures promote longer drying times. Working with liquid nails if it is colder than zero is not recommended at all, although there are variations for such conditions.
- The glue must not be allowed to freeze: it takes a long time to thaw, and the adhesive properties of the thawed composition are lower.
- High temperatures also have a negative effect on liquid nails: at +38 they can simply dry out inside the cylinder.
- It is also undesirable to leave the glue in the rain or allow water to penetrate inside in any other way: it can cause the composition to delaminate.
Most types of liquid nails are used on it. Both bonding surfaces are cleaned. If necessary, wash and dry, and then degrease. If one or both surfaces are porous, they should be impregnated with a primer to increase the degree of adhesion.
The glue is applied to one of the surfaces in one of 3 ways: with a grid, stripes (snakes) or individual dots. For large, heavy objects, a mesh is chosen; panels are usually glued in dots, and narrow elements like baseboards are glued in strips. The part to be glued is pressed forcefully onto the base and held for a couple of minutes. It is desirable that the pressure be uniform over the entire area of the element.
If any further manipulations with the glued elements are expected, they should be postponed for at least a day - until the glue has completely dried. If the temperature in the room (or outside) is low, the humidity, on the contrary, is high, and one of the planes (and especially both) is characterized by low roughness, the setting time may take up to three days.
Some types of liquid nails require a slightly different approach. Points 1-2 are carried out with the same care: the reliability of the clutch depends on them. However, further actions vary.
- The part (object) to be glued is pressed firmly to the base for a few seconds.
- Afterwards the element is carefully removed from it.
- Wait 10 minutes. At this time, the glue will gain some thickness, but will not dry out and will not form a film on its surface that prevents bonding.
- The object is again pressed against the plane and held until it sets.
Note that it is physically more difficult to work with this type of glue: it takes much longer to press the part to the plane. Before you start applying glue, it is important to understand which instructions for using liquid nails described above apply to it. Otherwise, if you make a mistake in your actions, you will not be able to achieve good adhesion: either the glue will dry before pressing the element (if you need No. 1, and you acted according to No. 2), or, conversely, it will not set at all.
Why do you need liquid nails?
Liquid nails are a special adhesive for installation. This adhesive solution is made from polymer and rubber.
Currently, it is quite popular due to its ease of application and good performance.
This device has many other advantages, for which both professionals and amateurs love it.
For example, using liquid nails you can quickly glue wood, metal, ceramics or PVC.
In addition, this glue dries very quickly, but this does not happen immediately, so you can quickly change the position of the elements being glued together. In addition, after gluing it to a liquid nail, you can bend the material as you like.
It should also be noted that the adhesive solution is very frost-resistant and does not ignite. Liquid nails can support a weight of about 50 kg.
When gluing, you do not need to use percussion instruments, which is also quite important.
In addition, liquid nail does not allow rust to form if metal parts need to be glued together.
Glue can connect any surfaces - rough, soft, etc., and they will all hold equally tightly.
However, in order to properly glue the necessary parts, you should carefully consider the choice of liquid nails.
There are nails based on organic compounds. They adhere well and are resistant to low temperatures.
Before purchasing, you need to carefully study the instructions, because with organic-based glue you need to work with gloves.
As a rule, nails in this category have a pungent odor, so it is advisable to wear a respirator before starting work.
There are solutions based on acrylic. This glue is almost completely safe, but you cannot work with it if the temperature is very low.
It is also not recommended to glue something in rooms with high humidity, otherwise the adhesion will not be as good.
In general, acrylic liquid nails glue worse than organic ones, so it is better not to use them for serious installation work.
To use glue you need a liquid nail gun. On average, a standard cassette contains about 310 ml of glue.
As a rule, universal liquid nails are needed to glue small parts. But there is also heavy-duty glue that is used for more serious installation work.
However, glue also has its disadvantages. For example, when working with it, you need to have clothes covering your hands, and you need to wear a respirator, because the solution has a very unpleasant odor.
In addition, if you have no experience working with such glue, then using it is quite problematic. Before using liquid nails, the instructions must be read.
Video:
Effective solution
If it’s winter outside and you need to make repairs, there are effective solutions. For example, you can purchase quick-drying tile adhesive. After how long will it be possible to walk on the laid tiles?
After 5 hours, the adhesive will acquire the required hardness. One of the disadvantages of using quick-setting adhesive is that you have to work it out quickly. Therefore, it is not recommended to make a large batch of the mixture.
Moreover, the time for adjusting the laid tiles is very limited, about 5 minutes. But on the other hand, quick-drying glue allows you to quickly solve the problem.
There is also a special composition that is intended for low temperatures. Even if the base is 0°C, the mixture will acquire the required hardness in a short period of time. After laying the tiles, you will be able to walk on them very soon.
Interesting! Frost-resistant glue can cope with at least ten freezing cycles.
However, it is not recommended to lay tiles at sub-zero temperatures. This may result in material damage.
How to choose the right one?
Most often, this glue is needed for adhesion of ceramic, metal, wood, brick, polystyrene and other parts.
Liquid nails can glue together even elements that do not fit tightly together.
In this case, the solution can withstand a load of about 80 kg. However, experts do not recommend gluing materials made from damp wood with nails.
Wallpaper made from natural materials is often glued to nails. In this case, there is no need to specially prepare the surface - just remove the excess plaster and start gluing.
As with conventional glue, liquid nails must be applied to the inside of the coating, after which the sheet is applied to the surface and pressed by hand.
Video:
Next, the canvas is removed for 10 minutes to allow the composition to dry, and then applied to the surface again, this time completely.
If the glue has leaked a little from the edges of the sheet, then you can take your time wiping it off. You should wait a little until the solution dries, and then carefully remove the excess.
Even ceramic tiles can be glued to this glue. In this case, the adhesion will be better than that of conventional tile mortars.
However, if you use nails on a large scale, it will be somewhat expensive - the price of glue is quite high.
It is best to use this adhesive solution for gluing fallen tiles, etc.
If you need to stick a heavy element to a vertical plane, then you need to fix the object on wooden supports until the composition is completely dry.
Usually the substance dries completely within 12 hours, but this depends on the brand and ingredients of the glue.
Many people advise reading the instructions for use when choosing liquid nails, but this does not always help.
If a person has never used this glue before, and there are dozens of varieties of adhesive solutions in the store, then it will be difficult to make a choice.
In any case, first you need to understand the most popular brands. For example, you can often see “Moment Installation Extra-Strong” adhesive based on neoprene.
This adhesive solution can withstand the load of heavy parts and elements. It is often used for gluing siding, stone, wood structures, etc.
However, this option is not suitable for polystyrene foam and other foam materials. For these purposes, it is better to purchase “Moment Installation super strong” based on water.
But you need to remember that you cannot glue polyethylene, polypropylene or Teflon with it.
There are also liquid nails LN601 on neoprene, which can only be used for interior work. But since the glue is universal, it can be used to glue almost anything.
However, this adhesive solution is not suitable for gluing tiles and other heavy objects.
There is also Multi-Purpose adhesive solution on neoprene, which can be used to glue brick, concrete or plaster.
In addition, this glue is suitable for plastic, wood, metal and ceramic elements, but it cannot be used for polystyrene foam objects.
It is worth remembering that nails that dry quickly are best for ceramic tiles. For example, Titan WB-50 and Solvent Free.
If you need to glue a mirror, then you need to choose LN-930 and other similar adhesive solutions. For work in a damp environment, it is better to take Nail Power.
Various wooden structures need to be glued together with Solvent Free or Tigger construction adhesive, they dry quickly.
If you need to glue something heavy, then high-strength Heavy Duty or Zigger 99 will do.
How to choose liquid nails - an overview of popular options
When choosing glue, first of all pay attention to the following factors:
- processed material;
- load on adhesive seams;
- operating conditions (outdoor or indoor).
Today, there are many different manufacturers and variations of liquid nails that can be easily found on the market or in a building materials store. However, they all differ not only in the brand and country of manufacture, but also in quality and final result.
The most popular and frequently used liquid nails, which are preferred by most professionals, are Moment, Titebond, Makrofix, TYTAN, Krass, Kim Tec, Quadro and others.
Let's take a closer look at popular brands that have had a good reputation for many years.
How to use?
Liquid nails are very often used during installation. Despite the fact that working with them is relatively simple, you still need to follow a few rules.
For example, you should remember that glue is applied only to a clean, dry surface. In addition, after spreading the solution, you must press the parts tightly in the desired position for 2 minutes.
You should also remember that the glue is applied in strips or dots. In this case, there is no need to spread the composition over the entire surface; gluing will be good without it.
Drying usually takes about 12 hours, but it can last 18 hours or a day - it depends on the brand and manufacturer. It is better not to touch the structure while it is drying.
If the gluing elements are quite heavy, then it is advisable to wait a week, then the glue will dry completely and will be able to completely hold the structure.
The composition is needed for gluing parts in difficult places.
We should not forget that nails based on organic compounds are quite dangerous - you should not allow the composition to come into contact with the skin. The glue must be applied with a special gun.
In stores, liquid nails can be found in the form of cartridges, which helps to use the adhesive solution in doses and save money. At the same time, the shelf life of the composition is quite long.
However, everyone has situations when they need to not only apply glue, but also remove it. High-strength adhesive mortar is especially difficult to remove.
To remove newly applied liquid nail, you should try washing it off with water and solvent. You can use a regular sponge for this.
However, this option is not yet the most difficult, since the composition has not yet had time to dry. If the glue has already dried, you will have to wash it off with special substances that are available in stores.
Video:
However, not everyone has strong solvents on hand. For such cases, the use of a conventional scraper is indicated. You just need to work with it very carefully so as not to spoil anything.
You can try to heat the frozen glue. In this case, the mass will become liquid and viscous, it can be easily washed off, you just have to heat it up to 60 degrees.
Many people still have the question of how to properly use a nail gun. This is also quite simple - you need to press the metal tongue of the gun, then pull the piston in your direction, which will make room for the adhesive solution.
After fixing the cylinder, you need to press the piston back, and then you can squeeze out the nails by pumping the trigger.
Some people don't know how to open a tube of solution. This question is often asked by beginners, but in fact there is nothing complicated here.
Video:
The tube is either sealed - then you need to open it with a knife, or you just need to pierce it from the top if the container is tin. It is best to pierce with a nail, because there is a protective film inside.
Types and purposes of the composition
Liquid nails are divided into several types, depending on the polymer composition. A mixture labeled “Instant Contract” is considered universal. This glue can be used for almost any task. It firmly bonds parts made of metal, ceramics, plastic, wood, and PVC panels in five minutes. To perform specialized work, there are the following varieties:
- “Express decor” - used for joining wood, plastic and PVC. Most often used for fastening cornices and baguettes;
- Liquid nails “For mirrors” are indispensable for fixing mirror panels and mirror tiles on any surfaces (some types of glue can damage amalgam, so it is important to attach mirrors using a specialized compound);
- “Super strong” - used for fastening wall panels made of plastic and PVC (may have differences in transparency and are intended for outdoor use);
- “Express” and “Very Strong” - used for external work on facing stone and any types of ceramic tiles.
It is convenient, for example, to attach bamboo wallpaper to this adhesive mixture, and there is no need to clean and prepare the surface in any special way. It is only necessary to remove the chalk or loose plaster.
It is convenient to attach tiles using liquid nails, and this installation option is considered more durable than traditional tile adhesive. The only negative is that liquid nails are more expensive and their use is only justified for repairing and replacing ceramic tiles.
To attach PVC panels, you need to choose a transparent glue that will not leave marks when dry.
What is taken during the drying time of the adhesive composition?
Before deciding how long it takes for a tile to dry, it is important to understand the existing stages of hardening of the adhesive solution. In this case, there are 3 stages of glue hardening:
- installation condition (life period of the solution);
- primary setting (partial drying);
- final hardening.
Having understood this issue, you can clearly determine the amount of mixture to be mixed at one time and when you can walk on the tiles after laying.
Installation condition
After the master has diluted the mixtures in the required proportions, there is a limited period of time to work and adjust the position of the tiles. This takes into account such characteristics as:
- period of use after dilution;
- working hours after applying glue to the wall;
- adjustment period.
It is important to understand that the adhesive solution takes longer to dry in a bucket than on the surface. The solution can remain in the container for about 5 hours, and after laying on the wall it begins to set after 30 minutes. It takes no more than 15 minutes to adjust the tiles.
Primary setting
The primary hardening stage implies a period when the tile is in a static state and the mortar has already hardened. However, the tile still cannot withstand heavy loads. The drying time for tile adhesive on the floor is about a day. At this stage, you can start grouting and cleaning the tiles. At this stage, you can already walk on the tiles, but you need to do this carefully.
Final hardening
The third stage is final hardening. The coating reaches the required hardness only after a week and the tiles can be fully used: place heavy objects and expose them to the necessary impact. The drying period for tile adhesive may vary: some solutions take longer to harden, so it is necessary to study their composition.
Instructions for use
The following instructions for use are suitable for most mixtures (suitable for external and internal use):
- The surfaces to be bonded are cleaned and degreased. Porous materials are treated with a primer composition. PVC and plastic must first be brought into the room and the parts must be allowed to “get used” to the temperature.
- An adhesive composition is applied to one surface of PVC panels or tiles in a dotted manner or in thin lines.
- The parts are connected and pressed tightly against each other for two to three minutes.
- The glued surfaces are left until the liquid nails dry completely (24 hours).
For some types of liquid nails, the following instructions are more suitable:
- After preparing the surfaces as in the first case, glue is applied to them.
- The parts are connected for one minute and then removed.
- The glue dries for seven to eight minutes. During this time it will thicken.
- The surfaces are again connected and pressed tightly against each other.
- The parts are left for a day until the liquid nails are completely formed.
Before using the composition for external or internal work, it is important to study which of the two described methods is recommended in the attached instructions.
How to remove liquid nails
As practice shows, it is very difficult to remove this durable composition. There are several ways to remove liquid nails.
Fresh composition
An accidental drop of the compound that gets past PVC panels or tiles during work is removed with a clean, dry rag or the blunt tip of a knife. Afterwards the surface is wiped clean.
Hardening composition
The set adhesive is gradually removed from the tile with a scraper. To facilitate the process, the surface of the panels is moistened with water or acetone.
Dried composition
If liquid nails have been applied a long time ago and are completely dry, special substances must be used to remove them. First you need to study the composition of the glue and select the appropriate solvent. Next, the surface is treated in accordance with the instructions for using the solvent.