Glue drying time table
I will give the drying time of tile adhesive using the example of popular cement-based compositions: from Ceresit and Unis.
| Glue name | Time to use the solution (in a bucket), hours | Working time (after application to surface), minutes | Tile adjustment time, minutes | Grouting joints, hours |
| Ceresit SM 9 | 2 | 10 | 15 | 48 |
| Ceresit SM 11 Plus | 2 | 15 | 20 | 24 |
| Ceresit SM 12 | 2 | 20 | 30 | 24 |
| Ceresit SM 14 Extra | 2 | 20 | 20 | 24 |
| Ceresit SM 16 Flex | 2 | 25 | 25 | 24 |
| Ceresit SM 17 | 2 | 30 | 30 | 24 |
| Ceresit SM 115 | 2 | 20 | 25 | 24 |
| Ceresit SM 117 | 2 | 20 | 15 | 24 |
| UNIS XXI | 3 | 10 | 10 | 24 |
| UNIS Hi Tech | 5 | 25 | 15 | 24 |
| UNIS Belfix | 3 | 15 | 15 | 24 |
| Eunice Pool | 3 | 10 | 10 | 24 |
| UNIS Plus | 3 | 20 | 10 | 24 |
| UNIS Granite | 3 | 15 | 10 | 24 |
| UNIS 2000 | 3 | 10 | 10 | 24 |
When adding elasticizers (for example, Ceresit SS 83), the time of using the solution is reduced by approximately 25%, but the open time and the time for adjusting the tiles increase. In this case, before grouting joints, it is better to wait twice the time recommended by the manufacturer.
During hardening, the glue shrinks noticeably. Therefore, the base should be smooth, the glue layer should be uniform and not thick. If you decide to correct large irregularities in the wall using a layer of glue, problems may arise: different ends of the tile will harden at different times, and it may come off or crack due to internal stress.
Do you want to see in practice how much the glue shrinks? Make a small groove in the wall and fill it with glue. Use a spatula to level the glue with the plane of the wall, and after drying, look at the resulting depression.
Fast drying glue
There is a quick-drying tile adhesive that has a reduced setting and hardening time:
| Name | Time to use the solution (in a bucket), hours | Working time (after application to surface), minutes | Tile adjustment time, minutes | Grouting joints, hours |
| IVSIL EXPRESS+ | 0,5 | 10 | 5 | 3 |
| Bolars Express Fast-hardening | 0,66 | 15 | 10 | 3 |
| KNAUF—Schnellkleber | 0,5 | 15 | 10 | 3 |
| Founds Scorplix T-15 | 0,5 | 10 | 10 | 3 |
When working with such a mixture, it is important to mix the glue in small portions and apply full load to the coating after at least 24 hours.
Curing period of various types
How long the tile adhesive will dry depends more on its type, and not on the company that produces the specific composition.
Types of adhesive mixtures:
- Moisture-resistant (Ceresit SM 11, Litokol, Knauf Flizen Plus, Yunis Pool, Typhoon Lux Plus) are designed specifically for use in rooms with high humidity: swimming pools, bathrooms, bathhouses. Fungus does not develop on their surface due to the content of antiseptic additives. Drying time is approximately 24 hours.
- White (Eunice Belfix) is perfect for laying glass mosaics or glass blocks, as there are no streaks left after work. Hardens in 24 hours.
- Reinforced (Ceresit 18, Yunis +) is ideal for installing large tiles due to providing excellent adhesion of the concrete base to the tile. The duration of hardening varies from 12 hours to a day.
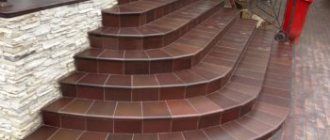
- Frost-resistant (Ceresit CM 17, Ceresit CM 117, Yunis 2000) is used for cladding facades of buildings, stairs, terraces. Such adhesive compositions can withstand at least 10 cycles of freezing and thawing. The hardening time is influenced by the weather; on average, final drying occurs in 36 hours.
- Universal (Plitonit B, Knauf Fliesen, Osnovit Mastplix T-12, Ceresit SM-11, Yunis 2000) is used most often and is most suitable for installing small tiles. The glue hardens in 8 hours if the room humidity is 60% and the temperature is from +20 to +25˚ C.
After mixing, the glue needs to stand for at least 5 minutes for the particles to swell. The pot life is typically 3 hours. The exact drying time of the tile adhesive, as already mentioned, depends on the working conditions and composition of the material. When purchasing, be sure to study the specifications of the specific product indicated on the packaging. Among them there will certainly be information about the estimated hardening time of the finished mixture.
Advice! Prepare the solution in small portions so that you have time to use each portion before the composition reaches its maximum tenacity. The closer to the end of the pot life of the finished solution, the lower the adhesion.
Professionals answer the question about the drying time of the glue differently. This is due to the fact that each of them has their own favorite brand of product and different conditions at the site. The best way to determine the drying time of the solution is to study the manufacturer's information on the packaging. In addition, you will need to take into account the air temperature, humidity, tile size, surface evenness and type of base in a particular room.
How long does it take to dry on the floor?
The tiles on the floor are subject to serious loads, and there is always a danger of mechanical damage, so you cannot start using them immediately after installation.
Typically, tile adhesive takes a day to a week to dry completely. When the tiles are laid on a cement-sand screed, the required strength coefficient is achieved in 2-3 days.
If the conditions are ideal (humidity - 60%, t = +20 °C), then you can carefully walk on the tiles a day after laying, but even in this case, the seams are grouted only after 48 hours. To speed up hardening, you can turn on additional heating in the room .
Walking on the floor and rubbing the seams is prohibited until it has completely hardened for the following reasons:
- when the adhesive dries out, but does not have time to gain maximum strength, the possibility of the tile shifting remains;
- The tiles may become damaged or deformed, especially in areas where little adhesive was applied.
How to determine the degree of drying
- Tapping. You will need a rubber hammer. Lightly tap the corners of the tiles. If it remains motionless under the influence of a hammer, the glue is considered dry. The degree of coupling is determined by ear. If, when you hit the tile with a hammer, you hear a muffled sound, the mixture is still damp; a loud sound means it has already frozen. The loudest sound will be produced by tiles under which air chambers have formed in the adhesive layer. Such fragments are dismantled and re-installed.
- Breakaway. This is a radical method. It is better to try it on the corners of the glued base, where it will be easier to glue the tile again if it comes off completely. The essence of the method: use the edge of a spatula to pry up the tile and tear it off. If this succeeds, the glue has not completely cured.
If a lot of time has passed, but you are not completely sure that the mortar under the tile has completely hardened, boards or plywood sheets are placed on top of it. This will help reduce the load on the tiles when walking.
Signs of hardening
The tiles are laid, I want to know how long it will take to grout and clear the seams, install the toilet, and start walking.
But first you need to make sure it grabs.
The easiest way to check this is by clearing the seams on the tiles from the edge where they were laid.
They remove the crosses and when clearing the seams, look to see if it is hard everywhere, or if there are areas that feel earthy to the touch. If the glue is dry at the edges, they move on slowly, cleaning the seams, and so on until the end.
As a rule, tile adhesive becomes lighter after hardening, and if the adhesive taken out from under the seam is dark, it means that it has not yet hardened, and you should wait another half a day. But you shouldn’t wait too long with clearing.
When the glue gains strength, it will become problematic not only to clear the seam from its beads, but also to simply remove the crosses and wash the tiles from dirt.
Dependence of layer thickness on its hardening time
Another important factor that affects the hardening period of the adhesive mixture is the layer. If the layer is uneven, then the drying process is also uneven. Where the layer is smaller, the drying rate of the mixture is rapid; where it is larger, the hardening period increases.
The layer of tile adhesive should be oriented based on the manufacturer's recommendations. They are indicated on the packaging of the material.
Foundation condition
Let's look at how long it takes to walk on tiles, taking into account the condition of the floor. After all, an ideal screed allows you to reduce the thickness of the working solution layer to a minimum. Otherwise, the hardening time may increase slightly. But the process is most influenced by water absorption of materials.
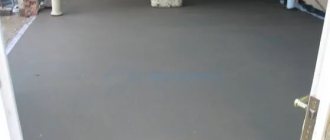
Leveling the floor with cement mortar Source cdvor.ru
Concrete screed treated with a primer practically does not absorb water at all. Therefore, the drying time is not affected. But if the surface contains a sufficient number of pores, this will speed up the hardening process, since the base will take away some of the water from the working solution.
The same applies to the tile material. Water-repellent porcelain tiles will not speed up the drying process. And ordinary clay tiles will absorb some liquid from the glue, which will speed up the hardening of the surface.
An important factor is the temperature of the base itself. Because it will always be lower than the surrounding air. Therefore, before work it is necessary to equalize the difference as much as possible. And if the latter remains significant, then this will certainly increase the hardening time.
Installation of tiled elements Source kraski-net.ru
When there is no time to wait for the solution to dry
There are mixture options that harden quickly and allow you to walk on the tiles - this is a quick-drying tile adhesive. Thanks to its unique composition, it is able to completely harden within three hours, after which grouting can begin immediately.
Fast drying adhesive tile adhesive
It is often used in combination with a branded self-leveling floor, thanks to which the fast-hardening tile adhesive IVSIL EXPRESS+ allows for complete installation, including all floor leveling work, in just one day.
Approximately these minimum deadlines must be observed. But we repeat that these are only manufacturers’ indicators, that is, the period for comfortable conditions, average temperature and humidity. Accordingly, if there is a deviation from the norm, drying may increase.
How to work with quick-hardening glue
The main principle of working with quick-setting mixtures is efficiency. The prepared composition must be applied to the surface within 30 minutes, otherwise it will harden and become unusable.
Before diluting quick-drying tile adhesive, prepare the base in advance. The wall/floor surface must be smooth, dry, free from dirt, dust, pieces of plaster and traces of cement.
Once the surface is ready, proceed to the solution. Prepare the mixture according to the instructions, strictly following the proportions and sequence of actions. Let the solution sit for 5 minutes and proceed with installation.
Apply fast-curing tile adhesive at a 60-degree angle using a spatula. Make sure that the layer is the same thickness. Saturate a section of the wall with the solution in such a way that in 20 minutes you will have time to cover it with tiles. It is better to carry out work with latex gloves. Avoid getting the mixture into your eyes. If this happens due to carelessness, rinse your eyes with water.
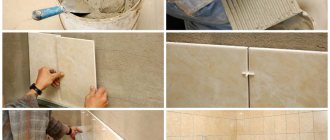
Stages of glue drying and work planning
The duration of finishing work largely depends on how long the glue takes to dry. This is relevant not only when laying tiles on the floor, but also on the wall. When you need to lay tiles over a large area and in the shortest possible time, you have to choose special types of glue. This, in turn, affects the duration of the intervals between the stages of finishing work.
You can determine the time during which tile adhesive dries by looking at its packaging. The manufacturer must indicate on it detailed instructions for using the mixture in different conditions. The drying period of the mixture most often directly depends on the temperature and humidity level in the room. But the drying speed also depends on the type of mixture and its composition.
All types of tile adhesive harden in several stages. The first stage lasts from the moment the package with the finished mixture is opened or the dry mixture is diluted. At this stage, the glue is completely usable. It is important to meet this period of time in order to carry out the entire process of laying and adjusting the position of the tiles before the glue begins to harden. While in the dilution container, the finished mixture can remain in a plastic state for quite a long time.
After applying a thin layer of the mixture to the surface, the process of moisture evaporation is activated, and the glue begins to dry. This phase can last several hours, during which the glue initially hardens. During this period of time, the laid tile will remain fixed in the appropriate position and it will no longer be possible to correct it.
What determines drying time?
In fact, the drying and hardening time of the glue depends on many conditions:
- Room temperature (at low temperatures, initial hardening may take 3-4 days),
- Air humidity,
- Layer thickness,
- Type of glue (high-strength types usually harden faster),
- Composition of the mixture and additives,
- Water absorption of the base.
Manufacturers indicate the time on the packages with a margin, and for the calculation there they take room temperature (20 degrees) and humidity 60%. In this case, cement adhesive is suitable for use at base temperatures from +5 to +30 degrees.
How to speed up the process
You should not resort to radical measures to quickly dry the tile material in order to put the plane into operation. Rapid drying will lead to peeling of the tiles and the appearance of defects.
For more gentle acceleration, install a fan near the open door of the room. The power of the wind flow should be minimal.
To speed up the hardening process of the mortar layer, the “warm floor” system is not used. It will lead to cracking of the facing plane.
The main thing is that the drying process proceeds favorably and that the ventilation system is in good working order. If it does not work or is absent, then the door to the room should always be open.
How to properly attach insulation to a wooden wall
Attaching the insulation to a wooden wall can be carried out both after the building is put into operation and at the stage of finishing the facade.
Both options are acceptable, the main thing is to choose the right material for insulation and act in accordance with the installation technology.
Mineral wool for insulating wooden walls
The simplest and most affordable option for insulating a wooden facade is the use of mineral wool and materials based on it.
The advantage of such materials is their excellent vapor and air permeability, as well as their ability to remove excess moisture from the walls.
In order to correctly attach insulation to a wooden wall, it is important to follow the recommendations of specialists, or to have some experience in carrying out such work.
To carry out installation you will need the following materials and tools:
- wooden bars for lathing;
- insulation;
- construction tape for processing joints;
- membrane film for waterproofing;
- moisture-resistant film gluing composition;
- self-tapping screws;
- facing material.
As for tools, in the process of installing insulation on a wooden base you will not be able to do without:
- hacksaws;
- hammer;
- drills;
- jigsaw;
- brushes;
- screwdriver;
- Bulgarians.
Insulation technology is not anything complicated, as you can see for yourself by studying the information below.
Scheme of fastening the material to wooden walls
At the initial stage of work, it will be necessary to install the sheathing on a wooden base made of metal profiles or well-dried wooden blocks.
They will play the role of guides and it is between them that a layer of insulation will need to be placed.
The pitch of the sheathing must correspond to the dimensions of the insulation boards.
Due to the high elasticity of mineral wool, the installation of layers can be carried out “expanded” in such a way that they are supported by each other. This type of installation eliminates the formation of “cold bridges”.
For reliability, you can additionally secure the insulation around the perimeter with adhesive tape.
We have described the simplest technology for installing mineral wool on wooden walls.
In fact, in certain areas of the country with a particularly harsh climate, slabs with a thickness of up to 100 mm are used, they are mounted in several layers, preparing a separate sheathing for each.
Naturally, not only mineral wool-based materials can be used to insulate wooden houses. That is why below are the main general recommendations for attaching insulation, regardless of its type.
Rules for preparing material and facade for installation
Regardless of how the material was chosen for insulating the wooden walls of the facade, it is important to unpack it a day before the work so that it takes its original shape.
It is better to install thermal insulation in the warm season on a day without precipitation.
Before you begin installing insulation, it is important to inspect the structure of the house for any defects that require removal.
If the old finish does not meet the requirements for strength, then the right solution would be to remove it and then treat the walls of the façade of the house with compounds that protect them from fungi, bacteria and mold.
Considering that most of the insulation for wooden houses is based on cotton wool, it is important to take care of protecting the material from exposure to atmospheric moisture.
As an option, you can sheathe the eaves of the building with roofing iron, using sealant to coat the joints. It is better to fasten the sheets to the base with self-tapping screws.
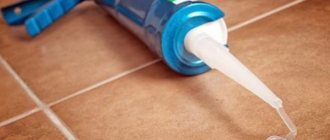
How long does it take for tile grout to dry?
If you use a standard grout mixture, it will set within an hour after finishing work. Then you need to let the grout finally set; this will take another 3-4 hours; with the floor, things are more serious.
More time is needed here, because it is the floor tiles that will bear the main pressure . Much depends on the humidity in the room. During repairs it increases, keep this in mind.
River sand is rightfully the most popular building material due to its qualities and cost. It’s all about the different densities of river sand.
Recently, aerated concrete has become quite often used in house construction when constructing walls. Here we talk about the technology of applying plaster to aerated concrete.
Wall decoration is considered the main component for a truly cozy and beautiful interior of your room. By clicking on the link, you will learn how to decorate a room with stone using wall panels.
The mixture will finally harden after 10-15 days, but these periods specified by the manufacturer may vary depending on the room temperature and humidity level. If the grout contains epoxy resins, it will take longer to dry completely, up to 20 days.
Comparative table of adhesive compositions from different companies - which are the best
There are a lot of different adhesive compositions available on the market. Which tile adhesive is better? Here are the most popular tile adhesives with their characteristics.
Ceresite cm 11 and how long it will take to dry completely
This brand has a number of tile adhesive mixtures of different composition and properties. For example, Ceresite cm 11. It can be kept dissolved for up to 2 hours; after application to the wall, it retains its properties for 15-20 minutes. How long does it take for Ceresit cm 11 tile adhesive to dry after final installation?
Grouting work can be carried out after a day. At low humidity in a warm room, the glue will completely dry in a week.
This is the most common type of adhesive used by most builders and is attractively priced.
For more information about Ceresit cm 11 tile adhesive, watch the video:
Eunice plus
This composition is also of good quality.
To fully use the diluted composition, 3 hours are given, the time for applying the tiles is 20 minutes, adjustments can be made within 10 minutes, and grouting work can be carried out after a day.
How long does it take for Eunice Plus tile adhesive to dry? Since its composition is slightly different due to additives, the hardening time increases to 8-10 days, depending on the properties of the room.
Ceresit cm 9
Ceresit cm 9 is considered the slowest drying tile adhesive . But the price is quite affordable. If you are not in a hurry with renovation work, then this is a great option.
How long does it take for Ceresit tile adhesive to dry on the floor? Most problems arise from the floor placement of tiles. Especially if the deadlines allotted for repairs are tight.
Ideally, floor glue sets well after three or four days, after which you can carefully place furniture on it.
But it is better to postpone such bulky things, like a washing machine or a bathtub, until a later date, after 7-8 days. Unless, of course, a quick-drying glue composition was used.
You should definitely pay attention to the temperature factor and humidity level in a particular case. Otherwise, you may damage or move the tiles.
Before you begin arranging heavy objects, check the strength of the floor.
Drying time on walls
As with the floor, the time for complete polymerization of the adhesive on the walls depends on the composition of the mixture, the type of tile and base, the size of the tile, as well as the conditions under which the material is applied and dried. Priming the walls accelerates polymerization. The minimum time for the glue to harden on the walls is two days.
An important factor is the evenness or curvature of the walls. If there are strong differences, the glue will harden unevenly. It is especially bad if this happens within the same tile: as a result, the fragment may crack. To avoid such problems, you should first level the walls and only then proceed with the installation of tiles.
Advice! As a means of leveling the surface of the wall, you can use plaster or the same mixture that will subsequently be used for laying tiles.
Why wait until the glue is completely dry?
You can often hear advice that you can grout the seams of floor tiles without waiting for them to dry completely. Professional builders do not recommend doing this, since there is a high probability that the adhesive mixture has not completely set in some areas and stepping on the tiles can move the row. This can only be corrected by dismantling the entire section.
The thickness of the mortar layer under the tile is uneven, and if there is a load on the place of insufficient application, there is a high risk of damage or breakage of the facing material.
How long does it take for tile adhesive to dry: when can you grout?
I want to complete the renovation as quickly as possible. But not all stages of work depend on the person. This is especially true for drying the adhesive solution on which the tiles are mounted. How long can tile adhesive dry? Several factors can influence this process.
What affects the drying speed of glue
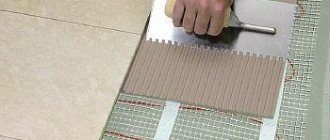
- The thickness of the adhesive mixture applied. The thickness of the layer can be reduced or increased using the selected spatula. The larger the teeth, the thicker the adhesive mixture will be. Also, the screed must be perfectly level. Then the glue will be distributed in a thin layer.
- In the room, the air temperature should be kept stably at 24 degrees . The slightest fluctuations will prolong time of the glue. At sub-zero temperatures, you cannot install tiles with glue . The adhesive mixture will simply freeze, and in the spring the entire tile will fall off the base.
- Air humidity should not exceed 40%. The higher the humidity in the room, the longer it takes for the glue to dry.
- Screed temperature. In summer, the floor can also be cold, despite the fact that the air temperature is high. Therefore, it is necessary to take into account not only the air temperature, but also the degree of heating of the floor. The warmer the floor covering, the faster the tiles can be used.
- Floor moisture. If the screed was made several days ago, this is a clear contraindication for laying tiles. Before covering the floor with the adhesive mixture, you need to wait until the screed has dried thoroughly. This may take up to 2 weeks. The floor heating cannot be turned on. The tiles must dry gradually, otherwise the glue will crack and deteriorate. The service life of such coating will be significantly reduced.
- The size of the tile also has a significant impact on the drying time of the adhesive. When laying large tiles, there will be fewer seams in the room, which means that moisture from the adhesive will evaporate more slowly. Drying times will be maximum. A floor with small tiles will have more joints, so it will dry faster.
- The density of the floor covering has a direct impact on the drying time of the adhesive mixture. Tiles made from clay materials will dry faster than porcelain tiles. Clay has a lower density than tiles and is made from rocks .
- What the screed is made of has a significant impact on the drying time of the glue. A screed made of cement and sand absorbs moisture better, so the tiles will dry faster, and the adhesive base on a concrete screed will take longer to dry.
To make the tiles dry faster, the room can be heated. This will shorten the drying time. The floor heating cannot be turned on; the adhesive mixture will dry too quickly.
If you can create ideal conditions for laying tiles, then the finished floor can be used within a day . But achieving ideal conditions in real life is almost impossible.
How long will it take for floor tiles to dry after being laid with adhesive in non-ideal conditions?
This process can take from several days to a week. It is important to remember that you should not . If the adhesive mixture does not dry completely, walking on the tiles can damage or disrupt the installation itself.
Therefore, it is important to know how to check the readiness of the tiles for use.
Verification methods
- You can tap the corners of the tiles rubber hammer. This manipulation must be done as carefully as possible, otherwise the tile may burst or the adhesive layer may be damaged. If the tiles do not vibrate, it means that the glue has dried and the floor is ready for use.
Only a rubber hammer will do
- Grab the corners of the tile with both hands and try to lift it. If a corner of a tile comes off, it can easily be glued back on. To do this, be sure to choose tiles in the corner of the room, and not in the middle. There will be less noticeable deformation.
You need to use both checking methods to be sure that the tiles are well fixed. Qualified craftsmen must use these methods to ensure that the customer is satisfied with the work. And after time, there was no need to re-lay the tiles. To be sure that the glue has completely dried, it is better to start grouting the joints after laying the tiles no earlier than 5 days later.
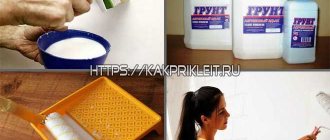
If the glue dries too quickly, craftsmen do not advise you to be very happy. This is due to the rapid absorption of moisture from the adhesive mixture. To avoid this situation, experts recommend carefully priming the surface of the screed, especially if it has a porous structure.
When laying tiles, different types of adhesives are used. This fact is also of great importance when taking into account drying times. The characteristics of the types of adhesive mixture in each specific case will help answer the question of how long it takes for tile adhesive to dry. There is a wide variety of adhesives on the market for laying floor tiles. It is very difficult for a non-specialist to navigate the large assortment. Alternatively, you can hire a qualified technician. But, if this is not possible, then you need to read the characteristics.
Types of adhesive for laying tiles on the floor
- Universal. This adhesive mixture is used for installing lightweight tiles. The minimum drying time is about 8 hours, and the maximum is a little more than a day. is not suitable for laying porcelain tiles .
- Special mixture for heavy tiles. The drying time will vary from a day, in ideal conditions, to several, especially in high humidity.
- Frost-resistant mixture. If styling is required urgently, and it’s frosty outside. In this case, frost-resistant glue is used. It dries in at least three days, but this process can last up to 1 week.
- Moisture resistant glue. When laying tiles indoors with high humidity or outdoors, experts give preference to a moisture-resistant mixture. The hardening time ranges from a day to several days.
- Adhesive for glass tiles. It is not very common, but it is still used. Drying time - from a day to several days.
There are situations when there is no time to wait for the adhesive mixture to completely harden. Then use a quick-drying mixture.
How long will it take for tile adhesive to dry on the floor?
This adhesive mixture will dry in three hours under literally any conditions. It is often used with a mixture of the same composition for the poured floor. In tandem they will dry as quickly as possible.
Stages of glue drying.
- The first stage is to apply the mixture to the floor and lay the tiles themselves. Some types of glue can allow you to do these manipulations within an hour, and for some the period of non-hardening lasts up to several hours.
- Initial hardening stage. It is characterized by the fact that the tiles no longer move; you can carefully begin grouting the joints, but loading them for several days is contraindicated. Furniture can be placed after 4 days .
- Complete stage . This period begins 7 days after the tiles are laid. The floor can be used: walking, arranging furniture, carrying strollers.
Many people are interested in: how long does it take for glue to dry on the floor? Everyone is in a hurry to put the flooring into operation. You need to remember the main rule of good installation of floor tiles. High-quality drying of the adhesive element is the key to long service life of the coating.
If circumstances arise that you have to walk on a half-dry floor, then you need to put wooden boards or a sheet of plywood on the floor. This method will help reduce the load on the floor covering and prevent damage or displacement of the tiles.
Precautions when walking on dry tiles.
- Shoes should be soft, with smooth soles.
- There should be no heels on the soles.
- Nothing should fall on the tile.
- Do not place heavy or sharp objects.
It has already become clear how long it takes for the glue to dry. It's time to move on to dismantling the plastic crosses from the seams.
Removing plastic crosses from seams
to pull them out . If they are installed to a depth of more than 2 mm, then they do not need . At this depth they will not interfere with grouting. It is recommended to remove the crosses when the glue dries well. The tile should not move when the clamp is pulled out. The next day, grouting can be done.
How long does it take for tile adhesive to dry? This is the most frequently asked question for everyone who is faced with laying tiles. Even professionals will not be able to give an accurate answer. The only correct solution is to read the manufacturer's instructions. But you need to remember that the average drying times under almost ideal conditions are indicated there. In reality, you need to add several days to the specified time frame. Then the experience of installing floor tiles will be positive.
Factors affecting the rate of hardening
Hardening of any adhesive mixture occurs in several stages. At the first stage, it retains its adhesive properties and optimal ductility for adjustments. Primary hardening occurs when the tile is already laid on the surface, but in the first minutes it is still possible to adjust the position of the tile.
During final hardening, the final polymerization of the composition occurs and maximum strength is achieved.
The duration of all these stages can vary depending on five basic factors:
- environmental humidity;
- ambient temperature;
- working layer thickness;
- surface type;
- brand of glue.
How long does it take for tile adhesive to dry in high humidity?
Hardening of floor tiles, or rather their adhesive composition, in conditions of high humidity will be long and problematic. And it’s difficult to say how long this will take.
If the humidity in the room is high, the glue will take an indefinite amount of time to dry.
If a situation arises where the ceramic coating is flooded with water, regardless of its amount, the tile must be dismantled. Because moisture absorbed into the adhesive composition will cause the material to swell, and the tile will swell.
Important! It is necessary to install ceramics on the floor surface only after it has completely dried. Otherwise, all efforts will be in vain. To dry the floor, you can use heat dryers or wait for it to dry naturally.
Substrate quality
The increase in mobility time of the adhesive solution is influenced by the quality of the screed surface primer. In this case, it is necessary to take into account that the process of preparing the coating due to mixing of cement will lead to an increase in the optimal period to 5 days.
Tile screed - main manufacturing stages
Material size
The smaller the tile, the sooner you can step on it. This is due to the likelihood of voids forming and an increase in the load on the adhesive composition when laying larger elements.
Common sizes of floor tiles
All these nuances must be taken into account at the stage of determining the optimal time interval for drying the glue. But it is worth remembering that it cannot be less than that recommended by the manufacturer of the composition.
Primer screed
In most cases, you can step on the tiles within a day. In this case, you should adhere to the following recommendations:
- Wear slippers with soft soles.
- Do not wear high heels.
- Do not allow heavy objects to fall.
- Do not install heavy equipment or furniture.
conclusions
To summarize, it is worth paying attention to many factors that affect the drying time of the glue. Therefore, carefully study the composition of the glue and the hardening time indicated by the manufacturer. If you decide to use quick-drying adhesives, then pay attention to the short period of use after dilution.
Which adhesive to choose largely depends on the room where the renovation will take place, the surface of the floors and walls. If you do not have experience in laying tiles, then you should turn to professionals to avoid wasting time and money.
Even experts cannot accurately determine the time required for the final drying of tile adhesive. So the timing will be determined depending on the specific case.
Preparatory work
When using adhesive for floor tiles, you need to know how to work with it. Thanks to skillful work, gluing PVC tiles to the floor will not create difficulties.
To begin work, you need to prepare the base, dilute the glue with water, determine the location of the starting point of work:
Preparing the subfloor involves correcting it if there are any unevenness and clearing it of debris or dust. Concrete floors can be easily corrected for unevenness using plaster or concrete mortar. A wooden floor will have to be welded together or a base made of plywood or plasterboard should be laid. The final stage of floor preparation is to use a vacuum cleaner. It is necessary to clean the surface from dirt and dust. After completing this work, you need to prime the base, preferably 2 times. The primer dries quickly and after the second layer has dried, you can begin laying the material. For greater adhesion, the surface can be sanded a little. Dry glue, before laying the tiles, must be diluted with water in the proportions indicated on the package with the mixture. Most often, water is required from 200 to 250 mm
The water should be cold and clean.
The liquid composition does not require preparation. Determining where to start work is very important, since appearance is an important indicator. The tiles are laid out in such a way that the floor pattern is not disturbed.
They begin to lay out plain material so that the supposed scraps go to the opposite wall of the entrance.
The optimal time after which you can walk on tiles
First you need to determine the drying time of the glue under optimal conditions. Room conditions are considered the norm
To do this, you need to pay attention to the microclimate of the room.
Optimal room indicators:
- Temperature – from 22 to 26 degrees;
- Humidity – 60%;
- No drafts;
- Lack of temperature indicators;
- The tiles should not be exposed to direct sunlight.
However, the indicators may differ. The main thing is that they are within the numbers specified in the instructions for the adhesive composition. A completely normal temperature is considered to be from 5 to 30 degrees and humidity within 50-70%. If you follow all the rules, you can walk on the tiles after a day.
The exact time it takes for the tile to dry is determined by the glue manufacturer. Therefore, these figures may vary from manufacturer to manufacturer. This is determined by different composition and manufacturing technology.
You must always follow the instructions exactly. Do not exceed the prescribed drying time. For insurance, you can begin further work by slightly increasing the specified period.
The most popular types of mixtures for tiled repairs
How long does acrylic paint dry?
They can be divided into three groups:
- Standard.
- Reinforced.
- Super.
Tile adhesive Ceresit-11 and Unis-20
- Typically, when renovating apartments, mixtures of Ceresit-11 and Unis-20 are used. For such compositions, the hardening time is about a day, and how long the tile adhesive dries on the floor depends on the temperature of the same floor. If it is low and within 5–7 °C, then it is better to let the solution dry for at least three days.
- There are enhanced tile adhesive formulations. For example, Ceresit-18 or Unis+. Such solutions set within twelve or fourteen hours. This saves a lot of time.
- The most versatile and modern compositions are superglues for finishing work. One of these mixtures is Plitonit V glue. It can be applied to any walls and floors, and can also be used for lining swimming pools and heated floors. At the same time, Plitonit is suitable for working with any type of facing materials, including porcelain stoneware and tiles made of artificial and natural stone. They can even plaster small potholes and uneven surfaces.
The advantage of this supermix is its drying speed. In the average climate zone, facing work can be completed in a day if you use Plitonit solution. Within four hours after laying the tile covering on the floor, you can carefully walk on it and grout the seams.
Tile adhesive Ceresit-18 and Unis+
The disadvantages of this mixture include its rather high price and the fact that there is little time left for adjustments. The undeniable advantages of glue include its versatility. The fact that Plitonite dries quickly allows for high-quality and efficient repairs and construction work.
During tiling work, it is also important to take into account the drying time of the grout. On average, it hardens in an hour, and after three hours it acquires full strength.
At the final stage, the tile covering is cleaned.
Crystallization of the diluted working mixture occurs quite quickly, so gluing the tiles requires some skill
When working with tiles, the master’s attention should be focused on various factors and nuances
- For example, large and heavy tiles laid on a horizontal surface can be walked on carefully if they are separated by crosses. The main thing is not to move them.
- Clay floor tiles dry faster than porcelain tiles.
Experienced tilers know that each stage of the technological process of tiling work must be completed on time. Each package of tile adhesive contains information about how long it should take to dry. Most experts, however, recommend not to rush, but to play it safe and wait longer than the manufacturer recommends. This is completely justified, since the mixture acquires maximum strength only after a week, thus you can walk on it as much as you like.
How to check if tiles are dry
It is impossible to determine one hundred percent whether the tile is stuck or not. Some try to disconnect one part of it, but it is better not to do this. You can also knock on the tiles - a duller sound indicates that there are voids.
If you notice that any part is coming off, you should disconnect it, remove the glue and glue it on again. Try to wait longer than what is written on the package. This way you can be sure that the coating is stuck and you can walk on it.