Today it is difficult to imagine finishing work without the use of modern building materials and means. After all, they allow specialists to implement higher-quality, durable and long-lasting coatings. Such important means include primer. It increases adhesion (adhesion, adhesion) of materials and smoothes out surface roughness.
Many people consider using such a solution before painting or wallpapering walls useless. Basically, this opinion arises among novice craftsmen or people eager to decorate their home with their own hands. Accordingly, after a while they begin to realize how seriously they were mistaken. Since pre-treatment of walls with primer solutions helps to significantly save time and money, reducing the consumption of finishing materials.
Any specialist will confirm to you that all walls in a residential area must be coated with a special primer, regardless of what repair procedures will be carried out in the future: putty, plaster, coating the walls with special paint, and also before wallpapering, etc. .d.
What is a primer used for?
The presence of another layer between the decorative finish and the wall itself is necessary to ensure that the aesthetic appearance of your room remains at the proper level for a long time.
The main purpose of the product is to create good adhesion between the wall and the finishing layer. It is thanks to the primer coating that wallpaper or paint will last a significant period of time. It gets into even the smallest cracks, closing them completely, which makes the wall of the living space more even, and this is very important when carrying out repair work.
The main advantages of the primer coating:
- creating a solid foundation before carrying out repair work;
- providing better adhesion for slippery-smooth substrates;
- eliminating stains and other contaminants from the walls of the room;
- the product is endowed with excellent antibacterial and antifungal properties;
- protection of metal from rust;
- decorated coverings look brighter and more beautiful on the walls;
- after applying the solution, the base can be painted even in light shades of paint, despite the fact that it was previously a dark shade;
- the paint applied to the treated surface has a less pronounced odor. And this is a very important point when carrying out renovations in a residential area. We also recommend that you read the article - how to remove paint from clothes;
- manifestation of texture on wooden bases.
Of course, it is impossible to list all the capabilities of this product; there are many more of them, but the list described above may well impress with the scope of the capabilities of this emulsion.
In order for the repair to be at the proper level, it is advisable to purchase a primer separately for each material from which the surface is made. This will provide additional protection from the environment, insects in the case of a wooden base, as well as from corrosion or mold.
Despite the fact that traces of processing are practically invisible on the walls, there are still significant benefits from this procedure: the adhesion to the wall is better, consumables will be wasted in smaller quantities. It will also reduce the required amount of glue when it comes to wallpaper.
When should you prime?
The primer mixture can rightfully be called the most universal remedy for repairs. It helps to more firmly connect building materials together and prevents the formation of corrosion.
If the walls were plastered during the work, then they can be primed only after a month . Before painting the walls, you need to stir the mixture thoroughly. Usually it is applied in one layer, but in some cases it is necessary to apply several. The second layer is applied after the first has completely dried.
Primers are applied to plaster or paint. In such a situation, the primer acts as a link between particles of paint or plaster, this helps make the wall or ceiling smoother and allows you to save paint or glue by reducing the absorbent properties of the surface.
When working with putty, it is also necessary to prime the walls. If it is applied in several layers, then before each new layer it is necessary to cover the surface with a primer mixture.
Regardless of what the wall is made of, there will be cracks and various irregularities in it. The primer mixture helps smooth this out. Due to this, the next layer of finishing material lies more evenly.
We recommend: Various types of floor primers
The primer improves the adhesion of paint to any surface . This protects the paint from cracking. The primer mixture helps save putty. When it dries, it forms a special film that prevents stains and fungus from appearing.
It is much easier and more even to apply a layer of putty onto the primer . The mixture contains various elements that prevent the formation of fungus and mold.
The primer is applied to dry surfaces, previously well degreased . If you do not follow these rules, you may end up with unevenly applied paint, cracks, or peeling of putty and wallpaper.
Before you start wallpapering, the walls need to be well prepared.
The primer mixture is diluted in a large container according to the attached instructions. If lumps appear, they need to be mixed thoroughly . A drill with a special attachment will help with this.
Then the resulting solution must be applied to the wall. Experienced craftsmen use a roller . This helps to minimize your time costs.
After the first layer is applied, you need to wait a certain time. The amount will depend on the type of primer. Then the second layer is applied, and after it has completely dried, you can begin finishing work. This will help reduce the amount of material absorbed into the drywall.
&feature
Types of primer and its properties
Today there are different types of emulsions on sale, each of which is produced to perform specific tasks. They all differ in properties and included components, which determine how long the primer takes to dry on walls and other substrates.
Drying oil or alcohol mixture
Designed for work on wooden surfaces. To make it dry faster, you need to preheat the base that will be processed.
As you know, all trees secrete resin, especially when it comes to conifers. That is why the wood needs to be carefully processed; coating with this product is also simply necessary so that the paint or wallpaper adheres well to the base of the walls. There are types of mixtures on the market that will protect wood surfaces from rot and insect damage.
Acrylic primer
This tool is universal. It can be used on any type of surface: wood, metal, or concrete. This type of solution will fulfill the hopes placed on it well. Accordingly, this particular product is most often purchased by specialists and ordinary residents.
Do not forget that even if non-woven wallpaper is glued or painted, the base must be coated with such a composition. You can perform this procedure either independently or with the help of specialists. If you decide to carry out repairs yourself, you should carefully study the procedure for priming surfaces in order to avoid negative consequences.
Oil or alkyd
Used when working with metal surfaces. Can be used over corrosion, as this type has an anti-corrosion effect. But also suitable for wood.
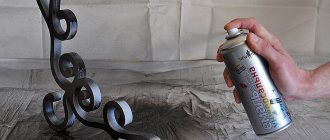
Metal also needs a primer coat. This will ensure minimal impact of the corrosion process on the coating. But it is still impossible to completely avoid corrosion due to the nature of this process. Non-ferrous metals also need to be worked on so that the decorative coating adheres well to the surface.
In modern construction stores you can purchase various types of emulsions that have the property of converting rust. So the composition is applied directly to the place where corrosion appears, then the top is covered with paint.
Contact mixture
Used to increase adhesion. It contains quartz sand. This type perfectly fills even the smallest cracks, which makes the base perfectly smooth. Prepares the coating for tiling.
How to prepare walls for wallpapering
When you decide to replace old wallpaper with new ones, you should not ignore the correct technology for this process. Even if the walls were perfectly prepared during the previous renovation, during operation and when removing the old coating they could lose some of their properties.
The primer is also included in this process, and it is applied twice. Let's describe it in detail.
Step 1.
Removing old wallpaper. To make it easier to remove them from the walls, you need to use special solutions. They evenly moisten the surface, allow the wallpaper to soak, and peel the whole canvases off the walls, preserving the integrity of the finish as much as possible.
Removing old wallpaper
Step 2.
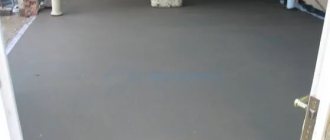
Primer. The product is poured into a special container, a roller is moistened in it and rolled over the walls, leaving no gaps.
How to dilute primer for walls?
Primer in a tray
Applying primer to the wall
Step 3.
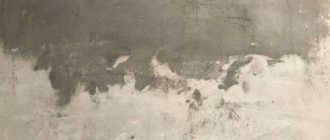
Plaster defects. After the primer has dried, all potholes, cracks and uneven walls are filled with plaster or starting putty solution. He is also allowed to dry.
Plaster defects
Step 4.
Continuous alignment. It is applied in a thin layer over the entire surface using finishing putty.
Methods for applying finishing putty
Prices for popular types of putty
Putties
Step 5.
Primer for wallpaper. The putty surface does not have sufficient strength - this can be confirmed by running your hand over the dry wall. You can strengthen it with wallpaper glue diluted with water. But not in the concentration required for wallpapering, but much thinner.
Primer for wallpaper
Step 6.
Drying. Before starting the final finishing, you need to wait 3-4 hours.
What affects drying time?
The time it takes for the primer to dry completely varies and depends on certain conditions.
The main factors that influence the drying process:
- Moisture and temperature levels. Usually the product dries in 4 hours if the humidity is at 65% and the room temperature is more than 25 degrees. If the weather outside is good without precipitation, then in order for the composition to dry faster, you can open the doors and windows. The main thing to remember is that the solution should dry naturally.
- Thickness of the applied layer. The solution must be applied in a very thin layer. If the surface is very uneven, then it is permissible to use several layers. But, naturally, the composition will take much longer to dry.
- Type of mixture. So, acrylic dries within 4 hours, and contact dries in almost a day. There are also water-based formulations that dry in only about two hours. Oil-based ones take more than 24 hours to dry.
- The type of surface on which the mixture is applied.
- Porosity of the processed material.
- Alkyd polymer is used to fill small cracks. This primer forms a semi-matte film, on top of which paint is applied. It is used for wooden and metal surfaces. The disadvantage of this coating is poor absorption. This composition dries in about a day.
The drying temperature should be natural. Artificial drying can lead to undesirable consequences.
Drying time for primer mixtures of different compositions
- The most common and universal is considered to be an acrylic-based composition. At optimal temperature conditions, such a primer can dry in four to eight hours, after which other types of materials can be immediately applied to it.
- Primers with oil bases or mixtures with the addition of quartz dust will take much longer to dry and can only be worked with after 24 hours.
- The “quick-drying” mark on the packaging indicates the possibility of further surface treatment six hours after application.
- For primers with alkyd resins in the base, a maximum drying period of ten to twelve hours is provided.
- If you do not take into account the quality of the mixture, then they can be divided into those that dry normally and those that require a long period. When using the first group, you can start gluing after four to six hours. The second group will require much more time and will only begin twelve hours after application.
- Work with primed plaster can be done after two to three hours, and wallpaper can be applied to primed surfaces with a putty layer after six to twelve.
Experts still advise not to limit yourself to applying one layer, but to do several. In this case, each layer must be allowed to dry for the prescribed period and a break in work must be taken during this time.
By following the instructions and knowing the characteristics of primers, you can correctly plan your time for repairs.
How long does it take for primer to dry?
In order for the repair to be carried out competently and efficiently, you need to choose the right product. It must be taken into account that not all soil solutions can be used for interior decoration.
Each type of solution is endowed with certain properties, on which the drying speed of the composition depends:
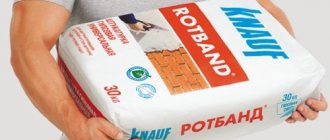
- The composition of the acrylic mixture is very wide: it includes dyes, resins, and antiseptics. The quantity of each element may vary. This leads to different densities of the solution. Acrylic impregnates well and penetrates even the smallest crevices, providing excellent adhesion for bases made of concrete, wood, brick, and plywood. Most often, such products are used in bath and kitchen renovations. The mixtures do not emit a strong odor and dry quickly - up to 4 hours. Knauf and Ceresit are the main manufacturing companies.
- The perforated composition is used only for external work, since the substances included in it are toxic. This type of mixture can be used on any type of surface. Good at preventing rust. Special additives protect against corrosion and protect the base from destruction. Among the additives of this type of emulsion there are a considerable number of additives that help speed up drying. The drying process at a temperature of 20 degrees is very fast - about 1 hour. Popular manufacturers are APP and Artelit.
- Phenolic solution is most often used on loggias, balconies and verandas, that is, in places that are located in the open air. It forms a thin film and is not susceptible to temperature changes and dampness. Drying times depend on the amount of special additives. If you work with it in the warm season, the drying process lasts approximately 8 hours. Recommended, "Pufas", "Ruslux" and "GLIMS®Prime"
- If you need to make the paint color brighter, then you need to purchase a polyvinyl acetate primer, which is based on a synthetic element. This solution is effective during repair work on drywall, as the product removes lint.
Why apply primer to walls?
Experts consider the impregnation process mandatory for the following reasons:
- The process enhances the strong adhesion of paint, wallpaper or other covering material to the base due to the penetration of the impregnating composition into the pores of the material and gluing the particles.
- Applying primer evens out unevenness and roughness.
- The finishing material adheres better to a flat surface, the period between repairs lasts longer, which will reduce costs.
- Modern soils prevent the development of fungal formations.
Useful tips
Recommendations from experienced specialists who will ensure work at the proper level:
- Outdoors, as well as in rooms with high humidity levels, it is necessary to use certain types of primer. Surfaces that have been treated will not reduce vapor permeability.
- To ensure better adhesion between the base and the decorative layer, you need to rid the walls of stains and other contaminants. Recommended reading: How to remove primer from glass.
- To understand whether the surface is ready for work, you need to attach polyethylene with tape. If no condensation is detected on the film, then repair work can begin. Otherwise, you need to pause for 24 hours. And some types can be absorbed for 10-15 days.
- The manufacturer always indicates the drying speed on the container label. But this value is only approximate, so it is worth adding at least another hour to the specified time. If the surface is treated a second time and subsequent times, the drying speed will be even slower. Also, drying depends on the temperature in the room; if it is very warm, then the composition will dry in the shortest possible time.
Summarize
These products are used as auxiliary materials during construction and finishing. The quality and durability of the repairs performed and the duration of the repair interval depend on the implementation of all the rules and adherence to the technology for treating the base.
Since repairs require a relatively small amount of product, professionals strongly recommend applying the mixture to the base according to the technology, at least 2 layers.
Thus, the drying time of the primer depends on various parameters - humidity and temperature in the room, the nature of the base and other factors, but the main thing that you should definitely pay attention to is the composition of the product. Concrete contact does not dry for long - about 2-3 hours, contact emulsions dry the slowest - up to 24 hours. For proper drying, any temperature changes, drafts/open windows and excessive heating are not allowed.
How long does it take for the primer to dry before painting, wallpapering, or puttying?
Primer coating is a mandatory stage of repair work that should not be skipped. Even smooth surfaces are primed to improve adhesion to finishing materials. Priming the treated base:
- It will hide imperfections, stains, stains that can show through paint or wallpaper.
- Will not allow fungal mold to spread.
- Reduces the smell of varnishes and paints.
These are the general properties of soil mixtures of any kind. But you need to choose depending on the surface structure and finishing materials.
Before painting
Before covering with new paint, inspect the old layer. The coloring pigment used is the type that is already present on the surface. Acrylic or acetone coatings should not be used on walls painted with water-based or oil-based paint.
Before starting work, the old layer is sanded to give it roughness. This will provide a bonding effect to the new finish. It is good to use concrete contact primer before painting.
If difficulties arise in removing old paint, apply a primer over it. For such cases, there are special formulations.
Total drying time is 4-7 hours. Emulsion primer is quickly absorbed and dries in 6-7 hours, acrylic – 5-6, enamel – 2-4 hours. How long it takes for deep penetration primers to dry on a wall depends on the base. If you cover it with this composition, you will have to wait a day. Do not paint over wet primer.
Under the wallpaper
Before pasting, the wall, regardless of the surface, is primed. This will strengthen the working base, protect it from crumbling, and bind dust. Pasted wallpaper of any type will hold tightly for several years, without being exposed to moisture and mold.
In rooms with high humidity, use a product with antiseptic qualities. Drying time for acrylic primer is 6-7 hours at room temperature.
The alkyd mixture will be ready in 12-14 hours, if the temperature is +24-25˚C, the glyphthalic solution takes a long time to dry. You will have to wait a day before pasting. Before wallpapering the walls, you should not let the surface dry too much, otherwise the glue consumption will increase.
If glue is used under the wallpaper instead of primer, you can continue working without waiting for it to dry. The time is reduced to 10-15 minutes.
Alkyd polymer compositions cannot be used under gypsum or plastered surfaces.
Before puttying
Preparing walls for putty begins with plastering. Level, fill the holes with plaster, then apply primer. The drying time of the primer depends on several reasons.
The plaster absorbs the product. If the temperature is maintained at + 20˚C, it will dry in 2-3.5 hours. It all depends on the surface being treated. You can check the readiness with your hand. If there are no marks left on it, then the surface is ready for use. To be completely sure, you can increase the waiting time by 2-3 hours.
Methods for accelerating primer drying
There are times when you need to shorten the drying time of the primer. You can resort to some tricks:
- When choosing soil, choose a quick-drying type of composition. It contains special components that speed up drying by up to 1 hour.
- Using a heat gun.
Each method has positive and negative sides.
Acceleration Supplements
The advantages of accelerated drying primers include the following qualities: the surface is ready for work in a short time, quick-drying mixtures can be used at different temperatures.
Most of them are used for outdoor work. Accelerating the process helps reduce adhesion to finishing materials. There are separate additives that can be added to the soil to speed up soil drying.
Additives for accelerated drying are toxic in composition. Safety rules should be followed: wear gloves and a respirator when working.
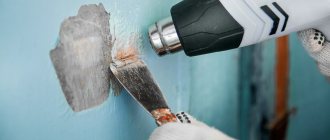
Heat gun
At low indoor temperatures, soil layers take a long time to dry. To speed up the process, use a portable heat gun. Convenience is explained by its mobility; if work is carried out in several rooms, it can be easily moved with the help of a handle.
To dry the ground coating, units with a power of 2 kW or more are used. When working with a heat gun, follow the rules:
- It is forbidden to dry certain areas with hot air.
- Do not turn on the device at maximum power.
- The heat gun must be installed at a distance from the object.
- Heating is not higher than +30˚С.
- The room is periodically ventilated.
Before using the equipment, carefully study the instructions. It indicates whether accelerated drying can be used, what method, and how many layers to apply. Violation of the rules will result in poor quality of repair work.