Plasterboard is used to line the walls and ceilings. Furniture and decorative elements are made from this building material. After leveling, the finishing process begins. In addition to wallpapering and laying tiles, decorative plaster is used on drywall.
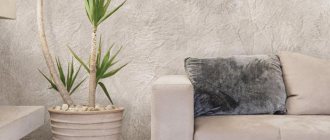
The question arises: is it possible to apply decorative plaster to drywall? Yes, this building material fits perfectly on a flat, prepared surface. It is used to finish plasterboard walls and ceilings. In this case, no wallpaper is needed. The plaster looks fashionable and solid. The room takes on a modern look, while at the same time creating coziness and comfort.
The construction market offers a wide selection of decorative mixtures. You just need to choose what kind of plaster is needed for the room.
Why is drywall plastered?
When performing repair work with your own hands, the question arises whether it is necessary to plaster the drywall. The opinions of experts sometimes differ, since the additional layer creates a load on the material, which does not have sufficient strength.
It is necessary to putty and plaster plasterboard walls for the following reasons:
- The surface of plasterboard sheets mounted on the wall will have slight differences at the fastening points and at the joints. If the surface is not puttied, this difference will be noticeable after finishing.
- Seams smoothed with putty will be noticeable under light-colored wallpaper, so the entire surface needs to be plastered.
- During subsequent repairs, wallpaper glued directly to a sheet of drywall will be removed along with this cardboard. If the surface is puttied, the wallpaper will be removed along with the putty, but the drywall will remain intact.
From this we can conclude that the entire surface of the walls at least needs to be covered with a layer of putty.
Is it necessary to plaster?
Some take the position that plastering drywall is futile and wrong. The latter claim that this process is sometimes necessary, for example, when a plasterboard wall was subjected to some kind of load, as a result of which it lost its original appearance both in terms of aesthetics and technically.
The only thing that proponents of plastering plasterboard walls say is that three important conditions must be met.
We will not go deep into the dispute between professionals. This is a thankless task. The only thing we note is that if a plasterboard wall has received significant flaws during operation, then it is best to dismantle such a wall and raise a new one in its place. And this will solve the problem.
A separate important question is whether it is necessary to plaster drywall under wallpaper? There is no need for this. If the material does not have large defects, then a not very thick layer of putty solution will be sufficient. Therefore, this topic can be closed immediately.
What to consider when choosing a plaster mixture
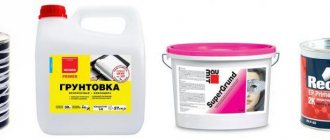
Plaster on drywall should have high elasticity and strength. Gypsum-based compositions and polymer solutions meet these requirements. They are sold in finished and powdered form.
Once the container is opened, ready-made mixtures dry out quickly and become unsuitable for use. Dry plaster solutions can be diluted in the required volume, and the remaining excess material can be stored for a long time in a dry room.
Gypsum mixtures are suitable for leveling walls in dry rooms. The material is lightweight and does not load the wall surface.
Polymer plasters can be used in rooms with high humidity. They are reliable and elastic. Their only drawback is their high cost.
Cement-based plaster compositions are suitable for use in rooms with high humidity. It is not recommended to apply it too thickly to avoid deformation of the drywall.
They produce ready-made universal mixtures that can be used in any room. They must be diluted with water according to the instructions on the package.
Each type of mixture is divided into starting and finishing. The starting mixture has a coarse-grained structure. It is applied in a layer 2 times thicker than the constituent fraction. Used to eliminate large surface defects.
The finishing putty is made from fine-grained components. Apply it in a thin layer at the final stage. This contributes to the formation of a perfectly flat, smooth surface.
How to plaster plasterboard walls is decided by each person individually, depending on the requirements for the surface and operating conditions.
What you need to know about plaster
- Plaster for drywall should be gypsum based. It is usually offered in 30 kg paper bags. Remember that it has a fast setting and hardening time (5 minutes and 30 minutes respectively), so it should be diluted in limited doses.
- Drywall can be glued to plaster. If you do not have such work experience, it is better to play it safe with self-tapping screws and dowels. They can be mounted directly into the wall, or into a pre-fabricated frame made of wood or metal (then no dowels are needed).
- You can use drywall instead of plaster to level the walls. Installation takes place in a short time, and it is not as difficult as it might seem.
In what cases is drywall plastered?
There is a lot of debate about whether it is worth plastering drywall, because under a thick layer of mortar the surface can become deformed over time. Non-moisture resistant sheets may collapse if covered with cement mortar. The sheets become saturated with moisture and collapse.
Moisture-resistant sheets are suitable for decorative finishing with various mixtures.
In what cases is drywall plastering necessary:
- if the surface has small defects and irregularities;
- Decorative plaster is applied to drywall in a thin layer, and it dries quickly without compromising the integrity of the surface.
If errors were made during installation, for example, sheets with large holes were used, then it is better to replace the material. Plastering with a thick layer will lead to deformation of the material, which will negate all finishing work.
Types of drywall
Five types of gypsum plasterboard are produced, the difference between which is in the composition of the core and its properties:
- In addition to the usual wall gypsum plasterboard, they produce plasterboard ceiling sheet material, which differs from the wall one only in its smaller thickness. The core contains the same building gypsum.
- Moisture-resistant plasterboard lined with green cardboard (GKLV) is used in the interior of bathrooms (they even cover walls in swimming pools). GKLV treated with antifungal impregnation and other compounds is not afraid of moisture.
- GKLO - fire-resistant gypsum board with reinforcing and fiber additives is suitable for lining fireplaces and chimneys. In a fire, the cardboard becomes charred, but the plasterboard sheet retains its shape.
- The core of a flexible arched gypsum board is reinforced with fiberglass threads, which allows the sheet to be bent in different directions with a possible minimum radius of up to 300 mm. It is thinner and more expensive. If you consider that to ensure the strength of the arches that are made from it, gypsum boards are used, folding two sheets at a time, the cost of plasterboard structures is decent.
- Moisture-resistant combines the qualities of fire-resistant and moisture-resistant.
- Combined, used for wall insulation, has a special composition with the addition of expanded polystyrene.
This information will be needed when choosing the type of plaster composition. The shape of the edge is important for sealing seams.
Application rules
When applying plaster solutions to drywall, you need to consider:
- Plaster can only be applied to drywall that is resistant to moisture. It is painted green, marked in blue - GKLV. The gypsum layer of such sheets is impregnated with special compounds with water-repellent properties.
- Several thin layers of solution are applied to problem areas (dents, depressions). The next one is applied only after the previous one has dried.
- Before applying the plaster solution, you need to treat the material with a deep penetration primer. It will serve as a barrier to the penetration of moisture from the plaster mortar into the gypsum layer of the walls. Apply the primer in a thin layer, making sure that the entire surface is saturated. After the composition has dried, apply the primer again.
- When using decorative plasters, you must strictly follow the application instructions.
Plasterboard walls only at first glance seem perfectly smooth. Even such a surface requires preparation before performing the final stage of finishing work.
We plaster the walls and ceiling from plasterboard
As we have already established, only drywall that has moisture-resistant properties can be plastered correctly. Almost exactly this material is used for ceilings in residential premises, because moisture accumulates at the top of the room from human activity. When purchasing materials for repairs, you must choose moisture-resistant sheets that have special markings.
It is important to use special primers that have deep penetration properties. To problem areas (potholes and dents), apply the plaster in a thin layer several times, not forgetting to let the previous layer dry completely.
Decorative plaster has a very thin layer and dries quickly, so there should be no problems applying it to drywall.
It is recommended to use a variety of decorative plasters for finishing drywall, while adhering to the application recommendations given in the manufacturer's instructions. A ceiling with this finish will look more interesting.
It is allowed to repair small dents and potholes that formed on the drywall as a result of improper storage, errors during the installation process, or violation of transportation rules. In this case, the surface must first be primed, then a layer of putty must be applied and, after a little time, a thin layer of plaster. However, you need to remember that the putty layer should not be more than 3 mm. If the depth of the pothole is much greater, then only plaster should be applied to the ceiling.
Return to contents
Preparatory work
Do-it-yourself plastering of plasterboard walls involves several stages.
To apply plaster to drywall you will need the following tools:
- To remove construction dust from walls, it is better to use a vacuum cleaner of an industrial type.
- Wide, narrow and medium spatula or trowel. Using a medium tool, apply the solution onto a wide trowel. A narrow one will be needed to apply the solution to hard-to-reach places.
- To apply the primer, use a roller with a long handle.
- Construction mixer for stirring the plaster mixture.
- Level and container for diluting the solution.
- Ladder.
Processing the corners of an arched opening.
First of all, check that the heads of the screws do not protrude above the surface - they must be on the same level with it. There is no need to recess them too much so that there are no depressions on the surface.
Remove dust from the surface. The most convenient way to do this is with a vacuum cleaner. If it is not there, wipe the walls with a slightly damp cloth.
Remaining dust will prevent the primer from penetrating.
Apply the primer with a roller in two layers. The second layer is applied to the surface after the first has dried. Acrylate mixtures have vapor-permeable properties. Their drying time is about 2 hours.
Fill all cavities at the joints, locations of screws and small irregularities with putty. The mixture will adhere better to the surface if it is applied in several layers of 1 mm each, rather than puttying it in one go.
When filling external corners and plasterboard boxes, aluminum perforated corners are used, which are pressed into the mortar layer. Any excess mixture that appears is immediately removed with a trowel. Once the solution has hardened, it will be difficult to remove.
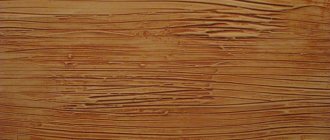
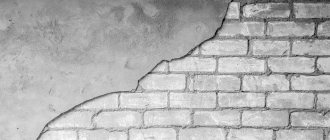
Decorative finishing of drywall. We create an imitation of masonry
This is also a kind of applied creativity, and you might also want to try it.
Therefore, get acquainted with the process that we presented in pictures:
| Photo for clarity | Process description |
Marking on a piece of drywall | To make bricks, all you need is a metal square, a pencil and a utility knife. Set for yourself the size of the brick that you will adhere to when marking the tongue or butt sides. |
The front side is cut first | Now the marked sheet needs to be cut into bricks. To do this, first the top cardboard shell is cut along the lines. |
Then the back | Then the sheet is turned over and the second shell is cut at the bend. The sheet is first divided into strips and then into bricks. We don’t throw away the half-sized pieces; they will come in handy. |
ready-made bricks | Note: If the edges of the cuts are not very smooth, it doesn’t matter, this will also give your imitation more authenticity. |
| How to glue decorative stone onto drywall | To glue plasterboard bricks, you can use the most common and inexpensive tile adhesive. Dilute it according to the manufacturer's instructions and apply it to the wall. Note: The base should first be primed - you can use the same glue, but diluted to a more liquid state. |
How to glue decorative stone to drywall: reinforcement of the outer corner |
|
Applying glue | Apply glue to a small fragment of the wall and make grooves with a comb with the finest teeth. |
Installation of the first tile | If the wall is adjacent to an outer corner, start tiling from there. In this case, glue the first brick with a protrusion equal to the thickness of the drywall. Note: This is necessary so that, for complete plausibility, an imitation of the butt side of the brick is glued to the perpendicular side. Accordingly, its length should be reduced by the thickness of the gypsum board. |
How to glue decorative stone to drywall - laying with a gap | You lay the tiles by analogy with masonry - with offset joints. Make a gap between them of approximately 10 mm. You can use a piece of drywall as a template. |
Wetting the surface with a sponge | After the glue has hardened, you can begin the decorative part of the work. First, you will need to remove the cardboard shell from the surface of the bricks, for which it is moistened with water using a dish sponge. |
Removing the paper casing | The moistened paper is easily removed, after which the exposed gypsum layer is also saturated with water. |
How to make decorative brick from plasterboard - applying relief | This is done to make the plaster more pliable. Arm yourself with a utility knife, a chisel, and “straighten” the masonry - causing chips and chips in the corners that bricks have. |
Do-it-yourself decorative brick from plasterboard - sanding | You clean the surface with a stiff brush and sandpaper, sweep away the dust, prime it - and your “masonry” is almost ready for finishing. |
Plaster application technology
Here is information on how to plaster plasterboard walls. Plaster for drywall hardens quite quickly, so you need to dilute the amount of solution that is consumed in 20-30 minutes.
It is better to mix the mixture with a construction mixer. When preparing the solution, you need to make sure that no lumps form. The consistency should be like homemade sour cream.
Plastering drywall begins with sealing joints and corners. When finishing corners, apply half as much mortar to the spatula as when working on a smooth wall. Distribute the composition only onto the corner of the spatula and spread over the surface.
The starting layer is applied with a spatula or metal trowel; the thickness should not exceed 3 mm. For better adhesion of the solution to the surface, a fiberglass mesh with 5x5 mm cells is laid.
How to plaster walls:
- A solution of starting putty is taken from the container onto a medium spatula, transferred to a wide trowel and distributed over the surface.
- Plaster plasterboard walls with your own hands.
- After the putty wall is completely dry, it is primed.
- The last step is to plaster the drywall with a thin layer of finishing mixture, which has a fine-grained structure and allows you to achieve a perfectly flat surface.
First, the joints and fastener locations are plastered.
After the finishing layer has dried, the wall is sanded with sandpaper. The final stage in finishing work is painting.
List of tools and materials
Covering plasterboard walls with plaster requires the necessary tools and raw materials. The list includes: primer, spatula or trowel for laying and spreading the mixture, water, plaster mixture, roller or brush, varnish, paint. You may also need a vacuum cleaner or rags to clean the wall surface. Thus, decorative plaster is an excellent finishing material. It will not only decorate any room, but will also help disguise various defects, including cracks and swelling of the wall surface.
This mixture has a number of advantages: it is easy to use, does not require complex equipment for application, and lasts a long time. Some types do not allow moisture to pass through and are resistant to low and high temperatures. Of great importance is the fact that this is an environmentally friendly material that does not emit harmful chemical compounds.
Application of decorative plaster
To the question: is it possible to apply decorative plaster on drywall, experts unequivocally answer that such a coating does not violate the integrity of the drywall, since it is placed in a thin layer.
From this section you can learn how to properly plaster drywall with decorative plaster.
It is better to choose a mixture with a fine-grained structure; it allows you to plaster the wall with a thin layer.
The preparatory work for plastering with decorative plaster is the same as for plastering with other mixtures.
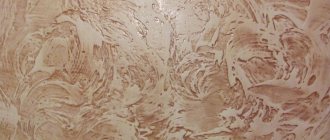
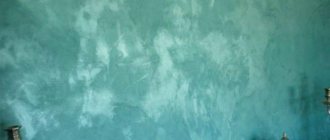
Decorative plaster on the wall surface looks very beautiful.
Align the joints of the sheets and all irregularities on the surface. After the solution has dried, prime the wall in 2 layers. In some cases, it is allowed to apply the primer in one layer.
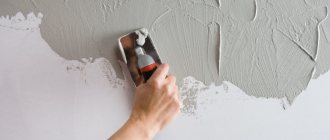
Decorative plaster is applied to drywall with a trowel or spatula and distributed over the entire area of the walls.
When the solution has set, but has not yet hardened, they begin to form the relief. They plaster plasterboard walls with their own hands and immediately form its texture.
The movements are performed easily, without pressure, so as not to damage the material. To give the desired texture, use shaped spatulas, hard brushes with sparse bristles, sponges, etc.
After the decorative plaster has completely dried, they begin to paint the walls.
More detailed instructions for applying plaster can be seen in the video:
Plastering a plasterboard ceiling with Rotband
Anyone who has ever dealt with drywall knows that this material is capricious. Particular difficulties arise when it is necessary to cover the surface with plaster. Due to the fact that it is a fairly fragile material, drywall can become damaged and change shape under the influence of the heavy weight of the applied layer of finish. Using a material such as drywall, everyone who makes repairs with their own hands asks whether it is possible to plaster drywall with a rotband and how to plaster it with a rotband, avoiding damage. There is only one answer - technology.
Finishing walls and ceilings with plasterboard is very popular due to its ease of installation and low price. However, you should be careful when plastering drywall.
Plasterboard sheets are the most popular finishing material, affordable for most consumers, and also allowing one to achieve excellent results in finishing premises in a short period of time.
Drywall allows you to quickly and perfectly level the walls and ceiling.
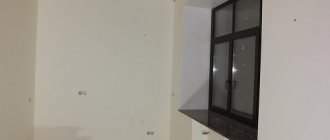
After finishing with plasterboard, there is only one problem left - visible joints between the sheets and recesses from the heads of the screws. These irregularities can be eliminated by plastering the plasterboard covering.
Plaster for drywall
A building material such as plasterboard is becoming increasingly popular among consumers today. It has become the most affordable finishing material in terms of price, as well as its ability to achieve excellent results when treating premises. Plaster for drywall is also necessary to make the walls smooth and prepare them for finishing.
However, working with this material is not so easy. When processing sheets with plaster, some problems arise. As a result of applying a heavy mixture to the surface, the fragile product may change its shape or be damaged. Therefore, a person who wants to renovate an apartment on his own immediately begins to wonder whether it is necessary to plaster drywall and what is the best way to do it in order to avoid damage.
Thanks to such building materials as plasterboard sheets, it is possible to perfectly level any surface in a short time. However, after covering with this material, holes from the screws remain on it and the joints between the panels are clearly visible. Plastering drywall with your own hands is an option to remove any errors. At the same time, it is necessary to strictly adhere to the technology of plastering this material, as shown in the video.
Applying bark beetle to drywall. How to apply bark beetle
Before applying plaster, the surface must be leveled (if possible, desired or necessary) and primed. So, if there are remnants of previously used finishing materials on the wall (paint, wallpaper, plaster), they need to be eliminated.
Instructions for use are attached to each material. It is important to strictly follow the described requirements for using the material.
However, the general usage parameters are:
- When you start preparing the mixture, it is important to add the dry composition to the water as you knead, but not vice versa;
- The water temperature should be at least 20 degrees;
- The material is mixed using a construction mixer at minimum speed;
- Manual kneading does not produce a quality substance;
- You need to mix the mixture until there are no lumps at all. Then the finished mixture should stand for several minutes (5 - 10), mix again and only after that it becomes ready for use;
- The instructions for each manufacturer of the plaster mixture contain individual indicators for the required proportion of water and the duration of use of the finished mixture. Some batches dry out after an hour, while others last for three. Therefore, it is recommended to make batches in small portions; besides, you should not add water to the finished drying mixture - it will not be possible to refresh it. That is why the manufacturer's instructions must be strictly followed;
- The finished substance is applied in small doses to the surface and shaded in even layers;
- After 30 minutes, the thicker mixture is processed with a grater. The movements are light, as if gliding along the surface. This way the layer will be even. Using a grater, a unique pattern is created. Experts recommend that inexperienced “repairmen” draw simple shapes (waves, rain, semicircular elements, etc.). The main thing here is to learn to hold your hand, movements with equal pressure. Softness and confidence in the hand guarantees a uniform pattern. Remember, the longer you iron the bark beetle, the less noticeable the grooves and bends are. If you overdo it at this stage, the “bark beetle” effect will be lost - the wall will become smooth and shiny;
- If work is carried out over large areas, then single execution is impossible. Mutual assistance is needed from at least two people - one applies the plaster, the second paints while rubbing. Decorative “bark beetle” is easy to use, so even a beginner can work with it;
- The temperature in the workroom should be from +5 to +25 degrees. However, if a colored substance is used, then the temperature is at least +10 degrees;
- Breaks between applications of plaster are not possible, but if there is an urgent need for a short time, the edge of the applied mixture is sealed with masking tape. This will temporarily stop drying;
- The plaster takes 1 to 5 days to dry, depending on the manufacturer’s brand. Only after complete and uniform drying does coloring begin. If you decide to use acrylic paint, it is recommended to wait 2 weeks after applying the plaster. When painting with silicate, three days is enough for the paint to lay down evenly.
When is plastering necessary?
In addition to the fact that plastering plasterboard sheets is a labor-intensive task, it can also give unexpected results. The product may warp under a thick layer of mortar, but may last for many years.
If after covering the walls with sheets you notice serious distortions, plaster on drywall will not solve this problem at all. On the contrary, over time the condition of this surface can only worsen. Therefore, there is no need to try to correct this situation; it is better to immediately eliminate the cause.
Important! Serious coating defects must be eliminated only by dismantling and reinstalling the plasterboard material. At the same time, moisture-resistant sheets will be the best replacement.
Plastering moisture-resistant drywall is much easier. If there are minor deviations in the plasterboard sheathing, you can safely proceed to plastering. You can use plaster if there are dents and putty joints.
An exception would be the application of decorative plaster to drywall. In this case, there are no restrictions, since it is applied to the sheets in a thin layer. Also, thanks to the composition of this mixture, it sets and dries quickly.
So, we found out that in order to finish the plasterboard base without any consequences, you need to pay attention to the technology, as well as properly prepare the surface.
Decorative plaster on plasterboard. Why do this?
Everyone knows that drywall is almost perfect - there is no particular need to level it. Plaster is used only to improve the appearance of the sheets. But these compounds must also be applied in other cases when it is necessary to cover the joints between sheets, various recesses and self-tapping screws sticking out. In fact, the plaster compositions have the function of putty; they are used when wallpaper is glued to drywall or tiles are laid. Under decorative plaster, such material is also quite acceptable.
There is a serious debate among experts about whether it is possible to plaster plasterboard sheets in principle. Some of the disputants point out that low-quality material with an insufficient level of moisture resistance cannot be covered with plaster: this will lead to gradual deformation, since the applied layer will be damaged by the released moisture.
There is also an opinion that it is quite possible to use plaster over gypsum plasterboard. Without going into the question of who is right, it is necessary to point out that such processing is acceptable only in strictly necessary cases.
When walls covered with gypsum board sheets have pronounced deformations, a layer of plaster will only worsen the situation. It would be much more correct to remove the cause of the distortions, rather than fight them themselves. It’s another matter if only minor deviations from the normal topography are detected. It is also necessary to apply basic plaster before decorative plastering. It allows you to guarantee accelerated drying and improve the polymerization process.
Technology
- After installing plasterboard sheets, be sure to clean them of dust and debris. A vacuum cleaner would be an excellent tool for such work, but you can use any available items;
- Then we putty all joints, recesses from self-tapping screws and other irregularities. To do this, you can use both a ready-made composition and dry putty, which we prepare according to the instructions.
Remember that the dry mixture must be prepared before use.
First, we use ready-made putty to treat seams and large errors. After the mixture has dried, you need to apply a leveling layer;
- The final stage of surface preparation is primer. For plasterboard products, manufacturers produce special mixtures intended for priming. They have the ability to penetrate deep into a given material, providing it with good adhesion to finishing mixtures, and also give it strength.
Finishing technology
There are universal points that must be observed regardless of the type of front finish.
The edges of plasterboard walls should be cut at an angle of 45 degrees, and a right angle is formed at the intersections of the sheets. Small planes are sometimes used for chamfering, which help prepare the material before attaching it to the wall. Then the dust is removed using brushes or tassels, and the chamfers themselves are primed (this helps prevent cracking of the seams). To mix the composition, be sure to use cold water.
The seams of plasterboard sheets must be filled with putty and leveled along the entire length. To do this, it is recommended to use narrow spatulas.
Then the solution is covered with a reinforcing mesh, which needs to be pressed a little. Then the mesh needs to be completely covered with an additional layer of putty. A spatula with a wide blade is already used here.
Processing of drywall at joints occurs as follows:
- chamfer the edges;
- prime the treated area;
- lubricate it with putty;
- covered with reinforcing mesh;
- use the final layer (for a flat seam it is recommended to use a mesh);
- The whole process is completed by rubbing the coating with fine graters.
For painting
Each option for plastering gypsum boards has its own characteristics. Preparation for painting the material is no exception. It is performed by any true professional to guarantee the actual quality of the coating. The layer is leveled using spatulas with wide blades, then the material is rubbed until perfectly smooth, and a primer is applied on top. Finish the drywall with sandpaper. You need to work very carefully, because paint will not only fail to hide defects, but will only emphasize them.
Under the wallpaper
Imitation of wallpapering walls is created with cellulose-based mixtures. Various fillers are added to it: silk, cotton, acrylic. Liquid wallpaper also contains pigments and some other components. Such mixtures are supplied in bags and are lightly moistened with water before use. The walls need to be primed, the material itself is leveled with a spatula after application.
"Rotband"
This is a truly high-quality composition made in Germany. But good surface preparation is also very important for it with the help of deeply embedded primer, which improves adhesion to the applied material. No less significant is the fact that the primer prevents the drywall sheets from becoming saturated with water, which inevitably escapes from any plaster.
When applying the primer mixture, any omissions are unacceptable, and the joints are glued with tapes (serpyankas), and then covered with special reinforcing compounds. On a dry surface, such lines are erased, removing slight deformations and sagging.
To work with Rotband, a spatula with a blade of 30 cm is recommended; it is held at an angle of 30-40 degrees. Strong pressure is contraindicated: it will provoke the appearance of waves.
If the defects of the original surface are significant, they work in two steps: 0.3-0.5 cm each. The final composition is applied to a maximum of 0.1 cm; the slightest deviations from an even layer are unacceptable. After drying (taking 24-48 hours), the plastered walls will be perfectly white.
Gypsum plaster
Recently, the use of gypsum plaster has increased significantly. People prefer to buy this mixture for repairs, which has good binding properties and elasticity. With its help, it is easy to level the surface, hiding holes and cracks. In addition, the gypsum mixture is an environmentally friendly product. In addition, it has such qualities as fireproof, moisture resistant, and also retains heat well.
It is worth noting that when processing drywall, rotband is used both as putty and as plaster. In addition, various decorative parts can be made using this mixture. A coating treated with this composition dries quickly and acquires a smooth surface, so it does not require additional decoration. If desired, using gypsum plaster you can apply a relief pattern to the surface, which will greatly decorate the interior of the room.
However, when working with gypsum mixture, you need to pay attention to some nuances. Applying gypsum plaster to drywall is not as strong as cement-sand mortar. A strong impact may cause dents. Also, it is not recommended to use it in houses with high humidity, as it can pick up moisture and simply fall off under its weight. The gypsum mixture has the ability to corrode metal. Therefore, over time, all the metal fasteners that are under the layer begin to rust, and dirty spots appear on the surface.
The question of plastering gypsum boards
Good day to all.
I looked through a bunch of sources, but didn’t find anything intelligible, that’s why I’m here. Situation: I was doing soundproofing in a room, one of the elements of which is plasterboard. I used this gypsum board to cover the walls and ceiling. The walls turned out to be smooth, but when installing the ceiling, an error crept in and the middle turned out to be 1 cm lower than the edges (the first time I did this). I decided to correct the mistake with plaster. Attention, question: will the rotband adhere normally to the ceiling if ceresite tst17 is used as a primer, given that the layer of plaster does not exceed one centimeter? And is it possible to apply rotband to drywall at all? Doubts began after reading the instructions for the rotband - among the surfaces on which it can be applied there is not a word about gypsum board. On the Internet they recommend using concrete contact in such cases, but I have a small problem - I have already primed everything with ceresite. And on the manufacturer’s website (Knauf) it is written about concrete contact: “Designed for pre-treatment for gypsum plaster of dense, smooth, weakly and non-moisture-absorbing bases, for example, concrete, cement plasters.” But gypsum plasterboard absorbs moisture well, not cement and a smooth material, why not use a regular acrylic primer? But, again, somewhere it was not recommended. Overall, I'm confused. Help me please. Go over the ceiling - it will be faster to remove a couple of sheets and straighten the guide than to plaster. Moreover, it is impossible to plaster gypsum boards. The basic rule is to go from more durable to less durable. Although many people do it, it’s impossible, but if you really want to... More than once I’ve seen that gypsum boards are also plastered, but never the ceiling.
I would have gone over it long ago and not suffered, but:
- two layers of drywall
- the cavity is filled with glass wool
- no assistants
- walls are attached to it
- everything is puttied i.e. in order to fix what it hangs on, you have to break everything and start over. I don’t really want to put plaster on the ceiling, but I don’t have the time and money to redo the whole room, so I’m looking for other options. Before that, I worked with Volma in a layer, but it failed and I hate to deal with it in the future, maybe this is not the most insidious surprise yet. Rotband is somewhat different from Volma layer in properties, so I think it will be suitable.
Hypo-cardboard can be plastered.
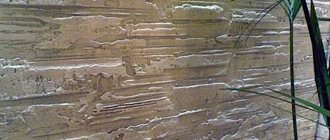
Drywall can be easily plastered with gypsum plasters. The main thing is that the drywall is not puttied. Here is a photo showing that the layer of plaster is 2 cm. [
C2h5-OH wrote: change the city in your profile, otherwise you will be banned.
OK. You can plaster - it's getting closer. But the topic is not disclosed. Will plaster fall on my head (Volma doesn’t fall, I’ve never used a rotband) if I have a deep-penetrating acrylate primer between it and the drywall, ceresit tst17
no, it won’t fall, but I would use betocontact.
Ind1g0 wrote: Will plaster fall on my head (Volma doesn’t fall, I’ve never used a rotband) if I have a deep-penetrating acrylate primer ceresit tst17 between it and the drywall
It won't fall off, I always use a deep penetration primer.
If you are very worried, then use a fiberglass mesh with a cell of 5x5 mm for additional reinforcement.
To begin with, prime the entire surface of the gypsum board with tifeng primer, stick punched tape on the joints, then putty with a 5 x 5 mm mesh. Uniflot, or Pufas. Then equalize either by beacons or by the Pufas rule. Plaster to plaster is a homogeneous material, everything will be ok. Checked Then finish and repair interlining. Painting
Labor without art is barbarism!
I'm afraid we can't find a pofas here. We don’t have Rotband in every store. I filled all the joints with uniflot putty, without mesh, as it allows. So far, not a single crack (it's been a year already). I will use the rule for lighthouses, the lighthouses have already been frozen. What do you mean by serpyanka mesh? Okay, let me put the question this way: is rotband very different from Volma layer in properties?
Rotband is very different from Volma layer in properties?
What didn’t you like about Volma? Volma is more “long-lasting”, i.e. easier for an unprepared person. In terms of strength it seemed weaker than Rotband, although according to the documentation almost everything is the same. Rotband is like the “ancestor” of gypsum plasters. The main thing is to make sure that it is not counterfeit or expired.
The following mess happened with Volma: in the summer of 2013, I took 4 bags of Volma layers and two ten-liter canisters of soil in castoram. The soil already smelled of rotten meat, but I managed to buy one canister of lime almost immediately after purchase. After 4 months of standing in the room, it completely went rotten, the lid swelled and smelled strongly, I had to throw it away. (and it costs almost a coat for the cylinder) Although the production date is indicated as 05/03/13, i.e. She could stand for another six months. I took ceresit tst17 instead of Volma, it costs the same, but there is more trust. Of the four bags of Layer, I only managed to use half a bag; the ones I smeared along with the first canister of soil were smeared normally. Half a year later (i.e., the other day) I started to smear it again - the volma from the open bag dries at the speed of ordinary plaster, I didn’t even have time to mix it before it set, the mixer almost bricked it up. I thought it was because the bag was standing open, and I opened another bag - the same nonsense. However, as in the third and fourth. This is where I became annoyed, read fifteen hundred pieces of wood for the trash and sabotaged work. But the plaster was released on 07/01/13, lay in a dry and heated room (in my room), and the shelf life is stated to be 12 months. I wrote to them on their website - no answer. He waved his hand at the Volma, because it costs a little less than the same Knauf, and that’s what it can afford. I decided to give fifty dollars more, at least the Knauf won’t let you down. By the way, it honestly states that it can only be stored for half a year.
Decorative plaster
To cover the surface with paint, it is best to first apply decorative plaster. The question immediately arises: is it possible to coat plasterboard sheets with such a mixture? People who do DIY renovations believe that it is difficult to do such a beautiful job, especially for beginners. However, experts say that if desired, work of any complexity can be completed. To tell you how to apply decorative plaster on drywall, let's look at some of its subtypes.
Structural
This mass includes small pieces of quartz, pebbles and other objects with a granular texture. This plaster can be applied to the surface even if it has some unevenness. At the same time, it must be dry and free of dust.
First, we strengthen the plasterboard material with a primer. It is necessary to wait for the mixture to dry completely, and only then apply structural plaster. Using a spatula, apply it to the surface in one layer. The strength of the layer will appear within three hours, but the solution will completely harden only after 6-7 days.
Textured
Textured plaster of walls over plasterboard creates the appearance of the original relief. To create patterns of varying complexity, you need to use special tools and add additives to the solution.
Before you start plastering, you need to clean and dry the sheets, and then apply a special primer designed for treating drywall. When the mixture dries well, cover it with special paint and sand so that the plaster adheres well to the base.
Textured wall plaster is applied to drywall in one or two layers. At the same time, different tools are used to obtain the desired pattern. If you want to create a complex texture, you will have to apply several layers of the mixture, while the layers must remain completely thin. This kind of do-it-yourself drywall plaster will delight the inhabitants of the house for many years. And the video will teach you how to do it correctly.
- The first step is to properly seal the drywall joints. To do this, you need to embroider the seams at an angle of 45 degrees. Then treat them with a primer for plasterboard surfaces;
- dilute the putty mixture and apply it to the seams after the soil has dried;
- stick the serpyanka onto the still wet mortar and, using an additional layer of plaster, level it as much as possible with the plane of the wall;
- treat the entire drywall with a double layer of putty, keeping in mind that each subsequent layer is applied to a dry surface.
The mixture is applied with a metal trowel, starting from the corner and to the thickness of the abrasive. If you apply a thick layer, you will not get the desired pattern. Do not dump the remaining abrasive and milk into the material.
They should go to waste. Before proceeding with any finishing option, we eliminate all irregularities, seal all seams, screw heads, potholes and roughness. The plaster is suitable for all surfaces, ideally it can be applied to drywall.
Almost all types of such finishes are suitable for such a surface, which means that all that remains is to simply choose the appropriate result. For those who think that the bark beetle coating can only be applied classically, it will be interesting to learn about the many methods of application. Travertine technique - We apply the bark beetle as usual, but when rubbing with a plastic trowel we make short chaotic movements in different directions. Separately, we can highlight the so-called Venetian plaster, made from marble flour. This coating will fit perfectly into the interior of any room. It is often applied to drywall, since the latter is very often used. Applying decorative plaster to this material is not an easy job.
However, it is not always possible to achieve the desired result. Before carrying out the main plastering work, you will need to organize some preparatory manipulations. The first step is to clean the entire surface of the plasterboard walls from dirt, dust, foreign objects, including nails, screws, and so on. This can be done using a vacuum cleaner or a simple rag. After this, they begin to prepare the solution.
In most cases, it does not need to be diluted, but must be used immediately. The number of layers when plastering plasterboard walls depends on the type of finishing coating. Thick wallpaper can be glued by sealing only the seams between the sheets. For thin fabrics, it is necessary to putty the surface completely 2 times. Drywall plaster for painting is carried out in 2-3 layers.
The outer corners where the plasterboard sheets meet are reinforced with aluminum perforated corners. Place them on the putty corners and cover with a layer of the mixture on top. A good technique would be to lightly grout the dried mixture. In this case, the tops of the texture protrusions will be removed and the lower white layer will appear. The gloss of the Venetian is given by protective wax, applied at the very end.
There are ready-made formulations in buckets. But you can also prepare a mixture for the Venetian with your own hands based on universal gypsum, tinting it with colors.
Using textured and Venetian plaster
Methods for applying decorative plaster: 1. Left-right. 2. Scarring. 3. Round. 4. Up and down.
To cover a wall with a textured mixture, you will first need to clean the surface of the plasterboard wall and dry it. After this, apply a primer. To increase the adhesion of textured plaster, it is advisable to make the next layer using paint with sand. After the paint has dried, apply 1 or 2 layers of textured solution. To give the coating a specific pattern, you can use a variety of tools. The complexity of the pattern will depend on the number of layers of plaster mixture applied to the drywall. It is important to remember that the thickness of each layer should be minimal.
As for the Venetian coating, not everyone can afford it. This type of coating is more demanding than the previous ones. It requires creating a perfectly flat surface. After applying the primer, the first layer is applied using a spatula. After it dries, be sure to clean the surface to eliminate any unevenness. The number of layers can be several (most often from 5 to 12). After each layer, cleaning is carried out. After the last layer has been laid, it is important to clean the surface with sandpaper. Upon completion of work, it is recommended to treat the coating with a layer of white wax.
How to properly apply decorative plaster on drywall
Then you need to treat the base with a special primer. In its consistency it resembles betocontact. It also contains quartz sand, but of a finer fraction, plus special binding components. You cannot use ordinary concrete contact! The work process depends on the type of plaster.
Structural plaster is applied in two layers, requiring virtually no complex pattern. Depending on the movements of your hand, the background of the surface will emerge. If you decide to finish the drywall with a mixture, then keep in mind that you must choose a mixture with a gypsum composition. The difficulty of working with such a mixture is that it dries quickly, only 30 minutes and everything you have done on the wall will be impossible to fix. Its undoubted advantages include the variety of design.
The textured structure is formed due to the marble or granite chips included in the composition, which creates the desired effect. The desired pattern can be applied by choosing the direction of movements when smoothing. Coarser grains are usually used for finishing facades; for interior work, a smaller fraction is used.
- Original texture. The mixture resembles mastic. If necessary, the plaster can be diluted with water. The paint of your choice is added to the solution. The plaster is applied with a spatula. The drawing is made based on the imagination of the master with his own hands. Drying time 1 day.
The technology for applying and preparing bark beetle plaster involves precise adherence to the proportions of ingredients, temperature and sequence of actions. The cost of this type of plaster per square meter is low (there are more expensive options). you can buy it in advance during the off-season to save money. The price per m2 will vary depending on the components, manufacturer and packaging, but on average for 25 kg, the seller will require no more than 550 rubles. Its undoubted advantages include the variety of design. The textured structure is formed due to the marble or granite chips included in the composition, which creates the desired effect.
The desired pattern can be applied by choosing the direction of movements when smoothing. Coarser grains are usually used for finishing facades; for interior work, a smaller fraction is used. After the solution stops sticking to the tool, begin to form the structure. Depending on the chosen pattern, the plaster layer is grouted using a polyurethane float using appropriate straight or circular movements.
When smoothed, the crumb creates grooves in the dried mixture. Periodically you need to remove the milk from the grater. No more rubbing of structured surfaces; milk deposits are removed with a sponge.
What type of composition should I choose?
Handitex
Handitex is a decorative plaster, it is presented in several styles:
- Relief. Contains plasticizers and acrylic. Apply with a roller or spatula. Before installation, you need to add paint according to color and saturation. The more coloring pigment there is in the composition, the brighter it will become. It is enough to apply only one layer. Complete drying - 12 hours.
- "Fur coat" or "bark beetle". There are several subspecies with different pattern shapes. The most common relief is a standard mixture, characterized by a medium to deep pattern texture. There is also a fine-grained one with a medium or fine background. There are micromixtures that represent a light pattern or something similar. You can see a “natural bark beetle” with a large grain fraction.
- Original texture. The mixture is similar to mastic. The finished mixture can be diluted with clean water to give density to the coating. Paint is added to the resulting mixture. The drawing is formed according to a pre-thought-out plan, which is created in the necessary style characteristic of the room. This composition dries in about 1 day.
All these types of Handitex plaster are suitable for covering walls. Any texture, pattern, relief can be combined on the surface of drywall and hold up well for many years in a row.
Silk
Silk plaster can be applied to any surface, but it will look different. On drywall, silk looks like a velvety and shimmering surface. You can make your interior surprisingly bright using standard colors and paints. Bronze, gold or silver shades look perfect in this style.
Silk must be applied to the surface of drywall using the following technology:
- Carry out complete puttying. The surface must be pre-prepared. This is done so that the resulting layer has excellent adhesion and the installation procedure is not difficult.
- Carry out installation without putty. The method can be defined as the main one. After this, you don’t have to prepare the surface for the next step and finish the plasterboard surface with silk plaster.
To avoid cracks and corrosion stains that occur during such a maneuver, the base needs to be prepared:
- To do this, examine the joints of the parts and form a V-shaped seam if the joints are not embroidered or do not have chamfers.
- Using a construction knife, cut each side at an angle of 45 degrees.
- After obtaining smooth joints, they are coated with a deep penetration primer. It should be applied without excess, as evenly as possible.
Advice
To obtain good results, the protruding heads of the screws are coated with anti-corrosion paint.
In this case, the likelihood of stains appearing is reduced to zero. According to the instructions, a putty solution is prepared and all seams are sealed with it.
Invoice
Textured plaster is used in many design projects. The composition with a binder and special additives imparts plasticity and slow setting. You can create a variety of patterns. You can make and implement any design solutions on drywall.
The work is carried out with a simple spatula. They recreate reliefs that imitate:
- a natural stone;
- tree;
- sand;
- cork;
- orange peel and much more.
You can add to the composition:
- pebbles;
- cotton fibers;
- wood;
- ground brick;
- mica;
- fine sand;
- grains of soluble pigments.
Varied relief is achieved:
- mixing shades;
- imitation of smudges;
- drawing spots and splashes.
Textured plaster on drywall is easy to care for, as it is easy to clean and wash. Its resistance to mechanical damage is high. You can apply the textured mixture in the bathroom or toilet, as the composition is impervious to moisture. Textured plaster does not contain compounds harmful to health. It is completely safe for use in any climate zone.
Structural
Thanks to the granular base and small pebbles in the structural mixture, it fits perfectly onto the drywall base and has good adhesion to the base. The plaster may also include small pebbles, granules, quartz, wood fibers, and mica, which give strength to the base.
Attention
The binding material is synthetic latex, potassium silicate, solvent-based or water-based cement-lime mixture.
The inclusions on the dried surface impart heterogeneity to the pattern, making it seem uneven. In its finished form, such plaster is sold in buckets or metal cans. The composition is stored in these containers for a long time.
You can choose plaster depending on the desired effect. You can take a coarse-grained or, conversely, a fine-grained mixture. Decorative qualities vary greatly depending on the choice of faction. The method of application and the type of working tool greatly influence the result. A spatula, a roller, and a sprayer are different tools for this plaster. The final effect depends on them.
Advantages of applying structural plaster to drywall:
- It can be applied to any surface. Drywall can be used both indoors and outdoors.
- It can hide minor defects - cracks, differences or old paint.
- It has high resistance to mechanical damage and impact resistance.
- Tolerates sudden temperature changes ranging from -45 to +70 degrees.
- Thanks to it, you can recreate any original relief solutions.
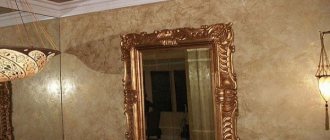
Venetian
The transparent appearance and composition of multiple components of lime and marble flour transforms the interior. Modern compositions of Venetian plaster have a transparent appearance, and with a special application technique it creates a marble effect. This shade provides a rich composition. Added to the mixture:
- water emulsion;
- slaked lime;
- marble flour.
Venetian plaster is very easy to install on drywall. Advantages over other types of coatings and differences:
- Creates a brilliant marble mosaic effect on the surface. The combination of a rich range of colors gives the interior a unique look.
- The most important advantage of the material is its waterproofness.
- Venetian plaster is easy to maintain. To add freshness and novelty to the design, simply wipe the surface with a cloth soaked in water. But even if more serious contamination is detected, you can use a soap solution that will not harm the coating in any way.
- Durability makes this material desirable for covering all drywall surfaces. Without repairs, walls can look fresh for 5-10 years. Such a coating does not require any repairs during this period if it is used carefully.
- High wear resistance allows you not to worry about sudden temperature changes and not to take special measures to avoid moisture getting into the pores.
- Environmental safety of the material: can be used in living rooms - in the bedroom, children's room.
Tool for plastering work
To work with plaster you need:
- bucket;
- drill mixer;
- trowel;
- plaster falcon;
- grout;
- rule;
- ironer;
- spatulas.
Plastering the ceiling
To understand what you are doing and not get confused in concepts, it is worth knowing that plastering and putty are two different things, performed using different technologies and for different purposes.
Preparing solutions should not cause any difficulties, since any package with construction mixtures always contains instructions written in accessible and understandable language. Application to the ceiling is also not difficult: the finished mixture is applied using a spatula and leveled with a metal tool.
There are several plastering methods, which depend on the quality of the surface. It happens that the ceiling does not require complete plastering, but partial, when after priming the mixture does not cover the entire area, but only a specific unevenness. This method is suitable for relatively flat ceilings that have only a small number of flaws (cracks, for example, or gaps between sheets of drywall, as in our case).
In my living room I made a two-level ceiling from plasterboard. True, I decided not to skimp on the strength of the ceiling. Therefore, I placed the CD profiles of the frame of the first level at 40 centimeters without jumpers, but the U-shaped suspensions at 30 centimeters from each other on two dowel nails, the second level I attached it partly to the first level, and partly to the main ceiling in the same way (well, the design is complicated and that’s not the point). The ceiling was sewn up with ordinary plasterboard from the Plato company, 12.5 millimeters thick, using a bunch of screws. But then I glued fiberglass mesh to the entire ceiling for plastering work. The edges of the plasterboard sheets were first cut in such a way that the plasterboard sheets would not suddenly touch each other, and then bevel the edges at an angle of 45 degrees and these places were simply puttied with “Rotband” and the screws were covered. And gluing the mesh takes a long time, but it’s simple, you prime the drywall, apply a little “Rotband” solution, press down the mesh and then push the putty through the cells with a spatula through the mesh, overlapping in places the junction of the parts of the mesh is at least 10 centimeters. After drying, apply a second layer of “Rotband” to close the mesh. After complete drying, after 7 days, touch the ceiling with a spatula to remove rough irregularities, prime again and after the primer has dried, apply layer by layer, letting each one dry layers, three layers of super-finishing putty. And then you rip and sand the entire ceiling with a special trowel, eliminating small flaws, which you smear and sand right away. After removing a ton of dust, you again need to carefully prime the ceiling and then you can paint it with acrylic paint twice, Well, then install the lamps. It’s been standing for three years and there’s not a crack anywhere, because the sheet of plasterboard is still thick and the sheets don’t interfere with each other, this isn’t 9 millimeters of ceiling plasterboard and it’s also not afraid of wet putty - it won’t get wet or fall off - it is screwed securely and the sheets do not interfere with each other, but what’s wrong is that it’s the fiberglass mesh that will take the stress, plastic mesh is no good in this case. A bit expensive? A little!
Recommendations for using drywall
A general recommendation for working with any drywall is that before starting work, drywall sheets should not be placed on edge, as this can lead to their deformation. You need to stack them on top of each other.
If it is necessary to plaster drywall, it must be of a moisture-resistant grade to avoid the penetration of moisture from the plaster mixture.
In most cases, it is impossible to perfectly level the walls or ceiling only by installing plasterboard sheets - you will also need to putty the cracks and dents. Therefore, it is better to use moisture-resistant drywall, since plastering is a wet process. If during operation it absorbs a lot of moisture, then deformation of the material may occur during the drying process. This is especially important when leveling ceilings, since it is on the ceiling that the highest bending load exists for the sheets.