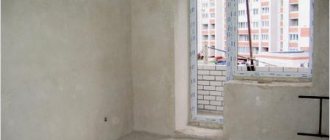
How to properly make a fur coat for your home - video, photo, step-by-step instructions.
Another option for decorative finishing of the facade of a building is to make a house under a fur coat. This idea of decorating a house and garden buildings was known back in the last century and was often used in summer cottages. The method of applying plaster under a fur coat is quite simple, fast and inexpensive. We will prove this in the article.
Selection and coloring of decorative plaster
In the past, cement-based compounds were used to plaster fur coats. Even now, many builders use them, preferring dry mixtures. Such materials are more practical and cheaper than other analogues. However, in this case, the cement completely deprives the finished solution of its elastic properties. Therefore, professional craftsmen today try to use acrylic compositions, which are sold ready-made and have a number of positive qualities. True, such mixtures cost several times more.
Ready-made acrylic plaster “fur coat”
Often ready-made and dry mixtures go on sale already colored. But you can also give the material the desired shade yourself using coloring powders or tinting pastes. The initial color of the composition is usually white or gray. The first option is suitable for creating pastel colors, the second - for preparing darker compositions. However, there is one caveat here. It will not be possible to dilute the material in a sufficient volume at once, and it is very problematic to give the mixture the required shade by preparing the color composition in small batches.
Important! When painting the composition, you need to try to maintain the proportions of the tinting paste so that the next time you mix the components, you get the same shade.
For those who do not want to take risks with guessing tones, there is a safer way - painting the surface with facade paint. Here you no longer have to worry about the finishing being multi-colored. However, this method is also not the most successful, since when small cracks form, they will be immediately visible.
This is interesting: Fastening step for sandwich panels of buildings and private houses: Step-by-step instructions
Properties of decorative plaster
Decorative textured plaster is used to create a finishing coating. It is excellent for exterior decoration of building facades and for finishing interior surfaces. It is often used for finishing borders and arches. This coating, in addition to its attractive appearance, has other positive characteristics. The advantages of a fur coat include:
https://youtube.com/watch?v=s8S36pwjtis
- peat insulating properties;
- soundproofing qualities;
- protection of walls from destructive atmospheric phenomena;
- ease of use, finishing can be done by hand;
- possibility of easy restoration of damaged areas;
- aesthetic characteristics;
- affordable price.
What is fur coat finishing: advantages and disadvantages
It is not for nothing that finishing the façade of a building with a fur coat received such a name. The fact is that outwardly such a coating
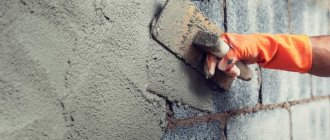
resembles the fur that is located on the inside of a sheepskin coat. At its core, finishing with a fur coat implies plaster, which is applied from a sand-cement mortar. The solution is poured or sprayed onto the prepared surface. This allows you to achieve the desired result.
Before you begin choosing a cladding method and purchasing materials, you need to evaluate the advantages and disadvantages of “shuba” plaster. As for the advantages, they include:
- easily tolerates temperature changes and high humidity, which makes it possible to reliably protect the surface of the building;
- the structure can be given a different shade, and, if desired, additional architectural elements can be formed;
- lightness and simplicity of cladding, which makes it possible to carry out all the work independently;
- using various additives, the surface can be given a different design;
- Due to its light weight, the foundation and walls of the building do not experience additional loads.
As for the shortcomings, there are relatively few of them. But, nevertheless, before you start cladding the house, it is worth taking them into account. The surface of the facing house is rough, which leads to the accumulation of dust. It is also worth noting the low thermal insulation properties of this method of cladding buildings. This means that if the building has thin walls, then it is worth thinking about additional insulation.
Wall plaster coat and methods of applying it
As mentioned above, the question of how to apply a fur coat to a wall can be solved in at least four ways, or rather, using four different tools. All of them allow you to do the work quickly and, most importantly, simply, which makes it possible to do the process of finishing the facade of a house without the participation of specialists. Let's take a closer look at these tools and the technology for using them.
Fur roller. A regular roller that is used for painting walls and ceilings with water-based paint. This, one might say, is the simplest way to solve the issue of applying fur coat plaster - to implement it you need to prepare a solution of rare consistency. Not very runny, but not thick either. You can use a roller in two ways - you can apply the solution to the wall with a spatula, and then roll it out with a roller, or you can immediately dip the roller into the solution and “paint” the walls with it. The peculiarity of this application method is that it produces a rather rough and coarse surface structure. If, after the initial drying of the solution, this structure is smoothed with a wet trowel, then you can get an interesting surface, reminiscent in structure of the pattern of a cork.
Special sprinkler. This is a classic tool for applying fur coats - in fact, this tool is a small box in which there is a shaft with rigid fluffy cables. When this shaft is rotated by the handle, the cement-sand mortar is sprayed - the cable catches the mortar from a small container and throws it out with force, as a result of which drops of the mortar stick to the surface of the wall. Depending on the cables with which this tool is equipped, you can obtain both a fine and large structure of the fur coat. The only drawback of this machine is that you will need to make it yourself - it is not sold in stores.
Spatula and trowel. This is also a fairly simple technology, through which you can apply fur coat plaster with your own hands - in some ways it can even be compared with a roller, but, you know, these are different tools. To begin with, a thin layer of cement-sand mortar is applied to the wall with a spatula - then a structure is created using a trowel. It is simply placed against the wall and abruptly torn off - the solution sticks to it, and when torn off it stretches, creating a structure. As with a roller, the result is a rough surface structure that can be smoothed after partial drying with a trowel soaked in water. Broom. As they say, it's cheap and cheerful, but most importantly, it's fast and effective. An ordinary broom will not work for applying a fur coat - it will have to be knitted from willow twigs. In principle, you can knit it from any thin twigs - even from bushes growing nearby
It doesn't matter, the main thing is that they are tough. The principle of using such a “tool” is very simple - a broom is lowered into a bucket of solution, after which, with a sharp movement of the hand, the solution adhering to it is sprayed onto the wall
Depending on the thickness of the twigs, you can get either a fine surface structure or a large one - as in many previous cases, the resulting structure can be smoothed with a wet trowel.
There are other (professional) methods for applying fur coats at home - one of the most common methods is spraying the solution using a hopper and compressor. You understand that technology is technology, and its capabilities are much greater - with the help of a device such as a hopper, you can regulate the shape and size of the drop. In fact, in this way you can give the wall almost any structure, and in some cases it can differ significantly from the classic Shuba plaster.
As you can see, applying fur coat plaster to walls is very simple, and most importantly, it is done with minimal financial costs. The only thing that can be added is to say a few words about preparing the solution yourself and some of the nuances of application. In principle, everything here is quite standard - the solution is prepared in a ratio of 1:3 (sand must be sifted through a fine sieve), and the walls are primed before applying the coat. It is also better to strengthen the fur coat itself with a primer after drying - in this case, it will crumble less during use.
Author of the article Alexander Kulikov
Plaster for cladding
Shuba facade plaster is the optimal solution for cladding a house. After all, you can do all the work with your own hands. Before starting work, you need to carefully select the plaster. The durability and aesthetics of the coating will depend on this. The best option may be to use a ready-made mixture. Today there is a wide selection of such finishing materials on the market. The peculiarity is that the plaster does not need to be diluted with water. The only thing is to thoroughly mix the mixture with a mixer. It is also worth noting that this plaster is available in a wide range of colors. This means that every person who has decided to transform their home with a “fur coat” will be able to easily choose the best option for themselves.
You can also use dry mixtures to create a “fur coat”. It is worth considering here that before work
With such plaster, it is necessary to dilute the mixture with a certain amount of water. Of course, even a self-taught builder can handle the thinning. The packaging indicates the ratio of water and plaster. Stirring must be carried out in accordance with the instructions. If the plaster has the wrong consistency, this may soon cause the coating to collapse.
You need to prepare the plaster correctly. To begin, pour the required amount of water into the container. After this, the dry mixture is gradually added. After this, everything needs to be thoroughly mixed using a construction mixer or a drill with a special attachment.
Finishing a private house with fur coat
An integral stage in the development of a house project is the choice of the method of its exterior finishing.
It involves choosing the appropriate material and carefully considering the overall style of the building. Today, the decoration of the facades of private houses directly reflects the level of income and taste preferences of the home owners, and the finishing materials used in the process of facing work are characterized not only by decorative, but also by functional purposes. In the process of selecting materials for finishing the facade of a building, it is necessary to take into account many technological nuances, such as the architectural features of the building, landscape area, as well as the climatic characteristics of the region in which the residential building is located. Taking into account the above, we can conclude that the facing materials used must not only be combined with the general style of the architectural object and landscape area, but also must be resistant to the influence of precipitation. The construction market offers a wide selection of facing materials, many of which are an example of the ideal combination of price and quality. One of these options is the decoration of the facade with a fur coat, which is not only a cladding item, but also an independent design solution. If you are looking for a simple, practical and, at the same time, original way to decorate the facade of a house, a fur coat will be the only right solution for you. What is the essence of finishing walls with a fur coat, what are its characteristic advantages and disadvantages, as well as how to apply the material in the process of wall cladding using this method will be discussed in this article. Contents
hide
- 1 What is decorating a house with fur coats and why is it attractive?
- 2 Decorating a house with a fur coat with your own hands: procedure 2.1 Preparing the rough surface
- 2.2 Preparation of the solution: mixture composition
- 2.3 Applying fur coat to the wall: basic methods and tools
What is decorating a house with a fur coat and why is it attractive?
Finishing the facade of a house with a fur coat got its name due to its external similarity to the fur located on the inside of a sheepskin coat, and therefore, when talking about this method of finishing the facade, they do not mean plush fur, but cladding with plaster, visually reminiscent of its texture. It is important to understand that, in fact, “fur coat” is one of the types of plaster that involves applying sand-cement mortar by spraying onto the surface of the wall. Throwing or spraying the solution onto the surface to be treated allows you to achieve the roughness effect characteristic of a fur coat. Before you start purchasing materials to implement this method of finishing the facade of a house, you need to study its advantages and disadvantages.
Advantages of decorating a house with fur coats:
- Due to the excellent tolerance to temperature changes and high humidity, the “fur coat” coating will protect the base surface from external influences;
- In the case of using “fur coat” plaster, it is possible to decorate the base plane with various patterns, thanks to which the building will be different from others. In addition, during the preparation of the solution, it is possible to give it any color shade;
- The simplicity of installation is also attractive, thanks to which you can do all the work yourself, without the help of specialists. This will significantly reduce the final cost of repairs;
- The surface design can be diversified through simple and technically accessible techniques, for example, by adding granular components with different fractions to the solution, using a mesh, etc.;
- Due to the low weight of the plaster, it practically does not increase the load on the walls and foundation.
Important! As for insulation, it should be noted that, despite the fact that the “fur coat” performs the function of insulation, it will not cope with this function fully if the walls of the residential building are thin and insufficiently insulated.
Disadvantages of decorating a house with fur coats:
Finishing walls with a fur coat is also characterized by a number of negative aspects, which craftsmen often learn about after applying the plaster.
- Firstly, the textured surface collects dust;
- Secondly, finishing the facade with a fur coat may not be combined with all stylistic decisions. For example, if the colors are chosen correctly, it will favorably complement traditional classical styles, but it is practically incompatible with modern high-tech style;
- The thermal insulation qualities of a fur coat do not exceed those of traditional plaster.
As for the severity of the decorative relief, compared to another type of plaster - bark beetle, fur coat is inferior to it in this regard, but it looks more elegant and modern.
Decorating a house with a fur coat photo
Decorating a house with a fur coat with your own hands: procedure
Preparing the rough surface
- By analogy with other methods of decorative finishing of facades, the installation of a “coat” begins with the preparation of the base surface, which must be carefully plastered, as it will determine its adhesive characteristics and the subsequent degree of adhesion of the “coat” to the base.
Important! If, after measuring the planes, you find that the walls are fairly even and their difference does not exceed 0.5 mm per square meter. meter, during the process of plastering the facade, you don’t have to place beacons. Even greater deviations in heights on the wall plane are possible if a “fur coat” is used, the fraction of which exceeds 10 mm.
- If the height differences exceed 2 cm, the wall surface will need to be leveled, which is done by applying a rough layer of plaster.
- First of all, inspect the surface and, armed with a metal brush, remove the previous coating. If there is partial tile finishing, it is also removed;
- To ensure high adhesive characteristics, the surface must be rough. On a smooth surface, using a chisel and a hammer, apply special notches or indentations along the seams of the brickwork, which will improve the adhesive characteristics of the surface;
- Next, the surface is treated with an antiseptic, which is especially important if you are dealing with old buildings. Thanks to this procedure you will protect the walls from fungus;
- After complete processing, apply a layer of primer, which, after drying, will provide high-quality adhesion to the surfaces. To achieve maximum effect, experts recommend using a deep penetration liquid primer, which is applied with a brush or spray.
Important! To make the connection of surfaces even better and more durable, craftsmen recommend reinforcing it with construction mesh.
Preparation of the solution: composition of the mixture
Manual mixing of components
- To carry out exterior finishing, a fur coat, or rather a mortar, is prepared from a mixture of cement and river sand, which are mixed in certain proportions. The ratio of components is determined by the brand of cement used. If you use M300 cement as a basis, you will need 3 parts cement and 1 part sand to prepare the solution. If you use M400 cement, the component ratio is 4:1, M500 – 5:1.
- Sand and cement are poured into a container prepared in advance with smooth walls and bottom, taking into account the ratios indicated earlier, and water is added, bringing the mixture to the consistency of mashed potatoes. Experts recommend preparing a small volume of the mixture and testing it on a small area. The need for this is explained by the fact that the decorative effect of the fur coat is determined by the density of the working mixture: the higher the density, the more pronounced the texture of the plastered surface will be.
Important! To prevent premature settling of the cement mortar, it is recommended to add a little washing powder to it. To make the consistency of the mixture more uniform, you must use a drill with an attachment to mix the solution.
There are many ways to improve the decorative characteristics of a plaster mixture. In order to diversify the type of facade plaster, the following techniques are used:
- A dye of the required color is added to the finished mixture, which will prevent fading of the painted surface and eliminate the need to renew it;
- To make the texture more pronounced, the mixture includes the same amount of putty and enamel paint;
- For the same purpose, marble chips, pieces of multi-colored glass and similar materials are added to the thick plaster mixture.
Important! If you plan to give the facade some shade, experts recommend giving preference to applying paint to the finished “coat”. This is explained by the fact that during the process of tinting the solution before applying it, it will be difficult to achieve a uniform shade, since the solution will have to be mixed several times. However, if you are confident in your abilities or you have to plaster a small area, which will allow you to mix and install the “fur coat” at the same time, you can neglect these recommendations.
Use of dry mixtures
Cement-based dry plaster mixtures are available for sale, which can be not only white, but also colored. They are mixed with water and, using a construction mixer equipped with a special attachment, brought to a homogeneous consistency. After keeping the solution for 5 minutes, it is mixed again, after which it is completely ready for use. It is important to prepare the mixture in the amount that will be used at a time.
Use of ready-made mixtures
In addition to dry mixtures, construction stores offer ready-made plaster compositions, the main difference of which is not the state of aggregation, but the chemical composition - most mixtures are made on the basis of acrylic copolymers, which reduces the vapor permeability of the finishing layer, at the same time increasing its elasticity.
Applying fur coat to the wall: basic methods and tools
After the solution has been prepared and all preparatory measures have been completed, it is necessary to begin directly applying the plaster. If you are a beginner, use the video presented in the article - finishing with a fur coat will not be as difficult a process for you as it seems at first glance.
There are four main ways to apply a fur coat to a wall. Let's look at them in more detail.
- Throwing mortar onto the wall using a broom and a stick is a finishing option that, according to most, is carried out using the “old-fashioned” method. As can be seen from the context, it is produced using a broom and a stick. Despite the fact that the technique is gradually becoming a thing of the past, becoming obsolete, some masters still value it for its low cost, characteristic simplicity of execution and accessibility of the tools used. However, it will be acceptable only for surfaces with a small area. To apply the solution using one of the simplest and most accessible methods, take a broom in one hand, dip it in its solution and, tapping it on a stick in the other hand, apply the solution to the surface with the resulting drops.
Important! To obtain finer splashes, the broom must be replaced with a stiff brush, and the stick with a thin wooden strip. Run the brush along the brush in the direction opposite to the wall and small splashes will fall on the surface being treated.
Important! In the process of applying plaster in this way, irregularities often arise that can spoil the appearance of the plastered surface. If you notice such a deficiency, remove excess solution with a trowel and repeat the application of the solution.
- Throwing the solution through a mesh is another accessible method of manually applying a fur coat. The texture of the plastered surface, the installation of which was carried out using this method, will be slightly different from that applied using a broom and stick. To make the application process more convenient, experts advise stretching the mesh screen over a wooden frame. The resulting structure is placed near the wall and, as the work progresses, it is moved along its surface, throwing the solution onto the mesh using a trowel.
In addition to manual methods, there are hardware methods for applying fur coats.
- Applying plaster using a mechanical machine is one of the modern advanced hardware methods. In the process of work, a machine is used, the design of which is nothing more than a drum made of stainless steel and equipped with blades inside. During work, the mechanism is turned with a handle located on the side of the drum. The work process looks like this:
- The solution is loaded inside the drum and the structure is directed so that the outlet is facing the wall, after which the handle is turned. The unit is considered convenient to use, but it needs regular washing and thorough cleaning. If this recommendation is ignored, the blades will soon become clogged with frozen solution, which will lead to failure of the mechanical structure;
- Applying a fur coat using a compressor - a device that pushes the solution to the surface under pressure created by compressed air. This principle of operation has certain similarities with what underlies the operation of a mechanical machine with rotating blades. The use of a compressor is valued by professional builders, who with its help can carry out a large amount of work in a short time. In addition, this device ensures uniform application of the solution, as well as the same shape and size of the treated drops.
Important! If you prefer this method, do not rush to purchase a compressor; you can rent it from professional builders, which will be much cheaper.
- Fragmentary application of a fur coat is practiced by creative people who want to diversify the design of the facade. In the process of fragmentary application of a fur coat, the plaster is applied to individual sections of the wall, highlighting the protrusions of the walls or drawing various geometric shapes. In this case, textured plaster is applied to areas previously delimited by slats.
Important! Before you start applying textured plaster, carefully measure your own strength and the time allotted for the work. Within one day, it is recommended to spread the plaster onto the selected surface, and if you need to take a break from work, cover the edges of the freshly applied plaster with film. This will protect the plaster from the appearance of cracks after applying a new portion of the solution.
Tips from the experts that you need to pay attention to
In order for fur coat plaster to be used for a long time, maintaining its original appearance, you need to follow the useful advice given by our experienced craftsmen. Pay particular attention to the following recommendations.
- Plaster application must be carried out under certain weather conditions. The air temperature should be in the range from +5 to +27 degrees, and direct sunlight should not fall on the plastered surface (it is best to carry out work in cloudy, but not rainy weather). This will prevent rapid, uneven drying of the plaster layer and its subsequent cracking;
- The plaster is applied in three layers, which are applied sequentially in one day. In this case, each subsequent layer is poured after the previous one has dried slightly;
- Do not skimp on the primer; it must be applied;
- To give the solution the desired shade, the following mineral powders are used: finely ground cobalt glass, coal powder, red iron ore, manganese powder, white asbestos and finely ground white marble. They are added to the solution during the process of mixing sand, cement and water;
- There are also special requirements for the consistency of the mortar: the mortar must be thin, but not allow the walls to slide;
- To increase the graininess of the fur coat, it is recommended to use a stick with a broom or a metal mesh. To create a less pronounced texture, choose a metal mesh.
Painting the facade under a fur coat: recommendations from experts
As mentioned above, to give a fur coat a uniform shade, they practice painting facades to match the fur coat. This can be done in several ways.
- One of the simplest methods is the use of colored plaster, which is added to the solution in such an amount that it provides the desired shade of the required intensity. It practically does not fade, and if microscopic cracks appear, the intensity of the shade will not change.
Important! Painting a facade like a fur coat is associated with certain difficulties associated with the surface topography. The texture of a fur coat implies height differences of up to 3 mm, which, on the one hand, increases the working surface area and excess paint consumption, and on the other, makes painting with a roller or brush almost impossible, since the surface will be painted unevenly.
- In view of this, it is necessary to consider a more effective method of painting a facade under a fur coat - using a spray gun or spray gun, which breaks the paint composition into tiny splashes, which allows you to evenly paint over all irregularities, while reducing paint consumption. If necessary, individual areas are painted with a brush.
Despite the cheapness of the work (the total cost of repairs consists only of the cost of sand, cement and dyes), the result will often exceed your expectations. After reading the article, you are most likely convinced that the process of applying a fur coat is quite simple, especially if you have special automated devices. To consolidate your skills, we recommend that you watch the video below.
Fur coat wall decoration video
Points to consider when working
When starting the plastering process, you should remember that the optimal air temperature for working with the solution is from +5 to +27 degrees. Not lower and not higher. At the same time, the raw mixture should not be exposed to direct rays of the sun, which means another desirable condition is to work in cloudy weather. But no precipitation.
Don't skimp on primer. The entire surface of the building must be carefully treated.
Special powders can be used as coloring agents for the solution:
- to obtain a white color, asbestos or crushed white marble is suitable;
- you can color the mixture red using iron ore or manganese;
- Coal powder will help give the composition a black color;
- finely ground cobalt glass is a means of preparing a blue-blue composition.
You can make coloring powder for decorative plaster yourself from well-known materials
Powders are added to the solution while mixing the cement-sand composition with water.
Now, knowing the technology of applying plaster under a fur coat, those who want to decorate their home themselves can only apply the theory in practice.
Types and installation of foundation plasters
Whatever finishing option you choose, the packaging with the composition should be marked “for facade work.”
Mosaic covering for the foundation
Mosaic plaster for the plinth is a working mixture of acrylic resins filled with granite or marble chips, natural color or painted, both mono- and multicolor. The filler fraction can be different, from 0.5 mm to 3 mm. The most popular is with a grain size of 1.2 to 2 mm. The coating can withstand mechanical loads, temperature changes and humidity well. Also, the acrylic contained in the finish gives it high elasticity, and therefore crack resistance.
Important: applying mosaic plaster for exterior work to the foundation is only possible in dry weather and on a dry surface. This is due to the low vapor permeability of the composition - moisture will escape from under it for quite a long time, which, in turn, can cause mold to damage the surface.
Mosaic plaster
Plastering the base of a house with your own hands: the video describes the process of applying mosaic finishing:
Stone foundation finishing
Plastering the plinth under the stone is done with ordinary cement mortar in a ratio of 1 to 3. Some craftsmen advise adding tile adhesive to it, approximately 20% of the total mass. The coating can be given any design: Roman and simple brickwork, rubble stone, etc. The technique of applying a coating to the foundation is very simple: ordinary plastering is done, then the texture is applied and the seams between the “stones” are unstitched.
The video clearly shows the process described above:
Stone plinth plaster has the following qualities:
- Good decorative characteristics.
- Low price compared to other types of finishing.
- Easy to install on foundation.
- Good vapor permeability.
- When applied correctly, long-term and trouble-free operation.
Important: this finishing option requires a fairly thick layer of working compound. Therefore, the foundation for installation of the coating should be prepared very carefully. If the surface is not very reliable, then the plinth must be plastered using a mesh.
Plastering the foundation under a stone: the photo shows a combination of textures
Basement plaster “fur coat”
Finishing the base with decorative plaster “fur coat” can be cement-sand, cement-lime or silicate in composition. The performance characteristics will directly depend on this:
- Cement-lime mortars are quite elastic, resist mold attacks well, and do not harden too quickly, which makes them easy to work with.
- Base silicate plasters “shuba” protect the foundation well from moisture, while maintaining decent vapor permeability. It should also be noted the high decorative qualities of the coating and long service life.
The characteristics of cement-sand compositions are given above, so we will not repeat them. “Shuba” plasters are applied manually or mechanically. Both of them are quite simple and do not require special skills to operate.
Finishing the base with “fur coat” plaster
Base plastering technology
The process of plastering the base with cement mortar or a composition of another quality can be divided into three stages:
- Preparation. This is repair, priming and/or installation of reinforcing mesh on the surface if the foundation is insulated with foam plastic.
- Application of working composition. The method depends on the type of plaster: stone and mosaic - with a trowel, fur coat - by spraying by hand or with a special machine.
- For “stone-like” and fur coats - creating a relief, stamping or trowel.
Plastering the foundation with your own hands: the video describes the process of creating a relief by stamping:
Important: preparing the base for finishing must necessarily include cleaning the surface from crumbling concrete. We knock down such areas until a homogeneous material appears.
How to paint a ceiling without streaks, streaks and unevenness
Painting the ceiling is the most common way to repair it. But it’s far from the easiest: to achieve a good result, you’ll have to spend a lot of time and take into account several subtleties. The topic of our article is how to paint a ceiling without streaks and other defects.
Our goal is the perfect ceiling. Material: water-based paint. Let's find out how to apply it correctly.
Preparing the room will come down to taking out what can be taken out and covering everything else. The ideal material for protecting against paint drops is polyethylene film. But preparing the surface of the ceiling will be much more hassle:
This is interesting: How to install facade panels on a frame house in detail: Step-by-step instructions
Brief description and advantages
Shuba plaster is the application of cement-sand mortar to the surface of the house by spraying. This process is easy and even a beginner in construction can do all the work, since you only need mortar, a stick, a broom and a trowel. The application process is not labor-intensive and will take a little time if you compare it with other finishing methods (log house, siding, stone cladding, etc.). Material costs are minimal, and the only thing you have to buy is cement and a colored pigment to color the solution in the required shade.
The advantages of making a fur coat at home are the following:
No costs.- Beautiful view of the building.
- Easy to apply the mixture
- Excellent thermal insulation and sound insulation performance.
- Excellent protective properties.
The disadvantages include the fact that the final result (appearance) will not fit into modern garden styles (for example, hi-tech), as well as the fact that such a coating is a dust collector due to the surface topography.
Independent work
To paint the facade of a house with a fur coat yourself, you will need the following materials and tools:
- Roller.
- Brushes for painting.
- Spray gun.
- Cement mortar.
- Mortar for textured plaster.
- Hard brush.
- Wooden slats.
- Paint tray.
When you don’t want to work the old-fashioned way with a broom and trowel, a special machine for applying plaster will help you do the job. The price of the device is relatively small and depends on the complexity of its design.
A machine for applying plaster will speed up the finishing process, allowing you to significantly save effort and time.
She applies the solution to the surface. The layer of plaster is relatively small and neat. In the video, which shows operations using a machine for applying plaster, you need to pay attention to how the specialists hold it correctly.
The bell of the machine is positioned at a right angle. And one more nuance: facade plaster using this device must be applied in several layers, otherwise the finish will be too thin and unsuitable for long-term use.
Fur coat creation technology.
Simple installation methods
As for the simpler old-fashioned methods, they are usually distinguished by the types of plastering tools. In addition to a broom, a brush and an iron mesh are perfect. Facade plaster is most easily applied using an ordinary broom.
It is soaked in the solution and hit with it on a stick that is held against the wall. The solution is sprayed, distributed over the surface. Then the action is repeated.
Using a brush, this operation is no more difficult to perform, and in some cases, much more convenient. The dissolved façade plaster is placed in a special container and a brush is dipped into it.
As soon as the tool is brought to the wall, it is turned over and passed along the bristles with a board. The action is performed in the direction “towards oneself”. The operation is repeated until the fur coat is applied.
When looking at photos and videos of finishing work, it often seems that finishing external walls using mesh is a very labor-intensive process. This is far from true if the mesh itself is chosen correctly. It should be light and not difficult to install.
The price of finishing work will be slightly higher, because, in addition to the metal mesh, you will need a wooden frame, where it will be strengthened. Using a trowel, apply the prepared solution onto the mesh. The mesh is removed as soon as all necessary facing operations have been completed.
Fragmentary application of a “fur coat”
For fragmentary application of a fur coat, it is advisable to prepare the appropriate areas
In the event that it is necessary to apply a “coat” to certain sections of the facade, thus drawing geometric shapes, or to highlight wall protrusions, it is recommended to initially make such elements with a mortar for plastering. As a rule, in such cases the pedestal is not made, and textured plaster is applied to designated areas, previously limited by slats .
Considering that the surface of the “coat” has a rough texture, the rough plaster does not need to be rubbed with a construction trowel. The only exception is deep corrosion. They should be removed when leveling the walls as a rule.
Methods of applying a “fur coat” to the wall
There are several methods of applying a “fur coat” to the facade of a building:
Schematic representation of methods for applying a fur coat
- throwing the solution with a broom and stick;
- throwing the solution through the mesh;
- machine method of applying a “fur coat”;
- throwing the solution using a compressor.
Let's consider each method of decorating the facade separately.
We recommend reading: DIY methods for applying façade plaster.
Broom and stick
The simplest method of creating a “fur coat” on the walls of a building is the one that is done using an ordinary broom and stick. A millet broom is taken in one hand, dipped into the solution and beaten against a stick, which is in the other hand. Impacts on the stick are applied with the base of the broom towards the surface to be treated. If you need to get small splashes, use a stiff brush and a wooden slate instead of a broom. To do this, just run the strip along the bristles of the brush in the direction opposite to the wall. So, the splashes will fall on the surface being treated.
Applying plaster under the “fur coat” using a broom
Mesh and trowel
The texture of the fur coat applied using mesh will differ from the previous one. For convenience, it is recommended to stretch the mesh screen onto a wooden frame. This structure must be moved along the wall, throwing the solution onto the mesh with a trowel.
Popular modification of devices for applying plaster
Mechanical machine
This method can be considered improved. Such a machine is nothing more than a structure made of a drum made of stainless steel and equipped with blades inside. The mechanism is rotated by a handle located on the side of the drum.
After loading the solution into the drum, you need to point the structure with the outlet hole towards the wall and turn the handle. This unit is easy to use, but requires regular thorough cleaning and washing. Otherwise, the frozen solution will clog the blades and quickly disable the mechanism.
Do-it-yourself device for applying plaster
Compressor
Considering that such a creative process should be approached with a certain amount of imagination, you can try various methods of applying facade decorative plaster to the surfaces being treated. It remains to master one more mechanism, which is used in this work. Here the solution is pushed onto the wall by applying compressed air. This method is reminiscent of the principle of operation of the blades in a mechanical machine for applying a solution.
Detailed video on working with professional pneumatic (compression) installations for applying plaster
| When starting to decorate the facade with a “fur coat”, it is recommended to measure your own strength as accurately as possible with the time allotted for the work. Within one day, it is advisable to completely sketch the solution onto the selected plane. If it is necessary to take a break from work, cover the edges of the freshly applied plaster with film. This will protect the “fur coat” from cracking after a new solution is applied nearby. |
How to properly mix a solution for a “fur coat”
When the walls are ready for applying decorative plaster, you can start mixing the finishing mortar. As mentioned earlier, such a solution consists of one part cement (mainly grade 400) and three parts sand . The size of the fraction of such a solution directly depends on its density. With denser plaster, the splashes will be larger.
| The optimal thickness of the solution for a “fur coat” is considered to be one whose consistency resembles liquid mashed potatoes. In order to make sure that the decorative plaster has the correct consistency, it is recommended to test it on a small section of the wall, adjusting it to the desired condition if necessary. |
In some cases, a solution for a “fur coat” can be prepared by mixing enamel paint and putty in equal parts. If a larger fraction is needed, more putty is added.
Video on how to mix plaster mortar
| To give the facade the desired color, paint should be applied to the finished “coat”. If you tint the solution before applying it to the wall, the shade may be uneven. This happens because the solution must be mixed several times and it will be difficult to calculate the same amount of pigment. |
Preparing a solution for the “fur coat”
You can buy ready-made dry mixture in stores, but if you throw on the “fur coat” on your own, then you need to knead it in the following proportions:
1 part cement + 2 parts sand. These ingredients are diluted with water, stirred with a mixer, and pigment is added along the way to give the solution color. After giving the solution a uniform consistency, PVA construction adhesive is added to the finished mass (it can be replaced with lime or gypsum) in a proportion of approximately 1 liter per 10 kg of solution. The thinner the mixture, the finer the fur coat will be.
Painting the facade with colored plaster
Finishing the facade with a fur coat allows you to paint the building in the desired color. To do this, dye is added to the finished plaster mixture. The color and intensity of the color depend on the color and amount of dye.
Colored plaster is able to retain its color under the influence of natural factors, various damage to coatings (for example, cracks), the color does not change.
Colored plaster gives free rein to the imagination of creative people seeking to diversify the design of the facade. Various geometric shapes are preliminarily drawn, boundary slats are installed on the boundaries of the areas, and plaster of different colors is applied to these areas. As a result, a pattern is created on the facade, giving the entire building a unique look.
Facade under a fur coat
The facade of a house with a fur coat is a practical and simple solution that allows you to give the building an attractive appearance at minimal cost. The method owes its name to the similarity of the resulting surface to the fur lining of sheepskin coats.
House facade under a fur coat
The facade under the fur coat is carried out by applying, or more precisely, by spraying, a suitable plaster composition. The work is simple and accessible to any novice master.
Finishing the facade of a house with a fur coat: advantages and disadvantages
Advantages:
- plaster reliably protects the base surface of the walls from rain, snow and frost;
- finishing work is simple and completed in the shortest possible time;
- the introduction of a coloring pigment into the initial mixture allows you to obtain any color scheme;
- the surface can be diversified using simple techniques: adding granular components to the mixture, using a mesh, and so on;
- finishing the facade of a house with a fur coat does not require complex preliminary work;
- the weight of the plaster is small and does not place a large load on the walls and foundation;
- the cost of both the material and the work is more than affordable.
Flaws:
- the textured surface, unfortunately, collects dust well;
- this method of finishing is not compatible with every stylistic decision;
- its heat-insulating qualities do not go beyond the usual parameters for plaster.
Facade preparation
Finishing is carried out on any surfaces: concrete, brick and wood. In the latter case, you will need lime-gypsum spray and specialized soil.
The scope of work depends entirely on the condition of the wall.
- If the height difference is no more than 1.5–2 cm, then the facade does not need any preparatory work other than cleaning.
- If the level differences are more than 2 cm, it is necessary to level the wall surface. To do this, a rough layer of plaster is applied to the façade.
- If the cladding is old enough and has collapsed in places, it is removed. If the finish is of good strength, the fur coat can be applied to such a surface, but in this case the wall needs to be processed - apply notches.
- The same technique is used when finishing the façade of a house made of facing brick with a fur coat: its surface is too smooth and does not provide a good level of adhesion.
Features of painting when finishing with fur coats
The needle-like, uneven texture of the resulting coating creates difficulties when painting it. First of all, this is an increased surface, which leads to excess paint consumption; at the same time, it is impossible to use brushes and rollers, because this leads to overuse of paint or poor quality of painting.
Good quality painting is achieved when using a spray gun. The spray gun turns the paint into dust-like drops that cover uneven surfaces, reducing paint consumption. Noticed unevenness in coloring can be corrected with a brush. Before applying paint, it is recommended to clean the surface and treat it with a primer for better adhesion to the surface covered with plaster.
Tips for making a fur coat
The method of applying a fur coat finish is quite simple, but there are some features of its application. By adhering to these rules, you can obtain a strong and durable coating that reliably protects the facade of the house from external factors. Here are some secrets of using the method:
- It is recommended to carry out work at air temperatures from +5 C to +27 C. The surface must be protected from direct rays of the sun. Cloudy, not rainy weather is optimal.
- Each layer must be done at one time, after applying the layer it must dry.
- The surface on which the plaster is applied must be carefully treated with a primer.
- It is not recommended to use thick solutions. The consistency of the finished solutions must be such that the plaster holds and does not flow down the surface.
- To preserve the color of the coating for a long time, it is recommended to use natural dyes: red iron ore, manganese, asbestos, powdered marble and cobalt glass, crushed coal.
- The best quality coating is obtained by using a broom and a stick or mesh.
Finishing building surfaces with a fur coat is one of the ways to update the appearance of old buildings and create an individual look for new buildings. The method is simple and accessible for beginners to master. A variety of colors and texture additives allows you to give a unique look to buildings. The cost of finishing is low and has a long service life. Finishing buildings with a fur coat will not require maintenance costs.
Paint Spray gun Finishing Painting wall facade Plaster
Dyeing and tinting the “fur coat”
The technology for forming a “coat” does not end with plaster alone – the painting stage is necessary. At least this applies to the white and gray mixture. There are colored materials on sale, which allows you to do without painting the surface. True, such options are more expensive than colorless or neutral products.
Painting is done after the solution has dried or by adding color during the preparation of the mixture. In this case, an aesthetic appearance is obtained that will highlight the interior design. However, it takes time to thoroughly stir the plaster. And at the same time take into account two main factors:
- The applied mixture turns pale after drying, so when selecting paint it is better to make test “strokes” on a separate and inconspicuous area.
- In the case of large areas, a lot of solution is required, which it is advisable to do in small portions. At the same time, it is difficult to give each batch of the prepared mixture the same color. Then the only way out is to paint the finished surface after the solution has dried.
For the desired color, you can use dry coloring components such as powdered coal, red iron ore, manganese, cobalt glass. After adding it to the solution at the mixing stage, you will not have to paint the walls in the future - they will already acquire a shade that will last for a long time.
There is one significant nuance in coloring a finished “fur coat” - due to its texture, the work is more difficult to do, but with a smooth surface it is easier. After all, the paint must penetrate into all the recesses. Therefore, it is recommended to use a spray gun or a fleecy roller.
The color of the plaster can be changed by painting
What do you need to apply it yourself?
Do-it-yourself plaster coat
Before we look at popular manufacturers of dry and ready-made fur coat plasters, let’s look at what tools you can use to create a plaster solution yourself:
- Bucket or mixing container
- Water
- Sifted sand
- Cement
- Stirring tool – wooden or plastic stick
- Broom
The manufacturing and application process is quite simple, but at first glance it may seem impossible. By the way, in this case, the wooden stick also serves as the material against which the broom, previously lowered into the plaster, beats. The most important thing is to position the materials correctly so that all the coat of plaster is sprayed in the direction of the wall.
Important! When using a simple solution, subsequent painting of the surface is allowed.
The disadvantage of creating cladding using a broom is that you will not be able to properly process a large area of the wall. Use this method on small areas. If the option with a broom does not surprise you, then you can use a roller to apply the fur coat. At the same time, select relief elements. First of all, plaster is applied to the wall, which is then given relief thanks to the above-mentioned roller. In order for decoration to achieve the desired effect, you must have some skills, otherwise the decoration will look awkward.
If you have a compressor, then applying coat of plaster will be much easier. By choosing the right gun that connects to the compressor, you can very quickly fill the entire surface with plaster. Using a spray gun, the consumption of plaster under a fur coat will be significantly reduced, since the technological process of processing using a mechanized method means applying a uniform and thin layer of the mixture. Hoppers for plaster are sold in specialized stores, where competent specialists will help you choose a nozzle for the desired fraction of fur coat.
The procedure for performing work on finishing walls with “fur coat”
- Preparing the walls.
- Sweep away the dust.
- We apply primer.
- We plaster the surface of the wall with ordinary plaster, keeping the level.
- Then you need to give time for the wall to dry completely.
- Mix the plaster solution under the “fur coat”.
Of course, in building materials stores you can purchase ready-made solutions for such purposes, but if you make “fur coat” plaster with your own hands, we use the following materials: It is better to choose river sand, having previously sifted it. We use ordinary gray cement, in my case, because the color will not change.
Please note that in order for the “fur coat” to be colored, it is necessary to use decorative white cement.
Advice. It is better to add a dye of the desired color to the prepared solution. This way it will be more resistant to fading than, say, painting a ready-made “fur coat.” Proportional ratio of mortar for “fur coat” plaster. 1 cement + 2 sand. The consistency should be like this - the thinner it is, the finer the grain size of the plaster.
Making a “fur coat” on the wall
✓We throw the solution on the wall.
To apply the solution, we used to use birch brooms, but we will use a regular sorghum broom. (Sorghum is a genus of annual and perennial herbaceous plants).
✓Dip the broom into the solution. ✓We hit the stick (you can just blurt it out). Thus, it is as if we were spraying the solution onto the wall.
Please note that it is necessary to apply in 2-3 layers; when the first layer is ready, you must immediately apply the second without allowing the solution to dry out, otherwise it will fall off. Try to apply the solution evenly so that you get a uniform color and no sagging.
By the way, when the fur coat is still fresh, you can apply different designs or patterns to the surface using a narrow spatula. And after hardening, simply paint over it.
If you decide to paint over it after plastering, it is better to do it after it has completely dried. If you are decorating some kind of ledge or parapet, then first you need to level the outer corners using a special perforated corner (sold in hardware stores) or profile.
Then plaster, and only then make a “fur coat”. That's all on this topic. Apply and experiment! If you want to learn about a more complex type of decorative plaster (“bark beetle”), read these articles: Remodeling a balcony - part two.
We insulate the country house with polystyrene foam. And also subscribe to the site's news - it's free!
If you have any questions, please contact us via the “Contacts” page or through the feedback form (blue button on the left). Good luck to all! Sincerely, Yuri Filippov.
Probably every owner of his own home has thought about how to transform the appearance of his home. One of the good options is decorative plaster of the walls of the room.
Of all the types of decorative finishing, the most common is the so-called fur coat. Low financial costs, as well as a simple technological process, are the reason for the popularity of this type of plaster. You don’t need to be a master with many years of experience to master the technique of decorating facades. The process itself is completely simple, and you will soon see this.
Selection of tools
First of all, you need to select the tools that you will use during the work process:
- capacity;
- roller;
- soft bristle brush;
- tinting paste;
- broom.
Material for plaster coat
Modern finishing mixtures have a number of advantages over the cement that was used before. Durability, elastic coating and low financial costs are an incomplete list of the advantages of modern materials for covering facades.
When you choose a mixture, please note that there is both dry material and ready-to-use material. The dry mixture will be cheaper in terms of money; just mix it with water and it will immediately be ready for use. But the disadvantages include the fact that all dry mixtures are made on the basis of cement, and this indicates a decrease in the durability of the plaster, as well as a lack of elasticity.
Ready-made material is another matter; you will have to overpay a little for it, but it’s worth it. Acrylic copolymers are the basis of the finished mixture; this viscous mass copes well with microcracks.
One of the excellent options for the ready-made mixture is the structural plaster aura putz fur coat. It is intended for surfaces such as concrete, plasterboard, masonry, plaster, plywood, chipboard. The mixture has proven itself very well and has a lot of positive reviews.
It also wouldn’t hurt to use silicone decor on the “fur coat plaster.” It is based on silicone and acrylic resins. This mixture is characterized by its durability and water resistance.
Methods of applying plaster
There are several methods of applying plaster, they all have their pros and cons, I suggest considering each method.
Method 1. Applying plaster using a stick and broom
Finishing a small area can be done using the old method, which uses a stick and a broom, but it is only effective when working with a small area. This type of fur coat plaster technology is carried out as follows: take a broom, dip it in the solution and hit it on a stick in the direction of the wall, as a result we get splashes on the desired surface. This process takes a long time, and, most importantly, you need to have considerable experience in order to apply the mixture evenly.
Method 2. Applying plaster with a brush and plank
This method of applying plaster is also a rather old method and belongs to the “old-fashioned” category. Few people use it these days, but we have to consider it.
So, we need a brush and a small wooden plank. The brush needs to be dipped into the solution, then near the wall on which the fur coat will be applied, turn the brush over and run the board over it towards you, as a result the splashes we need will fall on the wall.
Method 3. Applying plaster with a roller
The next method of plastering under a fur coat takes less time and is as follows: first you need to apply a thin layer of the mixture to the surface, then while the solution is still damp, take a textured roller and run it over the surface, the roller will leave a “lint” behind it. The complexity of the method lies in the fact that it is quite difficult to obtain a uniform texture using a roller, therefore, as in the previous method, you cannot do without the experienced hand of a craftsman.
Method 4. Applying plaster using a compressor
You can get the job done quickly enough with the help of a compressor; the money spent on its purchase will be repaid in full by the time saved. The drawing turns out smoother and more rounded. The texture is quite easily regulated by the concentration of the solution; if you make the mixture more liquid, the droplets become small, as a result we get less surface porosity.
Important! The advantage of the round surface of the plaster is its durability, since the thorns fall off quite quickly.
Method 5. Plastering under a fur coat using a machine
If your funds are not enough to buy a compressor, you can perform fur coat plaster using a special machine. The process itself is more of a manual job, but the result is almost the same if you applied the plaster using a compressor.
The machine itself is a container into which the solution is poured. Inside the container there are plates that, when the handle rotates, get dirty with the solution, then resting against a special stop, they splash onto the surface. This work is painstaking, but the result is a beautiful and uniform fur coat.
Method 6. Applying plaster through a mesh
This method is one of the most popular technologies for applying plaster manually. Despite the fact that the mesh has been used for quite a long time, it has not lost its popularity to this day.
To get started, we need the mesh itself with small cells. The mesh needs to be pressed against the wall, and then using a trowel, apply the mixture to the surface through the mesh. Then the mesh is removed, leaving behind a layer of plaster under the fur coat.
Important! There should be no mismatches or gaps between the resulting fragments, and the layer should not be duplicated.
How to paint plaster under a fur coat
Almost always dry mixtures are sold with the addition of dye. Tinting pastes provide the opportunity to choose the color of the plaster under the fur coat yourself. The basic colors of dry mixtures are gray and white; if you want to paint a fur coat in darker colors, a gray mixture is better for you, and to create light colors, take a white mixture.
It is better to color the solution with the help of a specialist, because you may not get the proportions right and you will not get the desired shade.
Fur coat plaster can also be simply painted with façade paint; uniform paint application is much easier to achieve in this method. The main advantage of façade paint is the ability to repaint a fur coat several times, but when cracks appear in the plaster, the original color of the solution stands out, because of this, many people opt for coloring.
How to make fur coat plaster with your own hands
Absolutely anyone can master the technological process of applying plaster; it is not a difficult job at all. First of all, you must have tools and devices for applying plaster (broom, stick, roller, compressor or special machine). Do not forget also about the tools that you will need when working on finishing the surface on which you will make a fur coat (chisel, hammer, brush, trowel, shovel, as well as a container where the solution will be mixed).
Step-by-step application of coat plaster
Decorating walls with plaster occurs in several stages, each of them is of particular importance. Therefore, it is extremely undesirable to neglect even the slightest detail in the work.
Stage one: Prepare the surface
First of all, we remove cobwebs and dust, then we get rid of traces of the old coating (if there are any), then if the surface of the wall is smooth, we apply notches using a hammer and chisel.
Stage two: Priming the walls
The solution adheres better to the surface if we first apply a primer to it. There will be no problems with purchasing a primer; it is available in every hardware store and is inexpensive. You need to apply the primer once with a wide brush, but very carefully. For a very rough wall, it is better to use a sprayer; thanks to it, the primer will get into every crack, and this will also save material consumption.
Stage three: Apply coat of plaster
After the soil has completely dried, we begin to apply plaster. The consistency of the solution should resemble sour cream. The solution is applied in three stages; it is better to let the first layer be applied and leveled by a master, since experience is required here. After the first layer has dried, carefully apply the second, and after that we proceed to the fur coat itself.
Advantages and disadvantages of a fur coat
To summarize, it is important to remember the pros and cons of shuba plaster, let’s start with the advantages.
- First of all, these are low financial costs. In fact, you only spend money on the mixture and tools, which are very inexpensive.
- Heat and sound insulation. This is achieved by applying a thick layer of plaster.
- An important fact is that absolutely anyone can apply a fur coat without any special difficulties.
- Great appearance
The only disadvantage, perhaps, is that for some people this appearance of the house is outdated. Here everyone judges according to their own taste.
As you can see, it’s not at all difficult to make a fur coat-like facade plaster with your own hands, the main thing is to believe in yourself and then you will succeed!
- Instructions for using gypsum plaster Eunice Teplon
- Knauf Rotband gypsum plaster - description and characteristics
- Plastering walls with cement-sand mortar
- Lamb plaster - correct application technology
Plastering the plinth is an integral stage of facade finishing. Without it, the foundation concrete will begin to deteriorate over time under the influence of the atmosphere. In addition, insulation can be hidden under the trim. There can be several options for covering the base: mosaic, stone-like and fur coat.
In this article we will talk about the features of each of them. The main stages of decorative plaster for the basement of a house are also described here.