A worthy alternative to conventional methods
This coloring material is a complete replacement for such traditional methods of wall finishing as wallpapering, cladding with plastic, wood and glass panels . Unlike using panels, texture paint does not require prior plastering. In comparison with traditional paints and varnishes, it is more versatile and stands out for its patterned texture and designs.
It is not just a paint and varnish material with a certain set of characteristics, but one of the varieties of water-dispersed mixtures with a wide group of materials, each of which plays its role as a means for textured surface finishing. The composition of the textured coloring material includes special fillers with particles of approximately 50 microns, which give it increased viscosity - this is what determines its ability to create relief coatings.
Video “Texture paint for walls. Types and methods of application”
The video tells in detail and clearly for the viewer about texture paints, their advantages and the correct application of this material on the walls.
We recommend that you read
How to make stencils for wall decor with your own hands
How to make your own drywall lift for installation work
How to choose decorative wall decoration for a house or apartment
Characteristics and potential
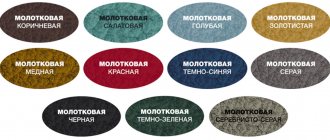
Texture paint is also sometimes called textured paint . It unites a large group of paint and varnish coatings, the purpose of which is to create an unusual surface structure and textured patterns. They are quite thick in consistency, and acrylic polymers occupy a special place in their base. They are characterized by a variety of colors and shades; in addition, pigment dyes are additionally used with them in various proportions, which makes it possible to further diversify the color palette.
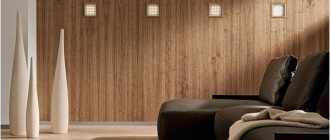
By purchasing texture paint and adding special fillers to it, you can create high-quality textured imitations of natural or synthetic surfaces: wood, stone, tiles, textiles. For example, if you want to create a relief surface with shades of roughness, you can add sawdust to the original color mixture. If you want to create a smooth gloss, the consistency is made thinner by diluting it with water.
Types of texture paint
The potential of this promising finishing material largely depends on its specific characteristics. The division into types is due to differences in the initial compositions and fillers for different texture paints. In this regard, it is divided into :
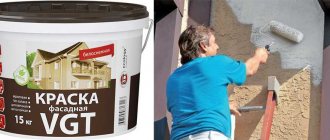
- textured for facade work;
- textured for interior work;
- universal coarse and fine grain.
Acrylic binders in any type of this paint give it resistance to precipitation and temperature changes. The only question is the number of binders and, as a consequence, the degree of stability.
Advantages of finishing material
The main advantages that distinguish textured paints and varnishes from traditional ones come down to the following:
- Can be applied to various types of rough surfaces;
- They have increased moisture resistance. This is the main quality that determines the use of textured paint for finishing rooms with high air humidity, such as kitchens and bathrooms. Moreover, it is advisable to treat even the walls of saunas with them;
- Fire safety is one of the obvious advantages of paints of this type. After application to the wall, they dry reliably, and they are based on no flammable materials that would contribute to the intensity of the fire;
- Surfaces treated with textured paint become resistant to fungus and mold. However, this paint should not be considered as a remedy against mold that has already appeared - only as a preventive measure;
- Surfaces coated with this paint have a long service life. During this period, the walls are not subject to changes in their physical properties, and the paint itself does not tend to lose its decorative characteristics. Where all traditional paints fade relatively quickly, textured paints last for many years;
- UV resistance is one of the main factors that determine the advisability of using textured paint for exterior use. It not only looks good on the façade, but is also perfectly preserved on it, as it is highly resistant to aggressive weather conditions;
- Texture paints use environmentally friendly components. Their harmlessness to the environment, the human body and pets is confirmed by appropriate certificates. In terms of possible allergic reactions, there are also no problems;
- The formation of a protective layer that covers the walls allows you to keep them safe and constantly clean. This layer is resistant to both alkaline reactions and chemical influences;
- Coating with textured paint hides small irregularities, voids and cracks on the walls. Thanks to this, the walls do not require preliminary leveling or other thorough preparation;
- The paint can be given the desired shade. To do this, just add a special color to it in the required proportions. This is a convenient tool for quickly adjusting color saturation;
- Ease of care is also on the side of texture paints. It is much more difficult to spoil this coating than, for example, wallpaper. Due to this, you can carry out wet cleaning using tools with any humidity;
- In many cases, one coat of textured paint is enough. It does not require additional consolidation through repeated application.
All this gives this coloring material not only excellent decorative properties, but also practicality in terms of operational value. It fills cracks in the surface to be finished and masks small irregularities; it is not afraid of humidity and drafts.
Some disadvantages
Against the backdrop of a lot of advantages, the disadvantages of this type of paint are almost invisible . The main ones:
- Significant financial investments due to the high consumption of material per square meter;
- Visual reduction of the room, since textured paint has a thick layer compared to regular paint;
- To refinish walls covered with textured paint, you will have to completely remove it, which can require considerable effort.
These shortcomings are not of a qualitative nature, that is, there are no flaws in the very composition of this material and its practicality that could fundamentally affect its operational potential. The volume of material consumption and the degree of visual reduction of walls are subjective evaluation factors individually for each person, which can also be adjusted. In this regard, much will depend on the complexity and variety of patterns. And the fact that if you remove this material from the surface you will have to work hard, it is compensated by the lack of labor-intensive care for it throughout its entire service life.
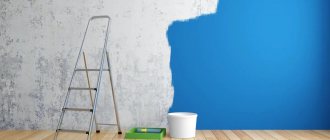
Preparation before painting
This stage is very similar to preparing for the application of usually water-based paint. However, due to the greater viscosity of the textured composition, the strength requirements for the base in this case are an order of magnitude higher.
Operating procedure:
- Preparing the premises. Carrying out repairs of this type is accompanied by the formation of a large amount of dust and dirt. Therefore, it is recommended to completely empty the premises of all furniture and decorative items, remove chandeliers and lamps. Those items that cannot be removed due to their size should be moved to the center of the room and covered with film. Also, the entire floor area is covered with polyethylene (if the final floor finishing has already been laid).
- Stripping off the old finish. The walls and ceiling (if it will also be finished) are cleaned of all old finishing. Ideally, bare panels or plaster should be left. All fragments of the rough base that do not hold well and vibrate when touched must be beaten off with a hammer or pick. The cleaned surface is thoroughly impregnated with primer.
- Plaster, putty. After the primer has dried, a leveling layer of plaster or starting putty is applied. As a rule, the walls are leveled with plaster, and the ceiling with putty. At this stage, it is important to achieve visual smoothing of all irregularities, for which you can use the rule and beacons. If the base is mostly flat, apply finishing putty immediately (in 2-3 layers).
- Grinding. After waiting for the last layer of putty to dry completely (this usually takes at least a day), sanding is carried out using painting sandpaper (No. 120-140). If in the future you plan to use decorative paint that forms a texture, you can be lenient with minor scratches during sanding: they will not be noticeable on the finished surface.
- Finishing primer. A very important stage, since it is important to achieve the most uniform thickness of the primer layer over the entire application area. Otherwise, the finish will contain unevenness. It is recommended to use acrylic impregnation as a material, coating the base with it in 1-2 layers. The pause for drying one layer is approximately 6 hours.
Types of created coatings
To create a unique decor, you need to wisely choose the paint itself and its combination with all kinds of additives. This plays a determining role in how organically the materials used will fit into the overall stylistic concept of the room. The coatings created can be divided into the following main types :
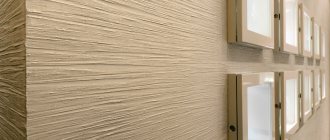
- "Relief". As the name implies, it gives surfaces a relief effect. This is achieved by applying a textured material to which a combination of sawdust and quartz chips is added. The desired degree of relief is achieved quite simply: you just need to adjust the size of the particles that are used as additives;
- "Mizuri." The glossy shine characteristic of this coating makes it no less popular than the relief type. To obtain such a shine, after the material has dried, it must first be diluted with the required amount of water and modified starch;
- "Atacama". The reflective effect of this coating creates an extraordinary optical effect of a surface with a velvety structure. To achieve this, an acrylic base, quartz sand and metal filings are combined in certain proportions;
- "Marseille wax". With this type of coating, both professional and novice designers will be able to unleash their creative abilities. It can imitate tree bark, all kinds of natural stone, climbing vines and much more. After the paint has dried, decorative wax is applied to the surface, designed to give the overall picture the effect of depth and luxury.
Also, sometimes random stains are created on the wall, imitating wet silk. This is done by applying shiny paint with a roller or wide brush, but not with a sprayer.
Additional effects and drawings
The high decorative characteristics of textured paints provide wide scope for creative imagination.
A number of options for additional decoration of the surface of textured paint are used:
- Trowel.
If you have enough work experience, you can achieve the creation of full-fledged artistic compositions on the ceiling or walls. Most often, the brush stroke technique is used for this: instead of a brush, in this case the artist holds a trowel. Applying paint with a trowel - Stencils, sponges, stamps, etc.
To create a uniform surface for additional decoration, you can use pre-selected stencils or sponges. The print is applied to the still raw material, so in such cases it is better to work together: one person applies the paint with a roller or spatula, and the other then applies additional prints to the surface. Applying paint with a sponge - Graters, scallops. They are used to scratch the surface (this technique is typical for creating the “Marseilles wax” texture).
- Azure. Using this material, the painted surface of the ceiling or walls is created with an additional effect. It can be shine, gloss, mother-of-pearl, etc. This will require a two-layer application of the glaze using a short-nap roller or paint brush. A pre-moistened and wrung-out natural sponge is also often used. Having dipped it in mother-of-pearl azure, decorate the base using circular movements. To increase the clarity of the resulting pattern, the sponge is pressed harder and rolled.
To protect adjacent surfaces from paint, the boundaries of the area to be finished are taped with masking tape. If you lack experience, it is not recommended to immediately take on the design of open areas of the ceiling or walls. It is better to choose for preliminary training a place on the wall that will later be covered by a cabinet. Given the thickness of the textured paint, it takes several days to completely dry.
How to apply textured paint: instructions with photos and videos 5 (100%) 1 vote
Application methods
It is impossible to choose a universal tool for finishing with textured paint . Each case will have its own optimal option, depending on many factors. The main thing is not to neglect the removal of the previous layer of material before this, otherwise any advice on choosing a tool will not be able to level out the defects that have arisen. It is also advisable to pre-plaster the surface and cover up large cracks and potholes. It is important to consider that the surface should not have a height difference of more than 2 mm.
Painting with a brush
This method is most relevant in cases where there is a need to apply coloring material to small or complex, angular and narrow areas. It is important that the wall and brush are absolutely clean - this will ensure the best adhesion of the material to the surface .
Before starting work, the coloring material is thoroughly mixed until it reaches a uniform consistency. The paint must be applied in at least two layers: the first by making vertical strokes, and the second by moving the brush in a horizontal plane, which will even out the marks of the brush. However, it is advisable not to make do with two layers and apply a third, consisting of vertical strokes.
Using a roller
The roller is reliable in this regard, as it allows you to create durable coatings . Working with it is fast in large areas, but using a roller in cramped areas can be not only inconvenient, but also ineffective.
When painting with a roller, acrylic paint with a latex base is usually used. A distinctive feature of this paint is its minimal tendency to crumble in the future. As with a brush, the paint is pre-mixed to a uniform consistency, after which it can be applied in one or two layers. If two coats are applied (which is recommended), one is applied from bottom to top and the other from top to bottom.
Sprayer operation
This method is considered the least labor intensive .
You need to prepare a clean spray gun, removing dust from all surrounding surfaces and even interior parts, and only then proceed. It is important that the wall on which the texture will be applied is not only clean, but also dry. The paint is sprayed in two layers: from left to right and from right to left. As a rule, complete drying after such painting takes only 24 hours.
Preparatory stage
The surface for textured paint must be dry and clean, without signs that impair adhesion. Problem areas should be cleaned, old cladding removed, cracks and potholes eliminated. Individual flaws are leveled with putty, and a reinforcing mesh is used to eliminate deep cracks.
The texture composition is able to mask minor defects in the base, hide small irregularities and roughness. For this reason, there is no need to create a perfectly flat base; you just need to repair chips and cracks, and correct height differences of up to 2 mm. Afterwards, the base should be primed with a water-based acrylic material.
Useful tips
Before you take up the tool, it makes sense to study additional useful recommendations from specialists and simply those who have worked with this type of material for wall decoration:
- Before starting work, the entire paint mixture should be placed in a clean container and warmed to room temperature, then mixed thoroughly. It is best to use a construction mixer for this, which should also be clean. A special nuance that facilitates mixing lies in the ability to add water to the initial composition, the total volume of which will not exceed 7% of the volume of the entire material;
- You should first coat the surface with a primer, preferably acrylic. This will increase the degree of adhesion of the paint to the surface, regardless of the composition of the materials;
- When choosing a primer for a wall, you should pay attention to its color - ideally it should match the color of the selected texture material. Also, the primer must be applied in an even layer.
To paint chaotic patterns on the walls, use a soft brush. With its help, the desired pattern is applied to the surface that has not yet hardened. If you wrap a thick rope, intertwined in different directions, around a roller and walk it several times over the painted surface, you can create an imitation of bamboo stems on the wall.
Nuances of technology
To obtain a high-quality finish with high decorative properties, the following points are taken into account:
- Before applying texture paint, the wall is covered with a thin layer of acrylic water-based emulsion to match. The measure helps to eliminate unpainted areas;
- the substance with the effect of volumetric texture is thoroughly mixed using a mixer, diluted with water if desired (no more than a tenth of the total mass);
- according to the chosen interior style, the substance can be distributed with a roller, spatula or spray gun;
- if the technology requires coating in a couple of approaches, the next application is carried out after the previous one has completely hardened, on average after 3-10 hours;
- when applying the mixture with a spatula, a layer with a thickness of 3 mm is formed, after which within 1.5 hours it is necessary to create the required relief using the selected tools;
- The optimal ambient temperature for operation is considered to be in the range from +5°C to +30°C. It is important to avoid direct exposure to sunlight, as well as the formation of condensation on the drying surface.
Important! The intensity and direction of light affect the decorative characteristics of the coating, so during work you should use the lighting option that is as close as possible to the constant scenario.