- before plaster
- after plastering
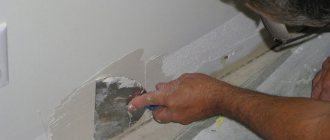
- combined method
A priori, electricians consider the following option to be the most correct. Is this really so and are there any exceptions? Let's consider in detail all of the arguments for and against.
Marking
Make markings before cutting
It is necessary to think about gating and fixing the wiring before finishing the room, before wallpaper is glued, linoleum is laid and furniture is installed.
Marking should be done on a bare wall.
At the selected location, the area through which the cables will be laid is marked.
Marking can be done using a pencil and ruler.
Keep in mind that you will need to decide in advance on the location of sockets and switches. The holes for their installation will need to be made at the same time as the groove for securing the wiring. The width of the groove is determined based on the number and cross-section of the wire that will be placed in it.
Mistakes when laying wires in walls
An example of a groove entering a hole for a socket box.
If you insert a wire through the top or make a hole in the upper part, there is a risk of a short circuit or breakage. When installing the socket, its body will tear the insulation or crush the wire;
Correct entry of wires from the bottom of the socket box
- You should not install wires on lighting and socket groups with a larger cross-section than specified in the project, usually 2.5mm2. With a cross section of 4-6mm2, the cores are difficult to place in the contact group of a socket or switch, especially when the alloy is hard and elastic. Sometimes in such cases, under the elasticity of the wires, the contact groups break, and the ceramic or plastic case bursts.
- In order not to make a mistake in the width and depth of the groove in a separate area, add up the width of all the wires that are laid there and make 1 cm more with a margin.
- When drilling with a hammer drill using a drywall crown, do not forget to turn off the perforation mode, otherwise the sheet may simply break in this place.
Requirements for installing open-type electrical wiring
Here are the basic rules that must be followed when laying open-type electrical wiring in an apartment.
Neglecting them is a violation of electrical safety standards and can cause a short circuit and line failure. So:
- It is prohibited to lay the line under pipelines on which condensate accumulates.
- There should be no heat emitters near the cables.
- It is not recommended to use a simple pipeline to lay such a line. It is desirable that the cable has additional protection. Depending on the location of the wiring, it can be rigid or flexible, or shielded.
- If the conductor is laid in plumbing niches, then you should not use junction boxes if quick access to the power transmission line is not possible.
- Cable cores can only be connected to each other in special junction boxes.
- To fasten the cable, it is recommended to use plastic brackets selected according to the diameter of the conductor. The distance between the clamps should not be too large, otherwise the conductor will sag under its own weight. The staples must be placed on both sides of the wire, and it is also necessary to install clamps near the points of connection to electrical elements. If the cable is laid horizontally, then the staples should be located from one another at a distance of no more than 40 cm when attaching an unarmored conductor and 75 cm for a wire with an armored coating. If exposed electrical wiring is laid vertically, then the maximum interval between clamps should not exceed 1 m.
- When installing conventional conductors with a protective coating in the horizontal direction, the interval between the staples should not be more than 25 cm, and in the vertical direction - 40 cm. The distance from the electrical element to the fastener closest to it should not exceed 10 cm.
- If the wire needs to be bent, the minimum bending radius should be 8 cm.
- If the line crosses a non-electrical pipeline, then the minimum interval between them should be 3 cm.
When laying a cable through a wall, it is recommended to use an insulating pipe to protect it along this section.
Electrical wiring installation, what do you need to know?
When running an electrical cable into an apartment, you need to know that the holes for laying are made in the voids of concrete slabs (if the floor is concrete). If you have wooden floors, then the wire should pass through a metal pipe (15-35 cm wide).
After the power supply wire is brought into the living space, you need to independently design the location of the power points (sockets and switches) and, based on this, lay the cable.
In addition, it is necessary to mark in advance on the wall the places where the distribution boxes and nodes where the wires will be connected will be located.
Every owner should know that when laying a wire between the connection and output points, you should always leave the ends of the conductor at least 30-40 cm for convenient connection of devices and installation of sockets and switches.
Cable laying in the walls should be done only in a vertical or horizontal direction; there should not be any oblique lines in the electrical supply diagram of the room.
Before installing wiring under the plaster, you need to make sure that there is no old connected cable under the finish.
To do this, you can invite the appropriate specialists with an electric locator or simply turn off the old power supply.
When organizing wiring in a brick or concrete wall, remember the following rules:
- the wire is mounted below the ceiling by 25-35 cm;
- the distance from the floor to the wiring should not be less than 15-20 cm;
- power points and connections must be at least 10 cm away from corners;
- It is not recommended to mount spliced wires in the wall; all wiring must be solid.
In junction boxes, wires can be joined using several methods. The “old-fashioned” (old) methods include joining conductors by twisting or soldering. A new joining method is the use of special terminal connectors that create tight and reliable contact.
Gasket using grooves
The methods of laying hidden wiring described above apply to the case when a house is being built and all engineering systems are just being organized.
Grooves in plaster for wiring
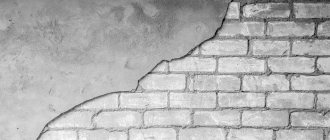
However, there are many cases when owners of brick houses want to replace old wiring with their own hands. In this case, additional difficulties arise.
They are due to the fact that all the old wiring is hidden under a layer of plaster and new wiring will have to be laid in this layer. In order to install it, you need to make channels in which the electrical wires will be placed.
Features of drilling grooves depend on the thickness of the plaster layer. If this layer is thicker than the wiring that will be laid, or the tubes in which the cables will be placed, then only the plaster is tapped.
In this case, you can say that you are lucky because you will not have to put in much effort. However, if the thickness of the plaster layer is insufficient, then you will have to trench the brick wall. And this is much more difficult.
The chipping of brick walls is also carried out with certain rules. So, the channel should not be wider or deeper than 25 millimeters. One groove should not be longer than three meters. Horizontal channels cannot be made on load-bearing brick walls. It is also forbidden to trench ceilings (with the exception of plaster on the ceiling).
In addition, the channels must be made in such a way that there is a minimum number of angles between the locations of the switch/socket and the junction box. Of course, it is better to make only one angle of transition from the horizontal groove to the vertical one. Wall joints are not taken into account in this case.
Pros and cons
There are positive and negative aspects to laying cables under plaster. Depending on the installation conditions, some of them can be neglected, while others should be taken into account. Here are the main pros and cons of this installation method:
Behind:
- Hidden from prying eyes under a layer of plaster.
- High electrical and fire safety.
- Long service life of components.
Against:
- It is impossible to reach the cable without damaging the layer of plaster.
- Complex installation process.
Outdoor wiring
To do this, you need to secure the cable over the decorative wall decoration. As a rule, this electrical installation option is used in wooden houses and garden buildings, for example, in a garage or outbuilding. Cable ducts, clips, or special porcelain insulators can be used to attach wires to walls. Let's consider the features of using each option.
Cable channels
Today, fastening wires and cables in special plastic channels is most often used. This is due to the fact that they have an attractive appearance, low cost, and most importantly, they allow you to quickly secure a group of conductors in one place. To do the fastening yourself using this method, just secure the plastic box to the wall using self-tapping screws.
If you need to connect several elements in one line, you can use special connections provided by the manufacturer. After the cable channel is secured, you can put all the cables into it and close the front cover (it is latched). We talked about this in more detail in a separate article.
Video instructions for installing a cable channel with your own hands
Clips
Fastening wires and cables with clips is used only when, and also if the conductor will be additionally protected by a corrugated pipe. In this case, attaching the wiring to the wall and ceiling is very simple.
If the surface is wooden, all you need to do is secure the clip with wood screws. In a concrete wall or ceiling, you need to pre-drill holes using a hammer drill, then drive in dowels, and then fix the clips themselves. The entire installation technology is clearly shown in the video example:
Correct fastening inside the house
By the way, clips can be attached not only indoors, but also outdoors. This method is suitable if you decide to conduct street electrical wiring along cinder blocks or brick walls of buildings.
How to attach corrugation on the street
Insulators
Fastening wires to the wall on an insulator is most often used in bathhouses. First, you must secure the porcelain barrels themselves, which are fixed to the wooden sheathing or frame using self-tapping screws, then twist the wires into a tight bundle and thread it onto the insulator as shown in the photo below:
In order not to twist the wires yourself, you can buy special antique wiring that is already twisted. Read about that in the corresponding article.
Nail staples
This mounting method is suitable for television and telephone cables, as well as Internet lines. There are flat and round plastic brackets that can be easily attached to the wall using the small nails included in the kit.
A very convenient installation option, which is used to unnoticedly run the cable over the baseboard in a house or apartment.
Differences between cables and wires
Both of these types of electrical products have a similar design: 1 or more insulated conductors are placed in a protective sheath. The differences between wires and cables are the insulation properties.
The sheath and insulation of the cable cores have high protective properties. They are resistant to various adverse environmental factors - high humidity, mechanical stress, exposure to chemicals, temperature changes. Therefore, cable wiring can be laid in thick walls.
Wire insulation does not have high protective properties. They cannot be buried in walls and used for installing apartment wiring. They are used for making electrical cords, connecting elements in electrical panels, connecting lamps and low-power electrical appliances.
Cable selection
The main materials used for installing electrical wiring, logically, include cable. You cannot neglect the correct selection of cables for electrical wiring, since at best this will only lead to an increase in the cost of installing the system, and at worst - to wiring failure, breakdown, electric shock or fire.
There is a huge variety of power cables on the market - and this is not counting cables for low-current systems - alarms, video surveillance, communication systems. In order not to make a mistake with the choice, let’s make a reservation right away: for installing household electrical wiring, you can only use the following types of power (!) cables:
- VVG;
- NYM;
- PVA (limited - for lighting only).
It is strictly prohibited to use power wires for other purposes, for example, communication cables.
The VVG cable is a Russian single-core copper cable (it is recommended to choose the one whose packaging says “made according to GOST” and not according to TU), specially designed for indoor installation in premises.
It can be used for installation of electrical wiring in networks with voltages up to 1000 V. Inside the cable there are 2 or 3 copper conductors, each with a cross-section from 1.5 to 10 mm (depending on the type of cable). Each core has individual insulation, all three are additionally protected by a common one. Insulation material is vinyl.
For systems with grounding (mandatory requirement), a three-core cable is used. Marking - VVG 3*1.5 (3 cores with a cross-section of 1.5 mm) - for lighting, VVG 3*2.5 - installation of wiring for household appliances, VVG 3*4 - installation of a line for an electric stove, VVG 3*6 (or 3*10) - entering electrical wiring into the house. A vein in blue insulation is always (!) zero, in yellow-green insulation it is earth, in brown, black or white it is a phase.
NYM cable is a German analogue of VVG, characterized by an additional layer of intermediate insulation for fire protection. Its advantage is the possibility of installation without additional insulation in rooms with high humidity, as well as ease of cutting (due to the design feature).
The disadvantage is the higher price than VVG, as well as the low resistance to sunlight inherent in the PVC from which its insulation is made. This cable is recommended for installation in cable ducts or grooves, but not in the ground or outdoors. The marking is completely similar to VVG.
PVS is, strictly speaking, not a cable, but a wire. It consists of three stranded conductors, and is much more flexible than VVG or NYM. But the current load that flexible multi-cores can withstand is significantly lower than single-core.
PVA with a cross section of 1.5 mm can only be used for installing ceiling lighting, and you cannot do without crimping the ends of the wires with ferrules. It cannot be used for other electrical wiring elements.
Layer of plaster
Among professionals, it is believed that electrical installation before plastering work was invented by lazy and greedy electricians. They are lazy, because it is much easier for them to haphazardly throw cable routes along the surface of the walls before plastering and not waste time on grooves.
Some even self-confidently convince you that you will save a lot by doing this, you should under no circumstances trench this wall, and they will bring up a lot of other arguments. However, modern installation involves the consumption of a very large amount of cable, and if you don’t cut it, then in the end it will all result in a thick layer of solution.
Which ultimately will result in more significant financial costs than passing one or two grooves to the socket block.
At the same time, take into account the costs not only of additional material (cement, mortar), but also take into account the increase in labor costs, and, accordingly, the payment of labor to plasterers. Therefore, it is much cheaper to pay for grooves and their subsequent sealing than to increase the thickness of the walls by several centimeters.
At the moment, only a greedy electrician cannot afford to buy a wall chaser and an industrial vacuum cleaner and work as a professional electrician.
If you are just a beginning builder and you really don’t have money for expensive and high-quality models from Hilti, Bosch or DeWalt, or you only need to make furrows in your own apartment and nowhere else, then you can get by with one universal attachment for the Mechanic Air Duster grinder.
If you want to completely get rid of dust 100%, use a household vacuum cleaner wisely and you will be happy.
The nozzle almost completely replaces a professional tool and performs dust removal functions even without a vacuum cleaner. You can check the current price and order it for home delivery here.
Keep in mind
The instructions provided above are suitable if you want to make a groove in a monolithic or brick house with appropriate walls. However, today aerated concrete, wooden and plasterboard partitions can be erected inside housing. We’ll talk further about how to groove one of the non-standard wall options yourself.
When installing electrical wiring in a bathhouse or wooden house, you will encounter walls made of logs or profiled timber. Making grooves in wood is prohibited due to safety regulations, and this is not advisable, because... You will not have to chisel the log, but rather cut special recesses in it. This task will be very difficult and will take a lot of time, so in the case of wooden walls, installation of open electrical wiring is used.
If you need to lay a cable in a wooden floor, gating here, again, is impossible, so you need to consider the option of laying it under the boards behind the chipboard, insulation and other layers of the pie. In this case, the cable is laid in pipes with localization capability, that is, metal tubes. In general, electrical wiring in a wooden house is not difficult, but there are a number of nuances. Hidden electrical wiring in combustible walls and ceilings is also possible in metal pipes, but not in corrugated pipes. If you are still going to lay wiring in corrugated floors or walls made of wood and other flammable materials, you must provide protection with a 10 mm thick layer of non-combustible material. This can be plaster, alabaster, etc. (PUE 2.1.40, Chapter 2.1). We discussed this issue in more detail in the article https://samelectrik.ru/montazh-elektroprovodki-v-derevyannom-dome.html.
Open electrical wiring in a wooden garage (using wood-look cable channels)
It will also not be possible to cut horizontal and vertical lines in plasterboard walls, because... The gypsum board sheet is very thin and fragile. The cable is simply laid behind the plasterboard partition in the corrugation, between the profiles. The only thing you can do in drywall is to drill holes for sockets and light switches with a crown, as shown in the photo:
If you need to make a groove in a tiled floor (for example, in a bathroom or kitchen), there should be no difficulties; it will be most convenient to use a grinder or wall chaser. You should not punch the tiles with a hammer drill, because... You will only damage the material - the tiles will crack, after which you will have to completely replace the floor covering. Do not forget that when working with stone and tiles, you need to install a diamond blade that is designed to work with such material.
Well, the last of the popular materials is aerated concrete. You can make a groove in aerated concrete yourself using a special manual wall chaser, the cost of which does not exceed 1000 rubles (and even then this is a model from the manufacturer). Using this tool is quite simple, as you can see by watching the video tutorial below.
Working with aerated concrete
That's all I wanted to tell you about what it is - cutting walls for wiring, and how to cut a cable route with your own hands. We hope that this information was interesting and useful for you!
Disadvantages of electricians after plastering
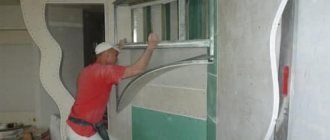
Now let's talk about a different order of work, its pros and cons. In this order, the walls are first plastered, after the coating has hardened, markings, grooves, laying of electrical wiring (in grooves), installation of “cups”, installation of sockets and switches, and restoration of damaged areas are carried out.
electrician after plastering
Damage to walls during gating
Even mastery of the instrument does not always help to avoid the consequences of a “shaken hand”. When scoring a plaster coating for laying cables, such cases are not uncommon, especially when the thickness of the plaster coating is small.
chips when chipping
In the load-bearing walls of houses made of prefabricated or monolithic concrete, the reinforcement that facilitates the perception and transmission of loads is located vertically. On top of it there is a protective layer of 2 cm. Therefore, for the safety and security of the building, it is prohibited to ditch load-bearing walls in Khrushchev-era and panel houses. It is also prohibited to cut floor slabs (ceilings). Only partitions can be tapped.
To maintain the exact depth of the groove, electricians use a wall chaser, in which the exact distance between the slots is set and there is a jaw limiter.
Noisy and dusty work
If laying wires and cable loops directly along the surface of the wall is a fairly silent matter, then gating, performed mechanically, is a “noisy” task, in which noise is heard in houses throughout the riser. This circumstance dictates its working conditions. For example, making noise on weekends is prohibited by law, and on weekdays making noise is allowed only during the day.
When cutting grooves, clouds of dust are formed; there are no reliable remedies for its formation. To reduce dust formation, the wall is moistened with water from a spray bottle. But it is more effective to use a wall chaser or angle grinder with attachments for connecting a construction vacuum cleaner.
Damage to layers of plaster
When making grooves for laying electrical cables, the integrity of the plaster coating may be damaged (the appearance of cracks, the layer moving away from the base). On partitions, the finishing layer on the reverse side may be damaged. This happens especially often when using impact tools, such as hammer drills. When cutting with an angle grinder (grinder), the reinforcing mesh that reinforces the plaster is often cut. What was destroyed needs to be restored, and this takes time, effort, money.
To avoid damage, avoid chipping the plaster coating laid on metal, concrete and other low-adhesive materials.
Price
After the electrical installation has been completed, plasterers will need to be called in to properly seal the grooves. You will need to again remove debris, clean the walls from dust, prime, prepare mortar and plaster. All this is time and work. And this is also a waste of money on mortar and wages for plasterers.
To compare the costs of the two methods, let’s calculate how much it will cost to thicken the plaster layer by half a centimeter and see what the gating will cost.
plaster layer thickness
If laying the cable requires a groove at least 1 cm deep, then with a designed thickness of the plaster layer of 1 cm, laid on the wall, the cable can rise above the base by up to 0.5 cm. By this thickness it will be necessary to increase the thickness of the coating on the entire wall so that the cable is not visible like a scar.
As an example, let’s calculate the additional consumption of plaster for a room with a perimeter of (5+4)x2=18 m and a ceiling height of 2.7 m.
Wall and ceiling area F = 18 x 2.7 + 5 x 4 = 68.6 m2.
The popular Volma-layer mixture has a consumption of 4.5 or 5 kg per 1 m2 with a layer of 0.5 cm.
You will need 4.5 x 68.6 = 308.7 kg. or 11 packs.
Price 30 kg (packaging) – 450 rubles. The plaster mixture will cost 450 x 11 = 4950 rubles.
Cost of 1 p.m. grooves - from 100 rub. That is, for the same amount we can make approximately 49 linear meters of grooves. Whereas for a room with an area of 45 m2 of the same height, in which 25 points are installed (some of them are double, triple sockets and a double switch), 10 two-meter grooves will be required, or only 20 m of grooves. – 2000 rub. According to our example, fewer grooves are needed per room, which means the cost of grooves is less.
Selection of sockets and switches
When choosing sockets, switches, protective devices and other structural elements of electrical wiring, you should pay attention first of all not to their cost, but to their quality. It is necessary to analyze the existing range of electrical goods and choose the most optimal option in terms of price-quality ratio
Very often, when choosing sockets, switches, mounting boxes and other electrical wiring elements, the conditions in which they will be used are not taken into account.
In this case, we are talking about protecting the case from the negative effects of moisture and foreign objects. For example, it would be a grave mistake to purchase ordinary sockets to power electrical appliances in the bathroom.
Wiring in the house, socket for powering electrical appliances in the bathroom
For rooms characterized by high levels of humidity, it is necessary to purchase sockets, mounting boxes, lamps and other elements that are adequately protected from moisture.
There is often a situation when the selected outlet quickly fails. The socket may be the most reliable and expensive, but if you plug in an electrical appliance that has a load greater than the permissible load for this socket, it will quickly fail. That is, when choosing sockets, a mistake is often made - the power of the household electrical appliance that is planned to be plugged into this socket is not taken into account.
Also worth mentioning are double sockets, that is, sockets that combine two or more sockets in one housing. Most of these sockets have a standard rated current of 16 A, and this current is the total for two pairs of plug connectors. Therefore, to turn on two electrical appliances, the total power of which is higher than the rated current of the double socket, it is necessary to install two separate sockets.
In what cases is it necessary to replace apartment wiring?
Electrical wiring in houses and apartments is changed in such cases as:
- Physical wear and tear of cabling. This is expressed in fragility, cracking of insulation, brittleness of metal cores, which can lead to short circuits. Physical wear and tear of the wiring occurs after 20-30 years of operation.
- The cross-section of the current-carrying conductors does not correspond to the load. With the acquisition of new household appliances, the total power consumption increases and may exceed that for which the wiring is designed. This is expressed in the fact that the wires begin to overheat, the sockets melt, and the machine knocks out.
- Installation of wiring from aluminum wires. According to current standards, wiring in apartments can only be done with cables with copper conductors, since they are more compliant with fire safety requirements.
It is also advisable to change the electrical wiring during a major overhaul.
Even if the cabling has not yet exhausted its service life, this may happen in the next few years, and then the walls will have to be refinished.
Chasing walls for hidden wiring
Before starting work, a diagram of the location of all switches, power appliances, sockets for them and distribution boxes is drawn up, and the location of the lines along which the gating will be carried out is determined. Such a diagram must be stored in paper or electronic form, so that in case of redevelopment, moving switches and sockets, installing hanging structures (shelves, sconces, hangers), etc., the wiring will not be damaged.
Marking begins with the locations of panels, sockets, switches and lamps, and then a route for the wires is outlined. All pipes must run strictly horizontally and vertically. Marking for them is done with chalk, pencil or marker using a plumb line, laser or regular building level.
Inclined lines are allowed only in attics and stairs, provided that they run parallel to the inclined surface. In this case, searching for damage on straight lines will take a minimum of time, and the likelihood of accidental damage to the cable, for example, when driving nails for shelves or pictures, will be minimized.
A wall chaser is a fairly expensive tool, so the grooves for wiring are usually made with a grinder and a hammer drill. First, two grooves are prepared using a grinder with a diamond wheel, and then the excess plaster is chipped between them with a hammer drill. The size of the groove is determined according to the dimensions of the wiring; usually a depth of 20-25 mm is sufficient.
The use of junction boxes in typical wiring of private houses and apartments is not mandatory. They are installed for convenience when dividing lines into separate groups. The distribution boxes are attached to the gypsum mortar so that they slightly protrude beyond the thickness of the future plaster layer.
For the socket boxes, recesses are made, which are partially filled with gypsum mixture to fix the wires. Their ends are tucked in, and the excess is trimmed so that 10-15 cm remains.
It is more convenient to install socket boxes in blocks at once. It looks more aesthetically pleasing, and they are more convenient to use. For their installation, latches (cable channels) are used. The holes are drilled in one row with a distance of 1-2 mm, the partitions between them are then removed. Socket box covers are installed last, only after finishing is completed - wallpapering or painting. In rooms with high humidity, moisture-proof sockets with grounding are used.
Surface mounting brackets
If the electrical work in the house is carried out after renovation, then the open wiring method is used for this. It is simpler to implement, but due to the fact that the wires remain visible, it requires greater care during installation, and the fastenings used here, in addition to the main function, should add some aesthetics.
Cable channels
One of the most convenient, beautiful and at the same time inexpensive methods of open installation is fastening using cable channels. It is a rectangular pipe with a removable front panel, which is attached to the wall using ordinary self-tapping screws, dowel screws or nails.
After installation, a group of wires is placed inside and closed with a lid. You can easily choose the right color scheme and even texture, thanks to which this mount will seamlessly fit into the interior of your room.
There are more complex options, one of which is shown in the diagram above. Most often they are presented in the form of electrical skirting boards. To install such a system, certain qualifications will be required.
Clips
This type of connection is intended for fastening cables placed in an additional insulator - a polymer corrugation. Due to its rough appearance, it is most often used in inconspicuous places and technical rooms; it is also perfect for installation outdoors.
To install the clips, use self-tapping screws or dowel screws, and then simply snap the corrugation into them. The resulting connection will be very reliable and practical.
Insulators for retro style
Today, when creating an interior in a “retro” style, they often use the open installation method, which was used at the dawn of the age of electrification, for which modern manufacturers produce special wires and fasteners. Such wiring looks very beautiful in wooden houses.
The cable is fixed using a ceramic insulator, which provides a safe gap between the conductor and the wooden base. During installation, be careful not to overtighten the screw to avoid damage to the insulator.
Staples
In the photographs above you can see the types of brackets for direct mounting of wires to the surface. Their installation is simple and intuitive, but due to the danger of direct cable contact with the wall, use this fastener only if the wires are double or triple insulated. Most often they are used to fix television cables.
Installation site
If you need to secure the wire in places where damage to the surface is undesirable (furniture, tiles), then use mounting pads. They come in different shapes and colors, but they have the same function - you just need to glue such fasteners in the right place, and you can stretch the wire.
Electrical wiring under plaster and its installation
To lay electrical wiring under the plaster, special channels are cut into the finishing - grooves. These channels can be created either on a plastered surface or on a bare concrete wall, which will subsequently be coated.
Approximate wiring diagram Channels should connect sockets to each other
The grooves connect “sockets” for switches and sockets, which are created by drilling holes of the appropriate diameter.
It is recommended to pre-attach distribution boxes to the wall with gypsum glue or mortar before plastering. It should stick out from the plaster cover by 5-10 mm.
Before cutting the wires, initially measure the distances between the distribution boxes or the power point and the box, to which 10-20 cm are added.
The wires in the corresponding channel will be secured using an alabaster solution, which is applied pointwise with intensity depending on the length of the conductor being laid.
The solution should not stick out from the surface of the wall, so it is recommended to carefully remove its excess.
Installation of wiring according to rules and regulations
It is recommended to lay wires in corrugated pipes
The ideal option for installing a power supply system in an apartment is to install the cable before finishing the finishing work. Most often, for these purposes, professional electricians use conductors of the VVG and VVGNG brands of various sections (depending on consumers).
If the surface of the walls on which the electrical lines will be attached is smooth, then there is no need to cut grooves.
The wiring is laid in special corrugated pipes, which are attached to the wall using clips. In this case, the thickness of the plaster layer should completely cover all electrical wiring elements.
Work with electrical wiring must be carried out strictly according to regulations
If the wall in the room is not level and there are significant differences, as a result of which the plaster will be applied to the surface in different layers, then drilling grooves in this case is necessary.
Any even hidden power supply wiring in the building must be carried out in accordance with the rules and regulations. These actions are regulated in specialized literature. Such sources include the “Rules for the Construction of Electrical Installations” (RUE) and the “Rules for the Safe Operation of Consumer Electrical Installations” (RBEEP).
Many of the requirements for laying an electrical cable in a residential area have been given above. Visual features of cable laying in a hidden manner can be seen in the diagram below.
Wiring markings
Markup example
The wiring is marked on the surface after accurately determining the installation locations of switches, sockets and junction boxes.
To make work easier, many electricians use a laser level to mark out points, after which they draw lines on the wall where the hidden wiring will run using colored tapping thread.
Grooves and conductor fastenings
After marking, if necessary, you can begin the process of creating grooves (if the wall is curved or a plaster layer has been applied). To create these channels, there is a special device - a wall chaser. This is a fairly expensive device that makes no sense to purchase for one-time use.
Vertical stripes are made using a grinder
For these purposes, you can use a grinding machine - a “grinder”, with which 2 vertical or horizontal furrows are made, and the intermediate concrete gap between them is knocked out using a hammer drill. The width of the groove depends on the number of conductors laid in it; the greater the number, the wider the channel.
The wiring in the channels is secured using special clamps installed at points using dowels. The distance between the clamps should not be more than 30 cm. After laying the wiring, all channels are sealed with putty or alabaster mixture. For more information on how to attach cables, watch this video:
To summarize the written article, it should be said that laying hidden electrical wiring is not an easy task, requiring the study of certain installation rules and strict adherence to the order of work.
If you adhere to the above recommendations and carry out all work in accordance with the standards, each owner will be able to independently install power supply lines, while saving a significant amount of money.
Disadvantages of electricians before plastering
What does electrical work involve before plastering? Here, strictly speaking, three options are possible: when the wiring is “hidden” in the body of the wall or the wires are “hidden” in the plaster layer, when the wiring is carried out in cable ducts on top of the finish. We are interested in the first two cases. We consider the second option, as it is more common.
Today's electrical wiring is more complex than it was several decades ago because:
- safety standards have been tightened;
- the number and power of electrical appliances used in everyday life has increased;
- new building materials appeared;
- The requirements for ergonomics, comfort, and aesthetics of housing are increasingly important.
There is nothing simpler: spread and attach wires or cables on top of the wall, install socket boxes and distribution boxes, and go ahead - feel free to plaster! In fact, this gives rise to several problems at once.
Plaster layer thickness
Plastering work is considered costly not only in terms of time and effort, but also from a financial perspective. Even if you make the solution yourself from cement, water and sand, and make a minimal layer of plaster, then for a small room you will need more than one bag of cement. If the walls are uneven, and even made of brick, then a thin layer is not enough. And every additional centimeter of thickness of the plaster coating in a new building results in additional cubic meters of mortar, time costs increase (plus the complication of work, for example, additional reinforcement), and wages for plasterers increase.
plaster thickness after electrics
To hide the thickness of the wire with plaster, especially if it is placed in a corrugation, you will need to make a layer of plaster (rough) coating up to 25 mm. If the thickness of the leveling layer is 2.5 cm or more, then electrical installation before plastering is justified. If the plaster layer is less than this value, then priority plastering will be rational. It is cheaper to make grooves and lay the wiring after plastering than to increase the thickness of the plaster coating. In addition, the last measure “eats up” the free space of the room.
Cable damage
Invisibility of electrical wiring can be fraught with unpleasant phenomena. Experienced craftsmen recommend that after laying the wires, immediately (even before plastering) do the following:
- measure the distances from the corners, floor, ceiling to the edge of the wires;
- draw lines on the wall with chalk indicating the distance;
- write (clearly) the measured values, and also label which room, which wall;
- take a photograph (faster) or sketch it in the form of a diagram on paper.
This diagram will come in handy more than once, for example, for installing dowels under a carpet or a picture.
There are often cases when wires laid and fixed on the walls were not sketched or photographed in a timely manner for their further “vision” after plastering. Then it is possible that a working tool or dowel can damage one of the wires when attaching a frame for installing drywall or finishing with clapboard, fiberboard, or attaching hanging furniture.
Forced project changes
At any stage of construction, changes can be made for various reasons. For example, what should be done first – electrical work or plastering – is not specified in the project. The issue is resolved locally, depending on the circumstances. Wiring performed earlier may cause a thickening of the plaster layer.
Following this, the residents of the house will need to move the custom-made furniture. And that one will “drive” into the outlet, blocking access to it. Of course, no one will redo the furniture, so you will have to move the socket. Other options are also possible, due to which the design position of not only the sockets, but also other electrical wiring elements changes. Therefore, performing electrical work with scoring rough plaster is more advantageous.
Oxidation of junctions
Wire routing includes connecting them to each other, including extensions. Plaster mortars are classified as “wet” materials, since they contain water, which has the ability to penetrate even the smallest cracks, and in the solution it is no longer so much water as a solution of salts (not a dielectric). The likelihood of oxidation of wire connections when plastering over completed wiring increases sharply. Oxidation begins to destroy the contact, and the destruction process can cause burnout, for example, in socket boxes.
wire oxidation
Therefore, before plastering, it is necessary to take additional measures to protect the installed socket boxes, switches, and distribution boxes from the ingress of liquid from the mortar and, in fact, the mortar itself. To protect the ends of the wires, they are brought out above the level of the top of the socket box and temporarily insulated (another problem arises).
Ways to protect socket boxes from solution penetration:
- sealing the top with masking tape (available to everyone, cheap, simple);
- production of “caps” from corrugated cardboard (can be cut as many as you like using a crown with a diameter equal to the diameter of the socket box).
True, it is not always possible to prevent liquid from entering the socket using these methods. Therefore, all wiring is de-energized before plastering.
Installation of socket boxes and accessories
Let's say that different people do electrical work and plastering work. Electricians do not need measurements necessary for plastering (creating an auxiliary vertical plane). Therefore, electricians cannot know exactly where the surface of the plaster coating will be located. It follows that they can only guess at what distance from the top of the unplastered wall to place the top of the “cup” of the socket box.
installing plugs on socket boxes
And it’s okay if this top turns out to be recessed after plastering (the problem can be solved by installing additional spacer rings and using longer-length self-tapping screws). But if the top “sticks out” above the layer of plaster, no matter how you look at it, the rosette will look like a “bump.” That is, the desired result, when the top of the “cup” is made flush with the finishing surface, may be unattainable. You will have to “disassemble” the problem area down to the wall and perform the same actions that are used for electrical work after plastering.
Difficult to markup
A strong argument in favor of the primacy of plastering is the simplicity and ease of marking. On uneven ceilings and walls, marking for tracing cable loops is more difficult, as is taking measurements that require millimeter precision. Electricians often use laser levels for marking work. A small protrusion on the surface of the wall can block the path of a thin beam of light installed against the wall.
Long ends of wires interfere with plastering
When leveling walls with mortar, plasterers apply the following rule. If the ends of the wires rise above the surface of the wall, they do not allow the rule to be carried out in this area from the beginning to the end of the work. The plasterer has to work hard to level the mortar in the area with the protruding wire.
Plastering is hindered not only by the ends of the wires, but also by socket boxes, distribution boxes and other wiring elements.
And if the wires accidentally become energized, then only an RCD or differential circuit breaker will help, by triggering, to save the plasterer from an electric shock.
However, they will not save you from searching for breakdown locations or finding out the cause of the operation.
On reinforced concrete floors
In buildings with monolithic or prefabricated reinforced concrete floors, open wiring is very rarely used. In this case, installation is carried out directly on the surface of the ceilings, on insulators, in boxes, electrical corrugated tubes (corrugations), pipes, metal hoses, and cable ducts. Temporary wiring may be carried out freely suspended.
When attaching wiring to the surface of ceilings, nail staples are used (in this case, nails are driven into pre-assembled dowels), dowel clamps, and dowel ties. Before installation, the location of electrical appliances, lamps, and cables on the ceiling is marked.
To install wiring in pipes, corrugations, and metal hoses, special clips or dowel clamps are used. At the beginning of work, places for attaching lamps and cables are marked on the ceiling. Then the installation of pipes, corrugations or metal hoses is carried out, in which cables are pulled using wire. More often, in buildings with reinforced concrete floors, hidden wiring is carried out along the ceiling.
If the ceiling is monolithic, the laying of wiring must be provided at the stage of manufacturing the structure; for this, the cables are placed in plastic or metal pipes, which are attached to the reinforced frame even before laying the concrete mixture.
They should be secured to structural reinforcement using plastic ties or wire.
The installation of permanent wiring embedded in panels and monolithic floor structures is not allowed.
In precast concrete floors, voids in the slabs are used for wiring installation. The location of lamps and devices on the ceiling is marked. After this, the plate is drilled in the required places, and the cable is pulled using wire. It must be taken into account that this installation method is applicable if the direction of the wiring coincides with the direction of the voids in the slab.
If there is no possibility of laying inside the structure, it is permissible to install permanent wiring under a layer of plaster. For this purpose, flat cables are used, which are attached to the ceiling with wire, steel tape, and nail clips before plastering work begins. The second way is to plaster the ceiling and lay the wiring in grooved channels. There should be no intersections of flat cables when laying under plaster. If this is not feasible, the insulation at the intersections is reinforced with three to four layers of insulating tape.
It is also unacceptable to lay cables in the seams between floor panels.
How to fasten
Before final finishing of the walls, you need to choose a method for fixing the wires.
Alabaster
Gypsum composition is used when it is necessary to quickly fasten the cable. The solution holds a small number of soft braided wires. Alabaster is applied in small portions. The main disadvantage is the rapid hardening of the mixture, which cannot be prepared in the required volumes.
Cable ties
Non-flammable plastic fasteners are suitable for installation on aerated concrete, brick, wood or concrete. It is used in combination with screws, screws and dowel nails. Before installation, a hole corresponding to the diameter of the fastener is formed. After this, the dowel is inserted, the tie-plate is hammered in, and the cables are laid on the finished route.
Dowel-ties
The product is a dowel-nail with a screed made of self-extinguishing plasticizers. The fasteners are equipped with one-piece or detachable locks. In the second case, you can supplement the bundle with new wires or remove unnecessary elements. Dowel ties are used for open or hidden laying of cables on brick or concrete surfaces.
Plastic dowel
Polyamide nails with a hole head help to quickly secure the cable in the groove. First, the fixing element is hammered in, then the cable is pulled through.
Dowel clamps
Products of different diameters are offered in white or black. The fastener has the form of a loop with clamps on the legs. Before installation, a groove is made, a clamp is placed, and wiring is laid. The disadvantage of this method is the need to strictly select the size of the fastener for the cable cross-section.
Installation of wiring in rigid pipes
Recently, many people are discovering the installation of external wiring using rigid plastic pipes. In this case, the cables are placed inside the pipelines, which are then fixed to the walls on special supports. To facilitate such installation, a large number of auxiliary devices have been developed (tees, cable sleeves, T-junctions).
The main advantage of this installation is the high degree of protection of electrical conductors from exposure to water, as well as from mechanical damage.
In this regard, this installation method is most often used in cellars, garages and basements. But this does not mean that external electrical wiring cannot be laid in this way on a summer cottage, in a city apartment or a country house, since insulating pipes look quite attractive in appearance.
Features of installing open electrical wiring in IRL pipes
When laying an electrical line in insulating pipes, you need to remember some important points:
- Pipelines must be attached to the walls in such a way that the distance between them is at least 80 cm, while there must be at least 10 cm from the electrical device or element to the nearest fastener.
- Cables can only be connected to each other at the terminals of electrical components or inside special junction boxes.
For this type of installation, special fixing devices are provided. A list of them can be found both on the Internet and in specialized literature.
If for some reason you cannot buy special fasteners, you can use regular construction paper tape to install insulating pipes. To do this, you need to cut a piece of the required length from the skein and secure it to the surface. The end fastenings should be made at an angle and slightly away from you so that the tape does not sag. The pipe is then secured with ties along its entire length. Sometimes, if it is impossible to get special fasteners, fastening with punched paper tape can be a completely successful solution.
An example of installing a pipeline for electrical wiring in the video:
Necessary tools for installing wiring in pipes
This installation method does not require many tools. To work you will need:
- Marking cord.
- Hammer drill (for working with concrete walls). This device will also require a drill of the required diameter.
- Plumb.
- Roulette.
- Hammer.
- Building level.
- Hacksaw for metal.
To connect in difficult areas, you will need two couplings, as well as a corrugation. The pipelines are installed in such a way that moisture does not accumulate inside them.
Therefore, you need to pay special attention to the quality of the rubber seal, which is installed at the junction of the pipe and the electrical element
It is advisable to use reinforced seals that match the diameter of the insulating pipe. When installing, the cuff should penetrate a small part of the electrical installation product.
Advantages and disadvantages of the method
The advantages of installing electrical wiring in insulating pipes include:
- Easy to install.
- Additional protection of conductors from mechanical damage and moisture.
- Attractive appearance.
The disadvantages of this method are the following:
- It is necessary to accurately select the pipe size.
- Quite a few additional accessories are required.
In general, installing open wiring in pipes is a completely working method, which allows you to reliably protect cables from damage and give the line elegance.