Metallic paints contain aluminum particles (flakes), which give it a characteristic look and shine.
Metallic paints have a high binder content (a transparent base without pigment) so that the aluminum particles are visible and do not merge with the pigment. Because of this, the hiding power of such paints is worse. Some shades of metallic paints are the most difficult to paint. These shades include light “metallics”. When painting with such paint, if it is not sprayed correctly, defects such as “stripes” and “spots” may appear. The appearance of such defects is influenced by both the paint gun and incorrect spraying technique, as well as the quality of the paint.
In this article, we’ll look at how to paint metallic and what factors need to be taken into account to avoid defects.
Spray gun settings before metallic painting
- A good paint gun with a consistent, even spray pattern plays an important role. To apply metallic paint, the spray gun nozzle must be the correct size. Typically the size used is 1.3 or 1.4 mm. The gun must be clean and produce a correctly shaped torch. It's best to do a test spray to make sure. If the torch does not spray evenly (more paint on top or bottom), then there is a high probability that there will be streaks when painting.
- It is very important to set up the spray gun correctly. Settings include torch size, air pressure and paint flow. You can read more about the settings in the article “setting up the spray gun”.
- The torch should be as large as possible. In some cases, when painting locally, the width of the torch can be reduced.
- If a pressure gauge with a regulator is connected to the spray gun, then you need to fully open the air supply on the spray gun, pull the trigger and set the desired pressure on the pressure gauge (usually 1.5 - 2 bar for HVLP spray guns).
- The pressure must be set depending on the viscosity of the paint. Thus, it is better to experiment, gradually increasing or decreasing the air supply and establishing the most acceptable pressure. You should get a good spray of paint, without dust or large droplets. If the air pressure is too high, there will be a lot of pollination. When dry paint hits the surface, the metal particles are positioned vertically and do not reorient to the desired position. With most colors, if the metallic particle arrangement is different from the original paint, the shade will look different. So, higher pressure makes the shade lighter. If the pressure is too low, the metallic particles will sink into the paint. In this case, more of the paint pigment will be visible than the metallic particles and the paint shade will appear darker than the original paint.
- It is better to set the paint supply to maximum and move the paint gun at a speed corresponding to the paint spray. If you don’t have the skill to paint quickly, then the paint supply needs to be reduced a little.
Preparatory work
Preparing the surface of a part for metallic painting is practically no different from preparing for applying acrylic or alkyd paint, but is associated with a number of difficulties. Preparatory work for metallic painting should be carried out more carefully, since on such paint, and especially on light colors, defects will be visible several times more strongly. Therefore, quality preparation for painting plays an important role in obtaining a good result.
Preparatory work includes the following steps:
- Removing old coating, if any.
- Cleaning the surface of any contaminants.
- Elimination of defects such as dents, scratches, chips using a special putty. It is important here that the color of the putty matches the color of the paint that you plan to apply.
Preparatory work should be carried out more carefully before metallic painting
- Sanding with sandpaper to obtain a smoother surface. This stage of work is carried out after the applied putty has dried.
- Removing dust and degreasing. Dust is usually removed by blowing on all necessary parts, after which the surface is degreased using anti-silicone liquid. You should also wipe the surface with a sticky cloth to remove any remaining dust.
Diluent
To thin metallic paint, a special base thinner must be used. Universal thinner for acrylic products or different solvents will not work. The evaporation rate of the thinner must correspond to the temperature in the workshop. A fast thinner will evaporate too quickly and the metallic particles will not have time to lay down as they should, which will give a lighter shade. If the thinner is too slow, the metallic particles will sink into the paint, making the paint shade darker. In addition, too slow a thinner can cause spots and streaks to appear, since metallic particles will float in the paint for a long time and are located randomly.
Differences between metallic and other types of paints
The main differences between metallic paint and conventional paints are as follows:
- The composition contains aluminum powder, thanks to which the material acquires shine.
- It is much easier to paint the surface with regular enamel. But metallic needs to be applied perfectly evenly, because otherwise unsightly spots cannot be avoided.
- Metallic is characterized by higher resistance to corrosion processes, which is explained by the presence of aluminum in its composition.
- Regular paint is more prone to fading.
- Metallic prevents the interior from heating up to a greater extent in hot weather (higher light reflection).
- Metallic looks more attractive.
- The cost of metallic paints is noticeably higher compared to conventional paintwork materials.
How to paint metallic?
- You need to develop a rhythm of movement of the spray gun. There should be no short, intermittent movements, jerking or stopping in one place while spraying. When spraying metallic, it is especially important to keep the spray gun parallel to the surface (the torch should be strictly perpendicular) and not too close.
- Spray the first coat at a distance of approximately 15-20 cm from the panel. The first coat should be thin, semi-wet and applied quickly. Do not aim to completely cover the repair area with the first layer. The task is to apply a uniform thin base layer.
- The second layer is applied a little thicker and begins to cover the surface to be painted.
- Drying time between coats should be approximately 2-5 minutes.
- After each layer, when it dries, you can wipe it with a special sticky cloth.
- Apply as many coats as necessary to completely cover the repair area (usually 2-3 medium-wet coats with a good drying time between coats).
- As a result, the repair area should be covered and not show through. Make passes with a spray gun, covering 50% of the previous one with the next pass, not paying attention to the appearance of streaks.
- Next, immediately after the last layer, while it is still “fresh”, increase the distance of the spray gun from the surface (should be about 35-40 cm) and apply a couple of foggy layers. This will make the arrangement of metallic particles in the paint layer the same and will hide possible inhomogeneities (stripes or spots). To apply the final foggy layers, you can thin the paint a little and reduce the pressure. As the distance from the surface increases, the speed of the spray gun should slow down.
- Remember that the base paint is only intended to cover the repair area. No need to spray the base coat wet and glossy. “Metallic” without varnish looks matte.
- Too thick, wet layers allow metallic particles to float randomly, causing spotting. With a drier spray, the metallic particles are distributed evenly, as they were sprayed by the paint gun, and remain in place. But too dry layers create a “dusty” surface, which can impair the adhesion of the varnish (this applies to the last “foggy” layers). Therefore, you need to spray the last “foggy” layers onto a still fresh, not dry layer, so that the paint sticks to the surface and does not fall like dust.
- Next, you need to let the paint dry for 20–30 minutes (at a temperature of 20 degrees Celsius) and apply varnish (see the article “coating a car with varnish”).
Process Features
Masters who have been involved in car painting for a long time certainly have a lot of experience and know how to properly paint a car with metallic paint. The same cannot be said about those who like to paint cars with their own hands. The metallic painting process is quite complex, so before you begin, it is recommended that you thoroughly study this process and the properties of the paint.
Metallic paint is often used to paint cars.
Metallic paint is a one-component composition, and there is no need to add a special hardener to it. The reflective property of paint enhances visible defects that may appear after uneven application of paint.
The main painting defects are applespotting (spotting) and striping. These defects appear due to uneven application of the paintwork.
The reasons for the appearance of such defects are:
- Incorrectly thinned paint. The brand of solvent and hardener must match the brand of the paint itself. Otherwise, color pigments may peel off.
- Weak solvent. This can reduce viscosity, resulting in loss of coating uniformity.
- The nozzle on the spray gun is incorrectly selected. As a result, the paint is directed in a stream onto the part being painted rather than being sprayed evenly.
- The coating layer is too thick. The thicker the metallic coating layer, the darker its shade. Because of this metallic property, spots and stripes appear even with a slight change in the thickness of the layer.
- The jet pressure is too strong.
The process of painting a car with metallic paint is quite complicated.
Transparent layer before applying metallic
One of the problems that arises with paints that have a high content of metal particles (for example, metallic silver) is that metal flakes can collect in even small scratches of the surface being painted. This may affect the final result. Sometimes, before varnishing, the transition looks good. After varnishing, metallic particles may settle into small scratches, and this will be noticeable.
To combat such drawdown, as well as halos and a visible transition line, you can use a transparent base (binder). This can be either a diluted binder (in fluidity as a base) or a very thinly diluted varnish. This coat will fill in minor scratches and will give the metallic a smoother surface to apply. In addition, it turns out something like a wet substrate, when applied to which the metallic particles fit as they should. Manufacturers in English call this layer “orientation coat”, as it helps to correctly distribute the metallic particles (orient). This layer can be used both when painting with a smooth transition, and when simply painting the panel.
An orientation coat is sprayed onto the entire panel to be painted before the paint is applied. A full wet coat must be applied. Despite the use of an orientation layer, surface preparation must still be thorough. This layer is optional and can be used at the discretion of the painter.
Which paint is better to choose?
Metallic paint can be of three types:
- single layer;
- two-layer;
- three-layer.
Single-layer paint is rarely used because applying it requires expert skills. Using three-layer paint, effects such as mother-of-pearl, chameleon, etc. are obtained. Three-layer painting technology includes the application of an additional layer of mother-of-pearl, which increases the cost of painting.
Two-layer paint is the most popular and widespread. The technology for applying such paint is much simpler than that of one- and three-layer coatings.
Metallic paint can be found in stores in several forms:
- Aerosol. In these cans, the paint is already mixed with varnish, which is an advantage for those who are painting for the first time. There are also cans in which the paint is separate from the varnish. This option is suitable for more experienced people, and the result of such painting will be of better quality.
- Acrylic paint. These paints have a number of advantages, such as adhesive properties and a large selection of shades. They do not harm human health, since they do not contain harmful solvents.
- Graphite metallic. These paints contain graphite powder, which makes the coating durable, resistant to corrosion, water and environmentally friendly.
The most popular two-layer metallic paint
- Powder formulations. Paints with this composition are beginning to gain more and more popularity due to their economical use, large number of shades and environmental safety.
- Automotive paints. This type of paint is the most popular at present. The dyeing process itself has certain difficulties. But if the paint and varnish material is applied correctly, the painted surface will be used for more than one year.
Smooth transition when painting with metallic
Standard transition. 1,2,3 - sequentially applied layers of paint, overlapping each other by 10 cm. The first layer is applied to the repair area.
- Some colors will differ from the original color even if the paint is chosen correctly. Painting with a smooth transition is important so that the repair is not noticeable. Achieving a smooth transition from new to old paint, where it is difficult or impossible to determine, distinguishes a professional from a beginner.
- The standard and most commonly used method involves applying the first layer slightly behind the repair area (10-15 cm), the second - further than the first layer, and the third layer - even further.
- One of the limitations of the conventional fade painting method is that each new coat of paint is applied to a dry surface. Thus, metal particles may not adhere correctly, and these imperfections will be noticeable after varnishing.
Reverse transition. Layers of paint are applied starting from the area farthest from the repair area.
- The reverse transition technique is used if the paint has a complex color or the arrangement of metallic particles is important. Using this method, the painter applies the first coat to the furthest area first, then applies a coat closer to the repair area, and so on. Due to the fact that each layer is applied on top of the previous wet layer, the metallic particles in the new layer will fall as they should.
- You can also use a transparent base (diluted binder) as the first layer. This layer was written above. First, diluted binder is applied to the panel. Next, paint is applied using the standard or reverse transition method.
- At the end of each pass, you need to gradually release the spray gun trigger. You can read more about the smooth transition method in the article “how to paint without differences in color.”
How to paint a car chameleon, metallic, pearl? How to create a color and paint it yourself?
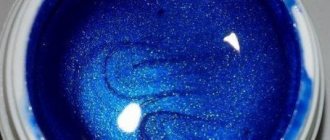
In this article I would like to consider in detail the process of painting a car with the effect of chameleon, metallic, mother-of-pearl, glitter, holographic and others. Manufacturers of car paints and car painting studios intimidate us with unrealistic price tags when they hear the words “chameleon”, “holographic”, “candy” and other effects, although in fact you can easily not only create such paints yourself, but also produce them well and with high quality coloring
Before we start painting, of course, we first need to choose a color and effect - this can be done in the thematic section of our website, powder pigments. Each color and effect is unusual and unique in its own way, often has no analogues in the world. We tried to collect for you in one place only the brightest, most spectacular and unusual powder pigments from all over the world!
Of course, powder pigments are used in almost all paints, to create women's cosmetics, in a large number of factories and industries - we can say that they surround us almost everywhere! However, today in this article we would like to look at their use specifically in automotive paints, liquid rubbers and heavy-duty protective coatings.
How much powder pigment is needed to create a good color? What will the cost be?
Powder pigments are very diverse - they have different bases and differ in particle size, all of which, of course, directly affects their consumption. If we consider the pigments of the chameleon, metallic, mother-of-pearl and neon series, the average consumption will be as follows: - average sedan: 70 grams; - SUV: 100 grams.
If we consider such bright and large additives as glitter and holographic, then their consumption per car will be significantly higher: - average sedan: 200-300 grams; - SUV: 300-450 grams.
Powder pigments of various effects are presented on our website in convenient packaging of 10 grams (except for American dipyourcar, which have the original packaging of 25 grams). This packaging allows you to order exactly the amount of pigment that is needed to create a particular paint or painting, without overpaying for the volume you don’t need. If you are opening a small production facility or plan to frequently use powder pigments in painting, do not hesitate to request a wholesale offer for dealers.
If you compare the cost of ready-made exclusive car paints with the effect of chameleon, aluminum, glitter, holographic and others, with the opportunity to make such paint yourself using powder pigments and a transparent base, then the difference in price is cosmic (sometimes 10 times). The most interesting thing is that the manufacturers of such paints will do the same in any case and sell you a ready-made product under their own brand.
How to add powder pigment correctly?
There is nothing complicated in the process of adding powder pigments of one or another effect to paint. You need to take a transparent paint (binder, base) and add the desired pigment to it. Remember that the lower the concentration of powder pigment in the transparent base, the easier it will be for you to paint in the future - this will help you protect yourself more from the appearance of streaks or clouds.
Let's take, for example, 2.5 and 5 liters of transparent base and pour 100 grams of powder pigment into both jars. In the first case (100 grams of pigment per 2.5 liters of binder), we will have to evenly spread a very rich and opaque color evenly over the entire body with 2 layers (1.25 liters of paint on average takes 1 layer). In the second case (100 grams of pigment per 5 liters of binder), we will paint the body in 4 uniform layers, which will allow us to more likely spread the pigment perfectly and evenly over the entire car body or other surface to be painted. We highly recommend that you use a technology that involves applying more layers (lower concentration of pigment per liter of material) to obtain the best and highest quality final result. This rule works both for conventional automotive paints and for liquid rubbers and heavy-duty polyurethane protective coatings.
What is the difference between working with regular car paints, solid colors and exclusive paint?
The differences in work are minimal and all you need from additional preparatory work is to pre-make one or another substrate before applying a transparent base with powder pigment. Pigments in most cases (95%) are applied to a black substrate - this allows you to maximize the full brightness and color saturation of a particular effect you have chosen. On our website, most of the pigments are painted with a black base, but there are also white ones - be sure to pay attention to this in the description of a specific pigment. Various experiments with different colors of substrates sometimes give such incredible colors and effects in the future, which allows you to fully immerse yourself in the world of creativity and limitless imagination!
So, as we discussed earlier, we prepare the car as if it were a regular paint job, be it auto enamel, liquid rubber or a protective coating. After all standard preparation procedures have been completed (we do not describe them in detail, since they differ for each coating and are standard for any color), we proceed directly to applying the color base we have chosen to the car body or other surface (specifically in our For example, for convenience, let's consider a black substrate; for other substrates the procedure will be the same, just the final effect will be different).
Our task now is to completely paint the body black, not to miss any hard-to-reach places. You can do the job with one layer, two or three - the main thing is to create a uniform black base over the entire surface. Then we take transparent paint (binder, base), add to it the required amount of powder pigment that we have chosen and mix thoroughly for 2-3 minutes using a special mixer (you can use a regular screwdriver with a paint attachment) at a speed of 300-400 rpm minute. Everything is ready for painting!
As already discussed above, we recommend applying exclusive paints in 3-4 layers - this will maximally protect against painting errors in the form of stripes and spots appearing on the body. Of course, you need to understand that painting in a regular black solid color forgives all mistakes, both painting and those associated with cheap equipment and painting conditions, while painting with exclusive colors is in any case much more demanding in terms of the following nuances: - the presence of painting experience and technical literacy performer; — availability of good painting equipment (for example: DeVilbiss or Sata) and its technical serviceability; — availability of a clean and working paint booth.
Thus, it turns out that the differences in painting are not so significant, but in the end you can create incredible masterpieces using powder pigments of various colors and effects! Come up with new unusual projects together with your clients, experiment with pigments and color substrates, create the most daring and unusual projects that simply have no analogues, in a word, make this world more colorful, brighter and kinder! 
Preparing the body for painting
Preparing the body element
Before you begin painting work, you need to prepare the body elements. To do this, they need to be puttied and primed. It must be remembered that the color of the putty must match the color of the car (future). It is recommended to dismantle parts that will not be painted or cover them with adhesive paper.
One of the most important stages in preparing parts for painting is degreasing and blowing off the body parts to be painted. First, the entire car body is blown through, taking into account all hard-to-reach places, and then the process of degreasing the surface begins. For this, anti-silicone liquid and a napkin are used. After all parts of the body have been treated with a degreasing composition, you need to wipe them dry with a clean cloth and then repeat the blowing again. To ensure the absence of small dust particles on the surface, it is additionally treated with a special dust-collecting cloth.
Upon completion of work...
There is another important point in the work of a painter, which is usually not given due importance. This is washing the gun after working with metallic. If this operation is performed carelessly, then particles of “silver” may remain in the gun, which then either clog the nozzle and spoil the shape of the torch, or fly to the surface during the next painting.
Sincerely admiring the shine of a freshly painted wing or hood, and even metallic, and even silver, and even without “apples”, and even... (sorry, I got carried away) you begin to experience the genuine joy of owning a car. It is so beautiful, shiny, smooth, fresh, inimitable, perfect, corrosion-resistant, on four wheels, five-speed gearbox... Sorry, we got carried away again...
Source
Necessary materials
The technology for painting a car with metallic paint is no different from painting a car with other types of paint. The process differs from conventional painting only in that metallic has a two-layer base, unlike standard painting. Find out which paint is the best for cars.
Basic basis
The base base is a nitro-based paint, which essentially imparts color and subsequently provides the desired effect. The base has no shine and does not have weather-resistant properties. Drying time between coats is approximately 20 minutes. It is important to apply the paint at a temperature of about 20 degrees, and if it is below 10 degrees, the drying time will deteriorate significantly and the quality of the base will not be as high.
It is made on an acrylic base. This second layer is the most important when painting a car metallic. The varnish acts as a protection for the painted body. There are and are used two types of varnish for painting cars metallic:
When painting a car metallic, traditional materials and painting equipment are used: spray gun, primers, putties, etc.
Technology
In enamels with a metallic effect, light reflection plays a vital role. As you know, these paints, in addition to color, also contain effective pigments - aluminum particles. They act as a kind of tiny mirrors that reflect the incident light, which gives the coating a sparkling effect.
Moreover, if you look at a metallic-painted part from different angles, you can clearly see that the intensity of this shine is not constant - it either decreases or increases. For example, we look at a car from a certain point at which the coating glows brightly and sparkles, then the car turns (the viewing angle changes) and the coating gradually darkens. These changes in hue, from light to dark and back again, are called the flop effect.
The main and most difficult task for a painter when working with metallics is to correctly “lay” the aluminum particles on the surface. Correctly means parallel to the substrate and to each other. If we can orient these particles in this way, the coating will then have optimal optical characteristics.
But if the “silver” lies chaotically in the paint layer, it will scatter light in different directions, which will lead to disruption of the flop effect, color distortion and the appearance of stripes and “clouds” characteristic of metallics.
As we already know, silver colors are especially capricious in this regard, since they contain almost no color pigments. Their color is provided almost exclusively by the aluminum grain, which is responsible for the flop effect. When working with such colors, the painter needs to be especially careful; he must clearly understand how aluminum particles behave in the paint layer.
Composition of conventional car enamels
Before talking about the features of metallic, it is necessary to remember the composition of ordinary ordinary enamel. It consists of three basic components:
- dye;
- connecting link;
- solvent.
The dye, or pigment, is a composition in the form of a fine powder. This is the component that forms the color of the paint. In addition, pigments may have other properties. Thus, some dyes can additionally protect the body surface from corrosion.
The binder refers to the layer that holds the powdered dye on the surface. When the process is completed and the enamel has dried, it is due to this connecting link that an even shiny layer is formed on the painted surface.
The main task performed by the solvent is to make the paint liquid. This is necessary for more convenient application of it to the body. After all, as a rule, paint is applied using sprayers. Although these components occupy a considerable amount of space in the enamel, its main function is still the dissolution of paint. In addition, after finishing painting, the composition should quickly evaporate from the surface. And often car enamels manufacturers use quickly evaporating liquids as solvents.
We have listed the main components of traditional car enamels, which are used to paint most cars as standard. And then we will look at how metallic paint for cars differs from them.