What putty to use to seal plywood joints on the floor
Most modern flooring is installed on a level base.
But old floors do not always meet the stated requirements, and they have to be leveled. There are many ways to correct uneven flooring, but the most popular is the use of plywood. Its prevalence is explained by several parameters:
- high wear resistance;
- ease of installation;
- affordable price.
Also, do not forget that plywood is a natural material, which is also important. Sealing the seams of plywood sheets on the floor
Sealing the seams of plywood sheets on the floor
During installation, whole sheets are sawed into rectangles, between which it is necessary to leave technological gaps of 3–8 mm. Therefore, after installation, the question arises: how to seal the plywood joints on the floor? There are many options, but their effectiveness varies.
Regardless of the chosen method, the main thing is to follow the technological process:
The joints of the sheets must be tightly secured. Plywood is a fairly elastic material, so the edges will “play” a little in any case. But the greater the amplitude, the faster the putty will fly out. To avoid this during installation, the self-tapping screws are placed as close to the seams as possible (it is advisable that the indentation be about 2 cm) in increments of no more than 20 cm
When attaching plywood with glue, you need to pay special attention to the edges and corners, avoiding un-glued areas. The plywood at the joints must be processed using a sander or sandpaper. This item plays a special role with soft finishing surfaces: linoleum, carpet. After completing all installation work, the seams need to be cleaned of dirt; this is most conveniently done with a vacuum cleaner.
Then degrease and prime. The best results are shown by a moisture-resistant primer, and if the room is damp, then preferably with an antifungal effect.
Types of grout
Naturally, sealing the joints of plywood when laying the floor will give a good result only with the correct putty. It should be elastic, but not soft. Also, it should not shrink, otherwise over time the joints may appear on the surface of the finishing coating.
Sealing plywood seams using putty
At the moment, the most common options are:
- Putty. It should be not just for woodworking, but specifically for wooden floors. An ordinary one may not withstand the loads. Of all the variety of options on the market, acrylic putty has proven itself best.
- Silicone. It is less popular due to its softness, and therefore is not suitable for use under finishing options such as linoleum and carpet. But it is often used in damp rooms, benefiting from its tightness.
- Elastic sealant. Shows some of the best results. The disadvantage is the high degree of shrinkage, but this can be avoided if it is applied with a spatula in several layers. But the process is quite long, because each time you need to wait until the previous layer has completely dried.
- Hot melt adhesive. Stretchy but not soft, dries quickly and shrinks virtually, it would be an ideal joint compound if not for its price. It is an order of magnitude higher than other options for sealing seams. In addition, to use it you need to acquire a fairly powerful hot melt glue gun with a power of 500 Watts. With its help, hot-melt adhesive is applied to the heaped seams, and after hardening, the excess is cut off using a wallpaper knife.
- Traditional methods. They are distinguished by a wide variety of recipes; according to them, puttying plywood joints on the floor can be done with sawdust mixed with PVA, or with epoxy resin heated to 40 degrees. There are examples of using a mixture of drying oil and construction chalk for these purposes.
You decide for yourself how to seal plywood joints on the floor, because each method has its own advantages and disadvantages. If all the rules are followed, any of the above methods can give a fairly long-lasting result.
You can see how to make putty with your own hands in this video.
Plywood floors
Note. Plywood is a fairly durable material, although it is made from thin pine or birch veneer. Two factors give it strength - gluing layers with a perpendicular orientation of the direction of the fibers to each other, as well as impregnation of the veneer (the price of the product depends on the type and brand of sheet).
Material selection
Much about the technical properties of such a structural material is said by its marking, which is written as an abbreviation. The table below shows the characteristics of the most popular brands, any of which you can use in this case. In this case, the purpose of the room (level of constant or periodic air humidity) should be taken into account.
| Marking | Impregnation | Features and where to use |
| FBA | Albumin casein glue | Due to low moisture resistance, it is used only in dry rooms |
| FSF | Phenol-formaldehyde glue | It has relatively high wear resistance and high moisture resistance. The most popular brand. It is also used for roofing work |
| FSF-TV | Phenol-formaldehyde glue and flame retardants | To all the advantages of FSF is added the low flammability of the material |
| FC | Urea glue | Low water resistance. Typically used in the production of furniture, packaging and interior work |
| FB | Bakelite varnish | Very high moisture resistance and resistance to aggressive environments. Can even be used underwater |
| BS | Alcohol-soluble bakelite glue | Aviation plywood of the highest strength, elasticity and water resistance. Previously used only in the installation of aircraft and ships |
| BV | Water Soluble Bakelite Glue | In terms of strength, the same qualities as BS with the exception of water resistance |
| FOF | Phenol-formaldehyde glue | It has all the qualities inherent in FSF, that is, it is FSF, only with a laminated coating. Due to the ability to create different colors, it is used as laminated plywood for furniture. It is also very good for installing construction formwork |
Table of technical characteristics of the most popular brands
Assortment:
- as you can see in the top photo, all products of this kind are classified into varieties, of which there are a total of 5 categories;
- this is the 1st, 2nd, 3rd and 4th grade, as well as the highest category E (elite), where the instructions according to GOST 3916.1-96 do not allow a single natural defect in the wood and a single manufacturing defect;
- for the front covering you, of course, need to use sheets of at least grade 2, and grades 3 and 4 are quite suitable for a rough base.
Surface treatment:
- in addition to markings on the adhesive or varnish composition, there is also marking on the surface treatment of the panels, which is written in the accompanying documents as Ш1, Ш2 and НШ;
- this means a surface that is sanded on one side, on both sides, and not sanded at all, respectively.
Thickness:
- The thickness of the sheet will depend on the number of layers of veneer that were used for gluing and there are three categories of panels, these are:
- three-layer;
- five-layer;
- multilayer.
Here you can also pay attention to such a parameter as the thickness of the plywood on the floor; it can be from 3 mm to 30 mm. But if you use a thin, 3 mm or 5 mm sheet, then the screed should be perfectly flat, without any drops or dents. Thin panels can only be fixed to a concrete floor using glue - dowels and screws will not work here.
Note. If you laid a warm floor on plywood, then its thickness should be minimal, since wood is a poor conductor of heat. The sheets are naturally fixed with glue.
Laying on plank floors
The above shows how to lay plywood on a floor made of boards - and in this case the installation process is the easiest, and the sheets are fastened using self-tapping screws. If the floorboards are good and dense, then a 3 mm thick panel will be enough for you.
However, if they are rotten, then, of course, they will need to be replaced with new ones. If there are mechanical defects on the surface, then the thickness of the plywood should be at least 10-12 mm or more.
Laying on joists
If plywood is laid directly on the joists, then the distance between them will depend on the thickness of the sheet and vice versa. And the section of the beam is selected according to the span length - see the table below.
Do not forget that the base for the logs must also be rigid - it can be a concrete screed or floor, as well as supports made according to the principle of a columnar foundation. Sometimes, in order to level the beams, the joists are covered with thick boards on top, as shown in the top photo. This method was used in almost all houses built during the reign of Stalin, Khrushchev and Brezhnev (“Stalinka”, “Khrushchevka” and “Brezhnevka”).
| Panel thickness (mm) | Lag pitch for plywood (mm) | Span length (mm) | Log section (mm) |
| 10 | 150 | 2000 | 110×60 |
| 12 | 200 | 3000 | 150×80 |
| 15 | 200 | 4000 | 180×100 |
| 18 | 250 | 5000 | 200×150 |
| 21 | 300 | 6000 | 220×180 |
| 24 | 400 | — | — |
| 27 | 450 | — | — |
| 30 | 500 | — | — |
Distance between lags and their cross-section
In addition, the bottom floor is often laid from plywood, on which the insulation is mounted. Look at the top image - there is a board drawn as such a base, but it can also be any sheet material, including OSB and plywood.
And what kind of insulation can be put under the plywood depends on your desire and technical capabilities.
It could be:
- expanded clay;
- mineral wool of any type;
- Styrofoam;
- extruded polystyrene foam or isolon (foamed polyethylene);
- as well as any type of substrate.
Sealing seams
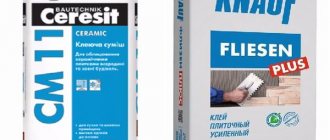
Now let's figure out how to seal the seams between the plywood on the floor. The material for this purpose can be fugenfüller or, in extreme cases, tile adhesive.
If you use wood putty, then it will be enough to clean the treated area from dust and dirt, after which you can immediately apply the putty mixture. But if it is fugenfüller or tile adhesive, then it would be best to go through these cracks twice, as the composition may crack.
Attention! At the joints, the edges of the plywood may turn out to be unequal in height. Therefore, before sealing cracks or laying a finishing coating, you need to level them yourself using a belt or disk sander.
How to remove cracks in a wooden floor ideas for a better floor
Leveling the floor with a self-leveling mixture with your own hands
There are quite a lot of ideas that allow you to solve the problem of how to seal cracks in a wooden floor without compromising its appearance, but they all depend on the presence of some professional tool - at least a hand router. It is this that allows you to give some semblance of order to the randomly separated seams - in general, to make it as if it was intended to be so. There are plenty of options for such decoration.
- Chamfers. By installing a cone tool on the router and deepening the cutter to a certain level into the wood, you can make even grooves at the junction of the floorboards - so to speak, to show the joints. Well, then, when the cracks are in order, fill them with colored acrylic putty and, after sanding the floor, open the whole thing with varnish. By and large, in this way you can even create the appearance of parquet or parquet boards, on which you can even cut patterns if desired.
- As an option, in order not to mess with putties, you can mill wide blind grooves in the area of the seams and fill them with a pre-prepared strip - you need a tight groove in which the strip will be held with glue. As in the previous case, this also opens up wide opportunities for creativity - if you master a hand router, then using this technology you can even create patterns with smooth curved lines. By the way, the floor will look much richer if the inserts are made in a different color - at least they can be covered with stain. As in all other cases, the floor is finally sanded and varnished. Alternatively, you can rub it with wax-containing oil.
In principle, if you think carefully, you can come up with your own technology for solving the question of how to seal cracks in the floor? The options you described are simply the most common and almost all craftsmen resort to using them - especially when it comes to the option with sheet material.
The methods are simple, but it is important to understand one thing - cracks in the floors themselves appear very rarely. As a rule, they have at least one travel companion - this is a creaking, which needs to be eliminated first, before proceeding directly to the question of how to seal the cracks in a wooden floor? And they can be eliminated simply - each board needs to be scrolled along the joists with a couple of screws
Only after this procedure will it be possible to begin the fight against cracks.
Technology of floor leveling with special compounds
Technology and installation of a wooden floor in a private house with your own hands
Scheme of floor construction with linoleum on the ground.
Leveling the surface using special mixtures before laying linoleum involves the initial installation of logs. If they are installed on the surface of a wooden floor, then all boards that are poorly reinforced must be fixed to the joists with self-tapping screws, the heads of which should be driven below the floor level.
The wooden floor must be prepared; for this, the cracks and grooves between the boards will need to be eliminated, which can be done using acrylic putty, which can be replaced by a leveling mixture; the latter must be diluted during the preparation process to the thickness of the putty composition.
As soon as the base has dried, it must be coated with a moisture-proof primer, which will ensure high-quality adhesion of the self-leveling composition and wood. The walls will need to be covered with waterproofing.
In order for the self-leveling floor to gain additional strength, reinforced mesh should be used. It will need to be secured to the wooden surface with a construction stapler. The mesh should be laid with an overlap of 5 cm.
Afterwards, you can begin preparing the leveling mixture solution. You can stir it using a construction mixer; an electric drill equipped with a special attachment will also work. Such mixtures must be used immediately after preparation. The mixture must be poured into the space between the logs, leveling the surface with a spatula and a rubber mop; the logs will act as beacons. Air bubbles can be removed using a needle roller. Now the mixture can be left to dry completely.
Types of joining materials
Leveling a wooden floor with plywood
Concrete, cement, plastered, brick walls. Make sure that the crack does not tend to get bigger. If the edges are crumbling, then everything that is crumbling must be removed, and the surface should be impregnated with a penetrating and bonding primer. Repairing cracks in such surfaces will in any case require the application of a suitable primer.
Plastic and laminated panels. Apply suitable primer. The primer should, on the one hand, fit well on the plastic, and on the other hand, be combined with acrylic paint and primer. A good primer is Tikkurila (Tikkurila) Otex (Otex). Our domestic GF-021 is suitable, but it must be thoroughly dried. Some acrylic paints and primers tend to curl up on it if not dried thoroughly.
Leveling the surface with plywood
Floor leveling is most often done by laying plywood. Leveling the floor in this way turns out to be of the highest quality. To carry out the work, it is recommended to use FK grade material, class 4/4, its minimum thickness should be 12 mm. If the rough base is fairly level, it is permissible to lay plywood with a thickness of 8-10 mm.
Spreading linoleum.
Before leveling the floor under linoleum using plywood, you should install beacons, which will be self-tapping screws; they must be positioned level on the surface. As a rule, beacons are mounted at the corners of squares, the side of which can be equal to the limit of 25-30 cm. A screwdriver will allow you to install beacons. Only then can you begin laying the logs, which can be made of plywood; they need to be given the appearance of strips with a width of 30-40 mm.
The joists can be fixed to the base of the floor with glue designed for working with wood. This could be PVA Moment or PVA Stolyar; self-tapping screws will serve as an alternative fastening solution. In the space between the joists and boards, in the gaps between the beacons, plywood bars should be laid, having previously coated them with glue.
Then you can begin preparing the plywood for laying on the floor. The sheets can be given the appearance of squares, each of which has a side of 60 cm. This method eliminates the formation of waste, since such squares can be obtained by cutting the sheet into 4 parts, the standard size of each will be 125x125 cm.
Scheme for leveling the subfloor with plywood.
It is impossible to level the floor surface under linoleum using defective sheets. Errors may become noticeable after the sawing process - delamination may occur at the ends of the squares, which, as a rule, cannot be noticed in whole sheets. Such elements will have to be replaced. Afterwards, you can level the floor surface by installing plywood on joists. During installation, it is necessary to ensure that the joints of the squares fall on the logs.
Before leveling the floor under linoleum using plywood, you should know that the sheets need to be laid with some offset so that they are laid like bricks in masonry. This indicates that it is not acceptable to cross 4 seams at one point. If necessary, the plywood can be cut to size.
You can cut a plywood sheet and save material if you place the sheet on the floor before installing the joists. Then you should mark with chalk where the plywood sheets will join. This way it will be possible to attach the logs in those places where necessary.
Level the surface using plywood by attaching the latter to the joists with self-tapping screws.
After laying the plywood, thin sheets of fiberboard should be nailed to it, then you can apply glue to the floor surface and glue the linoleum
It is important to ensure that the joints of the substrate and the finishing coating do not coincide. Otherwise, cracks may form
It should be noted that any preliminary leveling of the floor will slightly raise its level; for small rooms such a change will be very noticeable.
It will be possible to lay linoleum in a high-quality manner only with proper preparation of the base, because a soft coating can reveal all the shortcomings of the base surface, and later they will become a place where the linoleum can become depleted and torn, which will require replacing the coating with a new one. Thus, good foundation preparation can help save money in the future.
Properties of plywood
Classification of plywood involves division by grade, mechanical characteristics, elasticity and moisture resistance. A letter marking for the material has been developed, which must indicate the type of glue used to impregnate and secure the veneer during the production of the product.
Plywood characteristics:
- In the Russian Federation, standards provide for the production of plywood of the following sizes (in millimeters): 1525x1525, 1220x2440, 2440x1220, 1250x2500, 2500x1250, 1500x3000, 3000x1500, 1525x3050 and 3050x1525. The thickness of plywood sheets can vary between 3 and 30 millimeters.
- For the production of plywood, birch or coniferous trees (pine, spruce, larch) are used. The veneers are glued together perpendicular to the location of the wood fibers.
- Each type of product is assigned a specific label: FSF, FBA, FSF-TV, FB, FC, BS and BV.
- The following grades are suitable for puttying purposes: FSF, FSF-TV, FK, FB and BS. The fact is that these products are characterized by increased moisture resistance, which is an indispensable condition when selecting a material suitable for puttying.
- Plywood is also classified according to the degree of processing. Laminated and non-laminated varieties are available. Products polished on one side are marked as Ш1. Double-sided grinding is reflected in the marking Ш2. If the slab has not been sanded at all, it is marked as NSh. Of all the listed varieties, unlaminated and unsanded plywood is most suitable for puttying.
Characteristics of a quality mixture
Despite the fact that different types of putty mixtures differ in components, they all must meet a number of quality requirements:
- a sufficient degree of elasticity, due to which the mass lies evenly on the surface and fully fills all voids and cracks;
- good fixation of the mixture on the wood surface, which allows the floor to remain level for a long time, without swelling or peeling;
- homogeneous composition without large particles does not cause scratches or damage to the floor surface during application.
If you need putty for a wooden floor in an open area - in a gazebo or on a terrace, several mandatory characteristics are added to the material:
- frost resistance so that the surface does not crack during frost or sudden temperature changes;
- water-repellent properties that protect the wood of the floor from moisture and rotting;
- drying speed, which determines the duration of finishing work performed on the floor.
Wood putty for indoor floors must also have specific qualities related to human safety:
- an environmentally friendly composition that ensures the safety of people in the room when applying and drying the composition;
- antiseptic components that rid the floor of the occurrence and spread of mold, bacteria and fungi that harm wood;
- fire resistance, which will keep the putty layer intact when exposed to high temperatures or open fire.
To eliminate uneven walls before painting and wallpapering, various types of putty are usually used, but is it possible to putty plywood? Of course, it is possible and even necessary, since the material itself is far from smooth and contains many natural irregularities, chips and cracks.
Features of puttying plywood sheets
Since plywood itself is very susceptible to external influences, its treatment with a primer, protective impregnations and putty is necessary.
Important! Since all types of putty have a liquid base that can disrupt the physical properties of plywood, the wood must first be primed to protect the product from moisture and create better adhesion when the putty adheres to the surface
Primer of plywood is strictly necessary.
Specialty construction stores sell many types of primers specifically for wood on various bases.
Be sure to read the instructions on the package.
Containers with primer contain instructions from the manufacturer, which indicate the characteristics of the substance and scope of application. Many people recommend priming the sheets before installing them on the walls and only after they have completely dried, proceed with installation.
Types of putties for plywood
Before choosing what to putty plywood under wallpaper, you need to know exactly the features of the room and the type of finishing. Preparing the surface for wallpapering is slightly different from preparing it for painting and different types of putties are used for this.
It is also necessary to take into account the humidity of the room and possible temperature changes, which also affect the choice of putty.
To level out uneven walls and prepare them, two types of putty are used:
dry in powder form (photo);
ready-made in the form of a thick solution (photo).
Dry putty for plywood is most widely used, since such mixtures are easy to work with and the consistency can be adjusted independently depending on the circumstances. It is produced in bags of different weights.
There are ready-made finishing mixtures, which usually contain various dispersions, silicone or latex. The advantages of this material lie in the use of modern synthetic products as a filler.
There is no need to mix the solution yourself and use it completely. Such putties can be stored for a long time, but their cost is much higher than that of dry mixtures.
Based on its chemical composition, plywood putty is divided into four main types:
- gypsum;
- polymer;
- cement;
- homemade.
- Gypsum-based mixtures are easy to use and do not shrink. However, if the plywood sheets are not securely fastened to the frame and there is a possibility of vibration, then such a mixture may crack in the area of the joining seams, since it does not have the necessary elasticity after drying.
Dry gypsum putty.
- Polymer-based putty mixtures have shown their best performance when working with wood, but their price is significantly higher than their analogues. Polymer mixtures are water resistant, which justifies their use when processing plywood in rooms with high humidity.
Such mixtures do not shrink and have good elasticity after drying. If you don’t know how to putty plywood on a floor where there is an increased level of vibration and mechanical impact, then polymer putty will be the best option.
- Cement mixtures also have good water resistance, but you need to remember that after drying they shrink slightly and have no elasticity.
- Another type of common mixture is putty, prepared independently based on ordinary PVC glue and fine wood dust. How to properly sand putty on walls for painting? The advantage of such mixtures is their high water resistance, the ability to create the desired consistency and good elasticity. It is for this reason that such mixtures are used very often in order to save money.
What and how to putty plywood
To ensure that the result of your work is pleasing to the eye, and the need for another repair does not arise for a long time, you need to choose the right putty and strictly follow the technology for its application. Let's talk about this.
Which putty to choose
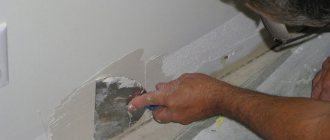
The easiest way to answer the question is how to putty plywood on the floor (see Puttying a wooden floor with your own hands step by step), if a decorative flooring will be laid on top of it - laminate, parquet board, linoleum, etc. In this case, it is enough just to protect the subfloor from moisture, for which it is covered with drying oil, and the seams are coated with epoxy putty.
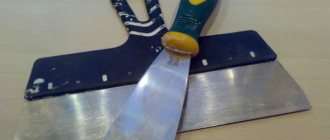
To seal the joints you will need a narrow spatula
Wall finishing needs to be approached more responsibly, taking into account the operating conditions, the type of future finishing and your own financial capabilities. Mixtures based on gypsum or polymers (acrylic) are suitable for this work.
What are their differences:
- Gypsum putties
are dry bulk mixtures that are diluted with water to a working consistency before application (see How to dilute putty for DIY repairs). They are easy to use, do not crack when dry, and are very inexpensive. But they can only be used in dry rooms, as they absorb moisture too well, swelling and peeling off from the base. It is also not recommended to use this material for finishing surfaces subject to vibration. For example, for plywood ceilings on the first floor in the presence of a residential second floor or for partitions with doorways. After drying, the plaster loses its elasticity and with such exposure can crack and begin to peel off.
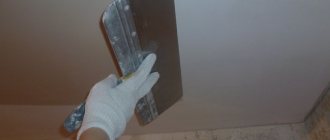
Fine finishing mixtures are used to putty plywood.
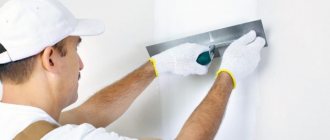
- Acrylic putties
are ideal for working on wood and plywood. They are ready-to-apply mixtures that have high adhesive properties and firmly adhere to the surface, providing it with reliable protection from moisture. Therefore, polymer putty on plywood can be used in rooms with high air humidity and on surfaces subject to serious mechanical stress. However, it costs much more than gypsum.
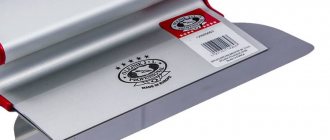
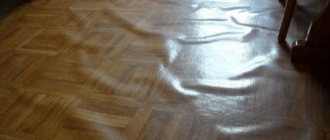
Only polymer-based mixtures are suitable for flooring
As you can see, the differences are quite significant, and the advantage clearly goes to polymer-based putties. The only downside is their high price.
Plywood, depending on the type and quality of finishing, can be used both for leveling surfaces, including floors, and as a finishing material. But the fact is that it remains a natural material, and for a long service life it is necessary to leave technological gaps between adjacent sheets. During the process of installing the floor, the question may arise as to what is the best way to seal the seams so that this has a positive effect on the quality and durability of the floor covering.
The choice of material for sealing seams depends on several points:
- From the material that will be used as a finishing decorative finish
- From the thickness of the gap, if the plywood has already been laid and you have to choose based on the available data
- From the characteristics of the room itself in which the renovation is being carried out.
Before you start sealing the seams themselves, you first need to carefully prepare the work surface. The most important step at this stage is sanding the seams to be sealed. The softer and thinner the finish is, the better all defects will be visible on it.
Even small gaps in the seams can cause a lot of trouble in the future if there is linoleum or even a more durable and thick material on top
The easiest way to bring sheets of plywood and the joints between them to the required condition is to use a sanding machine. This tool will allow you to quickly remove all unnecessary irregularities and joints from the surface. If you don’t have a sanding machine, then these same steps can be done manually, but it will take much more time.
Sequencing
At the beginning of the repair, a plastic film is spread on the floor, the panels of which should overlap each other by about 20 cm. This is done to prevent the access of moisture from the lower rooms.
Mineral wool is cut into strips approximately 3-4 centimeters thick, which are attached around the perimeter of each room. Why install bars at a distance slightly less than the width of the insulation boards? The evenness of the installation is controlled by a level. Insulation boards are laid between them, which should fit tightly into the rectangles between the bars.
What exactly to do with the boards depends on whether it will be a rough layer or a final one. If you need to level an old wooden floor by laying a new covering on top, the boards can be laid out at small intervals. Then the next step will be to lay sheets of fiberboard or plywood on top of the boards as a base for a decorative coating. The photo above in the article shows wooden floors after renovation.
How to make your own putty mixture
To save money, since putty prices in stores are quite high, you can make a lot yourself. The basis for such a mixture is drying oil, which will be required in the amount of 500 g. We add others to this component:
- varnish kerosene or turpentine - 125 g;
- dry sifted chalk;
- liquid drier - 25 g;
- animal glue 10% - 100 g;
- liquid soap.
If you need a larger volume of putty, simply maintain the proportions by multiplying the amount of each component by the required number. Only under such conditions will the mixture retain its beneficial qualities.
Preparation of the putty mass is carried out in the following sequence:
- animal glue is heated over a fire; left on the burner, stirring continuously;
- Soap, drying oil, turpentine are added one after another, and lastly - the drier;
- chalk is poured last;
- The mass is stirred until it becomes sour cream.
The resulting homemade putty must be used hot, which will need to be maintained during the work period.
Leveling with self-leveling mixture
Leveling a wooden floor with a self-leveling mixture: the base should not have large gaps or cracks
Pouring concrete screed has always been a success among builders as a simple and affordable way to level the floor. But in houses with wooden floors this was unacceptable due to the large mass of concrete that had to be used. Thanks to modern technology, this problem has been solved. Self-leveling mixtures allow you to level a wooden floor under linoleum, laminate or tile. The cement-adhesive composition, after drying, will create a smooth, durable and fairly elastic coating with low mass due to a layer of up to 20 mm. To do this you need to do the following:
— the floor surface is completely cleaned of old floor covering;
— we recess the protruding nail heads, remove any metal objects;
— using a sander or sanding machine, partially remove the top layer;
— all creaking and springy boards are secured to the joists using self-tapping screws;
— thoroughly vacuum and remove dust and dirt from the floor;
- putty all the cracks and cracks, let them dry completely;
— we impregnate the wooden floor with a deep penetration primer with moisture-proof properties; if this seems insufficient, you can lay a waterproofing membrane;
— we glue the joints of the walls and the floor with an overlap on the floor and walls, using double-sided tape, and glue a waterproofing membrane in the form of a strip onto it;
— on the walls we mark the level to which the self-leveling mixture will be poured;
Scheme of filling with self-leveling mixture: insulating layers
— near the door we fix a wooden plank, the thickness of which corresponds to the level of filling;
— we lay a reinforcing mesh on the floor surface and secure it to the floor using self-tapping screws or staples;
Now that the wooden floor is prepared, you can start pouring the mixture:
— add the mixture to a container with water and knead using a drill and a mixing attachment;
We get rid of bubbles in the self-leveling mixture with a rubber roller
— pour the resulting mixture onto the prepared surface and use a special rubber roller with spikes to get rid of small bubbles;
- level the surface using a large spatula or rubber mop;
— now all that remains is to wait for the mixture to dry completely and prepare it for laying the floor covering.
Reasons for the formation of cracks in the floor
Gaps between boards bother homeowners for many reasons. If there is a ventilated foundation under the floor, then cold penetrates into the room through the cracks.
Due to the fact that various debris gets clogged into the gaps, the floors take on an unaesthetic appearance. In addition, the boards themselves may begin to rot.
The cause of cracks can be:
- Drying of wood. This is the most common reason when using regular wooden boards. You don’t have to worry about drying out if the floor is made of factory boards treated with the “vacuum drying” method.
- Installation error. Gaps may form immediately after construction is completed if the floor installation was performed incorrectly. In this case, the gaps arise due to the fact that the boards are “walking”.
- Dry air. If the air in the room is dry, then there is no need to remove cracks on the wooden floor. After some time, boards pulled together tightly will go in “waves.” You can check air humidity using a hygrometer.
- Small rodents. The cracks made by mice are not easy to repair. You must first get rid of the rodents themselves.
With timely care and careful use of a wooden floor, you can get by with only cosmetic repairs. The choice of method and means will depend on the size, location of the defects and the reasons for their occurrence.
Types of putty for wooden floors
Before you buy a ready-made mixture or make it yourself, it’s worth understanding the main types of material and its purpose. So, parquet putty is divided into:
- starting - for rough finishing of the base with an obviously deformed surface;
- finishing - for final delicate leveling;
- universal - suitable for any type of work.
The putty also differs according to its components into:
- plaster;
- oil;
- acrylic;
- alkyd;
- latex;
- wax;
- variance.
The most popular is gypsum. It is a universal putty, has excellent adhesion and an affordable price, suitable for final and initial floor finishing.
Oil can be used to finish floors made of any type of wood. The downside of the material is the long drying time.
Acrylic putty is suitable for coating work where there is a minimum number of cracks and defects, and is indispensable for masking seams. The material is water-based, elastic, resistant to mechanical damage, and safe. The disadvantages include sticking to the edges of cracks.
Alkyd putty is produced from a mixture of resins from a number of oils (linseed, soybean, etc.). The main differences are elasticity, viscosity, reliability.
An analogue of alkyd, latex putty for parquet is suitable in cases where it is necessary to carry out high-quality delicate treatment of the coating with unevenness up to 2 mm. The material adheres well to the floor surface and is waterproof. The cost of latex putty is several times higher than the cost of gypsum putty.
Hot melt wax putty, also known as parquet floor restoration wax, is suitable for removing scratches, chips and small cracks. It is applied using a gas melter, therefore it is used mainly by experienced craftsmen for finishing wooden floors of different colors and from different types of wood.
The dispersion is intended for making putty with your own hands to obtain the desired color. Parquet dust is added to the mixture and used to seal irregularities and cracks with height differences of up to 6 mm. This floor leveling option is the simplest and most economical.
Types of putties for floorboards
Today there is a fairly wide selection of wood putties. Before choosing putty, you need to decide on the price, scope, type and brand.
Elastic floor putty does not require careful surface preparation; it is easy to apply and cover with other paints and putties
Putties are divided into types:
- Polymer putty, which is water-based, therefore does not emit chemicals into the atmosphere. It dries quickly enough, holds well and does not crack.
- Oil putty based on water, chalk and oils. It is one of the most reliable, however, after treating the crack, it takes a lot of time for it to dry completely.
- Acrylic putty is environmentally friendly and non-flammable, which is very important for wood.
- Solvent-based putty is ideal for hardwood flooring, but is not the most environmentally friendly option.
- The putty is elastic, which is ideal for “floating” cracks and joints. It holds its shape perfectly and has good adhesion to the surface.
- Wood putty is pigmented, that is, in various colors (white-birch, teak-mahogany, wenge-dark oak, beech-oak). It is necessary to take into account that often the color does not match what is stated on the packaging; you should request a demonstration of the product or a stand with these putties.
- Putty for wooden floors, which is used to smooth out unevenness, various defects and crevices.
The main brands of putty manufacturers are Dulux, Parade, Semin, Varathane, Axton, Neomid, Forwood, Rainbow, Tytan, Master's Choice. We must not forget that putties differ in the main types: finishing, leveling, filling, universal, sealing. The putty is applied with a spatula of the selected size by pressing it deep into the crack. After the putty has dried, it is necessary to level the surface using abrasive products for wood.
Securing the joint
The panels that are joined must be rigidly fixed so that they cannot move relative to each other. The easiest way is to place a piece of board under the joint and screw the panels to it with self-tapping screws, having previously drilled holes for them and made recesses for the caps. The diameter of the hole should be such that the self-tapping screw falls freely into the hole, but does not dangle in it. The depth of the recess under the cap should be such that the cap goes 0.5 mm deeper than the surface. If the panel is attached to a hard surface, for example, a door trim, then you just need to put additional screws along the seam; holes and recesses for the caps are also needed for them.
A common mistake is sealing joints in wall panels without fastening them. Such a seal lasts until the first good vibration.
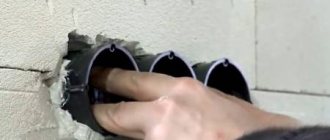
Need to know: how to seal a mouse hole
There are mice in both rural and urban areas. If there are any cracks in the houses, then mice can easily enter the living space; they will not only harm human health, as they are carriers of leptosperosis, toxocariasis, streptobacillosis and many others, which can lead to death, but also harm the room, its decoration, can penetrate into food products.
The most proven options for sealing holes in the wall from mice are:
- Glass wool sealing;
- Repairing the defect with cement;
- Polyurethane foam also helps a lot, mice don’t chew it, and it seals the hole tightly.
Expert advice boils down to broken glass being placed in mouse holes.
Adviсe
To properly putty the floor indoors, you should know how to choose a good finishing mixture and correctly apply it to the surface.
To achieve the desired result, you must follow the useful recommendations of experienced professionals:
puttying is not carried out at low temperatures: the process is more effective in the summer; Before sealing the main part of the surface, potholes and other floor defects must be treated
The holes that will be sealed should not be more than one centimeter; Putty is applied to a wooden floor only after preliminary drying of the surface material; When purchasing a ready-made mixture, it is important to check the contents of the product by opening the lid of the package. The low quality of the product is indicated by the presence of solid particles in the composition;
- Before using any mixture, study the instructions for working with this product;
- the composition is diluted in small parts, since with a large amount of ready-made unused mixture and rapid drying, the product loses its quality;
- It is recommended to apply PVA glue diluted in water before starting puttying;
- to apply the mixture to a concrete floor, it is necessary to bring the putty to a more liquid consistency than for finishing walls and ceilings;
- if there are a large number of cracks, finely dispersed compounds are used, and the depth of the crack is filled with a coarser material, which must first be treated with glue;
- After applying the putty to all problem areas of the floor, you need to carefully clean the base using sandpaper.
If the budget for purchasing dry or ready-made putty is limited, there are several ways to make the composition yourself:
- By mixing PVA glue with sifted chalk. As a result, a fairly thick mixture of viscous consistency should form. In the process of finishing large irregularities and cracks, sawdust is added to the composition. Drying time is about two days;
- By mixing acrylic varnish with chalk. The same mixing method is used here as for the first recipe for preparing putty. Only the result should be a paste-like mass.
- For rooms with high humidity, it is recommended to prepare an oil solution for leveling. You will need about one kilogram of drying oil, two kilograms of chalk and one hundred grams of any substance that accelerates the drying process;
To putty a wooden floor, a composition of varnish based on oil and wood dust is used; The leveling compound can also be made from small pieces of old linoleum. The main thing is that the material does not delaminate. It is filled with acetone solution
It is important to leave the workpiece for a short amount of time to dissolve the linoleum. The finished product protects the floor surface from moisture in the same way as professional products; It’s easy to make putty at home, which is an analogue of an acrylic mixture
For this you will need about 200 grams of rosin, 400 grams of ozokerite and yellow ocher. The substances are mixed in a metal container, which is placed over a fire to dissolve the materials. The peculiarity of applying such a product is that the putty is applied hot.
The most economical options for preparing a leveling mixture for a concrete floor with your own hands are obtained from a mixture of gypsum and chalk in a certain proportion: there should be twice as much chalk. You also need to add PVA glue to the composition. Another option is a combination of varnish and cement; it gives a good result, since the finished product is characterized by increased stability.
When mixing all products, safety precautions must be observed, as the use of chemicals can be harmful to health. It is recommended to use personal protective equipment during work. It is also better to prepare the solution in open spaces or on the street.
Following the puttying instructions will simply guide you through each step of the process. The result will be a smooth floor, ready for the final coat.
To learn how to putty a floor under a laminate, see the following video.
Types of mixtures
A number of factors are important for the correct choice of putty composition. The requirements for surfaces before wallpapering differ from the requirements before painting, since in the latter case the composition should have a more delicate effect on the surface. In addition, it is necessary to take into account the humidity in the room and temperature changes (for example, cement putty does not tolerate sudden changes in temperature).
Putty compounds are sold in one of two states:
- powdery;
- in finished form (viscous solution).
Most often, dry putties are used to process plywood. Such compositions are more convenient to transport, and their consistency can be adjusted during kneading to the desired degree of viscosity. Dry mixtures are packaged in bags of different capacities.
Solutions are also produced that are completely ready for use. These mixtures are based on various dispersions, as well as polymers in the form of latex or silicone. Polymer materials have a number of significant advantages, which will be discussed in more detail below. The main advantage of ready-made compositions is their complete readiness, since there is no need to spend time and labor on preparing the mixture. The disadvantage of ready-made solutions is their significantly higher cost compared to powders.
Answering the question about how to putty plywood, it should be said that the main differences between different putties are the base material.
For plywood puttying, mixtures based on the following components can be used:
- gypsum;
- polymers;
- cement;
- glue.
Below we will tell you a little more about the different types of putties:
- Gypsum mixtures are characterized by the simplicity of their composition and the absence of shrinkage. However, putties of this type are not flexible enough, as a result of which there is a risk of cracks at the seams due to insufficiently reliable fastening of the plywood sheets. The disadvantages of gypsum putties also include the rather high cost and frequent defects.
- Cement mixtures are characterized by fairly high moisture resistance. A significant disadvantage of cement is its tendency to shrink and lack of elasticity. The negative qualities listed above appear especially clearly in hot weather and sudden temperature changes.
- Polymer-based putty mixtures are most suitable for working with wood. Polymer compositions are characterized by high moisture resistance, and therefore plywood treated with such putties can be used even in damp rooms. Polymers do not shrink, have the highest elasticity, resistance to vibration and mechanical stress. All polymer putties are sold only in finished form (packaged in containers weighing from 3 to 20 kilograms). There are two types of polymer compositions: based on acrylic (silicone) and latex. Putties in this group are also divided according to their scope of application: for interior finishing and for facade treatment. The only significant drawback of using polymer compounds is the high cost of purchasing them.
- Adhesive putty is the result of making it yourself at home. This composition is prepared by mixing PVA glue with crushed wood dust in a certain proportion. Adhesive compositions are characterized by high moisture resistance and elasticity. The advantage of making it yourself is the ability to bring the solution to the desired consistency. In addition, the cost of such a composition is significantly lower compared to factory-produced putty.
Preparing plywood for puttying
If everything is clear with the preparation of a concrete surface: clean, fill out all the cracks and holes, then remove dust, prime, dry and you can start puttingtying, then with a wooden floor, and even more so with plywood, everything is much more complicated.
The first thing to do is to saturate the floor with drying oil. It needs to be heated to +50 - 60° C and applied with a brush (roller). Force dry the treated surface using a hair dryer at +200° C. The treatment must be done multiple times, drying the layer well each time. After 3 or 4 soaks, drop water onto the surface of the plywood. If it collects in drops, the treatment can be completed, but if it is absorbed, you need to dry it a few more times. Don't forget about the edges, otherwise when moisture penetrates they will ruffle and then separate.
A similar water-repellent effect can be obtained by impregnating plywood with PVA glue.
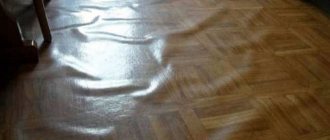
Before laying linoleum, be sure to fill all uneven areas.
And it doesn’t matter what kind of floor you have - wood or concrete. The main thing is to make it almost perfectly flat, then lay a backing and lay linoleum on top
Preparing for finishing
Selection of formulations
The range of tools that we can use to solve the problem is quite extensive. It all depends on where exactly we will process the wood boards.
The easiest way is to decide how to putty plywood under linoleum. Here we don’t need to create a perfectly flat plane—it’s enough to mask the fastener heads and protect the base from moisture. We proceed like this:
- treat plywood sheets with drying oil or primer (it is better to do this on both sides);
- Carefully coat the screw heads and joints between the sheets with epoxy putty.
But it’s more difficult to level walls under wallpaper or paint. Compositions that can then be leveled by grinding are suitable here:
- Gypsum materials
are sold dry and diluted with water to the optimal consistency before use. Easy to apply and work well. The disadvantage of gypsum compositions is that it is advisable to use them only in fairly dry rooms. Gypsum absorbs moisture, which can lead to swelling and peeling of the leveling compound.
And it is also undesirable to apply gypsum-based products to surfaces subject to vibration. Examples of such surfaces are partitions with doorways or ceilings of rooms above which there are living quarters. The low elasticity of polymerized gypsum will cause the leveling layer to begin to crack and crumble over time.
- Acrylic compositions.
Ideal for processing wooden surfaces: they are not afraid of moisture and vibration, are easy to apply and level, and have good adhesion. Most often they are sold ready-made, so they can be used without prior dilution. The downside is the higher price.
- Adhesive putties.
Such products can be prepared with your own hands from sawdust and PVA glue (less commonly, water-soluble wood varnish). They are used mainly for sealing defects, masking fasteners and sealing seams between sheets. They are also suitable for processing large areas, but are inferior to acrylic ones.
It’s difficult to say which option is definitely better: they all have pros and cons. But in general, gypsum putty can be used as a base putty, and where there is a risk of gypsum peeling off, acrylic putty can be used. I would recommend using homemade adhesive compounds exclusively for local repairs.
Putty technology
If you have at least minimal skills in finishing work, then you should not have any questions about how to putty plywood sheathing. Still, there are a number of features that are worth mentioning:
- Firstly, wood boards need to be leveled, dusted and primed. Only if these conditions are met will the putty mixture “lie” evenly and adhere well.
- Secondly, under any decorative material you need to lay a starting layer with good adhesion. Thus, applying bark beetle sand putty to USB plywood without prior leveling and reinforcement will lead to rapid cracking of the face layer. The reason is a change in the linear dimensions of plywood with changes in temperature and humidity.
Instructions for performing the work are presented in the table:
| Illustration | Stage of work |
| Sanding wood. Before you putty the plywood for painting, it is advisable to sand it. This will remove loose wood fibers and eliminate any unevenness. | |
| Base primer. Immediately before puttying, we treat the plywood with a wood primer. The primer will not only bind the smallest wood dust, but will also reduce the wood's susceptibility to moisture. So, the sheathing itself will not swell, and the plywood putty will dry more evenly, without the risk of cracking. After priming, possible fixation on the surface of the plaster mesh - to protect against cracking. | |
| Applying putty. After the primer has polymerized, we begin puttying. First, we apply the material to the joints and fastening points. After this, use a wide spatula to lay the mixture on a plane and try to smooth the surface as much as possible. We control the quality of processing using a level. | |
| Leveling with abrasive. When the putty has dried, carefully sand it with sandpaper, gradually reducing the size of the abrasive grain. The required quality of sanding depends on how exactly you plan to finish the walls. |
After dusting the sanded surfaces, they can be safely painted, covered with wallpaper, treated with decorative plaster, etc.