Advantage of arches
Door structures are always a massive structure. In some cases you cannot do without them, but it also happens that it is better without doors - in these cases, as a rule, arches are built.
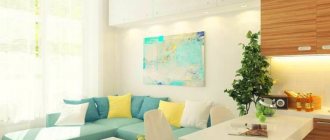
The combined rooms look more spacious, provide good visibility and visual control - for example, in cases when a mother needs to do cooking, leaving the children alone.
- In addition to unification, arches can also divide space - for example, in a studio apartment, or in a large kitchen - to zone the dining area and the food preparation area.
- In addition, for a small and cramped kitchen, combining it with a corridor or room can be a very thoughtful and ergonomic solution, thanks to which it will be possible to allocate more free space for moving or installing missing equipment.
- It is quite possible to build an arch between the kitchen and the living room on your own; it will not take much time, and the cost of such a structure is much cheaper than a door one.
Arches do not need fittings - their construction requires a minimum of components and small parts. They can be decorated very interestingly and elegantly, and the arches do not need to be repaired - unless after quite a long time or due to mechanical damage.
Arched structures look stylish and luxurious; this effect cannot be achieved when installing doors.
The problem of the spread of odors can be solved by installing a high-quality hood.
Choosing the appearance
From the point of view of form, you can endlessly fantasize and invent new original arches, make something special, corresponding in shape and appearance to this particular room. The main thing is that all the elements in the design of the room are in harmony with each other, creating a single ensemble.
The width and thickness of the arch depend on the size of the original doorway. The basic structure of the walls, ceiling and crossbars most often cannot be destroyed, so the shape of the arch is, as it were, attached to the base of the opening.
The symmetry or asymmetricity of the design depends on the chosen style. There are several main directions that define the shapes for the arches.
The simplest arched design is a regular rectangle. The design adds sophistication to it. The portal works great in small apartments with low ceilings. Despite the external severity, such an arch between the kitchen and another room makes the interior of the house very cozy.
Types of arches: bending radii
You should start decorating a doorway with an arch by choosing a shape, because it must be carefully selected taking into account the characteristics of the room, the chosen design, the size of the room, and the height of the ceilings.
Half-arch
Semicircular, or classic Romanesque: the easiest option to implement is an even semicircle. It is the easiest to install, because it does not require complete dismantling of the doorway, unlike all other types.
Luchkovaya
The bow or English arch is distinguished by sharp corners and the same even semicircle as the Romanesque. Most often it is used for wide openings and is well suited for large kitchens.
Half-ellipse
This form is suitable for small spaces up to Khrushchev-era apartment buildings and miniature studios. It visually expands the opening, enlarges the room and makes it brighter.
Trapezoidal
This unusual shape is not suitable for a small room: it needs a wide opening and a large space around. The “cut” corners should fit well into the interior and be combined with the design project.
Rectangular or square
The easiest option to implement, suitable for small rooms and narrow openings of “Khrushchev” and Brezhnevka buildings. Such arches look laconic and neat, but can look too simple.
The shape must be chosen taking into account personal preferences, not forgetting the characteristics of the room, because without this the arch will look ridiculous. Do not forget that massive and unusual ones will look strange in small apartments, where the rest of the interior is quite ordinary.
So, you have chosen the design and shape of the arch. Now it's time to think about the material for manufacturing. Arches are made of stone, wood and much more. About kitchen design in 10 sq. m. read here.
One of the most readily available materials is drywall. It is also the most commonly used for interior work. It is so easy to use that you can make a suitable product yourself with minimal effort. It is environmentally friendly, lasts up to 15 years, and is also inexpensive. Arches made of plasterboard are suitable for almost any interior, unlike more expensive materials. And the opportunity to play with a variety of decor allows the designer to fantasize. The only important drawback is the relatively low strength, but the visual advantages and low cost cover this. And if you are thinking about installing a plasterboard arch, it’s time to learn how to make it yourself with minimal time and resources. This article will tell you about sliding doors to the kitchen.
For families with active children, drywall is not the best choice.
Classic arch style for the kitchen
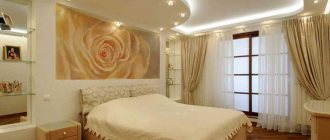
Roman arches are characterized by regular, symmetrical and rounded shapes. This is the most striking classical trend, originating (and name) in the buildings of the ancient Romans - in this way they made their homes more pompous.
Such forms are suitable for absolutely any opening and any interior. But they acquire a special chic with high ceilings.
Arched design of other architectural elements
“You can diversify your kitchen design if you design the space in the work area as an arch”
The passage opening is not the only element that can be designed in the form of an arch. For example, windows made in this style look very impressive - with their help it is easy to give the interior a medieval touch, making it interesting and elegant.
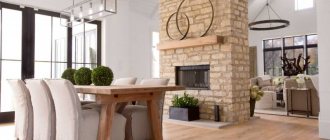
You can diversify your kitchen design if you design the space in the work area in the shape of an arch. Cabinets with arched doors will look harmonious with it, and even lamps may well have arched decor. If you have a traditional fireplace, its arch-shaped portal will look very impressive.
Arch-shaped space in the work area
The color scheme is usually chosen in such a way that attention is focused specifically on the arched elements of the overall composition. You can make them contrast with the rest of the interior, you can highlight them with texture, you can even give them an unexpected shape - but you need to try to maintain a fine line: arches should attract attention, but not be the central element of the entire setting.
Ellipsoidal structures
Also one of the most common options, differing from the classic model in its ellipsoidal top. Pairs perfectly with modern interiors.
And in the case of high ceilings, the ensemble of such an arch will be composed of columns. However, the ellipsoidal option is also good for low ceilings.
Eastern sophistication
The distinctive features of these structures are the asymmetry, as well as the pretentiousness of numerous elements. Creating and finishing eastern arches requires not only talent, but also good command of construction tools, as well as artistic taste.
You can often find numerous angles in combination with convex elements. Such extravagance fits perfectly into original styles with an oriental or Mediterranean slant.
Plastic
Inexpensive and simple, bright and unusual. But there are some dubious nuances. For example, such structures are sold already assembled, with certain dimensions and shapes.
It is sometimes simply impossible to fit them into a specific room, as well as to apply your imagination and creativity to their design. Creating comfort with plastic arches is also difficult. On the other hand, they are easy to care for, they have a long service life, and plastic does not react to high air humidity.
Plasterboard
The most common material from which you can make a kitchen arch with your own hands, or you can buy a ready-made product. In the latter case, the arch is a metal frame of a certain shape with separate plasterboard elements.
In the case of drywall, the flight of imagination is unlimited, and you can decorate the structure however you like.
How to make an arch with your own hands from sheets of plasterboard for the entrance to a room, corridor
Do not be afraid of these construction works, because even a beginner with a minimal set of tools can do them. As mentioned above, drywall is one of the easiest materials to work with, so the instructions in this article should be enough to get you started with the installation. This material will tell you which laminate flooring is best for the kitchen.
What you will need: tools and material
- screwdriver;
- screwdriver;
- impact drill;
- hacksaw;
- jigsaw;
- ruler (preferably wooden);
- pencil;
- engineering compass.
You should not use plastic rulers to make measurements more accurate. If you don't have an engineering compass, you can replace it with a rope with a pencil attached.
- 12.5 mm plasterboard sheets for the frame;
- arched plasterboard sheets for the end;
- metal profiles;
- screws, dowels;
- putty, primer;
- finishing putty and paint if necessary.
Before painting, check whether the paint is suitable for the selected material, consult with the sales staff in the store. Remember that paint with aggressive components can damage fragile sheets.
To install all types of arches, except for the Romanesque semi-arch, you will need to completely dismantle the wall opening. Most types fit wide openings; use a wall saw to widen it if necessary. Read about removing stains from towels here.
By law, you cannot expand doorways if the wall thickness is less than 20 centimeters.
Step-by-step instruction
- The first step is to secure the arched frame. To do this, you need to cut the profile with a hacksaw into 3 unequal parts. One should be equal to the width of the opening, the rest to the height of the arch.
- We attach profiles. The longest one is at the highest point of the niche, and the shortest ones are along the walls. On the other side we repeat this pattern.
- The profile is mounted with an indentation equal to the thickness of the plasterboard sheet with a fastening step of 10-12 centimeters
- Draw the desired arch on paper on a scale of 1:1. Show roundness using an engineering compass. Drywall is cut out using this unique “pattern” using a jigsaw or hacksaw. Be sure to make sure that all the parts are symmetrical so that everything turns out smooth!
- It's time to start installation. The arch elements are installed using self-tapping screws. Use a level to check symmetry. Avoid even small flaws, as they will be noticeable on the finished product.
- Let's start making the end part. Here you will have to make a bend, we will look at how to do it later. We measure a strip of drywall of the required size, taking into account the bend, and cut the sides of the metal profile at intervals of 3-5 centimeters (this depends on the planned bend). After this, the strip needs to be cut and, gradually bending, installed on the frame.
- Everything is almost ready. All that remains is to prime, putty and coat with your choice of paint. Also at this stage, you can decorate the opening by any means at your discretion.
Wooden
An exquisite option, although not that rare. Wood is considered the most natural and environmentally friendly material, but in the kitchen these qualities are held in high esteem. Finished wooden arches have a luxurious appearance. But a structure made from wood with your own hands will look no less chic.
There is also a completely unusual and at the same time simple option - an arched curtain for the kitchen. That is, a canvas that can be hung in a rectangular opening, and its shape will imitate an arched structure.
Selection rules
A few practical tips will help you make the right choice of arch for a specific interior that has certain parameters.
- The more expensive, the better quality - this statement is not always true. Luxurious finishes will quickly lose their luster in conditions of high humidity and constant temperature changes. Practicality - first of all, the material must be reliable.
- Proper arch care is the secret to its longevity. The more parts and decorative details there are in the arch design, the harder it is to clean them of grease and dust. The closer to the stove, the smoother the surface should be chosen. In addition, you should never neglect the protective coating.
- The design of the arch and the interior should be in harmony with each other. In a modern interior, pretentious classics are inappropriate, as are wooden products. But for a large dining room with a round table, they are quite suitable.
- When combining two rooms, you need to combine their styles and choose the right arch itself. To maximize space saving, a design that includes a mezzanine is suitable - shelves or niches above the arch, hidden from prying eyes.
- For a studio apartment, you should not choose bulky structures. A kitchen-living room with a small arch that effectively divides the space into functional zones will look best.
For a narrow corridor, low and small models are preferable, but large structures will enjoy a modern interior, high ceilings and spacious rooms.
How to do it yourself?
An arch is a beautiful, fashionable and functional interior decoration that you can make with your own hands.
If you are interested in how to make an arch yourself, then you should pay attention to plasterboard structures. This material will help make the construction without a team of specialists and extra costs.
But if you are planning to make a huge arch covering the entire wall, for which you will have to remove this wall, then it is preferable to call the craftsmen, otherwise you may not be able to cope with the amount of work.
You can make a small arch over the doorway yourself. Moreover, such a structure can be built even in a one-room Khrushchev house.
1. First you need to calculate the height of the arch. It should be comfortable for those who will pass under it and not create a feeling of oppressive overhang.
It is important to consider that there are reinforced concrete lintels above the doorways that help support the wall. If you plan to remove them, the wall must be secured with a metal frame.
2. Next, you need to buy plasterboard sheets and a special arched profile, which must be cut to give it the desired shape. Also stock up on the self-tapping screws that are needed to attach the frame. For detailed creation and design of the arch, watch the video.
Drywall arches can be given any shape due to the plasticity of the material.
3. After installing the arch, it must be puttied, primed and painted so that the structure does not differ from the renovation of the rest of the apartment.
If you don’t know how to decorate an arch, then pay attention to the new interior design - the photo shows the design using stucco molding, a wooden frame, spotlights or wall paintings. But do not overdo it with the decor, so as not to overload the interior.
In order for the fantasy design to be combined with the interior, it needs to be supported by the color scheme of the interior decoration of the apartment and the shape of the furniture.
In this case, you will get a harmonious and functional interior that looks stylish and modern.
Source: onkuhnya.ru
Step-by-step instruction
It’s not difficult to make an arch yourself. You just need to follow the procedure:
- A model is selected, for this you can look on the Internet for a photo of the arch in the kitchen;
- The passage is being redeveloped, which needs to be expanded to the maximum in all directions;
- A frame made of aluminum guide profiles is installed;
- The frame is finished with plasterboard;
- The product is decorated.
You can also use a ready-made arch purchased in a store.
But before purchasing, you should take careful measurements to ensure that the selected design fits into the opening without any problems.
We monitor compliance
Before making an arch from plasterboard, you should decide on its basic parameters. You need to choose the appropriate size, not only relying on your taste.
The height of the passage must be sufficient - at least 2.10 m. If the old kitchen doors were lower, then it is advisable to increase the opening by partially dismantling the upper lintel.
In a small kitchen, a huge portal that spans the entire wall will be out of place, and in narrow passages a small arch may become capricious and not fit into the overall design if you leave it with a classic shape. A quarter circle instead of a door would look better here.
The most important thing is to create a feeling of comfort. Without this, the house will turn into just a beautiful flat picture from a photo gallery.
Finishing
The product can be wallpapered, painted, stenciled or painted. The finishing with artificial stone, mosaics, tiles, as well as facing bricks – in a loft, for example, looks great.
Decorative plaster looks elegant, and light curtains or thread curtains hung in the opening will add originality.
Installation of a structure made of wet gypsum plasterboard
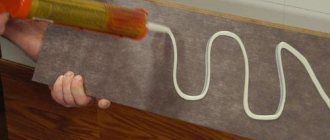
Creating the arch shape requires bending the drywall. If you moisten it a little with water before installation, the material will more easily succumb to deformation, taking on the desired shape. The builders called this installation method wet. This method for a structure with a radius of 300-500 mm requires the use of gypsum board with a thickness of 6-9 mm. In an arched structure with a radius of more than 1 m, gypsum boards with a thickness of 12 mm are used. Armed with the tool, proceed to the main installation phase:
- According to the desired dimensions of the future structure, markings are applied to the partition and excess sections of the wall are removed along it;
- Two strips are cut out of a large sheet of plasterboard using a knife. They will be needed to cover the inside of the arch (sides);
- According to the methods discussed above, markings are applied to the plasterboard and two identical front parts of the arch are cut out;
Tip: using a template, you can save material and time and at the same time apply more accurate markings.
- The profile is used to make the basis of the entire structure. Cuts are made in the sides using metal scissors, and the profile is carefully bent to the desired shape. Curved transitions should be smooth;
- A concrete or brick wall in the opening is drilled for plastic dowels and a profile frame is attached. The frame can be screwed onto the opening of a wooden wall with self-tapping screws;
- The front elements of the arch are attached to the frame. Then the strips prepared from plasterboard are slightly moistened and, carefully bending them, sew up the sides of the structure.