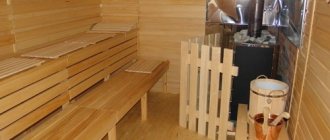
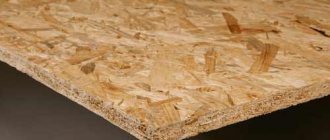
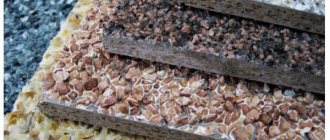
OSB (OSB) or OSB (oriented strand board) is a modern construction material that has become a serious alternative to plywood, chipboard and has found wide application in the construction of frame houses and the finishing of buildings and structures. OSB boards are used to cover interior and exterior walls, floors and roofs.
Wall cladding with OSB boards takes place in frame construction, when the board acts as a structural material and serves to strengthen the walls of a building, or when it acts as a facade material for concrete, brick or wooden houses, which is caused by the low price and high strength and durability of the material. In this article we will look at the question: how to attach OSB boards to the wall from the outside.
For cladding external walls, it is necessary to use OSB-3 boards, specially made for environments with high humidity. You can find out how different types of OSB sheets differ on the page: OSB sheets, their types, characteristics, sizes.
When installing OSB boards to external walls, sheathing is used for the following purposes:
- leveling the wall plane;
- creating a ventilation gap for insulation under the OSB board;
- preventing slab deformation caused by base movements, especially important for OSB slabs with a thickness of 9 mm or less.
Fastening OSB boards to the wall over insulation using lathing
The slab is fastened to the wall using lathing, which is made from a wooden block or metal profile. The technologies for installing OSB boards on a wall with wooden sheathing and sheathing made of metal profiles are not fundamentally different. When choosing a block, it is advisable to choose a dry, planed block of 40-50 mm, then it will not twist or move after drying, which will have a positive effect on the evenness of the entire wall.
To attach the bar and profile to the wall, special metal plates (hangers) are used. Before attaching the hangers, it is necessary to draw vertical stripes on the wall, the distance between which should be half the width of the sheet, which will subsequently ensure the joint of the slabs right in the middle of the bar or profile and will make it possible to fix the OSB slab in the center along its entire length. After the lines are drawn, hangers are attached along them in increments of 30-40 cm.
A metal hanger is used to secure the sheathing.
Suspensions are attached along the marked lines.
Hangers allow you to secure the sheathing over the insulation. After this, the insulation is laid and covered with a membrane that protects the insulation from moisture, after which the sheathing is installed.
It should be noted that a vapor barrier is not needed on the outside of the building, since it prevents moist air from entering the insulation from inside the room, and from the outside of the building, excess moisture should freely escape outside.
Wall with sheathing. Insulation is laid between the sheathing and the wall.
After securing the sheathing, you can begin installing the OSB boards. For wall cladding, a slab with a thickness of 9 to 12 mm is most often used. If a facade is not mounted on top of the slab, then the slab must be moisture resistant. OSB slabs are attached to the wooden beam sheathing with nails at least 2.5 times longer than the thickness of the OSB sheet. For metal profile sheathing - use metal screws 10-15 mm longer than the thickness of the OSB sheet.
With this installation, the sheathing weighs above the insulation and does not create cold bridges in the insulation between the wall and the OSB boards. Thanks to this solution, maximum efficiency of the insulation is achieved. In addition, between the sheathing beams there is an air gap through which moisture is removed from the insulation, which also improves its performance.
Preparing OSB boards for finishing
Usually on sale there is OSB board for interior finishing of the OSB-3 class, from which sandwich panels are also made.
Such products resist moisture better due to coating with materials containing paraffin or wax. Because of this, conventional painting of slabs is impossible, since the surface will not be able to provide the necessary adhesion, which leads to paint dripping.
Therefore, you should first prepare it as follows:
Align it. Carefully inspect the outer layer and remove defects and irregularities with putty or sanding.
Process the edges. They absorb the largest amount of paint or varnish because they are porous. Also round all edges and corners to prevent the paint from cracking.
Finish the seams
Treating the gaps between the plates is of no small importance, so fill them with acrylic sealant. You should not use silicone filler, as it is less easy to paint.
At the seams after painting, you can attach protective decorative overlays with your own hands.
Prime the surface. The overwhelming number of varnish and paint manufacturers recommend this stage of surface treatment of OSB boards. It will help reduce the consumption of finishing materials, prevent stains from various components from the slab from appearing, and also make the paint layer smoother. The primer should be acrylic or gypsum based.
- Sand the surface before applying the coating to remove any layer of wax or varnish.
Coloring
In the production process of OSB boards, specially treated chips of different tree species (maple, aspen, pine or poplar) are used. Therefore, choose a paint designed for finishing wood products.
Instructions for their use are on the label; be sure to follow them strictly. This is especially true when it comes to material compatibility.
For surface treatment of OSB boards the following is used:
- A varnish that makes it possible to preserve the original texture of the material and its color, as well as reliably protect the surface from the environment. It is better to use it on sanded OSB-3 sheets or pre-treat them with P60 sandpaper.
- Paint for interior work. When choosing, base your choice on the previous varnish tips. If there are no high demands on appearance, use a water-based material.
The best results are shown by acrylic dyes, which can be used for ceiling surfaces, partitions, walls and other interior elements.
stain
To highlight the structure of the OSB board material, you can use stain. It can be diluted with a solvent or water, since the material is universal in itself.
But, it is better to use the first type for OSB, for example, acetone, which will not raise the pile and will make it possible to dry the material faster. The stain can be applied with a brush, roller or spray gun.
The second step is to apply a layer of polyurethane primer over the dried layer. It will protect the stain and prevent subsequent layers from affecting it.
If you want to use two colors or create an antique effect on the surface of the OSB board, use patina. To do this, apply it to the material, and after drying, wipe it off with a sponge, and then secure the layer with varnish.
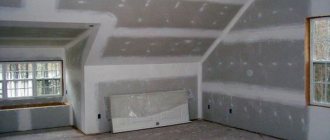
Wallpaper
Wallpaper can be glued to OSB boards, but subject to certain conditions. It was said above that they have a layer containing paraffin or wax ().
Therefore, before gluing wallpaper, it must be removed with sandpaper, then primed and puttied twice. Don't forget to add PVA to the wallpaper glue for strength.
Fastening OSB boards to a wooden frame
When building frame houses, recommendations for choosing sheets are the same as for covering previously constructed walls. The only difference is when the sheets act as a rigidity element. In this case, their thickness must be at least 12 mm. The recommended thickness is usually 15-18 mm.
When installing walls with a wooden frame, two main approaches are used: attaching OSB sheets to the frame through the sheathing and attaching OSB sheets directly to the frame without sheathing. Let's look at both.
How to attach slabs to a frame using sheathing
When strong slabs are attached to the frame on the inside of the wall, ensuring good rigidity of the wall structure, then a sheathing can be made on the outside between the frame and the OSB board. The sheathing forms air cavities for ventilation of the insulation and reduces the deformation loads from the frame to the OSB board.
Insulation is laid between the frame posts. A wind and waterproofing membrane is attached over the studs and insulation, which easily allows moisture to pass through. Next, the sheathing and OSB boards are attached to it.
Installation of OSB boards on a wooden frame with sheathing.
With this design, the slabs can be left unfinished; you can paint them, plaster them, or attach almost any façade material to them.
When fastening OSB boards without using sheathing, maximum rigidity of the wall structure is achieved. In this case, it is recommended to attach the wind and waterproof membrane behind the OSB board, then install the sheathing to create a ventilation gap and install facade material on it, such as siding, boards or decorative panels. OSB boards are attached to a wooden frame with nails at least 2.5 times longer than the thickness of the OSB sheet.
The advantage of using nails over self-tapping screws when fastening OSB on the outside of a house is justified by the fact that nails better tolerate deformation of OSB sheets under atmospheric influences.
Installation of OSB on the walls of a frame house without sheathing
Among the methods of providing rigidity to the frame, three methods are considered optimal, which can be combined with each other:
- Fastening sheet materials to frame posts inside the house;
- Jib joints between frame posts;
- Fastening sheet materials to frame posts outside the house.
When OSB sheets are mounted to the frame posts outside the house, the sheathing between the sheets and the frame posts leads to a reduction in rigidity by almost half. Therefore, to ensure maximum structural strength, this sheathing is excluded from it. Without the sheathing, the ventilation gap disappears, so it is recommended to attach such sheathing on top of OSB sheets. A waterproof, vapor-permeable film is attached to the OSB, then a sheathing, and on top of any suitable facade material: siding, corrugated board, wood, facade panels, and so on.
Technology for attaching OSB sheets to a wooden frame without using sheathing.
So, for example, when building a frame house using the Finnish “Platform” technology, there is no sheathing between the frame and the OSB frames. You can find out more about this technology in the article: construction of a frame house using the “Platform” technology.
The option described above is preferable. But there are other ways. When it is necessary for OSB sheets attached to the racks to act as a facade, and nothing is mounted on top of them, then a ventilation gap can be created between the frame racks. For this purpose, the space between the frame posts is not completely filled with insulation. Leave 2-3 cm for a ventilation gap between the insulation and the OSB sheets. The waterproof, vapor-permeable film is attached to the frame using slats. So that these slats remain between the racks - on two sides to each rack.
Ventilation gap when attaching OSB sheets directly to frame posts
A compromise option is to use oblique sheathing. It is laid at an angle of 45 degrees. This helps to increase rigidity compared to straight sheathing. To increase rigidity, boards 25 mm thick are better suited for such sheathing. The board is attached to each frame post with two nails. Due to the increased consumption of materials and the complexity of the work, this method is used extremely rarely, so there is no statistical information on the performance characteristics of built houses.
Oblique sheathing.
Instructions for building a house from OSB boards
For the construction of a frame building, slabs are often ordered according to the dimensions of a pre-prepared project.
Construction of the foundation
OSB panels are a fairly lightweight material, so any type of foundation is suitable for building a house. Most often, a tape base is used, which is easy to make yourself:
- after leveling the construction area, carry out a complete marking of the site according to the planned layout;
- dig a trench at a depth that depends on the characteristics of the soil and the level of its freezing - from eighty centimeters to one and a half meters;
- compact the soil at the bottom of the depression;
- cover with two layers of waterproofing material;
- sprinkle the mixture on top - one bucket of sand and three identical containers of crushed stone;
- install formwork from OSB panels;
- install a reinforced frame in the trench;
- pour concrete on top and level it using a hydraulic level.
After the concrete solution has completely hardened, the foundation is covered with a film material for waterproofing.
After this, a wooden frame is built on top, which includes:
- tying the bottom with logs;
- installation of vertical supports for walls;
- securing floor boards and joists;
- construction of a roof truss system from beams.
The finished wooden frame is sheathed with high-quality oriented strand panels.
Floor covering
OSB panels are connected on joists with straight edges. There should be a three-millimeter gap around each particle board.
The sheets are laid with their central axis perpendicular to the bars on the floor. Each slab must be connected to the previous OSB panel on joists or have additional support at the ends with a special tongue-and-groove fastening.
The sheets are fastened with nails. For additional contraction strength, adhesive solutions are used.
Fastening OSB boards to walls
For finishing load-bearing structures, oriented strand material twelve millimeters thick is used. To improve thermal insulation, the openings are initially filled with mineral wool.
Installation of sheets on walls can be carried out both horizontally and vertically. In window and door openings, panels are connected with a gap of three millimeters.
The slabs are fastened using ring or spiral nails. At the connection of the chip sheets, they are driven in every fifteen centimeters, and towards the supports the distance between the nails is doubled.
Installation of OSB panels on the roof
The quality of the reinforcement of the sheathing depends on the evenness of the roof frame base. For installation, select strong, undamaged panels that have been properly stored and transported.
OSB roof panels
Short sections of sheets are connected on wall and ceiling supports. The remaining panels for fastening must have tongue and groove markings at the ends and rest on auxiliary supports. Each OSB sheet must rest on at least two wooden bases.
The sheathing is secured with spiral nails fifty-one millimeters long. On the rafter sheathing, the fastenings are mounted at a distance of thirty millimeters, and at the connection of the edges of the slabs, nails are driven in every fifteen centimeters.
A minimum gap of one centimeter must be maintained from the edge of the OSB panel to the screws or nails. When lining the chimney, the distance required by the construction safety rules is maintained.
Fastening the OSB material is carried out according to established rules:
- leave a ten-meter gap between the panels and the foundation to protect against moisture;
- maintain a distance between nails or screws of at least fifteen centimeters;
- when screwing in the fastener, retreat one centimeter from the edge of the sheet;
- Do not connect the panels tightly, leave a three-millimeter gap between them.
It is not difficult to build a frame house from OSB panels. The main thing is to pour a strong foundation, build the frame smoothly and sheath it with oriented strand sheets in accordance with all the rules for their installation.
General rules for installing OSB boards to the wall
Regardless of the chosen method of fastening OSB sheets, there are general rules, compliance with which will ensure maximum strength, reliability and durability of the sheathing structure.
- Self-tapping screws should be screwed in at a distance of 10-15 cm from each other and at least 1 cm from the edge of the slab.
- A 10 mm gap is required between the bottom slab and the foundation to prevent water accumulation.
- The slabs cannot be joined closely to each other; a gap of 2-3 mm is required between them so that the slab can expand freely due to changes in humidity.
- All door and window openings are cut out with a jigsaw or a circular saw, but if you need perfectly even joints and cuts, then you can take ready-made sizes and OSB sheets to a furniture shop, where for a small fee they will cut your sheets on a format-cutting machine evenly and precisely to size .
How to make a partition from OSB inside a house and what screws to use?
OSB is a completely suitable material for the construction of internal room partitions. The strength and light weight of the sheets are clear evidence in favor of this product. OSB boards can be mounted on a metal profile (like gypsum plasterboard) or on a wooden frame.
If the second option is used, the wood should be treated with protective materials against mold and mildew, as well as fire retardants.
Now regarding the installation diagram of the partition, which will be considered using the example of a wooden frame:
- Markings are made at the installation site of the structure. Lines are drawn along the floor and ceiling, which will serve as guidelines for installing horizontal guides.
- Beams with a cross section of 4x6 cm are attached along the marking lines. If the wall will be subjected to serious loads (for example, you plan to hang furniture on it), it is better to use thicker bars - 5-8 cm. The guides are attached using dowels.
- Vertical posts are installed, which are fixed to horizontal beams using metal corners and self-tapping screws.
The pitch between the racks depends on the width of the slab, which varies. So, if the transverse size of the OSB sheet is 125 cm (the value characteristic of European brands), then the optimal distance between the axes of the vertical beams is 62.5 cm. In this case, it will be possible to screw the edges and the middle of the slab to the frame.
After installing the racks, OSB panels are installed.
They are attached using self-tapping screws, the length of which depends on the thickness of the sheets and should be 45-50 mm greater than this value. For example, when using material with a thickness of 12 mm, the recommended length of screws will be 60-65 mm.
In the middle of the slab, screws are screwed in increments of 30 cm, along the edges - every 15 cm. The distance from the edge is 1 cm. A gap of 1 cm is left between the slabs and the floor. The same gap should remain between the OSB and the ceiling.
Also, the panels should not be installed closely, but at a distance of 3 mm from each other. This will protect the sheets from deformation due to changes in humidity.
Making a partition from bars and OSB - watch the video:
Which side to mount OSB sheets
All sides of OSB sheets do not differ in composition. But there are differences in the surfaces. Often one side is smooth and the other is rough. In this case, when installing slabs on walls on the outside of a building, it is better to mount the sheets with the smooth side out. With this orientation, rainwater will not accumulate in such quantities in the uneven areas of the slab. Water helps accelerate the destruction of the slab. Protecting sheets from water penetration helps increase their durability.
When installing slabs on the roof under the roof, in turn, it is recommended to place OSB sheets with the rough side up so that they are not slippery to walk on during roof installation work.
When installing OSB boards in places protected from moisture, the choice of their orientation does not have a significant impact on subsequent operation.
Preparing OSB walls for wallpapering
Wallpaper is considered the most popular option for wall decoration, so it is used in rooms with walls finished with OSB boards. Sometimes such a need arises in the process of redevelopment of space. So, before making a partition, you should make sure that it is in harmony with the rest of the interior.
Wallpaper on OSB wall
If necessary, you can plaster OSB boards.
OSB wall putty can be used if there is a need for the finished wall to become universal for applying any type of decorative coating
With this type of wall treatment, you should pay attention to some features:
Putty is applied to a clean surface
The presence of dust, dirt or traces of other building materials on the wall can adversely affect the quality of the coating, so before applying the putty composition it is worth washing the wall well. It is worth paying attention that the heads of nails and screws are recessed as deeply as possible, and it is better to remove the top layer with sandpaper. The surface for putty should be slightly rough. It is better to treat the joints between the plates with nitro putty.
This will ensure evenness and strength. As an alternative, you can use body putty, since its properties are designed for moving objects. In this regard, the composition has not only lightness, but also great connecting properties, and it does not collapse on the wall for a long time. After completing the preparatory work, a layer of putty is applied. After applying the composition, you can begin priming the surface.
Processing wall joints before puttying
OSB boards are a universal material for cladding walls of a house or finishing rooms inside it. This raw material is used both to strengthen walls and create partitions. It is quite durable, lightweight and resistant to mechanical stress, humidity, fungus and insects.
In order for this coating to last as long as possible, it is worth considering several factors before attaching OSB. This is especially true for the distance between nails and screws, as well as the location of the joints. The appearance allows the use of OSB boards without any decorative treatment. However, they can be puttied, coated with paint, varnish, or prepared for wallpaper. If the technology is followed, the result will be smooth walls, which will be the basis for any interior and will delight its owner for many years.
Protecting the wall from mice, birds and insects
In most cases of installation of OSB sheets outside the house, a ventilation gap is provided. Air moves along it, which enters from the bottom of the wall from the surrounding space and exits from above back into the atmosphere. Blind sealing of ventilation gaps on any side is not acceptable. Otherwise, instead of a ventilation gap, you get a closed air cavity.
Wasps, mice, and small birds can enter the ventilation gap and build nests there, thereby violating the characteristics of the wall. Therefore, it is recommended to provide protection at the stage of its construction or repair.
There are several options for protecting the wall from rodents, birds and insects, let's look at them.
- Protection using metal mesh and sheet metal with small holes. It is better to use stainless metal that will not corrode. Mesh or strips of metal are attached to the bottom and top of the wall behind the OSB sheets so that they do not affect the appearance of the house.
- Painting mesh. Differs from the previous version in low price and less strength.
- Perforated facade material at the bottom and top of the wall. For example, in the case of siding, these are perforated soffits.
Grilles or meshes are mounted at the inlet and outlet of ventilation gaps.
After installing the OSB sheets, you can begin sealing the seams and further finishing. You can learn about how to properly seal gaps, what sealing material and in what cases to choose in a separate article: correct sealing of OSB joints.
Which OSB boards to choose for cladding a frame house
Oriented strand boards for cladding a frame house are selected according to the following parameters:
- Moisture resistance. OSB can be non-moisture resistant (OSB-1 and OSB-2) and moisture resistant (OSB-3 and OSB-4). For external cladding, you need to take moisture-resistant OSB-3 boards, which can be ordered inexpensively from us. For interior cladding of dry rooms, you can use OSB-1. But to maintain the quality of finishing in unforeseen cases, builders often also opt for OSB-3.
- Thickness. The optimal OSB thickness for a frame house is 12 mm . Deviations of 1-2 mm in a smaller or larger direction are allowed.
- Format. Two slab formats are common: 1220x2440 and 1250x2500 mm. It does not in any way affect the technical characteristics of future walls, so you should choose the size that seems more convenient to use.
When choosing a material, you also pay attention to the emission class - the higher it is, the higher the formaldehyde content. You can sheathe the outside of a frame house with OSB using Kronospan slabs. Their emission class is E1. Products in this class are also approved for indoor use in residential premises. But we have safer options. These include Kalevala OSB boards (E0.5) and Torzhok OSB, which meets European standards and belongs to zero emission class (E0).