Imitation of a fresco with your own hands. Master Class
Master class on learning various drawing techniques
Author: Irina Viktorovna Onipko, additional education teacher, Kagalnitsky Children's Creativity Center, Azov district, Rostov region
Master class is designed for additional education teachers, fine arts teachers, people who are not indifferent to creativity.
Appointment of the master class:
A) teachers to study with children various techniques of drawing on unusual surfaces;
B) can be used in interior design as walls and paintings of any format.
Summary of the master class “Imitation of frescoes”
Theme: "Drawing a butterfly."
Goal : to introduce teachers and educators to the technique of drawing on a non-traditional surface and the method of creating an imitation of a fresco.
Tasks:
— To introduce teachers to the type of monumental painting – fresco.
— Teach the peculiarities of making a fresco, drawing on an unusual surface.
— Develop imagination, imagination, interest in creative activities.
— To cultivate an aesthetic and moral attitude towards nature through the depiction of its image in one’s own creativity.
Materials and tools : sketch of a drawing, board for a fresco (hardboard, ceiling tiles, plasterboard, wall - choice of surface as desired), putty (preferably ready-made), PVA glue, paints (gouache), spatula (small rubber), bag of charcoal, awl, sandpaper, art brushes, construction brush, sponge, hair dryer, breadboard knife.
Progress of the master class:
This is true! Well, what is there to hide?
Children love, love to draw!
On paper, on asphalt, on the wall
And on the tram on the window...
Author: E. Uspensky
Children really like everything unusual. I want to introduce you to the technique of painting on an unusual surface - today we will paint on putty. Drawing on plaster has long been known and comes to us from time immemorial and is called FRESCO.
Historical information: Fresco - (from Italian fresco - fresh, raw), a type of monumental painting. Paints are applied directly to the surface of the wall, ceiling, vault. The area occupied by the fresco and its composition depend on the architectural forms of the building. Usually interiors are decorated with frescoes; on the facades of buildings, where they may be exposed to harmful effects of moisture, they are placed much less frequently. Fresco includes several techniques: painting with water paints both on wet plaster (al fresco) and on dry plaster (a secco); painting with lime-casein and tempera paints.
Fresco was already common in Aegean art (2nd millennium BC); It achieved great growth in ancient artistic culture, where multi-layer polished primers with the addition of marble dust were used. From the first centuries of our era, paintings close to frescoes were created among the peoples of the East (in India, Central Asia, etc.). Ancient masters completed the fresco dry using tempera. This technique was also characteristic of medieval frescoes, which were developed in the art of Byzantium, Ancient Rus', Georgia, Serbia, Bulgaria, Italy, France, Germany and other European countries. The art of fresco experienced a new flourishing in the work of Italian masters of the Renaissance (Giotto, Masaccio, Piero della Francesca, Raphael, Michelangelo, etc.). From the 16th century in Italy, “pure” fresco (“buon fresco”) without the use of tempera spread; The top layer of soil (intonaco) in this type of fresco was applied only to the area that the painter expected to finish before it dried. The fresco traditions later lived on in the decorative paintings of the 17th-18th centuries. In the 19th century The fresco was approached by the Nazarenes in Germany, as well as individual representatives of “modernism” (F. Hodler in Switzerland and others). Many progressive artists of the 20th century work in the fresco technique. (A. Borgonzoni in Italy, D. Rivera in Mexico, etc.).
In the USSR, a significant contribution to the popularization of frescoes was made by V. A. Favorsky, L. A. Bruni, N. M. Chernyshev and others.
Rice. Michelangelo Delphic Sibyl (fresco fragment).
The process of making an imitation fresco
On a large scale, a fresco requires a very large multi-stage preparation of the surface, and the process itself also requires knowledge not only as an artist, but also as an architect, sculptor, builder, etc. There is a lot of information on the Internet about frescoes, about production, both on an industrial scale and for creative people who are simply interested in, for example, decoupage.
I systematized the material and adapted it to school age. I really like giving children something unusual, because it captivates them, develops their imagination, imagination! The process of making a fresco is not complicated; even preschool children can handle it (provided safety precautions are followed). Therefore, I offer you this technique and I hope that it will bring you pleasure, and you, in turn, will infect your students with this pleasure.
So: Imitation of fresco (on dry plaster)
We will need materials and tools: a sketch of a drawing, a board, putty, PVA glue, paints (gouache), a spatula, a bag of charcoal, an awl, sandpaper, art brushes, a construction brush, a sponge, a hair dryer, a breadboard knife.
And, of course, if this work is carried out with children (depending on age), you need to talk about safety precautions when using sharp and cutting tools, about the purpose of the putty (instructions for use). If you think that the use of any tool is dangerous for the child, then it is better to show or use the dangerous tool personally by the teacher.
The first stage is surface preparation - applying putty.
1. Surface preparation.
A) Apply putty to a wooden (any) surface (composition = dry putty mixture + background paint + pva + water) The consistency of thick sour cream. Any surface on which the putty is applied is suitable - we used both fiberboard and drywall. My master class uses ceiling tiles. The putty should be applied in a very thin layer of no more than 4-5 mm and with random, frequent movements; no need to try to level the surface. The more unevenness there is, the more spectacular our fresco will look. You can use ready-made acrylic putty. Dry for 24 hours (see factory instructions for use).
B) When the putty dries, lightly sand the surface with sandpaper, not too much, lightly along the protruding surface where there are uneven areas. Remove dust with a dry brush.
Make an interior painting
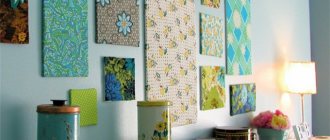
If painting walls doesn't inspire you, you can paint a picture. And it’s okay that you don’t know how to draw. Interior paintings are very popular now, and they will not necessarily be masterpieces. Create a drawing as your imagination tells you. Take a frame, mark it with masking tape and create. This way you can decorate not only wooden frames, but also flower pots.
First eggs, then ducklings: the guy watched as the duck settled on the balcony
Ulaanbaatar and other coldest places for people to live (10 photos)
The first details about the Mercedes EQS electric sedan have become known
DIY fresco - master class
One of the most popular options for decorating the walls of premises during renovation has now become a fresco. This is an ancient art form that involves painting on wet plaster. But since this is very difficult, any painting on the wall, artificially aged, is now called a fresco. Even someone who doesn’t know how to draw can do this painting. Do-it-yourself frescoes in the interior allow you to create an original design. Any picture looks more attractive than ordinary wallpaper.
How to make a fresco with your own hands?
If you decide to decorate the room in this way, prepare the necessary materials for this. You need to purchase special spatulas (metal and rubber), brushes and paints to match the image, putty, varnish and a drawing that will serve as a fresco. In addition, plaster is needed to prepare the wall.
Stages of making a fresco with your own hands
- First you need to prepare the surface by plastering it with a composition that will not crack. The wall preparation stage is very important.
- Next, the wall needs to be leveled and primed. Before applying the design, make sure the surface is perfectly flat.
- Making a fresco on the wall with your own hands begins with markings. It is recommended to use a level. In this case, the composition will consist of three drawings, so 3 rectangles are marked. The first rectangle corresponds to the size of the picture, the second acts as a spartan frame, and the third is a baguette.
- After this, the outline of the design is pasted over with wide masking tape and plastered, applying a thin layer of the composition to the wall with a metal spatula.
- The ends of the rice paper on which the image is printed are opened to make the fresco look more natural and textured.
- After the putty has dried, the rice paper with the image is placed on top with a special rubber spatula and smoothed from the middle to the edges. Glue the design using PVA mixed with water. We glue sequentially all the drawings conceived according to the composition.
- We putty a small frame-passport. Having selected paints that match the color of the picture, we tint the mat. Add a little water to the paint so that the consistency is not too thick.
- When coloring the mat, we make smooth transitions from one color to another, creating the effect of light and shadow. We work alternately on all three paintings using each color. By mixing the colors separately each time, the drawings will not look alike, because repeating the shade is problematic.
- Without waiting for complete drying, we sand to bring out the texture of the fresco.
- Leave the drawing until completely dry. After this, we lightly sand it with a scratch pad and wipe it with a damp cloth. It is important to remember that at this stage it is easy to damage the drawing, so you should act carefully.
- Apply rough putty with sharp movements over the entire area allocated for the background of the picture. We wait for it to dry, sand it with coarse sandpaper, and then tint it with liquid acrylic. We apply 2-3 layers of universal acrylic putty, after drying we tint and sand.
- We tint with ocher and water. After drying, sand it.
- We paint the entire surface with liquid acrylic. It is recommended to use a wide brush.
- Cover the drawing with a layer of matte varnish, wait until it dries completely and cover with another layer.
- We decorate the composition with a baguette, which is attached to the wall with liquid nails. The fresco is ready!
How to make a fresco on the wall with your own hands
To update the interior of a room or decorate an empty wall in an unusual way, and at the same time arouse the admiration of guests, a fresco on the wall, which you can create with your own hands, is well suited. The art of creating frescoes has been known for a long time - previously it involved painting a design on wet plaster, mainly in palaces and churches. Today, there are several ways to create such paintings - let's talk in more detail about the different types and technologies of application and learn how to make a fresco on the wall with your own hands.
Nowadays, the production of frescoes using classical technology is almost never used - instead, ready-made products that are easily applied to the wall are often used. At the same time, they look very natural.
An example of using a fresco in the interior of a dining room
These products are created in this way: the artist primes a special canvas, then applies plaster to it, and on top - the drawing that was ordered. After this, cracks and abrasions are created - for the effect of aging. This work looks no worse than if the fresco was applied directly to the wall. The disadvantage of this option is that such a product is quite fragile and is afraid of water and “chemicals”. To protect it, it is sometimes coated with wax.
It is very difficult to create such a product. Of course, you can try to make such a fresco yourself, but to do this you should have at least some drawing skills. Although such works are expensive, they are distinguished by their uniqueness and unusual appearance. When the picture is ready, it is glued using wallpaper glue.
This method is closer to the real version of creating frescoes. The design is applied to elastic plaster, the layer of which is reinforced with a special mounting mesh. There are several methods for applying images: manually and by printing on special devices. The finished picture is mounted either on the wall or on the ceiling using wallpaper glue, and the edges are covered with plaster so that it appears as if the image was applied directly to the wall.
If the product is made by printing, its cost will not be too high. In addition, it is not afraid of moisture, does not crack or fade over time.
Frescoes on plaster are closer to the “classic” version - they are also applied to such a base and then transferred to the wall
The cost of such frescoes is even lower, since the image on them will not be unique, and their basis is non-woven material. Plaster is applied to it, and the image is printed on a large-format printer. After this, it is aged if the customers so desire. You can, for example, make small cracks that will help give the fresco the effect of antiquity. You can also order a painting of any size - for example, to place it on the entire wall or only on a small area of it. In addition, the product is coated with special substances - impregnations and varnishes - to protect it from the effects of UV rays and moisture.
Fixing such a fresco to the wall is also simple - using glue, which is suitable specifically for non-woven wallpaper. By the way, the big advantage of this option is that the product can be applied to a wall with any defects, because it will cover all the defects.
This is an excellent choice for those who are not ready to create a fresco on their own due to a lack of skills and experience, because installation is very easy even for a beginner.
The price of such products is also not too high, and their installation is reminiscent of gluing photo wallpaper. By the way, some craftsmen consider them to be one of the types of photo wallpapers, because... They look more like them than real frescoes.
The basis of the products is a self-adhesive fabric - you just need to remove the protective film and attach the product to the base. Additionally, you do not have to buy glue or other compounds. However, during installation you should be very careful, since the product is quite thin. In addition, when gluing it to an uneven wall, all defects will stand out greatly.
The easiest way to install a fresco is on a self-adhesive base - you just need to remove the protective film and lean it against the prepared base
On the front side there is a composition made using sand. Alas, such a fresco cannot be aged, but it has a relief, which also looks unusual and beautiful. In addition, you can choose any design you like.
Such products are made by applying plaster to a base made of wood, ceramics or plastic. The drawing itself is created with acrylic paints. Such a fresco can be composed, chipped or scuffed.
These frescoes have an impressive weight, so they are not large - they can cover a small section of the wall. The cost of such products is quite high, but they also look very natural. They are usually mounted like paintings, but sometimes they are glued to the wall surface.
The main advantages of such products are the ability to use them in any room, creating with their help a truly unique interior and the visual effect of increasing space. You can decorate the room with an image that you selected yourself, or purchase a ready-made version. In addition, this decor is safe for health, since no harmful chemicals are used in its production.
What are wall frescoes: catalog, photos, prices and characteristics
Frescoes on the wall: catalogue, photos, prices
When updating the interior of a room, you always want to bring something unusual, beautiful, fresh, interesting, unique and, of course, relatively inexpensive. Today the editors of Homius.ru decided to draw the attention of their readers to this type of decorative finishing, such as frescoes on the wall, catalogue, photos, prices and other inherent characteristics inherent in them.
Fresco in the kitchen - brevity and grace
Add exclusivity
Create your own pattern and turn your furniture into a branded one. But in order for the furniture to look stylish, choose the right shades.
A man’s real dream: a guy made a cozy “den” out of a closet
ALROSA decided to name a unique diamond after the Sputnik V vaccine
There is time for training until the 2030s: NASA plans crew flights to Mars
Fresco or photo wallpaper: what's the difference?
The desired meaning of the fresco is drawn to the world of ancient art. The walls of palaces and chambers of noble citizens were painted with various landscapes and intricate patterns. This was considered the height of luxury and wealth. Moreover, it was impossible to take your eyes off such walls, they transformed the simple interior of medieval nobles so beautifully and unusually.
Greek antique fresco
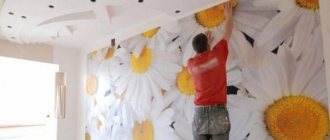
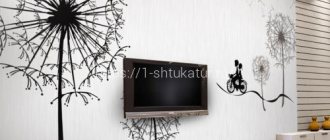
A modern fresco is still the same wall painting or an artistic work made with decorative plaster. However, in the age of advanced technology, they managed to replace such delicate manual work with a manufactured product. Many manufacturers offer for sale interior roll frescoes on the wall, which are very similar in the principle of pasting to photo wallpaper.
The difference between a modern fresco and stereoscopic or photo wallpaper is that the former are printed on one large canvas, while the latter, as a rule, are made on several sheets combined in one design. The frescoes are also complemented by texture, which enhances the effect of wall painting.
Related article:
If you need a noticeable and extravagant detail, choose 3D photo wallpaper for walls . A photo catalog of the best examples of using such wallpaper and tips from decorators, in a special publication in our online magazine, will help in decorating any space.
Features of the fresco
If in ancient times the secrets of wall painting were known only to a few artists, now wall frescoes have become widely available. Artists spent many years creating a masterpiece, and the image was a response to their inner world. Now the fresco reflects the inner world of the apartment owner, and its application will not be difficult. And modern paints will not fade in the sun, preserving the painting for a long time.
Wall decor is applied to different textures and can include a variety of subjects. With the help of such painting, a special atmosphere is created in the room.
You can achieve the interior of a luxurious palace, or simply decorate a corner of free space with the help of wall painting. You can order it from a master or make it yourself.
Decorating walls with frescoes has both pros and cons. Let's start with the positives:
- Will decorate almost any room;
- Expands the space, makes the room more airy;
- Gives a feeling of presence in the picture, pleases the eye;
- The colors do not fade for a long time;
- With the help of frescoes you can zone a room;
- Most often it is a unique image made to order.
The only downside is the high cost.
What are the pitfalls of modern wall frescoes?
The beauty and high decorativeness of wall frescoes are not their only advantages:
- the ability to decorate walls completely around the entire perimeter of the room;
- ordering photo printing based on an individual project;
- the ability to add a textured surface.
As for the disadvantages of wall frescoes, they include the inability to independently restore the damaged surface, unless, of course, you have artistic skills. Also on par with this disadvantage can be placed the high cost of a wall painting - a fresco. However, if you stick to the printed version, you can save a lot.
You need to take care of the fresco very carefully so that you don’t have to change it or show your existing artistic talents.
Attention! When ordering an artistic, or as it is also called - direct, fresco, always ask how to care for it in the future. There are paints that “float” from the slightest contact with water, not to mention wiping such a surface with a damp cloth.
Give a second life
Sometimes furniture serves us faithfully for several decades, and when it’s time to part with it, our hearts bleed. Or maybe you won’t have to throw anything away? Take a couple of pieces of sandpaper, sand the surface, remove the old paint and apply a new coat. For example, old stools or garden chairs will make excellent stands for pots of house flowers. And if you place your mini-garden on a loggia or balcony, you will get your own piece of paradise.
What types of wall frescoes are there?
To better understand decorative wall frescoes and understand which type is most suitable, let’s take a closer look at each.
Chic fresco in Indian-colonial style
Making a fresco using the “on canvas” technique is a manual process of decorating a wall. In this case, mainly natural materials are used - sand, cotton canvas, organic pigments, lime, etc. After completing the image, it is aged, fixed with special compounds and only then transferred to the canvas. The disadvantages include poor moisture resistance and the inability to use chemicals when carrying out wet cleaning.
"Portal" to another world
a fresco on a rigid base is reminiscent of the installation of decorative panels - on a plastered wall, such finishing is fixed to a frame or directly to the wall. The cost of this type of fresco is quite high. This is due to the complexity of execution and installation. However, they look impressive and can decorate any interior.
Interesting composition in green tones
A decorative fresco based on flexible plaster is a mix of the two previous types. It resembles manual work, since an image made from natural materials was applied on an automated line using a special technology, and at the same time it is on a flexible basis. It differs in that it can be glued to the wall independently, and during operation it is unpretentious in cleaning. Another plus is that it is moisture resistant.
A fresco on a non-woven basis is a high-definition photo print applied to a roll of non-woven material. To make the image look more realistic, it is subsequently aged or other texture effects are applied.
Timeless classic by Leonardo Da Vinci
The fresco on a self-adhesive basis belongs to the economy class of this type of finish. The design can be printed with a texture on a thick, sometimes rubberized sheet with a self-adhesive backing. For self-installation, beginners prefer these frescoes.
Related article:
Decorative plaster for interior wall decoration. From the article you will learn what plaster is used for, how it is classified according to materials and technologies, how to analyze costs during use, photo ideas and advice from professionals.
Types of frescoes
There are several types of frescoes:
- On non-woven wallpaper. Such frescoes are very popular. They are applied to a non-woven base using special plaster. Their cost is significantly less than that of self-adhesive frescoes. They consist of several elements. After gluing, the joints between the images will not be visible, but they should be glued very carefully: the slightest mistake will lead to the fact that the parts of the picture will not match.
- Self-adhesive. This look can be compared to textured wallpaper. The design is applied to the adhesive base using a specially made paste. Thanks to this paste, the texture of the design lies evenly. The image is then applied using digital equipment. The finished product should be glued onto a flat surface, otherwise all bulges and defects will be reflected in the image. Unfortunately, it will not be possible to age such a picture.
- On canvas. An image made from natural ingredients is applied to a specially prepared canvas base. Draw small details of the image, as well as decorative damage. This gives the fresco a natural look. Glue the canvas with regular glue. The disadvantage of this type is that it cannot be washed.
- Decoration applied to a hard surface. Such images look the same as on self-adhesive paper, but, unfortunately, they weigh a lot. That is why they are most often made in small sizes.
- Self-made fresco.
Making decorations from scratch with your own hands
Even in the old days, decorations were made by painting on wet plaster. Such work must be carried out quickly enough so that the drawing does not have time to freeze. Approximate time – up to 10 hours. Errors are unacceptable because nothing can be corrected. This method is very complicated and requires skills and certain training, so only professionals use it.
To paint a mural yourself, you must have certain creative abilities.
Before starting any work, it is necessary to carefully prepare the surface for pasting - clean it of previous coatings. After this, the surface must be leveled by plastering.
Purchasing materials is an important component of the work. You need to buy plaster that contains binders, cement and sand. You should buy it because it will not spread over the wall, which will make the work much easier.
Before applying plaster, the surface must be treated with a primer. If the background of the image is colored, then the desired color is added to the primer. It is desirable that after all the preparatory work the wall is completely smooth.
After the surface has dried, you can begin the creative part of the work.
In order for the drawing to fit well and look beautiful, you should use water-based acrylic paints. You will need two brushes made of natural material and with hard bristles, and one artificial.
Having prepared everything, you can draw a sketch of the future painting. Before applying it to the wall, it is painted over with a wide lead on the reverse side. Then it is pressed tightly to the surface so that the details of the design are well imprinted. After the drawing is displayed on the wall, its details should be scratched a little. This is done so that parts of the image do not disappear under a layer of paint.
Now the prepared wall needs to be moistened and the background applied. After the surface has completely dried, you can begin to draw the details of the design with paints.
After the drawing has dried a little, it should be treated with wax or varnish. This is necessary so that the image does not crack or become damaged over time.
It is preferable to use wax due to its ability to create a dense protective layer, as well as environmental properties. But if you have varnish, you can use that too.
Using blanks
Of course, looking at a self-made work of art is much more pleasant, but if a person does not have the necessary skills, then it is quite possible to purchase a ready-made fresco and then apply it to the wall.
A digital mural (self-adhesive) is well suited for those people who have not previously decorated walls. When making it, a design is applied to a self-adhesive base, and then it is transferred to the wet plaster.
Before gluing a fresco to a wall, you should determine its properties. It can be either elastic or applied to a hard surface.
The elasticity of the base allows the fresco to adapt to all the curves of the wall. Due to its small thickness, it can be any size.
Frescoes on walls with a hard surface are small in size. They cannot be used on walls with curves.
The basis should be chosen taking into account your preferences in advance. You can use a fresco as a painting. Pre-made decoration can be pasted on the wall like regular wallpaper.
The sequence and rules for gluing the finished fresco on the wall:
- The wall surface must be cleaned and leveled.
- The wall color should be light.
- It is necessary to measure the dimensions of the wall.
- A thin layer of glue is applied both to the workpiece and to the wall. The glue causes the decoration to become thinner, and if used carelessly it can easily be damaged.
- The decoration is placed tightly against the wall and they begin to be rolled in with a roller, making sure that all the joints of the image match.
- While drying, the windows in the room must be closed.
During drying, the fresco will smooth out on the wall.
Stencils
Stencils are the easiest wall design option for beginners. Even without creative skills, you can create a real masterpiece. Materials that will be required to make a fresco: a special stencil, watercolor paints, a sponge, a surface on which the paints will be mixed, and a special glue. The floor must be covered with a special coating before starting work.
Wall frescoes are an excellent option for decorating a room.
