Carrying out painting work involves not only preparing paint and varnish, but also preparing the correct composition for this procedure. The overall result depends on the physical properties of the painting material.
If the work will be carried out using a spray gun, then the composition should be liquid, this way it will be possible to avoid smudges. But when holding brushes in your hands, you should use viscous paint.
As a rule, all manufacturers indicate how to dilute their product, but sometimes the instructions can be an excellent advertising event that promotes a related product of the same brand, and it can be expensive.
To minimize costs and obtain high-quality components for painting a car, you should know the criteria for choosing paint, solvent, their interaction conditions, and much more.
When carrying out high-quality grinding work on the body, some cracks still remain on it. To fill all micro cracks, it is worth applying less thick paint.
Otherwise, minor deformations may appear on the painted surface of the car.
It is also not worth diluting the paint too much, because this is fraught with the appearance of shagreen, and the surface will take a long time to dry and worse, and who knows what may happen during this time.
This result directly depends on the paint, but the varnish plays an equally important role in the result; it is responsible for the gloss and strength of the coating that was previously applied.
But still, the solvent is added to the paint so that it adheres more easily to the surface; the only question remains in proportion, which depends on all the conditions where painting is carried out, taking into account technologies, volumes and many other points.
The quality of the applied coating determines the protection of the body from corrosion and other physical damage.
Solvents are divided depending on the temperature and time it takes for the paint to dry, but first of all you need to decide on the paint, how to choose it?
Choosing paint for painting a car
Depending on the concentration of components, all enamels are divided into: highly filled, filled to the middle, low filled.
In the first case, such paint is marked with the abbreviation VHS, but low-fill paints are designated as LS.
“Fullness” is a property that is responsible for the viscosity and volatility of a material. Knowing this criterion, you can determine how much solvent and other components are added to the paint so that it does not dry out.
Before applying paint, you should always read the instructions for it.
How much paint will it take to completely decorate a car? This question interests not only beginners in this matter, but also more experienced car enthusiasts who have already encountered this issue.
This issue must be approached individually. The amount of paint used is also affected by the previously selected solvent.
They are also polar and non-polar . To avoid possible compatibility problems, many experts recommend using products from one manufacturer, because this is the only way to avoid all sorts of defects.
Paint made from polar components is mixed with the same solvent, which contains hydroxyl group substances - ketones, alcohols, etc. Non-polar substances include other substances, for example, white spirit, kerosene.
Trying to make a replacement is strictly prohibited. In order to change the viscosity of the consistency, you can use a special device, a viscometer.
Such a device will not be as expensive as you think, but its role is irreplaceable. The holes in this container are calibrated.
When working, you can use viscometers of different volumes and diameters. How many seconds will the material flow out of this device, these are the indicators of its viscosity.
To obtain the most accurate data, all work with the device must be carried out in a certain temperature regime.
To correctly determine the type of composition, you should understand what type of solvent is specified in the instructions for the paint.
For example, if the composition contains acetone, then it comes into contact only with polar compounds. Many people consider xylene and benzene to be universal solvents; they are not so tied to the components of the paint.
Measuring viscosity
Any painter should be able to control such a vital indicator as viscosity. For what? So that it corresponds to the recommended size. Again, why? To evenly apply the material to the surface and obtain a coating of the required thickness with the required properties - beautiful and durable.
“Viscosity” (from Latin viscosus - sticky, sticky) is a value characterizing the fluidity of a liquid.
Why measure viscosity?
For more details, use the example of filler soil. The surface on which we apply it has various kinds of micro-irregularities left after preparation (grinding marks, pores, etc.). In other words, protrusions and recesses. From the deepest to the highest point - approximately 50 microns.
So, if we apply too liquid a filler to this surface, its thin film will not be able to cover these irregularities, and even with a margin for grinding (by analogy: if you put pebbles on the bottom of a jar and pour water without covering the stones “overall” ). As a result, the surface will remain uneven, and the soil, by and large, will be wasted. You have to do extra work - reapply the filler, spending twice as much time on repairs.
Let's take the opposite situation with applying too thick filler. It would seem that there certainly shouldn’t be any problems here. No matter how it is. A filler that is too thick and non-flowing, again, will not be able to properly fill all the micro-irregularities - its penetrating ability is too low and it is simply not able to flow into these small depressions (just as a soccer ball cannot fall into a golf hole).
The coating turns out to be loose, poorly adhered to the surface, and subsequently the filler begins to peel off. Not a very rosy prospect, but the troubles don’t end there. A filler that is too thick will not be able to spread over the surface in a smooth layer; increased shagreen is formed, which leads to torment and excessive consumption of materials during sanding.
And this is just a filler primer! What can we say about paints and varnishes? Gloss, shade, texture and adhesion again... All this directly depends on viscosity.
Someone will ask: “What if you dilute it thinner so that it flows everywhere, adheres well and spreads smoothly, and apply it thicker so that there is room for sanding?”
Not the best solution, to put it mildly. A thick layer of liquid material contains a large amount of solvent - the coating will remain soft for a very long time (until it dries completely, not hours or days, but weeks and months), and enamel applied over a wet primer can lead to wrinkling of the coating and poor adhesion between the paint and the primer . In addition, the likelihood of such unpleasant defects as “boiling” and many others increases.
So, it is imperative to be able to control viscosity. The question arises: how?
How to measure viscosity?
You can often see how viscosity is measured in the following way: a painter takes some long object (for example a screwdriver), dips it into a can of prepared paint and God knows, by the signs, determines whether the viscosity is optimal or whether it needs to be diluted more.
It is worth saying that if this method is good, it is only for professionals with very extensive work experience. Well, someone, and they, as they say, feel the paint and varnish material with their skin. But what should novice painters who don’t have much experience do?
From our school physics course, we know that viscosity is usually measured in pascal seconds (dynamic viscosity) or in square meters per second (kinematic viscosity). It is also known that methods for determining the true viscosity properties of liquids are quite complex, which means they are not suitable for use in repair shops. Therefore, such a concept as “conditional viscosity” was introduced into circulation.
Determining conditional viscosity comes down to measuring the time (in seconds) when a certain volume of liquid (100 ml) flows from a funnel through a hole of a certain diameter (usually 4 mm).
So don’t be surprised when you see the inscription on a can of paint: “working viscosity 22-24 s.” This only means that the material needs to be diluted to a conditional viscosity of 22-24 s, which is determined using a special device - a viscometer, which is a cylindrical measuring container with a volume of 100 cm³ with a conical lower part and a hole in it.
The most common viscometer for measuring the viscosity of paintwork materials is the DIN4 standard - with a hole diameter of 4 mm. In our standard it is called VZ-4. The VZ-246 funnel can also be used, only it has replaceable nozzles - with diameters of 2, 4 and 6 mm.
Viscometer DIN4. Our standard is VZ-4
Foreign paint manufacturers may recommend other devices to measure the viscosity of their materials, for example, a Ford #4 viscometer (nozzle diameter 1/6 inch or approximately 4.2 mm), some companies may also recommend their own viscometers.
In practice, any of them can be used with equal success: all of these devices are designed according to the same principle, and there are special nomograms and graphs for recalculating readings. This will not affect the measurement accuracy; the error is leveled by the permissible spread of the working viscosity.
How to use a viscometer? An approximate diagram is as follows. We fix the viscometer vertically, place a clean container with a volume of more than 100 ml under it, close the drain hole of the viscometer and pour paintwork into it flush with the edges. Let the material sit a little so that all air bubbles come out of it. The resulting foam can be removed with a knife or glass rod.
Then we open the drain hole and at the same time turn on the stopwatch. We complete the measurement when the liquid stops flowing in a continuous stream and begins to drip. The time recorded on the stopwatch in seconds is the conditional viscosity of the liquid. For example, the viscosity of water at 20 °C according to DIN4 is 13 seconds.
Viscosity is the most important indicator. It determines the material consumption, the optimal mode of its application, as well as the properties of the resulting coating.
I will add that measurements should be carried out at a temperature of 20±0.5°C. Deviations from this temperature are fraught with inaccurate measurements, since when the temperature rises, the viscosity of the material decreases, it becomes more fluid, and when it decreases, on the contrary, it increases.
The average working viscosity at 20 ºC according to DIN4 is:
- for acrylic enamels - 18-20 seconds;
- base enamels - 16-17 seconds;
- varnishes - 18-20 seconds;
- 2K soils - 20-22 seconds;
- liquid putties - up to 30 seconds.
For exact recommendations, see the instructions for this or that paintwork. Let's say the specified viscosity is 22 seconds. If the paint takes longer to flow out, then its viscosity is higher than normal and it needs to be diluted a little more.
By the way, the thinners themselves are “slow” and “fast” - depending on the evaporation rate and the temperature conditions under which they must be used. Thus, at low temperatures it is worth using “faster” thinners, and when working in hot weather, “slow” ones. In standard temperature conditions (18-25°C), respectively, standard. Read more about this here.
How to thin paint for a spray gun
The speed of paint spreading and drying depends on the external temperature. To protect and avoid bad results, manufacturers try to play it safe and recommend using each thinner at a certain temperature.
Car enamels are provided in liquid form, and when you open it, this does not mean that it is ready for application; you need to know the proportions that will allow the paint to lie easily and evenly on the metal surface.
When adding a solvent, take into account the composition of the paint, because it may already contain a certain amount of it.
You should not take measurements yourself and add solvent by eye.
Therefore, the ideal solvent for painting a car is one that:
- Used at low temperatures, the paint dries quickly, so drips do not even have time to appear.
- If the ambient temperature is within 25C, you should pay attention to a solvent with an average evaporation rate.
- If the temperature is above 25C, then a solvent with slow evaporation properties is suitable. When the paint begins to spread over the surface, the car owner will receive durable body protection.
If the color you choose is “pearl” or “metallic,” then you can’t think of anything better than a slow solvent.
This is the only way to achieve a uniform color and the absence of other defects.
The paint is ready and all that remains is to filter it, the most common way is to use an ordinary nylon stocking for this, only after this procedure can work on painting the surface be carried out.
4. Metal dust. Rust that washes off
Owners of light-colored cars may experience a slight shock when they discover traces of rust appearing on the exterior of the paintwork. Is it really time to sell the car?! Before you panic, try washing off the rust. Often the appearance of “spiders” is caused by pieces of metal soldered into the paintwork. This is usually metal chips that fly from the brake pads. It is hot and, when it gets on the varnish, it instantly sticks to the surface. Then, under the influence of moisture, the metal dust oxidizes, and rust spots appear on the paintwork.
This is the very case when you need to use only special tools. Both Liqui Moly and KochChemie have good cleaners for removing block dust.
Myth. Metal chips from the pads are harmless. It can be washed with ordinary detergents at the cottage or at a self-service car wash.
Is it true. The dangers of metal dust should not be downplayed. It is soldered into the varnish and leaves microcraters on it. It cannot be scrubbed, as metal particles will scratch the varnish. Places where metal dust is localized should be treated with a special agent that will dissolve the metal. The ideal way to solve the problem is to wash the car at a detailer from time to time, so that specialists wash not only the body, but also the wheel rims, which are covered with metal coating from the pads, with a special composition. If this is not done, the discs will quickly lose their appearance - they will look old and rusty.
How much paint do you need to paint a car?
Painting involves a certain amount of materials, the consumption depends on a number of reasons:
- What surface is covered, its dimensions;
- Depending on the brand of paint, the coating spreads differently.
- Sometimes paint needs to be applied several times to achieve the desired color.
- It is important to know what primer was used, its color and quality.
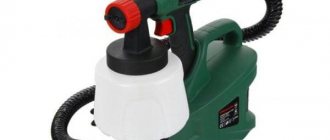
- The spray gun and its more important properties are important when painting the body.
We recommend reading about the spray booth, what it should be like, and the compressor for the spray gun.
Properly diluted paint is not wasted as much, which allows you to save money and achieve high-quality painting.
A viscometer will be no less useful in your work, but if you don’t have one at hand, it’s enough to use a regular ruler.
Only experienced craftsmen can dilute paint with solvent by eye, but for beginners, these instructions are necessary.
Two-component enamel requires the following proportion: 100 ml of hardener plus 500 ml of solvent mixed with a liter of paint.
To avoid confusion with proportions, it is best to use a measuring ruler or even a glass. An equally important task is to achieve the required viscosity.
If you don’t have a device at hand to measure this indicator - a viscometer, then you can use the traditional method: if the paint does not flow, but drips, then everything is normal with viscosity.
The fluidity of the paint is also an important factor when using a spray gun; in this case, for a device with a small diameter nozzle, a liquid composition is required, but if the work is carried out with a roller, then the thickness is important here.
Before you start painting, it is best to test the diluted substance on a coating that you do not mind using.
To make sure that the diluted material is correct, you don’t need a lot of substance, you need to use a brush or device a couple of times.
Do not forget that fluidity directly depends on temperature; it turns out that the warmer it is, the greater the viscosity.
You shouldn’t keep the paint in the container for a long time; it will harden over time, so for proper work you may need to dilute a new proportion of the solution.
Metallic is a rather capricious paint that requires compliance with many rules. Most often, the composition is used to paint car or motorcycle body parts. This is due to the aesthetic properties of the material. After application to the surface, the paint gives a metallic shine and a reflective coating.
Bird droppings. Extreme causticity
Drivers know how dangerous bird excrement is, so they try to remove it from paintwork immediately. Problems begin if droppings fall on a car, which, for example, has been standing idle for a long time. If the droppings are not washed off immediately, they will corrode the varnish, penetrate the base coat of paint, and even oxidize the metal. Therefore, if such dirt is detected, you should immediately pour cola on it and wipe it off with at least a damp cloth, or better yet, wash it off with plain water or a handy detergent. If marks appear on the varnish, do not try to clean them off. It’s better to show them to a specialist so that he can tell you how best to remove them. Most often, defects from droppings are removed by polishing.
There are many special means to combat bird droppings. If the car comes under a powerful bird attack, urgent measures need to be taken. From available means, you can use the same Coca-Cola or a similar drink. If you have dishwashing detergent, you can use that too. The faster the droppings are washed away, the less harm it will cause.
If bird droppings are not removed immediately, then these ugly marks may remain in its place. Defects of this depth can only be removed by painting.
Thinning technique
The most important parameter when diluting paint is viscosity. The quality of the coating will depend on how correctly you select the viscosity of the composition. A material that is too thick will not fill all the small pores and roughness, and it is impossible to get rid of them even with careful surface treatment.
Nowadays many ready-made enamels are sold. They are already diluted and ready for use. However, even using the factory composition, it is necessary to dilute it with a solvent for better application to the surface of the structure. This will also provide quick drying and additional protection against corrosion.
All solvents are divided into three groups depending on the rate of evaporation. For each climate, a special solvent must be selected. This determines what the coating will look like after drying. The main types are:
- fast - used in low temperature conditions;
- slow - suitable for work in hot weather;
- universal - used under any conditions.
Surfaces are painted with a spray gun, so it is necessary to select a thickness that the equipment can handle. The main parameter that you need to pay attention to when working is temperature. The spreading and drying of paint depends entirely on this indicator. At the moment, there are many thinners produced specifically for work at different temperatures. Unlike solvents, they are more expensive, but more effective.
It is not recommended to determine the amount of thinner by eye. Mixing should be done in small portions and after each time measure their content in the paint. Therefore, it is better for inexperienced people to use universal solvents suitable for any temperature conditions.
On each can of paint, the manufacturer indicates the correct ratio of solvent and composition. The first step is to adhere to the recommended parameters. However, depending on the date of manufacture and the type of solvent chosen, the mixture may not always reach the required consistency. Therefore, it is worth conducting several experiments with small portions of materials.
On each can, the manufacturer indicates the correct ratio of solvent and composition, but this does not always allow you to achieve the required consistency
Road reagents. What you shouldn't be afraid of, but should be wary of
During the cold season, cars simply bathe in a variety of chemicals. The roads are watered with reagents, sprinkled with sand and salt, and “anti-freeze” is poured from the washer nozzles. And this cocktail ends up on the paintwork. The most dangerous component of the mixture is road reagents. They usually leave yellow stains on paintwork. They are washed during everyday washing. Particularly stubborn stain fragments can be removed with bitumen cleaners.
Rumors about the destructive properties of road reagents are in fact greatly exaggerated. Road chemicals “love” to penetrate into damage to paintwork; it actively interacts with bare metal. So, before the start of the winter season, it is extremely important to repair all chips in the paintwork and treat the car with a protective composition such as “liquid glass”.
Myth. Car manufacturers know the problem of road reagents, so modern cars are immune to them. There is no need to protect the car with coatings.
Is it true. This would be true if all countries used the same reagent for decades. Unfortunately, up to 6 types of reagents are used on the roads of Moscow alone. Almost every year a new “chemistry” is introduced, which means that the machines were definitely not specially prepared for this “new”. Therefore, on the eve of the winter season, it is customary to apply protective coatings to expensive cars. They absorb the impact of the reagents, prevent the formation of an ice crust, and repel water and dirt. In general, they preserve paintwork and save the owner’s money.
Recommendations
The most common solvent to paint ratio is 1/1. Those. you need to add the same amount of thinner as paint. However, the correctness of painting directly depends on the method of applying the composition to the surface.
It is recommended to make the first layer “dry”. For such a layer, you need to dilute 2 parts of paint and 1 part of solvent. This way you will ensure the structure is protected from defects. The surface will become smoother, allowing for more uniform application.
After waiting 15-20 minutes, the second layer is applied. Apply a basic 1/1 ratio and coat the surface of the piece thickly with the spray gun. It will not cover the primer and will have a matte finish. After complete drying, the last layer is applied with the same ratio, but more thinly.
After painting, it is necessary to coat the surface with varnish with the addition of a solvent to achieve shine. When the composition has dried, polish the surface and you will achieve the desired effect.
Car painting jobs require attention and knowledge. To make a car look beautiful, it is necessary not only to carefully prepare the surface of the car body, but also to choose a high-quality paint coating. Moreover, the material must be prepared correctly. To achieve a better result, a special car paint solvent is added to it.
We recommend
DOCKER LACK is an industrial varnish remover. Effectively removes all types of varnish from wood, metal, stone. Deep penetration wash. Gel. Without smell.
Table of contents
Manufacturers of car shampoos claim that their detergent is capable of creating a real miracle - washing off any dirt from the car body without touching the paintwork. Only people who do not have cars believe such statements unconditionally. Drivers know that there are a good dozen types of contaminants that are resistant to even the most caustic car shampoos.
Types and features of the choice of solvents and thinners for automotive paints
All existing types of solvents can be divided into several groups, each of which differs from each other in the rate of evaporation. The solvent that will be added to the car paint is selected depending on climatic conditions. There are 3 types of funds:
- universal – used under any conditions;
- slow – can be used in places with elevated (positive) ambient temperatures;
- fast - used only at sub-zero temperatures.
Insects. Evil is in their blood
Insects are such a nasty thing. If in the city they are annoying, then outside the city they simply harass motorists. A cloud of midges instantly deprives the driver of his vision, and at high speed such a “surprise” is a direct road to an accident. Water and wipers cannot cope with the mess of broken insects. It can be done quickly only with the use of special detergents. And if insects break on a hot hood, then a new risk arises: the mush quickly combines with the softened varnish, and along with it, hard inclusions - chitin and dirt - penetrate into the paint.
Tips and tricks for proper paint dilution
There are a huge number of paints and varnishes, but only some of their representatives are used to paint a car:
All of them differ from each other in performance characteristics, but at the same time they are effectively used by car owners. For a 100% high-quality result, these products are diluted with solvents. What solvent should you use to dilute car paint?
Acrylic paints
This is a two-component liquid, which contains a thinner and a hardener. The desired color is achieved by applying a certain number of layers of material.
- does not fade in the sun, ages slowly;
- easy to apply and does not require varnishing;
- dries quickly;
- can be used at high temperatures;
- easy to polish.
For acrylic paints, a specialized automotive solvent is used, which is more expensive than conventional organic solvents (646, 647), but it is worth it. If such a product could not be found, then you can use its analogue - solvent 651 or P 12.
Alkyd paints
Such products are rarely used for painting car bodies, only because they require a more careful approach. The resulting surface should be varnished and polished, but the finished products are distinguished by high performance characteristics and good appearance. The coating prevents the formation of corrosion and performs well in adverse conditions.
For dissolution, white spirit, gasoline, solvent, turpentine and its mixtures are used. There is a universal solvent P 4, but it is better to choose according to the product labeling.
Nitro enamels
They have a mirror effect, for which they have received wide appreciation from car enthusiasts. The body, painted with nitro enamel, differs from other cars in its gloss and metallic sheen. The only significant drawback is toxic fumes during painting work, which are harmful to human health.
Before application, the body surface must be perfectly cleaned and prepared for painting. Nitroenamel dries quickly and lasts quite a long time. It is diluted with organic products, for example, transparent 646.
Advice. This solvent is highly flammable and belongs to the category of aggressive solvents, so it must be handled with extreme caution. To play it safe, you can use the universal product P 4.
Water-based paints
This type of paint is considered the most suitable for painting a car, although it requires expensive equipment to achieve maximum effect. Such products are environmentally friendly and have a number of advantages:
- the surface does not need to be thoroughly prepared;
- there is no swelling effect;
- high adhesion of the material;
- perfect result.
The only negative is the long drying time. Water-based paints are dissolved with plain water or alcohol.
Bitumen and tar. Red spots on a snow-white reputation
The flakes and flecks of bitumen are best seen on white paint. Regular car shampoos don’t remove them, but the right special cleaner washes them off in one go. The main condition: before use, read the manufacturer’s instructions so as to remove dirt and not damage the varnish. Usually, after treating stains, you need to wait for the product to work, and then the stain can be easily removed from the varnish.
Despite its stickiness, bitumen is one of the most harmless pollutants. Even after a month or a year, the bitumen stain is washed off without a trace, and the paintwork underneath remains intact.
Myth. The bitumen must be washed off immediately, otherwise it will eat through the varnish, and then nothing can wash it off.
Is it true. The age of the bitumen stain does not matter. Fresh and old dirt can be removed equally easily and quickly. Most likely, this myth arose due to the use of ineffective cleaners. A good special product removes bitumen without a trace.
How to wash bitumen and tar stains? It is ideal to use special cleaners. They wash away such contaminants quickly and without a trace. If you need an economical option, then instead of special cleaners you can use any solvent such as white spirit, diesel fuel or kerosene.
Kerosene and diesel fuel wash away bitumen without harming the paintwork. It is better not to experiment with solvents at random.
Features of metallic paint dilution
Metallic is considered a complex paintwork and requires precise application technology. The product is widely used for painting vehicles (cars and motorcycles). The surface has a metallic reflective sheen. This effect is explained by the presence of special aluminum powder in the material. The finished coating is not affected by corrosion, and the result will please the eye for a long time. However, mechanical stress and disruption of the integrity of the coating will ultimately lead to its destruction. The paint does not fade under the influence of ultraviolet rays of the sun.
The quality of the coating depends on the degree of viscosity of the material, so the solvent for such paint is carefully selected. A product that is too thick can harm the result because it will not be able to completely fill the rough surface of the car body. Modern metallic paints and varnishes are diluted directly by the manufacturer and are ready for application. The cost of such materials is much higher than others, however, the quality of the coating will amaze with its splendor and beauty.
«>
Shagreen on varnish
One of the indicators of high-quality paintwork is the absence of shagreen - the characteristic waviness of the painted surface. The lower and finer the shagreen, the clearer the boundaries reflected in the body of objects. The difference in shagreen between the parts immediately reveals that the part has been repainted.
There are several reasons for the appearance of excessive shagreen:
- errors when mixing varnish components;
- incorrect consistency of varnish;
- violation of application technology;
- neglect of the recommendations of the manufacturer of paints and varnishes;
- incorrect setting of the spray gun.
Removal of shagreen is possible by grinding and subsequent polishing. However, this process is quite labor-intensive, especially if large areas need to be processed. It is wiser to prevent shagreen from appearing than to eliminate it after the fact.
Afterword
The modern chemical industry produces cleaners for almost all types of contaminants. It is important to choose them thoughtfully and apply them wisely. If a product from one manufacturer does not work, this does not mean that an analogue from another brand will be just as useless. And price is not always an indicator of effectiveness. Sometimes cheap auto chemicals work better than expensive ones. If one cleaner doesn't work, you need to try another.
This car is treated with iShield ceramic protection. The coating forms a layer with a hardness rating of 9H+. It protects against foreign paints and is not afraid of droppings and insects.
But if you are not inclined to risky experiments, then it would be better to immediately turn to detailing specialists. They will apply a hard protective coating to the paintwork - ceramics or liquid glass. A durable protective layer will absorb all negative influences, be it bitumen, paint from markings, poplar resin, crushed insects or bird droppings. This protection does not always save you from stones flying at high speed, but surviving service in a beast washer without consequences will easily help.
The whole lobovukha has small dots of varnish. I tried to wash it with 646 solvent, but to no avail. Tell me how to remove this crap?
Concrete. Evil squared
You can get into concrete anytime, anywhere. There is always a risk of catching a drop of liquid solution from a “mixer” driving ahead; you can park unsuccessfully near a house whose facade is being repaired. What to do if you're unlucky?
Construction cleaners for concrete should be used with caution, as they can aggressively interact with car enamels. Before cleaning the paintwork, try applying the cleaner to the body in a place where the defect will not be noticeable. For example, there are suitable surfaces in the engine compartment.
High-quality concrete mortar sets very quickly, hardens and has good adhesion. If the stain has not completely set, you can try to dissolve it with an epoxy grout cleaner. This product is used by master builders to remove stains from freshly laid tiles. If it doesn't help, you need to go to specialists. Most likely, they will remove the stain with acid. It is dangerous to carry out this operation on your own. Working with professional acid-based cleaners requires certain knowledge and skills. After cleaning, the location of the stain will require polishing, since it will not be possible to fully protect the varnish layer from the negative effects of sand and acid.


