PREPARATION OF SURFACES FOR FINISHING WITH NATURAL STONE
Cladding work begins no earlier than six months after the brickwork of the walls has been completed to their full height.
With stresses in the brickwork up to 0.5 MPa, facing work can begin three months after finishing the brickwork of the walls to their entire height, and with stresses up to 0.05 MPa, facing can begin immediately after the end of the brickwork. Cladding at the same time as masonry walls is carried out in rare cases. Before starting work on external and internal cladding, all work must be completed, the implementation of which could lead to damage to the stone finish. Cladding work begins with the transfer in nature of horizontal (in plan) and vertical (at different height levels) marks of the structural elements of the cladding. All marks and level markings are made on the basis of the working drawings of the project. Setting out the lengths of lines of a given cladding pattern and its marks—the levels of various building elements—is carried out using measuring instruments and tools: levels, levels, plumb lines, steel tapes, tape measures, slats, etc.
Before installing the cladding slabs, the wall surface is prepared. It is cleaned, cut or, if provided for by the project, a metal mesh is stretched. Then the masonry planes are aligned and design marks of lines, corner axes, pilasters, window openings, and horizontal lines are applied. The surfaces to be coated are hung and beacons are installed on them.
The hanging is carried out over the entire height of the building - from the base to the crowning cornice. First, the outer corners of the building are hung, then the planes of the walls and other protruding or sinking parts; the corners of these structural elements are hung after the corners of the building are hung. First, the first corner of the facade is hung and the amount of deviation of the wall from the vertical is determined, then the next corner is hung and the offset of the front surface of the facing slab is determined, taking into account its thickness and the minimum size of the gap between the facing slab and the wall. After this, the beacon wire is finally secured to both pins.
The walls are suspended floor by floor, pulling the moorings along the lintels of the openings. The pins are driven into the vertical seams in such a way that the wire touches the corner wires - beacons that were hung earlier. After weighing for each floor and the area limited by the divisions of the facade, the shortest distance between the pier and the wall is determined. After hanging the walls, marks are installed, which are strengthened at such a distance that it is possible to check the slab from any place with a rule of 1.5 m in length. The marks are knocked down as the cladding is installed. If the fastening of the cladding slabs is ensured mainly through the use of metal fasteners (without reinforced frames), then the preparation of the surface for finishing with natural stone is carried out as follows.
First, check the verticality of the wall with a plumb line along the flat part after 2-3 m, as well as at the fracture points of the facade for the entire height of the building and floor by floor.
If necessary, wash the surface of the wall with a strong stream of water from a hose. Mark the outer surface of the cladding with a horizontal cord at the height of its first row. Drill holes in the wall for fastening the slabs in accordance with the dimensions and spacing of the fasteners.
Cladding of internal walls with slabs of natural stone using mortars and mastics is allowed after the load on the walls reaches at least 65% of the design load. Before the start of interior cladding, work must be done to install a roof or a waterproof coating on the part of the building being lined, to install frames in door and window openings, as well as to install all types of hidden wiring. Wall cladding is carried out before the installation of clean floors. In the rooms that are subject to cladding using solutions, in winter the temperature is maintained not lower than +10 ° C and the relative humidity is not more than 70%.
When installing floors made of natural stone slabs, the base is a concrete preparation or a cement mortar screed of at least 150. Preparation of the base includes cleaning from dirt and debris, moistening, installing beacons or beacon tapes. The most rational method of marking the floor or base surface is that in each room, using a level or water level, marks are made in the form of dashes on all walls. The floor is divided into squares with a side of more than 2 m, and then beacon marks or longitudinal beacon strips are installed at any point in the room.
Flaws
- Weight. Natural stone has a significant mass, which puts a load on the building. To avoid problems in the future, increased strength is built into the structure in advance or strengthening work is carried out.
- Expensive. Stone finishing involves serious financial expenses: the main component of which is the cost of the work. Also, do not forget about related products for stone protection and installation.
- Difficult to install. Finishing with natural stone is a long and labor-intensive process. Any violations of technology lead to deformation of the coating.
MASTICS AND MORTARS FOR FINISHING BUILDINGS WITH DECORATIVE STONE
Mastics are mixtures that contain an adhesive composition with a solvent to which finely ground or natural dust-like (chalk, cement, marshallite) and polymer materials have been added.
Properly selected mixtures of inorganic binder, fine aggregate, water and, if necessary, inorganic and organic additives are called solutions. Construction mortars and mastics must ensure strong adhesion of natural stone to the surface being coated. Solutions for external cladding made of natural stone must be no lower than the grade specified in the project. The most commonly used solutions are grades 100-150. To prepare the solution, Portland cements and additives to them are used, which increase the hydrophobicity of solutions, such as soap naphtha and organosilicon liquids.
During operation, solutions should not form efflorescence on the surface of the stone. To prevent efflorescence, when preparing solutions, it is recommended to use pozzolanic Portland cement of a grade of at least 300, washed coarse sand, as well as solutions with a low water-cement ratio (0.45-0.50). To do this, it is necessary to introduce plasticizing additives (soap, sulfite-alcohol mash, etc.) into the mixing water.
To install slabs of dark colors, ordinary cement mortars are used, and in the case of facing surfaces with especially light natural stones, such as white marble, light limestone and others, in order to prevent the appearance of stains, mortars on white cement or lime mortars are used.
The mobility of cement mortar for cladding surfaces with slabs and decorative stone parts is set within 8-10 cm. Cement mortars should be used no later than 1.5 hours after their preparation. In winter conditions, at air temperatures down to - 10 ° C, it is necessary to introduce sodium nitrite into solutions in an amount of up to 10% by weight of cement.
The use of sodium chloride and potash as antifreeze additives is not recommended, since their use can cause the appearance of efflorescence on the cladding.
For cladding indoor surfaces with natural stone, liquid cement-lime-sand mortars, as well as carboxycement-sand or polyvinyl acetate (PVC) mastics, are used.
Preparation and delivery of the solution, its reception, additional mixing, transportation to the workplace and application to the surface to be coated are carried out using mortar mixing plants and units for supplying mixtures.
For small volumes of work, for covering surfaces with slabs of decorative stone, it is recommended to use dry cement mixtures, which are delivered to the site in closed containers, the solution of which is prepared at the work site in mobile mortar mixers.
Advantages and disadvantages of using natural stone for facade cladding
The above properties of natural facing stone are among its advantages; however, like any other material, the stone is also endowed with significant disadvantages that should be taken into account when choosing the final finishing option. Among the disadvantages of stone when decorating the façade of a country house are:
- weight of the structure. The density of the stone is quite high, and the weight of the wall lined with it increases very significantly, which leads to high demands on the stability of the walls;
- possible contamination of the material. Stone extraction is often carried out in places where the ecological situation leaves much to be desired, which does not exclude the possibility of obtaining a wall contaminated with radiation as a result;
- the complexity of installation makes it difficult to do the work yourself and requires the involvement of specialists in finishing the facade, which, in turn, increases the cost of finishing.
PREPARATION OF STONE FACING PRODUCTS FOR INSTALLATION
Dense limestones, sandstones, dolomites, marbles, tuffs, and granites are most often used as facing materials for exterior finishing. Due to the difficulty of processing, diorite, quartzite, labradorite, gabbro and other rocks whose compressive hardness is 100-400 MPa are less commonly used.
Facing products in the form of stones of regular and irregular shapes and various architectural details are delivered to the construction site in a ready-to-use form. Polished, polished, ground and ultrasonic treated products and architectural parts must be supplied in containers suitable for mechanized loading and unloading. Products must be installed in pairs with their front surfaces facing each other, lined with paper, cardboard, hardboard or wooden spacers and secured with wedges. Products with a front surface of a different texture may be delivered unpackaged, but measures must be taken to prevent damage and contamination of the products.
Natural stone cladding products must arrive at the construction site in boxes or lattice containers, sorted by type, size and color.
Custom-made products must be marked to indicate their location when installed in the structure according to the design. At the construction site, facing stones and slabs are laid out taking into account the order of their installation. To ensure strong adhesion of facing products made from natural stone to the mortar, their back sides, if necessary, are cleaned of dust and dirt before installation.
In order to protect slabs and cladding elements from splashes of mortar and smudges during their installation, polished surfaces can be covered with paper, and hewn surfaces can be coated with liquid diluted clay. Clay and paper are removed or washed off upon completion of work.
In order to prepare products made of decorative stone for installation, it is necessary to check its various parameters and, accordingly, bring all deviations to the standards, adjust them to dimensions for installation in a specific place on the facade or in the interior, cut grooves, quarters using mechanisms, drill holes, remove chamfers, etc.
When accepting products, the first operation is performed selectively. When carrying out this procedure, the dimensions of the products and chips on their edges are checked with an accuracy of 1 mm using a metal ruler or tape measure and a square; right angles between adjacent end faces are checked with a metal square with a side of at least 500 mm; to determine the non-planar front surface, apply a metal ruler along the perimeter and diagonal of the product and measure the clearance; to determine the correct straightness of profile products, a ruler is placed along the profile crest; The quality of the texture is determined by measuring instruments or visually.
The second operation consists of bringing the slabs and products to the required geometric dimensions. This is done if necessary to eliminate defects in the delivered products. Most often, defects are associated with deviations from a right angle in the mating of adjacent faces of slabs and cutting of edges due to chips on them. Defects are also detected when adjusting the slabs to install them in the installation position. Trimming of slabs is necessary when forming internal and external corners, at the junctions of the wall field with window and door openings, when designing partitions, columns, and pilasters.
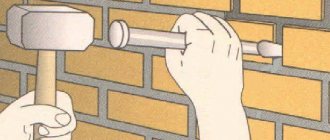
Similar operations are performed on on-site stone-cutting machines or using power tools. Small adjustments (tweaks) can be made with hand tools.
The third operation is drilling holes for installing anchors and pyrons. In addition, it is associated with cutting grooves, quarters, and chamfering. These operations are performed in the workshop using special machines.
Drilling of slabs is necessary for all slabs that are installed on facades.
Selection of grooves, chamfering, selection of quarters, cutting edges at an angle is carried out when facing columns, pilasters, external corners, pillars, piers, and when constructing steps from composite elements.
Types of stone
For work, several basic options of natural material are used, which differ in their characteristics. When choosing suitable products, attention is paid not only to appearance and cost, but also to quality. There are products on sale that do not have the required properties or are defective. Stone for facades, especially elite brands, must have accompanying documents and quality certificates.
Not every type of wild stone is suitable for self-cladding
Granite
Granite comes in slabs that are pre-polished or unpolished. The peculiarity of the material is its durability and extraordinary strength.
This facade stone includes three options:
- Alaska. The details are pink.
- Plagiogranite. The surface has a light gray tint.
- Porphyritic granite. It differs from alaskite in the presence of inclusions.
Granite is considered a particularly durable luxury finish, and the choice of one or another variety depends on the designer’s ideas
On a note! Often there is an opinion about the radioactivity of products. In fact, the indicators do not pose a threat to humans, so the façade made of natural stone is completely environmentally friendly.
Marble
Like the previous option, this material is considered elite. Exterior finishing is carried out in a polished variety. The decorative component largely depends on the place of extraction, but the material is always distinguished by its rich color. Medium-density parts are used for cladding.
Natural marble is one of the most expensive facade materials, and only professionals work with it
Limestone and sandstone
Limestone slabs have a matte polished or natural chipped surface, the shape of the parts is different. The finishing of the facades is carried out with a material that has a high calcite content. In nature, pure white and yellowish tints are more common. The strength of the parts is not so high; due to exposure to moisture and temperature changes, the coating is destroyed.
Sandstone is similar to the previous variety, but surpasses it in reliability. There are several types of material: shell rock, pisolite, oolite, lithographic.
Light-colored facades made of limestone and sandstone give the building a special lightness and airiness; in addition, these materials are lighter and much cheaper than granite and marble
Slate
Such products are parts that have a multifaceted structure; unprocessed products are more common. The disadvantage of the material is the possibility of delamination.
Of all types of wild stone, slate is considered the most affordable both in cost and in terms of installation.
FASTENING PARTS FOR CONNECTING cladding elements TOGETHER
Elements of external and internal cladding are connected to each other and to the wall with metal pins, staples, clamps, and fasteners. All of them must be protected from corrosion. To do this, steel elements are pre-coated with a layer of zinc or aluminum. It is prohibited to bend the fasteners after applying the anti-corrosion coating. Some structures use fasteners made of stainless steel, non-ferrous metals and alloys (copper, bronze, brass).
Adjacent elements of the external and internal cladding are connected end-to-end, stepped and wedge-shaped. When connecting end-to-end, the stones are in contact with their end faces; for slab thicknesses up to 150 mm, steel pins and staples can be used to eliminate relative displacements. Pins (pyrons) are made of round steel with a diameter of 3-8 mm and a length of 30-60 mm and are used in horizontal and vertical seams. The pins are inserted into sockets drilled in adjacent cladding elements to half their length. Staples are made of round or strip metal. They are placed in horizontal or vertical joints perpendicular to the plane of the slabs. In order not to increase the thickness of the seam, grooves are cut in the slabs and staples are inserted into them.
Fasteners for connecting stones to the wall. The cladding is connected to the wall with metal anchors and fasteners, which are simple and combined hooks, pins, staples, etc. A simple hook is made of round stainless steel with one curved end. The dimensions of the hook depend on the size of the cladding element. The hooks are installed in horizontal rows, two pieces per slab. The depth of installation of hooks into the wall must be at least 100 mm.
Combined hooks are made of stainless steel and are used to simultaneously connect cladding elements to each other and to the wall. In each horizontal row, two of them are installed in a slab. For fastening marble, dolomite, limestone slabs, mainly brass, copper, copper-plated anchors or stainless steel anchors are used.
To reduce the load and protect the supporting row from deformation during wall shrinkage, it is recommended to cladding multi-storey buildings in tiers. The unloading support row can be installed on the structural elements of the wall being lined and separated from the underlying tier by an expansion joint 5-15 mm wide. In claddings that are installed on a finished wall, the unloading row is supported on steel elements made of angle steel, fixed in the load-bearing wall. If the seam is left open at this joint, it is filled with sealant. For individual stone structures, fastenings are specially designed.
Stone on the wall in the living room - what to use?
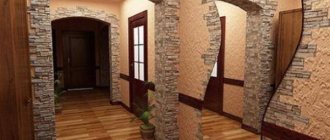
There is another room in the living room that would work great with a stone wall. Thanks to the material, you can vary the location - just use the material on the wall behind the TV. You can also use stone on the wall in the living room in the sitting area next to the sofas. The material will be combined with both wallpaper and paintwork.
A living room with stone walls can be used in a modern, elegant or classic style. All you have to do is choose your marble. The material is more suitable for a dry room because it is sensitive to moisture and stains.
Marble in the living room interior
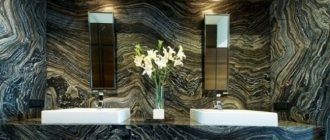
In fact, marble is limestone in which chemical processes took place. It comes in a variety of colors, but the most popular is white with black streaks. This option will look great in a minimalist space when paired with white paint. The stone wall in the living room can also be black with light veining - this option will look good only in a spacious room.
Travertine in the interior
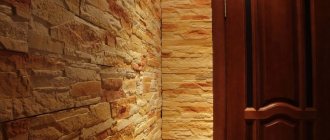
A stone wall in a living room doesn't have to be made of marble, which gives a pretty cool effect. Travertine in warm colors will also work. This wall stone will look great in both classic and modern designs.
Travertine is resistant to damage. The stone is also distinguished by a large number of channels and deep recesses. Travertine is suitable for dry areas because it has a high level of water absorption. It is better not to use it in the bathroom, but you can use it in the living room decor without fear - it can decorate not only the wall, but also the fireplace.
FINISHING BUILDINGS WITH NATURAL STONE IN NORMAL AND WINTER CONDITIONS
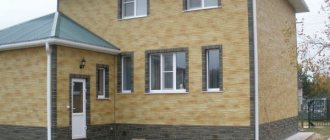
Work on finishing buildings with natural stone begins after preparing the surfaces to be faced, stone products and fasteners. Basically, external cladding is carried out on a ready-made surface. Before work begins, the facades are cleaned of build-up and leaks of mortar and concrete, frost, snow, and ice. How are buildings faced with natural stone slabs?
Facing of buildings with slabs of natural stone is carried out: by fastening with anchors and mortar; at the same time, the thickness of the slabs on the facade should be from 30 to 40 mm, in the interior 20-30 mm, in the sinuses 20-40 mm; on mortar close to the wall inside buildings (with slab thickness up to 10-15 mm) and to a height of no more than two floors; on a slope from the wall, leaving free space between the wall and the cladding and developing a special fastening design. This design is called mortarless cladding.
The method of fastening the cladding elements depends on the type of walls and their operating conditions. When working on wall cladding using fasteners and mortar, leaving horizontal expansion joints in the process of laying brick walls, V-shaped outlet loops are laid between the rows of bricks to attach working reinforcement to them. The grid of release loops is arranged depending on the calculated stresses in the brick wall (MPa). After the building is erected, working reinforcement is installed, welding it to the outlet loops. Then the facing slabs are installed on the solution, attaching them to the working reinforcement with hooks. For these purposes, use hooks only from non-corrosive metals with a cross-sectional area not less than the cross-sectional area of the outlet loops (calculated per 1 m2 of wall, taking into account that the loops are double-cut). Adjacent cladding elements are connected to each other with pins and staples. The correct position of the slabs during installation can be achieved using wooden wedges that are then removed. The corners formed by the slabs of the wall field and openings are in most cases formed with the ends of the slabs extending to the edge of the corner.
Simultaneously with the cladding work on the wall field, cladding of window and door openings is carried out. The slabs are attached to pre-installed working auxiliary fittings. The elements are fastened together with staples. When facing lintels, the slabs are installed on supporting corners. Instead of facing the lintels of the lintels, they can be plastered and painted with organosilicate or perchlorovinyl paints to match the stone. Using the same technology, work is carried out on cladding panel walls, parapets, retaining walls, flower beds, columns with sawn natural stone, as well as finishing surfaces with unedged slabs. The space between the wall and the cladding is filled with cement-sand mortar (1 part cement and 3 parts sand) by layer-by-layer pouring in several stages, preventing the slabs from moving.
With mirror and polished textures, the cladding parts made of natural stone must be mated dry, carefully pushing the edges of the slabs by selection, and the seams, if necessary, must be filled with mastic. For other textures, the seams are filled with mortar, and the mortar squeezed out of the seams is cleaned off. The thickness of the seams between the cladding elements depends on the texture of the slab and ranges from 1.5 to 10.0 mm. It is recommended to install horizontal expansion joints in the cladding depending on the design stresses in the wall: after one floor - more than 1 MPa, after two floors - up to 1 MPa.
Parts made of natural stone with a mirror texture are washed with water using brushes and then wiped with a clean rag. Facings with a polished, dotted, textured “rock” type surface, if necessary, are cleaned using sandblasting machines. To prevent the formation of indelible traces of mortar on the front surface of sedimentary stone slabs, the mortar protruding beyond the lining cavity is removed after drying.
In winter, at outdoor temperatures from +5 to -10° C, facing work is carried out using cement-sand mortars of grades no lower than 100 with anti-frost additives. At lower temperatures, electric heating is used.
As antifreeze additives to cement-sand mortars, a solution of ferric chloride can be used at temperatures down to -5 ° C, and at temperatures from -5 to -15 - calcium nitrite with urea NCM or ANS powder. Antifreeze additives are used in the form of aqueous solutions of a certain consistency. They are introduced into the cement-sand mortar during its preparation at the construction site. A solution of ferric chloride is prepared in a wooden, enamel or polyethylene container by introducing ferric chloride crystals into water and stirring them until completely dissolved.
Solutions of NCM and ANS are prepared, respectively, from crystals and powder in containers of any material. The shelf life of ready-made additive solutions is 10 days in a closed container at temperatures down to -30° C. When preparing the solution, it is necessary to maintain the dosage of additives. When selecting the composition of the solution, it is necessary to use cements of increased activity and grade, improve the grain composition of the sand and reduce the water-cement ratio. The aggregates and water are heated. The mixing time of the mixture is increased by 50% compared to normal conditions. The period for laying the solution with antifreeze additives should not exceed 40 minutes after its preparation.
When performing facing work using electric heating, the installation of facing slabs and blocks is carried out in order. After installing one row of facing slabs or blocks along the façade of the building and securing them to the piers and hooks to the metal frame, it is advisable to blow out the resulting cavity between the slabs and the wall with hot air for 20 minutes before filling it with mortar. The heated part of the wall and cladding slabs can be covered with some material to retain heat. After heating, this material is removed, and the cavity is filled with solution to a level 5-7 cm below the top edge of the installed row of slabs.
The temperature of the solution at the time of pouring must be at least +10° C. Electric heating begins immediately after pouring the solution into the cavity. To do this, select electrodes 10-15 cm in length greater than the height of the row of facing slabs, immerse them in the solution and connect them to a power supply with a voltage of 36 V. The distance between the electrodes, depending on the outside air temperature and the ambient heating temperature, is set to 5-15 cm The rate of temperature increase at the initial stage of warming up should be no more than 4-6 degrees per hour, and the temperature of isothermal heating should be within 40-50 degrees. Heating is continued until the solution reaches 50% of its design strength.
The electrode installation scheme is adjusted based on the results of control temperature measurements. Monitoring of the temperature regime of electric heating and the strength gain of concrete is carried out around the clock, noting in the work log the temperature of the outside air, the temperature of the grouting solution at the time of pouring it into the cavity, changes in the temperature of the solution during the entire electric heating cycle with a temperature measurement interval of 3-4 hours. In order to eliminate temperature stresses, cooling is carried out gradually, at a rate of 2-3 degrees per hour.
The next highest row is installed after completion of the pouring and heating of the solution of the underlying row.
In winter conditions, floor slabs made of natural stone are laid if the base under the covering has a temperature of at least +5′ C, otherwise it needs to be warmed up. Before installing the floors, they check the completeness and quality of the slabs, laying them out dry, preparing the base surface with the installation of beacons and moistening, laying the underlying layer of cement mortar and installing the slabs in the design position. The laid coating is held until the mortar hardens, then the joints are filled with ordinary cement mortar or special compounds. If necessary, the finished coating is subject to sanding and additional polishing.
Floor coverings must be horizontal or correspond to a given slope. Clearances under a two-meter rail are allowed up to 4 mm. There should be no cracks, gouges or unfilled seams. Deviations of the coating seams from the straight direction should not exceed 10 mm per 10 m of row length. After installation, floors made of polished slabs must be covered with thick paper or cardboard before delivery of the facility in order to preserve the high decorative qualities of the products.
In winter, when finishing work in the premises, the temperature is maintained at least +10 ° C. The temperature is measured near the outer walls at a height of 0.5 m from the floor. To do this, before the start of interior cladding work, the heating is connected to heat sources. If necessary, additional temporary heating and ventilation systems are used to ensure the required temperature and double air exchange in the rooms per hour at a relative humidity of no more than 70%. At least two days before the start of finishing work, it is necessary to maintain a temperature of at least +10° C. After completion of work, this temperature is maintained for 15 days.
Specifications
Natural stone is a material of natural origin, its quality does not lend itself to any standardization. Therefore, the technical characteristics of the cladding, to a greater extent, have the nature of requirements for the quality of processing. Let's look at the main ones.
Surface type:
- Polished.
- Polished (smooth, but without shine, matte).
- Polished.
- Sawn.
- Heat treated.
- Spot.
There is also a type of surface called artificially aged. This can be equated to decorative coatings, since in this case the appearance of the surface is the goal, and not a consequence of the processing method .
By density degree:
- Lightweight - up to 2200 kg/m3.
- Heavy - over 2200 kg/m3.
By block configuration:
- Panels.
- Tile.
- Chip.
- Plates.
According to the shape of the piece, natural stone can have either a regular or arbitrary configuration, since the formation of geometrically regular blocks requires a workpiece of sufficient size. At the same time, a large amount of material goes to waste, which is irrational .
In addition, facades finished with raw plates without clear geometric outlines have no less, and sometimes even greater, decorative value, since in this form the material looks more natural and wild.
SET OF MATERIALS AND ELEMENTS FOR FINISHING BUILDINGS MADE FROM NATURAL MATERIAL
The engineering supply of materials and finishing elements for buildings made of natural materials can only be ensured if prepared technical documentation is available. Technical documentation includes technological maps for assembling materials and products made from natural materials at the maximum degree of readiness for a building or a set of working drawings of pallets and containers of various types, and diagrams of their arrangement on vehicles. The basis" for determining the need for materials and products made of natural stone are the planned volumes of finishing work, picking lists of the need for materials and products for all objects and their delivery schedules, a delivery plan for related products (mortars, mastics, metal products, etc.), production standards for material consumption at planned facilities and standard carry-over balances at the end of the year.
In addition, an exact specification of the cladding elements must be issued, indicating the type of stone used, size, texture of their front surface, and methods of fastening the cladding. To ensure timely complete delivery, its planning is carried out object by object or for repeating parts of the building (sections, floors) in natural volumes. The system of engineering supply of objects with facing materials and products made of natural stone provides for their sorting, selection, processing and delivery in strictly defined quantities (for a building or part of it) within the time limits specified in the technological schedules for the production of finishing works. To speed up the production of finishing work, it is necessary to carry out preliminary preparation and refinement of materials and products made of natural stone in on-site workshops or at assembly bases. In addition, it is necessary to ensure the centralized preparation of mortar mixtures and mastics (in some cases, dry mixtures) and supply of them to the construction site.
Deliveries of solutions by brand to each facility must be made on the basis of monthly schedules and weekly requests.
If it is impossible to carry out centralized delivery of finished stone products directly to construction sites, acceptance of materials and products arriving by road and rail from suppliers, unloading, warehousing, storage, sorting, selection and preparation for assembly, laying of assembled materials and products on pallets, in bags , containers, loading onto vehicles and delivery to the site must be carried out at the Central Acquisition Base.
Delivery of slabs and natural stone products in containers should mainly be carried out by road transport or truck crane trains (truck crane and trailer). Simultaneously with the supply of stone and mortar, the supply of fastening elements (hooks, pyrons), wooden wedges and other materials must also be completed. The import of scaffold elements is also technologically coordinated. Calculation of the need for inventory and tools is also associated with the configuration and is included in the engineering kit as an integral part.
If necessary, pre-staffing bases are organized, equipped with the necessary mechanization equipment for loading and unloading operations and stone processing. These bases receive products and materials directly from supplier companies.
By what principle is the material for finishing walls with stone selected?
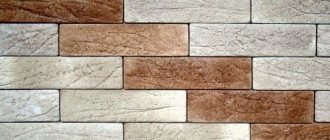
Regardless of whether the kitchen design is created or the material for walls, columns, fireplaces is selected, Graon specialists pay special attention to its quality and issues of pattern selection. Brighter contrasting elements go to areas that need to be visually highlighted.
For optimal gluing, the reverse side of each element undergoes a special treatment that eliminates any unevenness.
SAFETY TECHNIQUES FOR FINISHING WORKS USING NATURAL STONE
When carrying out finishing work using natural stone, it is necessary to comply with safety requirements in construction, fire safety rules during construction and installation work, relevant fire and sanitary inspection documents, instructions and guidelines for the use of finishing materials and products made of natural stone, for the operation of machines, lifting mechanisms, electrified tools, scaffolding and scaffolding.
Issues of occupational health and safety are considered at the design stage of finishing works. At this stage, it is necessary to provide for grounding of stone-cutting machines, laying wooden flooring around them and a device for draining water, performing stone processing operations on special stands (tables, benches), while there must be either a distance of at least 3 m between working stone-cutters or protective shields , limiting the scattering of stone fragments, the use of portable electrified tools with a voltage of no more than 36 V, the safe organization of the workplace when performing cladding, including the use of the necessary means of scaffolding and fencing of workplaces.
Newly hired specialists and workers must undergo induction and workplace safety training on working with mechanisms, tools and materials. The instruction must be recorded in the production instruction log.
Only those who have undergone special training and safety instructions are allowed to work with electrified tools, stone cutting machines and sandblasting machines. Stone cutters and granite workers must be provided with special clothing - overalls, mittens, knee pads, respirators, goggles, rubber shoes and gloves (when working with electrified tools) and safety helmets.
When carrying out work on finishing facades, it is necessary to use previously tested (a test report must be drawn up) inventory scaffolding, scaffolding means, and cradles. Scaffolding and scaffolding with a height of up to 4 m must be accepted by the work manager, and above 4 m - by a special commission appointed by order for the organization. The scaffolding acceptance certificate is approved before the start of work.
Workers over 18 years of age who have undergone a medical examination and are found fit, trained in safe working methods, have at least 1 year of experience in steeplejack work and a tariff grade of at least third are allowed to install and dismantle scaffolding.
Newly hired workers are allowed to work on metal tubular scaffolding only after a medical examination and completion of introductory and initial training on safety precautions, industrial sanitation and fire safety. Re-training should be carried out at least once every three months.
Scaffolding is installed in accordance with standard instructions for each specific facility. Posters are hung on scaffolding and scaffolding with diagrams of load placement and indicating the magnitude of permissible loads. All sections of scaffolding must be grounded every 20 m. During the work process, the flooring of scaffolding and scaffolding must be cleared from time to time of construction debris, ice, and snow.
When checking the condition of the scaffolding, it is necessary to pay attention to whether there are any deviations of the posts from the vertical, whether individual posts at the gate openings and in places of traffic movement are not bent, whether the fastening of the scaffolding to the walls is broken (the strength of the fastenings, ties, spacers), whether the side , end, staircase and other scaffolding fences, are they firmly installed, are the flooring panels laid correctly, what is the condition of the stairs for passage from tier to tier, are safety canopies installed everywhere, boards covering the gaps between the shields and the walls of the facades, fencing of dangerous areas.
Detected scaffolding faults are immediately corrected. A certificate must be drawn up to test the cradle and authorize its operation. The dangerous area under the canopy or cradle is fenced off, and warning signs are posted on the fence. When working in a cradle, workers' safety belts are secured using self-acting ropes to reliable building structures. Electrical safety when working with cradles is ensured by grounding live parts of electrical equipment and the housing. At the end of the work, the cradles are lowered and disconnected from the electrical source. Uneven distribution of materials on the working floor of the cradle, connection of two cradles into one, as well as work on them during thunderstorms, fog, at night without providing the required lighting and in wind force 6 or more is not allowed. Stepladders may only be used when performing minor labor-intensive work in individual places.
During loading and unloading operations, supplying stone parts to the workplace and installation in the design position, special attention should be paid to the correct slinging. It is prohibited to stand under a load. When slinging and lifting loads, it is necessary to check the serviceability of rigging devices (grips, ropes, loops, hooks). When processing stone facing materials, it is necessary to wear safety glasses and gloves.
When drilling reinforced concrete, concrete and brick walls with pneumatic and electric tools, you must wear safety glasses. The area where sandblasting work is carried out is fenced off. When working with large amounts of dust (preparing mortar, grinding stone surfaces), it is necessary to use universal respiratory dressings. Before turning on or after each movement of the equipment, it is necessary to check the insulation of wires, protective equipment, fences and grounding of the equipment.
In winter, when the preparation of mortars is carried out with the antifreeze additive sodium nitrite, workers need to work in overalls, rubber boots and gloves, and safety glasses. To protect the skin of your hands from exposure to chemically harmful compounds, it is necessary to use protective ointments and pastes. The handles of facing tools (hammers, bush hammers, etc.) must be made of tough wood (beech, acacia, oak, etc.) and wedged with a metal wedge, and chisels, pins, scarpels must not have broken heads or burrs in places where they are grabbed by hand , sharp edges.
Installation technology
Installation work is carried out in two versions :
- With the installation of insulation and the formation of a ventilation gap.
- Installation directly on walls.
The first method involves a larger number of operations, so let's consider it.
Procedure:
- The sheathing is installed on the prepared wall surface. This is a system of planks that form a flat plane. The pitch of the planks (the distance between adjacent ones) corresponds to the width of the insulation (most often, 60 cm).
- Insulation material is placed in a dense layer between the sheathing strips. The most preferred option is stone (basalt) mineral wool. The insulation is tightly inserted between the planks, it is attached to the wall with special glue and additionally fixed with disc-shaped dowels. No cracks, voids or spaces between the insulation boards should be allowed.
- A sealed layer of waterproofing membrane is laid on top of the insulation. The material is rolled, laid in horizontal strips from bottom to top with an overlap of 15 cm. The joints between the rows are taped.
- A layer of counter-lattice is installed, supporting the supporting plane for laying the stone and at the same time forming a ventilation gap. The planks are installed in the transverse direction.
- A support plane is installed on the counter-lattice - a continuous layer of moisture-resistant sheet material (chipboard, OSB or special grades of plywood).
- A reinforcing mesh is attached to the supporting plane and the plane is plastered.
- After the plaster has dried, you can begin laying the stone. It is produced using adhesives for tiles or similar materials. If the stone does not have clear outlines and there are no planes, then installation is carried out using sand-cement mortar. The installation technique in this case is typical for masonry - pieces of stone are selected according to shape and laid on the mortar.
